Longer faces can feel narrow and elongated, which is partly why finding the right hairstyle matters so much. The key to balancing facial proportions isn’t about cutting shorter hair or chopping off length—it’s about creating strategic width across the sides of your face and adding movement that draws the eye horizontally rather than downward. The right cut, texture, and styling technique can completely transform how your face shape reads, making it appear more balanced and proportionate without any makeup tricks or face-shaping filters.
Whether you prefer flowing waves, textured layers, dramatic volume, or blunt statements, there’s a style out there that’ll work with your face shape and hair type. The best part? You don’t have to commit to something complicated or high-maintenance. Many of these cuts work beautifully with natural texture, minimal heat styling, or just a simple blow-dry routine. Let’s explore the most effective hairstyles that create width and break up the vertical line of a longer face.
1. Blunt Bangs with Layers
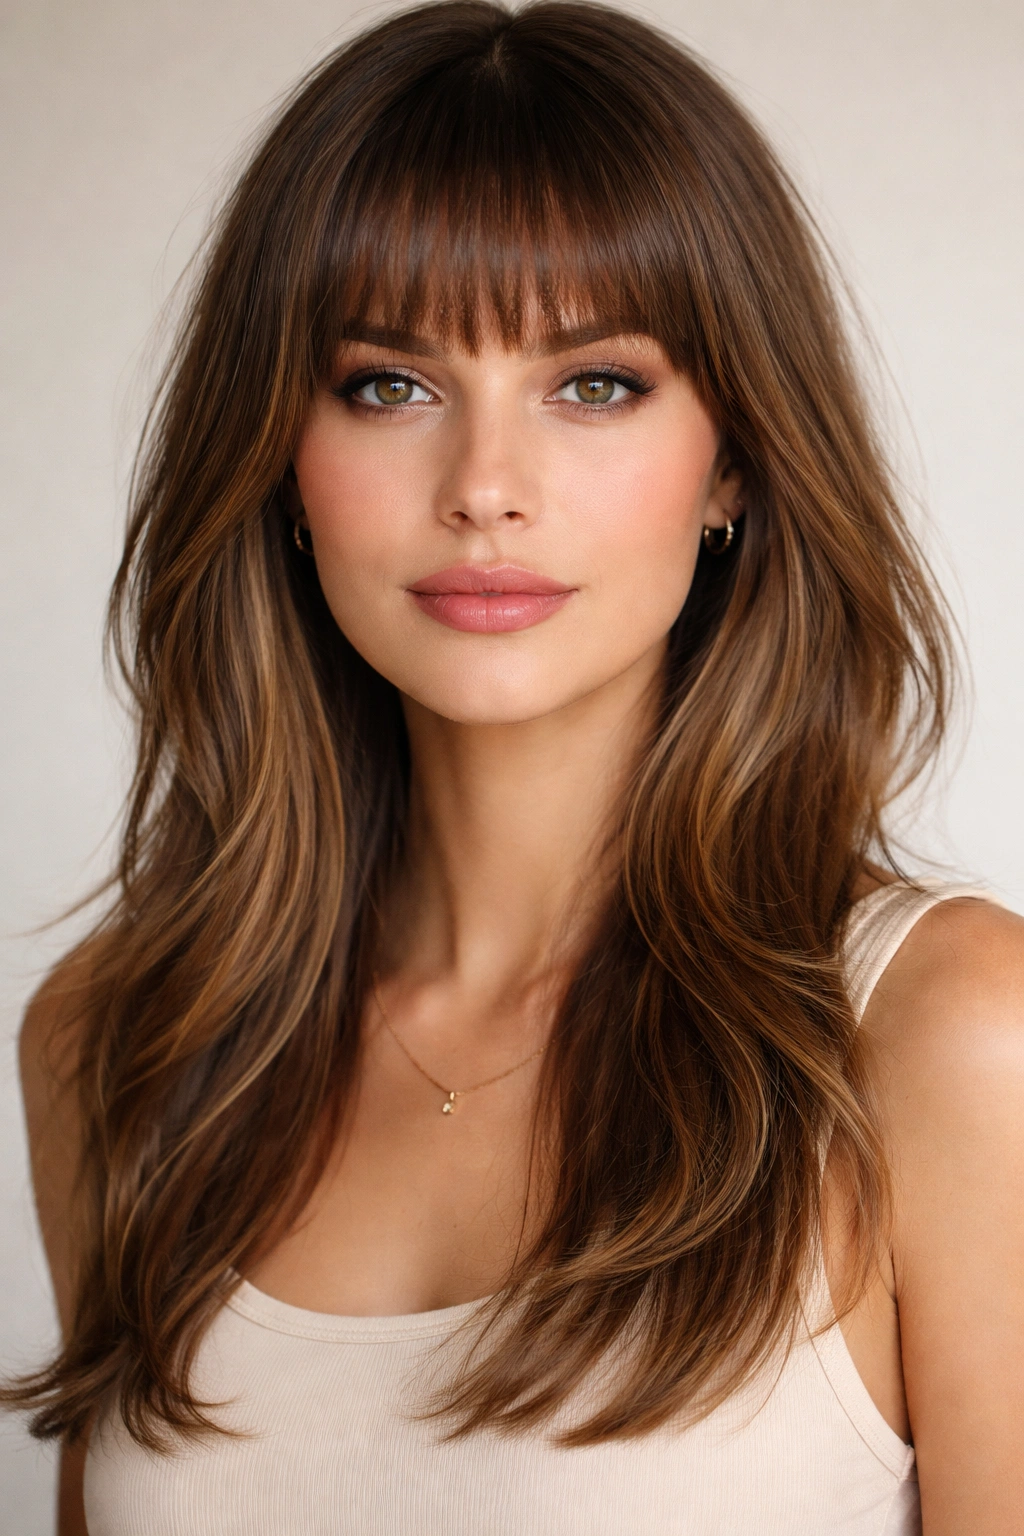
Blunt bangs are a game-changer for longer faces because they visually shorten the face and create a strong horizontal line right across the forehead. This style works especially well when paired with layered lengths that add movement and prevent the hair from looking flat or heavy.
Why This Cut Transforms Longer Faces
Blunt bangs instantly draw attention upward and create a natural stopping point that breaks the vertical length of your face. The width of the bang line itself—typically extending from temple to temple—adds that crucial horizontal dimension you need. When combined with layers throughout the rest of your hair, you get both the face-shortening effect from the bangs and the texture-based width from how the layers create separation and dimension at cheekbone height.
How to Style and Maintain Them
- Blow-dry your bangs straight and smooth for maximum face-framing impact, or embrace a slightly textured, undone vibe depending on your hair type
- Pair blunt bangs with longer lengths that graze your collarbones or beyond—the contrast between the blunt line and flowing lengths works beautifully
- Get trims every 3-4 weeks to keep bangs crisp and positioned correctly; as they grow out, they lose their face-shaping power
- Use a round brush and blow dryer to create subtle waves or texture in the longer layers, which enhances the width effect
- For wavy or curly hair, consider pairing full bangs with natural texture throughout—the movement prevents a heavy appearance
Pro tip: If you’re nervous about committing to full blunt bangs, start with slightly longer “grown-out” bangs that sit just above your eyebrows. They’re more forgiving as they grow and still create that horizontal line.
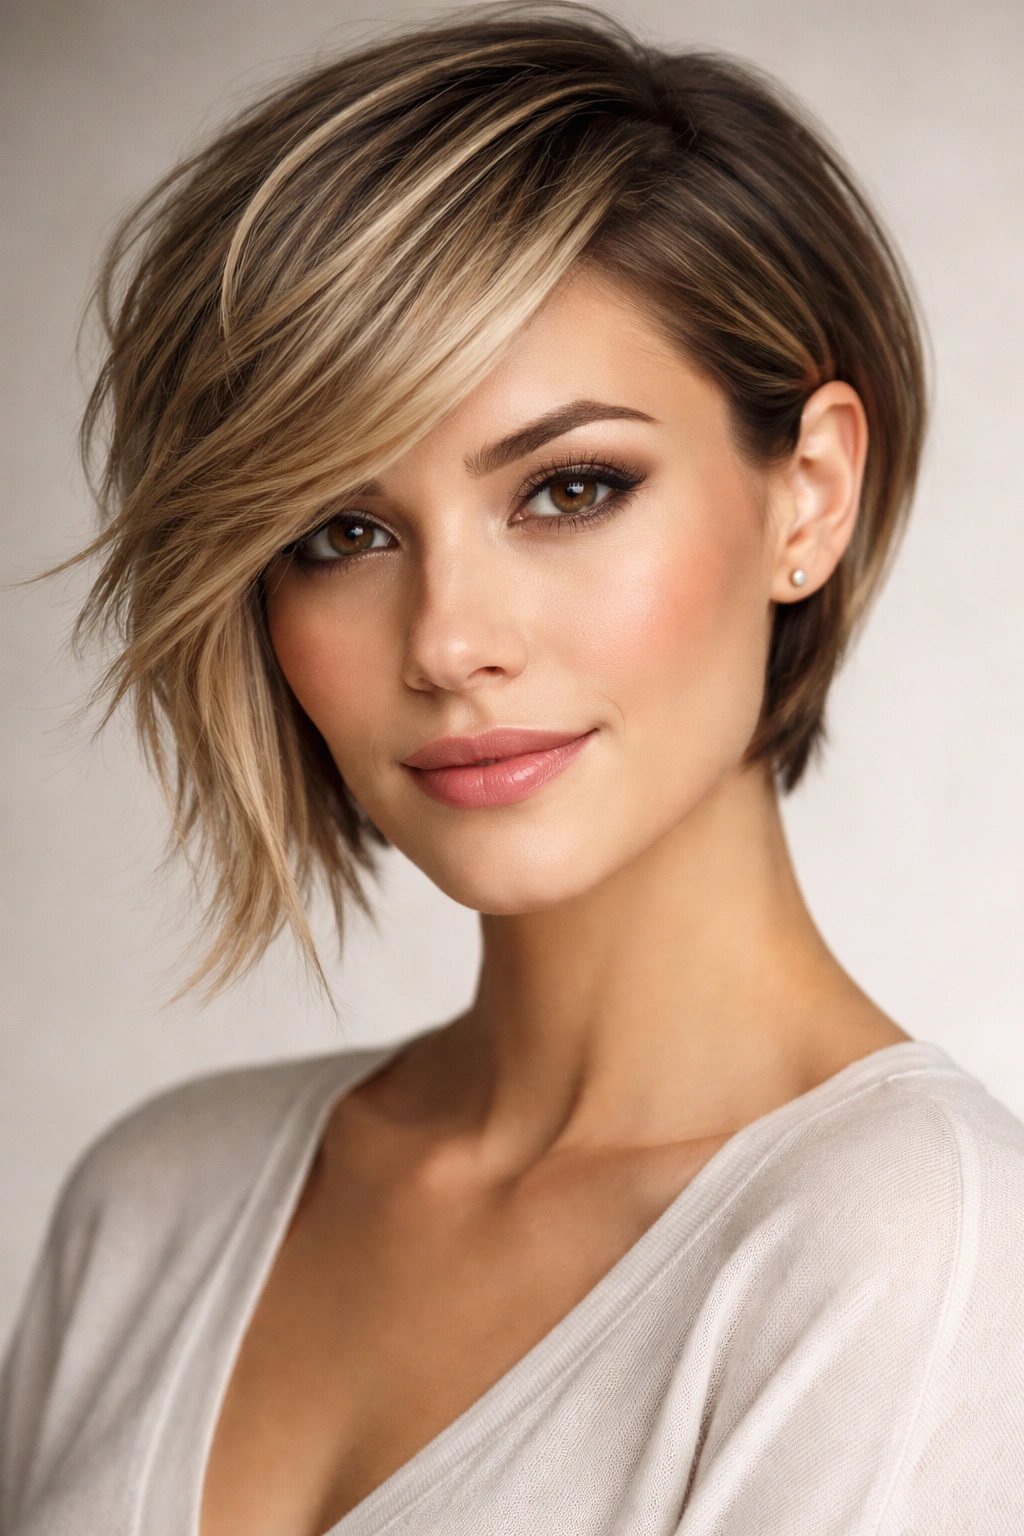
2. Side-Swept Pixie
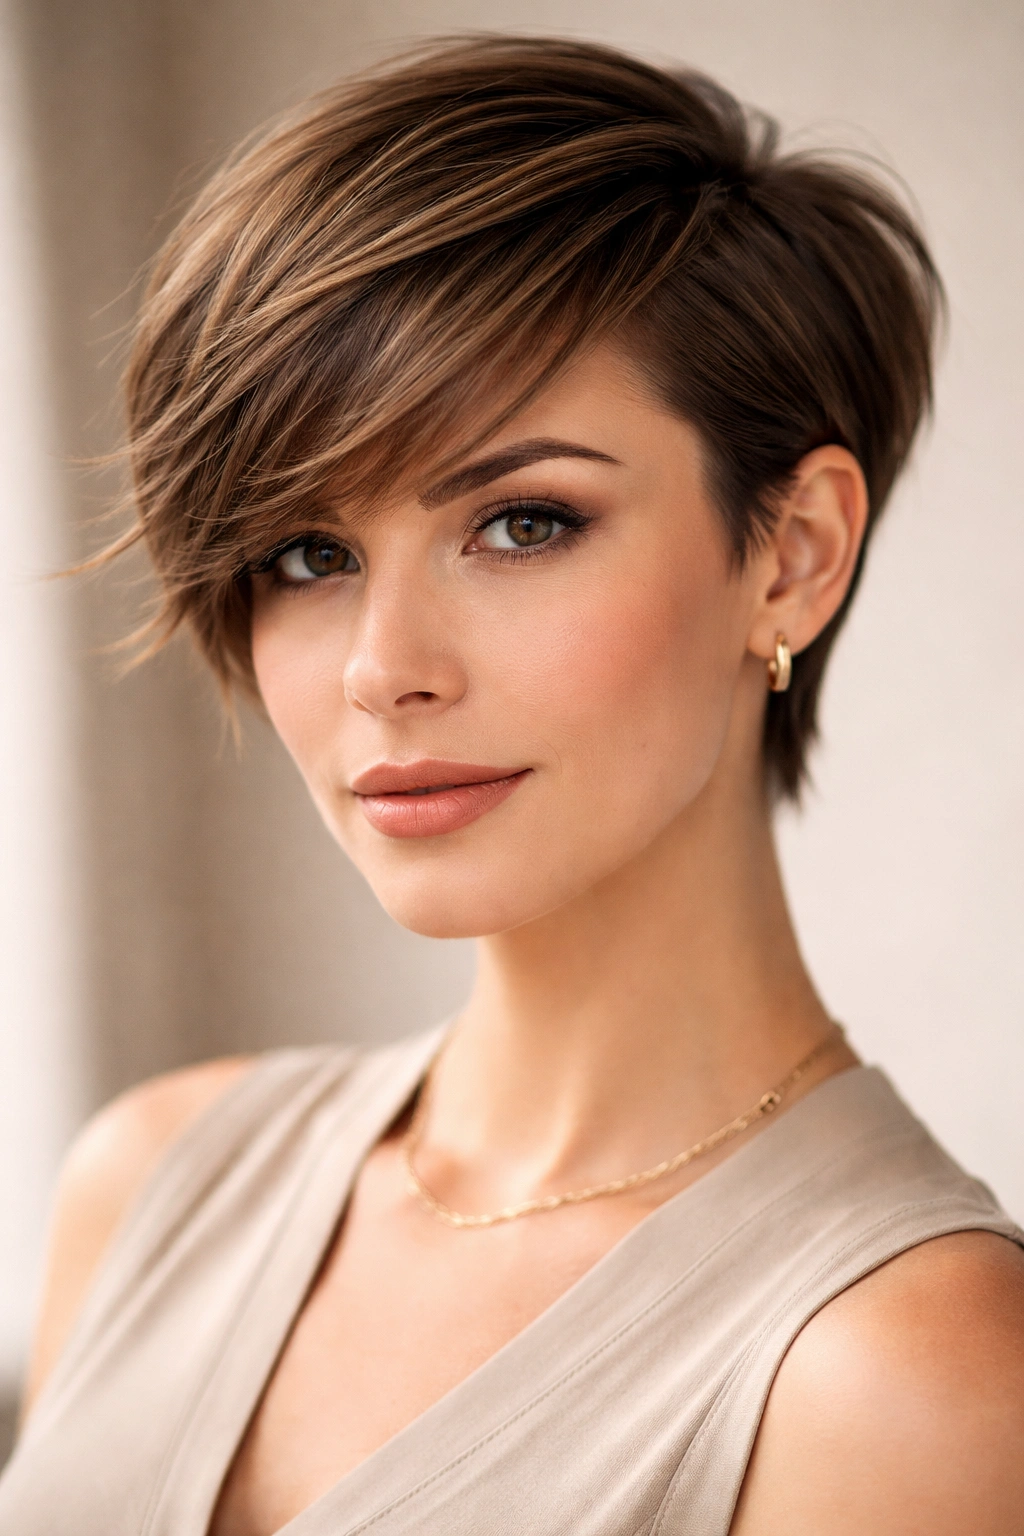
A pixie cut with length swept to one side creates width on the side where the hair falls, while the short, textured layers on the opposite side create dimension and visual interest. This unexpected combination works because the length and texture balance the long lines of your face.
The Width-Creating Structure
The magic of a side-swept pixie lies in the contrast—short, cropped layers on one side give you texture and movement, while the side-swept length creates an asymmetrical silhouette that reads wider than a symmetrical cut would. The longer pieces frame one side of your face, drawing the eye across rather than down the length of your face. This asymmetry actually works better for longer faces than perfectly balanced cuts.
Styling to Maximize the Effect
- Blow-dry the longer side away from your face and smooth or wave it depending on your texture preference
- Style the shorter side with texture and volume using a texturizing spray or light product—this prevents that side from looking flat
- The cut works best with some styling; fully air-dried pixies can lose the width effect
- Pair this with slightly longer bangs or an extended fringe that softens the overall look
- Consider adding a subtle color-melt or highlights to draw attention to the texture and movement
Worth knowing: This cut requires regular maintenance every 4-6 weeks, as pixies grow out quickly and lose their defining shape. The investment in cuts pays off in the styling ease once you get used to managing the layers.
3. Textured Bob with Volume
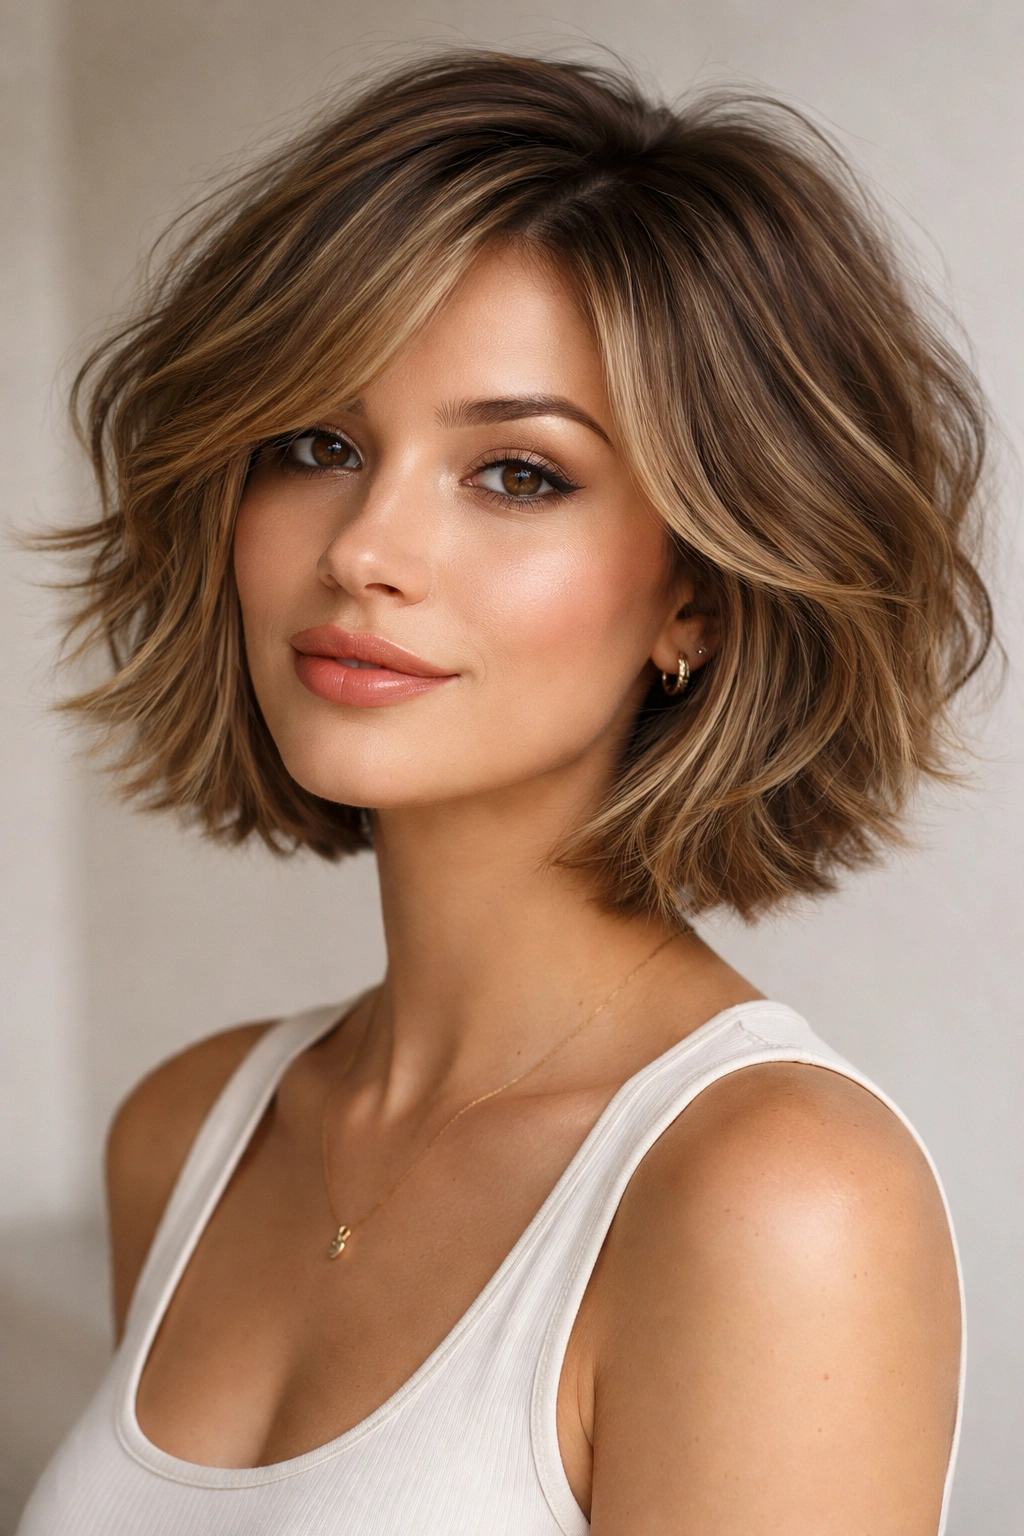
A textured bob—think choppy, deliberately undone, with plenty of movement—creates width by breaking up the vertical line with horizontal texture and movement. The key is keeping the layers piece-y rather than blunt, so hair falls away from the face in multiple directions.
Why Texture Adds Width
Smooth, blunt bobs actually emphasize longer face shapes because they create a clean line that reinforces vertical length. A textured bob does the opposite: the choppy layers create visual width by making hair stick out slightly and fall in different directions. This texture catches light, creates shadow, and makes the overall silhouette appear wider than the actual hair length would suggest.
Getting the Cut and Styling Right
- Ask your stylist for a textured, choppy bob rather than a blunt one—specify that you want piece-y layers, not subtle layers
- The cut should sit somewhere between your chin and shoulders; longer textured bobs work better for longer faces than very short ones
- Style with a salt spray, texturizing spray, or light cream product to enhance the separation between layers
- Blow-dry with a round brush to add volume at the crown, which prevents the style from emphasizing vertical length
- Embrace the undone texture; sleek, polished bobs actually work against what you’re trying to achieve with a longer face
Quick styling fact: A textured bob looks better slightly messy than perfectly neat. The more you fight the natural texture, the less flattering the width effect becomes.
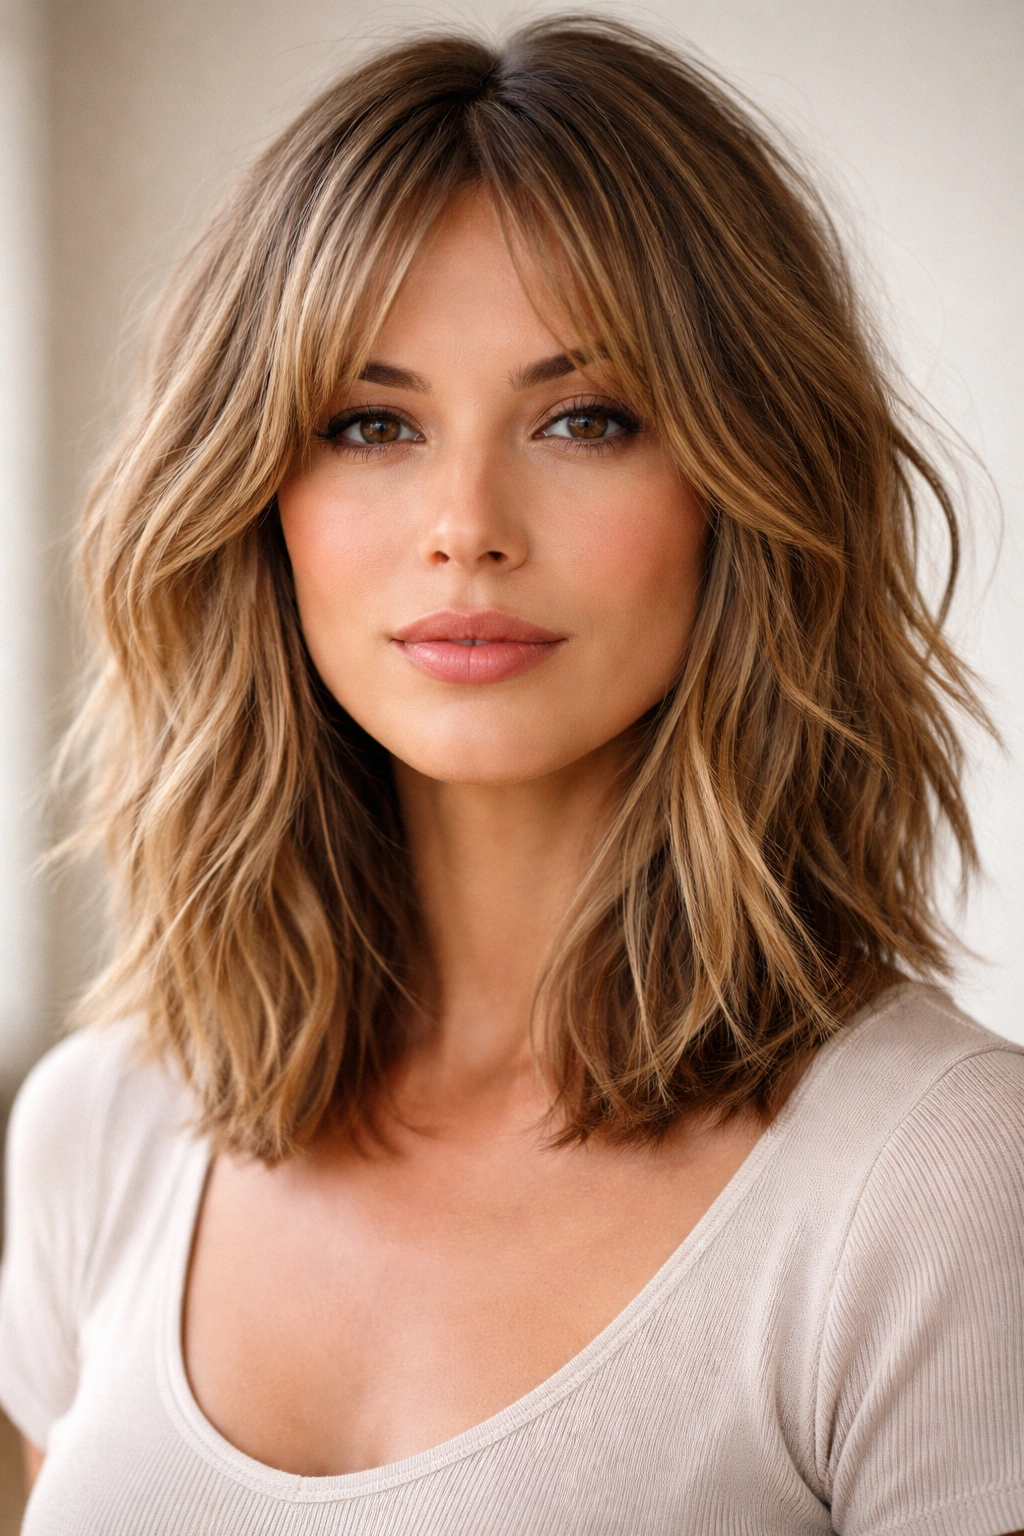
4. Shoulder-Length Shag
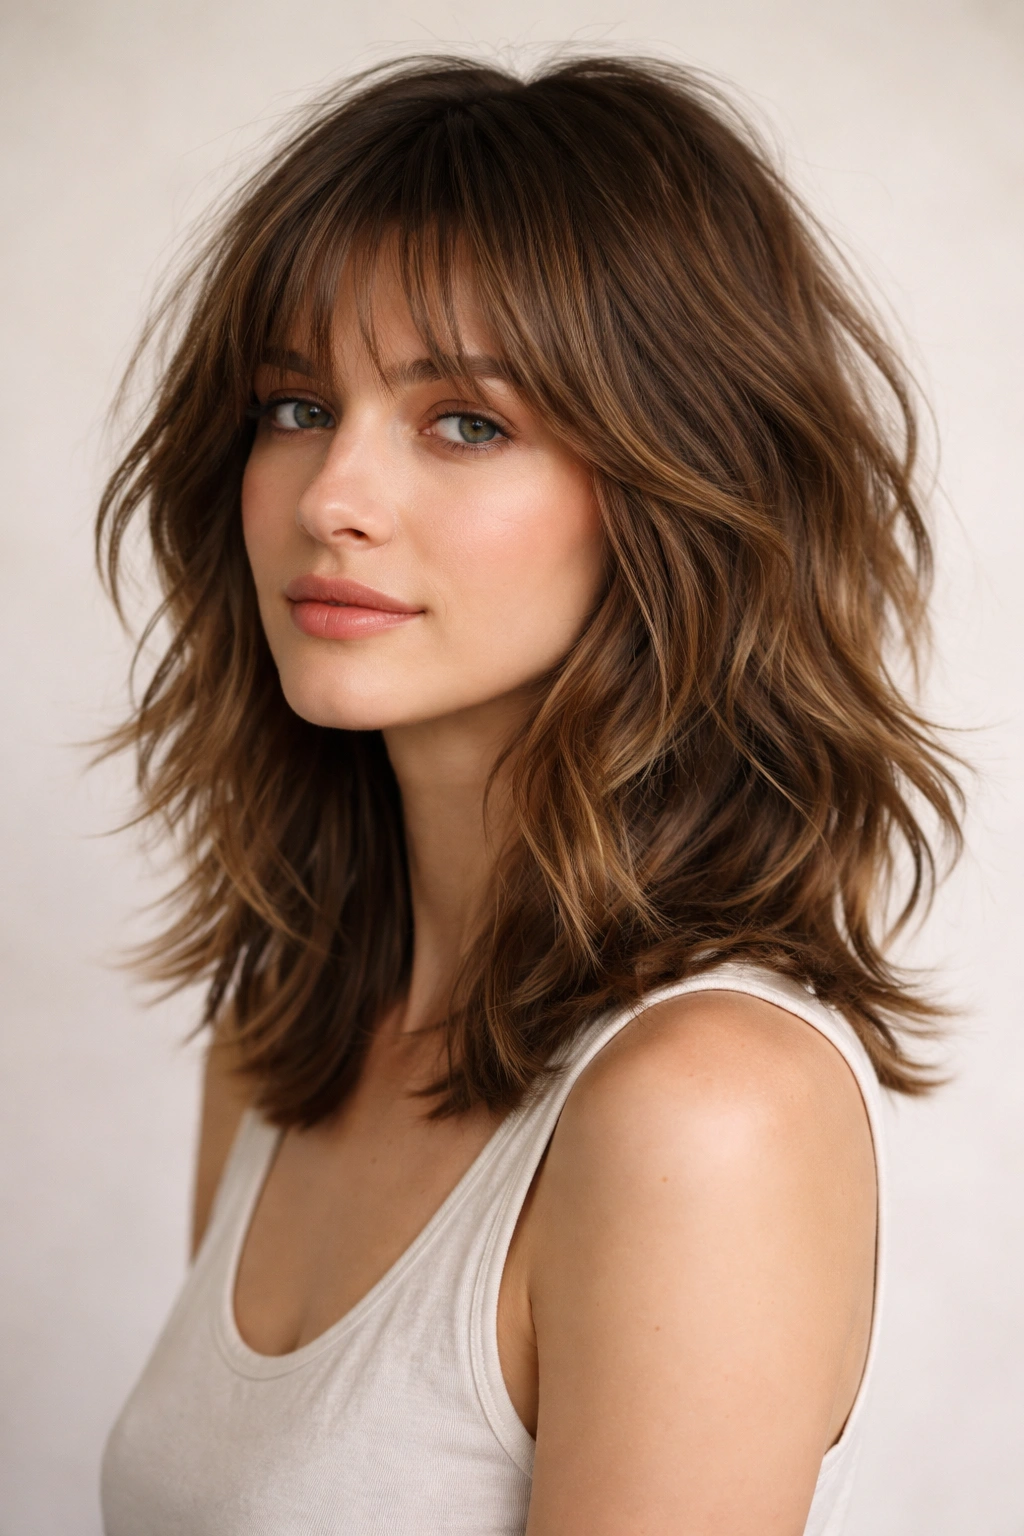
A modern shag—which is basically controlled choppy layers with a slightly longer top layer and shorter underneath layers—creates width through texture and movement while maintaining enough length to feel flattering. This 70s-inspired cut has made a major comeback because it genuinely works for most face shapes, especially longer ones.
How the Shag Adds Face-Width
The shag’s genius is the multiple layers at different lengths, which create volume and horizontal texture throughout the entire cut. Unlike a blunt long hairstyle that would emphasize vertical length, a shag breaks up that line with short layers that flip out and create width at the cheekbones and jawline. The result feels modern and intentional, not accidentally dated.
Styling a Modern Shag
- Blow-dry with a round brush or diffuser to emphasize the layers and create volume where you need it most
- Use a texturizing spray or light mousse to separate the layers and create that piece-y, undone texture
- The cut looks great with slight waves or curls—work with your natural texture rather than against it
- Part your hair in the middle or off to the side; both work equally well
- You can also straighten a shag for a sleeker look, though the texture version is more flattering for longer faces
Inside knowledge: A shag works especially well if you have naturally wavy or curly hair, as the multiple layers enhance your natural texture rather than fight against it. Straight-haired people will need to style it to get the full effect.
5. Chunky Highlights with Waves
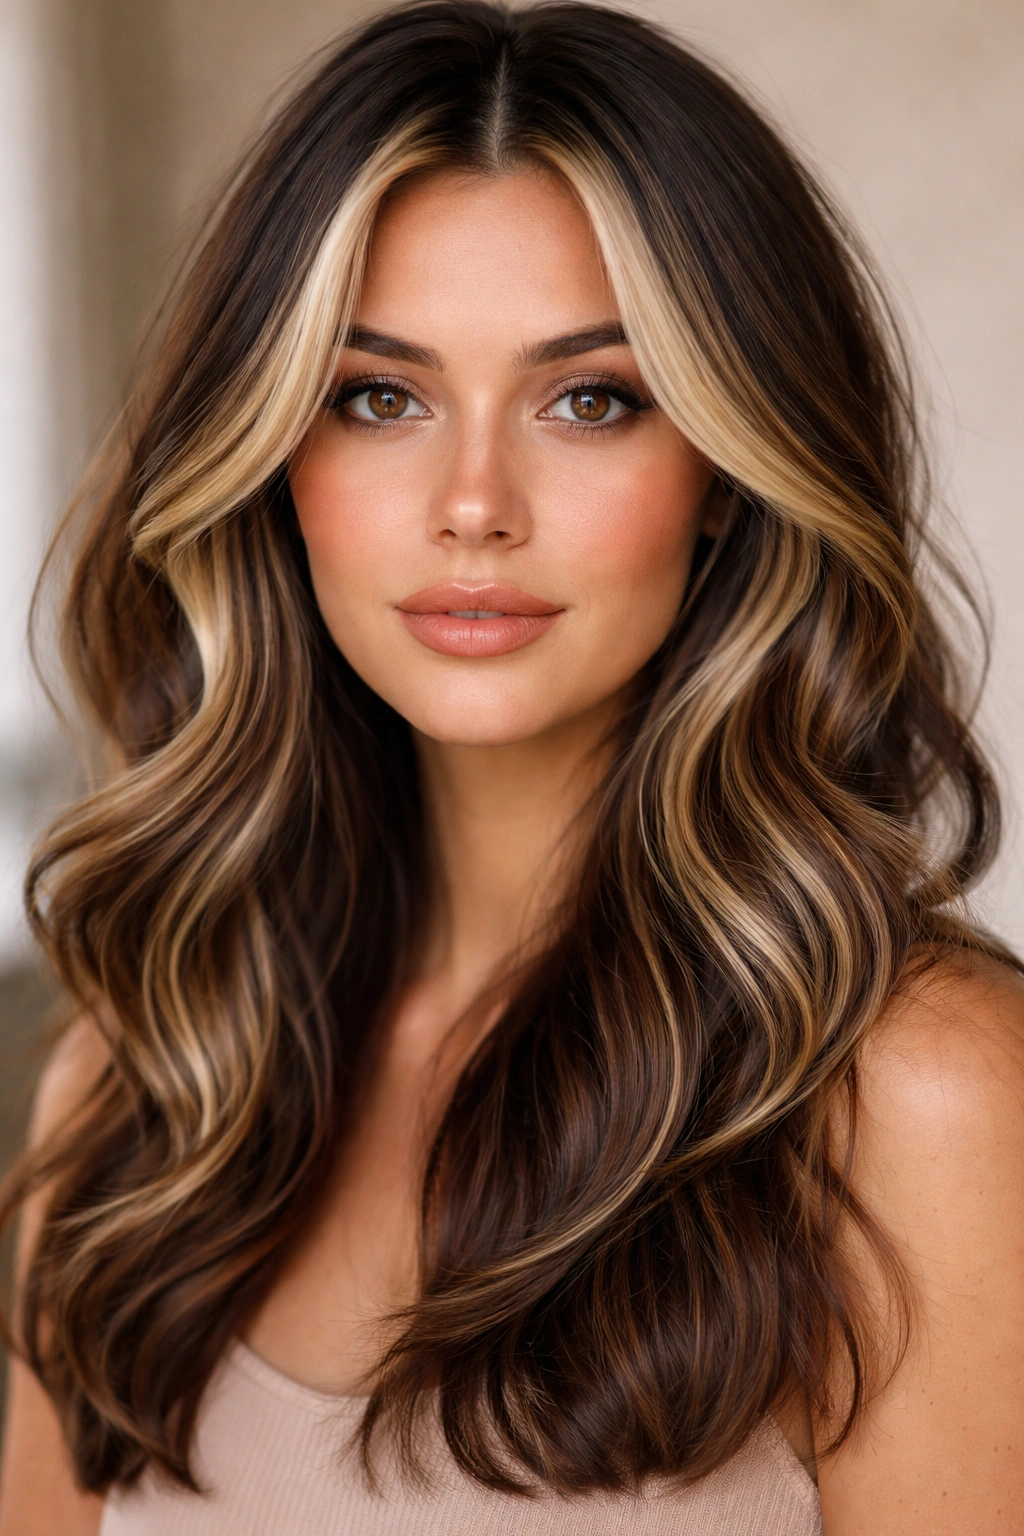
While this isn’t technically a haircut, the combination of chunky face-framing highlights and loose waves creates an optical illusion of width and breaks up the vertical length. Strategic color placement draws the eye horizontally and makes the hair appear thicker and fuller.
The Visual Width Effect of Color and Texture
Chunky, contrasting highlights—especially ones placed around the face—create horizontal visual lines that counteract the vertical lines of a longer face. Pair this with loose, textured waves, and you get movement that travels across the face rather than down it. The lighter sections catch light and create shadow, which makes the overall head shape appear wider and more dimensional.
How to Approach This Style
- Work with your colorist to place highlights in face-framing sections—typically around the front, temples, and crown
- The chunks should be substantial enough to be visible when hair is styled, not so thin they disappear
- Pair highlights with loose waves or curls; the movement is essential to the width effect
- Consider a balayage or highlights that start from mid-length, creating a sun-kissed, dimensional look
- Darker roots add depth and make the overall face shape appear less elongated
- Refresh highlights every 8-12 weeks to keep them looking intentional rather than growing out unevenly
Pro tip: This works especially well for people hesitant about a dramatic cut. You get a major style change through color and styling rather than committing to a new cut.
6. Modern Mullet
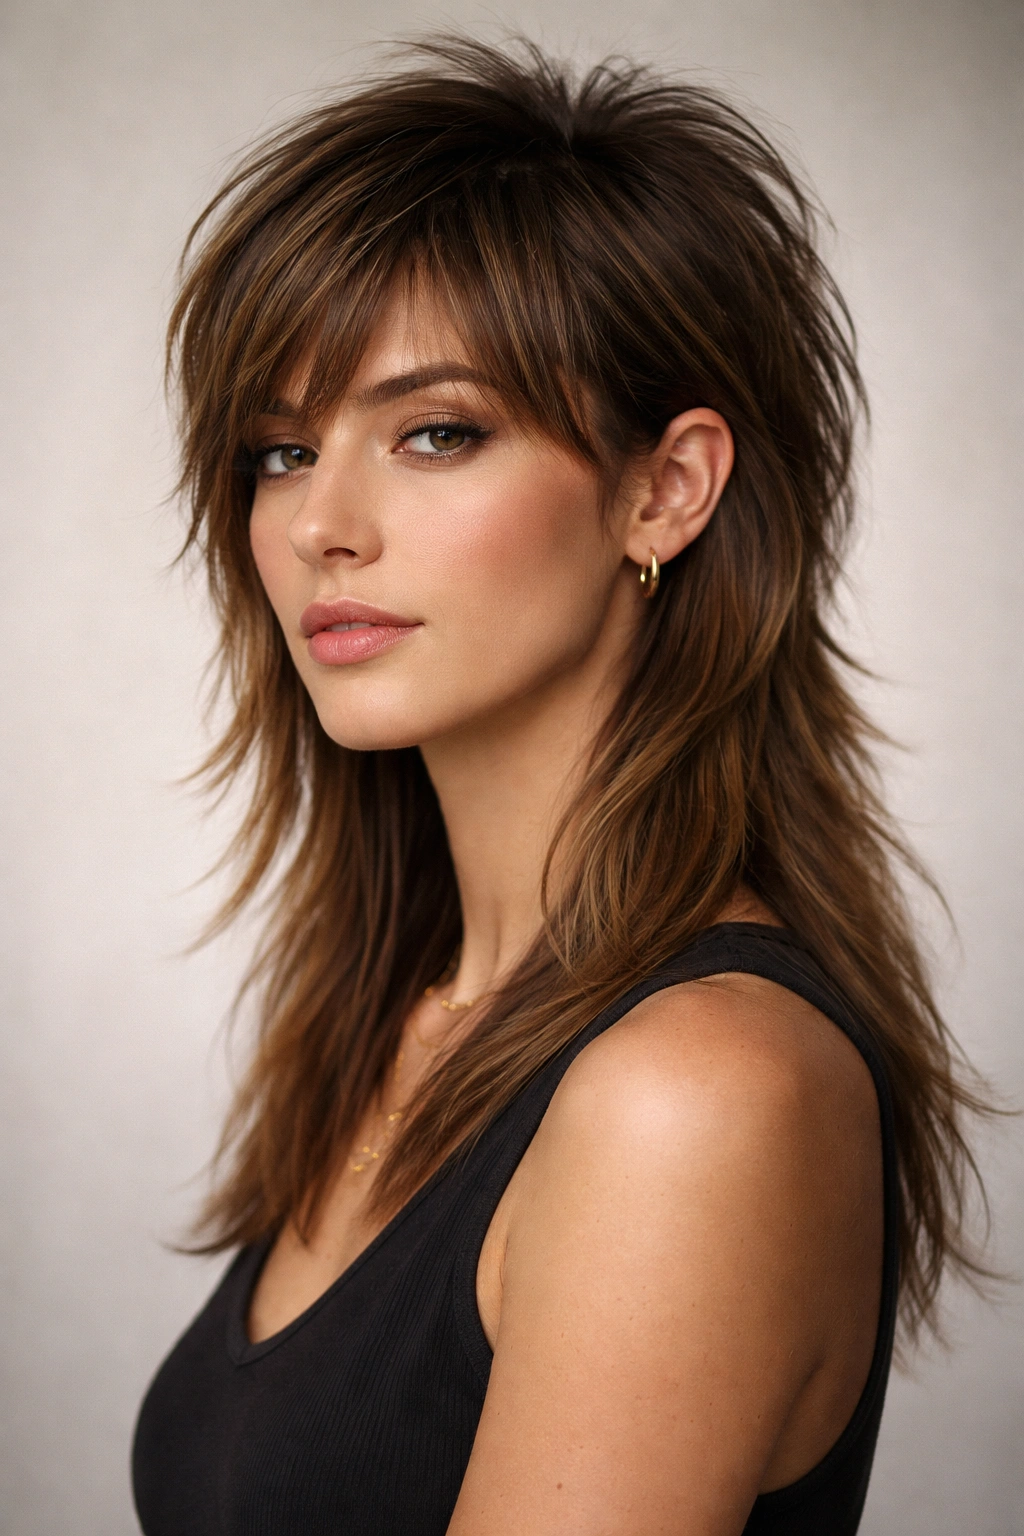
The modern mullet—which is much more subtle and wearable than its 80s predecessor—features shorter, textured layers on top with slightly longer length in the back. The contrast creates width at the top while the length prevents it from feeling too choppy or severe.
Why a Modern Mullet Works for Longer Faces
The shorter, layered top creates volume and width right where you need it—at the crown and around your face. Your eyes don’t travel down the full vertical length of your face because the textured layers and crown volume stop the gaze earlier. It’s unexpected and fashion-forward while still being functional and wearable for everyday styling.
Styling and Maintenance
- Ask your stylist for a subtle, modern mullet—not an exaggerated 80s version (there’s a big difference)
- The top should have plenty of texture and layers, while the back can be longer but still textured
- Blow-dry the top with texture and volume using a round brush and texturizing product
- The back can be worn sleek or textured depending on your preference and hair type
- This cut works well with a slight taper on the sides for a more contemporary look
- Maintenance is moderate; you’ll need cuts every 6-8 weeks to keep the top textured and the shape defined
Real talk: This cut is definitely bold. It’s best suited for people who genuinely enjoy experimental, fashion-forward styles. If you prefer a more conservative appearance, skip this one.
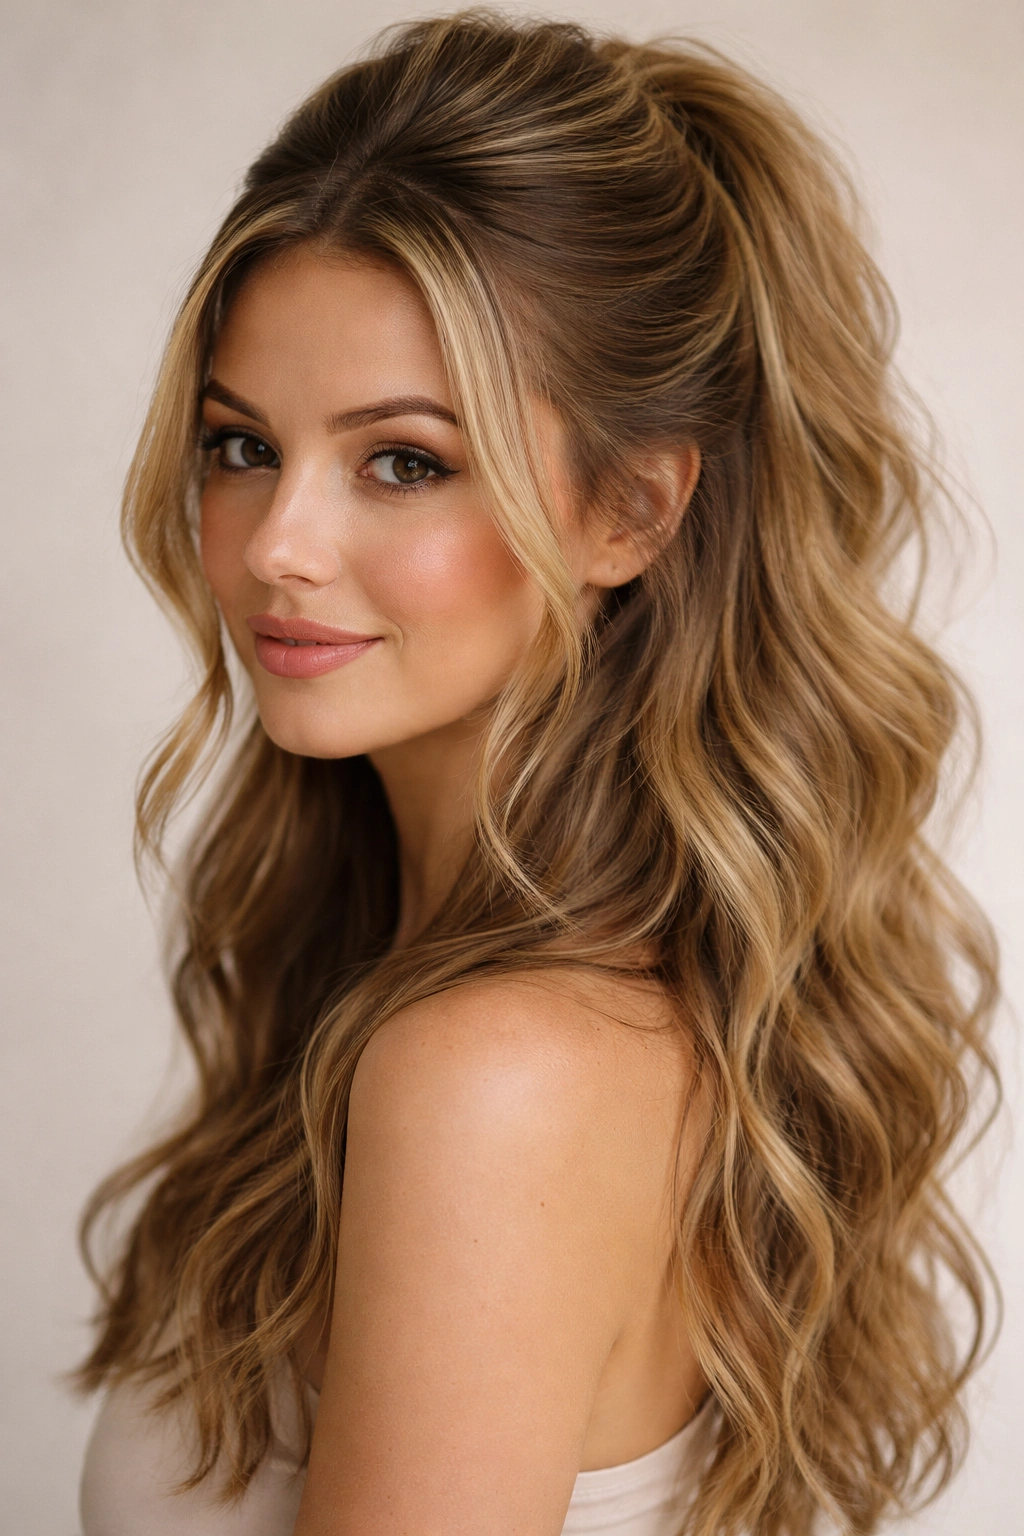
7. Tousled Beach Waves
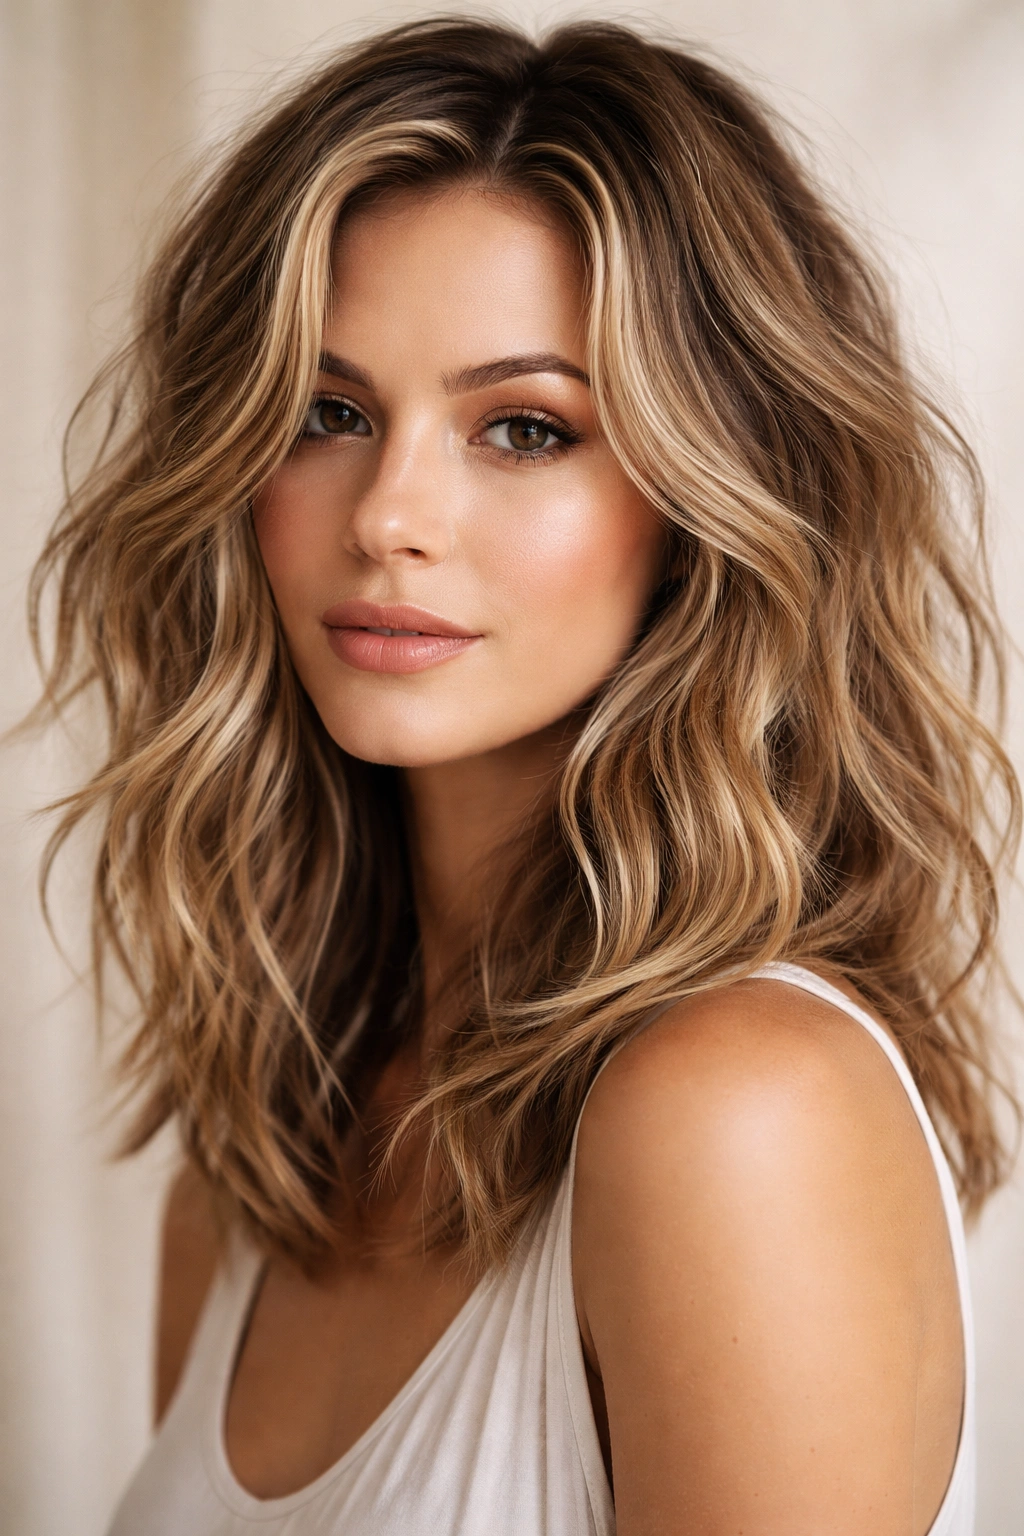
Loose, messy beach waves—achieved through braiding, curling, or salt spray—create visual width by making hair look fuller and thicker while the horizontal wave pattern breaks up vertical lines. This is a styling approach as much as a cut, but it dramatically changes how your face shape reads.
How Waves Create a Width Effect
Waves travel horizontally across your hair, which counteracts the vertical line of a longer face. The texture and movement make hair appear thicker and fuller around your face and jawline. Plus, waves naturally create some volume at the crown, which draws focus upward rather than emphasizing the length of your face. It’s one of the simplest and most effective styling tricks for this face shape.
How to Create and Maintain Beach Waves
- Braid damp hair before bed, then release in the morning for effortless waves
- Use a curling iron or wand to create loose, undone-looking waves through the mid-lengths and ends
- Apply salt spray or texturizing spray to enhance the wave and add grip to your hair
- The waves don’t need to be tight or perfect; looseness is key to the casual, flattering effect
- Works best on hair that’s at least shoulder-length; shorter hair can lose the wave effect too quickly
- Refresh waves every 2-3 days with a spray bottle of water and light product, or re-curl as needed
Quick fact: Beach waves work on straight, wavy, and curly hair types. The approach varies, but the principle—creating horizontal texture—remains the same.
8. Sleek Straight with Side Part
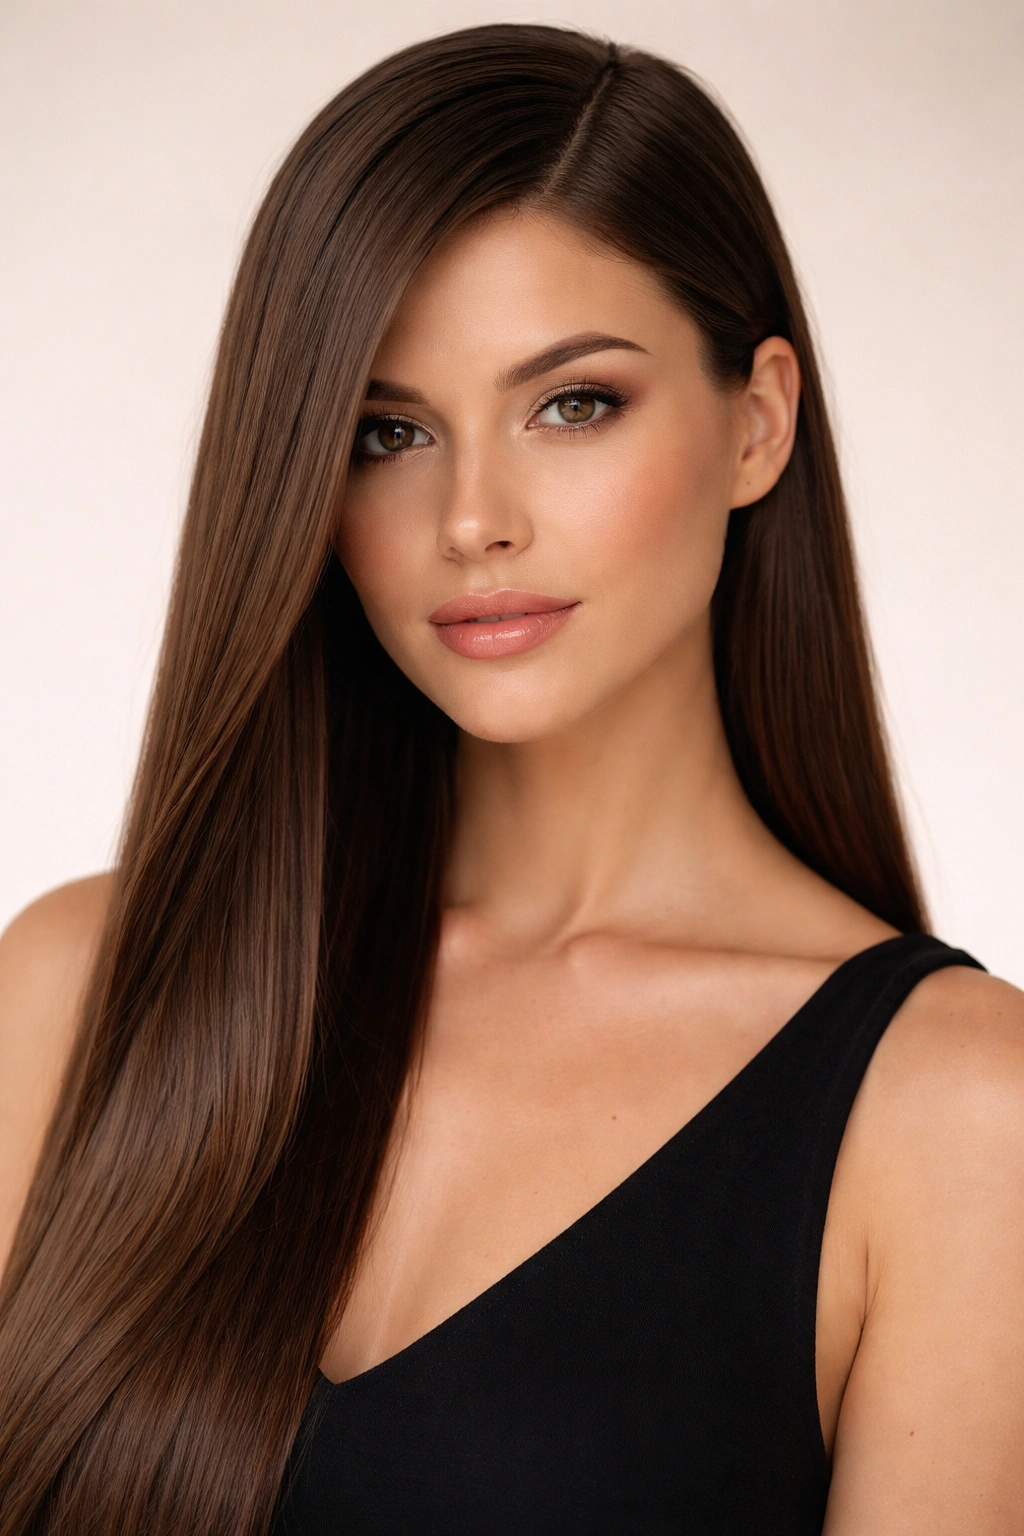
A sleek, straight hairstyle with a deep side part sounds simple, but it’s actually quite effective for longer faces because the side part creates an off-center vertical line that’s less severe than a middle part. Combined with smooth length, it elongates without emphasizing width, so it only works if you add intentional width-creating elements.
Why This Works Better Than a Center Part
A center part on a longer face emphasizes the vertical symmetry of your features and can make your face appear even longer. A deep side part breaks that symmetry and creates an asymmetrical visual line that’s inherently more flattering. When you combine a side part with some volume or waves, you get the elongating effect of straight hair without it working against you.
Styling for Maximum Effect
- Create a deep side part—start near the outer corner of one eye and go back
- Straighten or smooth your hair using a flat iron or smoothing serum and blow-dryer
- Add subtle waves or texture through the lengths using a curling iron; fully straight can look too severe
- Use volumizing powder or texturizing spray at the roots to create lift and prevent the style from lying flat
- Pin the hair behind your ear on one side to create additional width and break up the vertical line
- Consider adding face-framing highlights or color to draw attention horizontally
Worth knowing: This style requires regular maintenance if you have naturally textured or curly hair. It works best as a styling approach rather than a cut-based strategy.
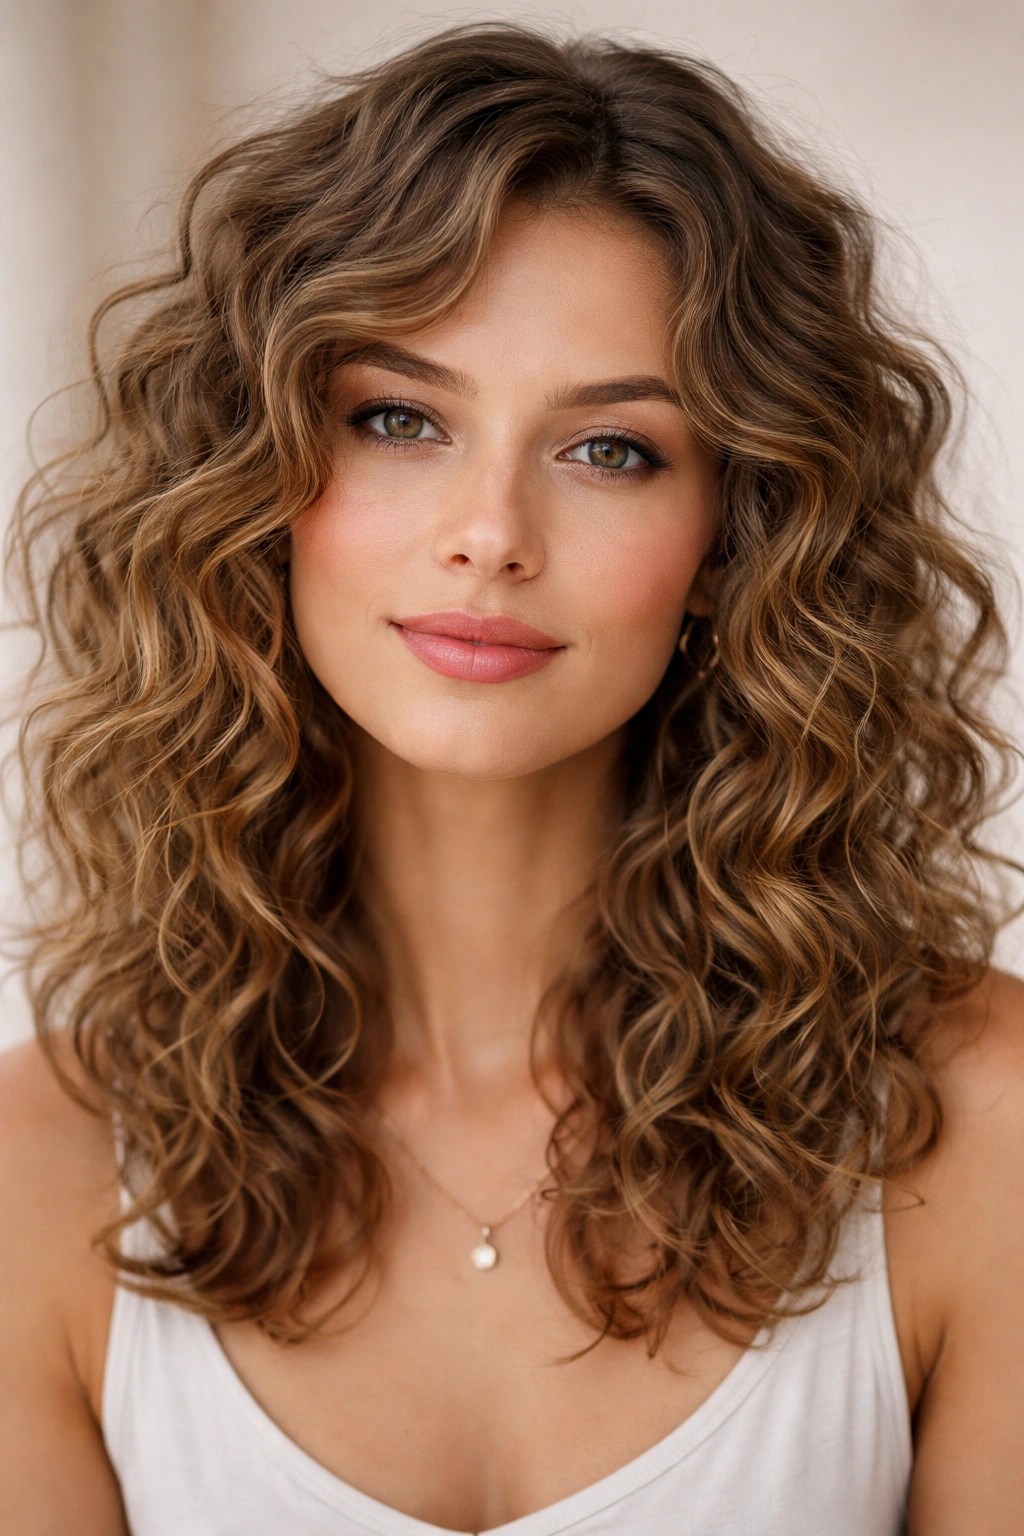
9. Voluminous Curls
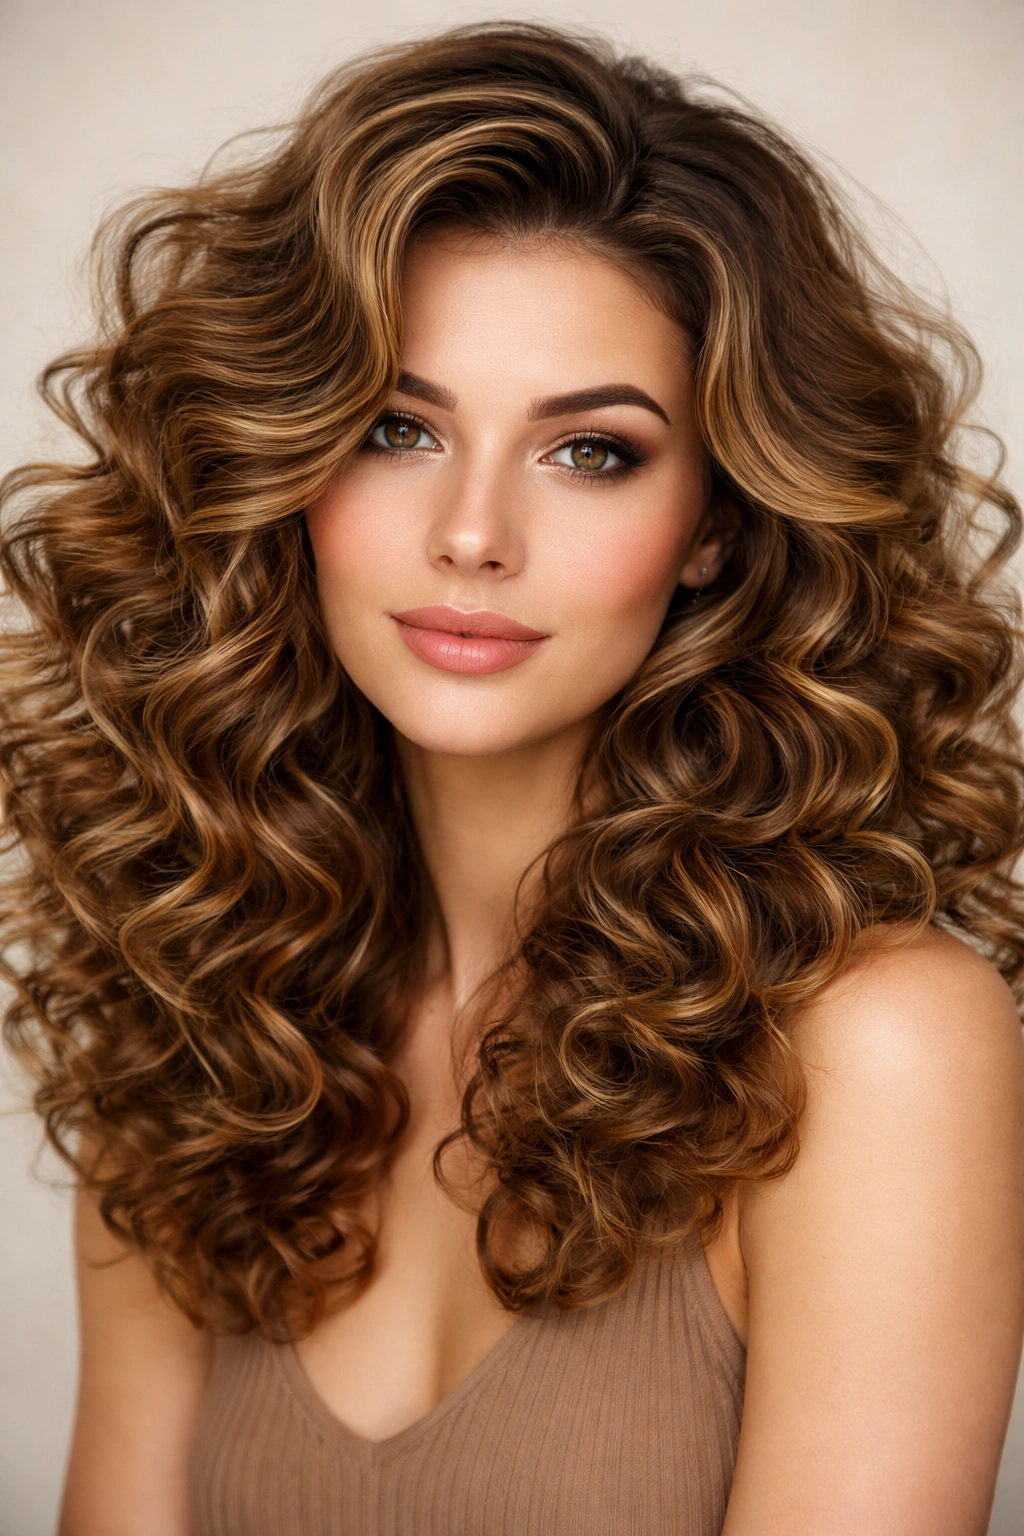
Full, bouncy curls—whether natural, permed, or created through styling—create dramatic width because curly hair has inherent volume and texture. Curls expand outward and sideways, creating a wider overall silhouette that balances a longer face shape.
The Physics of Why Curls Create Width
Curly hair occupies more space than straight hair of the same length, and the vertical curl pattern creates horizontal visual interest that breaks up the vertical line of your face. Curls also add volume at the crown and throughout the length, which prevents your hair from lying flat against your head in a way that would emphasize length. The texture creates movement and shadow that makes your overall face appear wider and more proportionate.
How to Get and Style Voluminous Curls
- Embrace your natural curl pattern if you have one; curly-haired people have a major advantage with longer faces
- If you’re straight-haired, consider a perm for semi-permanent curls, or create curls through styling with hot tools
- Use curl-enhancing products like curl creams, mousses, or gels to define and amplify your curl pattern
- Dry your hair with a diffuser to prevent frizz and enhance curl formation rather than disrupting it
- Apply products to soaking-wet hair for best results; fully dry hair won’t take styling product as effectively
- Refresh curls every 2-3 days with water and product; daily brushing will disrupt the curl pattern
Pro tip: Curly-haired people should avoid heavy oils or products that weigh curls down. Lighter formulas maintain volume and definition better.
10. Choppy Layers All Over

Choppy, piece-y layers throughout your entire head—short and textured, not blended—create volume and movement that prevents hair from looking flat or one-dimensional. This is essentially a more extreme version of the textured bob or shag, working at any length.
Why Choppy Layers Fight Vertical Length
Multiple short layers create visual texture and movement at different heights throughout your hair. Rather than your eye traveling straight down the length of your hair (and thus down your face), your eye bounces around following the texture and movement. This broken visual line reads as wider and more dynamic than a smooth, blunt hairstyle would.
Getting Choppy Layers Right
- Tell your stylist you want choppy, piece-y layers—not subtle blended layers (this distinction matters a lot)
- The layers should be visible and intentional, creating separation between sections of hair
- Works at any length, but longer choppy layers tend to be more wearable than very short choppy cuts
- Pair with texturizing products and blow-dry styling to enhance the choppy effect
- Wavy or curly-haired people can let their natural texture work with the choppy layers; straight-haired people will need to style them
- Gets maintenance cuts every 6-8 weeks to keep layers fresh and intentional-looking
Quick reality check: Choppy layers require styling to look good. If you’re not willing to blow-dry and use texture products, the cut will look flat and less flattering.
11. Half-Up Half-Down with Texture
Styling hair half-up, with the top section secured and the bottom left down, creates the illusion of shorter, wider hair while maintaining the length you want. The secured top section also adds volume and lift at the crown, preventing the style from reading as too vertical.
How Half-Up Styling Changes Face Proportions
By securing the top half of your hair, you visually shorten the face while the remaining bottom-half length prevents it from feeling too short. The volume created by the secured section adds width at the crown, and the secured style naturally sits wider than hair that’s hanging straight down. It’s a temporary illusion rather than a cut, but it’s incredibly effective.
Different Ways to Wear Half-Up Hair
- A simple half-up pony adds volume and width; secure with an elastic at the crown and gently pull to create lift
- A twisted or braided half-up style adds texture and visual interest while creating the width effect
- Pair half-up styling with waves or curls in the bottom section for maximum texture and movement
- This works at any hair length, though it’s most effective with hair that’s at least shoulder-length
- You can do this as a daily styling approach or save it for special occasions
- The style works especially well if you have fine or thin hair; the gathering of hair at the crown creates the appearance of fullness
Insider note: This is one of the easiest ways to immediately change how your face shape reads without actually cutting your hair. Great for testing whether you like the shorter-looking effect before committing to a permanent cut.
12. Blowout Waves
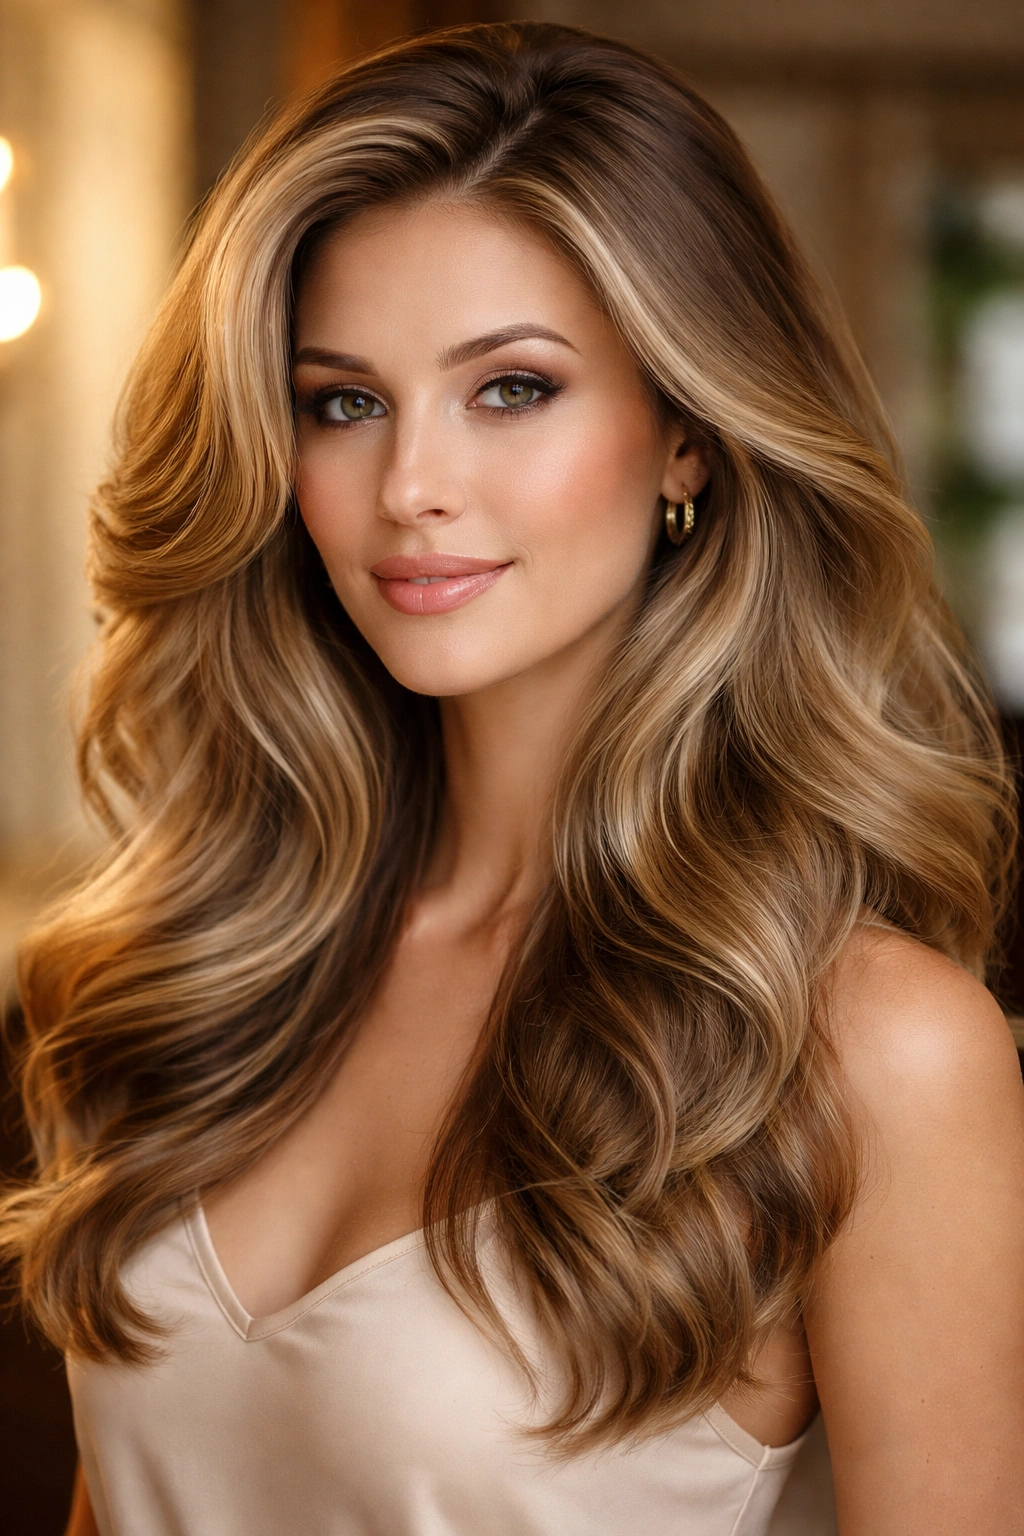
A professional-style blowout with smooth, voluminous waves—the kind you’d get at a salon—creates width through the combination of volume at the roots and the horizontal movement of the waves. Even if you never get a professional blowout, learning this styling technique is valuable.
What Makes a Blowout Flattering for Longer Faces
A good blowout starts with volume at the crown, which immediately draws attention upward and prevents the overall look from being too vertical. The smooth waves that follow create horizontal movement and texture, while the overall volume makes hair appear fuller and thicker. Combine these elements and your face shape appears more balanced and proportionate.
How to Create a Blowout at Home
- Start with damp (not soaking wet) hair and apply volumizing mousse or styling spray to the roots
- Blow-dry your roots first using a paddle brush, lifting hair away from your scalp to create maximum volume
- Once the roots are dry, work through the lengths with a round brush, creating smooth waves as you go
- Use a curling iron or wand to touch up waves or create them from scratch if your natural blow-dry texture isn’t quite right
- Finish with a light hairspray to hold everything in place without making it feel stiff or crunchy
- The goal is smooth, voluminous waves that feel soft and moveable, not rigid or overly done
Worth knowing: Professional blowout bars offer this as a service, and it’s genuinely worth the investment occasionally. Watching a professional do it teaches you techniques you can recreate at home.
13. Face-Framing Layers
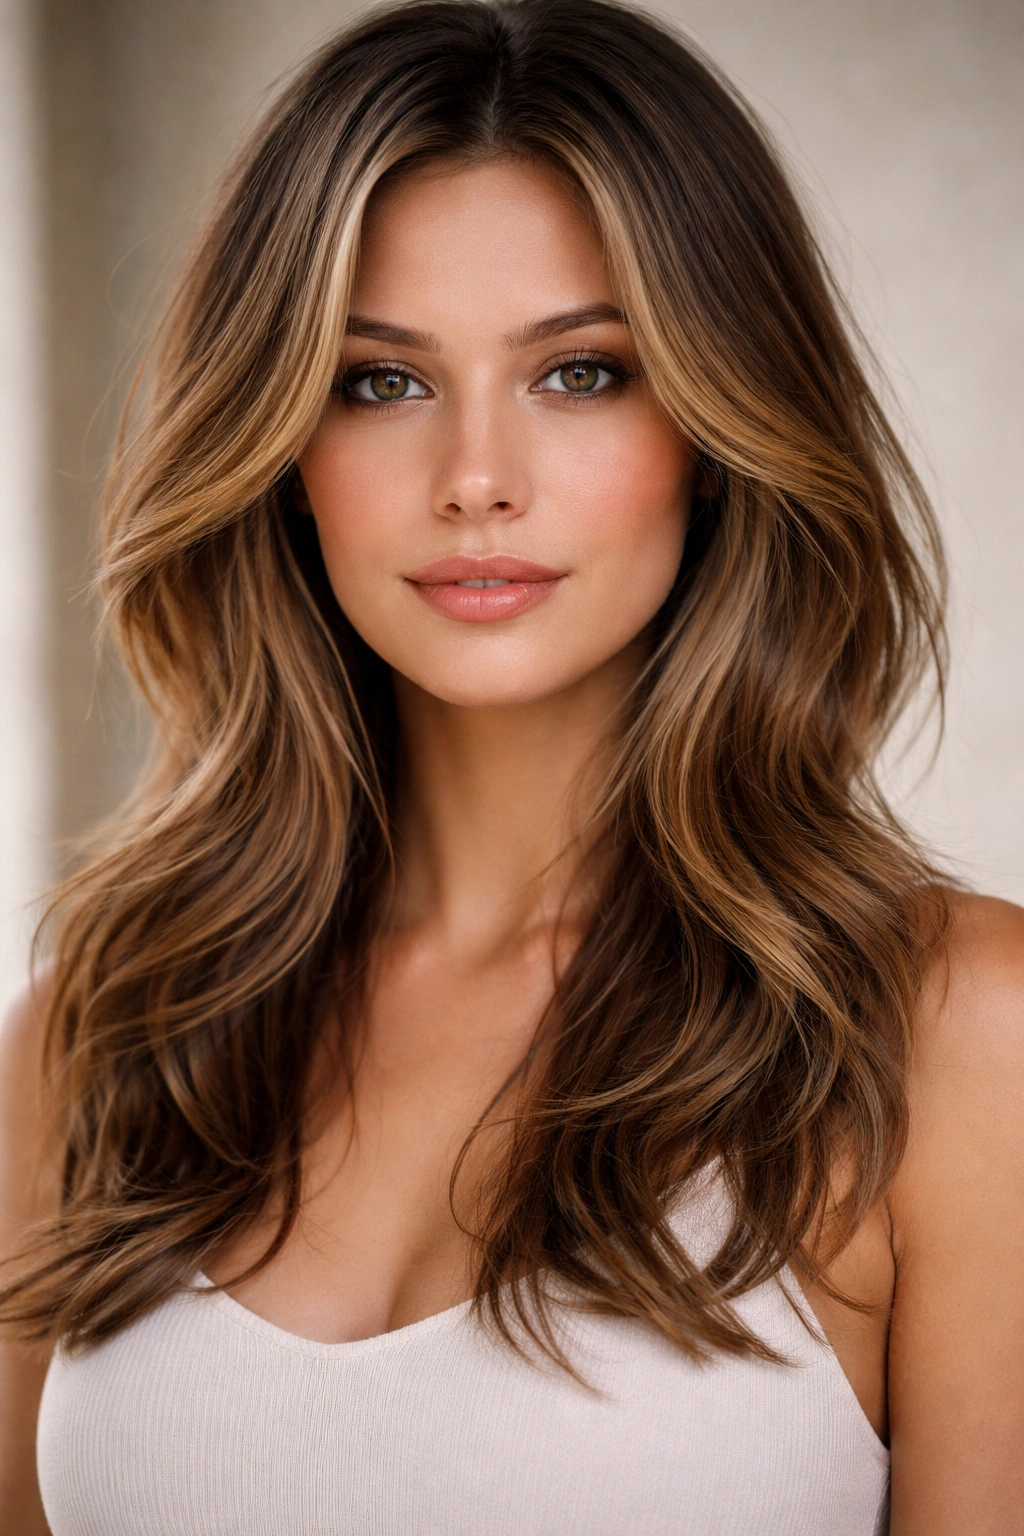
Shorter layers that specifically frame your face—distinct from all-over choppy layers—create width by drawing attention across your face rather than down its length. These layers should be noticeably shorter than your overall hair length, creating a defined, intentional look.
How Face-Framing Specifically Works
Face-framing layers create horizontal lines around your face, and these lines are visually powerful. They also allow hair to move and separate right at cheekbone height, which is exactly where you want visual interest and texture for a longer face. Unlike all-over choppy layers, face-framing layers combine the width effect of shorter pieces with the length and shape of longer overall hair.
How to Get and Style Face-Framing Layers
- Ask your stylist for face-framing layers specifically; show them reference photos of the length and placement you want
- Layers should typically be several inches shorter than your overall length, creating a distinct visual difference
- They work best paired with somewhat smooth or wavy underneath sections; too much texture everywhere competes with the face-framing effect
- Blow-dry these layers outward and slightly away from your face to enhance the frame effect
- Pair with a side part or center part depending on your preference; both work well
- These layers need maintenance every 4-6 weeks, as they grow out quickly and lose their shaping power
Pro tip: If you’re getting a cut, bring reference photos and be specific about where you want the shortest layers. A stylist’s idea of “face-framing” might not match yours.
14. Asymmetrical Cut
An asymmetrical cut—where one side is noticeably shorter or longer than the other—creates visual imbalance that prevents the eye from reading your face as uniformly long. One side appears shorter, while the length variation creates inherent width and interest.
Why Asymmetry Flatters Longer Faces
Symmetrical shapes emphasize a longer face’s vertical lines. Asymmetry breaks that symmetry and makes the overall look less obviously elongated. One side will read as shorter, and the visual difference between the two sides draws attention across rather than down. It’s bold and requires confidence to carry off, but it genuinely works.
Wearing an Asymmetrical Cut
- The cut can be subtle (one side slightly shorter) or dramatic (one side much shorter than the other)
- Pair with side-swept styling to emphasize the asymmetry
- The shorter side can be textured and choppy, or smooth and blunt—both work with a longer face
- This cut works best with a hairstyle that requires some styling rather than looking good fully air-dried
- You’ll need regular cuts every 4-6 weeks to maintain the defined asymmetry
- This style works best for people comfortable with fashion-forward, eye-catching cuts
Real talk: An asymmetrical cut is a statement. Make sure it aligns with your personal style and comfort level before committing.
15. Braided Crown with Loose Waves
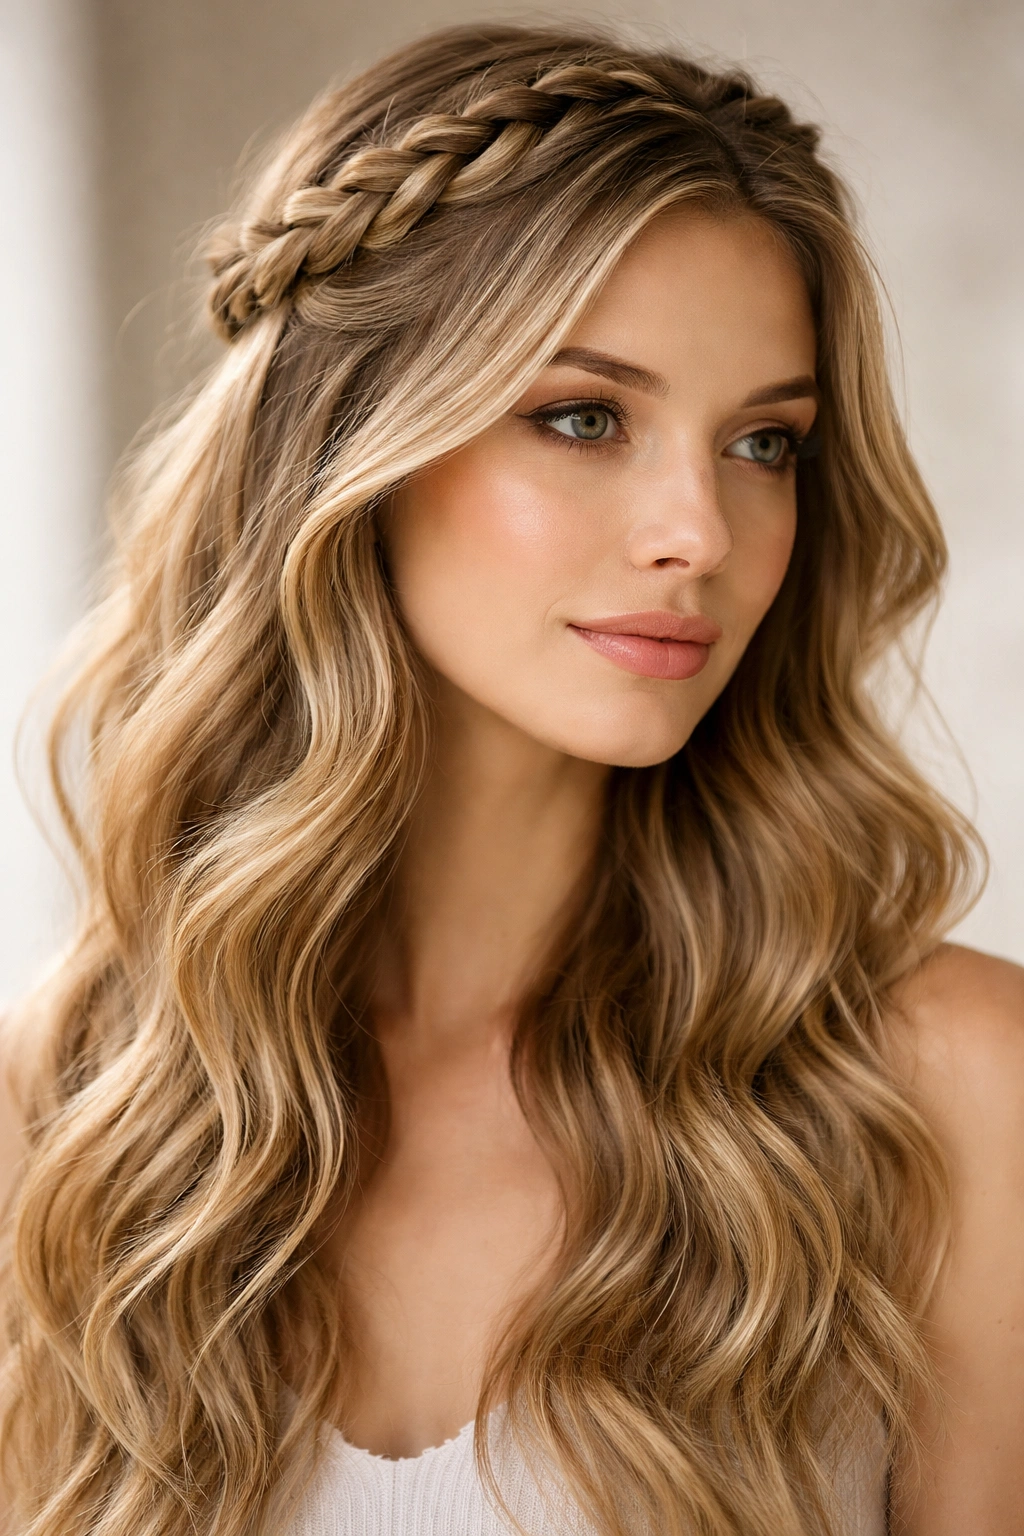
A braid crown or halo braid paired with loose waves isn’t a permanent cut, but it’s a styling approach that creates significant width. The braid sitting above your head literally adds height and width where you need it, while loose waves below provide texture and movement.
How a Braided Crown Reshapes Your Face
A crown braid, which typically wraps around the back of your head, visually shortens your face by taking up space above it. It also creates an elevated, intentional style that reads as more interesting and dimensional than straight hair. Pair this with waves, and you get horizontal movement that breaks up vertical length while the braided element adds structure and visual interest.
How to Create a Braided Crown
- Start with damp hair and create waves using a curling iron, braiding method, or salt spray
- Create a side part for asymmetry, or a center part for balance
- Begin your braid on one side near the temple, braiding loosely across the back of your head
- Secure the braid with bobby pins that match your hair color, tucking the end behind your ear or into a small bun
- Leave the front sections unbraided and wavy for face-framing softness
- This works on hair of any length, though shoulder-length or longer is most flattering
Worth knowing: This style works especially well for special occasions or events where you want a polished, intentional look.
16. Full Bangs with Straight Hair
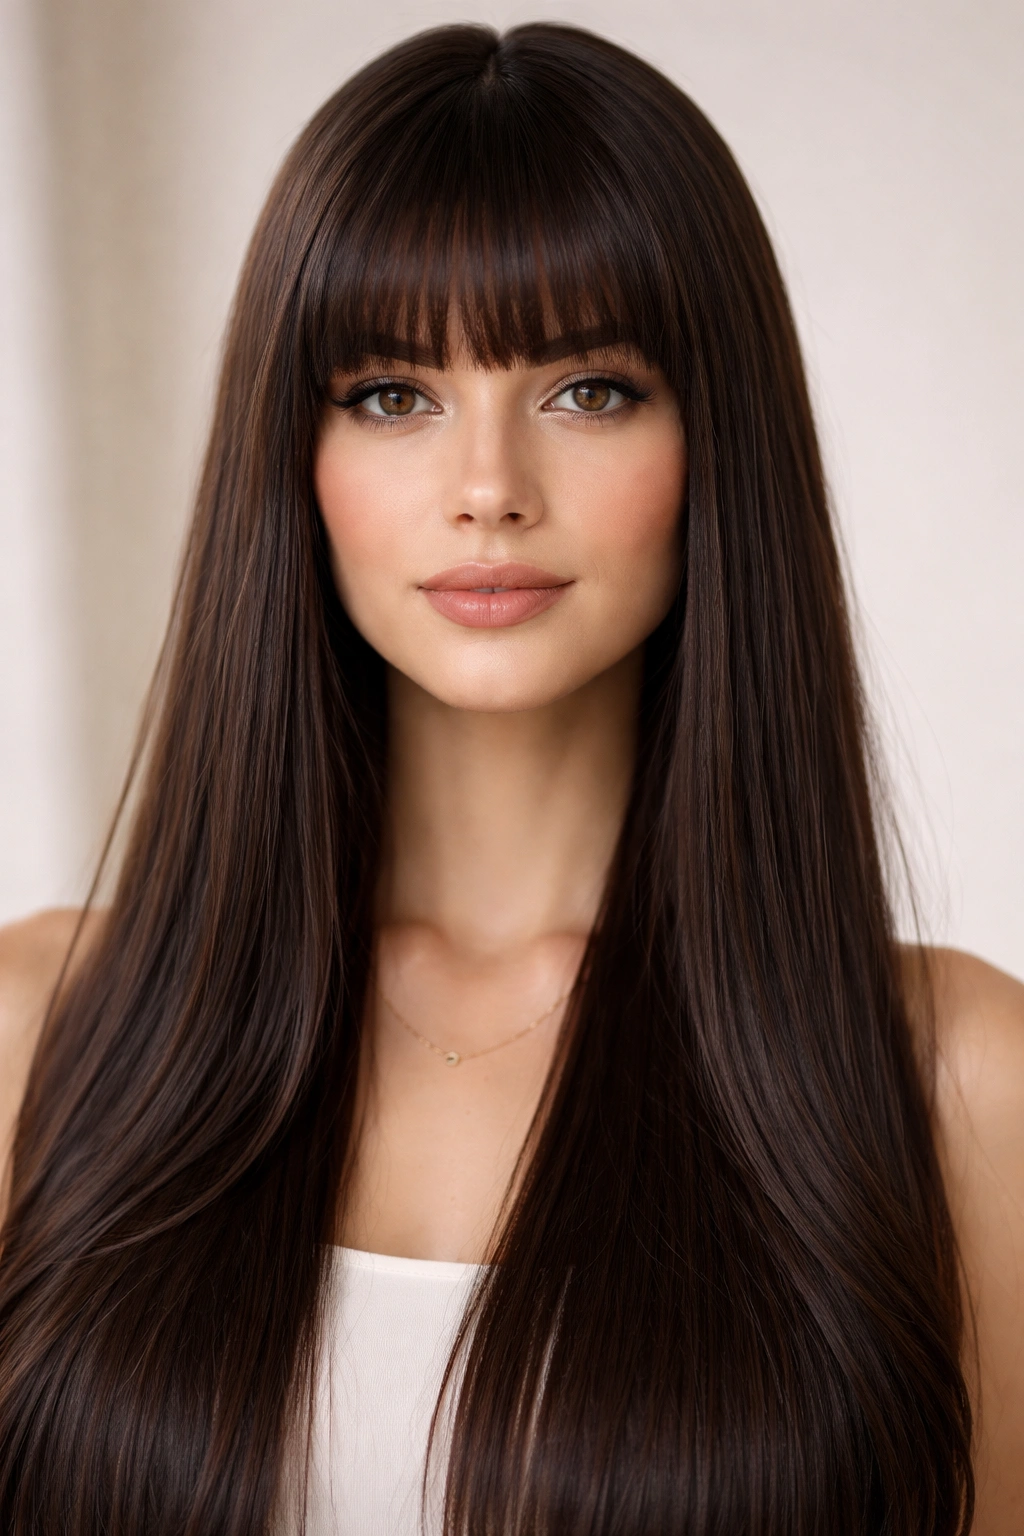
Full, blunt bangs paired with straight, sleek lengths create a strong horizontal line across your forehead while the straight lengths balance the look. This combination is chic and intentional, working especially well if you prefer a sleek, minimalist aesthetic.
Why Full Bangs Matter So Much
Full bangs create the strongest possible horizontal line across your forehead, which is powerful for counteracting a longer face shape. The width of the bang line itself—extending fully across your forehead—adds immediate width to the upper face. Pair this with straight lengths, and you get a clean, intentional look that feels curated rather than accidental.
Styling and Maintaining Full Bangs
- Blow-dry your bangs straight using a paddle brush and flat iron for a sleek finish
- Keep the underneath lengths smooth with a flat iron, or allow them to have slight texture depending on your style preference
- This style requires getting bangs trimmed every 3-4 weeks; as they grow, they lose their face-shaping power
- Consider pairing with a middle or side part; both work well
- The style looks best when it appears intentional and groomed rather than messy or grown-out
- Add subtle color or highlights around the face to enhance the effect
Quick fact: Full bangs are high-maintenance in terms of regular trims, but the face-shaping payoff is significant and immediate.
17. Textured Lob
A lob (long bob), typically hitting between your chin and shoulders, works beautifully for longer faces when it’s textured rather than blunt. The texture prevents the style from being too severe while the mid-length creates a natural widest point around your jawline.
Why a Textured Lob Works for This Face Shape
A blunt lob at your jawline actually emphasizes a longer face because it creates another line that the eye follows downward. A textured lob does something different: the choppy layers and piece-y texture create horizontal visual interest while the mid-length prevents the style from reading as too long. You get the short-ish appeal of a bob with enough length to feel flattering.
How to Get and Wear a Textured Lob
- Ask your stylist for a lob with choppy, piece-y layers rather than a blunt, blended cut
- The layers should be visible and textured, creating separation throughout
- Blow-dry with texture products to enhance the choppy effect
- The style works with waves, curls, or even relatively straight hair if you add texture through styling
- This cut requires maintenance every 6-8 weeks to keep layers fresh and intentional
- Pair with a side part or center part depending on your preference; both work well
Pro tip: A textured lob is the perfect middle ground if you want something shorter than your current length but you’re not ready for a dramatic cut like a pixie.
18. Curly Perm with Waves
A perm—which creates semi-permanent waves or curls—gives you reliable texture that creates width and volume without daily styling effort. Modern perms are gentler than older versions and can create anything from loose waves to tighter curls depending on what you want.
Why a Perm Creates Lasting Width
A perm adds permanent texture to your hair, which means you get the width benefits of waves and curls without having to style them into your hair each time you wash it. Your hair dries with built-in volume and texture, which immediately creates the horizontal visual lines that counteract a longer face. It’s essentially a cut plus styling in one service.
Caring for Permed Hair
- Perms require a commitment to keeping them moisturized and healthy; curly, textured hair needs more hydration than straight hair
- Use moisturizing shampoos and conditioners specifically formulated for curly or textured hair
- Avoid heat styling as much as possible, as it can frizz out the curl or wave pattern
- Get regular deep conditioning treatments to keep your hair healthy and hydrated
- Refresh your perm every 4-6 months as new growth comes in straight
- This works especially well if you have straight hair but love the aesthetic and feel of curly or wavy hair
Real talk: A perm is a commitment. Make sure you’re genuinely willing to care for textured hair before getting one. That said, once you do, the ease of styling is genuinely worth it.
Final Thoughts
The best hairstyle for a longer face isn’t about fighting your face shape—it’s about working with it strategically. Every style here creates width through texture, layers, waves, or intentional styling choices that draw the eye horizontally instead of down the vertical length of your face. Some of these are cut-based; others are styling-based. Some require regular maintenance; others are more low-commitment.
Start by thinking about your lifestyle and styling preferences. If you love low-maintenance, air-dried looks, a textured cut or a curly perm might be your answer. If you enjoy styling and want flexibility, waves or a sleek blowout could work beautifully. If you prefer bold, fashion-forward choices, an asymmetrical cut or modern mullet might be calling your name. The most important thing isn’t matching your face shape to a perfect style—it’s choosing something you’ll actually feel confident wearing and maintain regularly enough that it looks intentional rather than grown-out or neglected.