Pushback hairstyles have become a signature look for Black women, offering that perfect blend of sophistication, versatility, and style. Whether you’re heading to the office, a special event, or just want to switch up your everyday look, pushback styles keep your hair off your face while showcasing your features and allowing your edges to shine. These hairstyles work beautifully with natural hair, protective styles, braids, and extensions, making them incredibly adaptable to your personal aesthetic and hair goals.
The beauty of pushback styling lies in its simplicity paired with undeniable impact. You’re essentially sweeping your hair away from your face and securing it in a way that feels intentional and polished. The style can range from sleek and minimalist to textured and decorative, depending on your mood and the occasion. What makes these styles so appealing is that they work across different hair types, lengths, and textures—whether you’re rocking natural coils, locs, braids, or straight styles, there’s a pushback hairstyle that’ll become your go-to.
Real talk: pushback styles also give your edges a chance to breathe and recover from tight styling. You get to highlight your natural hairline while keeping the bulk of your hair off your neck and shoulders, which is especially practical during warmer months or when you’re focused and busy. Plus, these looks photograph incredibly well and always feel intentional, even when you’ve styled them quickly.
1. The Classic Slicked-Back Bun
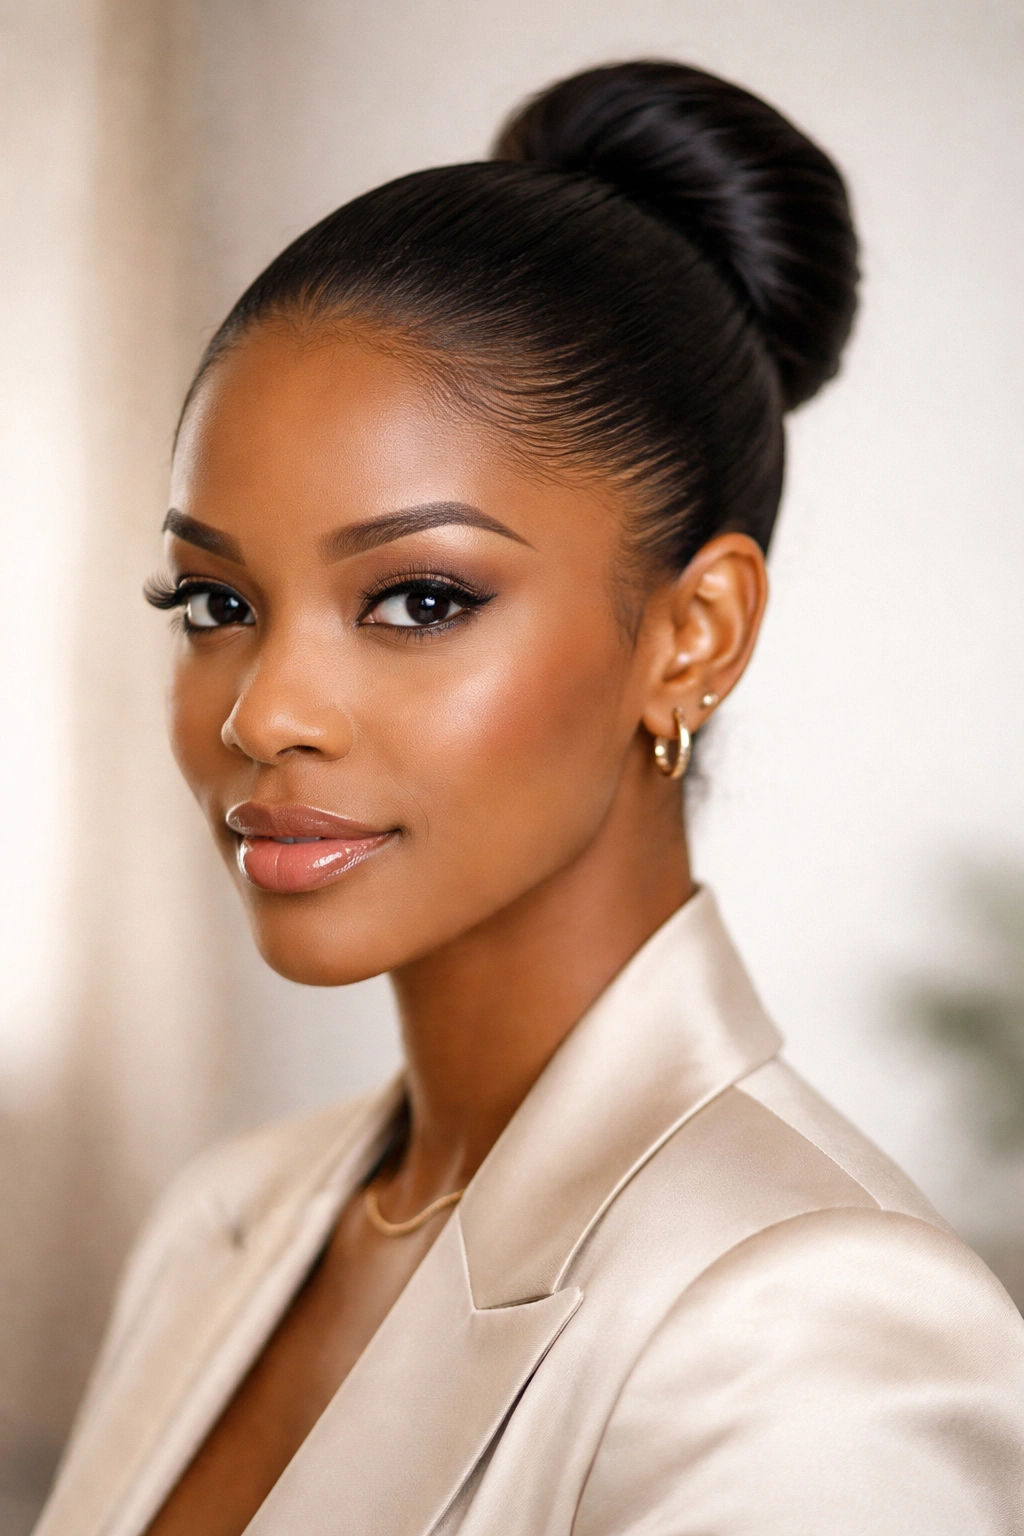
This timeless pushback hairstyle pulls all your hair straight back from your face and gathers it into a neat bun at the crown or the nape of your neck. The key to nailing this look is using a smoothing gel or pomade that holds without flaking or feeling stiff. You can create a tight, minimalist bun or a fuller, more relaxed one depending on your hair texture and the vibe you’re going for.
Why This Works for Every Occasion
The slicked-back bun is universally flattering because it elongates your face, showcases your bone structure, and works equally well in professional settings and casual outings. You can wear it to a board meeting, a date night, or while running errands. The style also keeps hair secure without being overly tight, which means less tension on your hairline. It’s one of those pushback hairstyles that never feels outdated.
How to Perfect This Look
- Use a soft-bristle brush or toothbrush to smooth your hairline and create sleek edges
- Apply pomade or gel in the direction you’re brushing for a polished finish
- Secure your bun with bobby pins, hair sticks, or a hair cuff depending on your hair volume and personal style
- Finish with a light hairspray to keep flyaways in place without crunchiness
Pro tip: Create your bun off to the side slightly rather than directly at the center back—it’s more modern and flattering on most face shapes.
2. The Wrapped Pushback with Scarf Accent
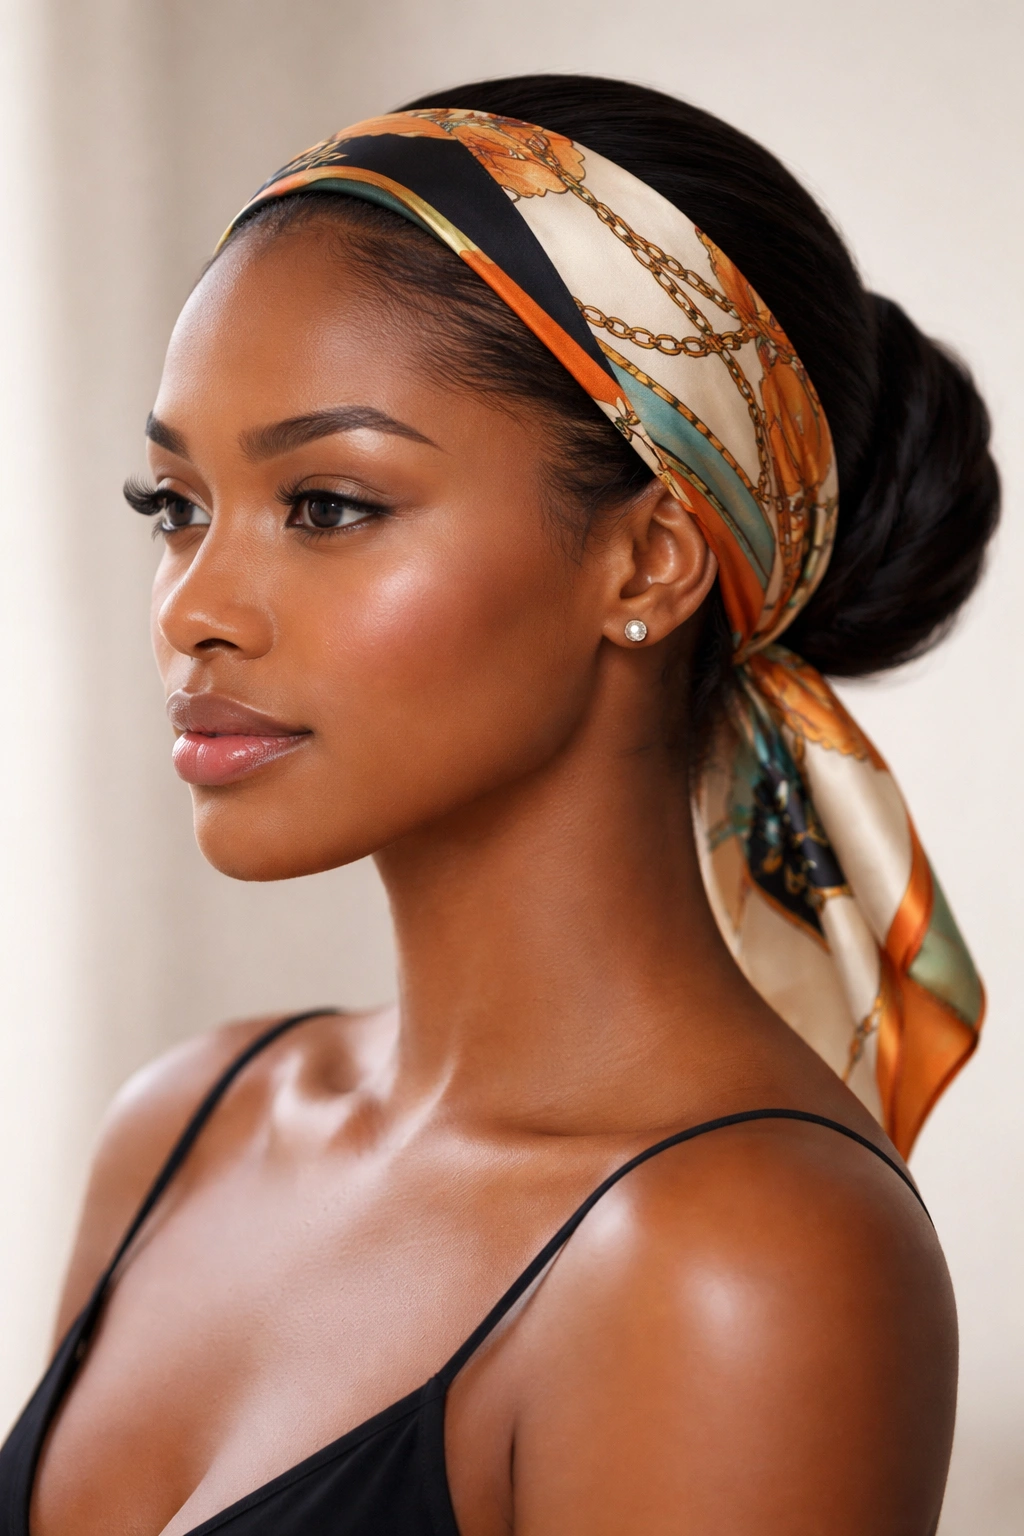
This style takes the pushback concept and adds a fabric element—usually a silk scarf, headwrap, or coordinating fabric—that frames your face while keeping hair off your features. The scarf gets wrapped around your head just above your hairline, creating a decorative element that instantly elevates the look. Your hair is still pushed back, either into a low pony or bun, but the scarf becomes the focal point.
What Makes This Style Special
Wrapping a scarf into your pushback style isn’t just beautiful—it’s also protective for your edges and hairline. The fabric creates a barrier that reduces friction and tension. You can choose fabrics and colors that complement your outfit, making this an incredibly versatile styling option. It reads as intentional and culturally connected, and it works across all hair types and lengths.
Styling Tips
- Choose a silk or satin scarf to minimize friction and frizz
- Position the scarf so it sits smoothly against your hairline without bunching
- Wrap it once or twice around your head depending on how much coverage and drama you want
- Secure with bobby pins underneath so they’re hidden by the scarf
- Leave a few face-framing strands for a softer, less severe look if desired
Worth knowing: This style works beautifully with protective hairstyles like braids or twists underneath—the scarf wraps over the top, creating a polished finished look.
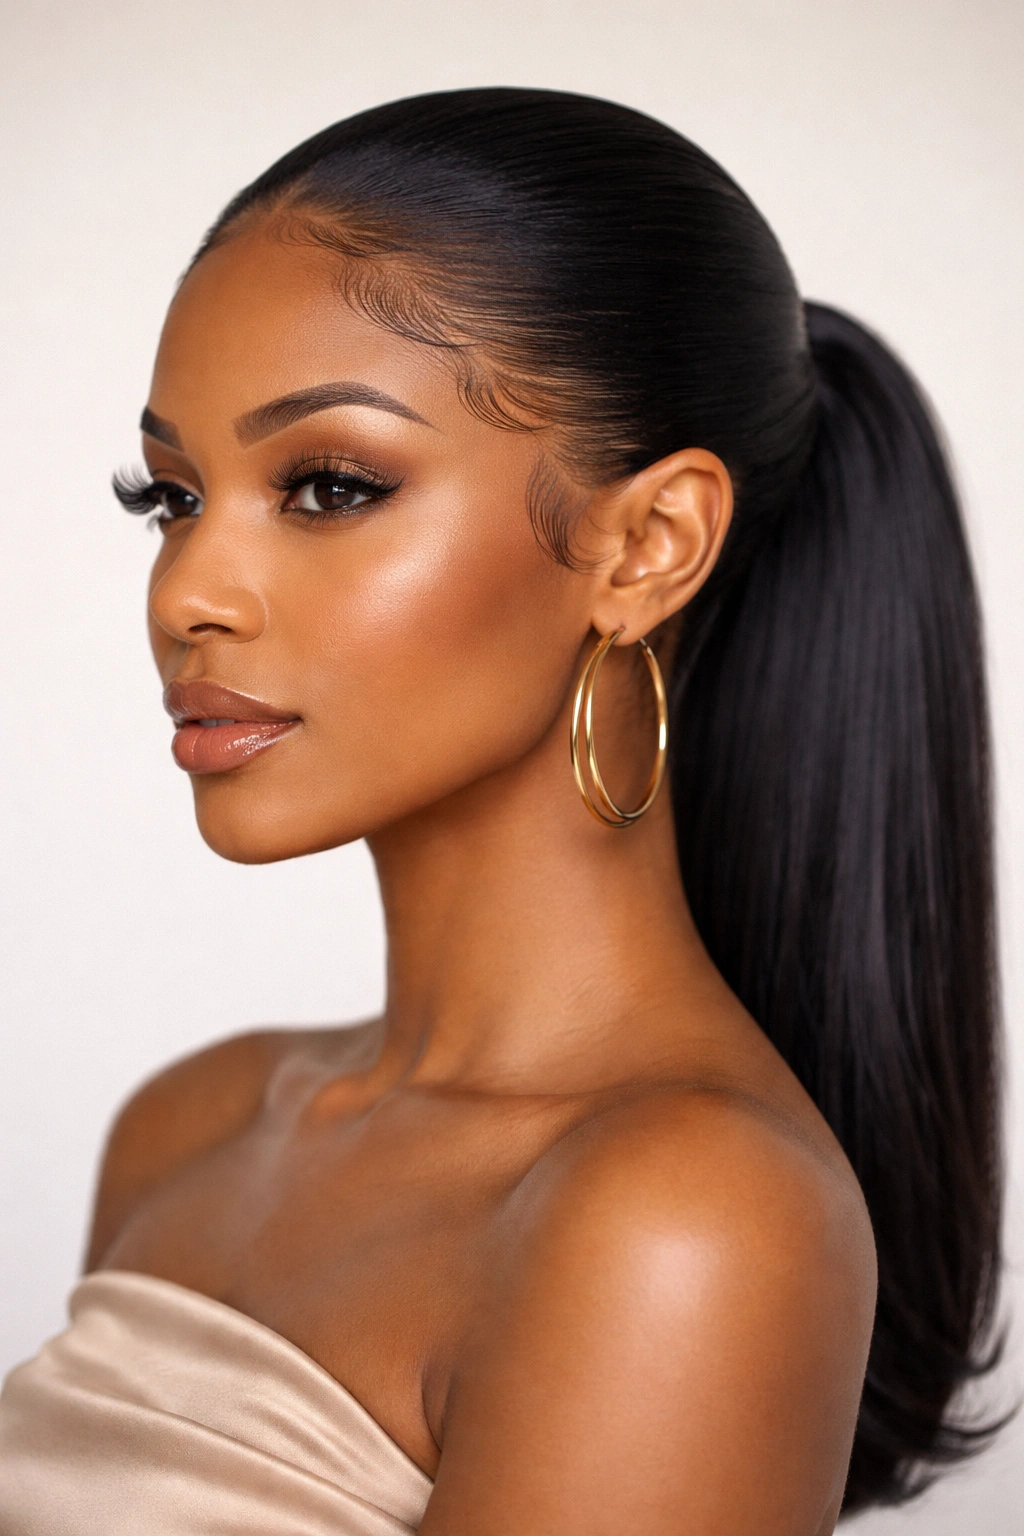
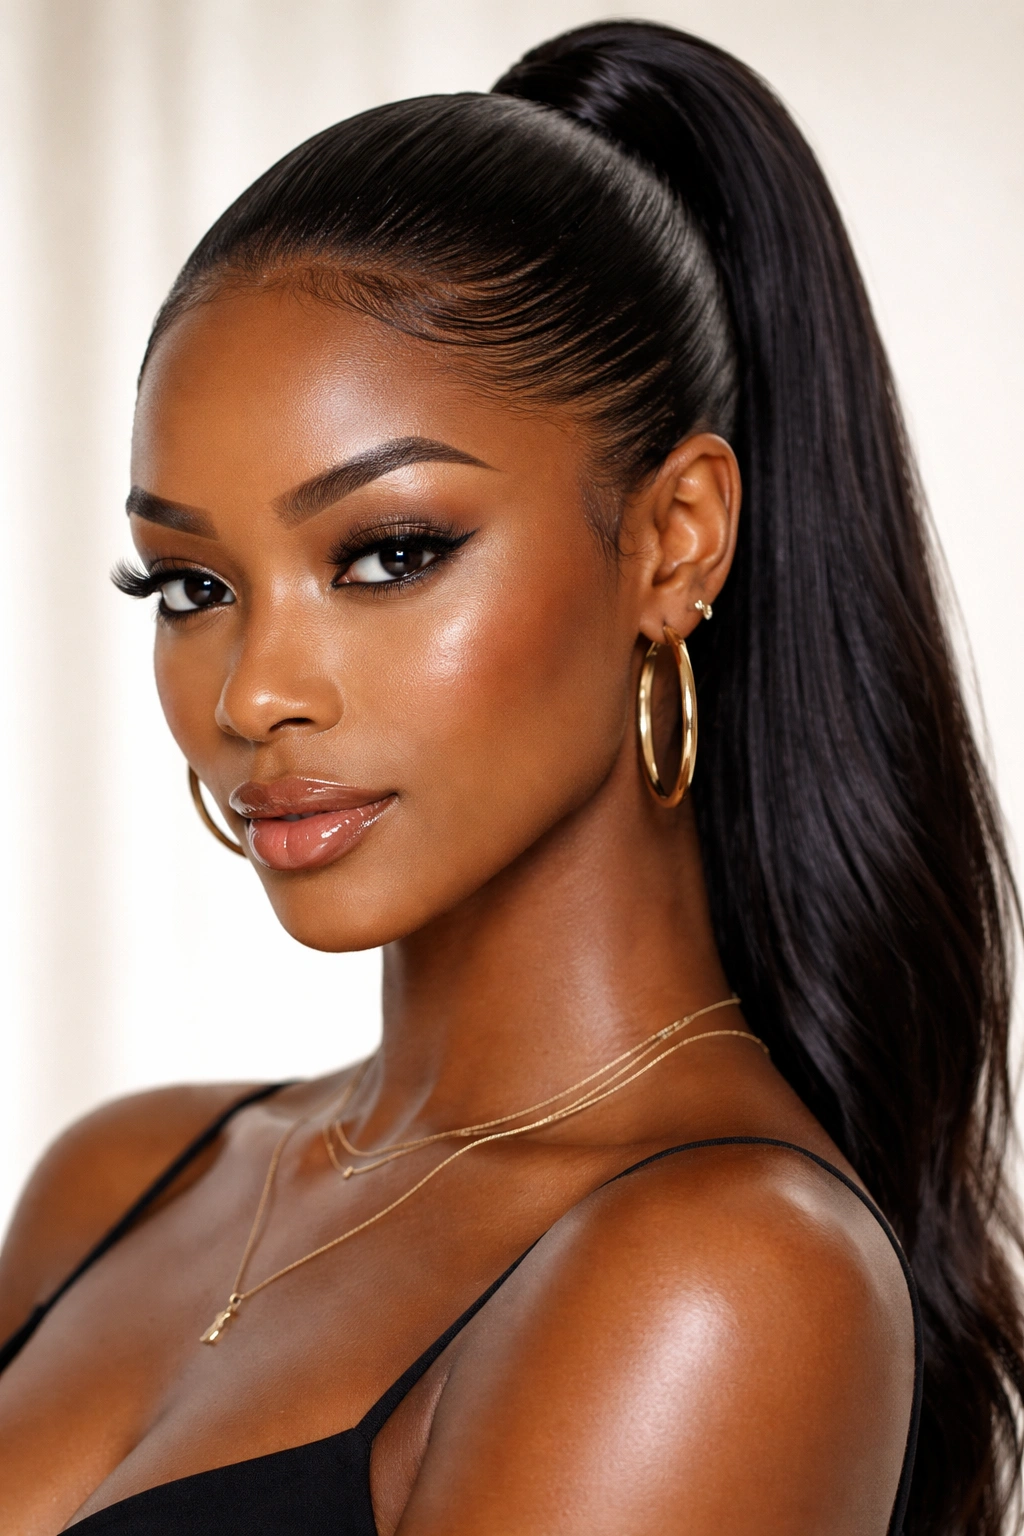
3. High Pushback Ponytail with Gel-Defined Edges
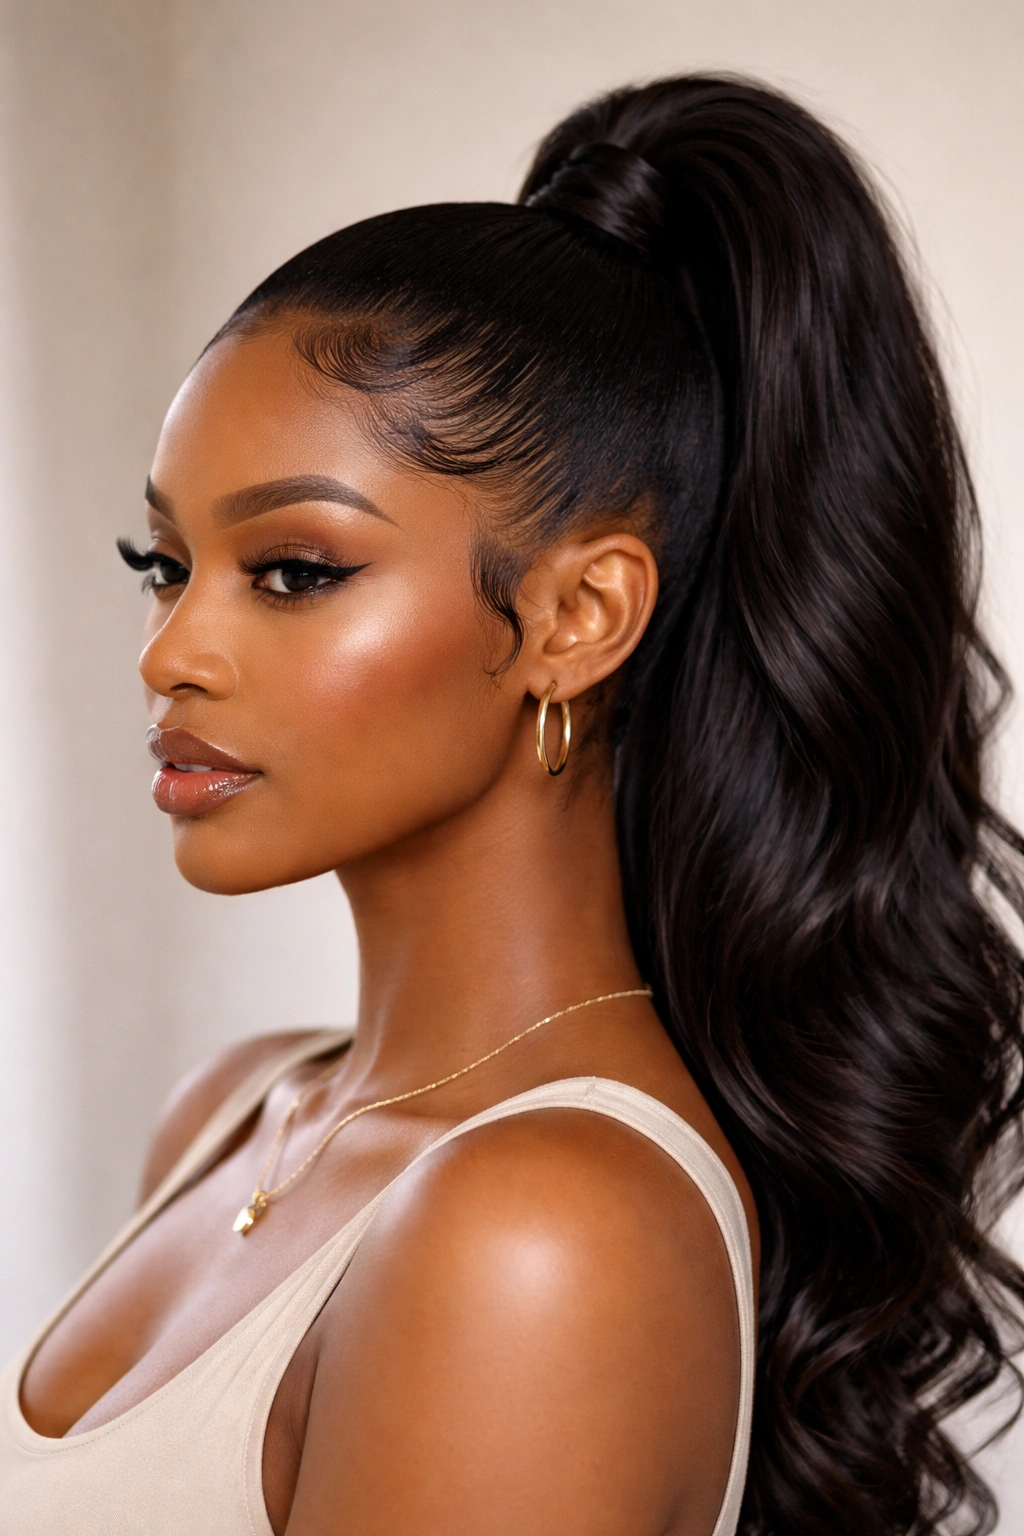
Take your edges seriously with this sleek high ponytail that features carefully groomed, defined edges along your hairline. The ponytail sits high on your crown, pulling hair completely away from your face, while you apply edge control or gel to create clean, geometric lines along your edges. You can create simple lines or go for more intricate designs depending on your comfort level with edge styling.
The Edge-Focused Power Move
Defined edges are a statement, and this pushback style lets yours take center stage. You’re not just pulling your hair back—you’re creating intentional, crisp lines that frame your face and demonstrate attention to detail. This look works especially well for special events, professional settings, and days when you want to feel extra confident. The high placement of the ponytail also prevents strain on your edges since the weight sits higher on your scalp.
Creating Clean Edges
- Use a stiff edge control product and a fine-tooth comb or toothbrush
- Start at your center part and work outward, creating clean lines
- Work in one direction for the sleekest result
- Consider creating swoops, waves, or geometric patterns if you’re comfortable with edge design
- Use a flexible hold spray to set your edges throughout the day
Insider note: Your edges are an art form—don’t rush this step. Taking an extra two minutes to nail clean lines transforms your entire look.
4. Twisted Pushback Half-Up Style
This style combines pushback principles with texture by twisting sections of hair at your crown and gathering them into a half-up, half-down arrangement. Rather than pulling everything back, you’re only securing the top section, which means your hair flows down your back while your face remains completely visible. The twists create dimension and visual interest while keeping the practical benefit of hair off your face.
Why Twists Add Movement
Twists are beautifully versatile and work with straight styles, coils, waves, and everything in between. They add texture and dimension to your pushback style without the commitment of braids. The twisted sections hold well with just a few bobby pins, and they photograph gorgeously from every angle. This pushback variation is perfect for days when you want sophistication without the severe sleekness of a full pull-back.
Executing the Twisted Half-Up
- Section hair from one temple area around to the other temple
- Divide this section into 2-4 subsections depending on how much texture you want
- Twist each subsection, making sure twists go toward the back of your head
- Gather all twisted sections and secure with a clip, cuff, or bobby pins
- Let the remaining hair fall freely down your back
- Smooth flyaways with edge control for a polished finish
Quick tip: You don’t need perfectly smooth twists—a slightly textured, relaxed twist looks intentional and beautiful while being faster to achieve.
5. Low Bun Pushback with Wispy Face-Framing Pieces
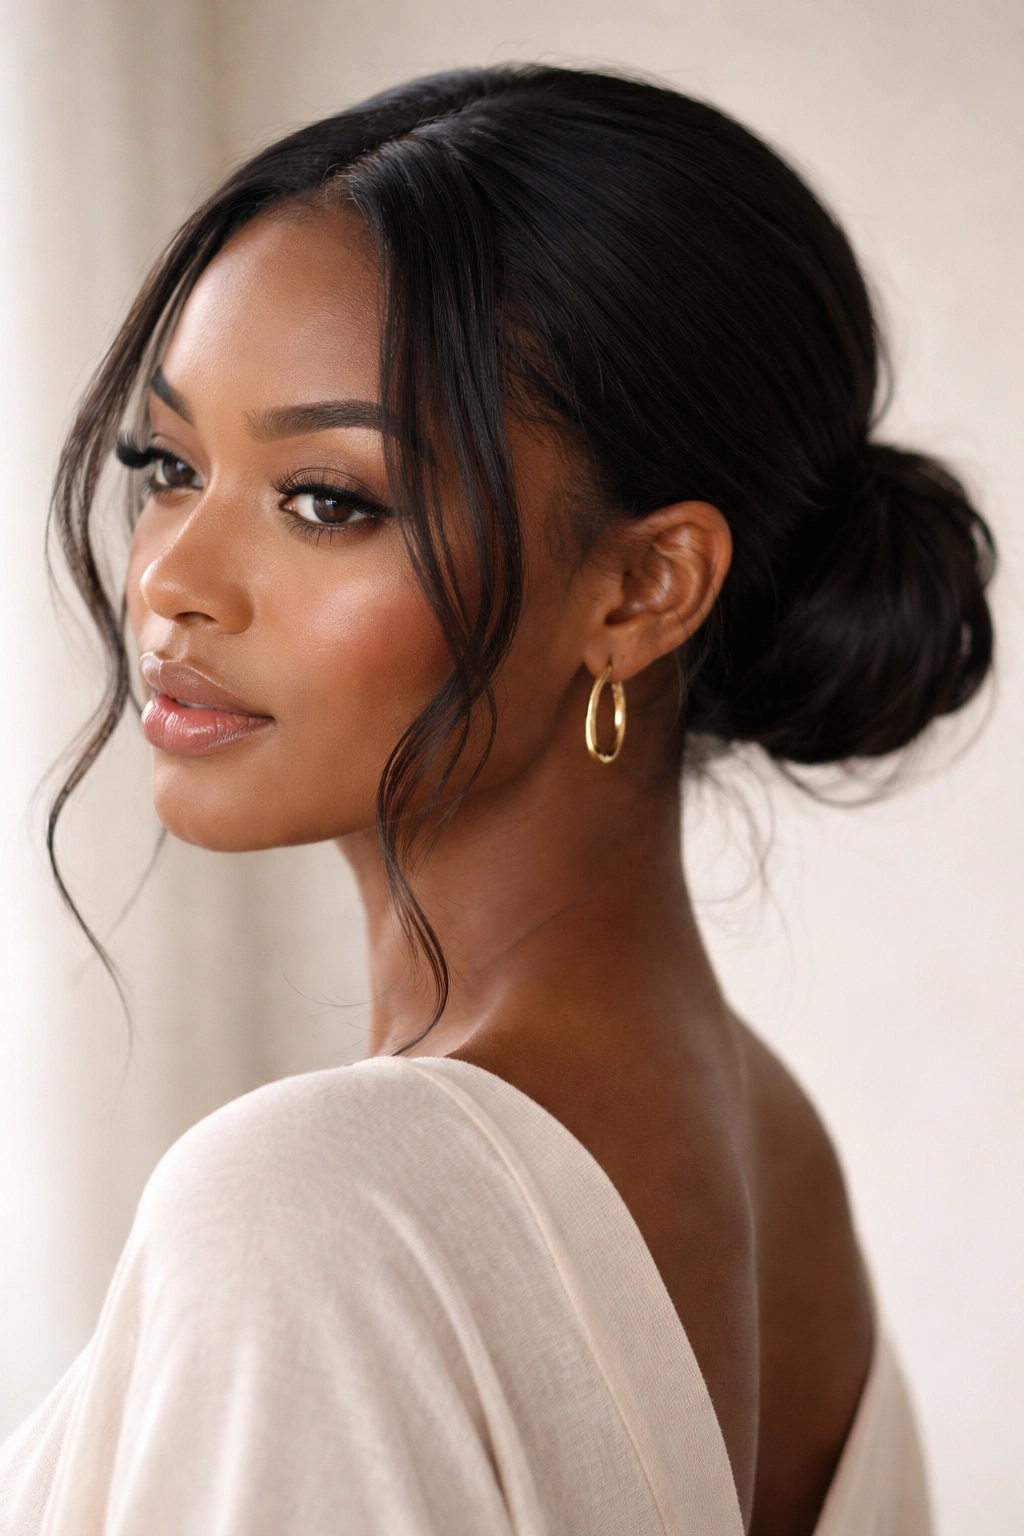
This elegant variation gathers hair into a low bun at the nape of your neck while intentionally leaving a few small pieces down around your face. The face-framing strands soften what could otherwise be a severe look and create movement around your features. It’s the perfect balance between putting your hair “up” and keeping some softness, making it ideal for both professional and romantic occasions.
The Art of Intentional Softness
Leaving wispy pieces down is a styling choice that requires intention—you’re deliberately creating them rather than letting them fall by accident. This makes the look feel curated and thoughtful. The low placement of the bun keeps weight off your scalp, the face-framing pieces draw attention to your eyes and cheekbones, and the overall effect is polished without being overly formal. It’s a pushback style that says you have your life together while still feeling approachable.
Creating the Face-Framing Pieces
- Before securing your hair back, identify which pieces you want to leave down (usually 2-3 thin sections from each temple area)
- Gather the rest of your hair into a low bun, securing tightly with bobby pins
- Gently tug the bun to create fullness and texture if desired
- Smooth the gathered hair with pomade or gel
- Lightly curl or wave your face-framing pieces with a curling iron or by wrapping them around your finger
- Apply light hairspray to keep pieces in place
Pro tip: The face-framing pieces work best when they’re thin and delicate—thick sections won’t have the same effect.
6. Sleek Pushback with Geometric Edge Design
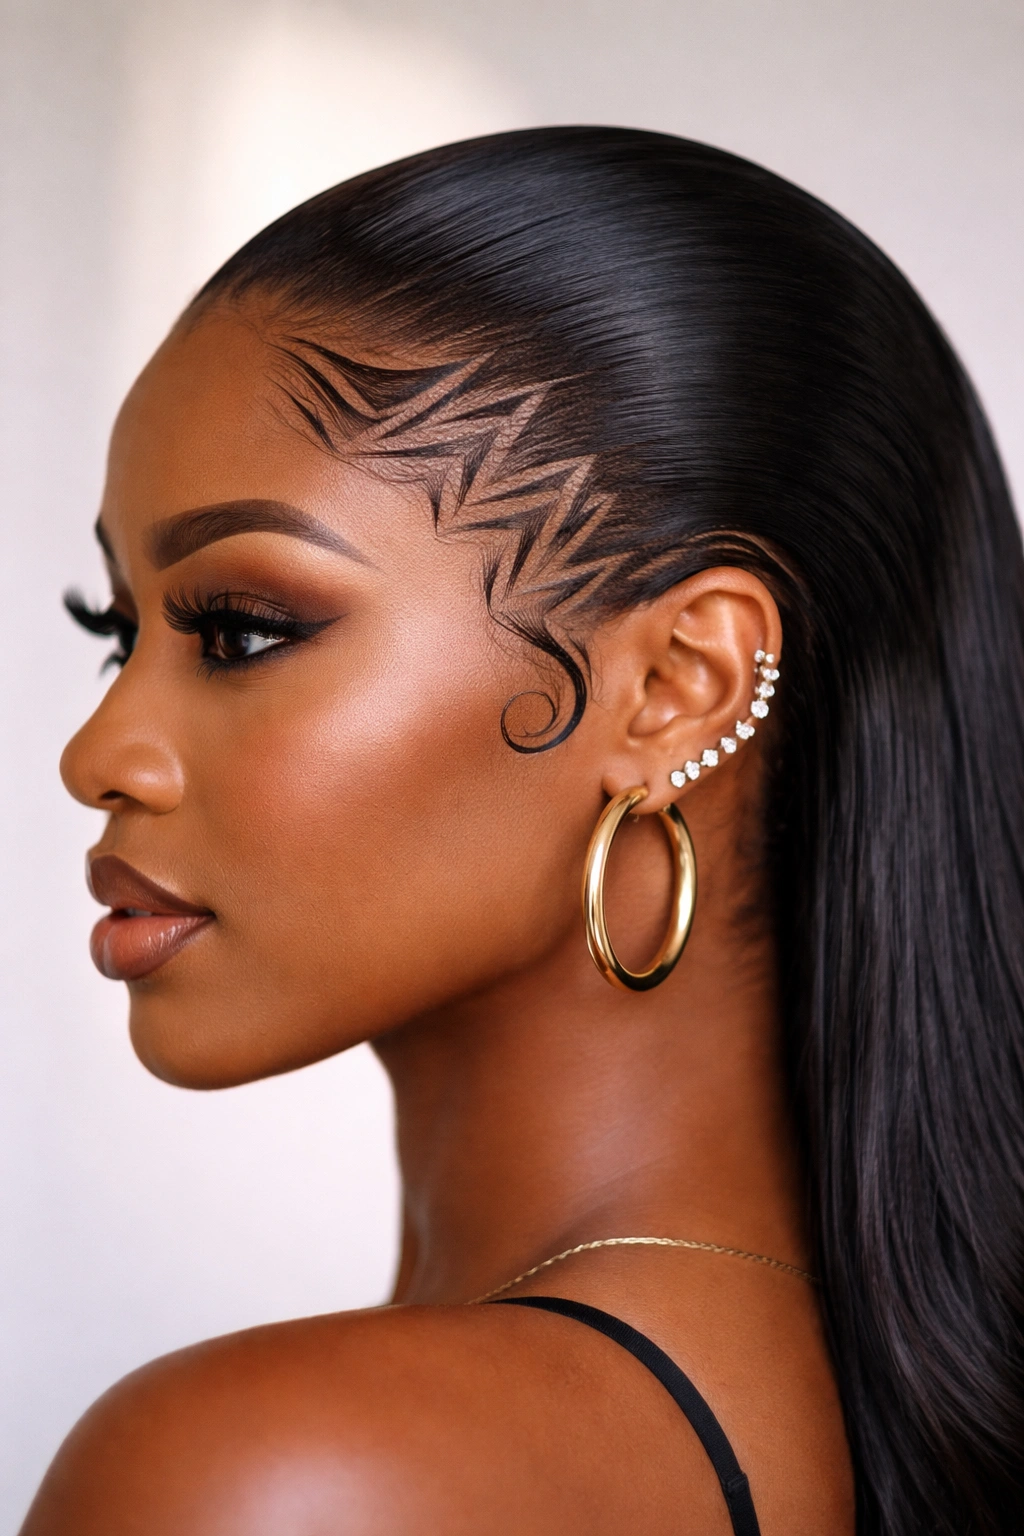
Take edge control to an artistic level with this style, which features a completely slicked-back hair arrangement paired with intentional geometric patterns along your hairline. Think clean lines, sharp angles, and designs that complement your facial structure. Your hair can go into a bun, high pony, or even be styled sleek and straight, but the star of the show is your edge design.
Edge Artistry as Style Statement
Geometric edge designs are a form of self-expression that celebrates your edges and hairline as beautiful, design-worthy features. They require precision and the right products, but the result is a look that’s undeniably striking. This pushback style works for anyone confident enough to make a statement, and it’s especially popular for events, performances, and moments when you want attention on your style.
Geometric Edge Design Steps
- Choose a simple pattern first—lines, waves, or dots are good starting points
- Use a fine-tooth comb and firm edge control to map out your design
- Work slowly and deliberately; you can always add more product, but removing product takes longer
- Use edge control with enough hold to set your design but not so stiff it flakes
- Set with flexible hairspray that won’t crack when your face moves
- Practice your design on a day when you’re not going anywhere important to build confidence
Real talk: Geometric edges take practice—your first attempts might not be perfect, and that’s completely okay. Each time you do it, your hands will become steadier and your designs more precise.
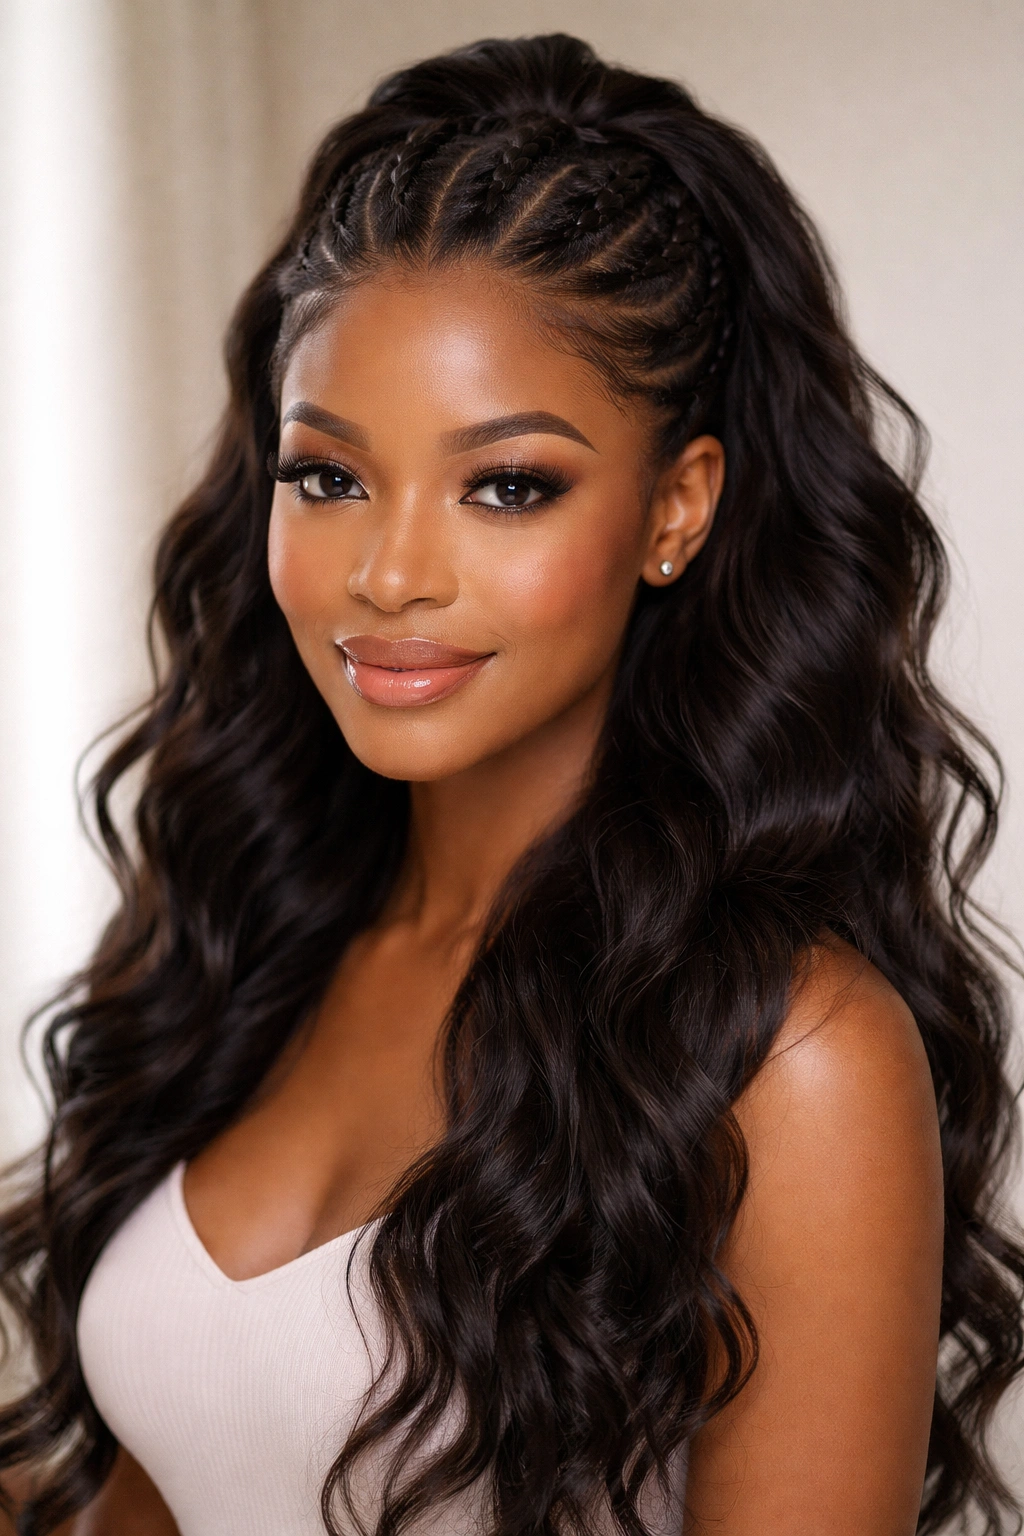
7. Braided Pushback Crownpiece
This style incorporates one or more braids along your hairline that wrap around your head like a crown, with the rest of your hair either down or secured in a style below. The braids themselves become a decorative pushback element that keeps hair off your face while adding texture and visual interest. You can use cornrows, box braids, or freestyle braids depending on your skill level and desired look.
The Protective and Beautiful Combo
Braided pushback styles offer the protective benefits of braiding with the aesthetic appeal of a pushback style. Your edges get a protective barrier from the braid itself, and you’re creating an intentional crown-like frame for your face. This style works beautifully at any length and with any hair texture, and the braids can last several days or even a week if you take care of them properly.
Creating Your Braided Crown
- Start a braid at one temple area, angling it toward the back of your head
- Make sure the braid is snug enough to stay in place but not so tight it causes discomfort
- You can do a single braid that wraps halfway around your crown or multiple smaller braids
- Secure the braid end with a small elastic or bobby pins
- The rest of your hair can be left down, curled, straight, or gathered into a style below the braids
- Use edge control to smooth any hair not incorporated into the braids
Worth knowing: This style is perfect for transitioning days between full protective styling—it keeps your hair up and off your face while looking intentional and styled.
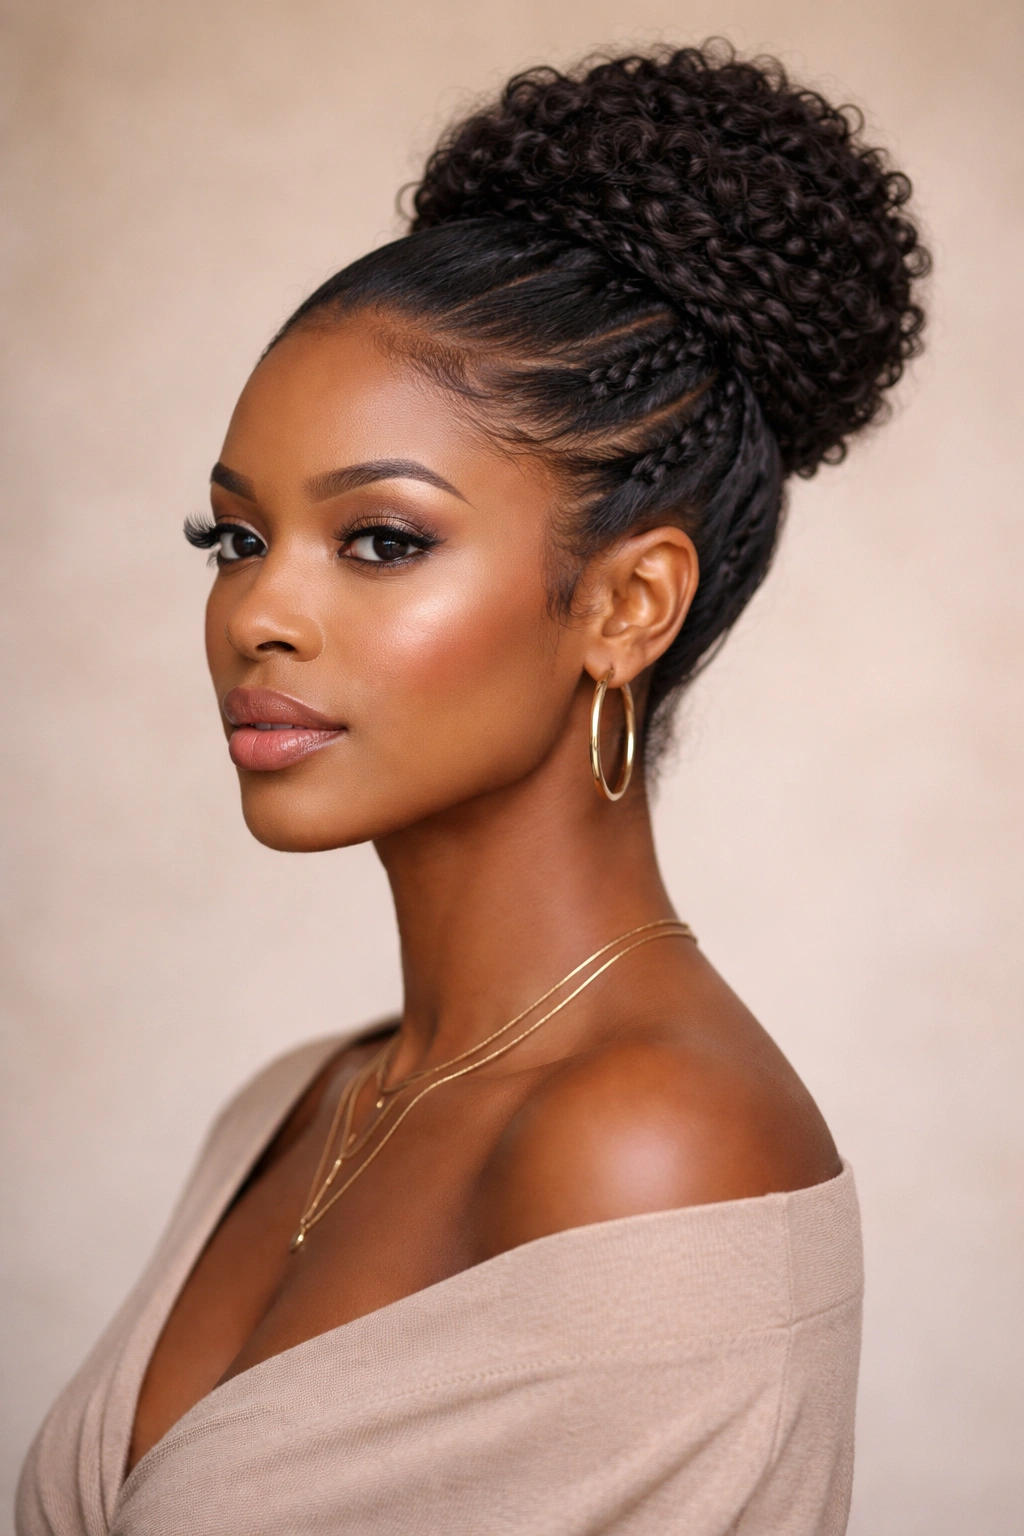
8. High Pushback Puff with Texture on Display
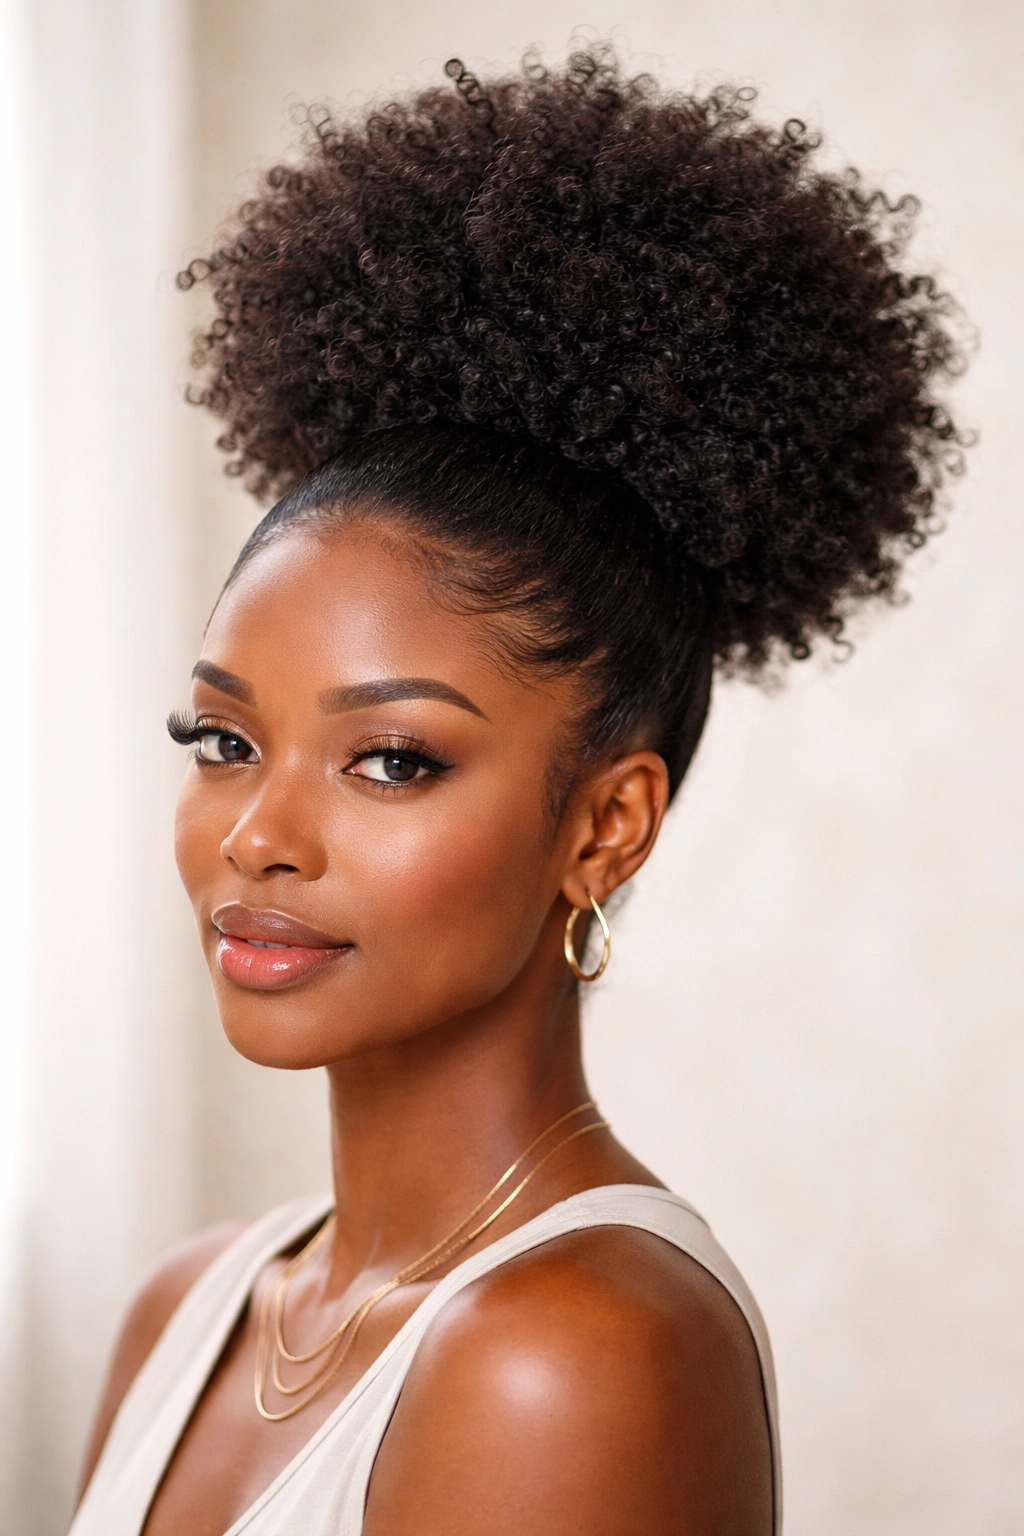
This style gathers hair at the crown into a high puff or bun while allowing the hair to maintain its natural texture rather than being smoothed flat. The result is a voluminous, bouncy look that pushes hair off your face while celebrating your natural curl pattern or texture. You can create a tight, compact puff or a fuller, more relaxed one depending on your preference.
Texture as the Main Event
High pushback puffs let your hair’s natural texture shine without the need for heat styling or heavy manipulation. They work with coily natural hair, wavy textures, or even straightened hair that’s been curled for texture. The high placement is flattering on most face shapes, and the style reads as both effortless and intentional. It’s perfect for low-manipulation styling days when you want to protect your hair while still looking completely put-together.
Building Your High Puff
- Use your fingers or a wide-tooth comb to gather hair at your crown
- Don’t smooth it down—you want texture and volume
- Secure with a scrunchie or clip that won’t snag your hair
- Gently tug sections of the puff to create fullness and the dimension you want
- Use a light-hold product or edge control on your hairline for definition
- Leave your edges smooth while your puff texture takes center stage
Quick tip: High puffs look best when they have some volume—don’t pull so tightly that you end up with a small, flat bump on your head. Generously gather your hair.
9. Sleek Straight Pushback with Curved Edges
Straighten your hair with a flat iron and push it back completely for this polished, modern look that pairs sleek styling with curved, soft edge design. Rather than geometric angles, this style features flowing, curved lines along your hairline that complement the softness of your face. Your hair goes back into a bun, high pony, or even stays down and straight, but the focus is on the beautiful curve of your smoothed edges.
The Modern Softness Approach
Curved edges represent a shift away from only sharp geometric designs—they’re just as intentional and precise but feel softer and more romantic. This pushback style works beautifully for date nights, professional settings, or any time you want a polished look with a hint of elegance. The combination of sleek straight hair and curved edges creates a cohesive, curated appearance.
Achieving Curved Edges
- Straighten your hair completely with a flat iron for maximum sleekness
- Apply edge control to your hairline, working in one direction
- Use a fine-tooth comb or an edge brush to create smooth, flowing curves
- Think about the natural contours of your hairline and enhance them with curves rather than fighting them
- Set your edges with flexible hold spray that won’t crack
- You can smooth these edges daily or refresh them after a few days depending on your haircare routine
Pro tip: Curved edges photograph beautifully—if you’re planning a photo day, this edge style is an excellent choice.
10. Twisted Topknot Pushback
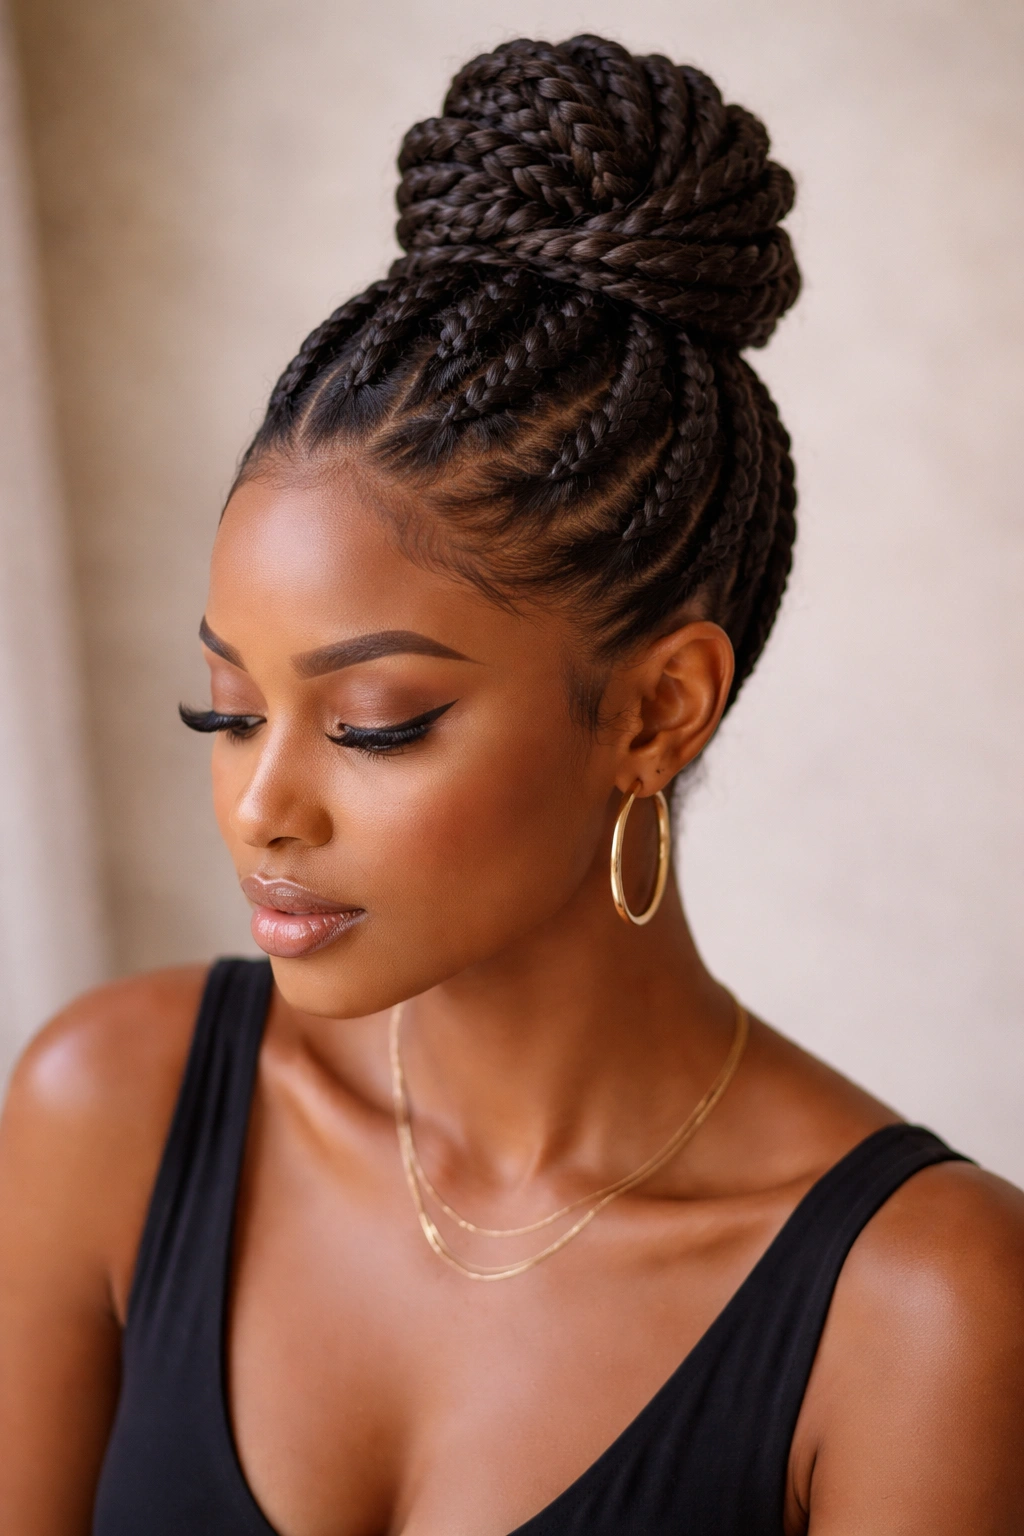
Create multiple twists throughout your hair and gather them all at the top of your head into a topknot bun, creating a textured, dimensional pushback style. Rather than a single smooth bun, you’re incorporating multiple twisted sections that add movement, texture, and visual interest. This style works especially well with braided protective styles, natural hair, or any texture that takes well to twisting.
Dimension Through Texture
Twisted topknots offer the practical benefits of a pushback style combined with the visual richness of textured styling. Each twisted section contributes to an overall look that’s much more interesting than a flat bun, and the topknot placement is young, playful, and flattering. This style works for casual hangouts, creative work environments, or any time you want something that feels more textured than sleek.
Building Your Twisted Topknot
- Section your hair into 4-6 subsections, depending on hair volume
- Twist each section, working toward the back of your head
- As you complete each twist, incorporate it into a loose topknot at the crown
- Secure everything together with bobby pins, hidden within the knot
- Don’t worry about perfection—slightly loose, relaxed twists look intentional and beautiful
- Use edge control on your edges and smooth any flyaways
Insider note: This style actually looks better when it’s not perfectly neat—a slightly undone twisted topknot feels effortless and modern.
11. Side-Swept Pushback with Full Volume
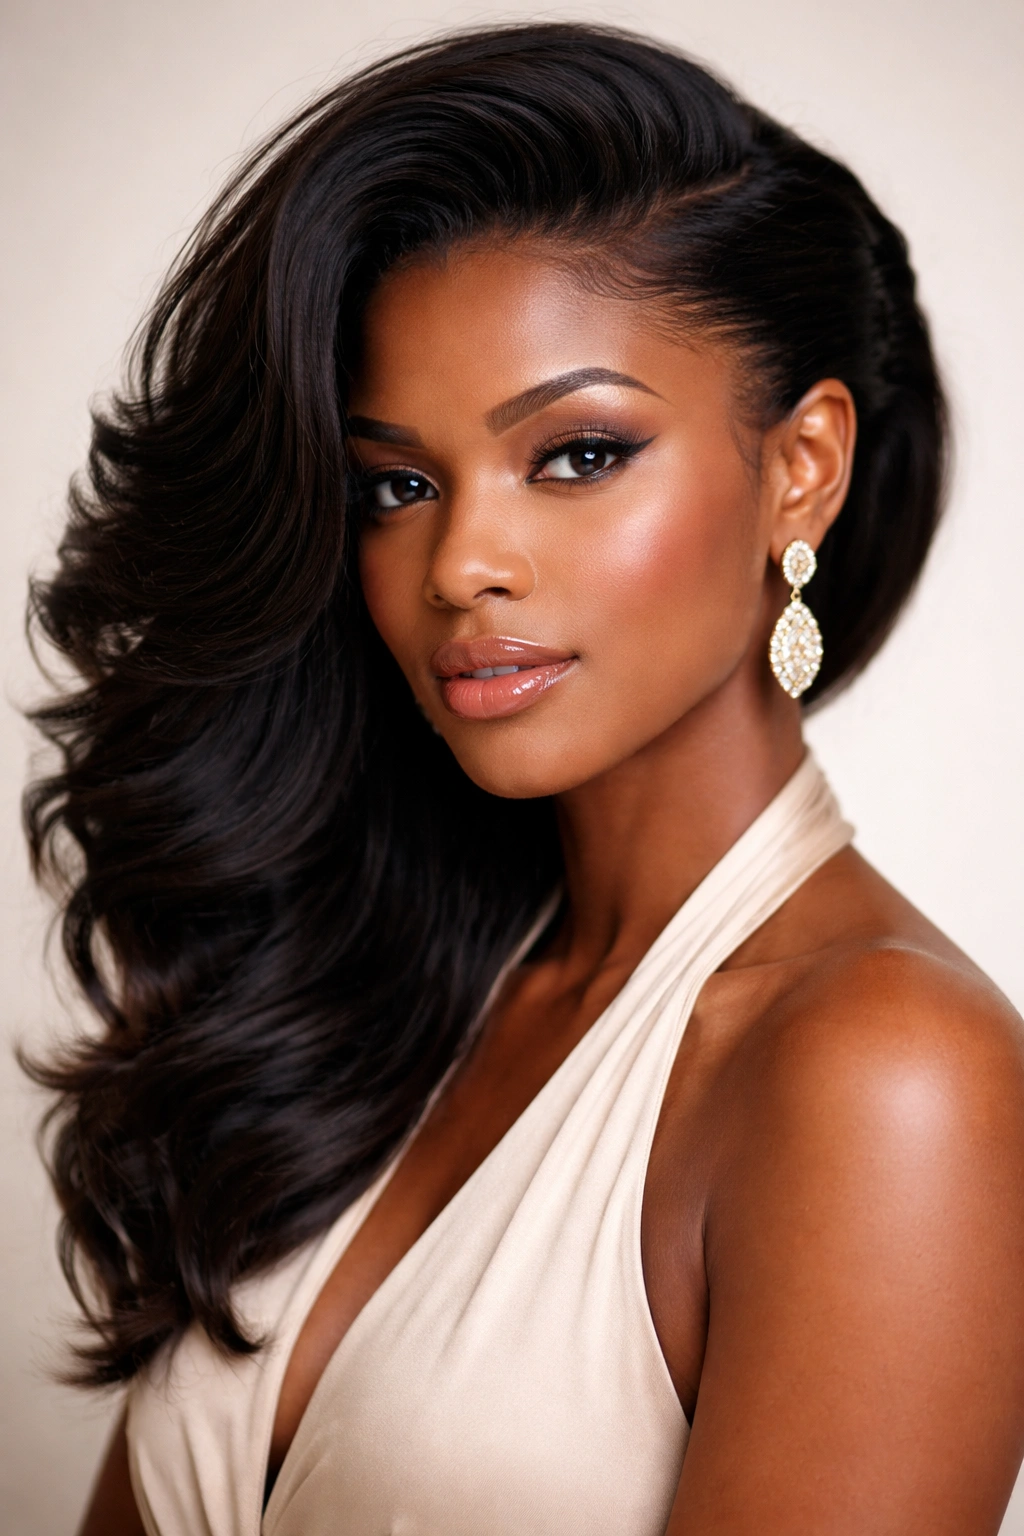
Sweep all your hair to one side and secure it, creating an asymmetrical pushback style where one side of your face is completely visible and the other is covered with your voluminous hair. This creates an interesting balance and showcases different angles of your face. The gathered side can be a bun, a twisted knot, or a low pony depending on your hair length and the statement you want to make.
Asymmetry as Art
Side-swept styles are inherently flattering because they frame your face from one angle while keeping everything accessible. The asymmetry makes the style feel more artistic and intentional than a centered arrangement. This pushback variation works beautifully for date nights, special occasions, and any time you want something more dramatic than an everyday style.
Creating the Side Sweep
- Determine which side feels better swept back (usually the side that’s naturally toward your face)
- Brush or comb all your hair to that side
- Secure at the back of your head with a clip, cuff, or bobby pins
- Allow the gathered section to have fullness and movement—don’t flatten it
- The other side of your hair can be smooth or wavy depending on your preference
- Use edge control on your hairline to create clean lines
Real talk: This style is more dramatic than center-parted pushbacks—commit to the asymmetry and it’ll look intentional and stylish.
12. Honey-Glazed Pushback with Accessory Pin
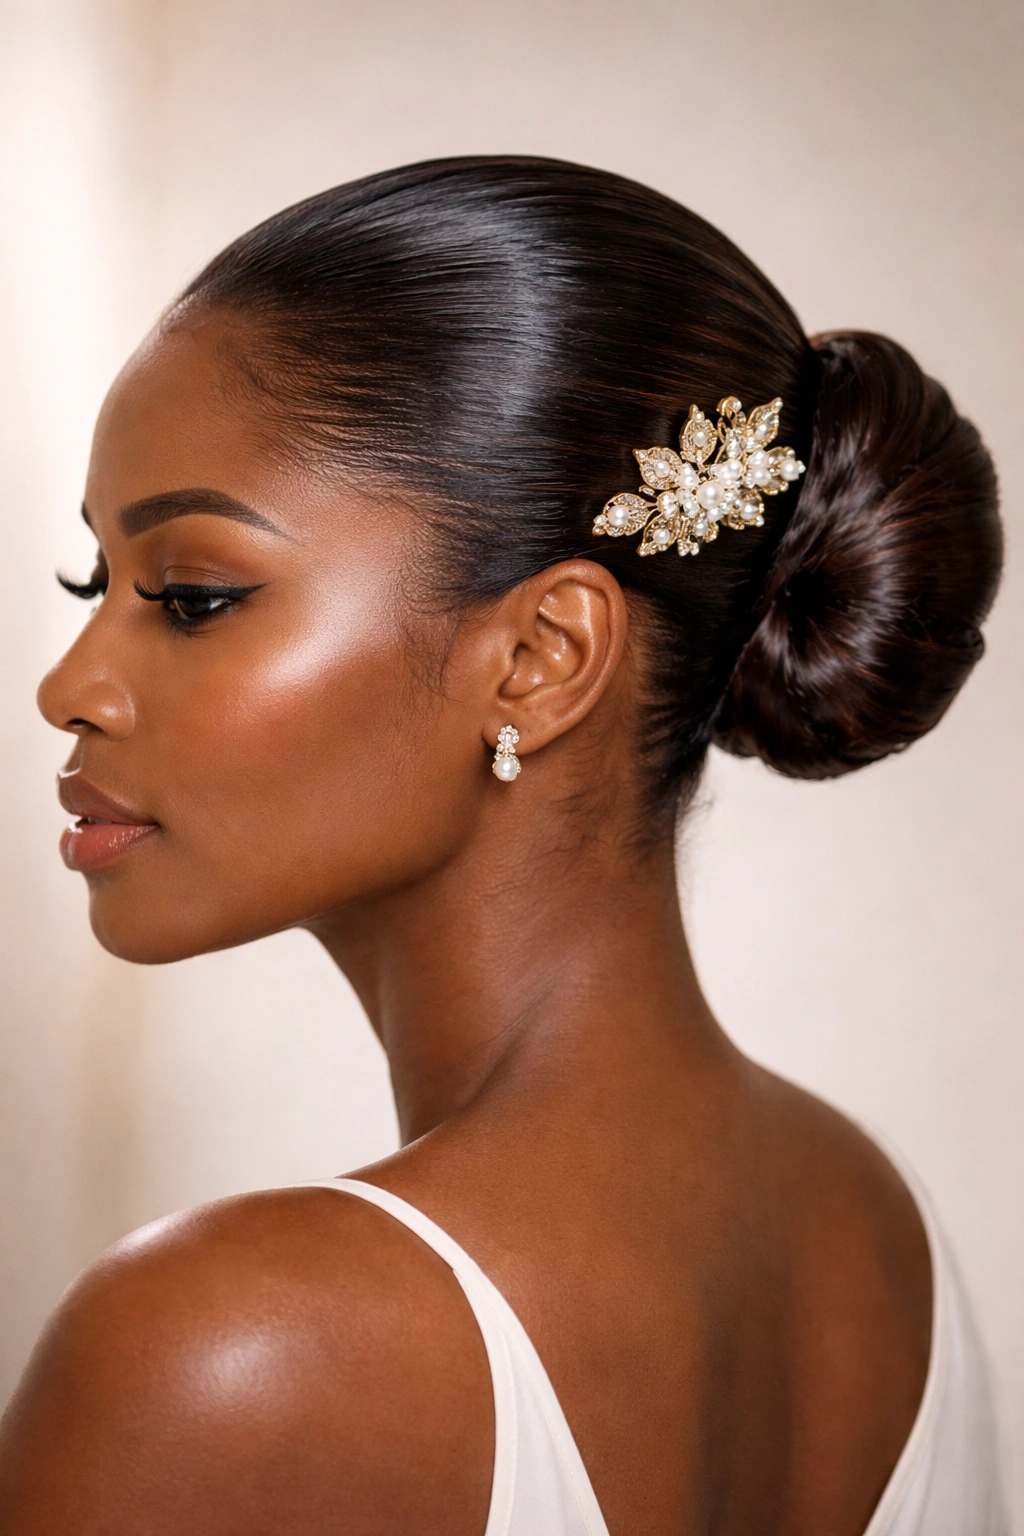
Style your pushback bun or pony with a decorative hair cuff, stick, or pin that adds both function and fashion. These accessories not only hold your hair in place but also serve as a visible design element that elevates your entire look. You can choose metals, beaded pieces, carved sticks, or jeweled accessories depending on your outfit and aesthetic.
Accessories as Statement
A beautiful hair accessory transforms a basic pushback into something special and intentional. Whether you’re using a gold cuff, a shell-decorated stick, or a jeweled clip, the accessory draws attention and adds personality to your style. This is an especially good option if your hair texture makes traditional bobby pins visible—a pretty accessory becomes the focal point instead.
Styling with Hair Accessories
- Choose an accessory that complements your outfit and personal style
- Create your bun or pony as usual
- Instead of using traditional bobby pins, secure with your chosen accessory
- Make sure it’s actually functional—it shouldn’t just sit on top of loose hair
- If your hair is particularly fine or slippery, use one or two bobby pins hidden underneath, then place your accessory over top for security and beauty
- Position the accessory so it’s visible and prominent
Worth knowing: Quality matters with hair accessories—cheap ones can break or pinch your hair. Invest in well-made pieces you’ll use repeatedly.
13. Pushback with Colored Underside Pop
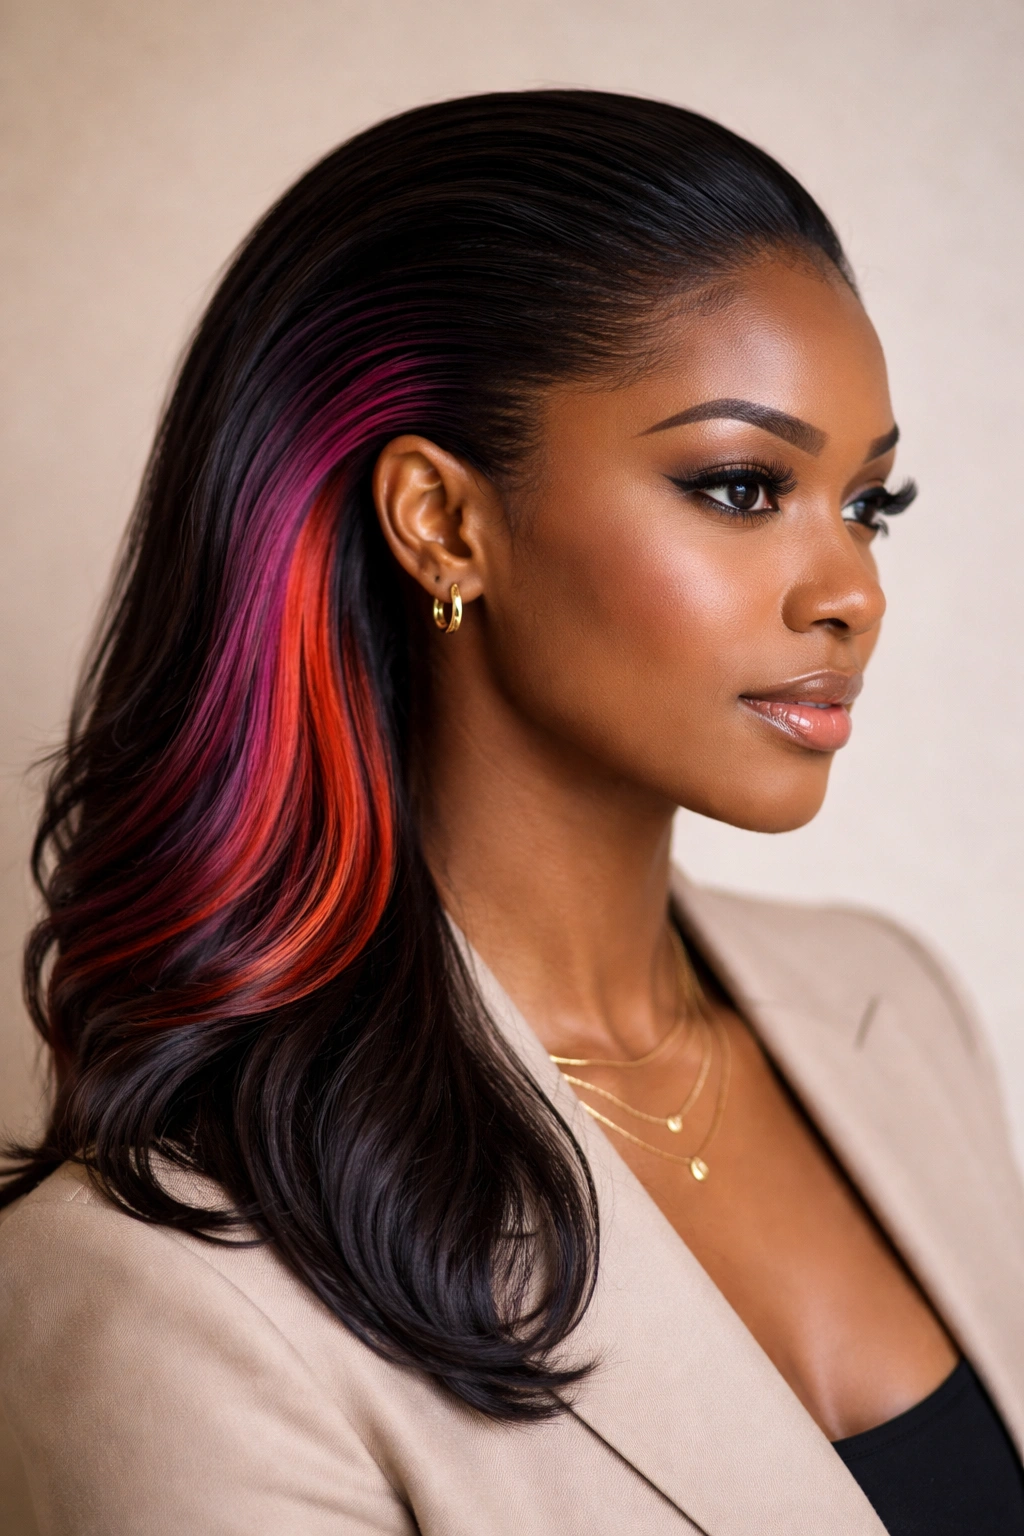
Create or enhance colored hair underneath (perhaps box braids with color, colored weave, or colored edges) and push your hair back so the color is visible underneath. This style celebrates any colorwork you’ve done while keeping a sleek, professional-looking top. You can use bright contrasting colors or subtle highlights depending on your preference—the pushback placement lets you control when the color shows.
Hidden Dimension Made Visible
This style is brilliant for people who want colorful hair but need or prefer more conservative styling at times. By pushing your hair back, you’re intentionally showing the color underneath, making it a design choice rather than something you’re trying to hide. It’s perfect for workplaces where full color might not be acceptable, but a pop of color underneath absolutely is.
Creating the Colored Underside Effect
- If you have box braids or another protective style, request color in the braids underneath
- Alternatively, color specific sections of hair that will be hidden when your hair is down
- Create your pushback style—usually a bun or pony works best
- Make sure the colored sections are visible and prominent in your chosen style
- The contrast between your natural color on top and the colored underneath creates visual interest
- This style works best with high ponies or high buns where the color is maximally visible
Pro tip: This is an excellent approach if you want to experiment with color without committing to your entire head being colored.
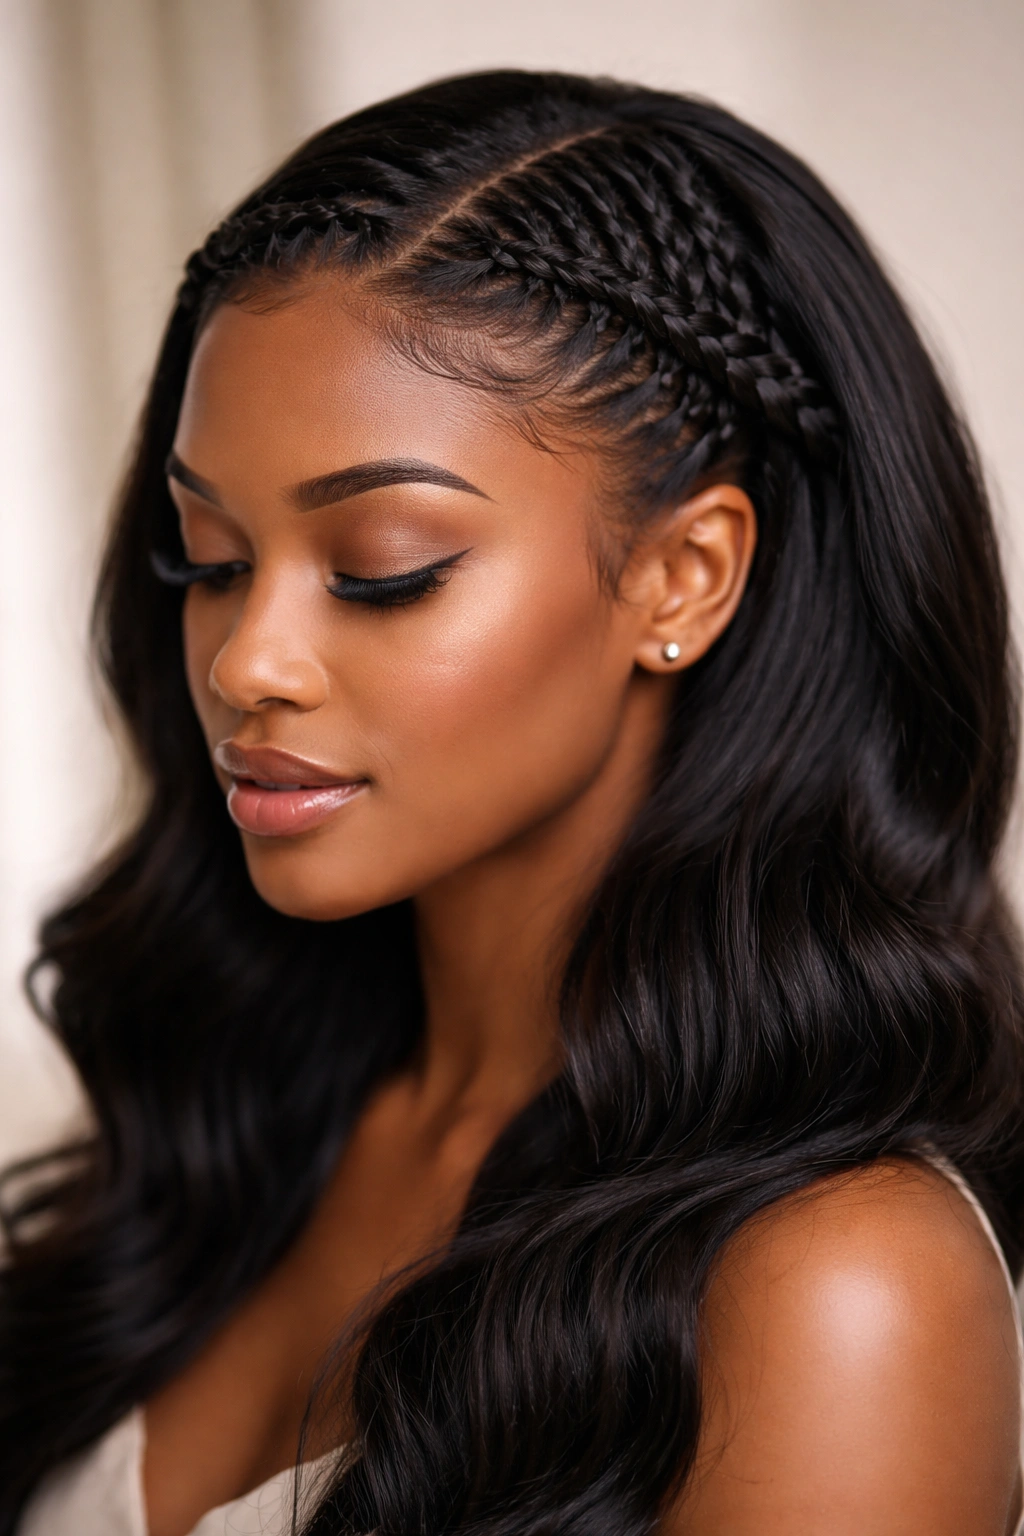
14. Braided Sides with Center-Part Pushback
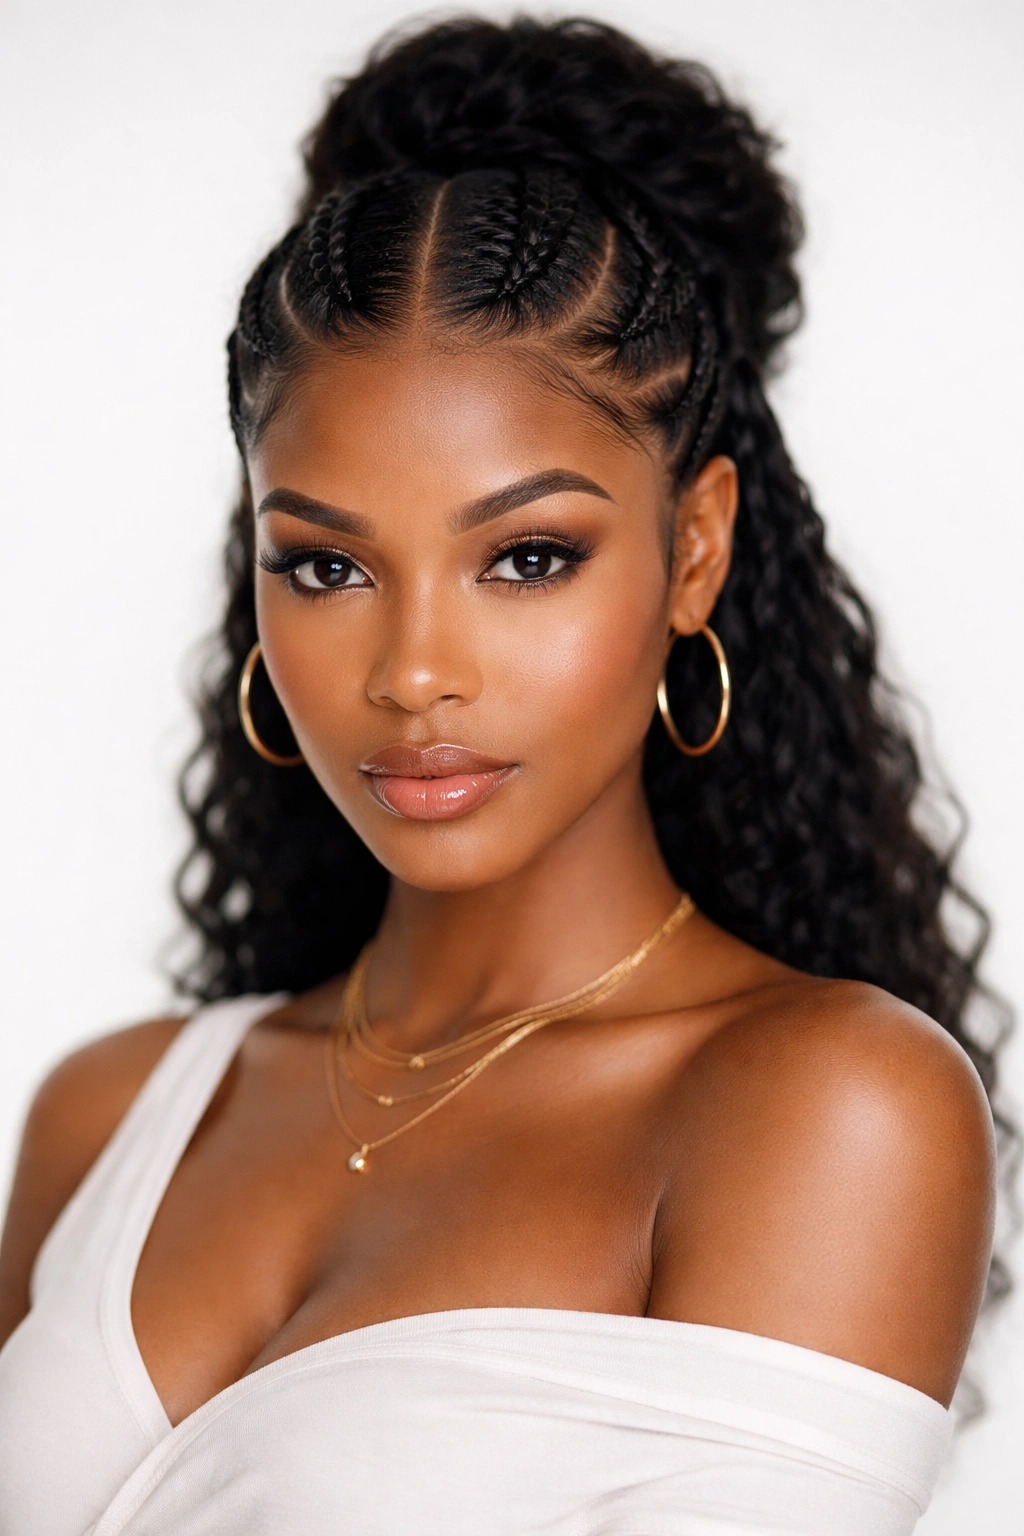
Incorporate two braids that start at your temples and follow along your sides, while pushing the center section of hair back into a bun or pony. The braids act as decorative pushback elements on either side of your face, creating a balanced, symmetrical look. This style works with any hair texture and any braid style you prefer.
Balanced Symmetry with Movement
Braided sides create visual interest while keeping hair securely off your face. The symmetry of having matching braids on both sides is inherently flattering, and the style works equally well for casual and dressy occasions. This pushback variation is especially good if you have a lot of hair—the braids redistribute the bulk so you’re not ending up with a huge bun.
Executing the Braided-Sides Style
- Start a braid at one temple, angling it back along the side of your head
- Mirror this on the other side with a matching braid
- These braids can be loose and casual or tight and controlled depending on your look
- Once both braids reach the back of your head, secure them and gather any remaining center hair
- Create a bun, pony, or another style with the gathered center hair
- The braids stay visible and become part of the style design
Quick tip: Your braids don’t need to be identical to look intentional—slight variations actually make the style feel more organic.
15. Wet-Look Pushback Slick
Use gel, mousse, or water-based styling product to create a wet-look finish on your pushed-back hair, making it appear glossy and sleek. This style is edgy, modern, and works beautifully with buns, high ponies, or even hair that’s smoothly styled and left down. The wet effect is achieved through product and careful styling rather than actually wetting your hair, so it maintains hold throughout the day.
Bold Shine and Sleekness
Wet-look pushbacks are confident, fashion-forward styles that make a statement. They photograph beautifully, photograph even better in person, and immediately read as intentional and styled. This is a great option for nights out, fashion-forward professional settings, or any time you want your styling to be obvious and impressive.
Creating the Wet Look
- Start with clean or refresh-spray-treated hair
- Apply a gel, mousse, or liquid styling product generously
- Use your hands or a soft brush to push hair smoothly back
- Work the product through to create that glossy, wet appearance
- The glossiness is the key—light hairsprays will dull the effect, so use minimal spray if any
- This style works best when your hair is as smooth as possible
Insider note: The wet look tends to work better on certain hair types—if your hair is naturally very coily, you might get a wet appearance on smooth styles or straight-styled hair more easily.
16. Low Crownbraid Pushback Hybrid
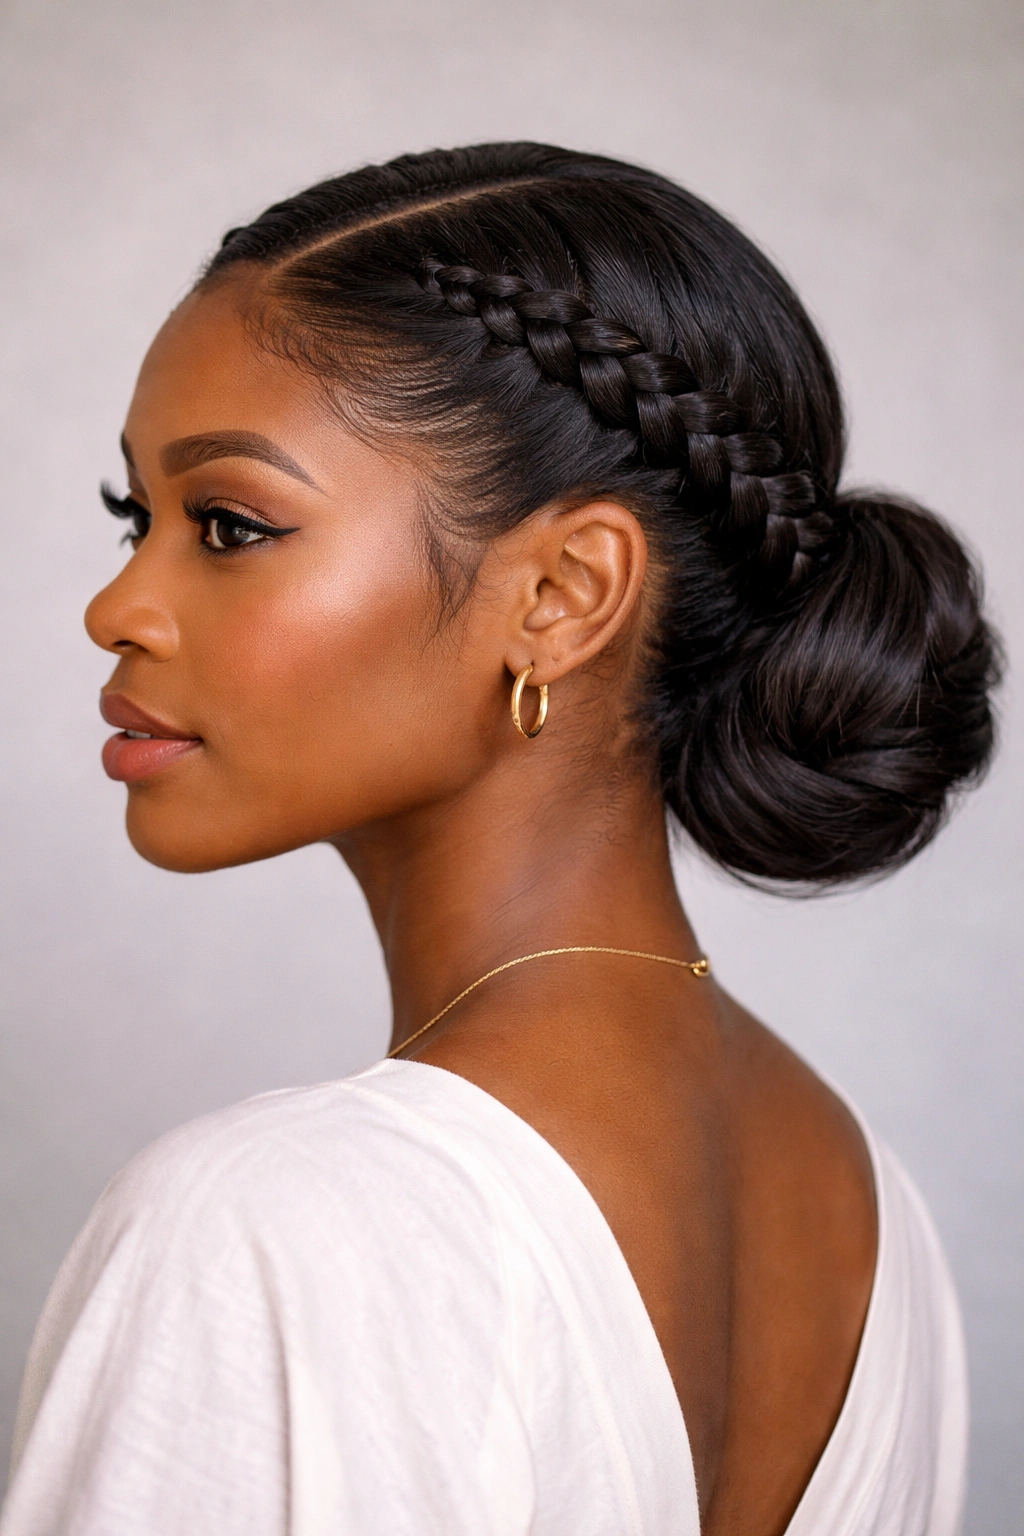
Combine a crown braid that starts at one side of your head and wraps around with a low ponytail or bun, creating a style that’s part braid and part traditional pushback. This hybrid approach offers texture from the braid while maintaining the clean, face-forward benefits of a pushback. The braid wraps around like a crown, and then your remaining hair is gathered below.
Braided Detail Meets Streamlined Elegance
This style is more interesting than a simple pushback but more practical than being fully braided. The crownbraid element adds artistry and texture while the gathered bottom keeps your style neat and secure. It’s perfect for days when you want something with a bit more sophistication than your everyday look but not so elaborate that it requires tons of styling time.
Building Your Crownbraid Hybrid
- Start your braid at one temple, angling it toward the back of your head
- Braid all the way around the back to the opposite temple (you can braid all your hair into this if you want, or just start with a section)
- Once your crown braid wraps around, secure it with bobby pins
- Gather any remaining hair (usually the bottom back section) into a low pony or bun
- The crownbraid should sit above and frame your gathered hair
- Smooth your edges and any flyaways
Worth knowing: This style actually works beautifully with loose waves underneath—the braided crown provides structure while the waves underneath add softness.
17. Pushback with Statement Earrings Focus
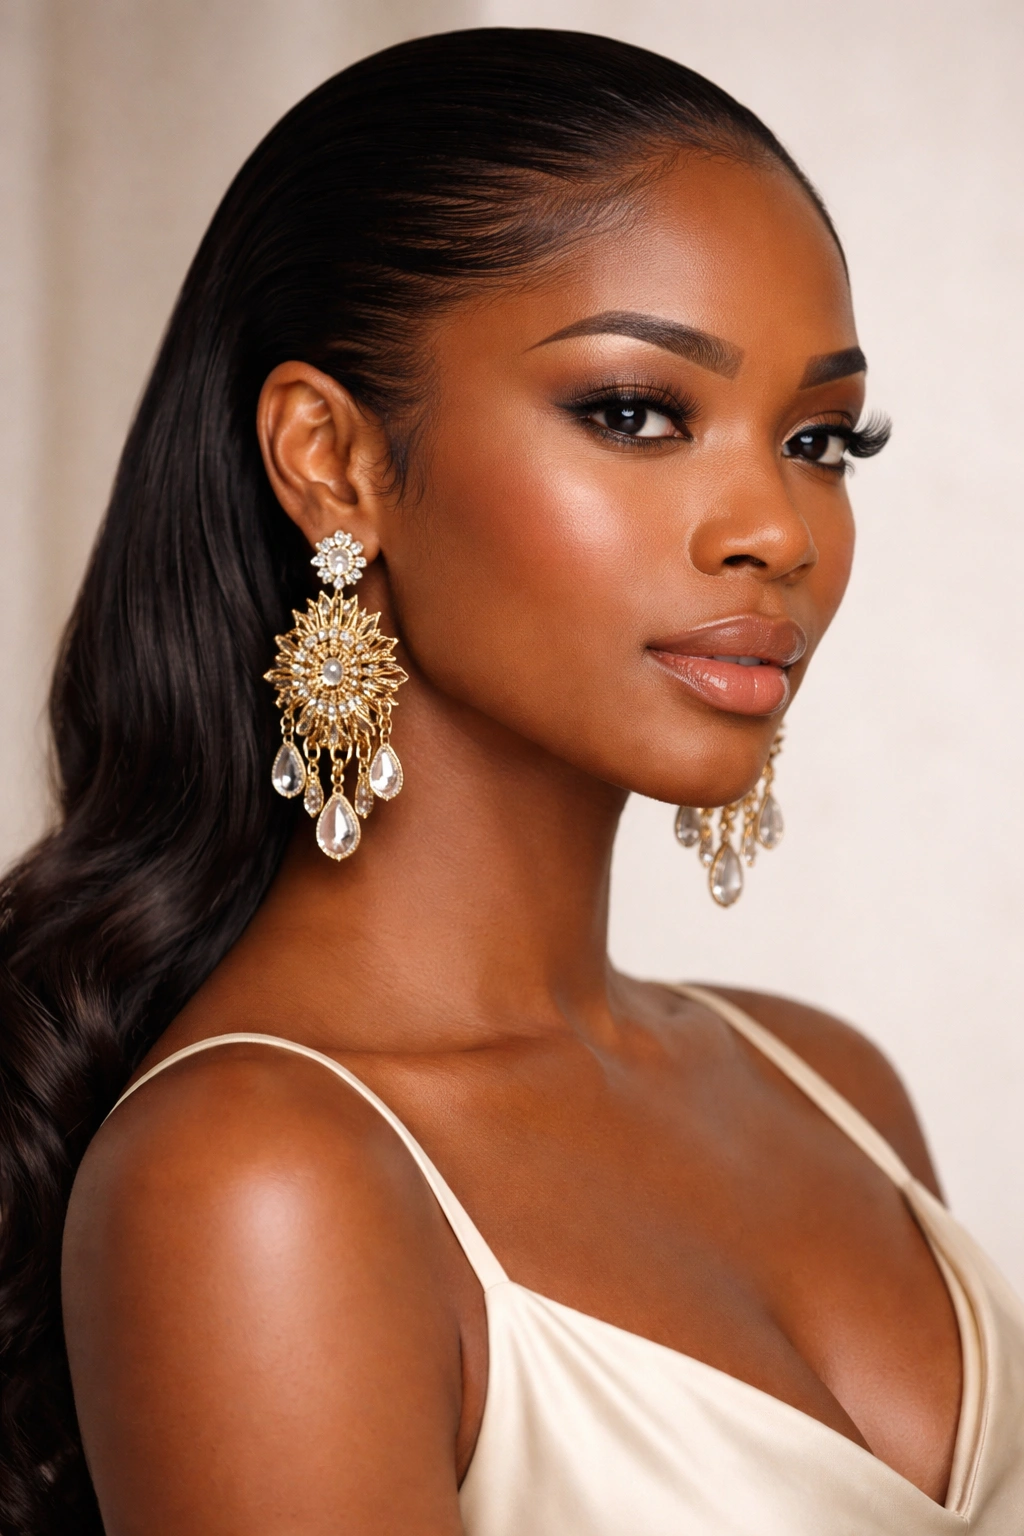
Create a clean, simple pushback style—whether slicked bun, high pony, or twisted knot—that deliberately frames and highlights your ears and neck. The point of this style is to remove all hair from your face and ears so that any earrings, jewelry, or your natural features become the main visual element. It’s minimalist pushback styling with maximum impact through simplicity.
Jewelry and Features as the Star
When you push your hair completely back with clean edges and nothing to distract from your features, any earrings become an immediate focal point. This style works beautifully with statement jewelry, delicate pieces, or even just your naturally beautiful ears and neckline. It’s an exceptionally flattering choice if you have high cheekbones or a beautiful jawline, as these features become totally visible.
Executing the Minimal Approach
- Create a clean, slicked pushback style—no texture, no detail needed
- Keep your edges smooth and defined but not overly intricate
- Your focus should be on sleekness and simplicity
- Wear earrings that feel meaningful to you—gold, silver, beaded, dangly, studs
- Keep your styling otherwise minimal so the earrings and your features are the only things drawing attention
- This is the perfect time to skip heavy makeup and let your natural features shine
Pro tip: This style is exceptionally flattering on faces that have strong features and good proportion—trust yourself to let your features be the style statement.
18. Pushback Low Locs Style
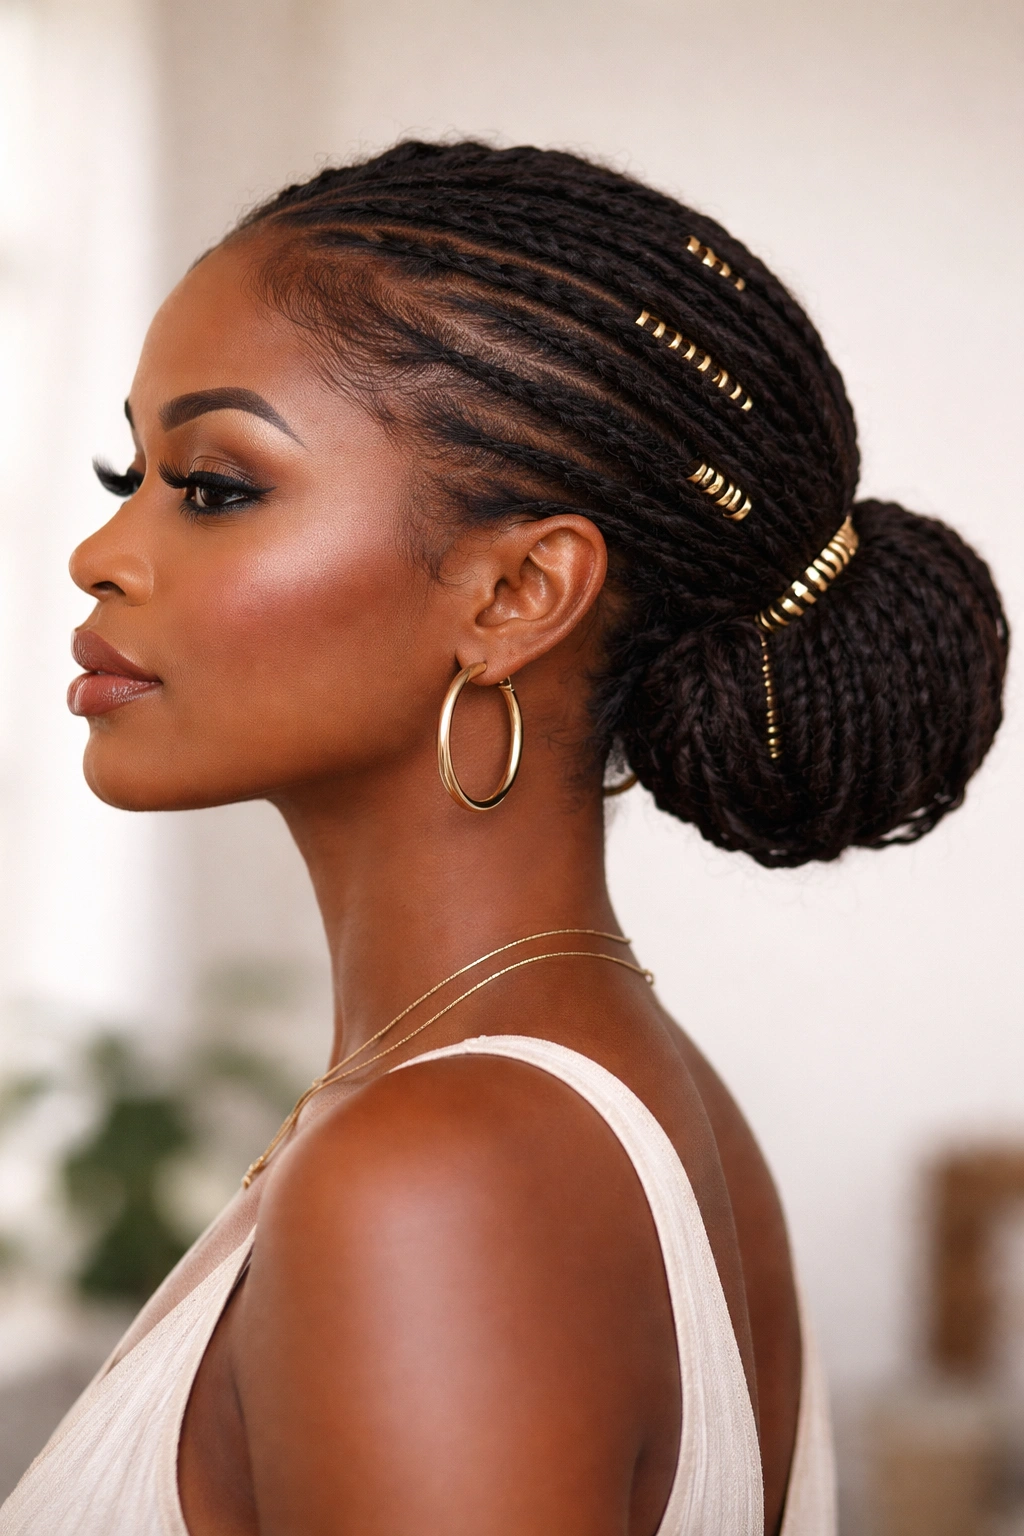
If you wear locs, push them back into a low bun, gathered pony, or wrapped low style that keeps them off your face while celebrating their length and texture. Locs naturally have movement and character, so pushing them back is simply a practical styling choice that also happens to look beautiful. You can use decorative elastics, cuffs, or wrapping to accessorize.
Locs as Naturally Beautiful Hair
Locs don’t need complicated styling—their texture and movement are already beautiful. Pushing them back is often the most practical option for keeping them secure while still showcasing their appearance. A low loc bun or pony is instantly elegant and requires minimal product or manipulation.
Styling Your Locs Pushed Back
- Gather your locs at the base you prefer—low, middle, or high depending on your face and style
- Use a hair elastic, cuff, or wrap that complements your look
- You can group all locs together or create multiple groupings within your bun or pony
- Locs naturally hold their shape, so minimal additional products are needed
- Consider decorative wraps, beads, or cuffs that match your style
- Your edges should still be smooth and well-maintained even with locs
Real talk: Locs are a long-term commitment, and pushback styles are one of the easiest ways to keep them looking intentional and styled daily.
19. Sleek Pushback with Laid Natural Hairline
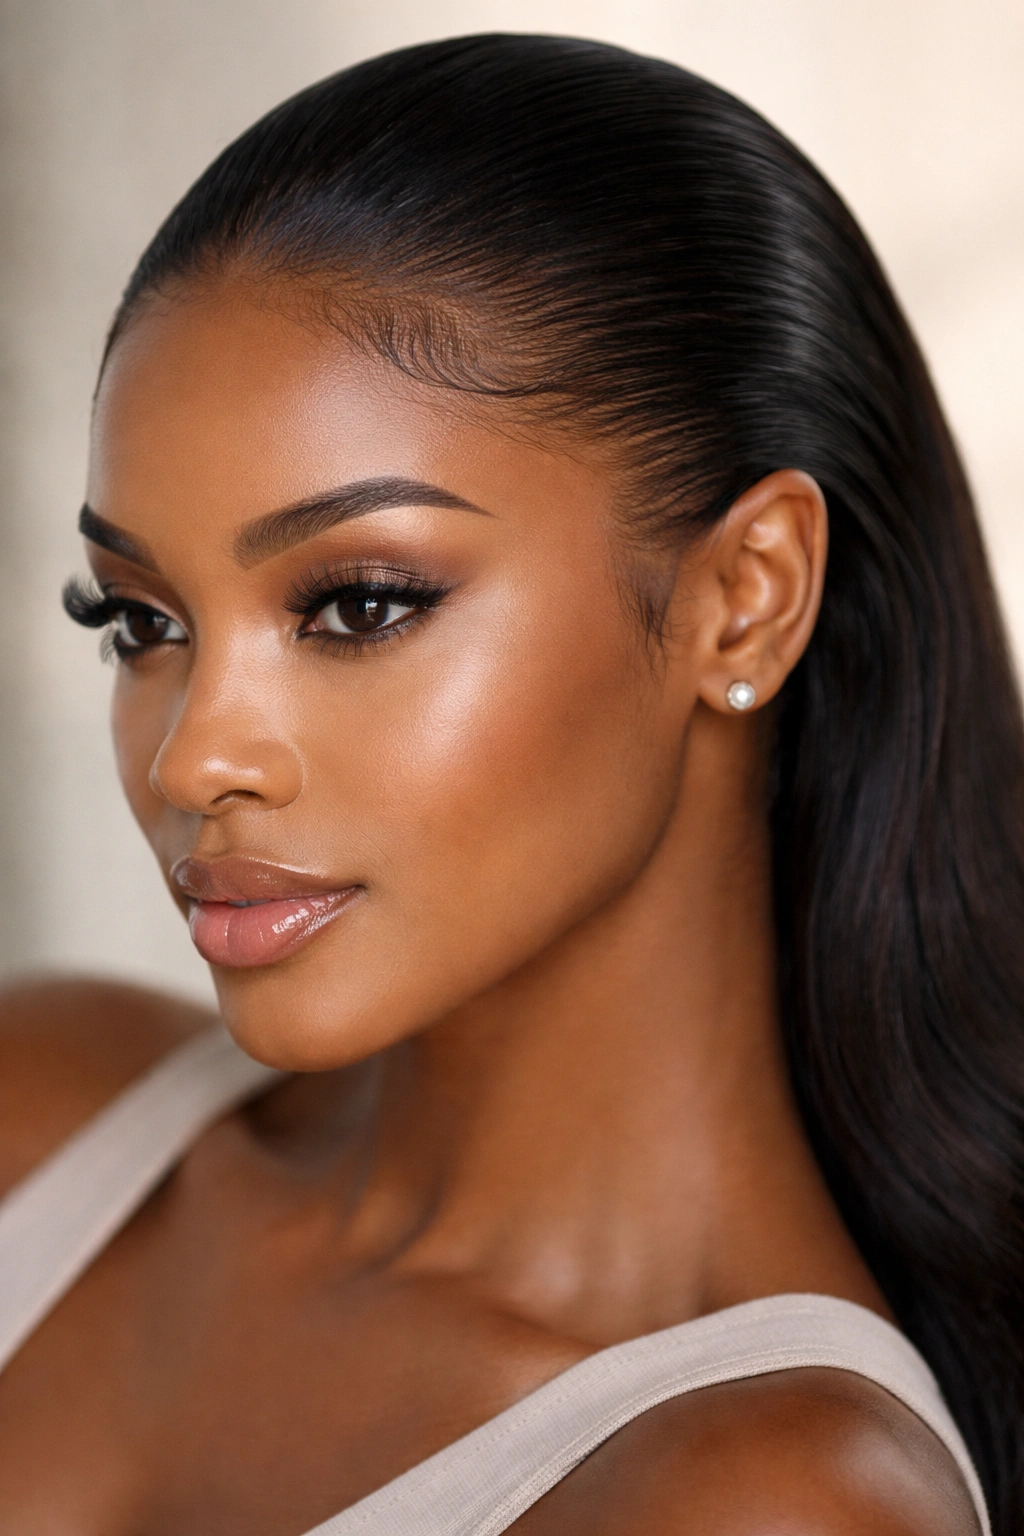
Achieve the ultimate low-manipulation pushback by smoothing your natural edges with edge control, creating clean laid lines without any complex design. Your hair is pushed cleanly back and secured simply, and the focus is entirely on your naturally beautiful, well-maintained hairline. This is minimal styling with maximum impact.
Natural Hairline Beauty
A well-maintained natural hairline doesn’t need complex edge designs—sometimes the most beautiful approach is simply laying it smooth and letting it be. This pushback style celebrates the natural shape of your hairline and respects the hair you have. It’s especially beautiful on people with naturally low hairlines or clean hairline shapes.
Creating the Natural Laid Look
- Keep your hairline healthy through protective styling and moisture
- Use a light edge control that smooths without flaking
- Apply with a soft brush or cloth in the direction of your hair growth
- Create clean lines that follow your natural hairline shape rather than trying to change it
- Your pushback style should be simple—avoid overly intricate designs
- Let your natural edges be the main feature
Worth knowing: This approach requires actually taking care of your hairline—no tight styles, consistent moisture, and protection at night. Healthy hair makes this style shine.
20. Mixed-Texture Pushback Updo
Create texture variation within your pushed-back style by mixing smooth sections with textured, twisted, or braided sections. Your overall style is pushed back (bun, pony, or gathered arrangement), but different parts have different textures—some smooth, some twisted, some wavy. This creates visual richness and interest while maintaining the clean, face-forward benefits of a pushback.
Complexity Through Layered Texture
Mixing textures gives you the best of everything—the polished look of a pushback combined with the visual richness of multiple styling techniques. This approach works beautifully for people who love the way their hair looks with different textures and want to showcase more than one styling method in a single look.
Building Your Mixed-Texture Pushback
- Identify which sections will remain smooth and which will be textured
- Create braids or twists in some sections while smoothing others with pomade or gel
- Gather everything into your chosen pushback style (bun, pony, or other)
- The mixed textures should be visible and intentional, not hidden
- Use edge control to keep your hairline clean and defined
- The overall effect should feel curated and artistic
Pro tip: This style is perfect for showing versatility—it demonstrates that you can do multiple styling techniques and combine them creatively.
Final Thoughts
Pushback hairstyles offer incredible versatility because they work across different hair types, textures, lengths, and styling approaches. Whether you’re choosing a sleek, minimal look or something textured and elaborate, pushing your hair back accomplishes several goals at once: you create a polished appearance, keep hair off your face for practical reasons, showcase your features and edges, and demonstrate that your styling is intentional.
The best pushback style for you depends on your personal aesthetic, your hair type and length, and the occasion. Some days you might want the sleekness of gel-smoothed edges, while other days a textured twisted puff feels more like you. The beauty is that you don’t have to choose just one—these styles are flexible enough to rotate through depending on your mood and needs.
Remember that pushback styles are most beautiful when your edges and hairline are healthy and well-maintained. Use moisturizing edge products, avoid styles that are too tight, protect your hair at night, and give your edges regular breaks from intense styling. When your hairline and edges are thriving, they become a gorgeous feature to showcase, and any pushback style you choose will look even more stunning.