Short hair on your wedding day doesn’t mean compromising on style—it means you’ve got options that most long-haired brides can only dream about. Think about it: no wrestling with heavy extensions, no complicated updos that take two hours, no hidden bobby pins that never quite stay put. What you get instead is freedom, movement, and the ability to rock a look that feels authentically you on one of the most important days of your life.
The real secret that wedding magazines don’t emphasize enough is that short hair bridal styles showcase your face, your features, and your confidence in a way that longer hair simply can’t. Your guests will actually see your carefully applied makeup and your glowing skin. The right short hair wedding look can be elegant, romantic, edgy, or classic—sometimes all at once. The key is choosing a style that works with your hair texture, your dress style, and the overall vibe of your wedding day.
What follows are ten completely distinct bridal looks specifically designed for short hair. Some are polished and romantic. Others lean modern and chic. A few push toward bold and unconventional. But every single one of them proves that short hair brides have just as much bridal styling power as anyone else. The difference is that your style choices show intentionality rather than defaulting to “the wedding updo”—and that thoughtfulness translates into something your wedding photos will capture for decades.
1. Sleek Low Bob with Pearl Accessories
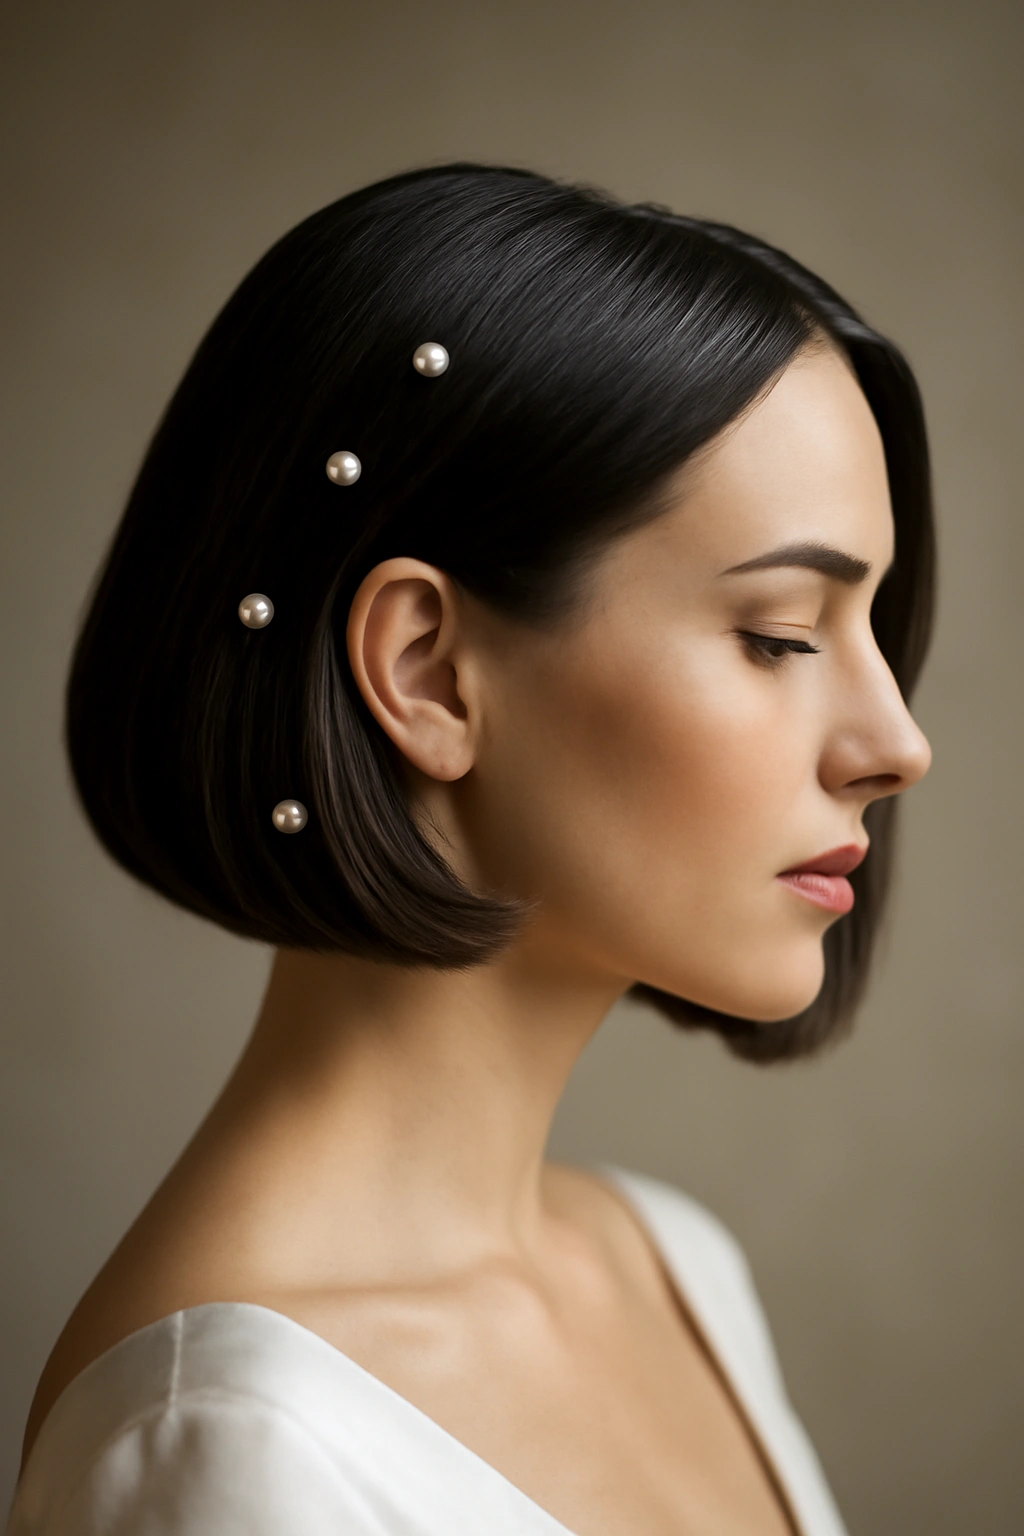
A polished, chin-length bob is arguably the most timeless short hair wedding choice, and it works because it’s inherently elegant without demanding any fuss. The magic of this look comes from the styling—a flat-iron or smoothing balm creates that mirror-like shine that photographs beautifully under dramatic lighting. Pair the sleekness with delicate pearl pins scattered subtly throughout, and you’ve created something that feels both modern and romantic.
Why It Works for Weddings
A short bob keeps its structured shape throughout the entire day and evening, which matters when you’re going to be hugging guests, dancing, and moving through multiple locations for photos. The precision of a good bob also creates a clean canvas that allows your dress neckline and jewelry to be the focal point. Pearl accessories feel inherently bridal without screaming “wedding hair accessory,” so the look reads sophisticated rather than costume-like.
How to Achieve This Look
Book your hair appointment for the day of, or style it the morning of your wedding. Use a professional smoothing serum or anti-frizz cream as a base—this is essential for that glass-like finish. Blow-dry in sections with a paddle brush, creating smooth tension. Finish with a flat iron on medium heat, working through each section methodically from roots to ends. Once you’ve achieved your base sleek look, ask your stylist to clip 3-4 pearl bobby pins or geometric clips throughout the crown area, positioning them so they’re visible but feel like an intentional detail rather than a safety measure. Set everything with a light-hold hairspray so you’re not creating a helmet effect.
Pro Tip
The night before your wedding, sleep on a silk pillowcase to prevent frizz and maintain your blowout. Wake up 90 minutes before you need to be camera-ready so you have time to refresh with a straightener if needed.
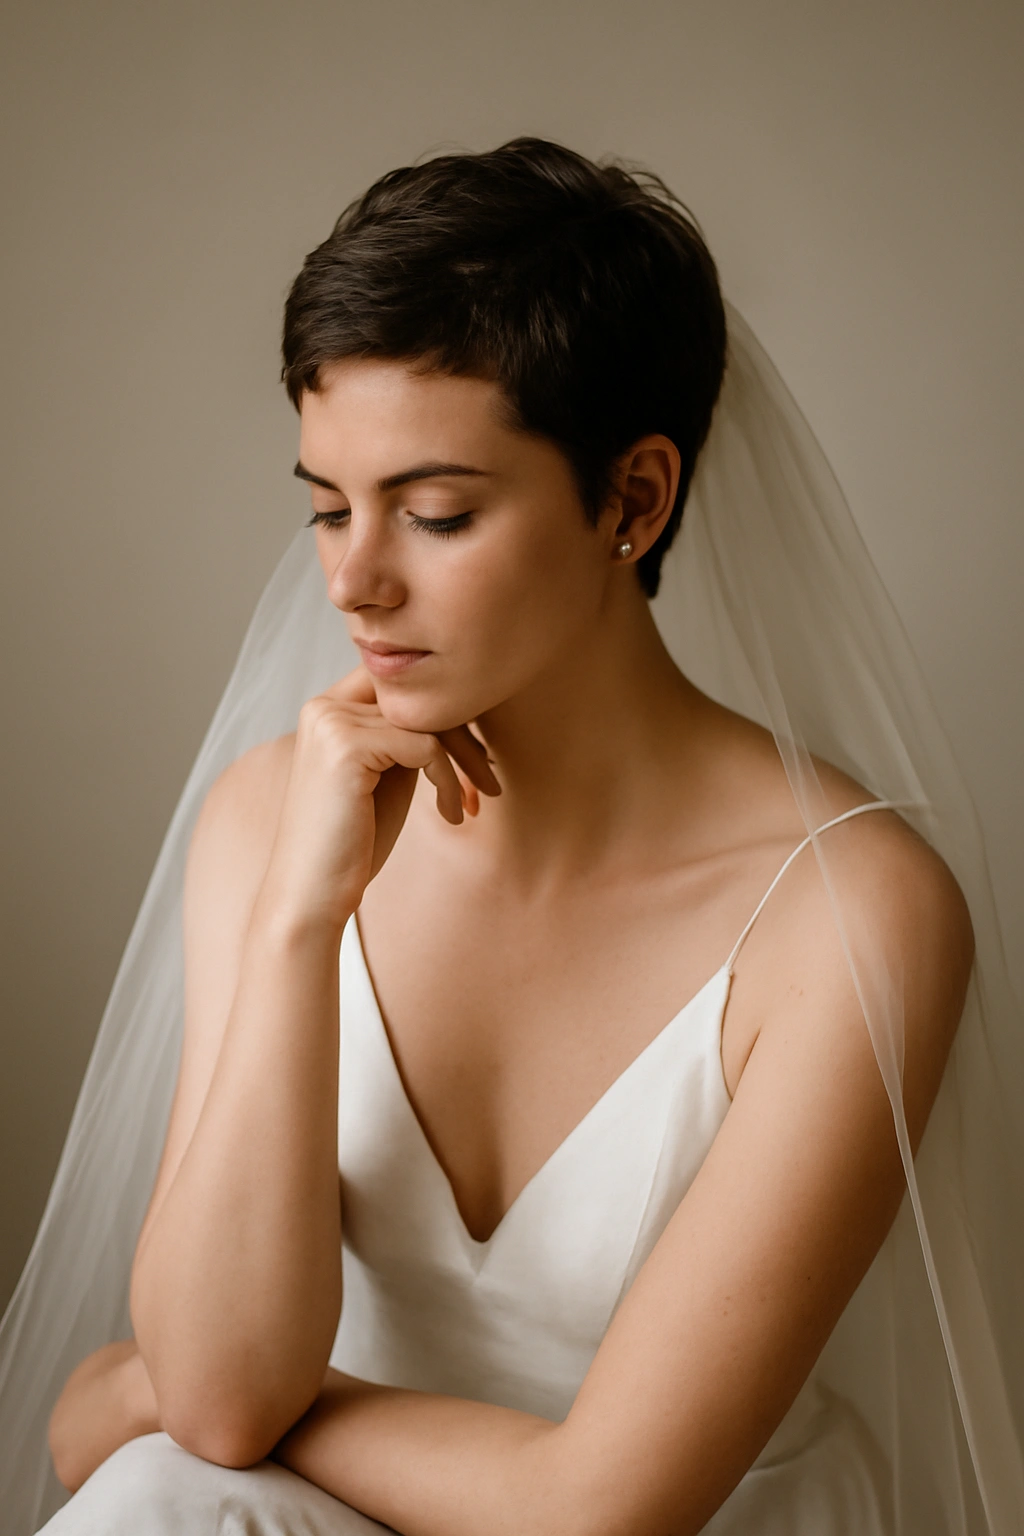
2. Textured Pixie with Flower Crown
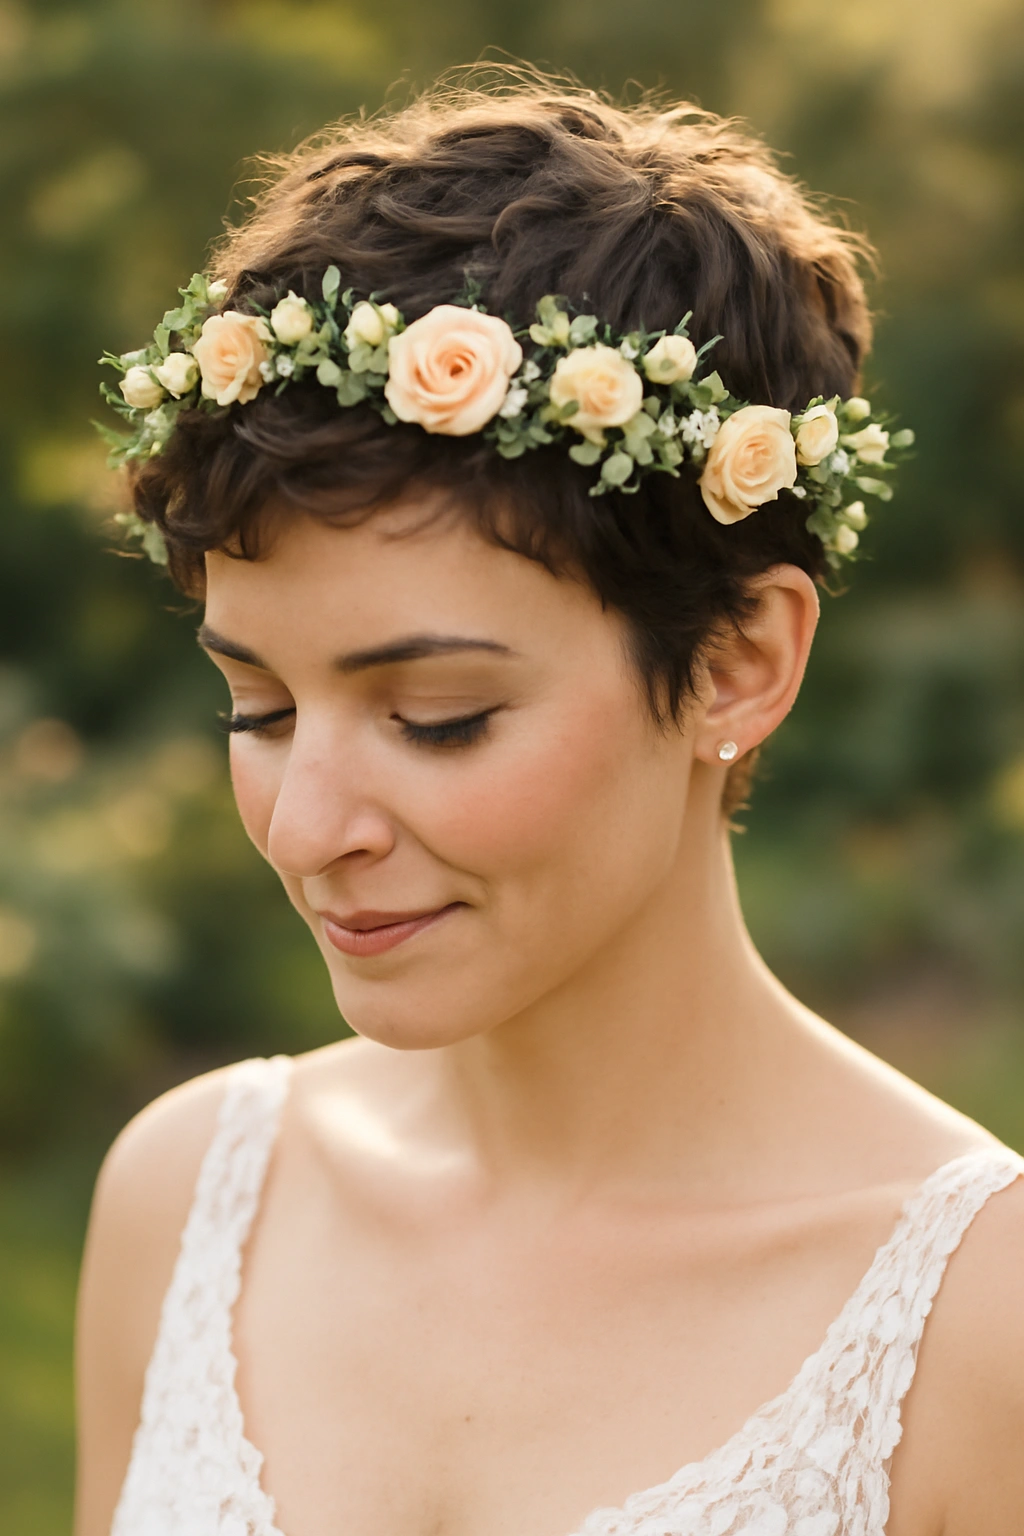
If your short hair is naturally textured, curly, or wavy, a pixie cut becomes a bridal superstar when you embrace the texture rather than fight it. The key is letting those natural waves and curls do the work, then adding a delicate flower crown that sits nestled into the texture like it grew there. This look screams romance and relaxed elegance—perfect for outdoor weddings, garden ceremonies, or any couple who values authenticity over convention.
Why It Works for Weddings
A textured pixie is deeply comfortable to wear, which means you’ll look relaxed and happy in photos rather than stiff and overly styled. The natural movement and dimension of textured hair catches light beautifully and photographs with incredible depth. A flower crown feels lightweight and stays put because it has texture to anchor into, unlike smooth hair where it can slip and slide throughout the day.
How to Achieve This Look
Enhance your natural curl or wave pattern by applying a curl-defining cream or mousse to damp hair and diffusing dry it or air-drying depending on your curl type. You want defined texture, not frizz—the difference is all in using products designed for your specific curl pattern. Once your hair is dry and naturally textured, ask your florist or a hair stylist to create a lightweight flower crown using greenery, baby’s breath, and 2-3 statement flowers positioned where they won’t interfere with your vision or the back of your dress. Secure it with bobby pins tucked into your texture so they disappear completely.
What Makes It Special
This look celebrates your natural hair rather than asking you to transform it into something it’s not. On your wedding day—when you’re already managing a thousand details—being able to work with your hair texture instead of against it is genuinely liberating.
3. Half-Up Twisted Crown
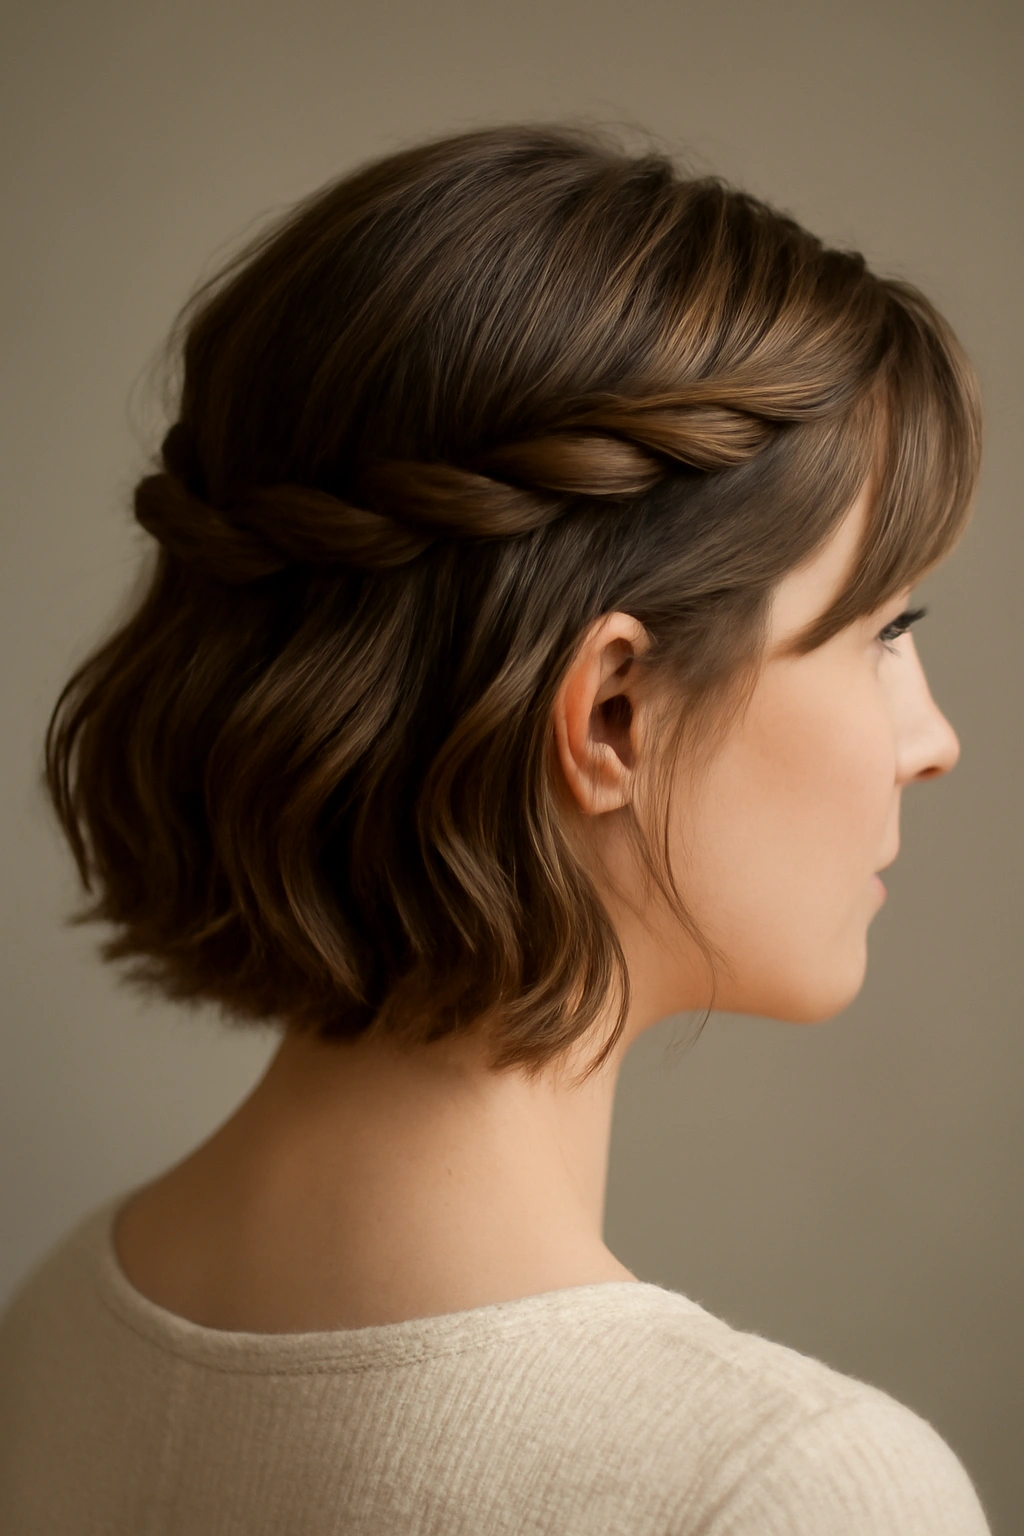
Half-up styles work beautifully on short hair when you approach them as a way to add dimension and visual interest rather than thinking of them as scaled-down versions of long-hair styles. Create two small twists on either side of your head, secure them low in the back, and you’ve instantly created an elegant detail that frames your face while keeping hair off your neck and shoulders.
Why It Works for Weddings
The half-up twist instantly elevates even the simplest short haircut into something special without requiring length. It creates the visual effect of an updo without the weight or the hours of styling. The twist detail catches light and adds sophistication that reads beautifully in both close-up shots and full-length photos. It’s also surprisingly practical—you can feel the difference in terms of hair staying off your face, which matters when you’re emotionally overwhelmed and sweating through excitement.
How to Achieve This Look
Start with hair that has some texture or wave to it—either blow-dry with a round brush to create body, or work with your natural texture. On the left side of your head, take a 2-inch section of hair from your temple and create a loose twist moving toward the back of your head. Repeat on the right side, twisting in the same direction. Meet both twists at the nape of your neck and secure them together with 2-3 bobby pins, allowing a few shorter pieces to frame your face. The twists should feel relaxed and romantic, not geometric and tight. Add a delicate pearl bobby pin or small geometric clip where the twists meet for extra polish.
Pro Tip
Practice this style at least twice before your wedding so you know exactly how tight to make the twists and how to position them for your specific face shape.
4. Slicked-Back Gel Look
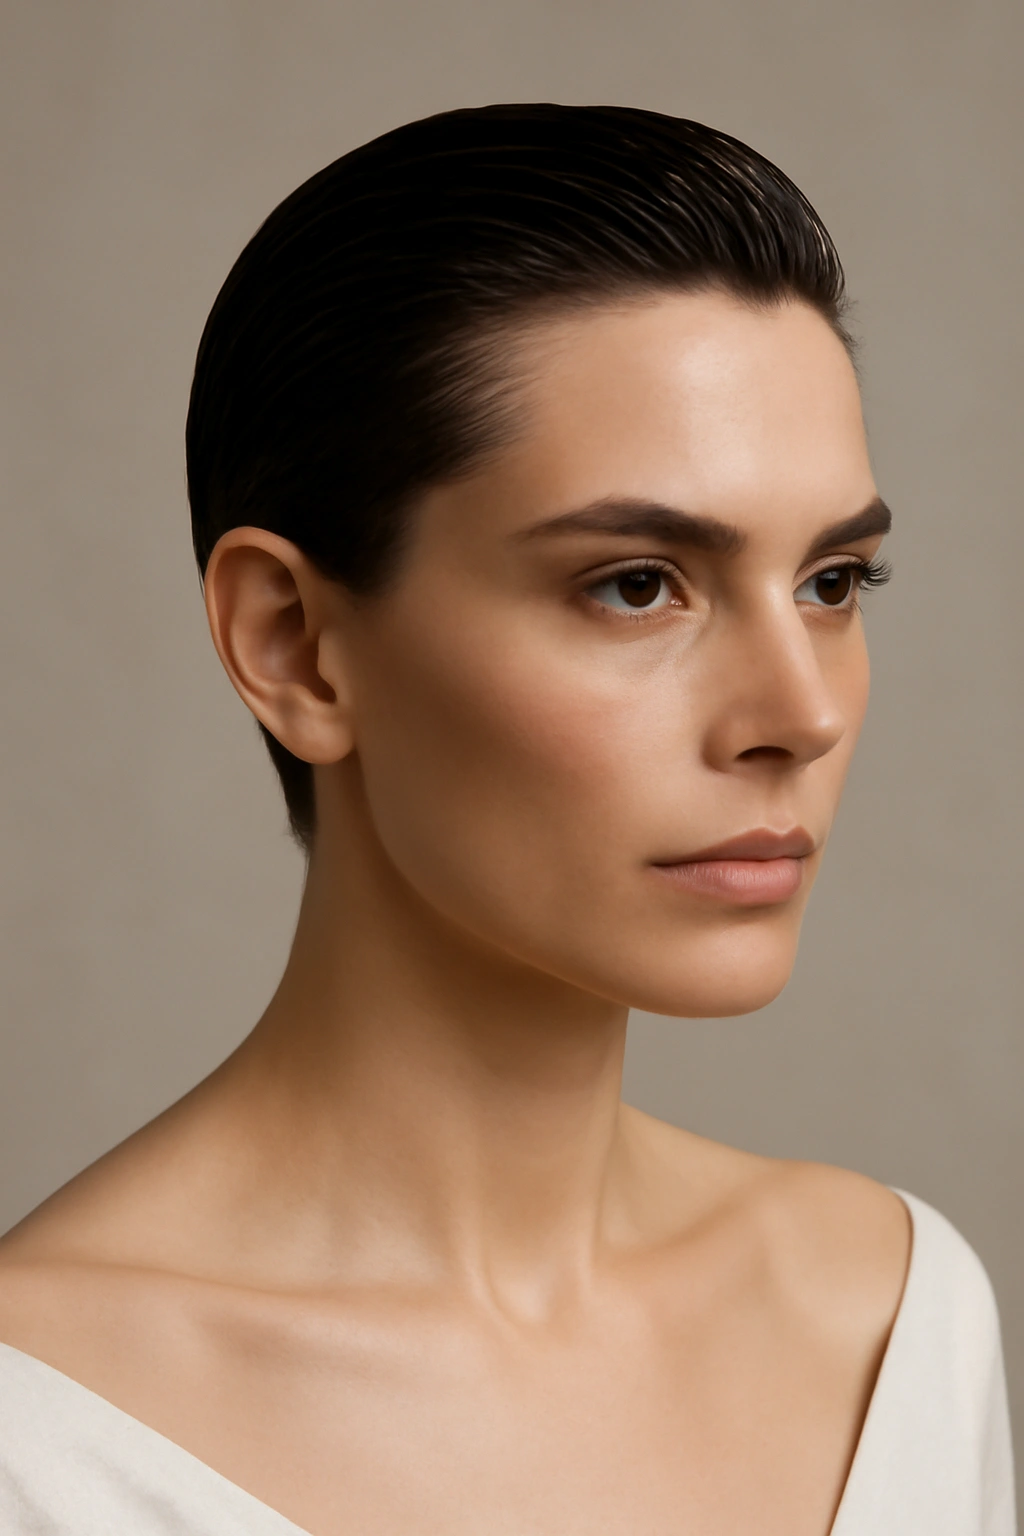
There’s something undeniably chic and fashion-forward about a slicked-back gel look that’s increasingly popular with brides who want modern elegance. This style works especially well if you have shorter hair in the 1-3 inch range and want to emphasize your bone structure and facial features. Pair it with a statement earring or headpiece, and you’ve created something that feels runway-ready rather than traditionally bridal.
Why It Works for Weddings
A sleek, slicked-back look is architectural and intentional—it says you made a deliberate choice rather than defaulting to “bridal standard.” It photographs cleanly and clearly, showing off your makeup, your dress neckline, and any jewelry or headpiece you choose. This style also stays flawless throughout the entire day and evening; there’s no hair falling into your face, no flyaways to worry about, and zero risk of your style deflating by 6 p.m.
How to Achieve This Look
Use a strong-hold gel, pomade, or slicking cream designed for styling short hair. Work product through your hair starting from the roots, smoothing backward and slightly to the side if you want subtle directional movement. A blow-dry with a paddle brush in the slicked direction helps set the style before you apply gel. Once you’ve applied product and smoothed the hair back, blow-dry briefly on cool to set the gel. The result should look polished and controlled without appearing stiff or overly product-heavy. Finish with a flexible-hold hairspray that allows minimal movement without looking wet.
What to Pair With It
This look truly shines when paired with a statement element—a bold geometric headpiece, architectural earrings, a dramatic makeup look, or an ultra-modern dress. The sleekness makes these visual anchors stand out even more.
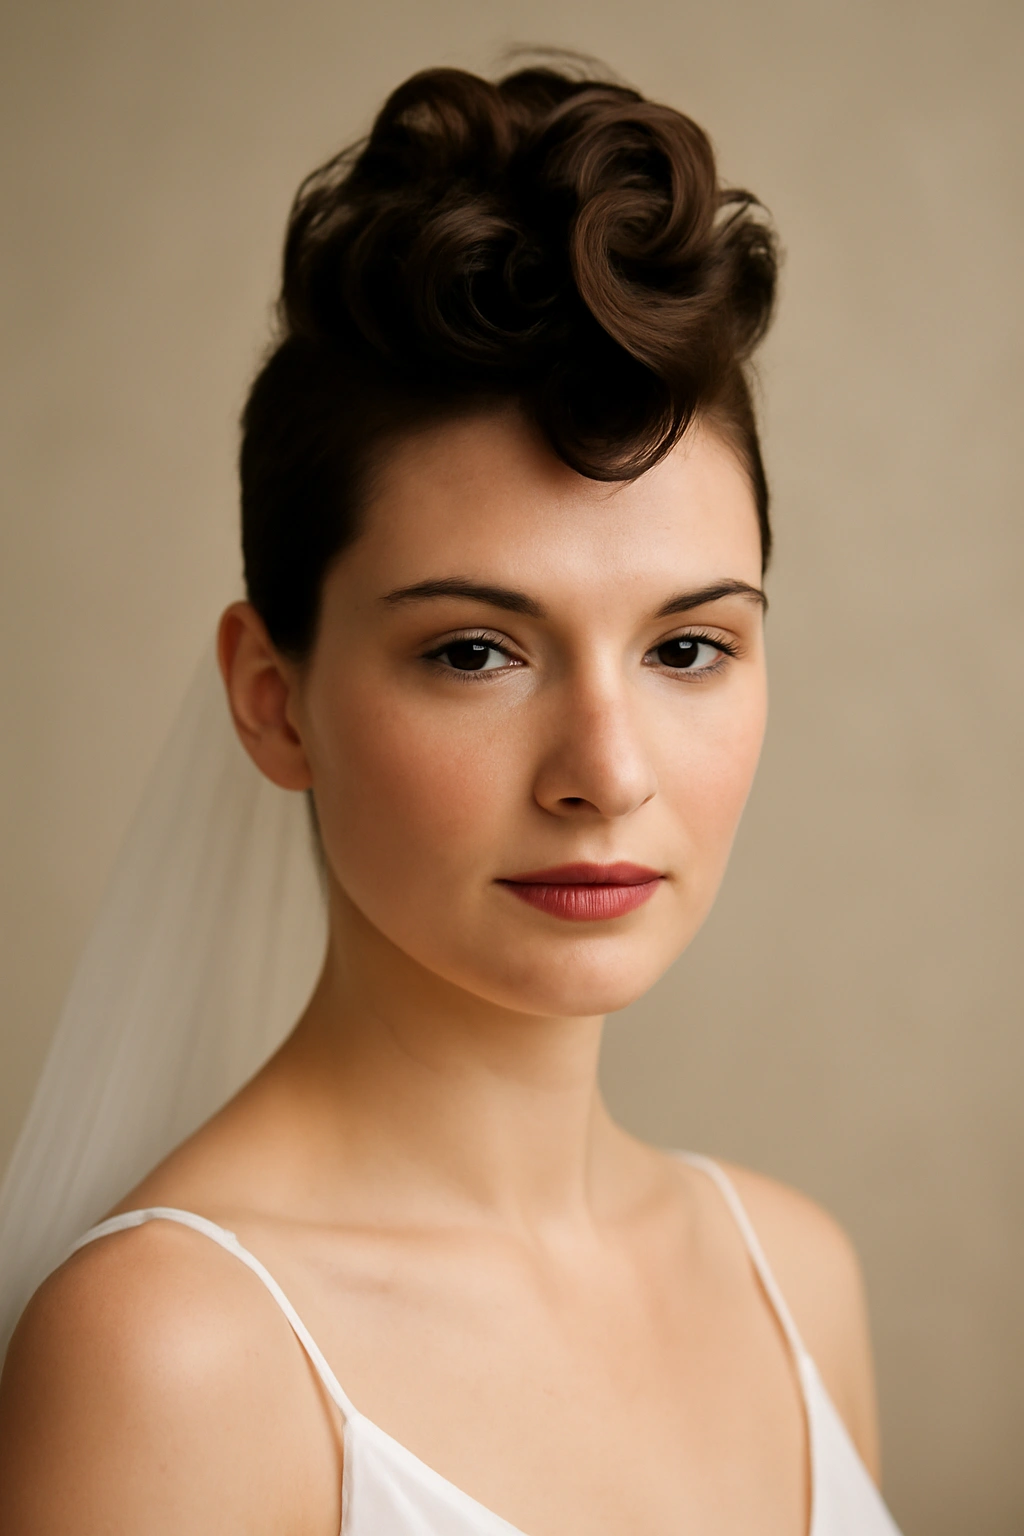
5. Romantic Waves with Vintage Comb
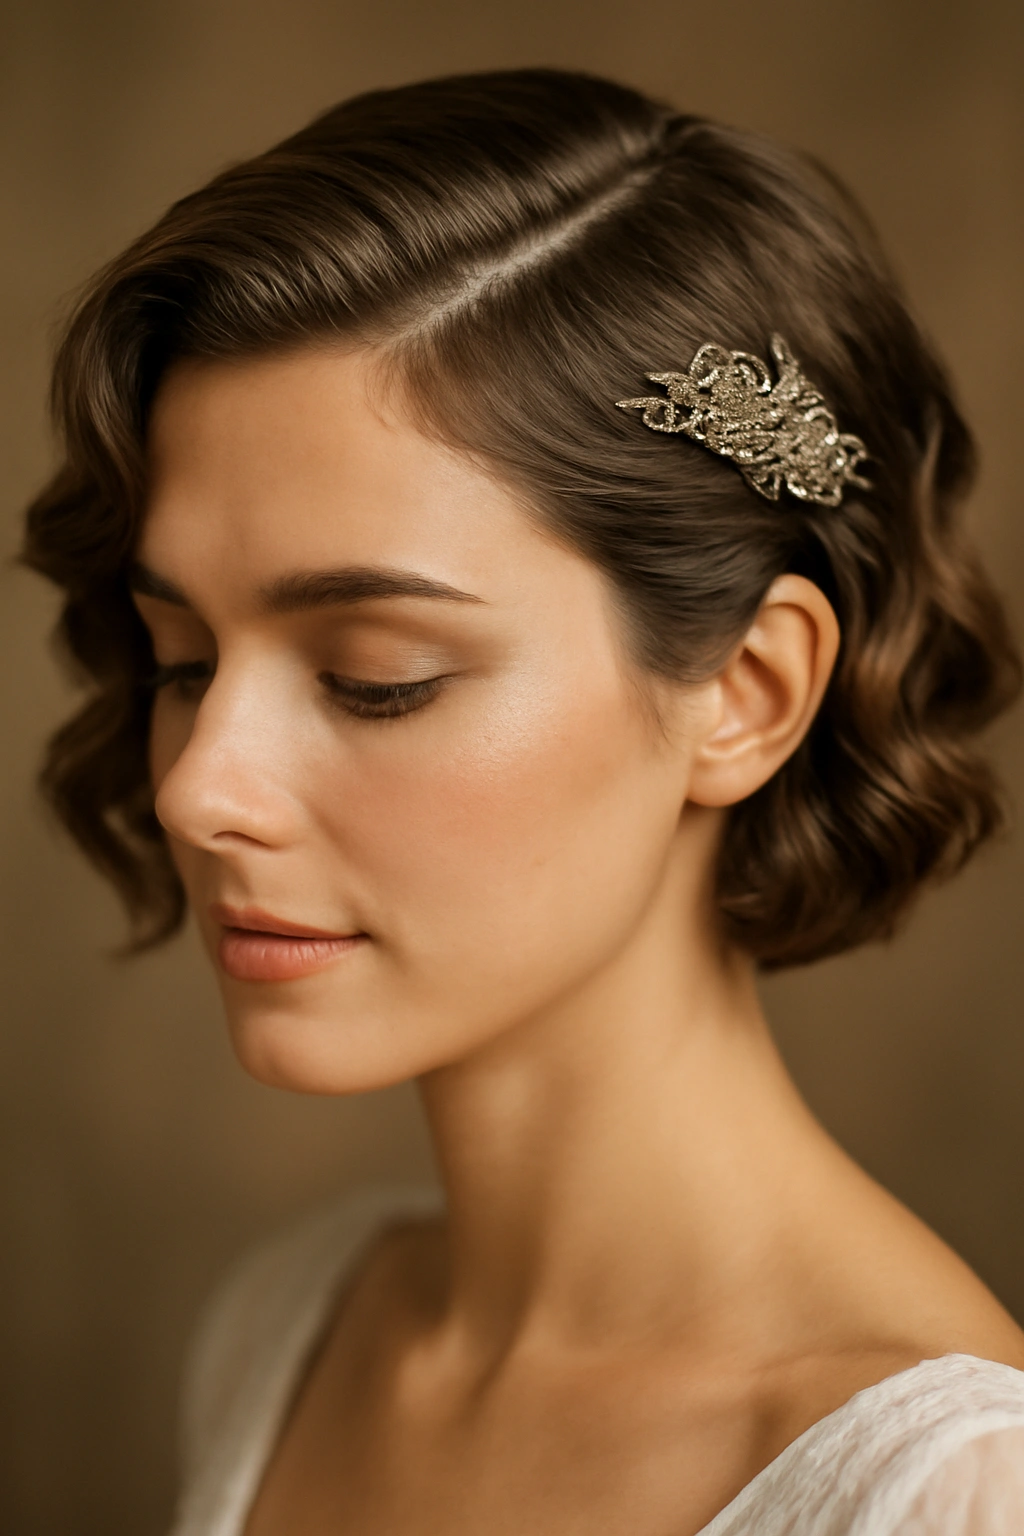
If your short hair can hold a wave or curl, this style offers the romance of longer-hair wedding styles while remaining rooted in what’s actually possible with short length. Create soft waves through your entire head using a curling iron or wand, then position a delicate vintage comb—tortoiseshell, gold, pearl, or antique metal—to one side where it both secures a few waves and creates a visual focal point.
Why It Works for Weddings
Waves automatically read as feminine and romantic, and they create movement and dimension that photographs beautifully. A vintage comb adds a touch of old-world elegance without looking costume-like or overdone. The combination feels simultaneously timeless and personal, especially if you’re using a family heirloom comb or an authentic vintage piece.
How to Achieve This Look
Start with hair that has some volume at the roots—blow-dry with a round brush or use a volumizing product at the crown. Use a 1.25 to 1.5-inch curling iron or wand, taking small sections and wrapping them around the barrel away from your face. Curl the entire head, then let curls cool for a few minutes before gently running your fingers through them to create soft, undone waves rather than tight ringlets. The goal is movement, not definition. Position your comb on one side of your head—typically to the side opposite your part, or wherever feels balanced with your face shape. Secure it with bobby pins hidden beneath the waves, and set everything with a flexible-hold hairspray that allows the waves to move naturally.
Pro Tip
The most beautiful waves happen when you curl hair that’s been blown dry but isn’t completely dry when you apply the curling iron—there’s just enough moisture to hold the curl without being damp.
6. Choppy Shag with Pearl Clips
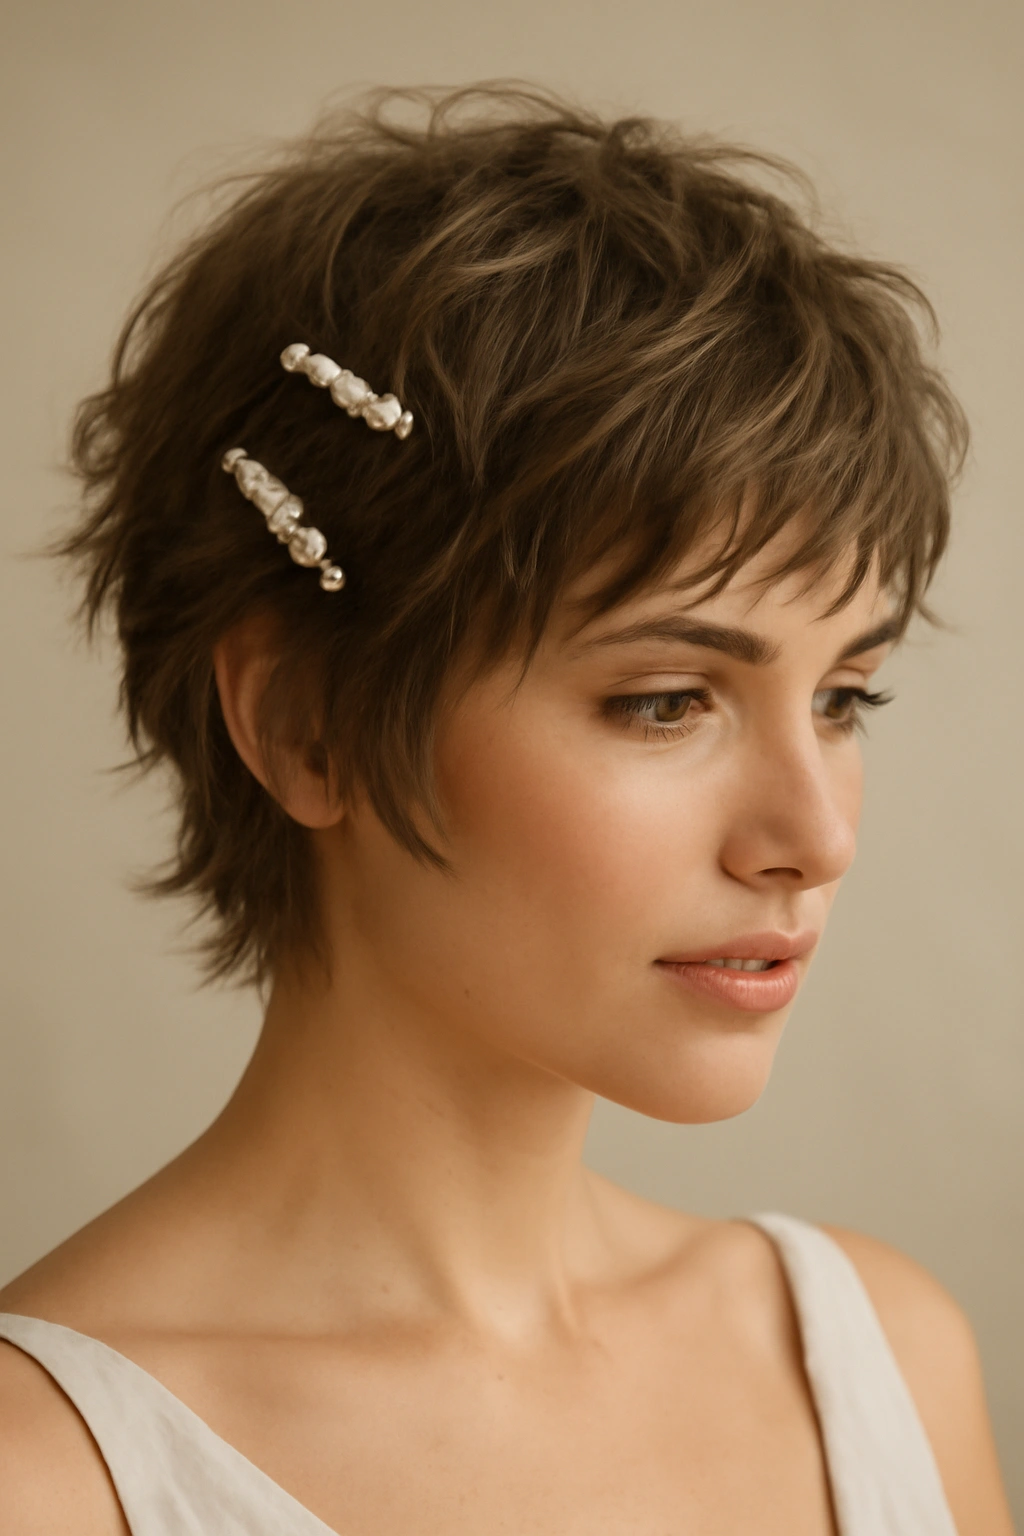
A textured, choppy shag cut is having a major moment, and for short-haired brides, it’s the ultimate way to look effortlessly chic while still feeling distinctly bridal. The built-in layers and texture mean minimal styling effort, and scattered pearl clips or delicate geometric barrettes add just enough “wedding” without demanding a full transformation of your everyday hair.
Why It Works for Weddings
A shag celebrates movement, texture, and personality in a way that more structured cuts can’t. It photographs with incredible dimension and depth, and it stays interesting throughout the day because the layers move and shift naturally. The beauty of this style is that it works whether your hair is straight, wavy, or curly—the cut is designed to work with natural texture rather than against it. Pearl clips feel delicate and vintage without being fussy or costume-like.
How to Achieve This Look
Make sure your shag is cut at least a week before your wedding so you can see how it settles and moves. On your wedding day, apply a texturizing spray or sea salt spray to damp hair and rough-dry it with your fingers or a diffuser attachment to encourage the natural texture and movement. Once dry, you can add a light cream or oil to individual sections to enhance shine without weighing the layers down. Position 2-3 pearl clips or delicate barrettes throughout, tucking them in at angles that feel intentional rather than scattered. Less is more here—you want the clips to feel like an accent rather than a distress signal that your hair needed containing.
What to Know
This look requires confidence and trust in your cut. If you’ve been wearing your hair the same way for years, a shag might feel too textured or moved when you first see it—but in photos, especially with movement and light, it’s absolutely stunning.
7. Wispy Asymmetrical with Side Pin

An asymmetrical short cut—longer on one side than the other—is incredibly flattering and bridal when you style it to emphasize the asymmetry. Pull the longer side back gently with a decorative pin, allowing wisps of the shorter side to frame your face, and you’ve created something sophisticated and visibly deliberate without being complicated.
Why It Works for Weddings
Asymmetry is unexpected and modern, which creates visual interest that straightforward styles don’t offer. An asymmetrical style also allows you to frame one side of your face—emphasizing a side you love, balancing facial proportions, or creating flow that draws the eye—in a way that symmetrical styles can’t match. The wispy framing feels romantic while the geometric balance of the cut feels editorial and intentional.
How to Achieve This Look
Style the longer side with soft waves or texture using a curling iron or texturizing product. On the shorter side, you can keep it sleek and close to your head, or add subtle texture depending on your preference. Once your hair is styled, gently sweep the longer side back and secure it low with a decorative pin—vintage, geometric, or organic all work beautifully. Allow a few wispy pieces from the shorter side to fall forward naturally around your cheekbone and temple. The effect should feel elegantly composed rather than accidental, like you intentionally framed one side of your face.
Pro Tip
Take photos from both sides of your face while styling to confirm the asymmetry is flattering from every angle. What works beautifully from one side might not balance well from the other.
8. Curled Faux Hawk
For brides who want drama and edge alongside elegance, a curled faux hawk offers the perfect balance. Rather than a literal Mohawk, imagine texture and volume concentrated down the center line of your head, with the sides smooth but not flat. Add curl throughout the center section and you’ve created something that’s undeniably dramatic while still reading as bridal.
Why It Works for Weddings
This look is bold—it says something important about who you are as a person. It photographs with incredible presence and confidence. The height and volume create drama that’s visible in full-length shots and close-ups alike. Combined with elegant makeup and a sophisticated dress, a curled faux hawk reads as fashion-forward rather than costume-like. It’s the choice for a bride who knows exactly who she is and isn’t trying to be anyone else.
How to Achieve This Look
This look requires either natural volume at your crown or the ability to create it with styling and possibly a small volumizing clip. Blow-dry your hair with maximum volume at the crown, using products like volumizing mousse at the roots. Create tight curls down the center section of your head using a small-barrel curling iron, leaving the sides smoother. Smooth the sides down with a small amount of product, creating contrast with the textured center. Set everything with a strong-hold hairspray that maintains the height and curl definition throughout the day.
What to Pair With It
A faux hawk pairs beautifully with bold graphic makeup, dramatic earrings, or a structured dress. This isn’t the look to pair with a delicate, romantic aesthetic—it needs an equally confident visual partner.
9. Tousled Layers with Head Wreath
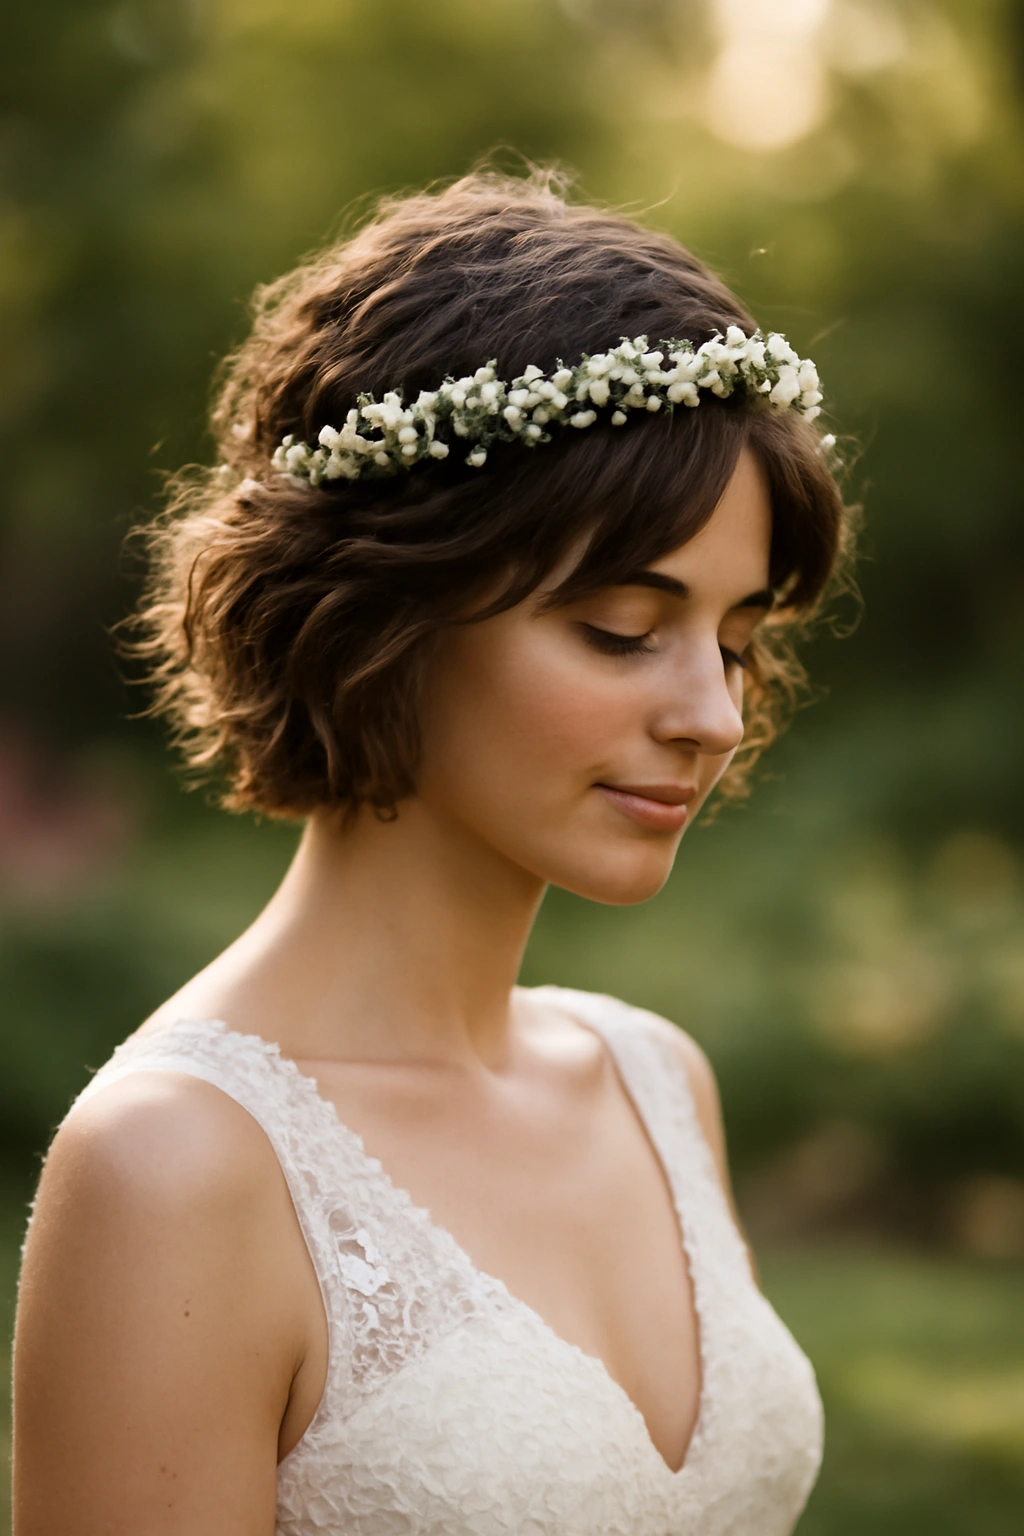
Tousled, undone waves with a bohemian head wreath creates romance that feels intentional rather than accidental. This look works beautifully for outdoor weddings, garden settings, or any couple drawn to a more relaxed, free-spirited aesthetic. The key is achieving that “I didn’t try too hard” appearance while actually being very intentional about styling.
Why It Works for Weddings
This style feels intimate and personal rather than like you’re wearing a costume. It photographs beautifully in natural light and works equally well indoors. The combination of tousled texture and a delicate head wreath creates visual softness that’s deeply romantic. Because the styling emphasizes movement and naturalness, you’ll feel comfortable and confident rather than worried about your hair staying put.
How to Achieve This Look
Start with textured hair—either your natural texture or created with a curling iron and then softened with your fingers. You want waves with movement rather than defined curls. Add a texturizing spray or sea salt spray to enhance texture without making hair feel crunchy. Once your hair has that tousled, slightly undone appearance, ask your florist to create a delicate head wreath or halo using greenery, baby’s breath, and small flowers positioned loosely rather than densely. The wreath should sit gently on your head, more like a crown than a covering. Secure it with bobby pins tucked into your texture where they won’t be visible.
Pro Tip
The most beautiful “undone” looks actually require more styling precision than perfectly polished looks. Tousled waves should feel soft and intentional, not like you forgot to finish getting ready.
10. Blunt Cut with Dramatic Headpiece
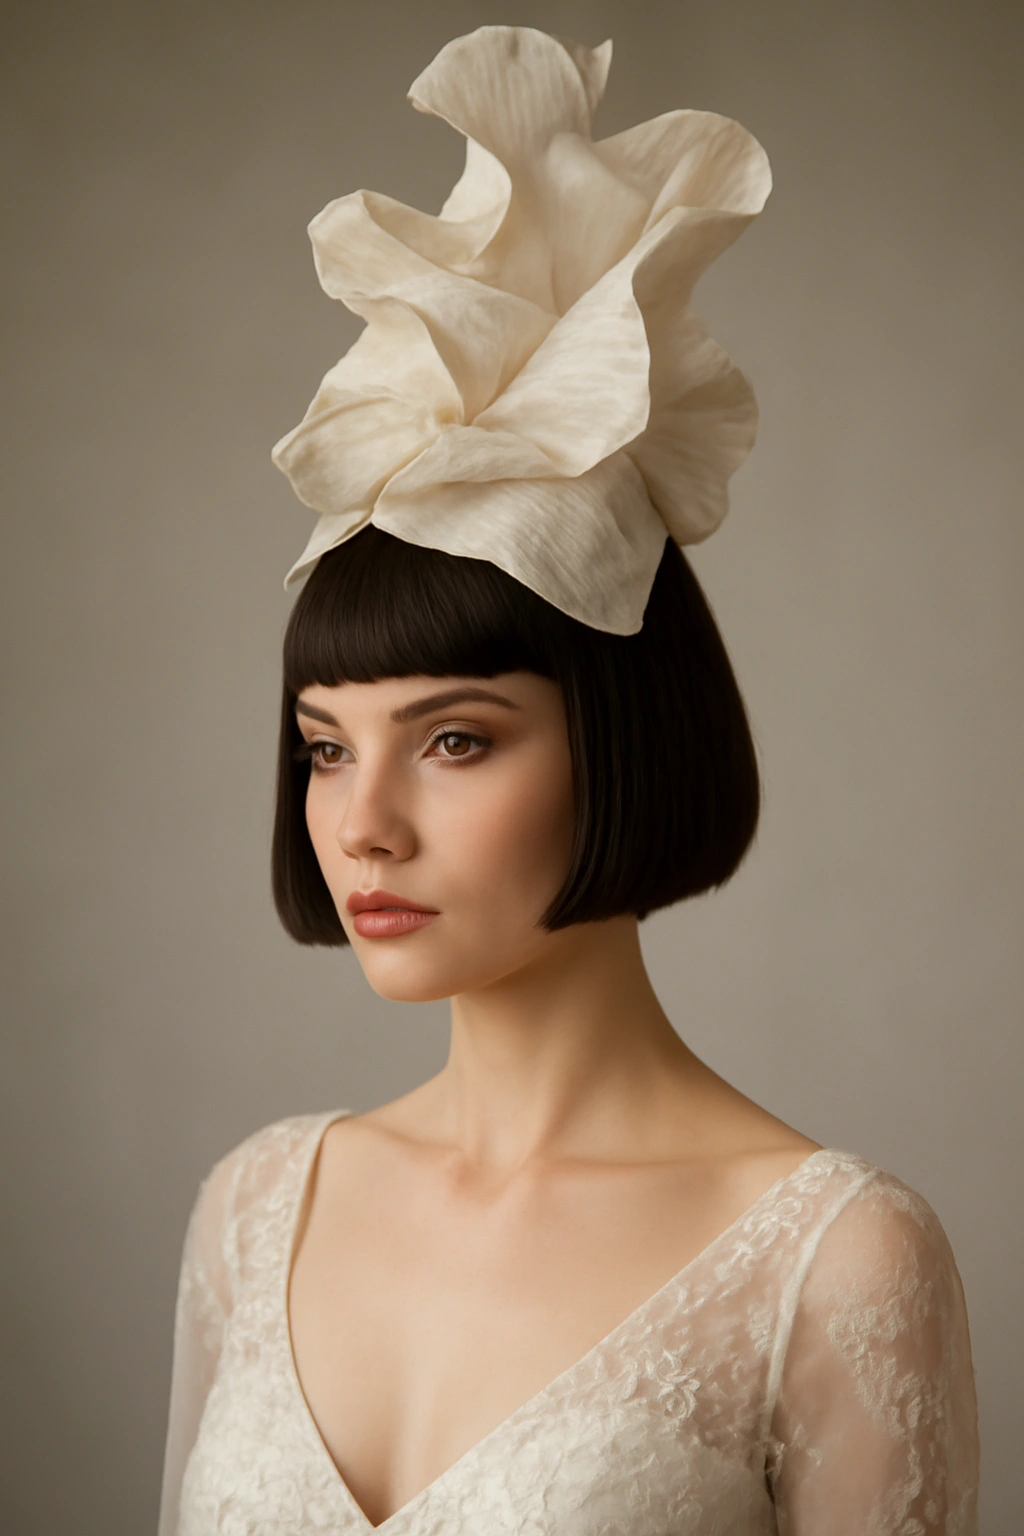
If you’ve got a really short, blunt cut—think Mia Farrow’s iconic pixie or a modern super-short bob—consider going completely opposite direction and pairing it with a dramatic, statement-making headpiece. A tall fascinator, a sculptural metal piece, an elaborate vintage headpiece, or even a dramatic crown takes the stark simplicity of a blunt cut and transforms it into something haute couture.
Why It Works for Weddings
The contrast between the simplicity of a blunt cut and the drama of a statement headpiece is genuinely striking. It creates a look that’s absolutely unforgettable in photos. This combination works especially well if you have strong facial features and the confidence to pull off something unconventional. It also means your headpiece becomes the focal point of your styling rather than blending into hair, which can actually make the overall look feel more cohesive.
How to Achieve This Look
Keep your blunt cut extremely clean by booking a trim within 3-5 days of your wedding—a blunt cut loses its definition quickly. Style it by blow-drying smooth or adding light texture, depending on your cut and preference. The focus is really on your headpiece, so your hair should be a clean canvas that doesn’t fight for attention. Choose a headpiece that’s proportional to your head and face but genuinely dramatic—scale matters here. Secure it carefully so it sits exactly where you want it and won’t shift during the ceremony or reception.
What to Pair With It
This look demands equally confident makeup and styling. Go bold with color, graphic shapes, or dramatic winged eyeliner. Pair it with jewelry that complements your headpiece rather than competing with it. The entire look should feel cohesive and intentional.
Final Thoughts
Your wedding day is one of the few times in life when you get to be completely intentional about how you present yourself to the world, and your hairstyle is a massive part of that presentation. Short hair doesn’t limit your bridal styling options—it simply offers a completely different set of choices, many of which are actually easier to execute and more comfortable to wear than longer-haired alternatives.
The most important thing isn’t choosing the “right” style—it’s choosing a style that makes you feel like yourself, amplified. Whether you’re drawn to sleek modernism, romantic softness, textured bohemian vibes, or editorial drama, there’s a short-hair bridal look that lets you walk down the aisle feeling genuinely confident in how you look. Book consultations with stylists who have experience styling short hair for weddings, practice your chosen look at least once before the day, and trust that you’re going to look absolutely stunning. Your guests won’t be wondering why you didn’t have longer hair—they’ll be struck by how perfectly your style captures who you are.