Short hair is a game-changer for anyone juggling a demanding schedule, but let’s be honest—even low-maintenance styles need the right techniques to look polished when you’re rushing out the door. The secret isn’t finding a cut that requires zero effort; it’s discovering the hairstyles that work with your natural texture and timing, so you can go from bed to presentable in minutes. Whether you’re managing fine, thick, curly, or straight hair, there’s a short-hairstyle solution that fits your morning reality.
The best quick hairstyles for busy mornings do more than save time—they actually look intentional and styled, not like you’ve just given up. These are cuts and styles that work because they either embrace your hair’s natural movement, require minimal product and tools, or come together in the time it takes to brush your teeth. Some lean into texture, others play up geometric precision, and a few work because a little bedhead actually looks better than trying to tame everything into submission.
What makes a hairstyle truly “quick” comes down to three things: the cut itself, your styling approach, and knowing which shortcuts actually look good versus which ones just look rushed. A well-chosen pixie cut can literally take two minutes to style—just finger-comb some product through and go. A textured bob, on the other hand, might need a quick round with a brush or a blow dryer, but it forgives bedhead better than a sleek, polished style. The trick is matching the hairstyle to both your hair type and your honest morning routine.
1. The Textured Pixie with Piece-y Layers
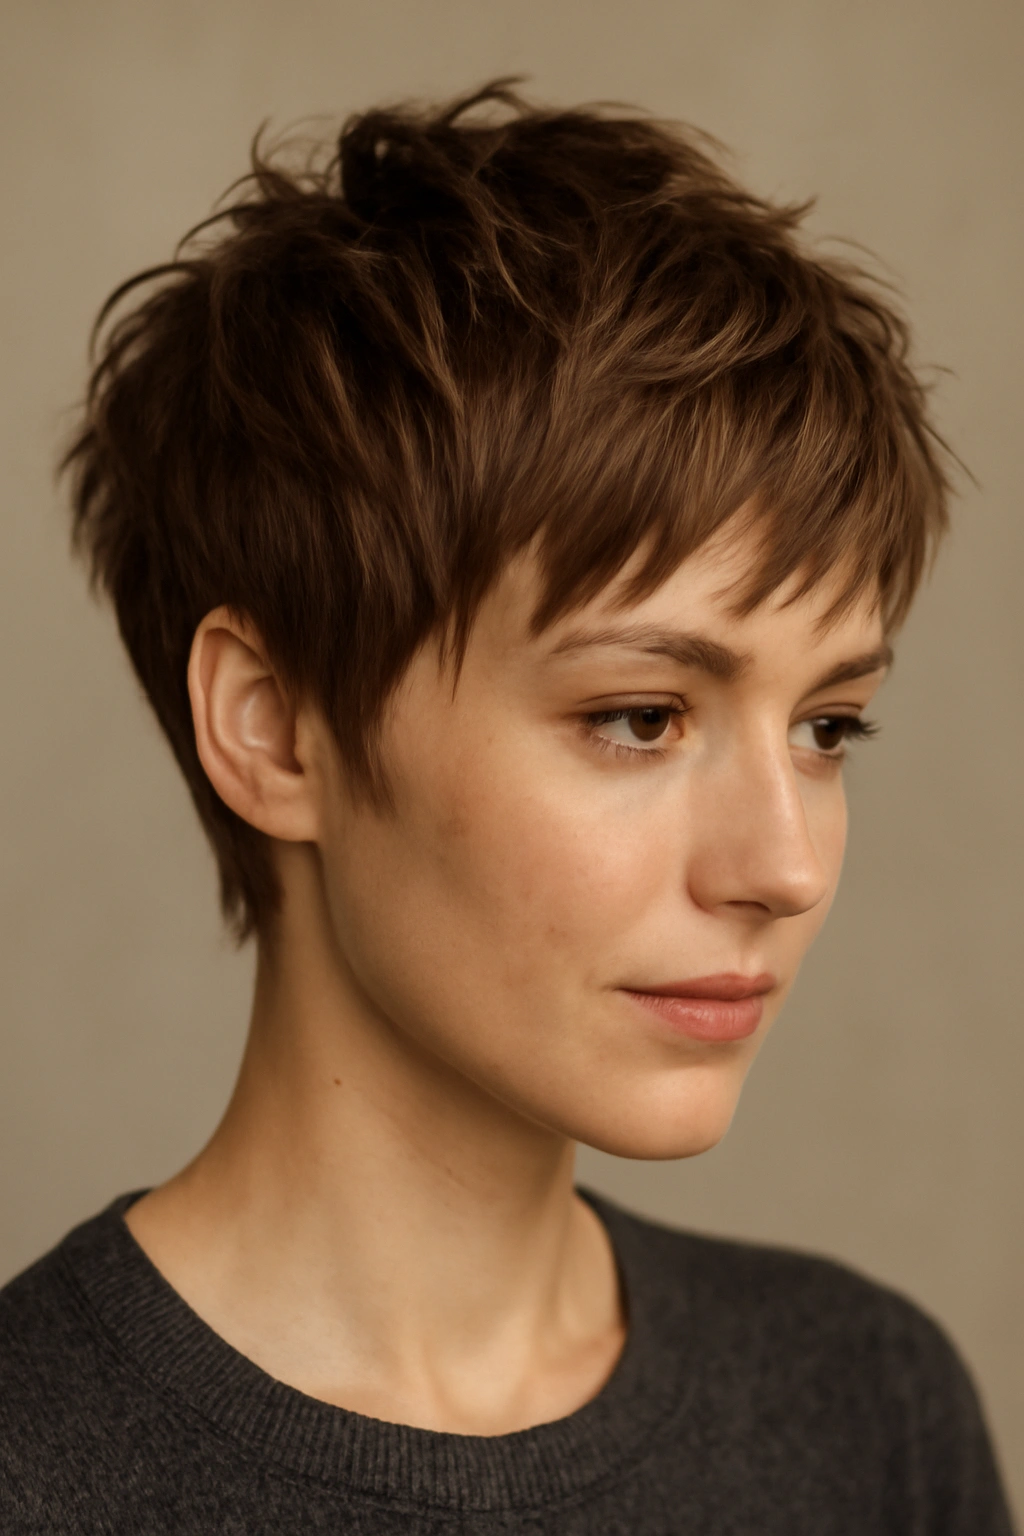
A textured pixie cuts your styling time down to nearly nothing because it’s designed to work with the random directions your hair naturally falls when you wake up. The key is asking your stylist for choppy, uneven layers throughout that create movement and visual interest, rather than a blunt, uniform cut that demands precision styling every single day.
Why It Works for Rushed Mornings
The beauty of this cut is that imperfection is literally the point. You’re not trying to create smooth, sleek lines—you’re creating a tousled, playful texture that looks intentionally undone. Even if your hair dries at weird angles, those angles are the style. Most mornings, you can wake up, run your fingers through your hair with a texturizing spray or light pomade, and you’re done.
How to Style It in Under Three Minutes
Rub a small amount of texturizing spray or dry shampoo between your palms, then scrunch it through your hair, focusing on the crown and the shorter layers around your face. Use your fingers—not a comb—to separate and define individual pieces. If you want more definition, use a tiny dab of matte pomade or paste on just your fingertips and piece out the front sections. The goal is to look like you just woke up and looked good, not like you spent thirty minutes styling.
Styling Variations for Different Occasions
On days when you have an extra five minutes, blow-dry your pixie with a blow dryer and round brush to add volume and smoothness. For a polished evening look, apply a light styling cream and comb everything in one sleek direction. If you’re headed somewhere humid, a light hairspray helps lock the texture without creating that stiff, helmet-like feeling. Keep a dry texturizing spray in your bag for a midday refresh if your hair goes flat during the day.
2. The Undercut Bob with Shaggy Top
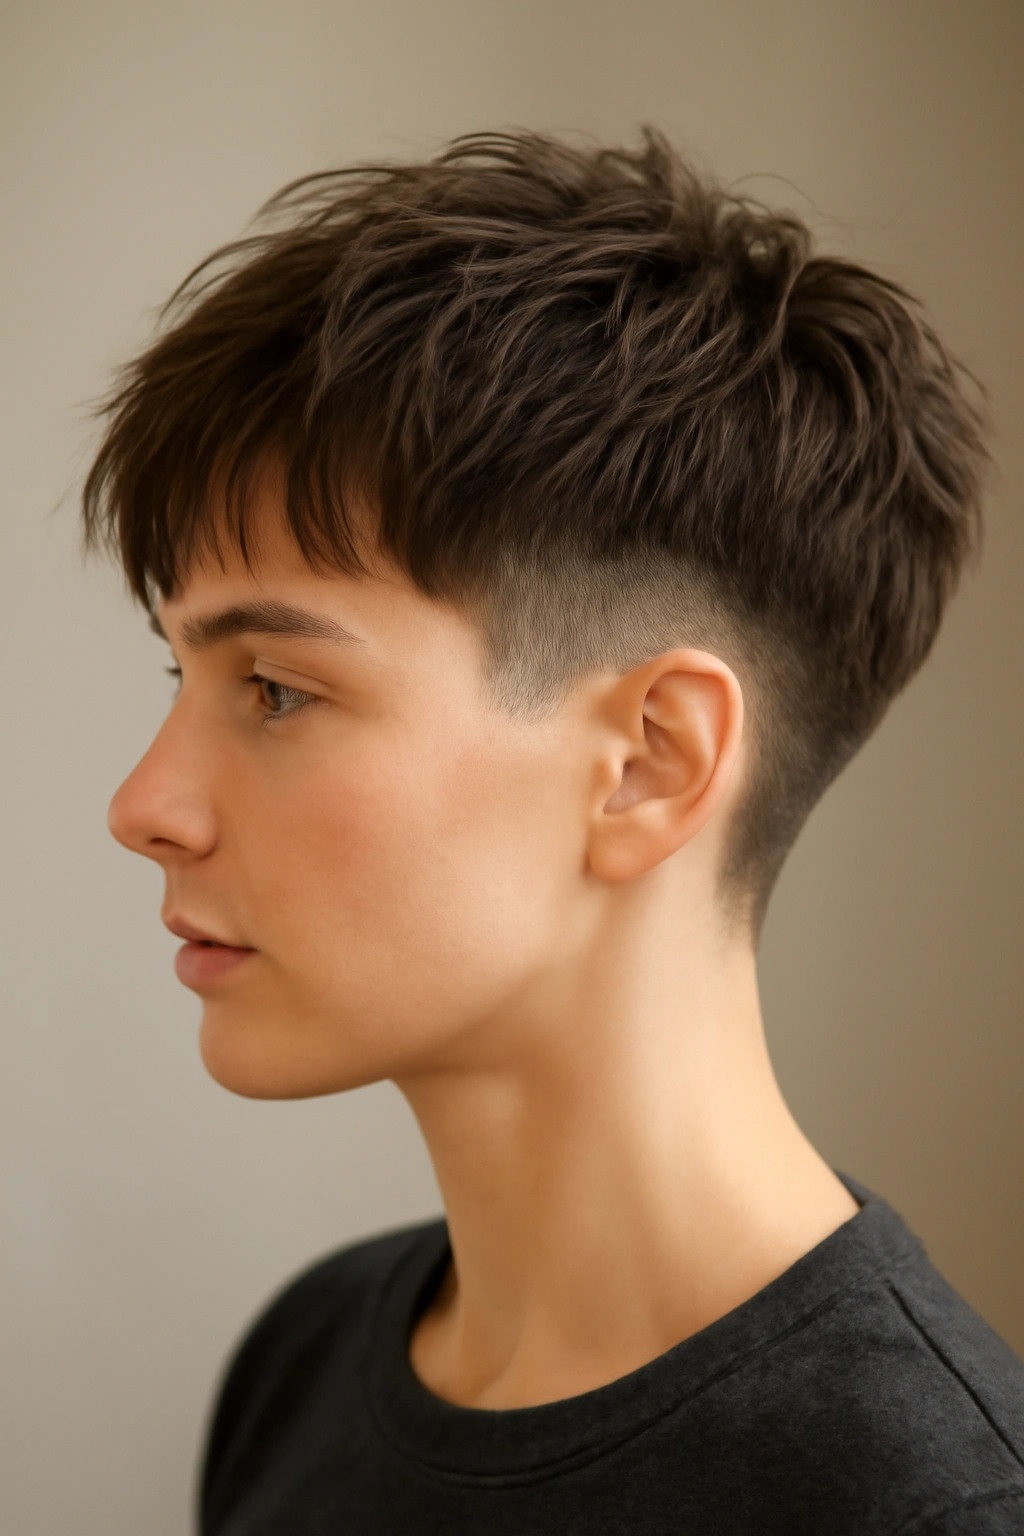
This is a bob with the sides and back cut very short (sometimes clipped even shorter), while the top stays longer and textured with shag-like layers. The contrast between the clean, minimal sides and the tousled top takes minimal time to style because the undercutting naturally creates movement that makes everything look intentional.
The Science Behind Why This Saves Time
When you remove weight from the sides and back, the top layers have more freedom to move and stack naturally. You’re working with gravity instead of against it. There’s no heavy density that needs to be blown out or smoothed down. Even when your hair is slightly damp from sleep, the shorter sides and back air-dry quickly while the textured top dries into that desirable piecey, lived-in texture.
Minimal Styling Steps for Maximum Impact
Wake up, refresh the texture of the top layers with your fingers and a little texturizing spray or sea salt spray, and you’re done. If you shower in the morning, let your hair air-dry about 80 percent of the way, then use your fingers or a wide-tooth comb to separate the top layers. The undercut sides don’t need any attention—they just sit clean and close to your head. On days you have three extra minutes, a quick blow-dry of just the top section adds volume and definition.
Customizing for Your Hair Texture
Fine hair benefits from a shaggy top because the layers create the illusion of thickness. Thick or curly hair works beautifully because the texture is already built in—just add product and go. Straight hair needs a little more product to maintain the piecey look, but the undercut makes the whole style read as intentional rather than flat. The key is matching the layer length to your hair type: shorter, choppier layers for fine hair; deeper, longer layers for thick or curly textures.
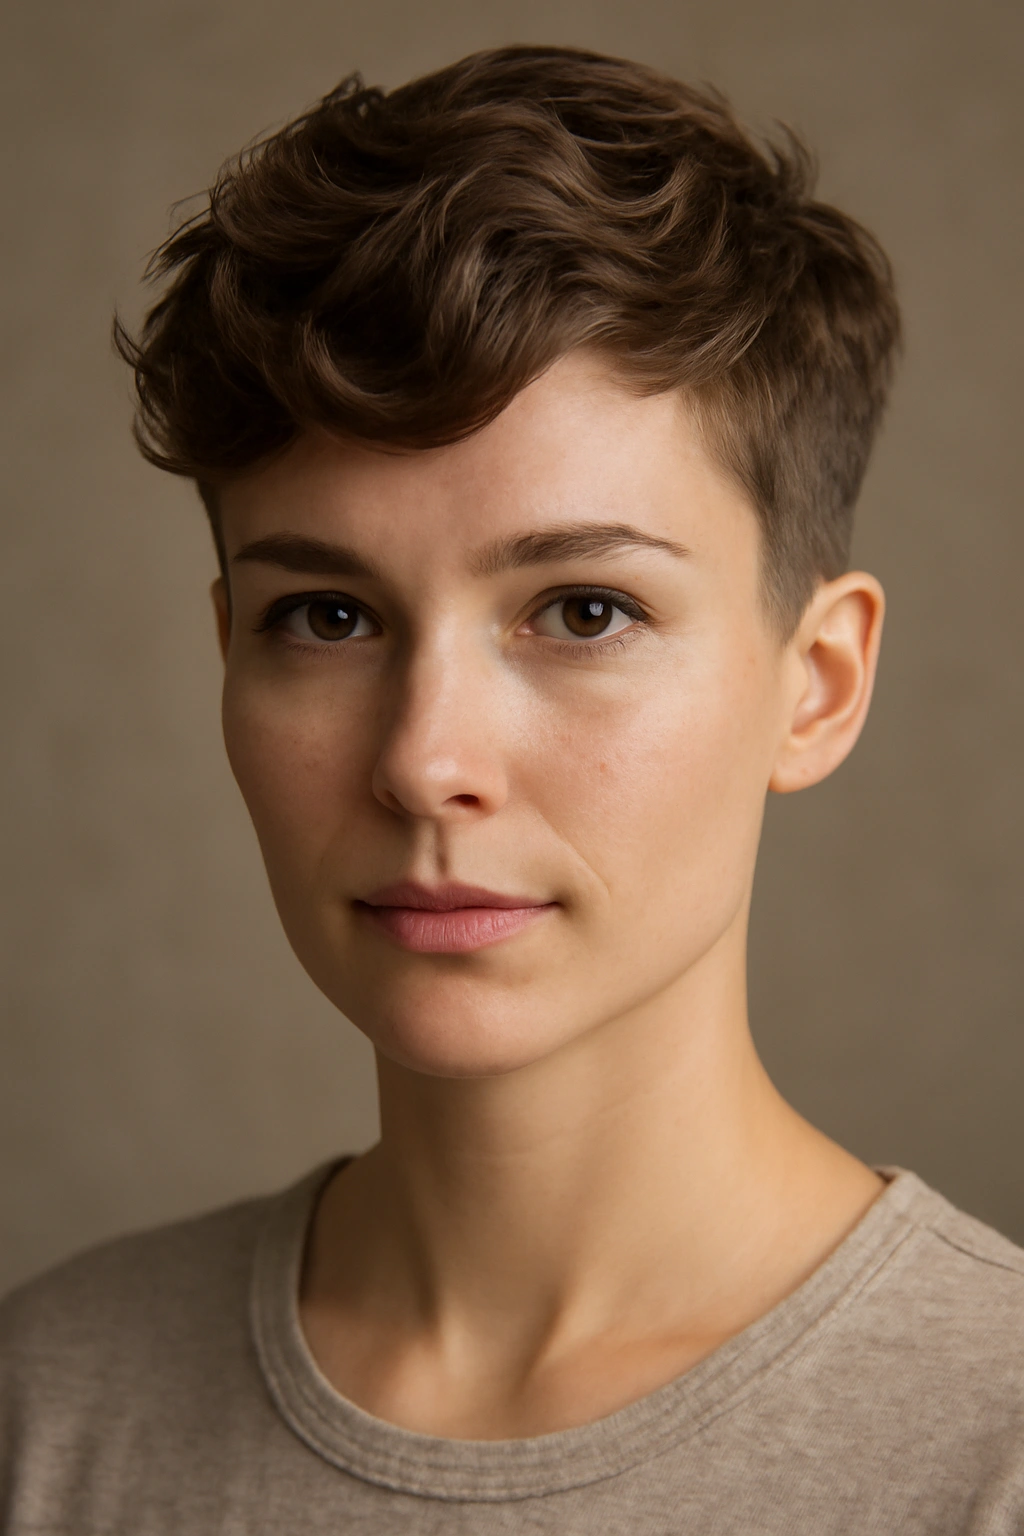
3. The Sleek Crop with a Deep Side Part
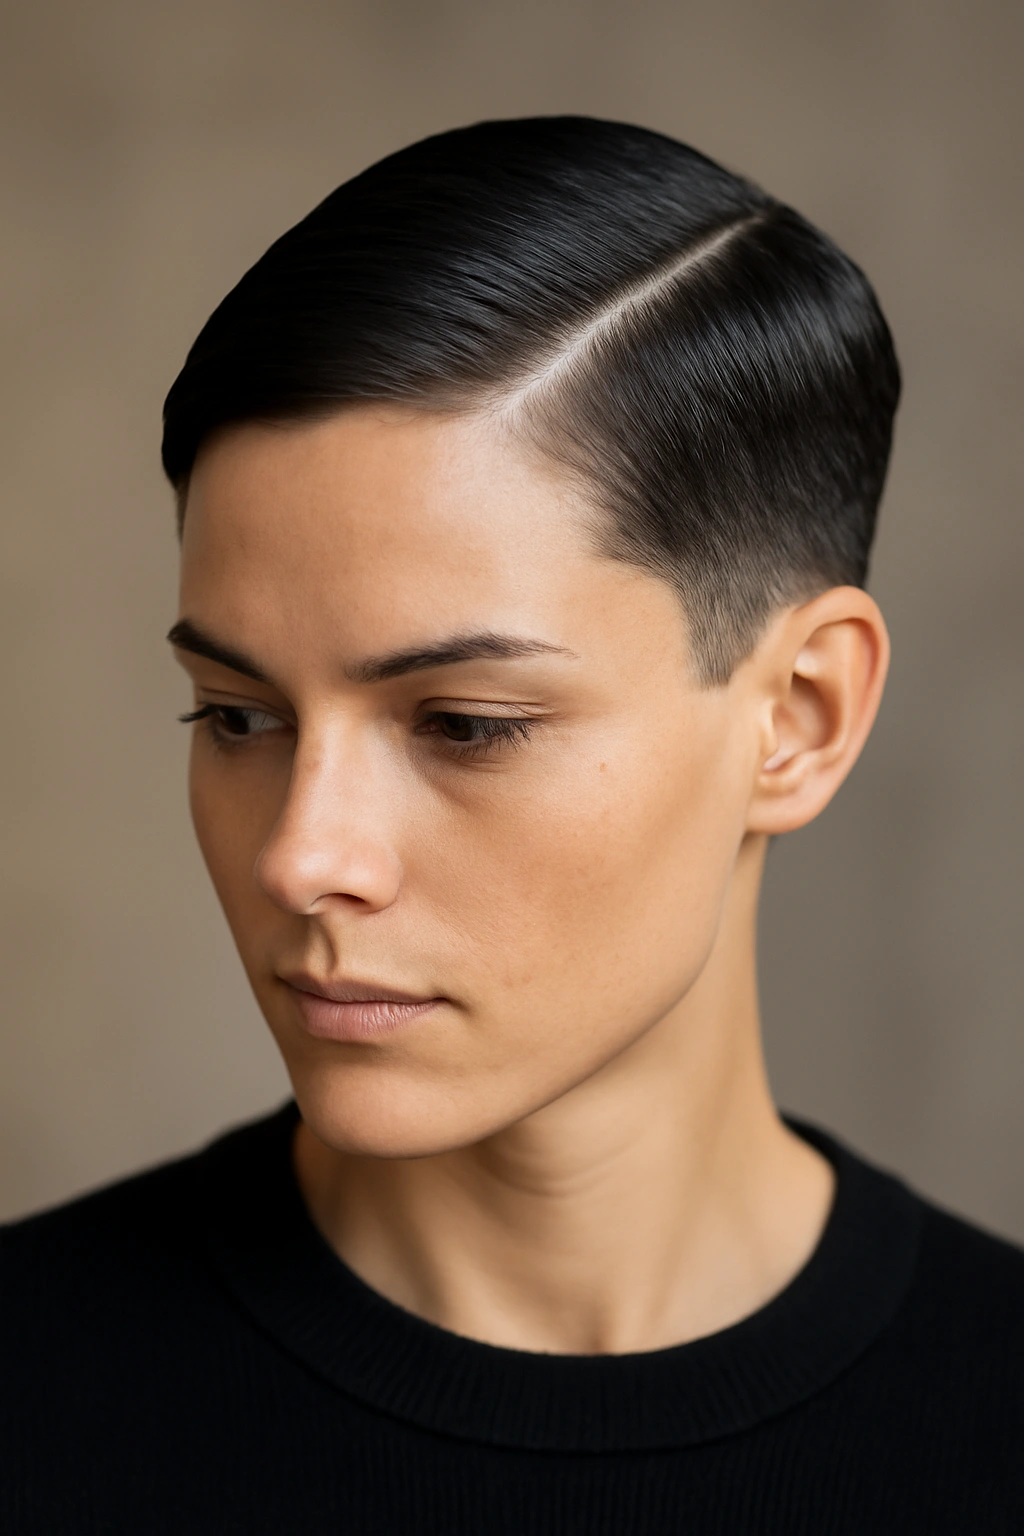
A very short, close-fitting crop (usually an inch or less all over) styled with a sharp, deep side part is the uniform of people who’ve decided that looking polished is the best shortcut to appearing put-together. This style says “I have my life together” even when you’re running twenty minutes behind.
The Efficiency of Geometric Precision
A sleek crop dries fast because there’s barely any hair to dry. The challenge isn’t styling it—it’s maintaining the clean shape and making sure you’ve got enough product to keep everything smooth and intentional. This is the style for people who either blow-dry their hair every morning (because it’s genuinely quick) or who don’t mind washing their hair daily and letting it air-dry into its natural shape.
The Three-Minute Styling Process
After washing or waking up, apply a light smoothing cream or pomade to damp hair, comb everything back and to one side with a fine-tooth comb, and blow-dry while pushing everything in the direction of the part. The entire process takes three minutes if you’re efficient. If you skip the blow dryer and let it air-dry, you’ll need to reapply product and comb it through once it’s dry, which takes about two minutes.
Making It Work Year-Round
Humidity is this style’s only real challenge. On humid days, apply a light hold hairspray after styling to lock everything in place. A smoothing serum under your styling product helps fight frizz and keeps the sleek finish intact. The key is using the right product weight—too heavy and the style looks greasy; too light and it won’t hold the shape. Find the middle ground with a lightweight pomade or cream that offers hold without buildup.
4. The Messy Textured Crop with Volume
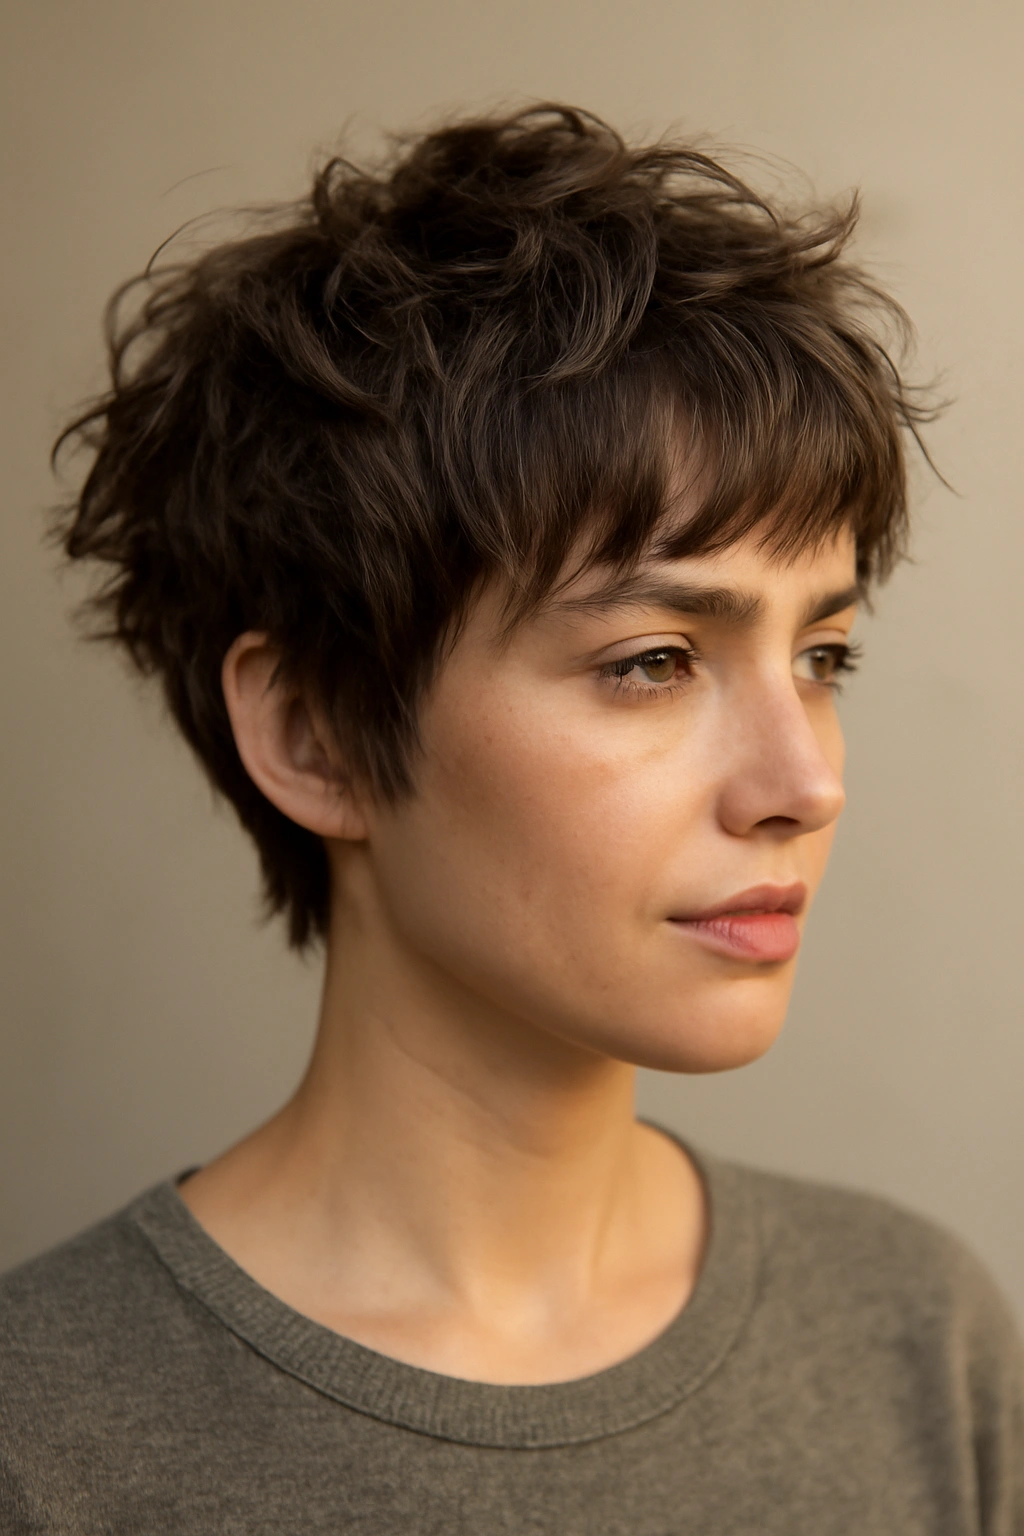
This is a crop that’s slightly longer than the sleek version (usually one to two inches) and cut with choppy, uneven layers that encourage texture and movement rather than smooth precision. It’s the “I woke up like this” version of short hair, and it genuinely takes less time to style than it looks.
Why Choppy Layers Are Your Morning Shortcut
When a stylist cuts choppy, face-framing layers into a crop, you’re not actually creating extra work—you’re creating built-in texture that works with bedhead rather than against it. Your hair naturally wants to separate and move in different directions, and this cut uses that to its advantage. The styling isn’t about making everything neat and uniform; it’s about enhancing the texture that’s already there.
The Finger-Comb Approach
This is genuinely one of the quickest hairstyles in existence. Wake up, run your fingers through your hair with a little texturizing spray or dry shampoo, and you’re done. Spend thirty extra seconds separating the longer pieces around your face if you want definition, but that’s optional. This style looks intentional whether it’s slightly messy or more defined, so the level of effort you put in is entirely up to your morning timeline.
Adding Product for More Definition
On days when you want more texture or hold, work a small amount of matte paste or cream pomade through your hair with your fingers. Start at the roots and work through, making sure the product is evenly distributed so one section doesn’t look greasy while another looks flat. The matte finish is crucial—a shiny pomade makes texture look sloppy instead of stylish; a matte finish makes it look intentional.
5. The Graduated Bob with Flipped-Out Ends
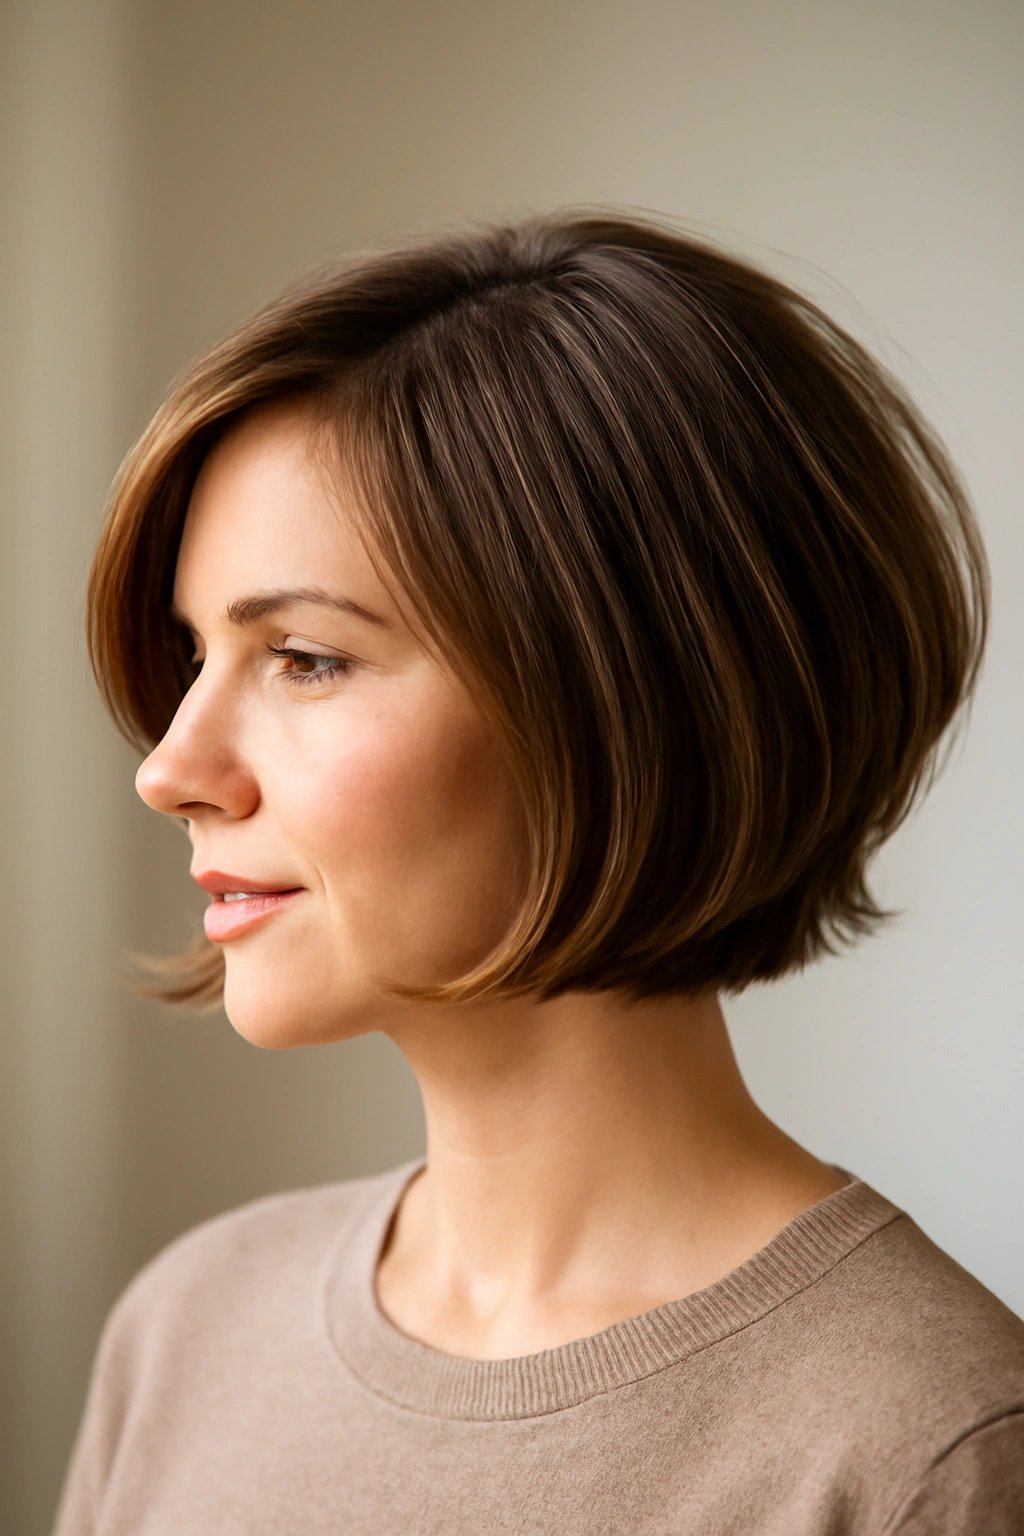
A graduated bob is longer in the front and shorter in the back, and when you flip the ends outward slightly, it creates a modern, polished look that seems more complicated than it actually is to achieve. The flip happens naturally if the cut is right and you use the right styling technique.
How the Cut Does Most of the Work
A good graduated bob is cut at angles that make the ends want to flip outward without forcing them to. Your stylist is essentially giving you a cut that works with the natural pattern of your hair. This means that even with minimal styling, the ends naturally turn out slightly, creating shape and movement. You’re not fighting the cut; you’re just enhancing what’s already built in.
The Blow-Dry Technique That Saves Time
Blow-dry your hair straight first, then use a round brush on just the ends of each section, rolling the brush out and away from your face as you dry. This takes about five to seven minutes for a bob but creates that finished, intentional flipped-out look that actually looks polished. If you’re in a huge rush, skip the round brush—even with just a regular blow dryer, the ends of a well-cut graduated bob flip naturally.
The Quick-Dry Alternative
If you don’t blow-dry, wash your hair, apply a lightweight styling cream to damp hair, and let it air-dry in a loose braid or twist. When you take it down (either in the car or at your desk), the braid texture adds volume and helps the ends flip naturally. You’ve essentially created styled waves and flipped ends with zero actual styling, just by planning ahead the night before.
6. The Tousled Shag
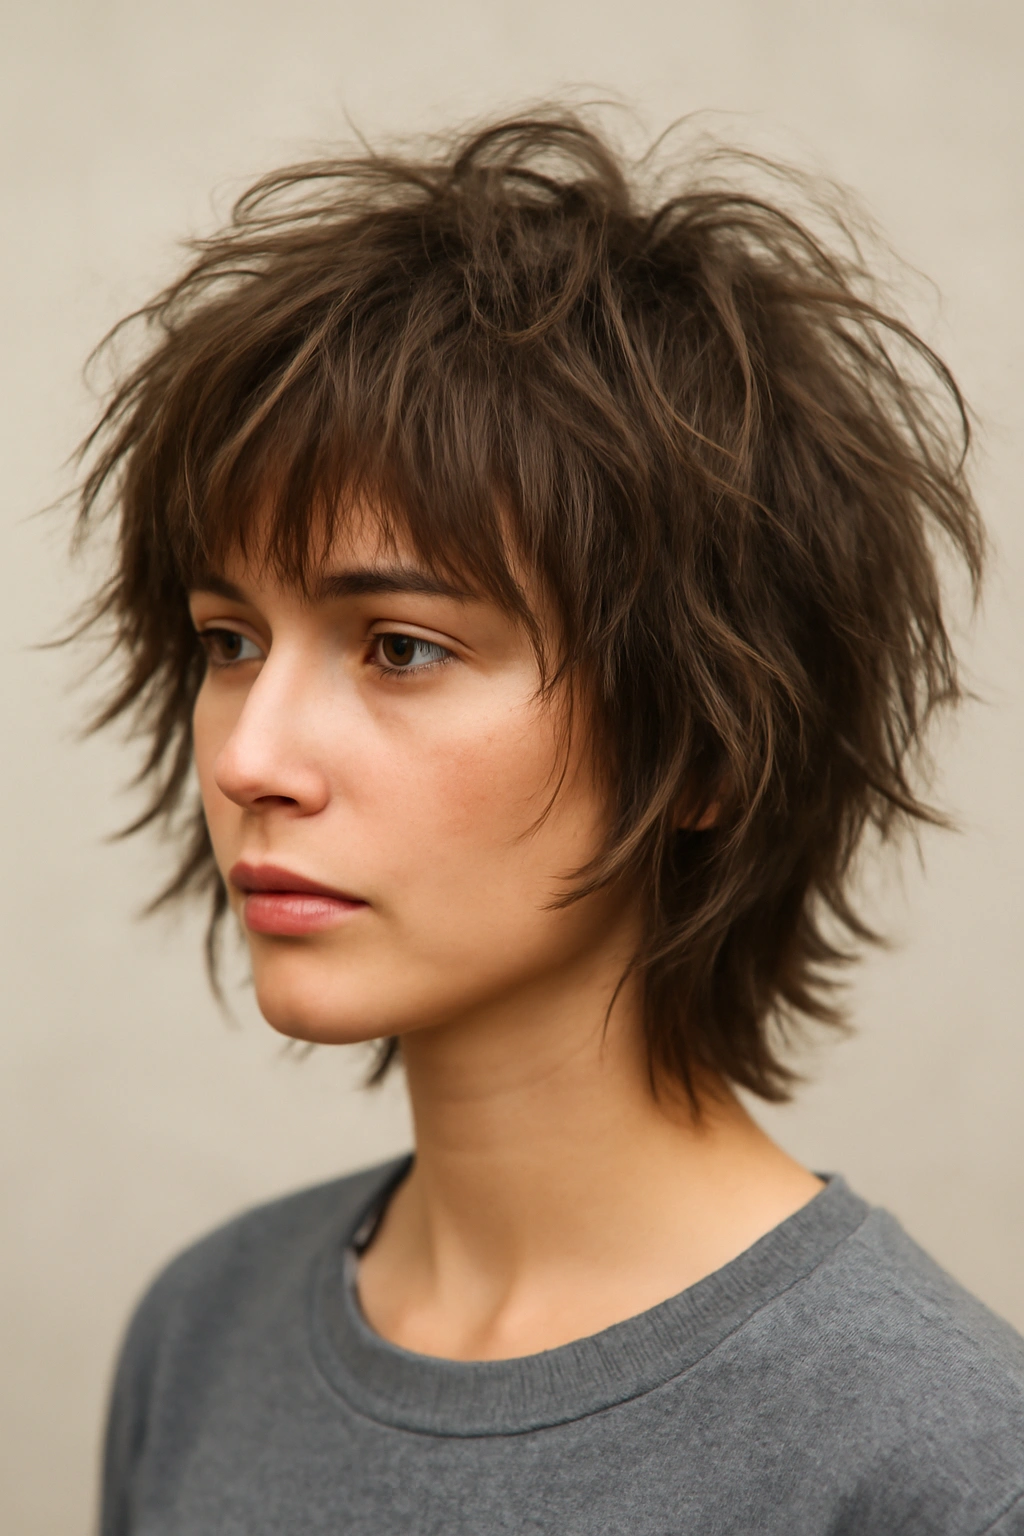
A shag is layered throughout the entire head (unlike the undercut bob, where only the top is layered), creating movement and volume everywhere. It’s cut to look perpetually windswept and textured, which means your natural bedhead is actually part of the design.
Built-in Movement That Requires Almost No Work
Shags are specifically designed to accommodate texture, movement, and the random directions hair falls naturally. There’s no “wrong” way for a shag to fall because the entire cut is built on the premise that layers create movement that looks good no matter what. Wake up, run your fingers through it, add texture spray if you want, and you’ve got a fully styled look.
Product Strategy for Maximum Texture
The key to making a shag look intentionally tousled rather than just messy is using the right product and technique. A sea salt spray or texturizing spray adds grit and separation, making individual layers visible and intentional. Work it through your damp hair, scrunch it up toward the roots to encourage volume, and let it dry (either in the air or with a quick blow-dry). The product gives your hair enough grip to hold the tousled shape without looking wet or product-heavy.
Why Shags Work for All Hair Types
Fine hair gets the appearance of thickness from all those layers. Thick or curly hair embraces its natural texture instead of fighting it. Straight hair gets movement and shape from the layers. Unlike a style that requires blowouts or careful styling, a shag is forgiving across every hair type because it’s designed to work with your hair’s natural behavior, not against it.
Maintaining Shag Shape Between Cuts
Because a shag relies on layers to create shape, you’ll need trims every four to six weeks to keep the layers sharp and distinct. The good news is that trims are quick because your stylist is just refreshing the layered ends, not creating a whole new cut. Schedule trims as part of your routine, and the style will always look fresh and intentional.
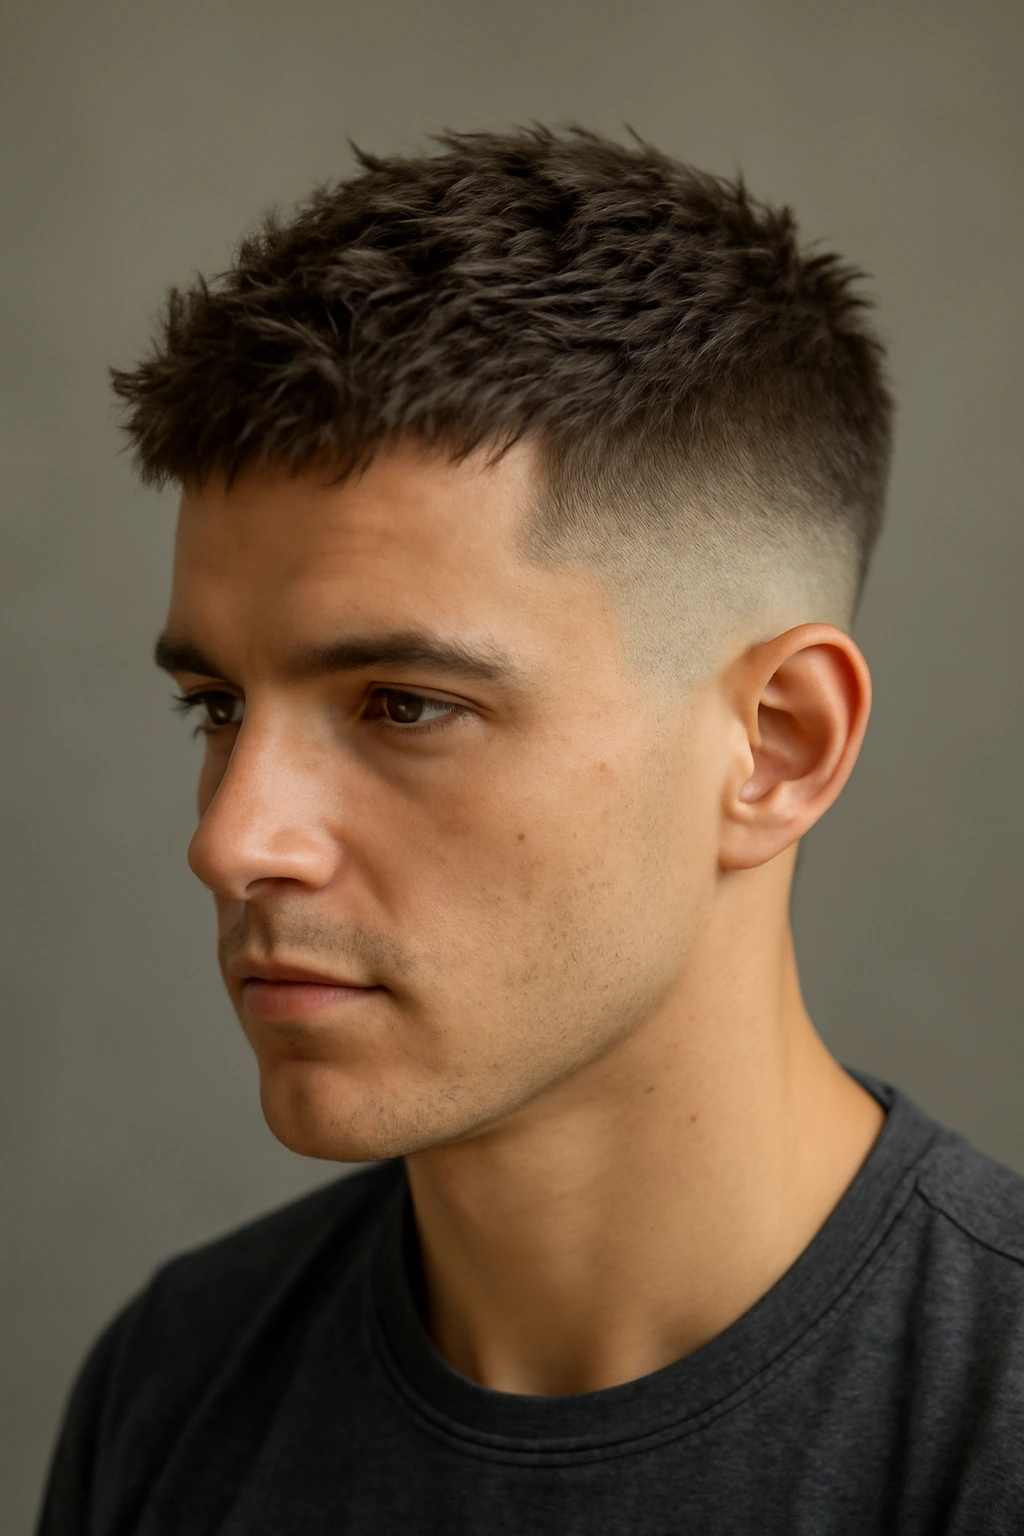
7. The Tapered Undercut with Slicked-Back Top
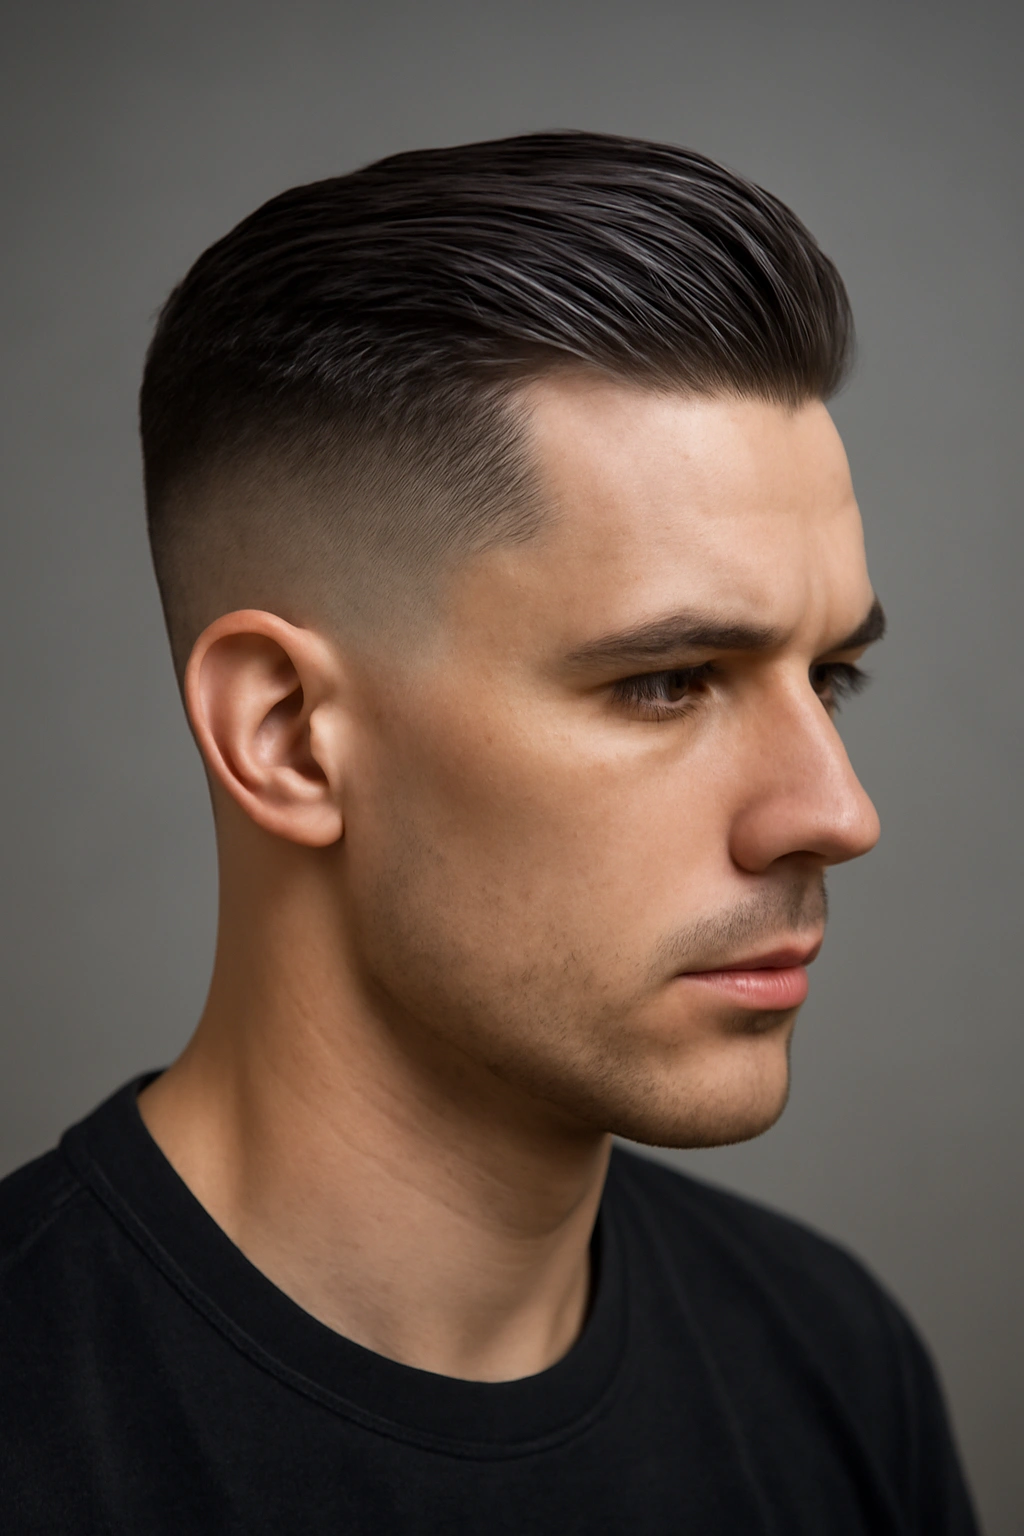
This is a style where the sides and back are tapered very short (almost shaved in some cases) and the top is left longer, styled back and away from the face with pomade or gel. It’s sharp, modern, and reads as intentional even when styled in under five minutes.
The Contrast That Creates Visual Impact
The dramatic difference between the short sides and longer top makes the style look deliberate and high-effort, even when the actual styling process is remarkably simple. You’re not trying to blend everything into a cohesive, soft shape—you’re leaning into the contrast. That contrast does a lot of the visual work for you, so the actual styling is minimal.
Quick Styling for a Sharp Finish
Apply a pomade or gel to your damp hair, use a comb to push everything straight back, and blow-dry while combing backward. This takes about three to four minutes. If you air-dry, apply product to damp hair, comb it back, and let it dry; you just won’t get quite as much hold or shine. For a more casual version, apply product to dry hair, comb back, and go—the result is slightly less polished but still looks intentional.
Pomade Weight Matters
A heavy pomade works best for this style because you need enough hold to keep everything slicked back throughout the day. The shine that comes with most pomades actually enhances the look—it emphasizes the smoothness and control. If you prefer matte finishes, look for a matte pomade or a texturizing paste, but know that the slightly shinier pomade will give you the sleekest, most polished version of this cut.
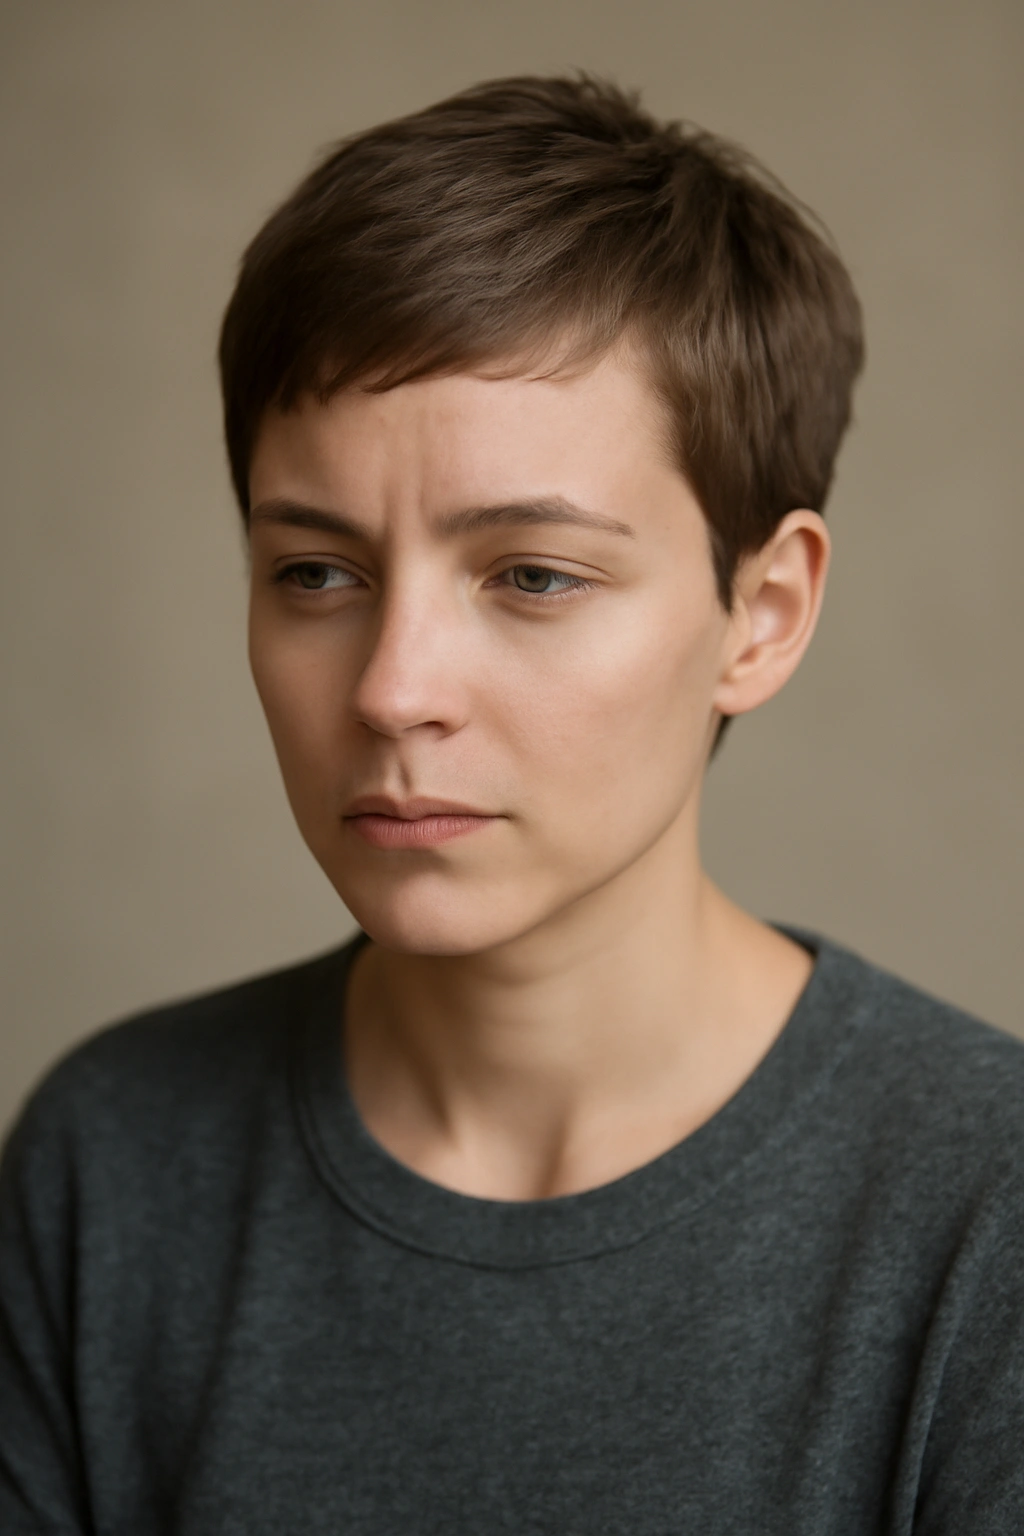
8. The Wavy Pixie with Length on Top
A pixie where the sides are short but the top is left longer (usually three to four inches) and styled in soft waves creates a feminine, romantic look that’s still exceptionally quick to style. It’s feminine without being high-maintenance.
Creating Waves Without Curling Irons
The fastest way to create waves in a pixie is using salt spray and your fingers. Spray damp hair generously, scrunch it up toward the roots, and either air-dry or blow-dry with your fingers working through the hair (not with a brush). The texture spray gives you the grit to hold a wave shape without needing to use a curling iron or flat iron. If you blow-dry, use your fingers to scrunch and lift as you dry, encouraging the wave pattern.
Embracing Second-Day Hair
One advantage of the wavy pixie is that it often looks better on the second day, when the texture is set and the waves are more defined. If you wash your hair at night, let it dry in a loose braid, then release it in the morning and add texture spray. You’ll have beautifully defined waves with zero heat styling. This makes it a genuinely quick style even if you’re also trying to minimize heat damage to your hair.
Length Variations for Different Preferences
Shorter hair on top (two inches) gives you a more playful, androgynous look. Longer hair on top (four inches) reads as more traditionally feminine. Either way, the styling is identical—salt spray, fingers, and maybe a little blow dryer. The length is purely a personal preference and doesn’t affect the morning styling time at all.
9. The Clean-Lined Asymmetrical Bob
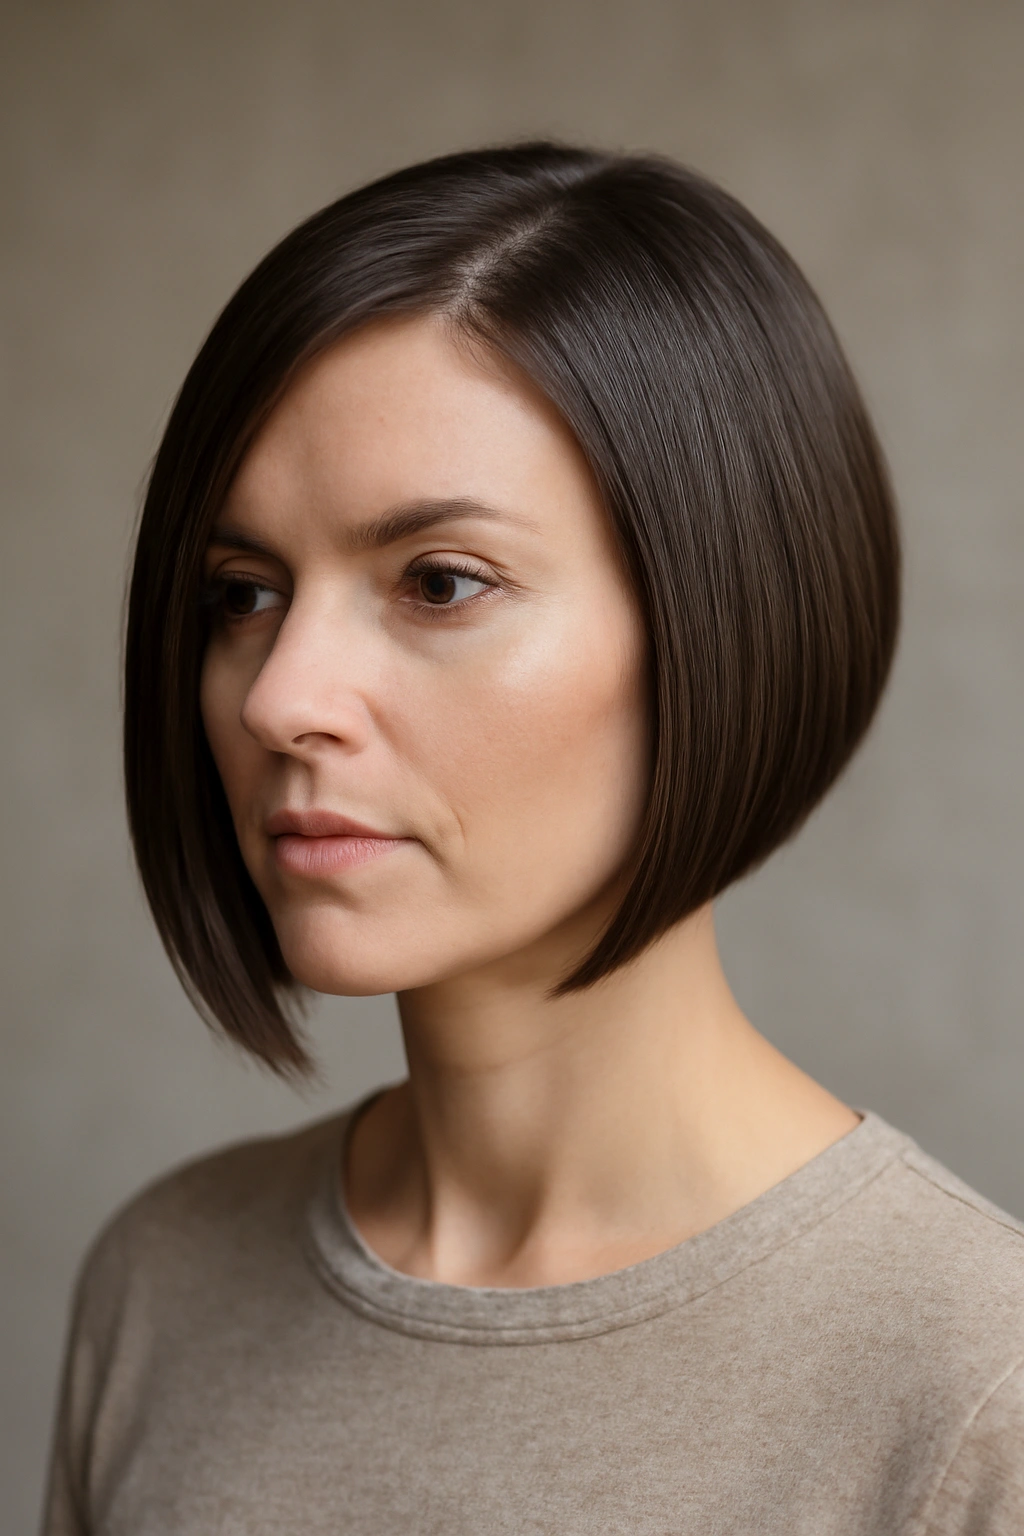
An asymmetrical bob is longer on one side and shorter on the other, with clean lines and geometric precision. It’s modern, catches light beautifully, and the asymmetry reads as intentional styling even when you’ve done almost nothing.
Geometry as Your Styling Shortcut
The clean lines of an asymmetrical bob mean you don’t need texture or movement to make it look styled—the shape is the style. You can blow-dry this straight and smooth, and it will look intentional and polished. You don’t need layers, waves, or texture to make it work. This is actually a relief if you prefer simpler styling.
Blow-Dry Straightness for Precision
The fastest way to style an asymmetrical bob is to blow-dry it straight with a paddle brush. Blow-dry in the direction your hair grows, using a paddle brush to smooth and straighten as you go. This takes about five to seven minutes depending on hair thickness. The result is clean, precise lines that show off the asymmetrical cut beautifully.
Making It Work with Texture
If you prefer texture, this cut also works beautifully with light waves or a slightly tousled finish. The asymmetrical length keeps the style interesting even if it’s not perfectly straight. Add texture spray and dry with your fingers or a diffuser for a softer look. The geometry of the cut keeps it looking intentional even when you’ve added soft movement.
10. The Textured Crop Fade
This is the most low-maintenance option: sides faded very short (sometimes to skin, sometimes just clippered close) and the top left long enough for texture (usually one to three inches), cut with choppy layers for built-in movement.
Genuinely Minimal Daily Styling
A textured crop fade is the closest you can get to a truly wash-and-go style. Wash your hair, apply a tiny amount of texturizing spray or pomade to damp hair, and you’re done. The fade on the sides is so short that it dries instantly; the textured top dries with natural movement and shape built in from the cut. This is the ultimate quick hairstyle.
Maintenance Is the Trade-Off
The trade-off is that you need a fade touch-up every two to three weeks to keep the contrast sharp. The good news is that fade cleanups are quick (usually fifteen minutes) and inexpensive. If you’re willing to commit to regular trims, a textured crop fade is the lowest-effort hairstyle available. You’re never fussing with styling in the morning because there’s genuinely almost nothing to style.
Styling Options When You Have Time
On days when you want a more finished look, apply a matte pomade or cream to damp hair and style the top layers forward and upward with a comb or your fingers. On casual days, just spray and go. The beauty is that the style looks intentional either way—it’s not a default look that needs dressing up; it’s designed to work great with minimal effort.
Product Flexibility
You can wear this style with zero product, with a light texturizing spray, with a matte pomade for definition, or with a cream for hold and slight shine. The flexibility means you can adjust based on your day, your hair’s condition, and how much time you’re willing to spend. Most mornings, though, zero product or just a quick texture spray is all you need.
Final Thoughts
The best quick hairstyle for your busy mornings isn’t about finding something that requires literally zero maintenance—it’s about matching a cut and styling approach to how you actually live and what your hair naturally does. A textured pixie is genuinely quick if bedhead is your baseline, but it’ll feel like work if you prefer polished precision. An asymmetrical bob is fast if you love blow-drying, but it’s a hassle if you’re trying to avoid heat styling.
Pay attention to your honest morning routine: Do you shower in the morning or at night? Do you have five minutes or ten? Do you prefer texture and movement, or clean lines and precision? Is your hair naturally wavy, curly, or straight? Once you know what you actually work with—not what you wish you worked with—you can choose a cut that genuinely saves time instead of one that just promises to. The styling techniques that save the most time are the ones built into the cut itself, where the shape, layers, and proportions do most of the heavy lifting and your five-minute routine just enhances what’s already there. That’s how a short hairstyle becomes a genuine time-saver on rushed mornings, instead of becoming just another thing on your growing to-do list.