Wavy pixie cuts have become the ultimate answer for anyone who wants a chic, textured cut without the daily styling marathon. The magic is in the cut itself—when a pixie is shaped intentionally for waves rather than sleek lines, your natural texture becomes the feature, not something you have to fight against. Throw wash-and-go pixies into that equation, and you’ve got a hairstyle that looks intentional and polished while requiring minimal effort beyond a quick shower and maybe some product.
The beauty of these styles lies in how they work with your hair’s natural tendencies rather than against them. Whether you’ve got loose waves, natural curls, or even straighter hair that holds a bend, there’s a wavy pixie variation that’ll look effortlessly chic on you. These aren’t one-size-fits-all cuts—they’re strategic shapes designed so that when your hair dries naturally or with minimal styling, it falls into flattering texture and movement.
What makes a pixie truly wash-and-go worthy isn’t just the length or layers. It’s the placement of shorter and longer pieces, how the sides taper, and where the stylist positions waves and texture to frame your face in the most flattering way. Some of these styles work best on rounder faces, others on longer faces, and some are genuinely versatile enough for almost anyone willing to embrace a little texture. Let’s walk through the pixie variations that actually deliver on the wash-and-go promise without looking flat or requiring a flat iron to look decent.
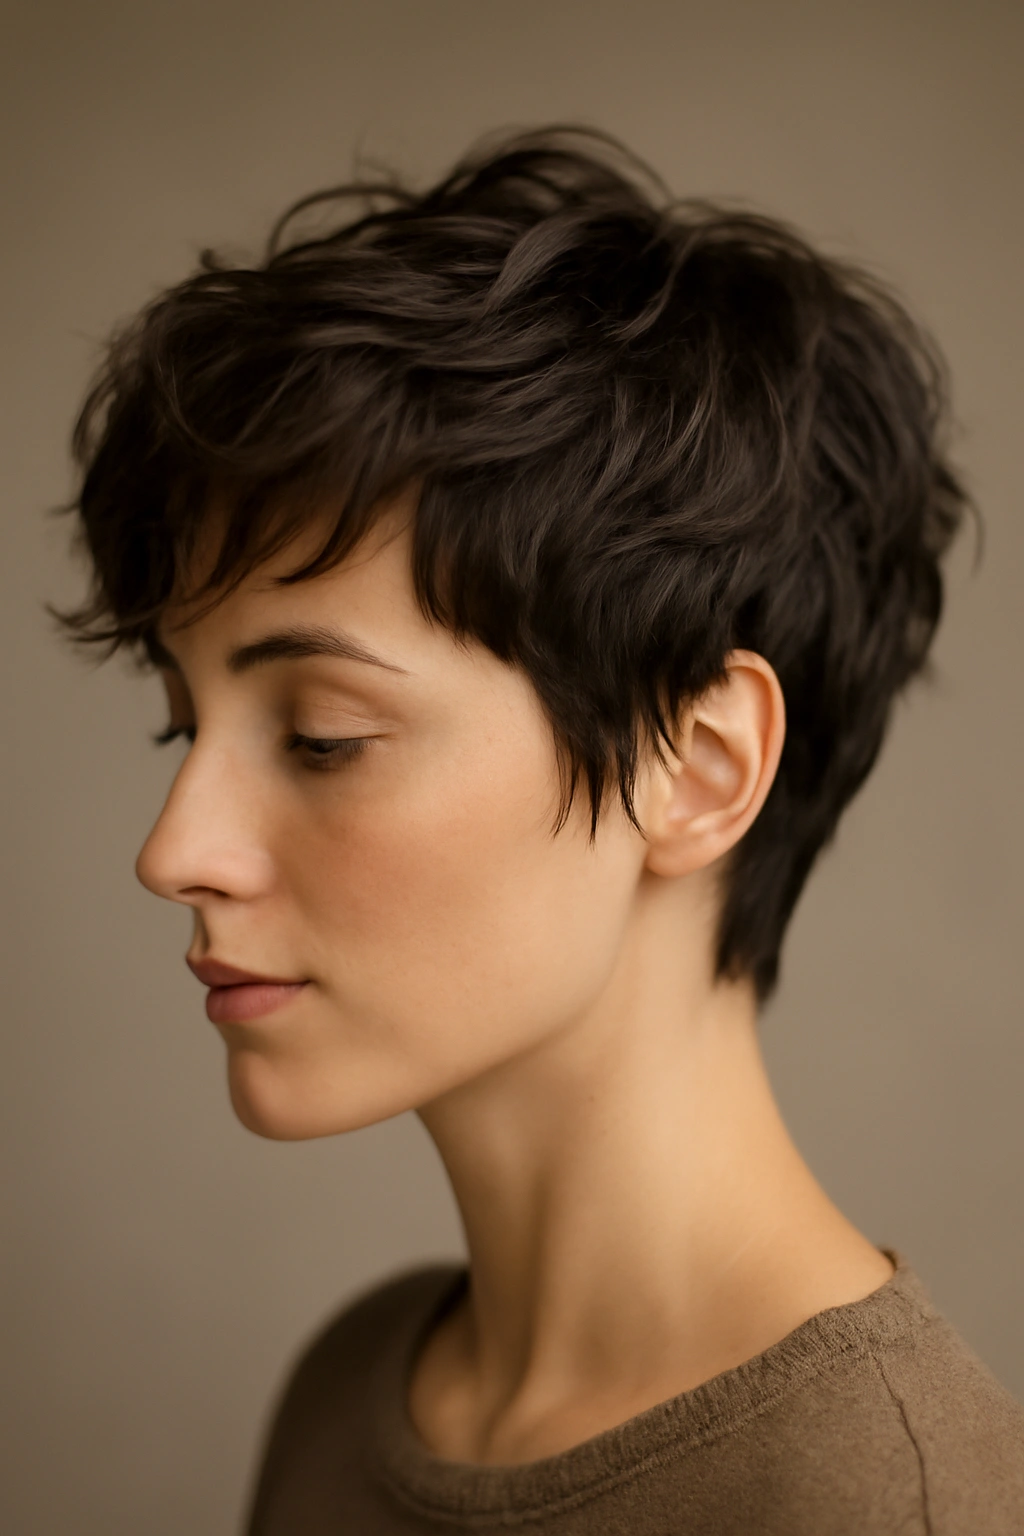
1. The Textured Wisp Pixie
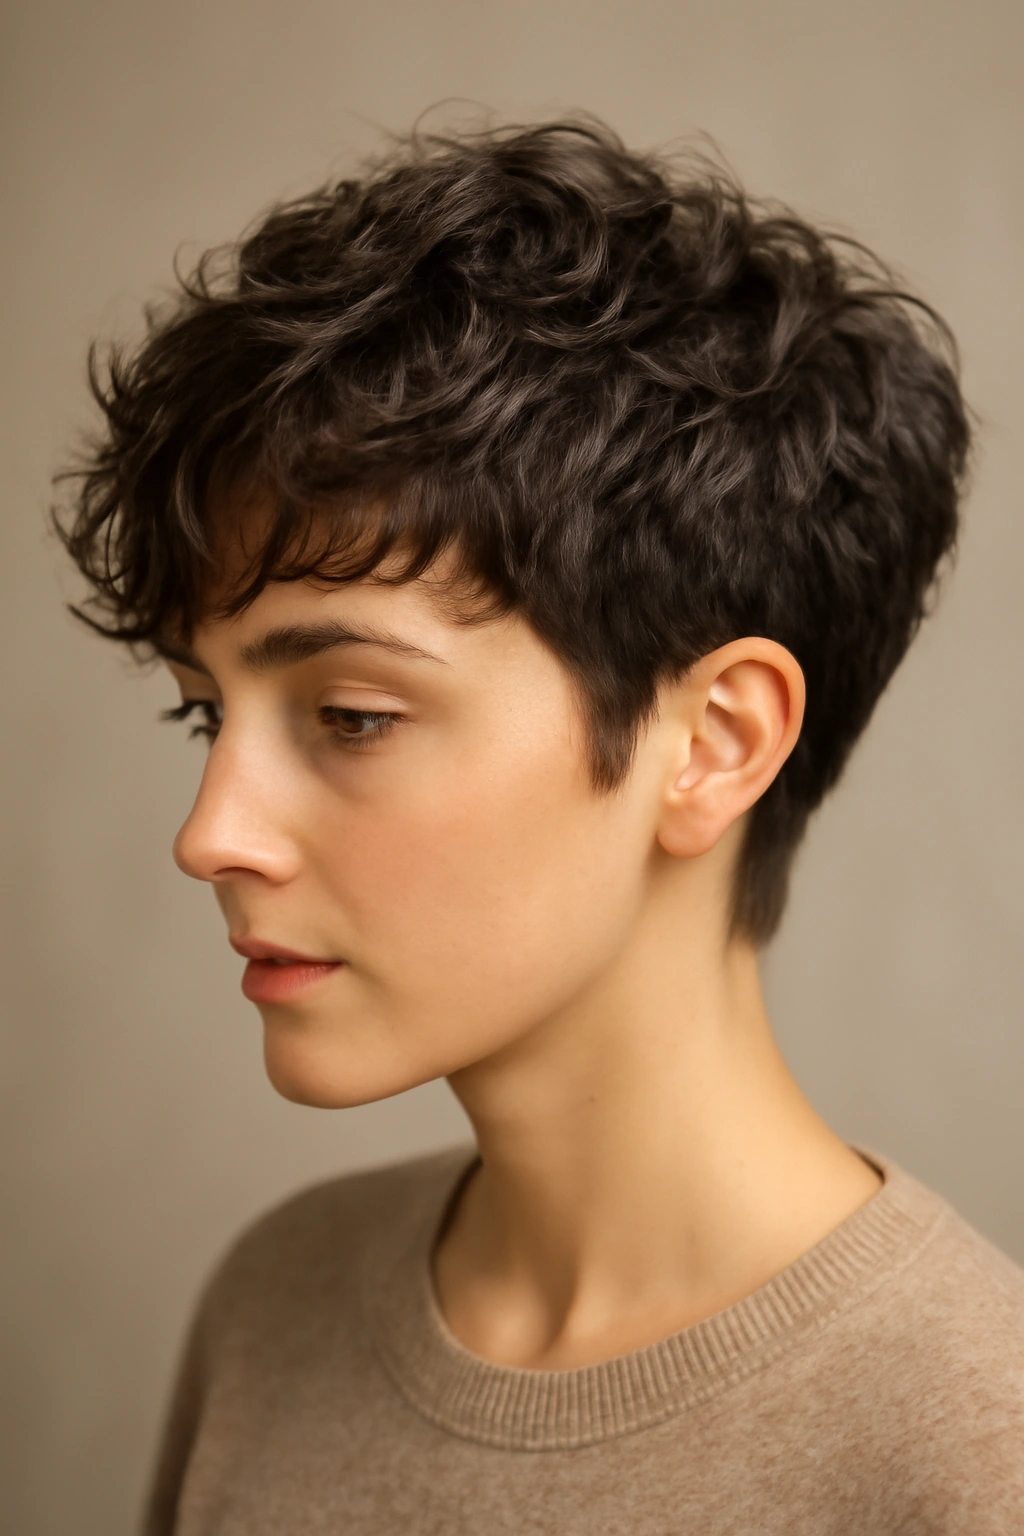
This style keeps significant length on top—think 2 to 3 inches—while tapered sides create a delicate contrast. The longer top is heavily layered and pieced out so that when you wash it, the layers naturally separate and create soft, wispy waves that catch light beautifully. The shorter, textured sides prevent the whole look from feeling bulky, which is crucial because you’re not going to blow-dry this into submission.
Why This Works for Wash and Go
The secret is in the layering strategy. Instead of blunt layers, your stylist should use point-cutting or razor techniques to create choppy, disconnected pieces that have movement built into the geometry of the cut itself. When water hits these layers while you’re washing, they separate naturally and set that way as they dry. You’re essentially building the wave texture into the cut, so the hair does the heavy lifting for you. The tapered sides also mean you don’t have bulk around your face—just soft, textured waves that frame without weighing down.
How to Style It When You Want Extra
On days when you want more definition, a lightweight texturizing spray or sea salt spray applied to damp hair creates more pronounced waves without crunch. Scrunch it in gently while the hair’s still damp and let it air dry, or use a diffuser attachment on your blow dryer if you’re in a hurry. The built-in movement means you’re enhancing what’s already there, not creating texture from scratch.
Quick Styling Facts
- Dries best without heat—just air dry for maximum wave definition
- Works especially well if you have naturally wavy or curly hair already
- Requires a trim every 4-6 weeks to maintain the textured layers
- Looks best when styled with your natural hair texture, not straightened
Real talk: This style rewards you for embracing your hair’s natural wave pattern. If you’ve been fighting your texture your whole life, this pixie is permission to stop.
2. The Shaggy Wavy Pixie
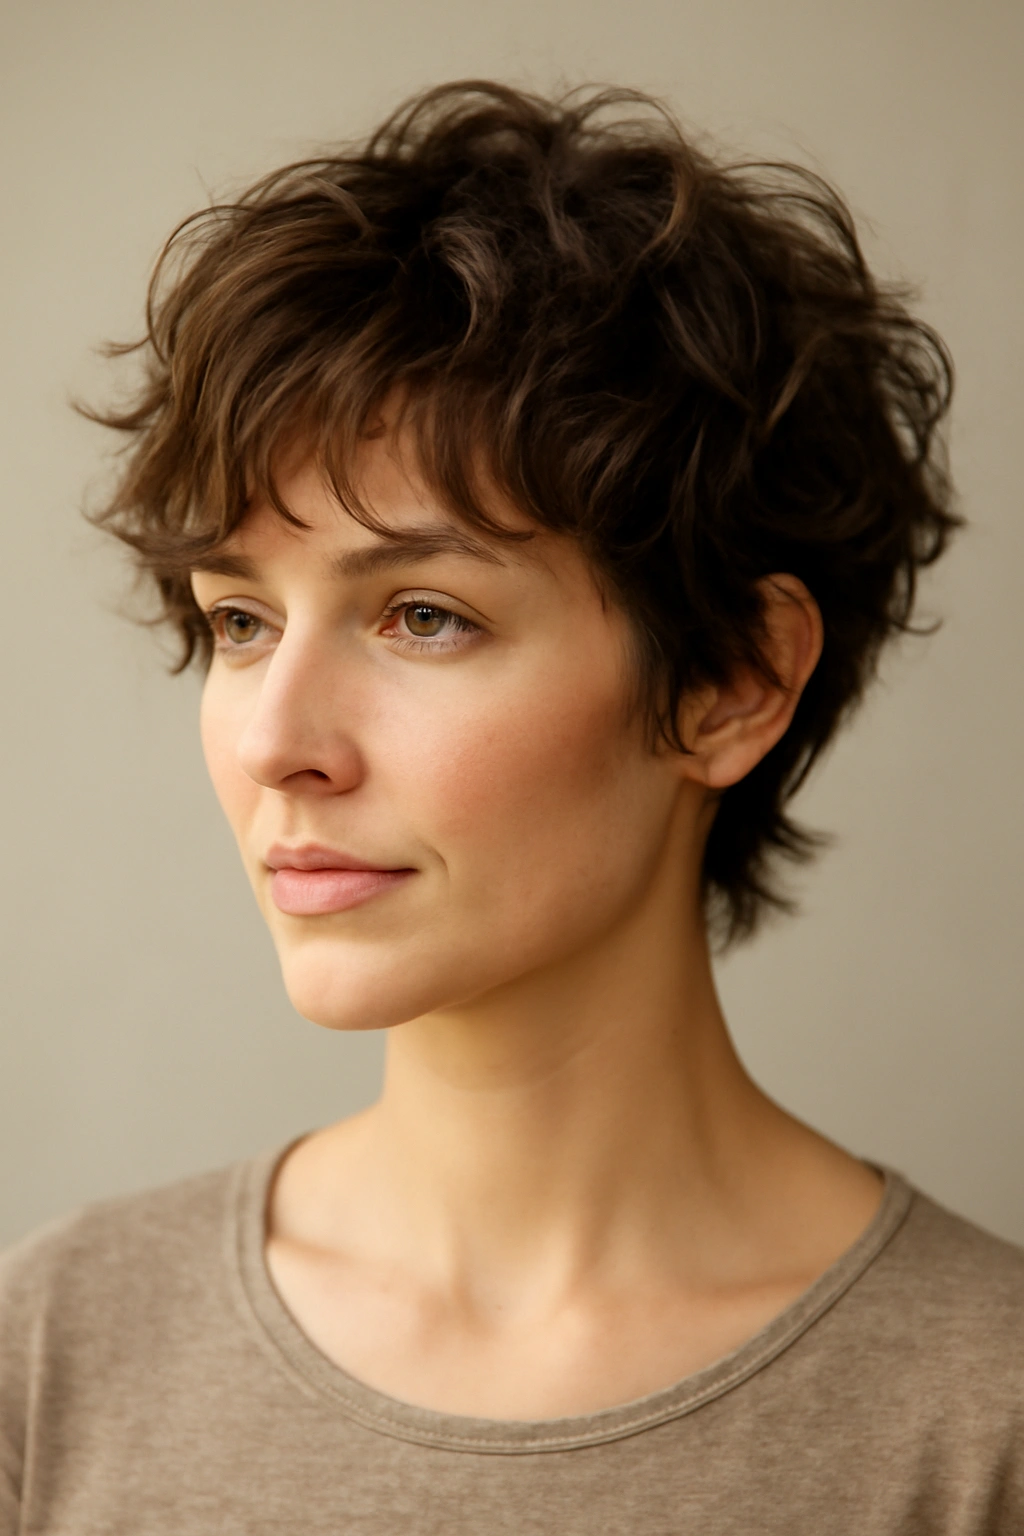
Shag pixies lean into that ’70s-inspired movement with longer pieces throughout, especially around the face and crown. Shorter, tapered sides keep it undeniably a pixie, but the length and layering create immediate texture and dimension. When you wash your hair, those layers dry into soft, undulating waves that feel lived-in and intentional.
Why This Works for Wash and Go
Shag pixies thrive on movement, which is exactly what wash-and-go styling creates. The multiple lengths work together so that no matter which direction your hair dries, some pieces are long enough to wave, some are short enough to stick up for texture, and the overall effect reads as deliberately tousled rather than accidentally messy. The key is that every layer has a purpose in the silhouette—nothing is random.
How to Get Maximum Waves
This is one pixie style where a bit of product can genuinely enhance the look without being required. A leave-in conditioner or lightweight wave-enhancing spray applied to damp hair helps define the layers as they dry. Flip your head upside down while it’s still damp and let your hair fall that way for a few minutes—gravity helps set bigger waves into those longer pieces. Once it’s mostly dry, you can flip back up and finger-comb through it to break up any crunchy sections and separate the layers.
What Makes It Different
- Longer pieces around the face create softer framing than very short pixies
- Multiple layers mean texture from every angle, not just the top
- The shagginess itself creates movement—you don’t need to add much to get impact
- Blends beautifully if you’re transitioning to shorter hair from longer styles
Worth knowing: This style needs a skilled stylist who understands how to layer for movement. Ask to see before-and-after photos specifically of shag pixies they’ve cut—the difference between a great shag and a choppy mess comes down to technique.
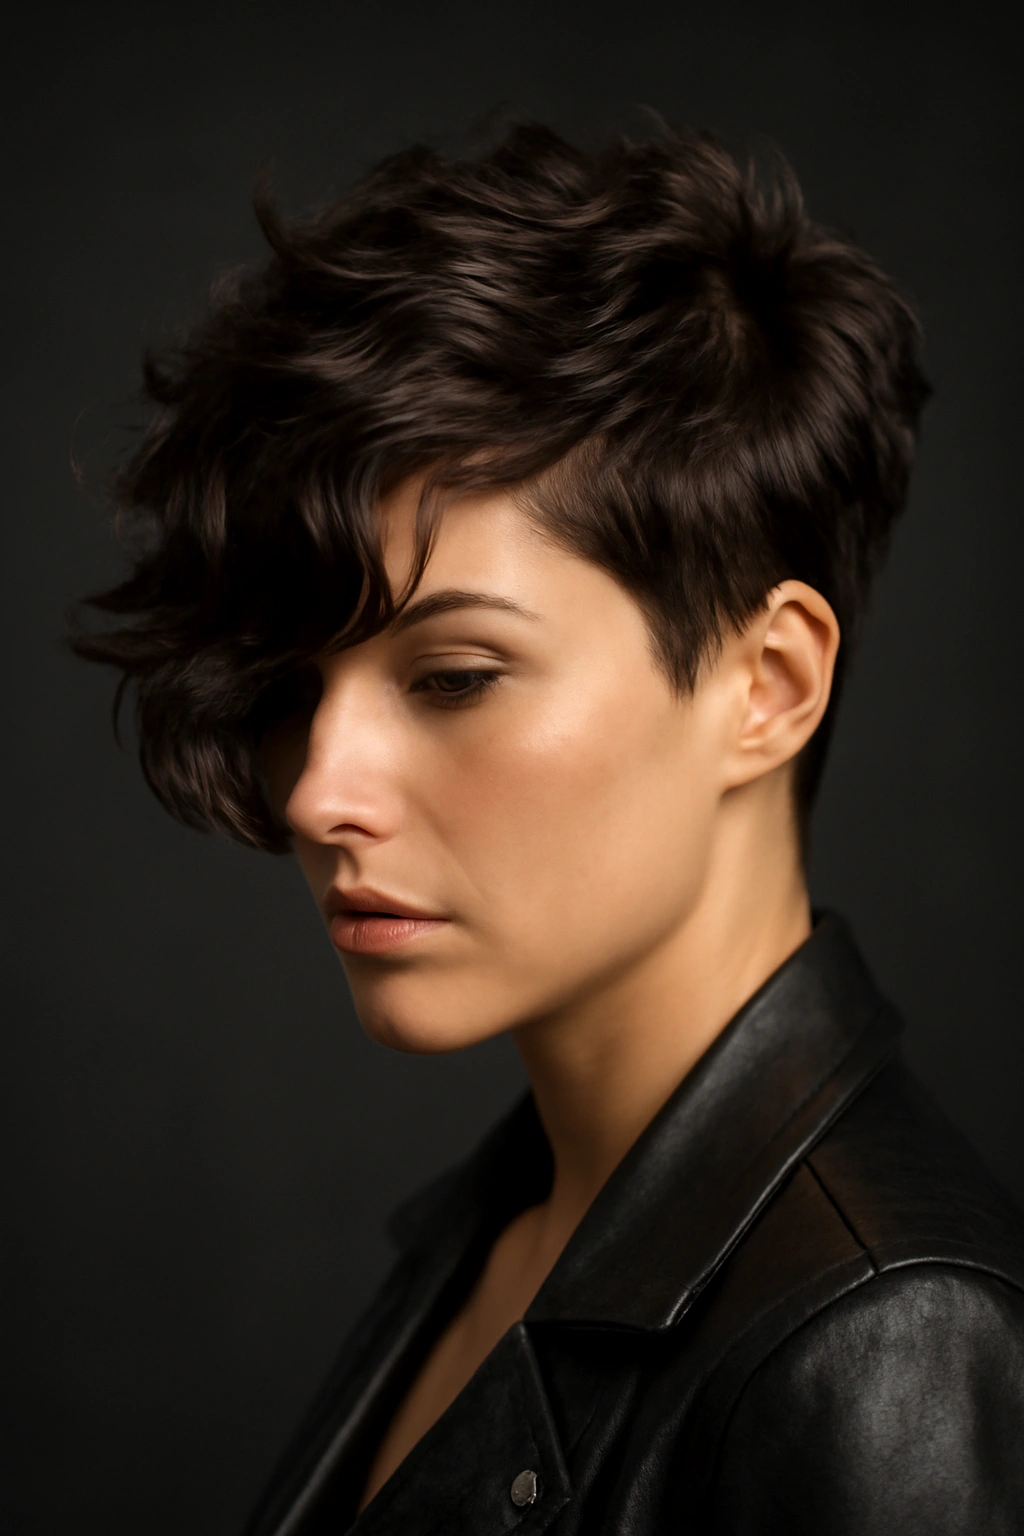
3. The Tousled Textured Pixie with Side Sweep
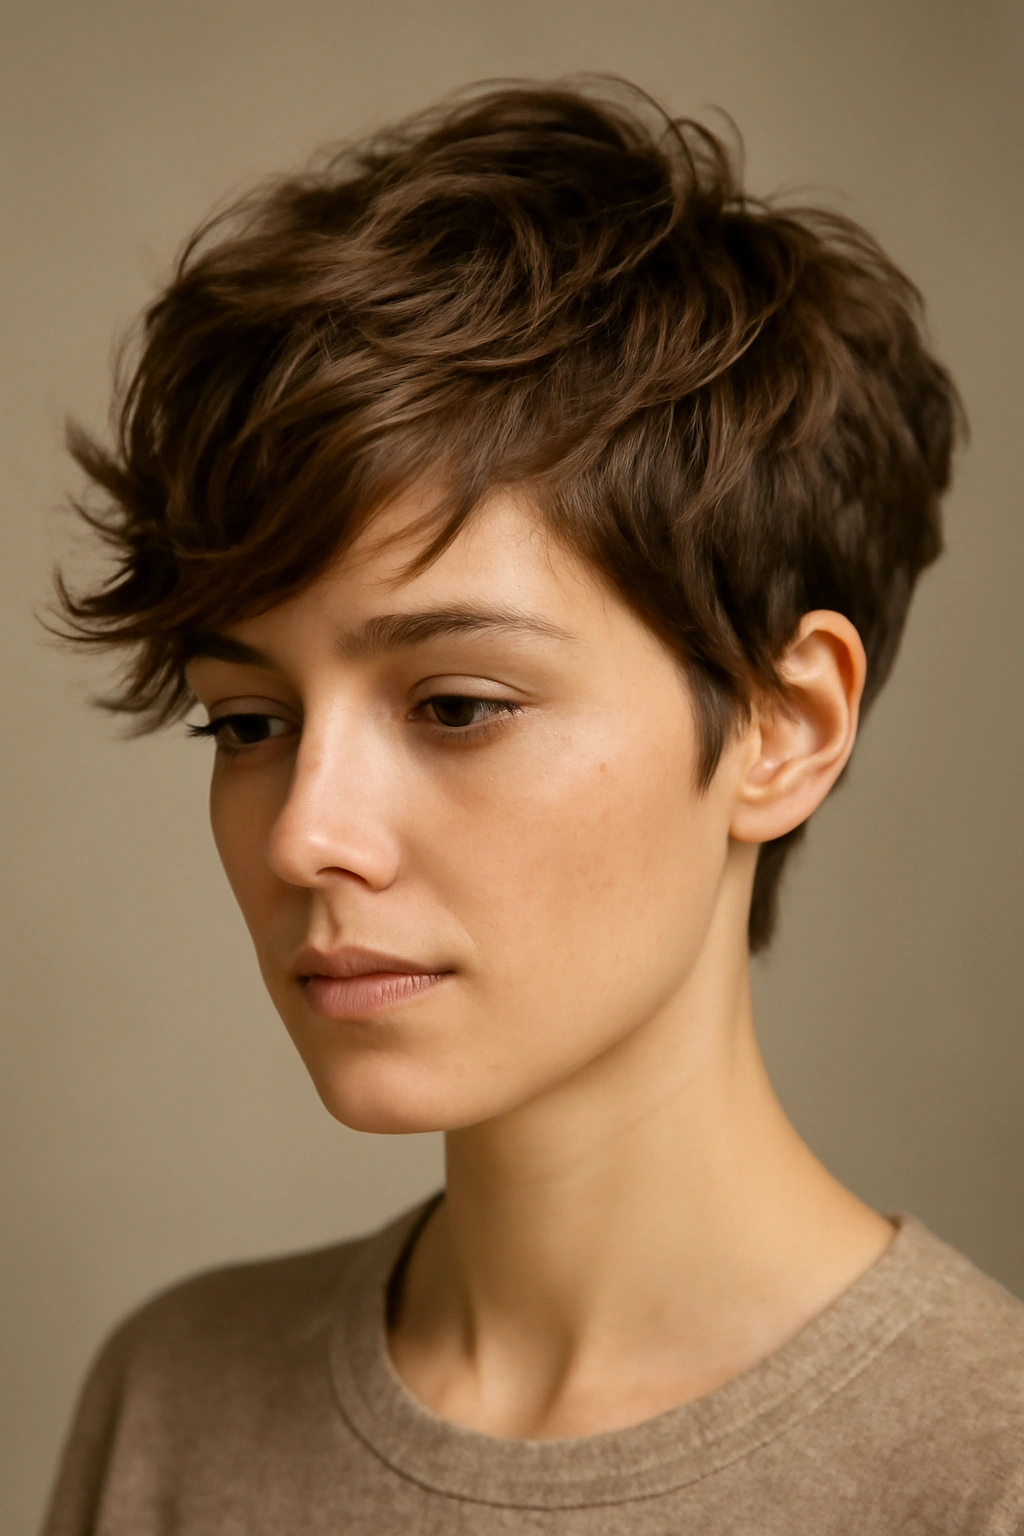
This variation keeps slightly longer pieces that can sweep across the forehead or fall to one side, while the back and other side stay short and textured. The longer sweeping pieces have enough length to create genuine waves, while the shorter sections add definition and prevent the style from looking like a shag mullet (yes, that’s a risk worth avoiding). When wet and freshly washed, this style falls into soft waves naturally because of how the cut directs the hair.
Why This Works for Wash and Go
The asymmetry actually makes wash-and-go styling easier because the longer and shorter pieces do different things, creating visual interest without requiring you to style them the same way. The sweeping pieces can either wave loosely or be tucked behind your ear depending on your mood—same cut, totally different looks. Because the shorter sections are textured rather than blunt, they dry with dimension rather than lying flat.
How to Style Without Heat
Wash your hair as usual, gently squeeze out excess water with your hands (not a towel—rubbing disturbs the natural wave pattern), and let it air dry. If you want the sweep to go in a particular direction, you can gently encourage it while the hair is damp by tucking it behind your ear or running your fingers through it in that direction. By the time it’s dry, the wave pattern will be set and the longer pieces will have a natural flow.
Quick Facts About This Style
- The side sweep direction can be changed by how you dry your hair
- Longer pieces frame the face better on square or angular face shapes
- Works well with wavy, curly, or even slightly straighter hair textures
- Requires styling precision from your barber or stylist—asymmetry has to be intentional
Pro tip: Ask your stylist to razor the longer pieces rather than blunt-cut them. Razor lines create softer ends that wave more naturally than blunt edges, which can look a bit choppy on longer pixie pieces.
4. The Ripple-Wave Pixie
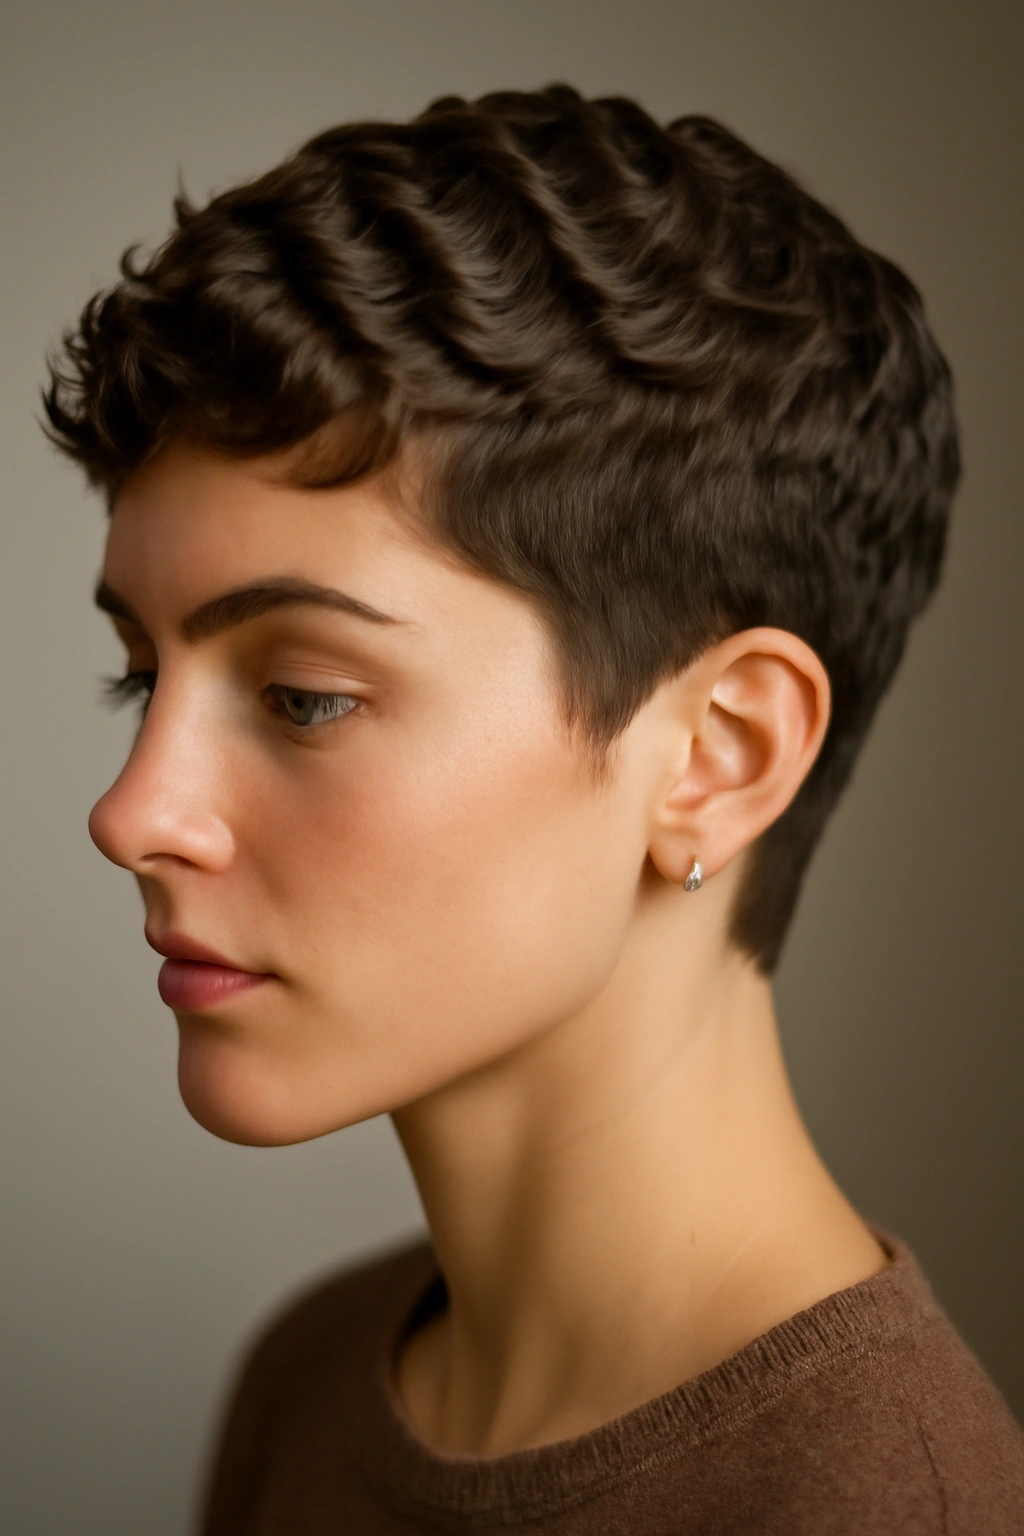
This is a pixie cut specifically designed to create horizontal ripple waves from root to tip. The cut uses alternating shorter and slightly longer sections that create a built-in wave pattern—almost like the hair naturally zigzags across your head. When water hits these strategically placed sections, they dry into soft waves that run parallel to the ground rather than in random directions.
Why This Works for Wash and Go
The ripple pattern is built into the geometry of the cut itself, so you’re not relying on your hair’s natural texture to create waves—the cut is creating them. This makes it especially good for people whose hair doesn’t wave naturally or for anyone who wants wave structure without needing to style it in. The sections are typically arranged so that the ripples flow with your head shape rather than against it.
How to Enhance the Ripple Effect
On wash days, apply a lightweight texturizing product or wave-enhancing cream to damp hair and gently work it through with your fingers, pushing the hair in the direction the ripples naturally want to go. A quick pass with a diffuser on low heat can also help set the ripples faster without roughing up your hair. The ripple pattern itself does most of the visual work—you’re just enhancing what’s already there.
What to Know About This Style
- Works best when you commit to keeping the cut precisely maintained
- Requires a stylist with specific experience cutting ripple or sculptural pixies
- The ripple pattern can be positioned to flatter different face shapes
- Looks intentional and geometric rather than casually textured
Insider note: This is the pixie style that looks most different from a traditional cut, so it’s not for anyone wanting something subtle. But if you want a pixie that genuinely looks modern and thoughtfully designed, ripple waves deliver that in spades.
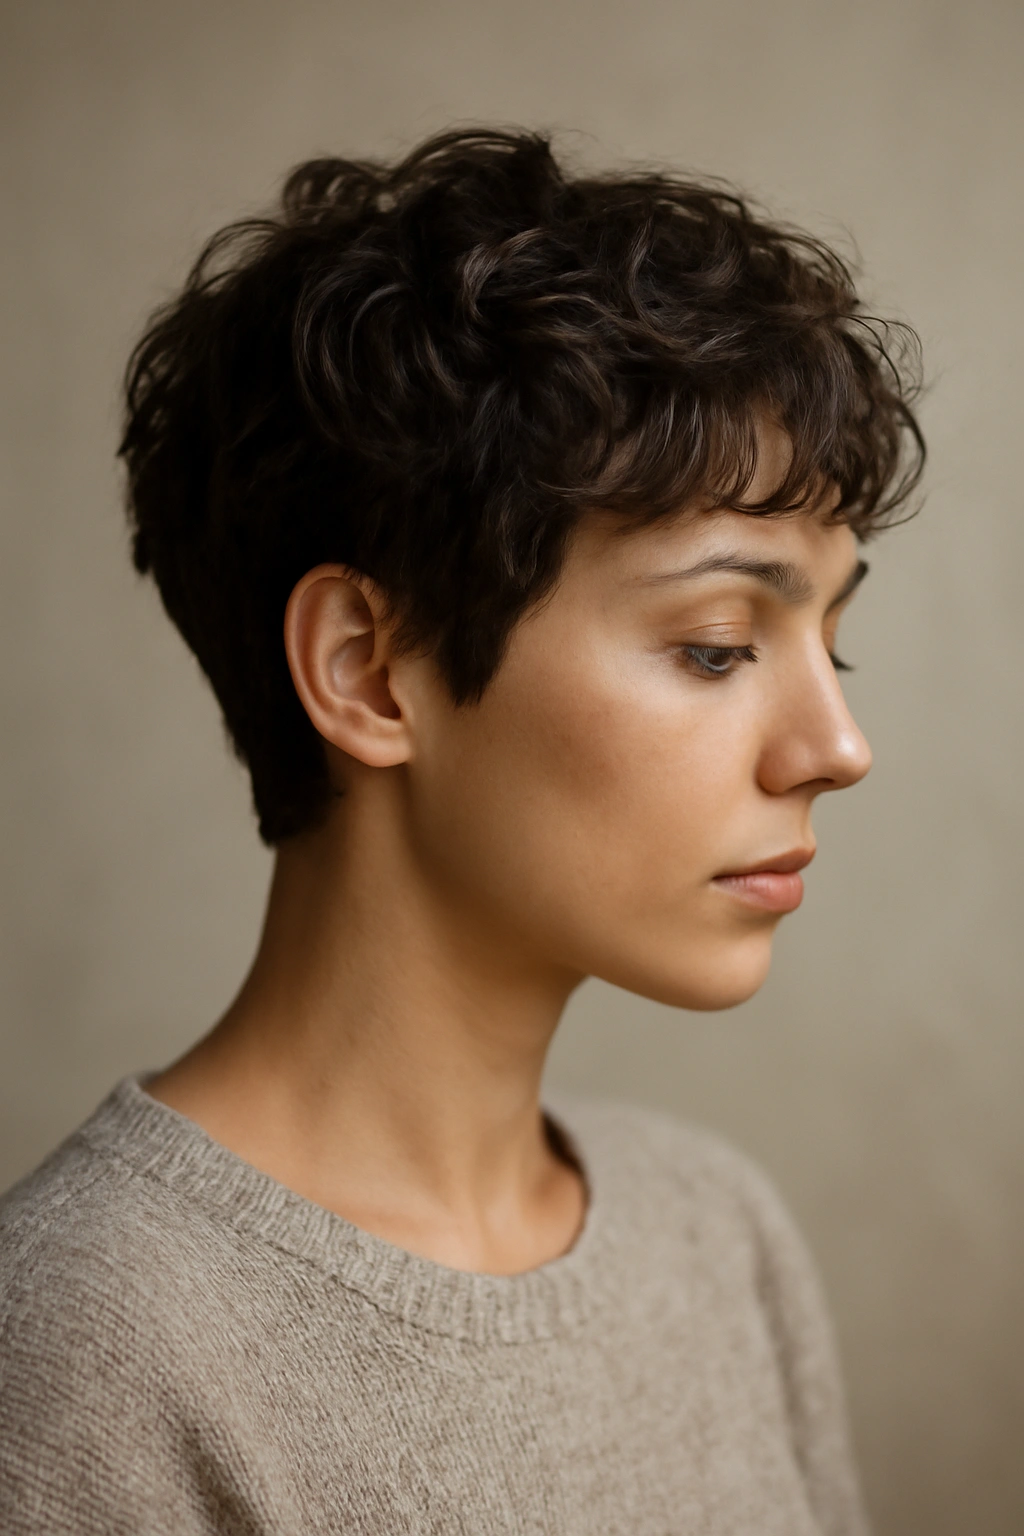
5. The Curly-Topped Pixie
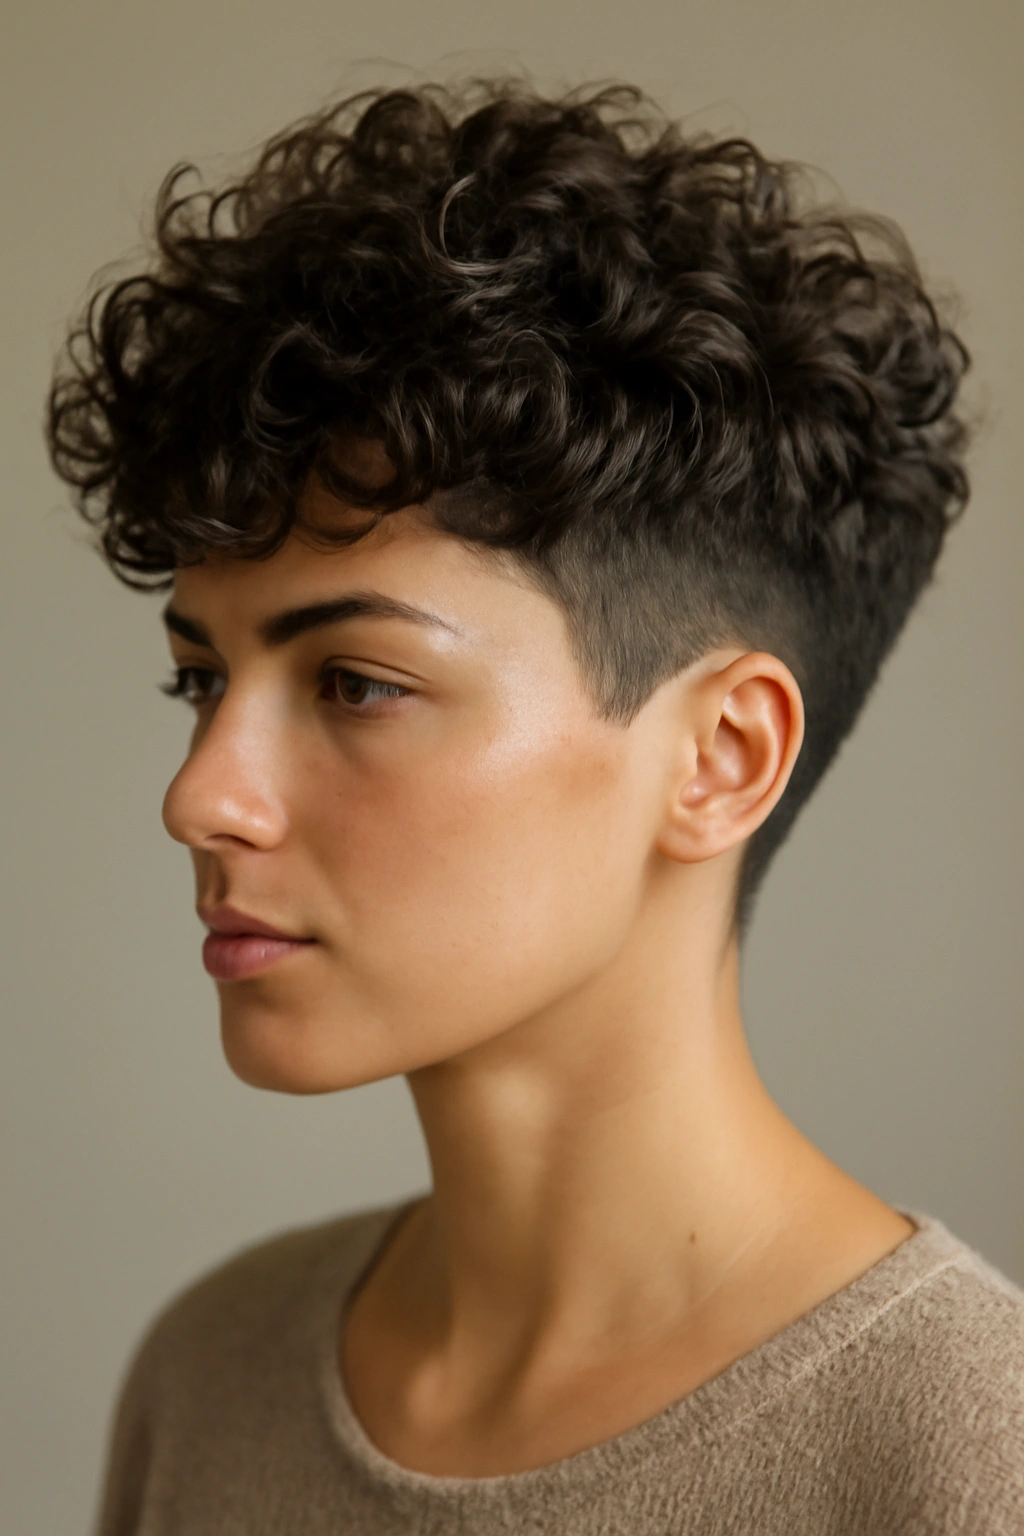
This style keeps the most length and volume on top where natural curls or waves can really show themselves, while the sides and back are tapered short and close to the head. The contrast between the voluminous, textured top and the clean, tight sides creates an intentional silhouette that reads as stylish rather than unbalanced. For anyone with naturally curly or very wavy hair, this is the ultimate wash-and-go cut.
Why This Works for Wash and Go
Curly hair dries fastest when it’s not weighed down, so keeping the sides short and the top where your curl pattern is fullest means your hair dries into its best shape with zero effort. The tapered sides prevent the overall look from being too heavy at the sides, which is a common problem when curly-haired people try to keep longer sides. This shape works with curl patterns instead of fighting them.
How to Dry Your Curly-Topped Pixie
Wash with a curl-friendly shampoo or co-wash if that’s part of your routine, then apply a leave-in conditioner or curl cream to soaking-wet hair. Scrunch the product upward into your curls rather than combing through—you want to encourage curl clumping, not break the curl pattern. Let it air dry completely, or use a diffuser on low speed to help it dry faster without disrupting the curls. Once dry, you can gently rake your fingers through the curls to break them up if you want a messier texture, or leave them as clumped individual curls if you prefer that look.
Key Details
- This cut works best with curly or very wavy hair—it’s designed around curl needs
- Requires a stylist experienced cutting curly hair, ideally trained in curl-specific techniques
- The shorter sides are crucial for balance—don’t ask for longer sides or the style loses its proportion
- Hair texture on top can be looser waves or tight coils; either way, the shape works
Real talk: If you have curly hair and have been thinking a pixie might not suit you, this cut proves that wrong. The key is having someone who actually understands how curls behave do the cutting.
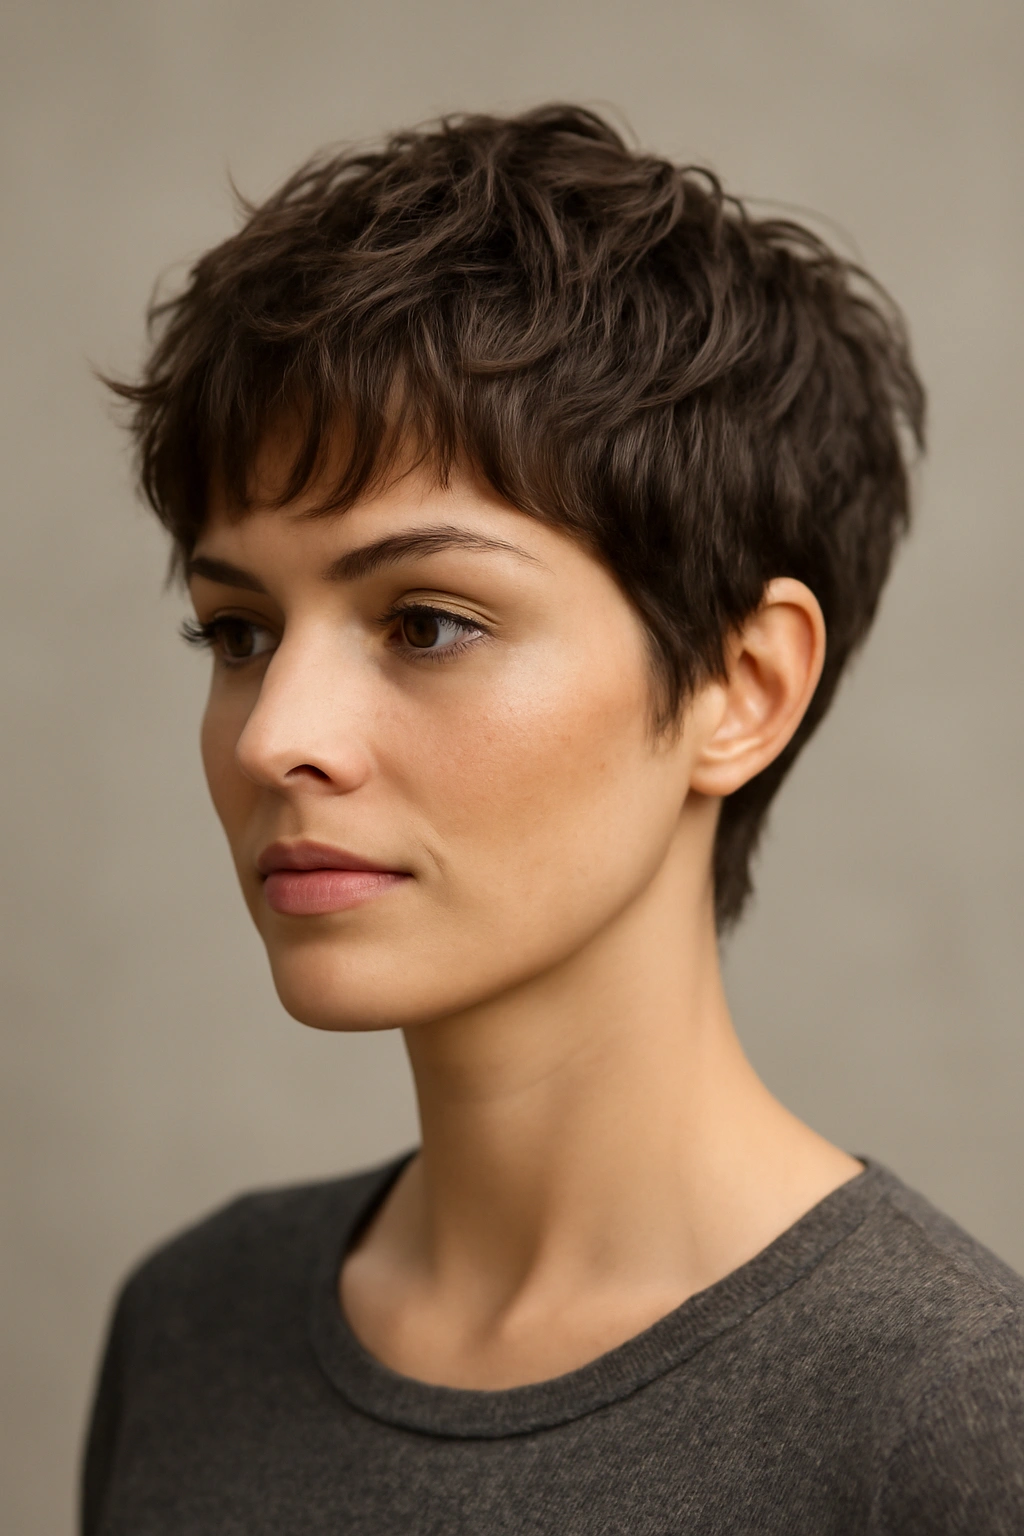
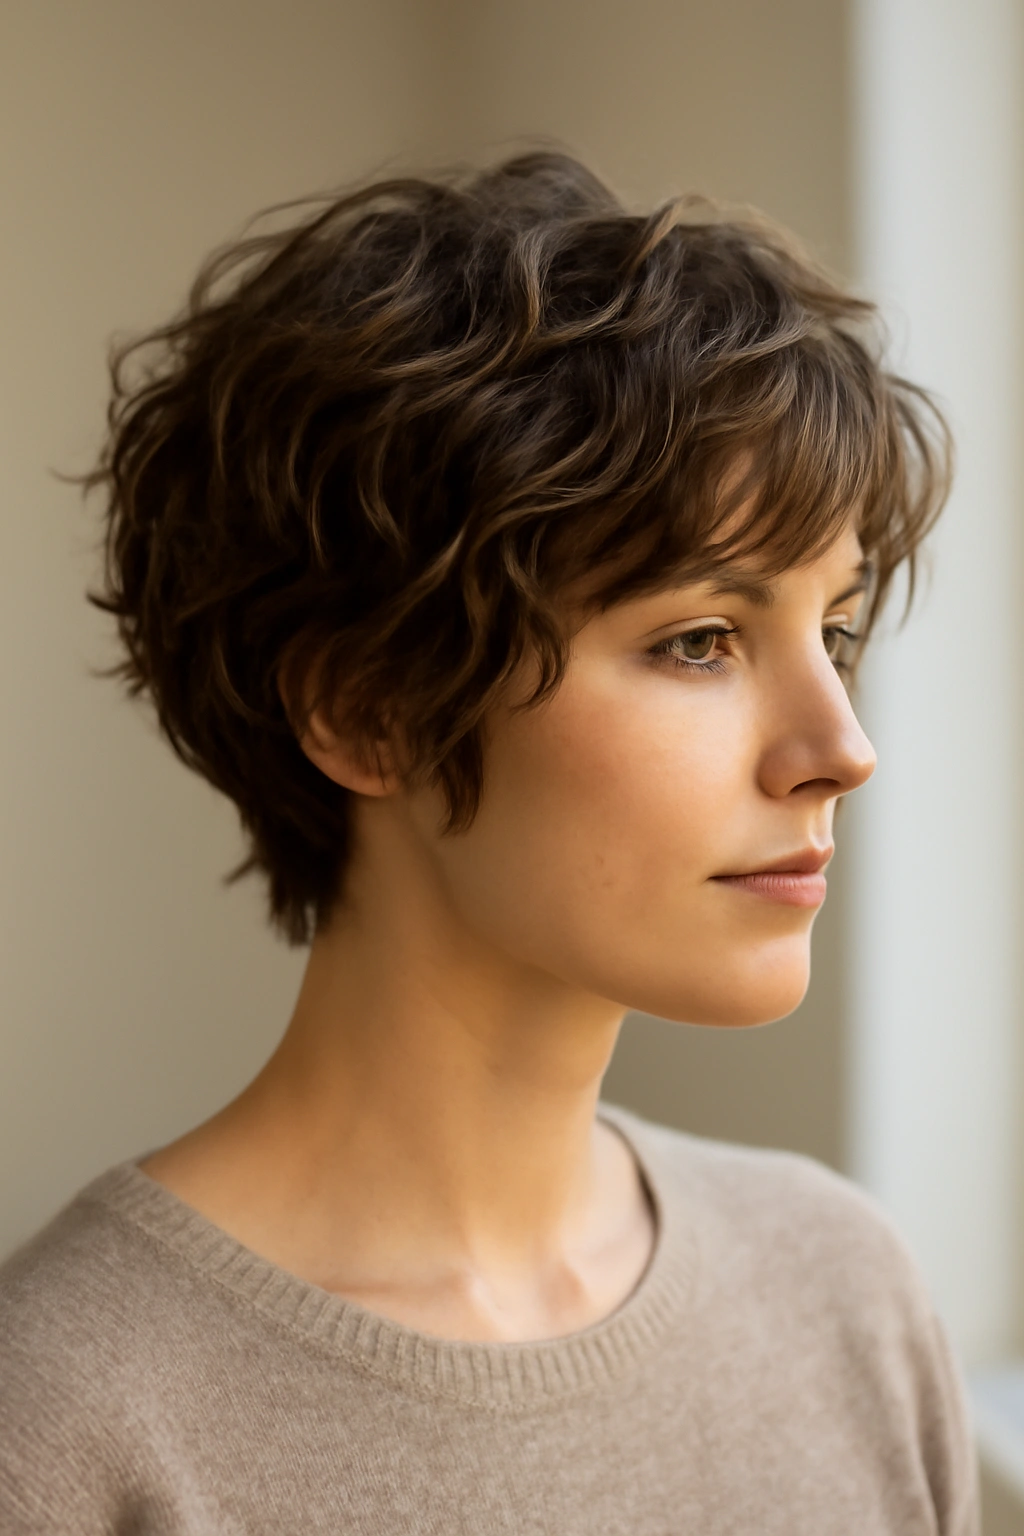
6. The Feathered Wave Pixie
Feathering creates soft, gradated layers that mimic the appearance of feathers—each layer is slightly shorter than the one underneath, creating super soft texture and movement throughout the entire cut. When combined with intentional wave placement, feathered pixies dry into soft, flowing texture that looks effortlessly romantic rather than sharp or geometric.
Why This Works for Wash and Go
The feathered layers give you texture in every direction without requiring you to blow-dry and style. Water running through feathered layers separates them naturally, and as they dry, those separated layers catch light and create movement. Because no single layer is blunt, the whole effect is soft and diffused—very forgiving for wash-and-go styling since there’s no line you’re trying to maintain.
How to Style Feathered Waves
A lightweight leave-in conditioner or texture spray applied to damp hair enhances the feathering without weighing it down. Run your fingers through your hair while it’s damp, pushing the feathered layers upward and outward to encourage separation. The feathering itself does most of the visual work—your job is just helping those layers stay separated as they dry. Air dry when possible, but if you’re using a blow dryer, use your fingers or a wide-tooth comb to keep the layers separated and textured rather than smoothed flat.
Quick Facts
- Works beautifully on fine or thin hair because the feathering creates volume illusion
- Best on people who enjoy a softer, more romantic aesthetic
- Requires regular trims (every 4-6 weeks) to maintain the feathered shape
- Looks good with a bit of texture product, but genuinely works as a wash-and-wear without anything
Worth knowing: If you have very curly hair, feathering can sometimes create too much volume on top. Your stylist should know to use caution or slight modifications if you have tight curls.
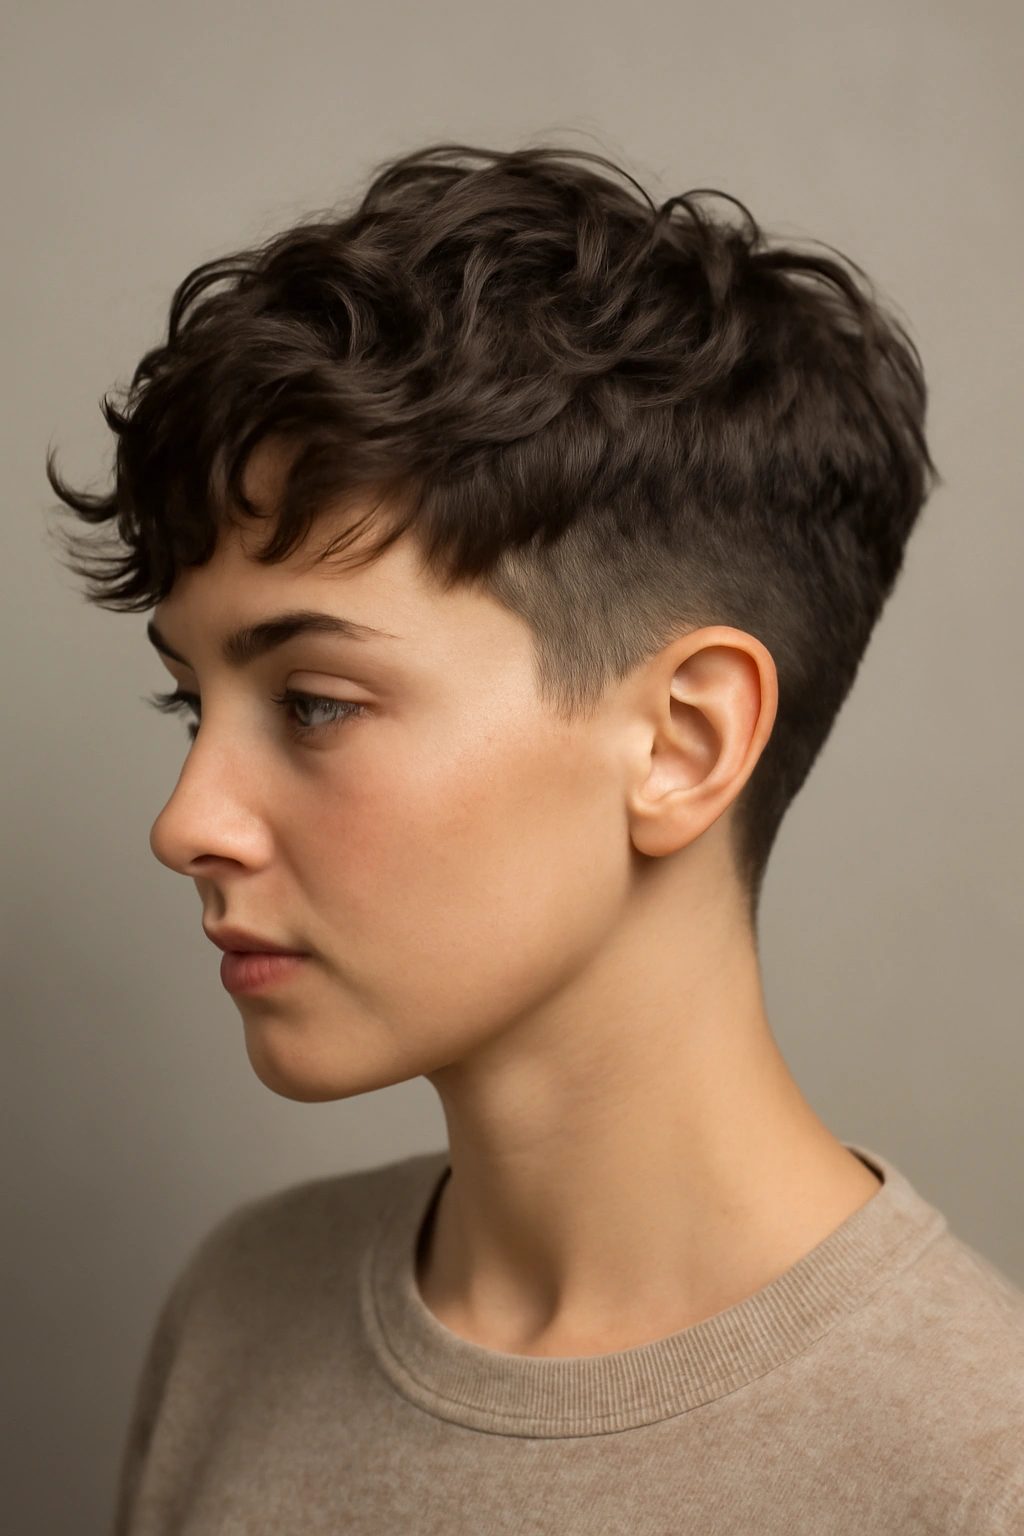
7. The Taper Fade Wavy Pixie
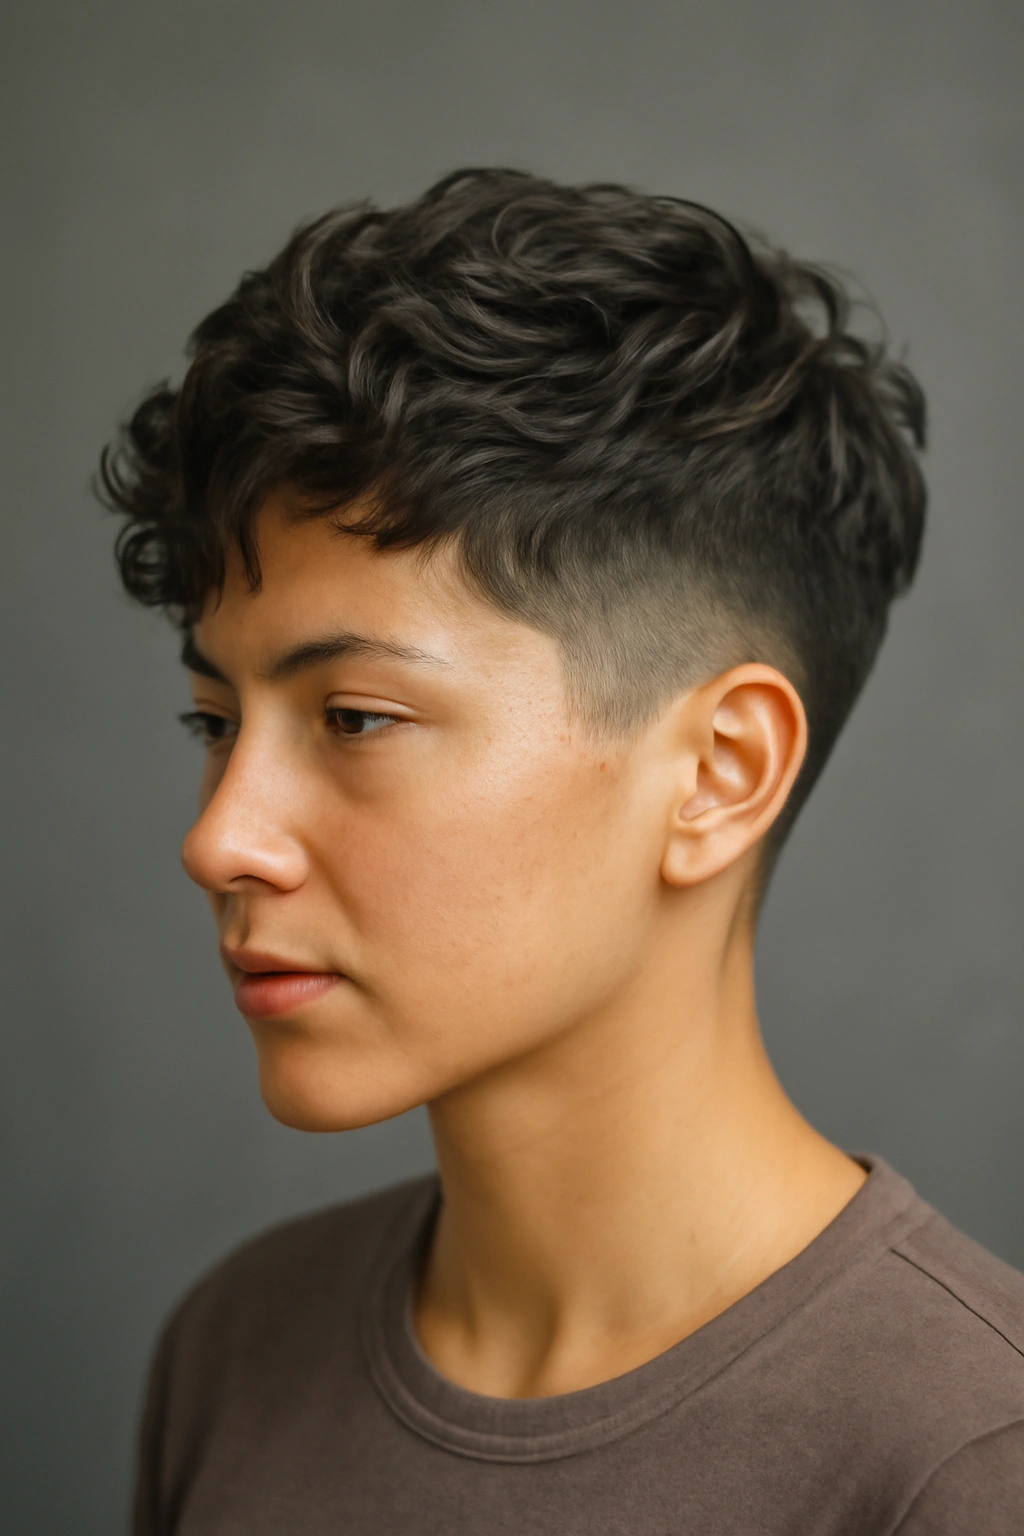
This is a pixie for anyone who loves clean, barbershop-style precision combined with textured waves on top. The sides and back fade from very short near the neck and ears to slightly longer as you move toward the crown, while the top is left longer and layered for waves. It’s masculine-leaning in its structure but absolutely works as a chic, modern pixie when styled with texture and waves on top.
Why This Works for Wash and Go
The fade taper means your sides and back don’t require styling—they’re just clean and shaped. All your styling energy goes to the top, where you actually want texture and movement. Because the shorter sides are faded (not blunt), they don’t look harsh even without product. Water naturally falls away from tapered sides, so you don’t end up with any weird stuck-down sections—the whole thing dries evenly and looks intentional.
How to Get the Best Results
This is genuinely one of the most wash-and-go-friendly pixie variations because the sides require absolutely nothing. Wash your hair, squeeze out excess water, and let it air dry. If you want to enhance waves on top, a light texturizing spray or sea salt spray applied to damp hair helps. The fade is maintained through regular trims (every 2-3 weeks minimum), so your main styling responsibility is just keeping it trimmed, not styling it daily.
Details That Matter
- Works great on people who like a cleaner, more structured look
- The fade requires a skilled barber or stylist—this isn’t a cut to book with someone who mainly does traditional salon work
- Best on straight to wavy hair; very curly hair can look a bit odd with this precise structure
- Looks more androgynous than other pixie variations—perfect if that’s your vibe, worth considering if you prefer more traditionally feminine styling
Pro tip: Ask your stylist to fade the sides to about a half-inch at the shortest point and leave at least an inch on top to work with for waves. Too short on top defeats the purpose of the wavy texture you’re going for.
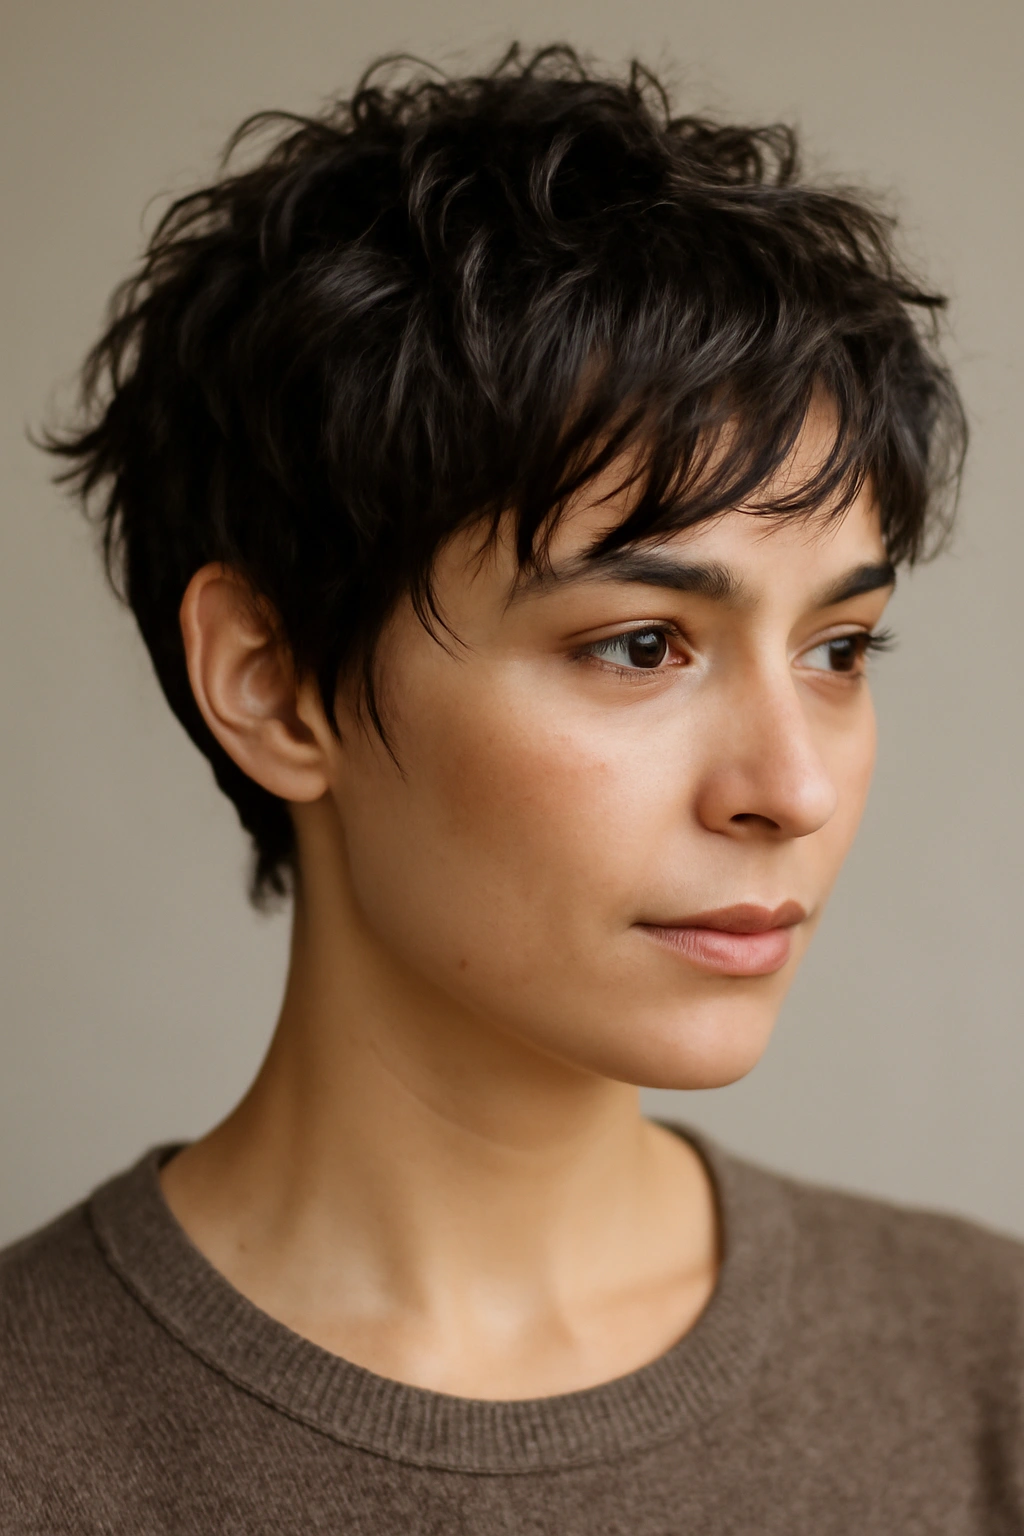
8. The Textured Crop Pixie
This style is essentially a very short all-over crop with intentional texture built into the cut through strategic layering and choppy pieces. The “waves” on this one are more about dimension and texture than actual undulating movement—think more a lived-in, tousled effect than smooth waves. It’s the most low-maintenance pixie variation possible because literally everything is super short.
Why This Works for Wash and Go
You cannot get more wash-and-go than a textured crop. Wash your hair, shake it out, and you’re done—it dries in minutes and looks intentionally styled because of how the choppiness catches light. The texture is built into the cut through layers and point-cutting, so there’s dimension from every angle even though the overall length is minimal. It’s the pixie for people who want the shortest possible cut while still maintaining some style.
How to Style Without Any Effort
Literally just wash it and let it dry. If you want more definition in the texture, a tiny bit of texture paste or matte product worked through damp hair with your fingers adds some grit, but it’s completely optional. You could probably style this cut while still in the shower and have it look intentional by the time you’re dry.
What You Should Know
- This is the most gender-neutral pixie variation
- Works on all hair types, though the texture will read differently depending on your hair’s natural texture
- Requires the most frequent trims to maintain (every 3-4 weeks) because there’s no length to hide growth
- Looks modern and fashion-forward, but it’s also the least versatile in terms of styling options
Real talk: If you’re worried about being too attached to your hair or want options for different looks, this might be too short. But if you want pure simplicity and are confident in how you look with minimal hair, this is where it’s at.
9. The Rocker Chic Wavy Pixie
This variation is all attitude—longer pieces in the front that can fall over one eye or sweep across, shorter textured pieces on top, and tapered sides. It’s reminiscent of ’80s rock aesthetic but styled in a modern way that reads as intentional rather than costume-y. The waves add softness to what could otherwise be an edgy cut, creating a cool-but-approachable vibe.
Why This Works for Wash and Go
The longer front pieces naturally create waves because of their length, while the shorter pieces on top and sides add texture and volume. When you wash your hair, those longer pieces fall into soft waves naturally, and the texture on top dries with movement. The whole thing has an effortlessly cool vibe that doesn’t require much styling to achieve—your hair does most of the work.
How to Style the Rocker Aesthetic
This is where a tiny bit of product can make a big difference in how the style reads. A texturizing spray or light pomade applied to damp hair enhances the piece-y texture without making anything look greasy. Tousle it with your fingers while damp, letting the longer front pieces fall however naturally feels right. Some days they’ll fall over one eye, other days they’ll sweep, and both looks work because the cut is designed for movement.
Key Details
- Best on people who are comfortable with an edgy, rock-inspired aesthetic
- The longer front pieces work well for people who like some hair falling on their face but don’t want it in their way
- Works on most hair types, though you need enough wave to the hair that the longer pieces don’t just hang straight
- Definitely reads as a statement cut—this is not the pixie if you want to blend in
Worth knowing: This cut benefits from someone with styling confidence. You’re not required to style it, but the more you work with the texture and let the pieces move around intentionally, the better it looks.
10. The Soft Undercut Pixie
An undercut means there’s very short hair (sometimes even skin-tight fades) underneath, but a longer layer on top that covers some or all of the undercut. For a wavy pixie, the top layer is left longer and layered to create waves, while the undercut gives structure and a modern edge. It’s a bold cut, but the waves soften the edge enough that it reads as chic rather than severe.
Why This Works for Wash and Go
The undercut creates visual interest without requiring styling on those shorter sections—they’re essentially done once cut. The longer top layer waves naturally as it dries, and the texture combined with the geometric structure of the undercut creates a super modern look. You’re getting both soft texture and sharp geometry in one cut.
How to Style It
Wash your hair and let the top layer dry naturally into waves—the undercut requires zero styling and the longer top does its thing without help. If you want more wave definition, a texturizing product applied to damp hair helps. The undercut will show more or less depending on how you style your hair on top—you can cover it completely with longer pieces or let it peek through for a more dramatic effect.
Details Worth Considering
- This is a bold, fashion-forward cut that works best on people confident with shorter hair
- The undercut requires very regular maintenance—every 2-3 weeks—or it looks scraggly
- Works on all hair types, but shows best on straight to wavy hair where you can see the contrast
- Is genuinely higher maintenance than other wash-and-go pixies despite being wash-and-go on the actual styling
Pro tip: If you’re getting an undercut pixie, ask your stylist to blend the undercut into the longer top layer gradually rather than creating a super sharp line. A gradual blend looks more modern and is easier to grow out if you change your mind.
11. The Piece-y Textured Pixie
This style uses razor-cutting or point-cutting techniques to create super piece-y texture throughout—every layer is disconnected from the ones around it, creating a shaggy, textured effect without being a full shag. The pieces are intentionally choppy so they don’t blend together, instead catching light individually and creating tons of dimension. When you wash it, all those individual pieces dry with texture and movement.
Why This Works for Wash and Go
All those disconnected pieces mean texture from every angle without effort. Water runs through piece-y hair and dries it with texture already built in—you’re not smoothing it flat and then having to add texture, the texture is already there. The cuts is forgiving because piece-y hair doesn’t require precision styling; slight messiness reads as intentional rather than sloppy.
How to Style Piece-y Texture
A light texture spray or sea salt spray applied to damp hair enhances the piece-y effect without being required. Run your fingers through your hair while it’s damp, working the product through and encouraging the pieces to separate. The piece-y structure does the heavy lifting—you’re just helping maintain the separation.
What Makes This Unique
- Works on all hair types and textures equally well
- One of the most forgiving pixie cuts because precision styling isn’t required
- Reads as intentionally textured and modern rather than undone
- Perfect for anyone who likes a lived-in, effortless aesthetic
Real talk: This is the pixie for people who are done with trying to make their hair look “perfect.” Piece-y texture is supposed to look a bit tousled, and that’s exactly what makes it work for wash-and-go styling.
12. The Grown-Out Pixie with Soft Waves
This isn’t a pixie you just cut and keep at one length—it’s a pixie that’s intentionally grown out with waves built into the process. You start with a pixie cut, then as it grows, your stylist cuts it in a way that encourages waves and texture at each length. By the time it’s a few inches long, you have soft waves throughout that look intentional rather than like you’re neglecting to cut your hair.
Why This Works for Wash and Go
This is genius if you’re transitioning to longer hair but want it to look intentional every step of the way. The waves are built into the layers so that whether your hair is 2 inches long or 4 inches long, it looks like that length was the actual goal. You’re not dealing with awkward growth phases because your stylist is actively shaping the waves as the hair gets longer.
How to Maintain It During Growth
Trim every 4-6 weeks as you’re growing it out, and work with a stylist who understands how to cut waves into growing-out hair. Waves need strategic layering and angle to work, so this isn’t a cut where you can go 12 weeks without a trim and hope it works out. But if you’re already committing to regular trims anyway, you might as well grow it out intentionally with style rather than just letting it get longer randomly.
Details to Understand
- This approach requires a stylist who’s thinking about your long-term goals, not just your current cut
- Waves need consistent layering as hair grows, so expect your trim appointments to be slightly longer and more involved
- Works beautifully on wavy, curly, or even straight hair—the waves are built in through cutting, not relying only on texture
- Perfect if you’ve always wanted longer hair but hated the awkward growing-out phase
Worth knowing: Have a detailed conversation with your stylist about where you want to end up length-wise and exactly how you want waves positioned when your hair reaches that length. The stylist can plan the cut accordingly so each trim is moving you toward that goal rather than just maintaining whatever length you’re at.
Final Thoughts
The magic of wash-and-go wavy pixies isn’t that they require zero effort—it’s that the effort you do put in creates maximum impact because the cut is designed to work with what you’re doing rather than against it. Whether you’re drawn to the softness of feathered layers, the boldness of an undercut, or the lived-in vibe of piece-y texture, there’s a wavy pixie variation that’ll look intentional and chic while still being genuinely low-maintenance.
The real key to making any of these styles work is finding a stylist who understands that you want waves as a design feature of the cut, not something you’re hoping will magically appear. Bring reference photos that specifically show the wave placement you love, talk about your daily styling reality honestly, and ask your stylist exactly what you need to do to recreate the style at home. A great cut does most of the work; all you’re doing is the finishing touches.
Most importantly, choose the style that makes you feel like yourself. A pixie should make you feel confident every time you catch your reflection, whether you’ve just stepped out of the shower or you’re rocking the style for day three. When the cut is right, that’s exactly what happens—no second-guessing, no wishing you’d styled it differently, just genuine “I look good” energy.