Wavy hair and air drying sound like a match made in heaven—and they really can be, if you know how to work with your natural texture instead of against it. The frustration most people feel with their waves isn’t actually about the waves themselves; it’s about fighting the process or expecting results that don’t match their hair type and density. When you stop trying to force your waves into someone else’s shape and instead lean into what your hair naturally wants to do, styling becomes almost effortless.
The best part about air drying wavy hair is that you’re not chasing perfection—you’re chasing movement, texture, and a lived-in look that actually feels more contemporary and intentional than a salon blowout. Air-dried waves have an authenticity that blow-dried waves sometimes miss. Your hair gets to dry at its own pace, which means less heat damage, less frizz in humid climates, and honestly, more time to do other things while your hair does its thing.
What makes these 15 styles special is that they’re all designed to look incredible without requiring a flat iron, a round brush, or even a blow dryer. Most of them need just three things: the right products applied to damp hair, a specific styling technique, and time. Some styles dry in as little as 30 minutes; others benefit from a few hours of air drying while you go about your day. The variation matters because your lifestyle matters—what works for someone with fine, loosely wavy hair might not work for someone with thick, densely textured waves, so this list covers the full spectrum.
1. Beachy Waves with Side Part
This is the foundational air-dry wavy style that works across nearly every hair type, length, and texture. Beachy waves are deliberately undone—they’re about movement and dimension rather than definition or precision. The side part adds intentional asymmetry that makes the style feel modern and flattering on most face shapes. Think of it as the style that says you spent the day at the ocean when you actually spent it at your desk.
How to Achieve Beachy Waves
Start with damp hair—not soaking wet, but noticeably moist. Apply a curl-enhancing mousse or sea salt spray to your roots and mid-lengths, working in sections. Use your fingers to scrunch the product upward toward your scalp, which activates wave patterns and creates lift at the crown. Create a deep side part by running your fingers along the scalp from one temple to behind your opposite ear. Flip your hair to the side where most of the volume will fall. Now here’s the key: don’t comb or brush through the waves. Instead, use your fingers to gently tousle and separate the pieces as your hair air dries. The randomness is the whole point.
What Makes Beachy Waves So Versatile
- Works on straight hair, naturally wavy hair, and curly hair with the right product combination
- Takes 45 minutes to 2 hours to fully air dry, depending on hair thickness and length
- Looks intentional whether you’re heading to work, a casual lunch, or a social event
- Pairs beautifully with face-framing layers that catch light and create additional dimension
- Gets better and better as the day goes on—the waves actually become more defined as they settle
- Can be refreshed the next day with a spray bottle of water and a quick finger-tousle
Pro tip: Apply your sea salt spray or mousse while your hair is still dripping wet, not just damp. The extra moisture helps the product distribute evenly and gives you more control over where the waves form.
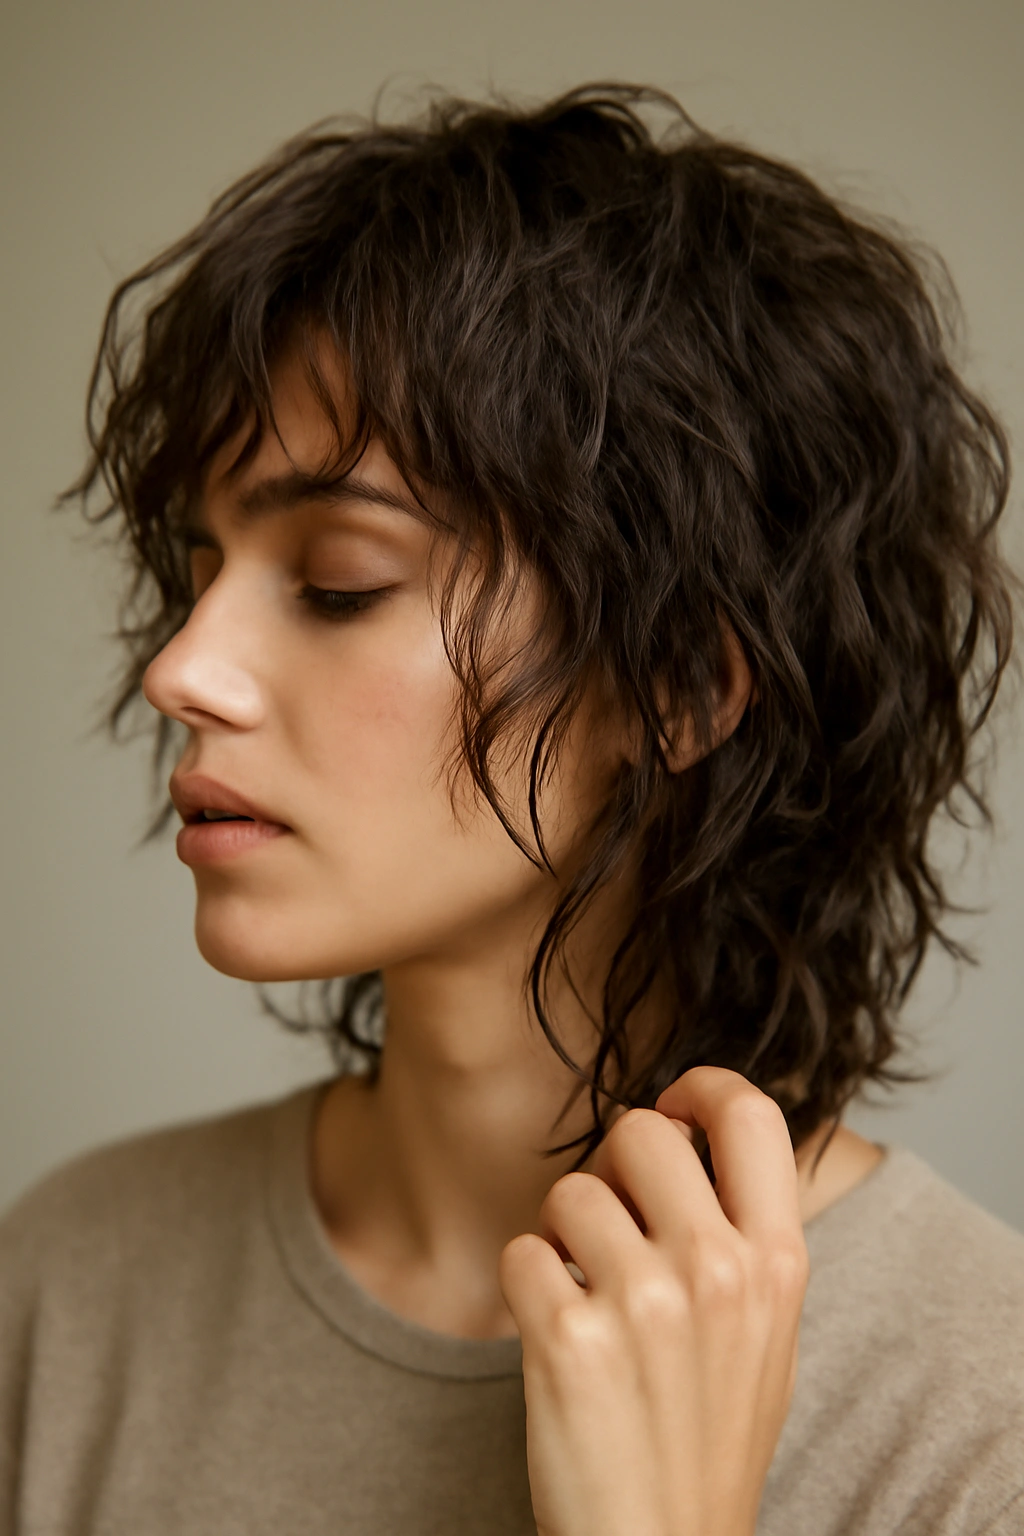
2. Textured Shag Cut
A shag is an air-dryer’s dream because the cut itself is designed around movement and texture rather than sleekness. Layers create a natural framework that waves and curls settle into beautifully without needing any real styling technique. This is the style to choose if you want maximum payoff for minimum effort—your hair literally dries into shape.
Why the Shag Works for Air Drying
Shags typically feature choppy layers throughout, shorter pieces at the top for volume, and longer layers on the bottom for movement. This structure means that waves have built-in places to sit, creating a naturally textured, piece-y appearance without you having to do anything special. The shorter layers at the crown give you inherent lift without needing mousse or volumizer. The longer, choppy layers catch air and dry into natural-looking waves that don’t appear forced or overly styled.
Key Features of an Air-Dry Shag
- Layers should start higher up (around ear length) and graduate longer progressively
- The shortest layers should be choppy and textured, not blunt-cut (texture absorbs movement better)
- Works best with a shaggy fringe that grazes the eyebrows or sits above them
- Dries in approximately 1 to 1.5 hours depending on hair thickness
- Requires a trim every 4 to 6 weeks to maintain the layer structure and choppiness
- Pairs beautifully with a middle part or a deeper side part, depending on your face shape
Worth knowing: A true shag isn’t the same as just adding layers to a long haircut. A proper shag has intentional choppy texture throughout and specific proportions that make it work. Consult with a stylist who specializes in shags if you’re considering this cut.
3. Half-Up, Half-Down Waves

This style combines the best of two worlds—the polished look of a half-up style with the relaxed, undone feeling of waves falling freely. It’s versatile enough for work but casual enough for weekends, and it keeps hair off your face while still letting you show off your wave texture. Half-up styles also work as a practical solution if you’re between wash days and your roots need a refresh.
How to Create Half-Up Waves
Apply your wave-enhancing product (sea salt spray, curl cream, or mousse) to damp hair and scrunch it in, focusing on the mid-lengths and ends. Let your hair air dry for about 20 to 30 minutes until it’s mostly dry but still has some moisture in it—this is the sweet spot for creating defined waves that hold their shape. Once your hair has reached this stage, take a section from each temple and twist or braid it gently, then secure it at the back of your head with a clip or elastic. The waves that fall below the secured section will continue drying into soft, natural-looking undulations.
Why Half-Up Works for Air Drying
- Gives structure to damp hair by securing the upper half, which helps the lower waves dry more evenly
- The twists or braids create additional texture that adds dimension when you release them later
- Keeps hair off your face while it dries, which prevents awkward folding and creasing
- Works as a complete style on its own or can be re-done after your hair fully dries for a different look
- Looks equally polished in professional settings or casual weekend environments
- The texture from the twist/braid translates beautifully into the final wave pattern once released
Pro tip: If you’re short on time, pull the half-up section while your hair is still quite damp, then finger-comb and separate the waves once everything is dry. This actually creates slightly more defined waves than waiting to style.
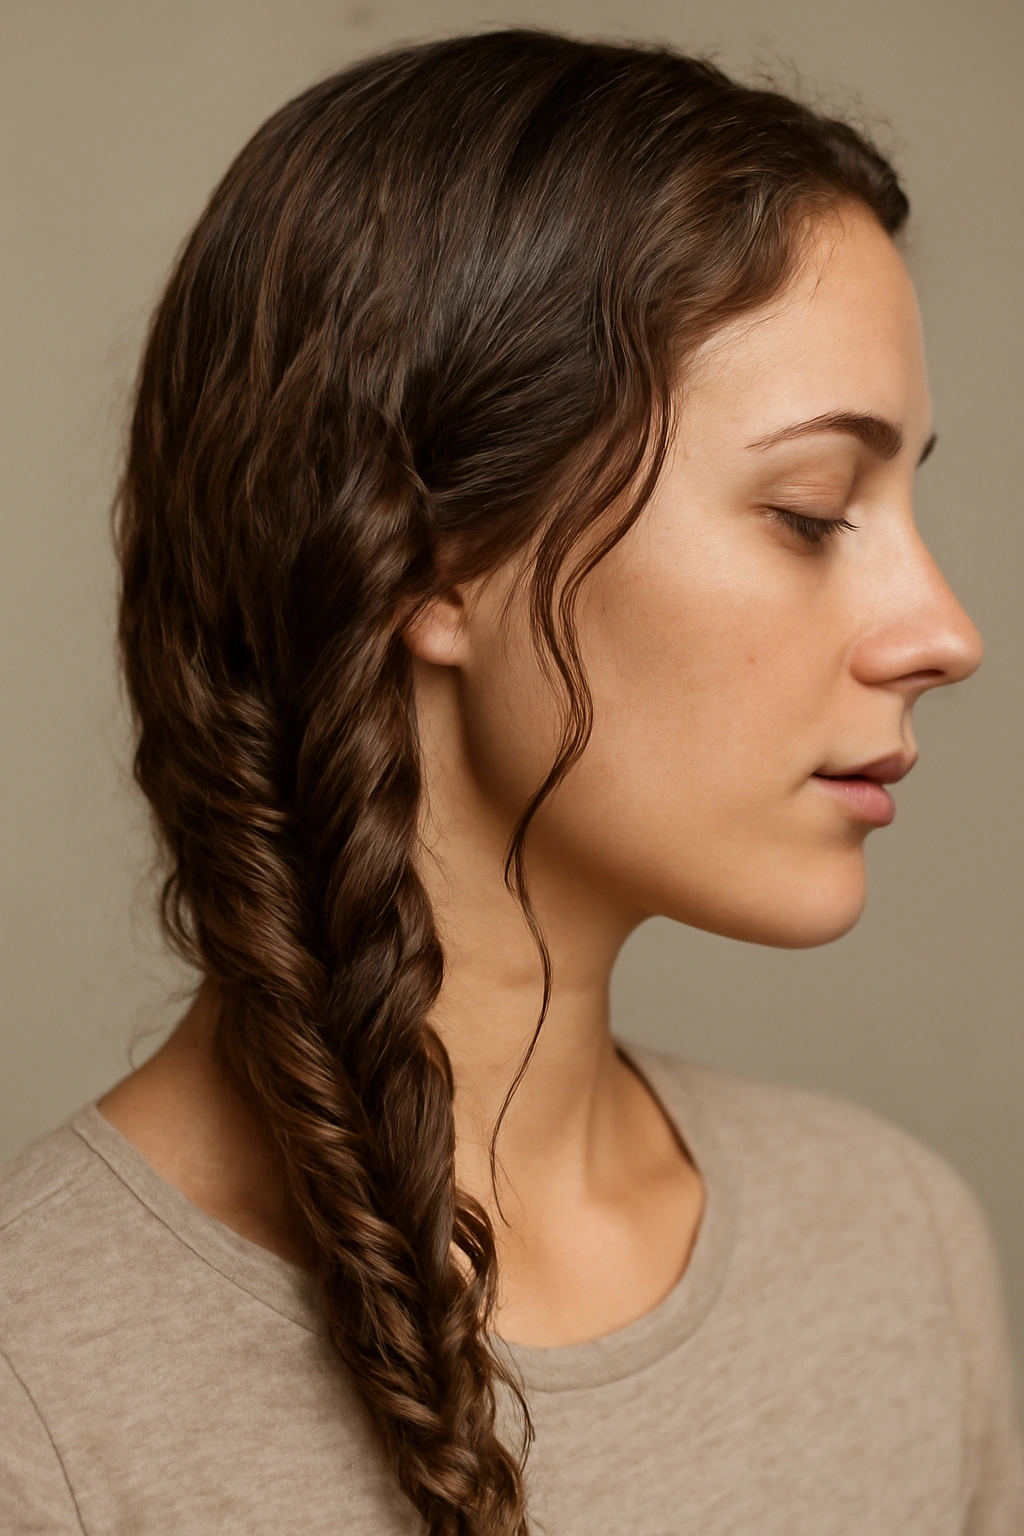
4. Loose Braided Waves
Braids are one of the oldest and most effective methods for creating waves without heat. The braid creates a framework that your waves settle into naturally, and removing the braid releases waves with built-in texture and definition. This method works spectacularly well if you’re willing to braid your hair while it’s damp and then leave the braids in while you do other things—think early morning braid before work, braid removed by evening.
The Mechanics of Braided Waves
Apply your styling product to damp hair and work it through thoroughly. Divide your hair into two, three, or four loose sections depending on how much wave definition you want (more sections = more waves, fewer sections = gentler waves). Braid each section loosely from roots to ends—the looser the braid, the softer and more natural the resulting waves will be. Secure each braid with a small elastic at the end. Now let time do the work. Your hair will dry completely within the braids over the next few hours. Once fully dry, gently unravel each braid by running your fingers through it, starting at the ends and working toward the roots. Separate the waves with your fingers to create a soft, undone texture.
Braided Wave Results Depend On
- The tightness of the braid (loose braids = soft waves, tight braids = more defined curls)
- The number of sections (two braids = gentle waves, four braids = more texture and definition)
- The thickness of your hair (thicker hair needs looser braids to avoid an overly crimped look)
- The length of time the braids stay in (minimum 2 hours, but overnight gives the most dramatic results)
- The texture of your starting hair (naturally wavy hair creates more defined waves; straighter hair creates gentler undulation)
Insider note: This method actually works best if you braid your hair right after showering while it’s still quite wet. The extra moisture helps the waves set more effectively. You can sleep in the braids and wake up with ready-made waves.
5. Tousled Beach Bob
A textured, choppy bob is one of the easiest cuts to air dry into waves because the shorter length means less drying time and the layers provide built-in movement. A beach bob usually lands somewhere between the chin and shoulders, features choppy, textured layers throughout, and has a deliberately undone quality that pairs perfectly with waves.
Styling the Beach Bob for Air Drying
Shower and get your hair damp. Apply a volumizing mousse to your roots and a curl-enhancing cream or sea salt spray to your mid-lengths and ends. Use your fingers to scrunch all of it upward and inward toward your scalp. Create movement by flipping your head upside down and scrunching while your head is inverted—this distributes product evenly and creates lift throughout. Once you’ve scrunched thoroughly, flip your head back upright and use your fingers (never a comb) to separate the layers and encourage them to dry in slightly different directions. Let it air dry completely, which should take about 45 minutes to an hour for a shoulder-length bob.
Why Beach Bobs Ace the Air-Dry Test
- Shorter length means the waves hold their shape better without needing additional styling or product buildup
- Choppy layers create multiple texture points, so waves form naturally without you having to encourage them
- A textured bob actually looks better the more undone and piece-y it appears—air drying delivers exactly that
- You can style it multiple ways by adjusting your part or using your fingers to move pieces around
- Works beautifully with or without face-framing layers, depending on your face shape and preferences
- Dries quickly enough that you can have a finished style in under an hour
Worth knowing: The key to a beach bob that air dries well is making sure the layers are actually choppy and textured. If your bob is blunt or has too-long layers, it won’t have the same movement. Ask your stylist specifically for choppy, textured layers throughout.
6. Messy Low Bun with Wavy Tendrils
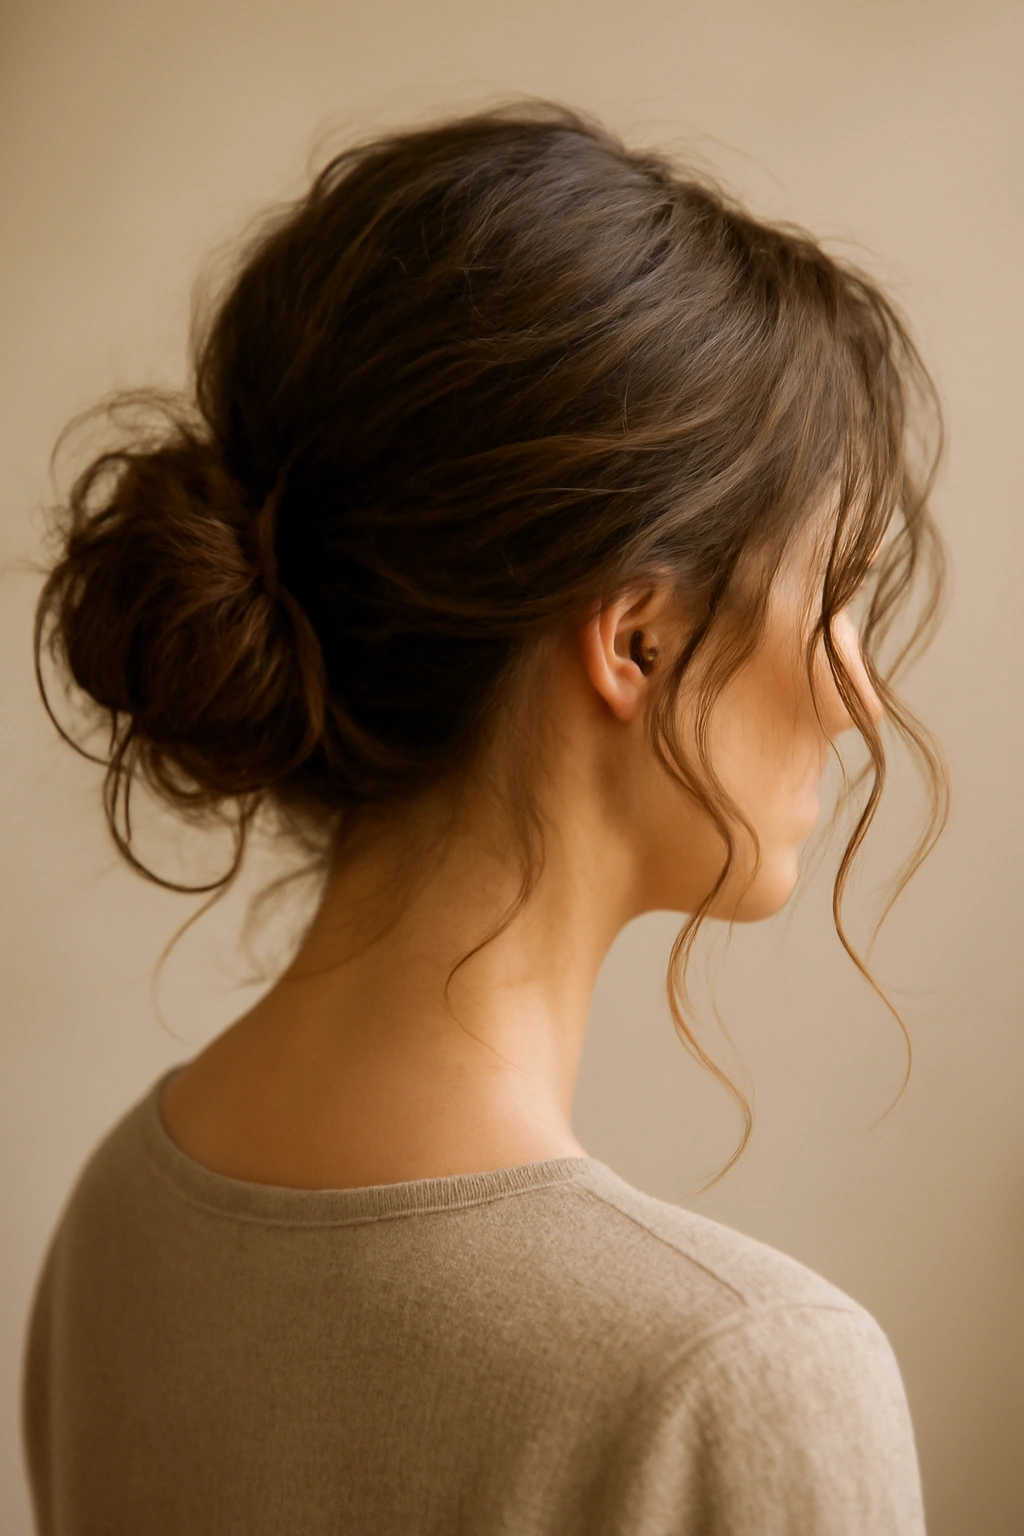
This style offers polished practicality with a romantic, undone edge. You get the neatness of a low bun but with loose waves framing your face and falling from the bun, which gives you the best of both worlds—put-together and effortlessly textured. It’s an especially smart choice if your waves aren’t quite dry but you need to be somewhere soon.
Building the Low Bun with Waves
Start with damp hair that’s been product-treated with sea salt spray, mousse, or a curl-enhancing cream. Let it air dry for 20 to 30 minutes until it’s about 60 to 70% dry—still noticeably damp but not soaking. Gather your hair into a low ponytail at the nape of your neck and secure it loosely. Now here’s the styling moment: take the ponytail and twist it loosely, then wrap it around the base to form a bun shape. Secure it with bobby pins placed strategically to hold the bun without looking rigid. Pull some pieces gently away from your face and around your temples—these tendrils should look like they escaped the bun naturally, not like you carefully placed them. Let the whole thing continue air drying once the bun is in place. The tendrils will dry into soft waves that frame your face beautifully.
What Makes This Style So Practical
- Gets your hair off your neck and face while still showing off your wave texture
- Works when your waves aren’t quite defined enough to wear down on their own
- The tendrils frame your face and draw attention to your eyes and cheekbones
- Looks more polished than a simple ponytail but far less formal than a sleek, tight bun
- Can be worn to work, casual settings, or even dressier occasions depending on how you finish it
- Takes about 5 minutes to create once your hair is mostly dry
Pro tip: Don’t make the bun too tight or too perfectly shaped. The beauty of this style lives in the imperfection. A bun that looks slightly messy and textured, with waves falling from it unevenly, is exactly what you’re going for.
7. Sleek Wave with Deep Side Part
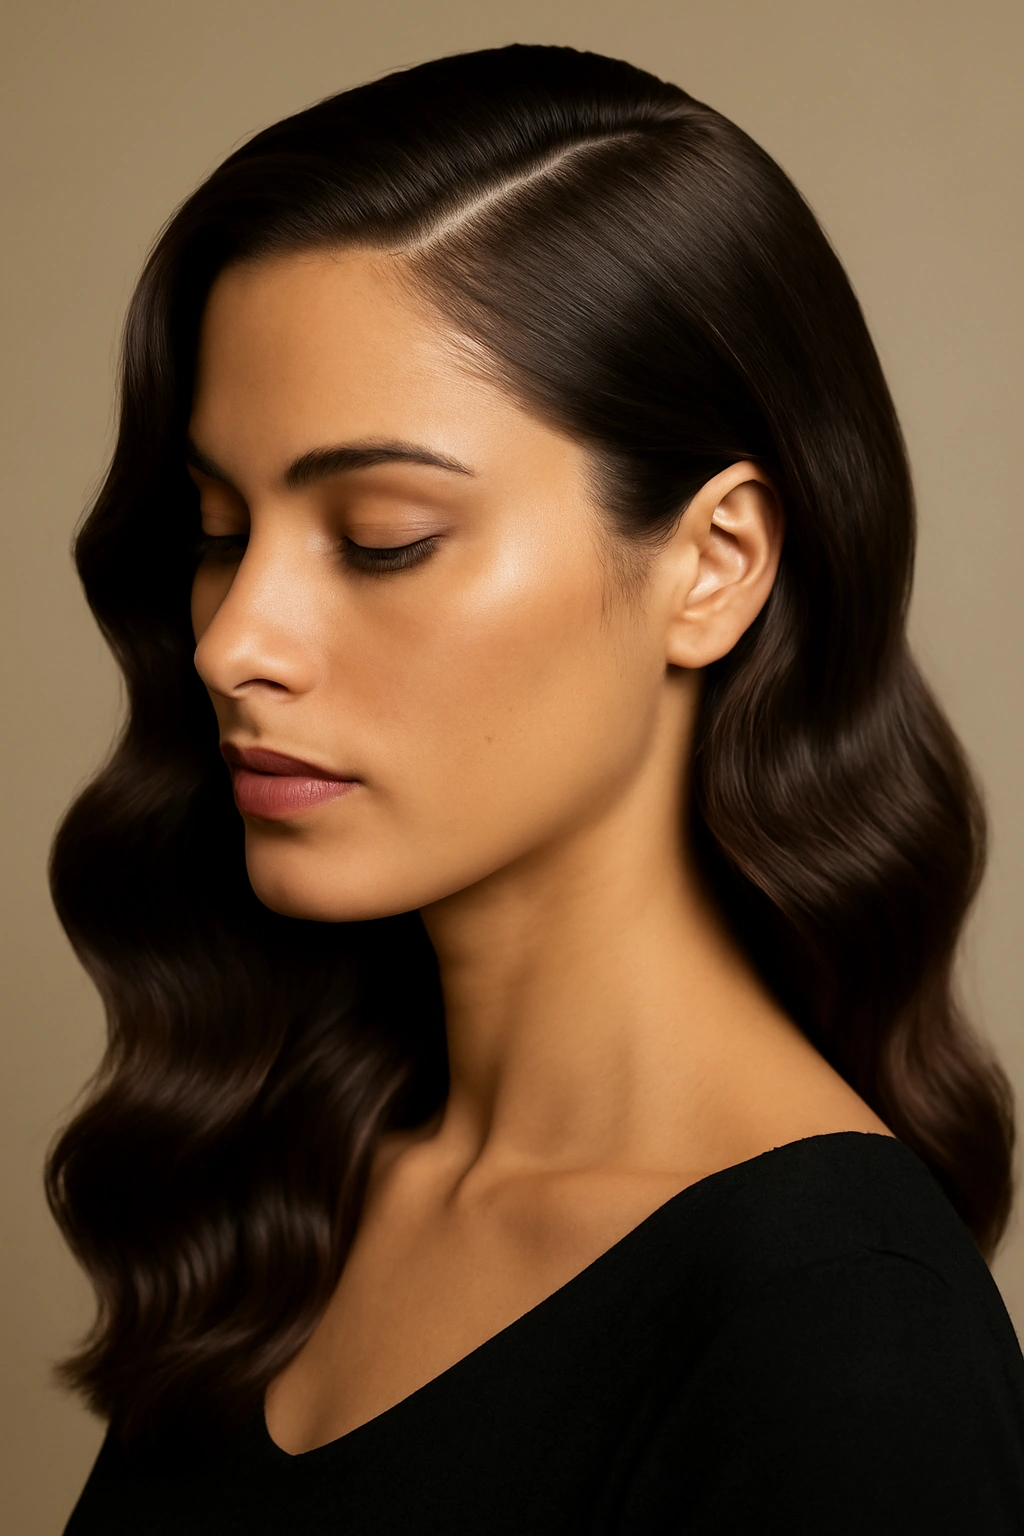
For days when you want your waves to look polished and intentional rather than tousled and undone, a sleek wave with a deep side part delivers sophistication without any heat styling. This is a great option if you’re heading somewhere professional but still want to show off your wave texture. The deep side part adds drama and flatters most face shapes.
Achieving Sleek Waves with Definition
Apply a lightweight styling cream or curl-defining gel to soaking-wet hair, working it through section by section. The key here is using a product with more hold than a mousse—you want your waves to stay in place as they dry. Create a very deep side part by running your fingers along your scalp from your temple on the deeper side all the way across to behind your opposite ear. Smooth the hair on the deeper side of the part down toward that side of your head using your fingers or a wide-tooth comb. Tuck the hair on the lighter side behind your ear or let it fall across your shoulder. Use a microfiber towel or cotton t-shirt to gently squeeze (not rub) your hair to remove excess water without creating frizz. Let it air dry for 1 to 2 hours. As it dries, you can occasionally run your fingers through the wave sections to encourage them to separate slightly.
The Appeal of the Sleek Wave
- Creates a polished, intentional look that reads as “styled” without looking overdone
- The deep side part adds dimension and visual interest to your face
- Works beautifully for professional settings, dates, or special occasions
- Requires minimal product compared to tousled wave styles
- The waves actually become more defined and glossy as the hair fully dries
- Pairs well with minimal makeup because the style itself creates strong facial framing
Worth knowing: The difference between sleek waves and tousled waves is mostly about product choice and how much you manipulate your hair while it dries. Sleek waves use firmer-hold products and are left largely alone once styled. Tousled waves use lighter products and get finger-combed and scrunched frequently during the drying process.
8. Curly Clipped Top Knot
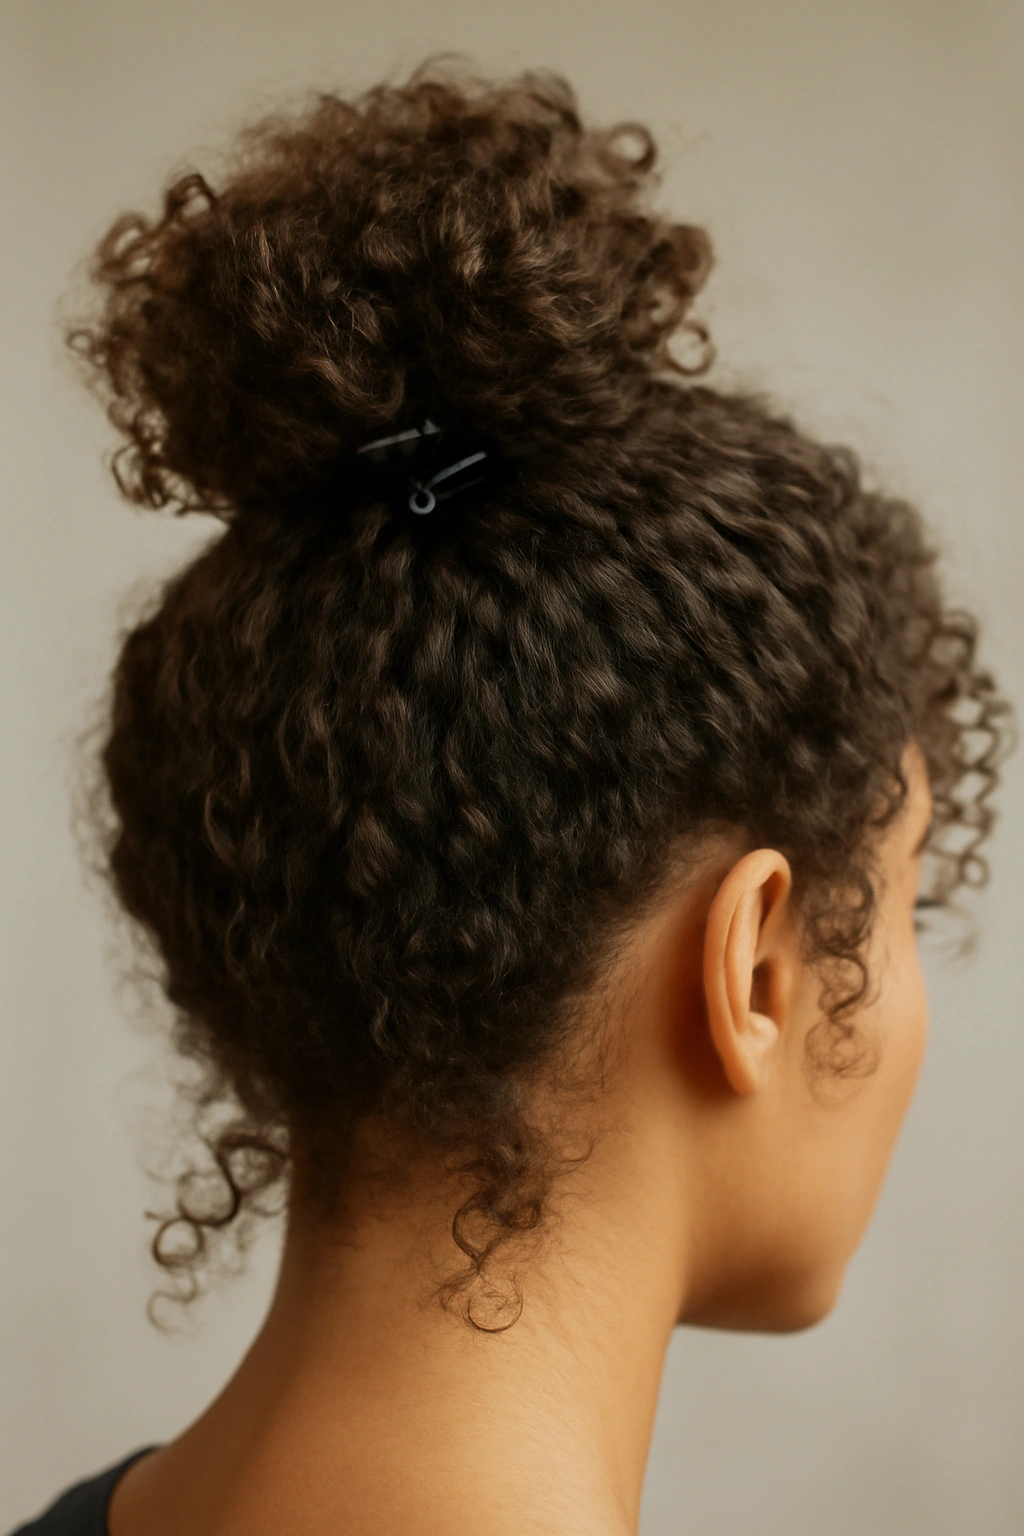
This style works especially well if you have naturally curly or densely wavy hair and want a style that emphasizes volume and texture on top. A top knot secured with a clip (rather than tied with an elastic) creates a more modern, intentional look than a traditional bun. The clip keeps everything in place while allowing the knot to sit higher and look fuller.
Creating the Clipped Top Knot
Apply your styling product—a curl-enhancing cream or mousse works best—to damp hair and scrunch it thoroughly. Flip your head upside down and gather your hair at the crown, then flip back upright while holding everything in place. You’re essentially creating a ponytail positioned at the very top of your head, right at your crown. Twist this ponytail loosely and coil it into a knot shape. Use a large claw clip to hold everything in place, positioning the clip so it secures the knot but doesn’t flatten the curls or waves too much. Some pieces should be able to escape the clip naturally or be gently pulled out to frame your face. Let your hair air dry completely—this usually takes 1 to 2 hours depending on your hair density.
Why This Style Works for Wavy Hair
- The clip method gives you a more modern, intentional aesthetic than a traditional elastic bun
- Lifts hair off your neck and face while air drying, which helps waves form without folding or creasing
- The height of the knot creates the illusion of more volume, which flatters most face shapes
- Works beautifully as a complete style on its own or can be released and restyled once fully dry
- The escaped pieces create the appearance of a styled, deliberate look rather than a haphazard knot
- Dries completely in under 2 hours for most hair types and densities
Pro tip: If you have fine or thin hair, use a smaller clip and make sure the knot isn’t too heavy. A top knot that’s too large can slide down as it dries or look droopy rather than voluminous. Test the position and tightness before you let it air dry.
9. Layered Choppy Waves
This style is really about celebrating whatever layers already exist in your haircut and using a specific product and styling technique to make those layers work with your waves rather than against them. Choppy layers naturally create more surface area for waves to cling to, which means your waves will be more defined and textured throughout your hair rather than smooth and uniform.
Styling Choppy Layers for Maximum Wave Definition
Start with damp hair and apply a textured styling spray or curl cream, being extra generous on the layers. Use your fingers to scrunch and separate the layers as you work the product through—you’re trying to encourage each layer to dry independently, not as one uniform mass. The independence of each layer is what creates the choppy wave effect. Flip your head upside down and scrunch for about a minute while inverted. Flip back upright and use your fingers to continue separating and scrunching individual layers. As your hair air dries, avoid combing or smoothing it down. Instead, keep scrunching and separating. The more you work with the layers, the more textured and piece-y your waves will be.
What Choppy Layers Bring to Waves
- Create visual dimension and movement that straight layers don’t offer
- Allow waves to sit at different angles throughout your hair, which looks more dynamic and intentional
- Give the appearance of more texture and volume even if your natural waves are quite loose
- Can be restyled in multiple ways depending on how you part your hair or which direction you flip your head
- Require more frequent trims (every 4 to 6 weeks) to keep the choppy texture looking intentional rather than shaggy
- Look better the more piece-y and textured they appear—air drying delivers this perfectly
Insider note: If you have longer hair and want the choppy wave look, ask your stylist for layers that start around shoulder length and graduate longer. This creates movement throughout while still maintaining length.
10. Wet-Look Wavy Pony
A wet-look ponytail with waves falling from it is a modern, undeniably polished style that works for both casual and dressier occasions. The wet look comes from using a smoothing gel or lightweight serum that creates shine and definition without looking stiff or crunchy. The waves falling freely from the ponytail add softness and texture that pure sleekness misses.
Building the Wet-Look Wavy Pony
Apply a lightweight styling gel or serum to damp hair, working it through to coat each strand evenly. This creates the glossy, wet appearance. Use a fine-tooth comb to smooth your hair back into a sleek ponytail—high, mid-level, or low, depending on your preference. The ponytail itself should be smooth and tight with no flyaways. But here’s where the waves come in: the hair already in the ponytail holder is going to dry with whatever wave or texture your hair naturally has. To enhance this, let the first 2 to 3 inches of the ponytail hang loose (before it gathers fully into the elastic), and these loose pieces will dry into soft waves. You can also gently scrunch the ends of the ponytail while it air dries to encourage wave formation.
The Appeal of the Wet-Look Pony
- Looks sleek and intentional without requiring heat styling
- The combination of smooth roots and wavy ends is visually striking and flattering
- Works beautifully as a workout style, casual everyday style, or dressier occasion style
- Takes about 5 minutes to style and dries mostly within 30 to 45 minutes
- The glossy gel or serum makes your hair look healthy and shiny
- You can easily release the ponytail later and have wavy hair ready to go
Pro tip: Don’t apply the gel all the way to your roots if you want a natural-looking wet style. Apply it starting from about an inch away from your scalp. This prevents your roots from looking weighed down or slick while keeping the rest of your hair glossy.
11. Braided Crown with Loose Waves
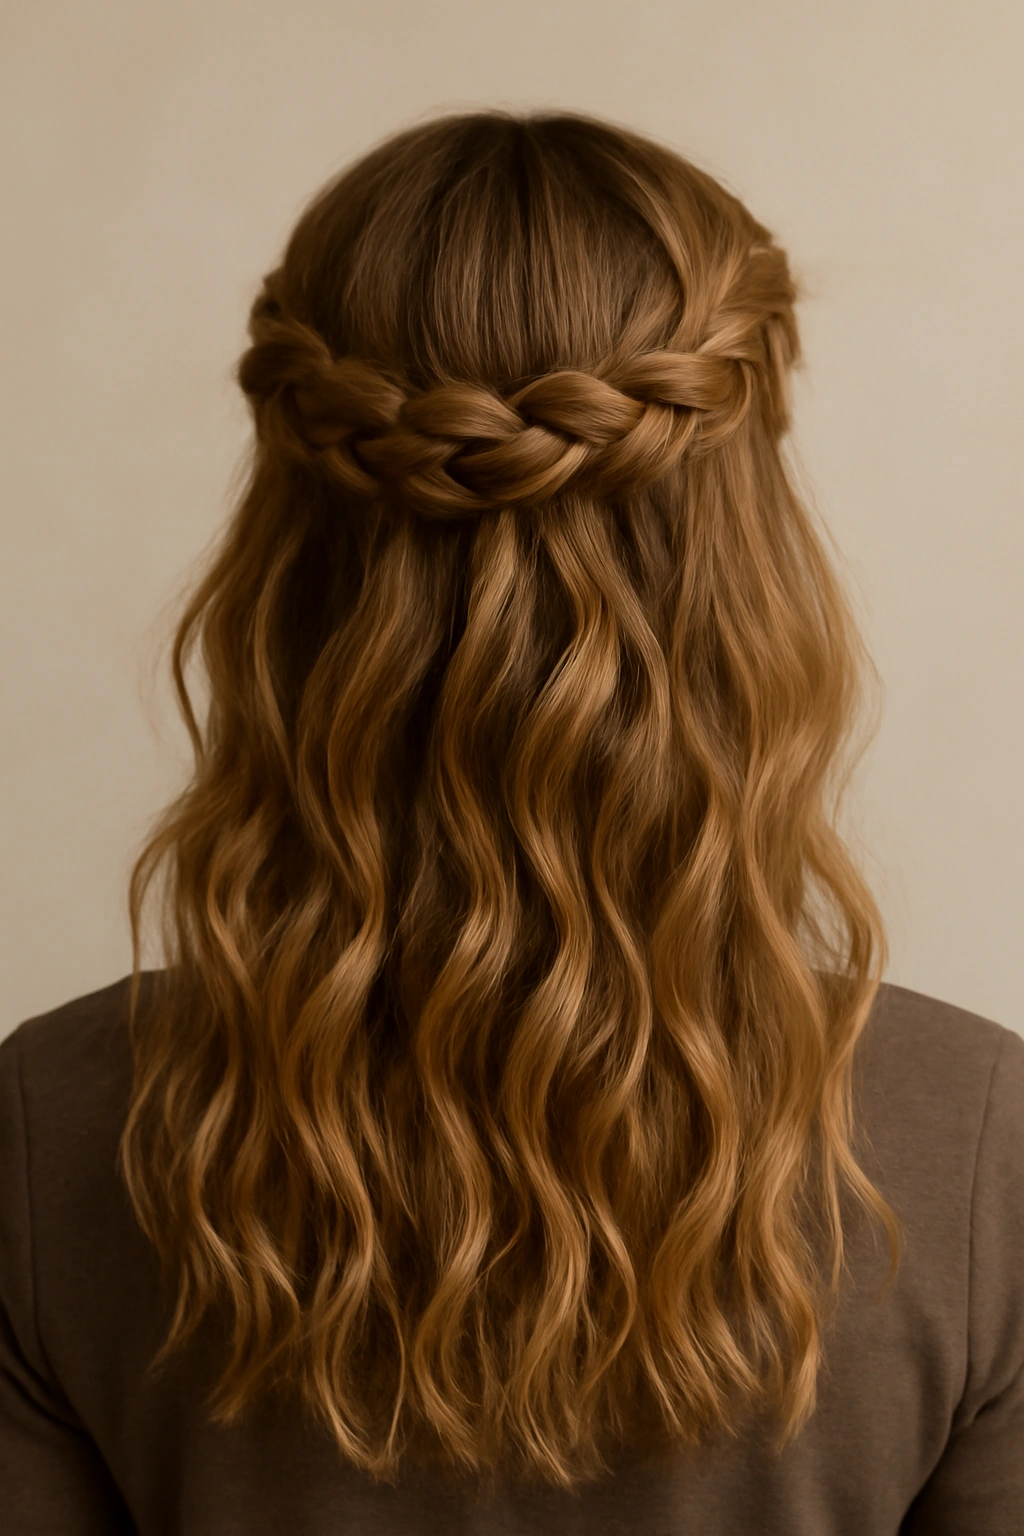
A braided crown that curves around your head from one side to the other, with waves falling freely below, is romantic and whimsical without being overly formal. This style works for date nights, special occasions, or just when you want to feel extra put-together. The crown braid adds an element of styling without requiring any heat tools.
Creating the Crown Braid
Start with damp hair and apply a curl-enhancing product throughout. Let it air dry for about 20 to 30 minutes until it’s approximately 50% dry—still quite damp. Take a section of hair from one temple and begin braiding it loosely, angling the braid backward and across the crown of your head toward the opposite temple. Keep the braid loose—this is key. A tight crown braid looks severe; a loose one looks romantic. Once you’ve braided across to the opposite temple, secure the end with a small elastic. Now, the hair below the braid (which is the majority of your length) will continue air drying into waves. You can gently scrunch this section while it dries, or let it dry completely without touching it—both approaches work beautifully.
Why Crown Braids Work for Air-Dry Waves
- The braid itself adds intentional styling and texture without heat
- Keeps some hair off your face and neck while still showing off your waves
- Works for many hair types, lengths, and wave patterns
- The style automatically looks more polished than wearing your hair completely down
- You can remove the braid once your hair is fully dry and have additional wave texture from where the braid was
- Takes about 10 minutes to create once your hair has partially dried
Worth knowing: The looser your crown braid, the softer and more romantic the final style. If you want a very defined braid, make it tighter, but you’ll get a slightly more formal look.
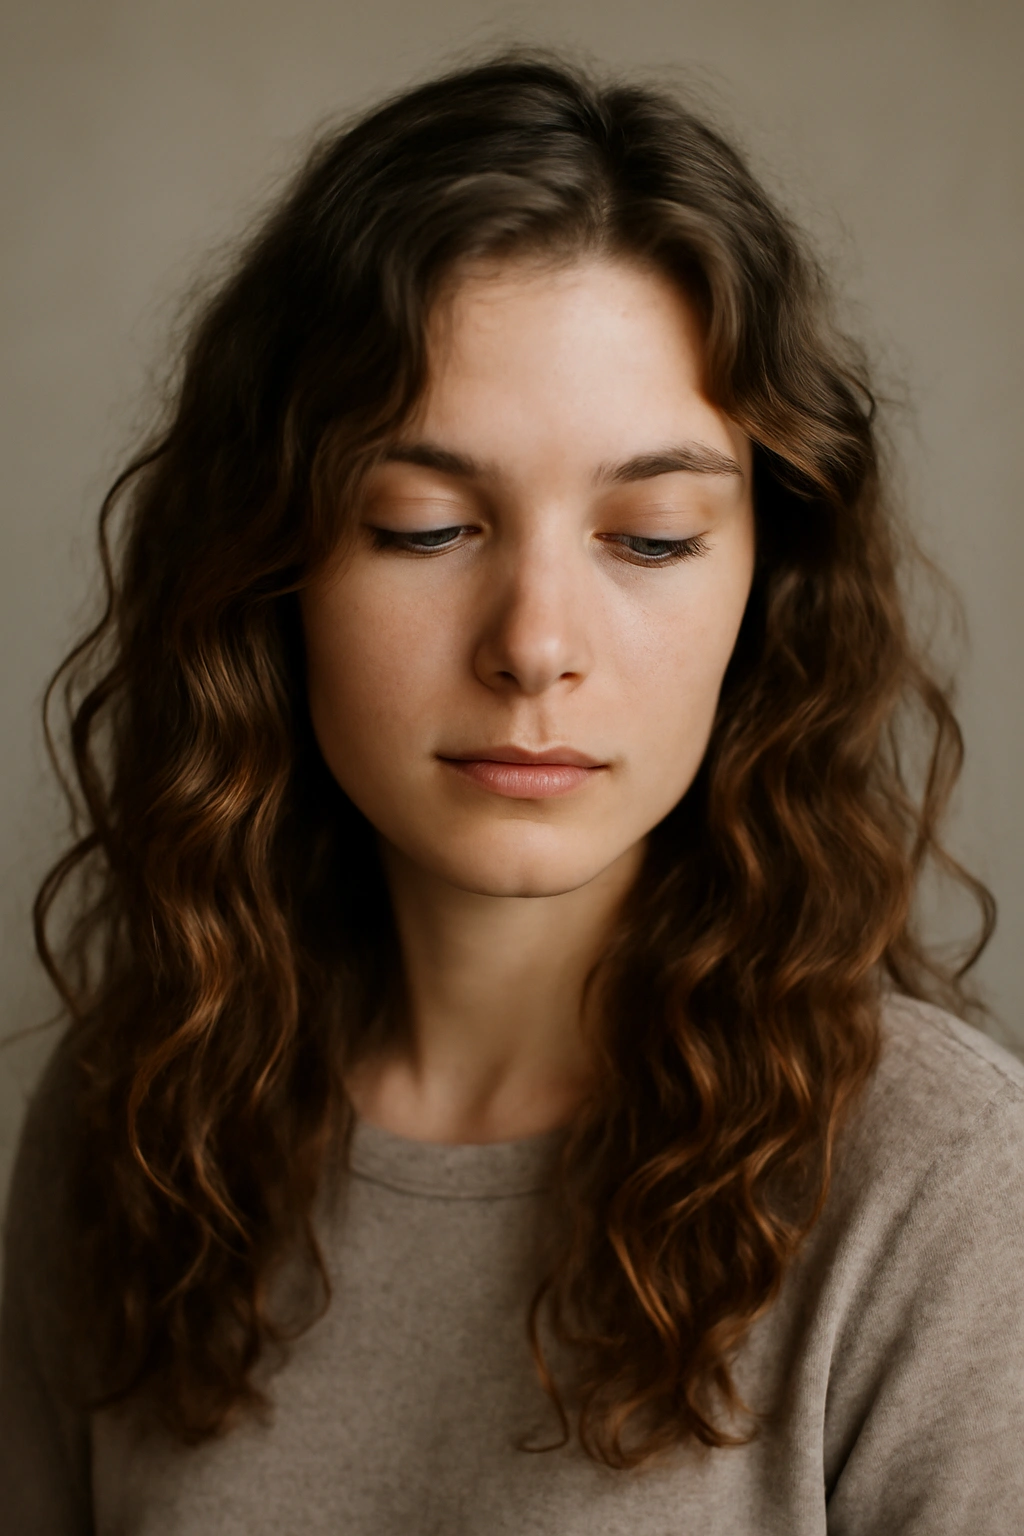
12. Undone Waves with Face-Framing Layers
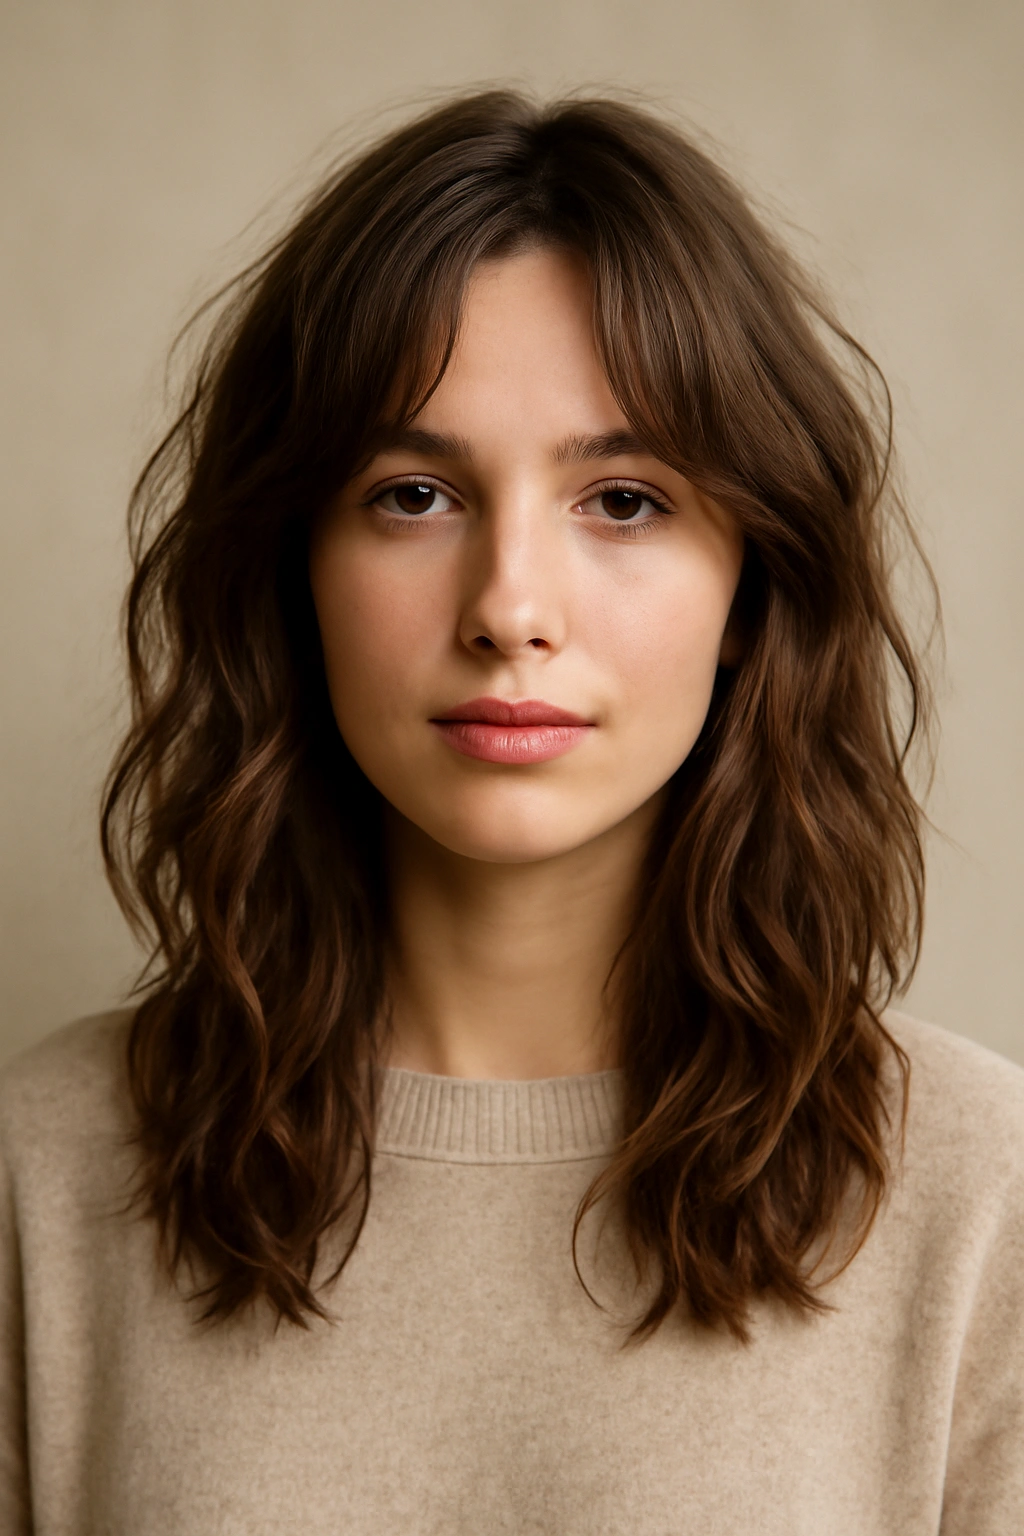
This is the ultimate “I woke up like this” style, and it requires intentional face-framing layers in your cut. The layers should start around cheekbone length or slightly shorter, which allows them to catch light and frame your face beautifully as they dry into waves. This works wonderfully if you have a longer haircut but want more texture and movement around your face.
Styling Face-Framing Waves
Apply your wave-enhancing product to damp hair, focusing extra attention on the face-framing sections. You want these pieces to have enough product to hold a wave but not so much that they look stiff. Use your fingers to separate and scrunch all your hair. Flip your head upside down for 30 seconds to add volume and activate the product. Flip back upright and use your fingers to gently tousle your face-framing layers, encouraging them to dry away from your face or framing it softly, depending on the direction of your waves. Let everything air dry without combing or brushing. The face-framing layers will settle into soft waves that catch light beautifully.
What Makes Face-Framing Layers Essential
- Create instant softness around your face regardless of your overall hairstyle
- Catch light and create dimension that longer, one-length hair misses
- Can frame your face even if the rest of your hair is styled up
- Make even the simplest wave style look intentional and polished
- Work for most face shapes when cut to hit around the cheekbones or slightly above
- Continue to frame your face and add movement even after several weeks between trims
Pro tip: When asking for face-framing layers, be specific with your stylist. Show them a photo of where you want the layers to start and how much movement you want. Layers cut too bluntly won’t create the soft, wavy effect you’re going for.
13. Two-Tone Beach Waves
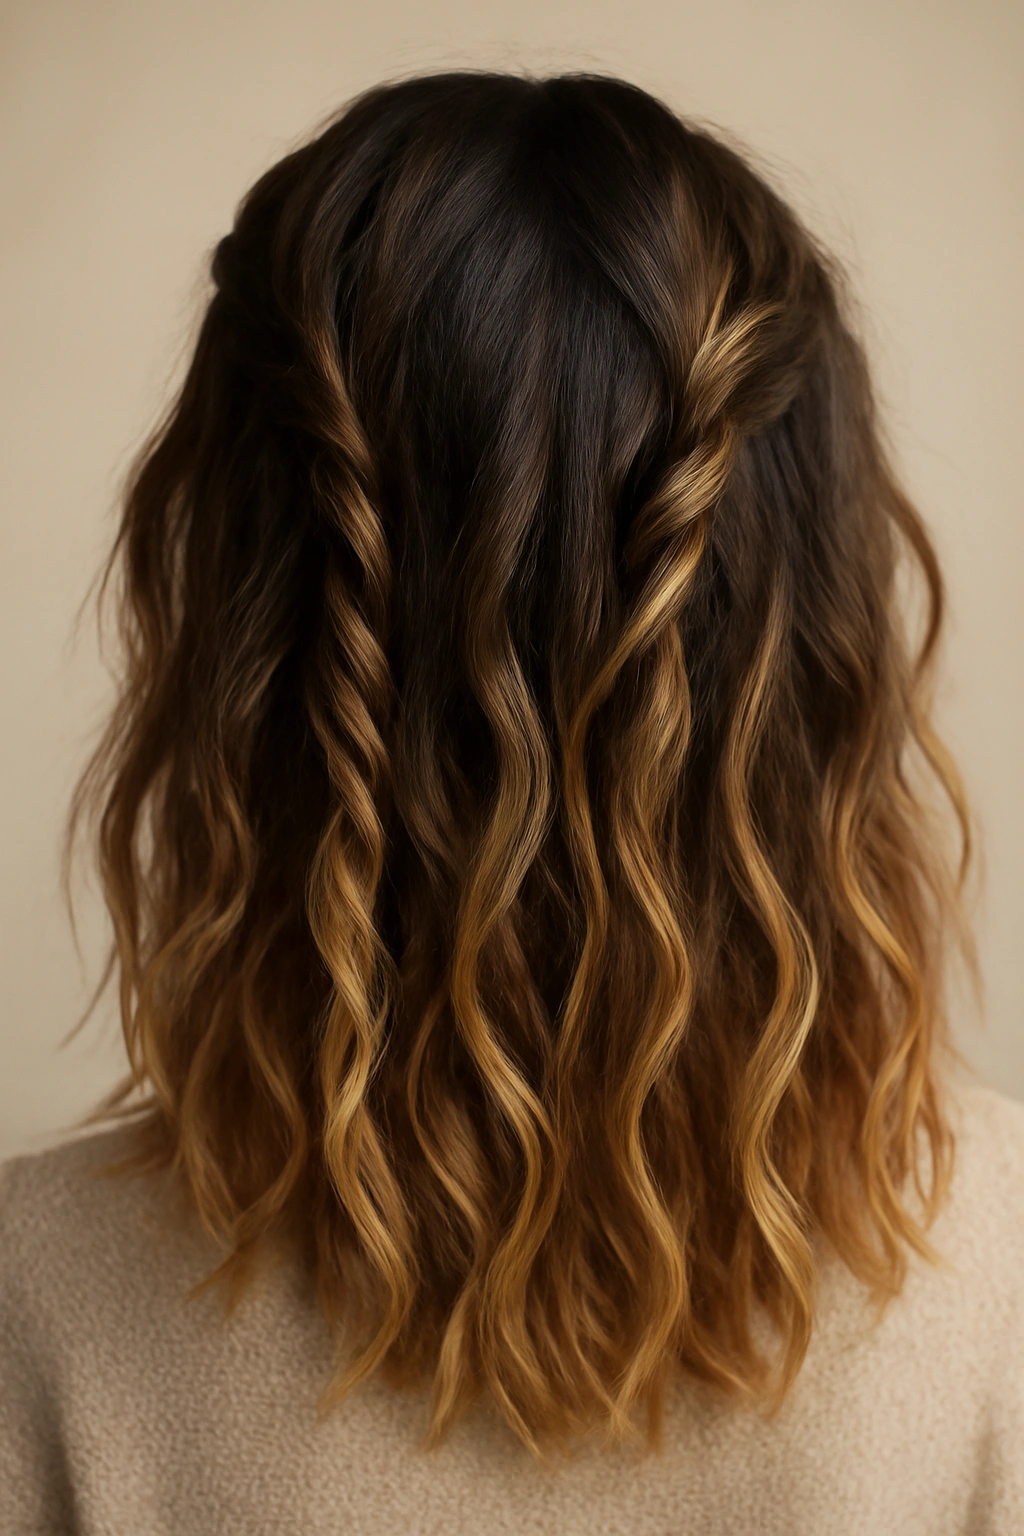
This style uses a combination of braiding and twisting to create waves with multiple textures throughout your hair. The “two-tone” refers to the fact that some sections are twisted (creating tighter waves) while others are left loose (creating gentler waves), resulting in waves with varying degrees of definition that look natural and undone.
Creating Two-Tone Textured Waves
Apply your styling product to damp hair. Divide your hair into several sections—at least four or five. In some sections, create loose braids; in others, create loose twists; and in others, leave the hair relatively loose. The variation is what creates the two-tone effect. Secure each section with a small elastic. Let your hair dry completely—this takes a couple of hours. Once everything is dry, release each section and gently finger-comb and separate the waves. The braided sections will have tighter, more defined waves. The twisted sections will have medium waves. The loose sections will have gentle undulation. Together, they create a naturally textured, undone appearance.
Why Variation Creates Natural-Looking Waves
- Uniform waves (all tight or all loose) can look overly styled or monotonous
- Varying the texture throughout your hair makes it look like your natural waves, just enhanced
- Different textures catch light at different angles, creating more dimension and visual interest
- This method works beautifully for shoulder-length or longer hair where you have enough length to play with
- Takes advance planning (usually done in the evening to dry overnight) but zero styling effort once dry
- The result looks like naturally textured waves rather than an obvious style
Insider note: The more sections you create, the more varied your wave textures will be. Try creating six to eight sections for maximum texture variation, or just four to five for a subtler effect.
14. Twisted Side Waves
Twisting sections of your hair and allowing them to air dry creates waves that are softer and more gentle than braids but more defined than completely loose air-drying. This method works beautifully for people who want waves with shape and definition without the tight curl patterns that braids sometimes create.
The Twisted Wave Technique
Apply your wave-enhancing product to damp hair. Take a section about two inches wide and twist it loosely from roots to ends. Don’t make it too tight—you want a gentle spiral, not a rope-like twist. Secure the end of the twist with a small clip or elastic. Repeat this process throughout your head, creating anywhere from four to eight twisted sections depending on how much texture you want. Let your hair dry completely in the twists, which usually takes 1.5 to 3 hours depending on your hair density. Once fully dry, unwind each twist by running your fingers through it and gently separating the waves. Separate and tousle the waves with your fingers to create a soft, undone appearance.
Why Twists Create Perfect Intermediate Waves
- Tighter than loose air-drying but looser and more natural-looking than braids
- Create waves with visible definition that still look soft and undone
- Work on all hair types and textures
- Take significantly less time than braids because twists are faster to create
- The resulting waves look intentional without looking overly styled
- Work beautifully whether you have shoulder-length hair or waist-length hair
Pro tip: Keep your twists relatively loose—aim for about three spirals from root to end rather than five or six tight spirals. Tighter twists create more defined curls; looser twists create softer waves.
15. Long Flowing Waves with Movement
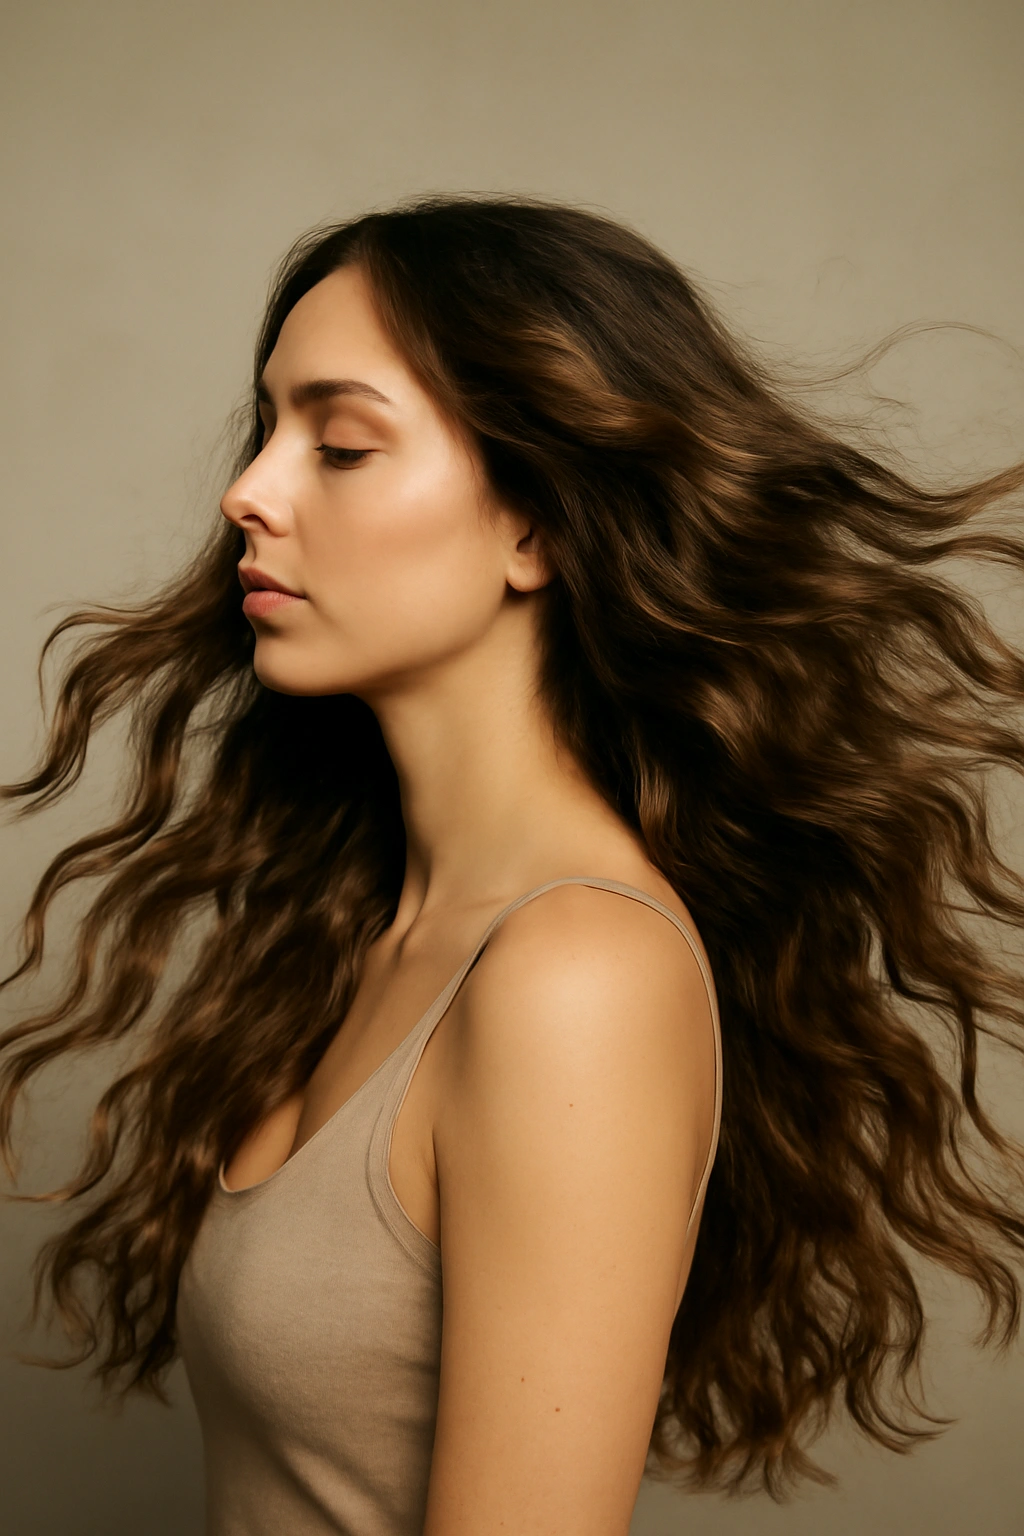
For those with longer hair and loose, natural waves, sometimes the best air-dry style is simply to enhance and encourage your hair’s existing texture without dramatically changing it. Long, flowing waves work as an everyday style and are also elegant enough for dressier occasions. This approach celebrates your hair’s natural pattern rather than fighting it.
Building Long, Flowing Waves
Apply a lightweight curl-enhancing cream or mousse to damp hair, working it through evenly but not overloading your hair with product. Use your fingers to scrunch your hair gently, activating the wave pattern without trying to change it significantly. Create a center part, deep side part, or no part at all—whichever suits your face and style. Flip your head upside down for 30 seconds and gently scrunch while inverted. Flip back upright and use your fingers to separate your waves, encouraging them to dry in a relatively undisturbed way. The key to this style is hands-off air drying; you’re not constantly manipulating your hair. Instead, you’re setting up the conditions for your waves to dry beautifully and then mostly leaving them alone.
The Beauty of Embracing Your Natural Waves
- Takes less product and less styling effort than trying to create waves you don’t naturally have
- Your hair dries into waves that actually look like your authentic texture, not a forced style
- Works beautifully for daily wear and requires minimal maintenance
- The simplicity of the approach paradoxically looks more polished than overcomplicated styling
- Your waves will likely be more defined and healthy-looking because you’re using minimal heat and minimal manipulation
- This style actually looks better the more you resist the urge to fiddle with your hair as it dries
Worth knowing: If your waves are very loose or subtle, you might need to use a slightly firmer-hold product or a sea salt spray to give them more definition. But avoid the temptation to use too much product—a little goes a long way, and heavy product on loose waves can make your hair look limp instead of flowing.
Final Thoughts
The reality of air-drying wavy hair is that it’s far easier than most people think once you understand the fundamental principle: work with your hair’s natural texture instead of against it, use products designed for waves specifically (not general styling products), and give your hair the time it needs to dry completely. None of these 15 styles requires a blow dryer, a flat iron, a curling wand, or any heat tool at all. What they all share is an understanding that waves are beautiful exactly as they are when you give them the right conditions to form.
The best style for you depends on your hair length, your natural wave pattern, how much time you typically have before you need to leave your house, and what kind of occasions you’re styling for. If you have thick, densely wavy hair, the shag cut or textured layers might be your answer. If you prefer your waves to look more intentional and polished, sleek waves with a deep side part or wet-look waves might suit you better. If you want maximum impact with minimal effort, half-up styles or low buns with wavy tendrils deliver both.
The time investment is genuinely minimal compared to heat styling—most of these styles take five to ten minutes to create, then your hair does the rest while you’re getting ready, working, or just living your life. Your waves will be better for it. Your hair will be healthier without constant heat exposure. And you’ll have a reliable, beautiful style that works with your natural hair texture rather than fighting it every single day.