Twist styles have become the gold standard for protective styling in natural hair communities — and for good reason. They’re low-manipulation, they last for weeks, and they work beautifully on practically every hair texture from loose waves to tight coils. But here’s what most people don’t realize: “twists” isn’t a single style category. The way you section your hair, the thickness of each twist, how tightly you coil them, and whether you use extension hair completely changes the look and feel. What works spectacularly for 4c hair might need adjustment for 3a curls. That’s why having a diverse toolkit of twist styles is essential — not just for variety, but because different textures genuinely thrive with different approaches.
The beauty of short twist styles is that they give you all the protective benefits without the weight and length commitment. Whether you’re growing out a pixie cut, recovering from heat damage, maintaining healthy mid-length hair, or simply embracing a chic, low-profile aesthetic, short twists deliver dimension, texture, and a polished look that reads as intentional, not lazy. They photograph beautifully, they age well (no frizz catastrophes at week three), and they create the perfect canvas for accessories, creative colorwork, or a minimalist aesthetic.
What follows are fifteen distinct short twist styles, each tailored to different textures, lifestyles, and maintenance preferences. You’ll find detailed techniques, specific texture recommendations, real-world wear time, and honest notes about what makes each style shine. Think of this as your complete short twist reference guide — the styles you can actually execute at home or confidently describe to a stylist.
1. Classic Two-Strand Twists
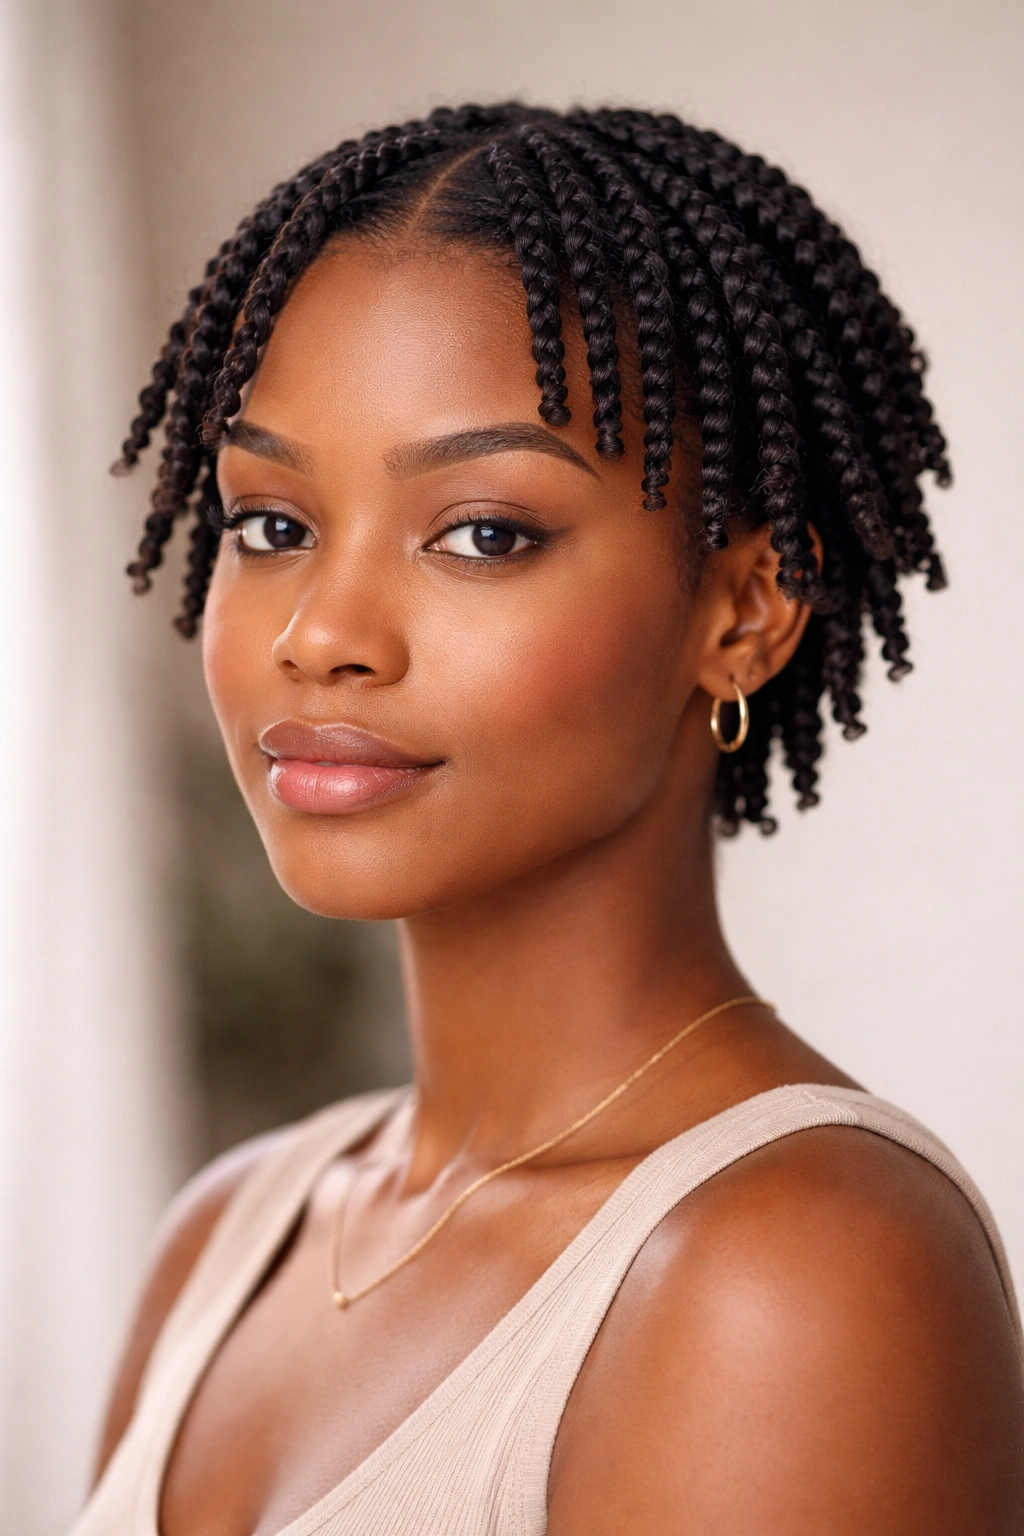
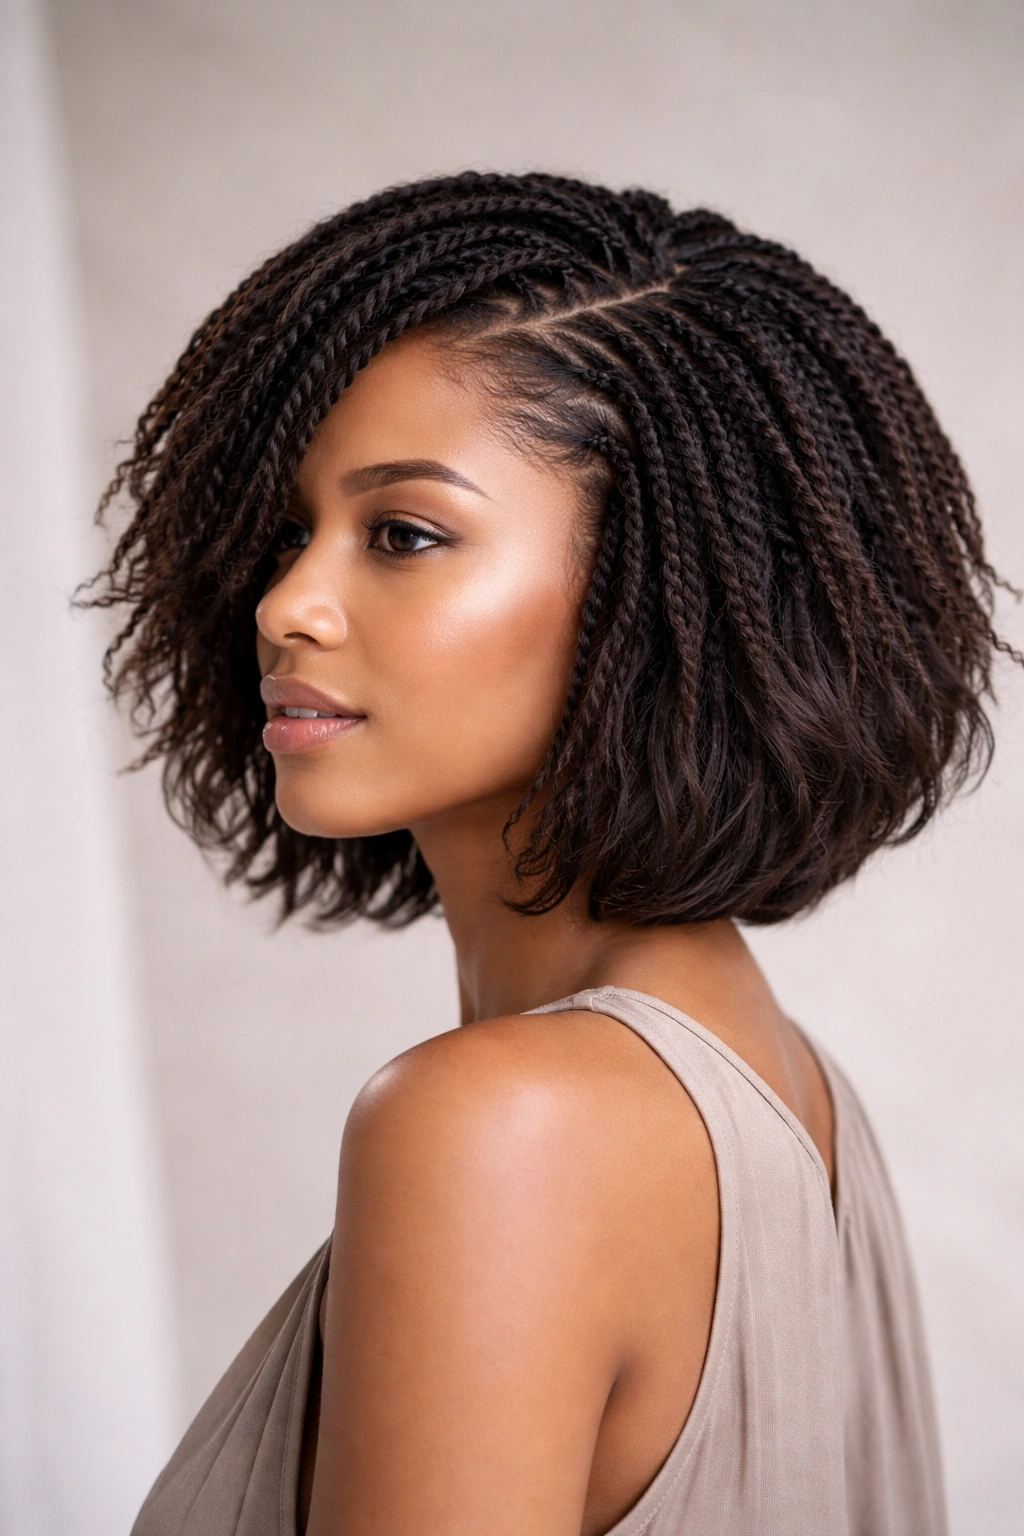
Two-strand twists are the foundation style — two sections of hair twisted around each other from root to tip. When done on shorter hair, they create a sleek, defined look that reads polished and intentional. The beauty of this style is its incredible versatility depending on how thick you section your hair and whether you use extensions.
Why This Works Across All Textures
Two-strand twists succeed because they work with your hair’s natural texture rather than against it. Looser curls don’t require as much tension to hold the twist shape, while tighter coils grip the strands naturally and create beautifully defined spirals. On short hair, the reduced length means less frizz and a more controlled appearance than longer versions. The style also offers a clean aesthetic — there’s nothing fussy or overly complicated about it, which is exactly why it never goes out of style.
Technique Specifics for Different Textures
- Loose to wavy hair (2a–2c): Use thicker sections (about the width of your pinky finger) and consider using lightweight yarn or thread underneath to help the twist grip and hold shape. Without this anchoring, looser textures can unravel more easily.
- Curly hair (3a–3c): Medium sections work beautifully; your natural curl pattern will help define the twist. You can go finer or thicker depending on your preference, and the style holds well without extension hair.
- Coily to kinky hair (4a–4c): This texture is where two-strand twists truly shine. Even with thinner sections, the twists stay defined and crisp. Many people find they don’t need extension hair at all, though adding it gives extra length and can reduce styling time.
Pro tip: Twist while your hair is damp but not soaking wet. Completely wet hair stretches too much and may not hold the twist shape once dry; completely dry hair can feel stiff and potentially break during the twisting process. The sweet spot is damp-to-moist.
2. Flat Twists
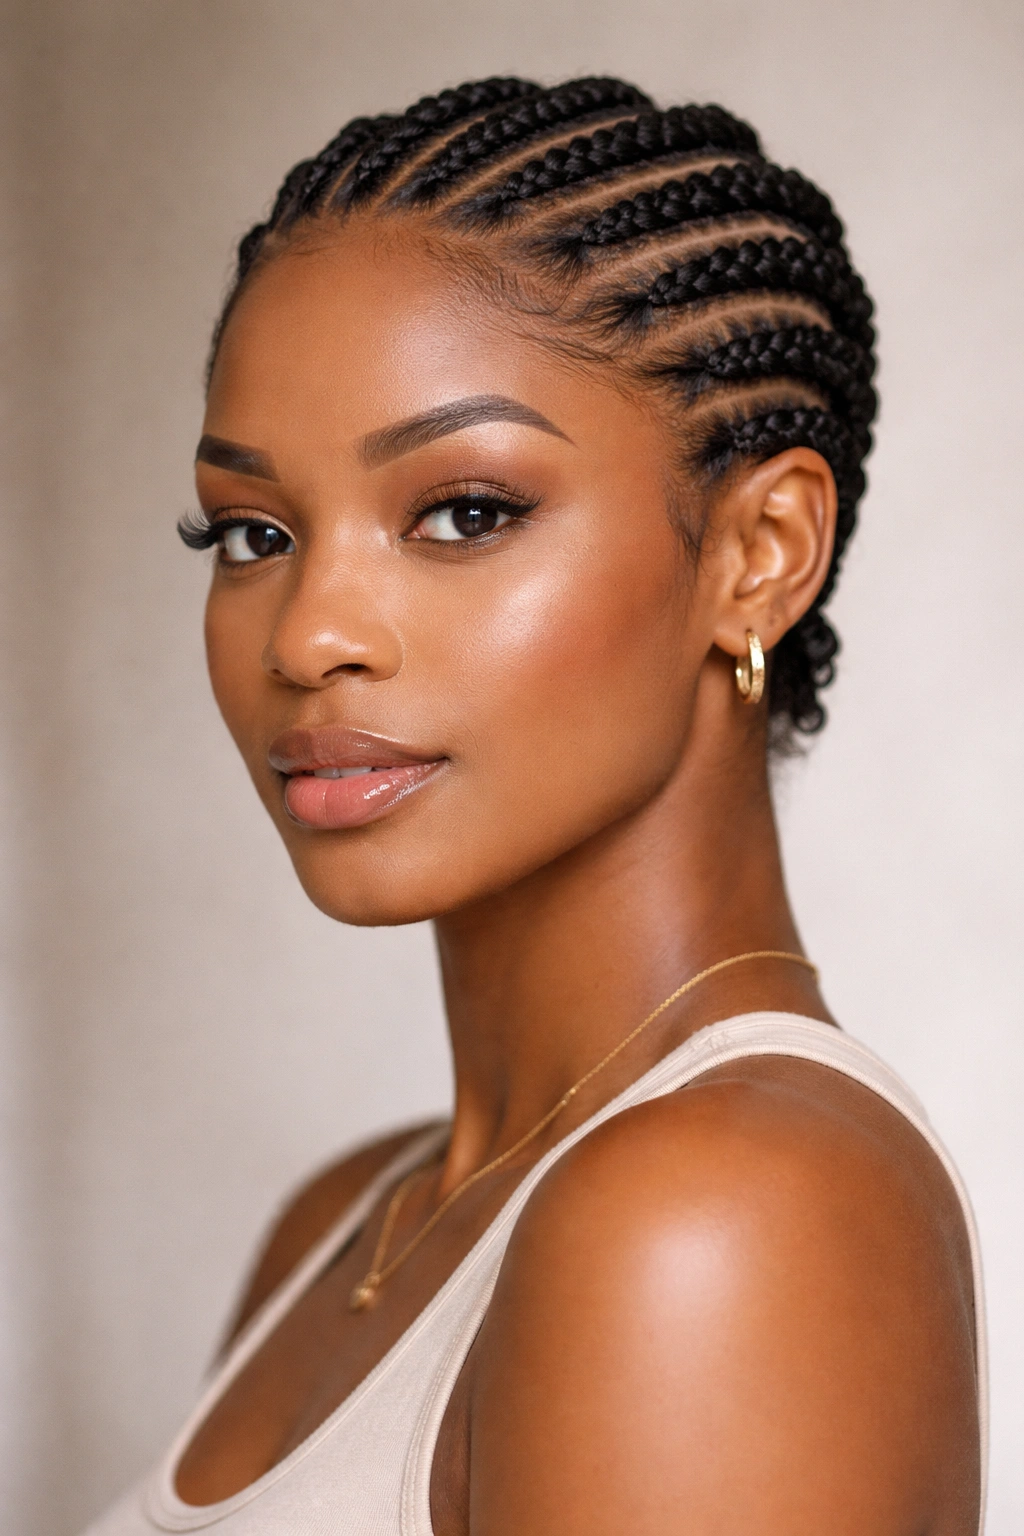
Flat twists sit close to the scalp, creating a sculptural, almost braided appearance while technically being twists. On short hair, they’re absolutely stunning — they can frame your face, trace your natural hairline, or create graphic patterns across your head.
The Sculpting Advantage
Flat twists require more precision and skill than regular two-strand twists, but the payoff is a polished, intentional style that photographs beautifully and lasts longer because they’re anchored directly to the scalp. The tension keeps them secure without relying on the length of loose twists to maintain the style. This makes them particularly effective for shorter hair, where loose twists might look droopy or unfinished.
What You Need to Know
- Section width: Use sections about the width of your index finger for a balanced look. Too-thin sections take forever; too-thick sections look sloppy.
- Tension is everything: Tight enough to stay secure and close to the scalp, but not so tight that you feel discomfort or see strain on the root area. The goal is a neat look, not a headache.
- Best for: All textures can wear flat twists, but they’re especially stunning on coilier hair (3c–4c) where the dimensional twist detail really pops against the defined coils.
- Longevity: Flat twists typically last 3–4 weeks on most textures, sometimes longer if you’re gentle during sleep and use a silk pillowcase or bonnet.
Worth knowing: Flat twists set while damp and dry into their final shape, so plan your pattern while your hair is still wet and use a leave-in conditioner to keep it workable.
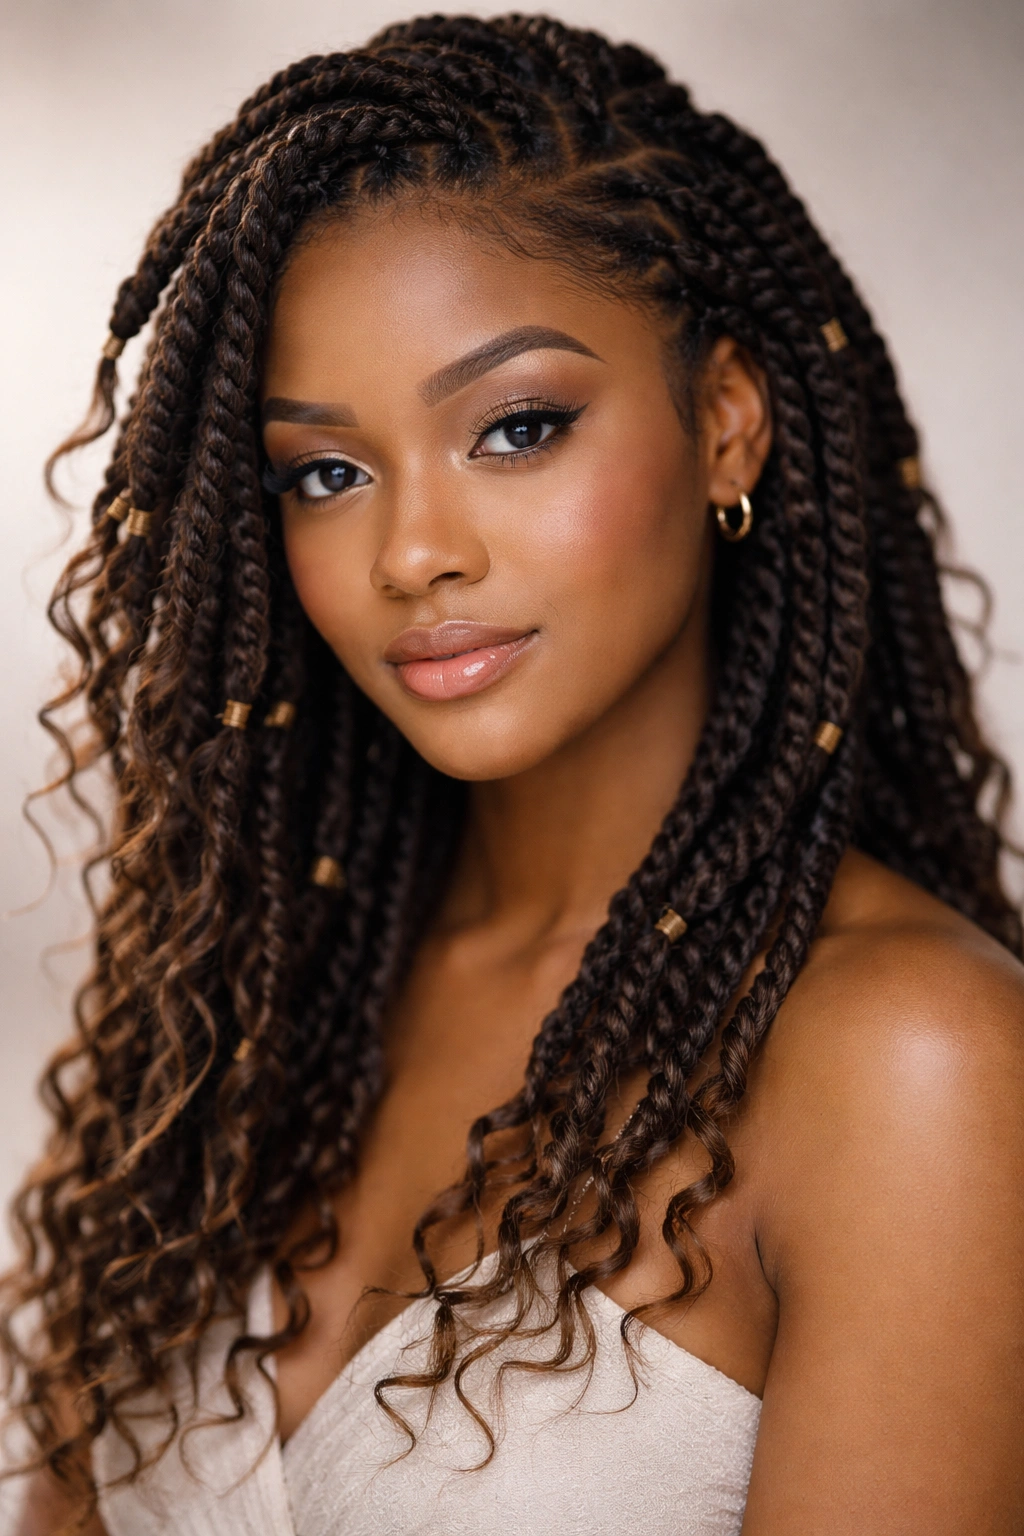
3. Passion Twists
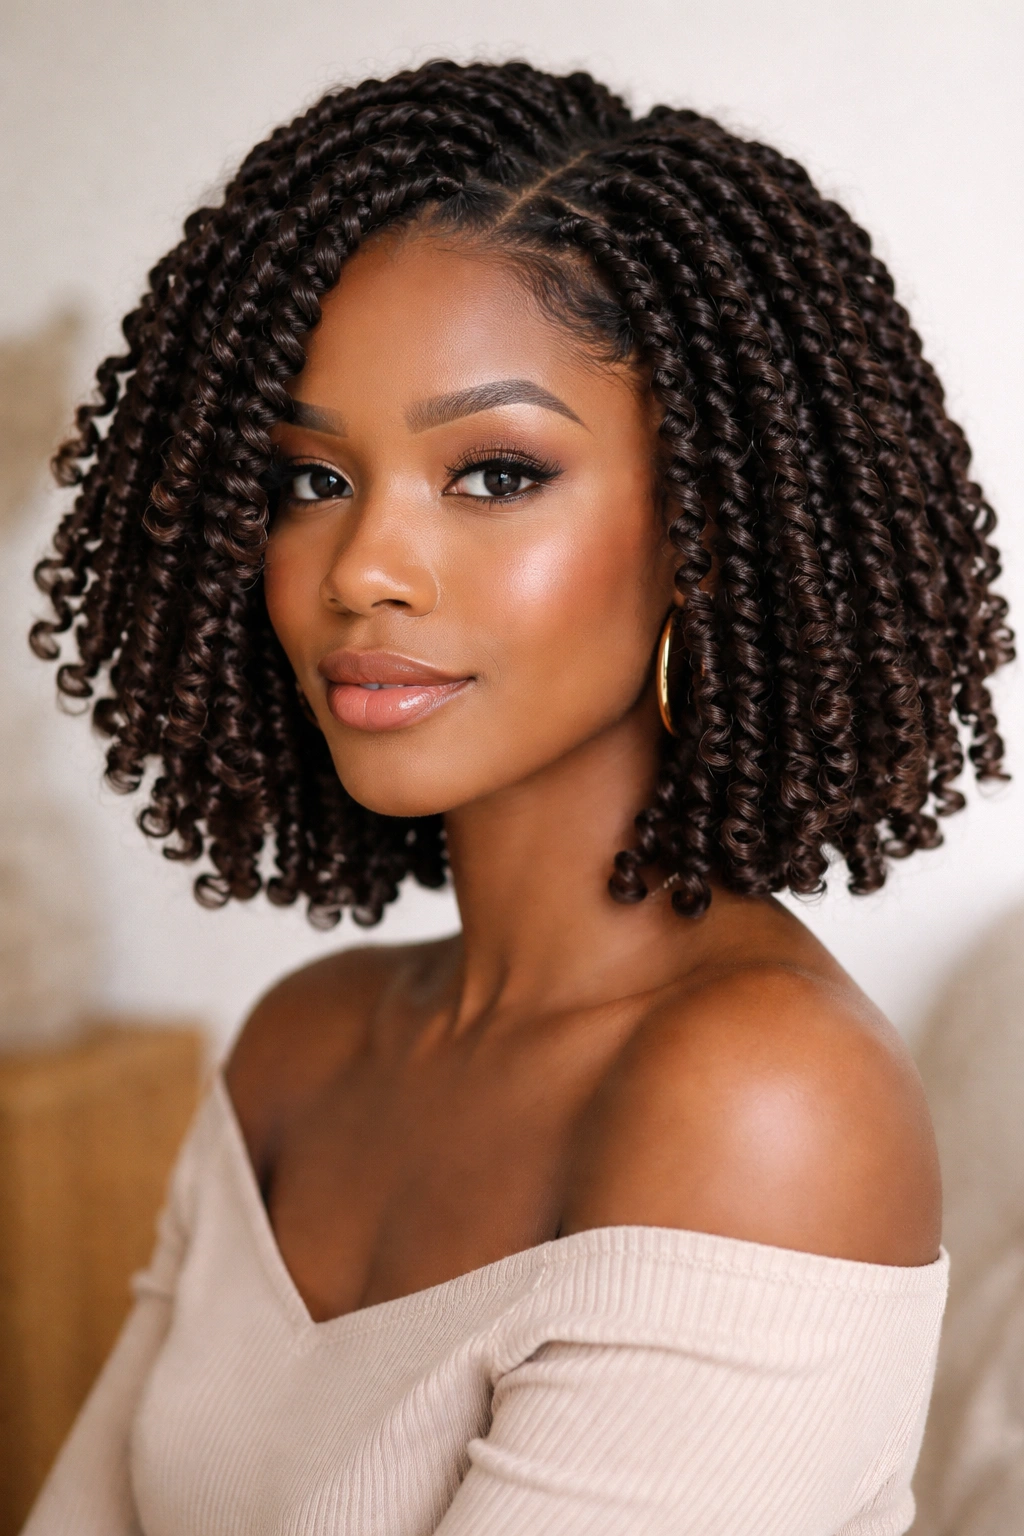
Passion twists are a hybrid between twists and locs — they’re lighter weight than traditional locs but have more grip and definition than regular two-strand twists. They’re made by wrapping hair around a core (usually thin yarn, thread, or fine extension hair) to create a rope-like texture with soft, bouncy spirals.
Why They’re Perfect for Short Hair
Passion twists give you that coveted loc-like aesthetic without the months-long commitment or the heavy weight that can stress shorter hair. Because they’re installed around a core, they hold their shape beautifully and create incredible texture and dimension. On short hair, they look particularly fresh and modern — the bounce and movement is exactly right for a chin-length or shoulder-grazing cut.
Installation and Maintenance Breakdown
- Installation time: 3–5 hours depending on how many twists and your experience level. It’s faster than traditional locs but takes longer than standard two-strand twists.
- Hair needed: You can install on your natural hair alone or add lightweight yarn/thread (or synthetic hair) for extra fullness and to extend the style.
- Wear time: 4–6 weeks before they need to be redone or refreshed. The core keeps them locked in place longer than unanchored twists.
- Best textures: Coilier hair (3c–4c) holds passion twists with beautiful definition. Wavy and curly textures can wear them too, but looser hair may require a tighter core to keep the shape intact.
Insider tip: Use high-quality yarn (soft cotton or acrylic blends, not cheap itchy thread). Your scalp will thank you, and the twists will look more polished and professional.
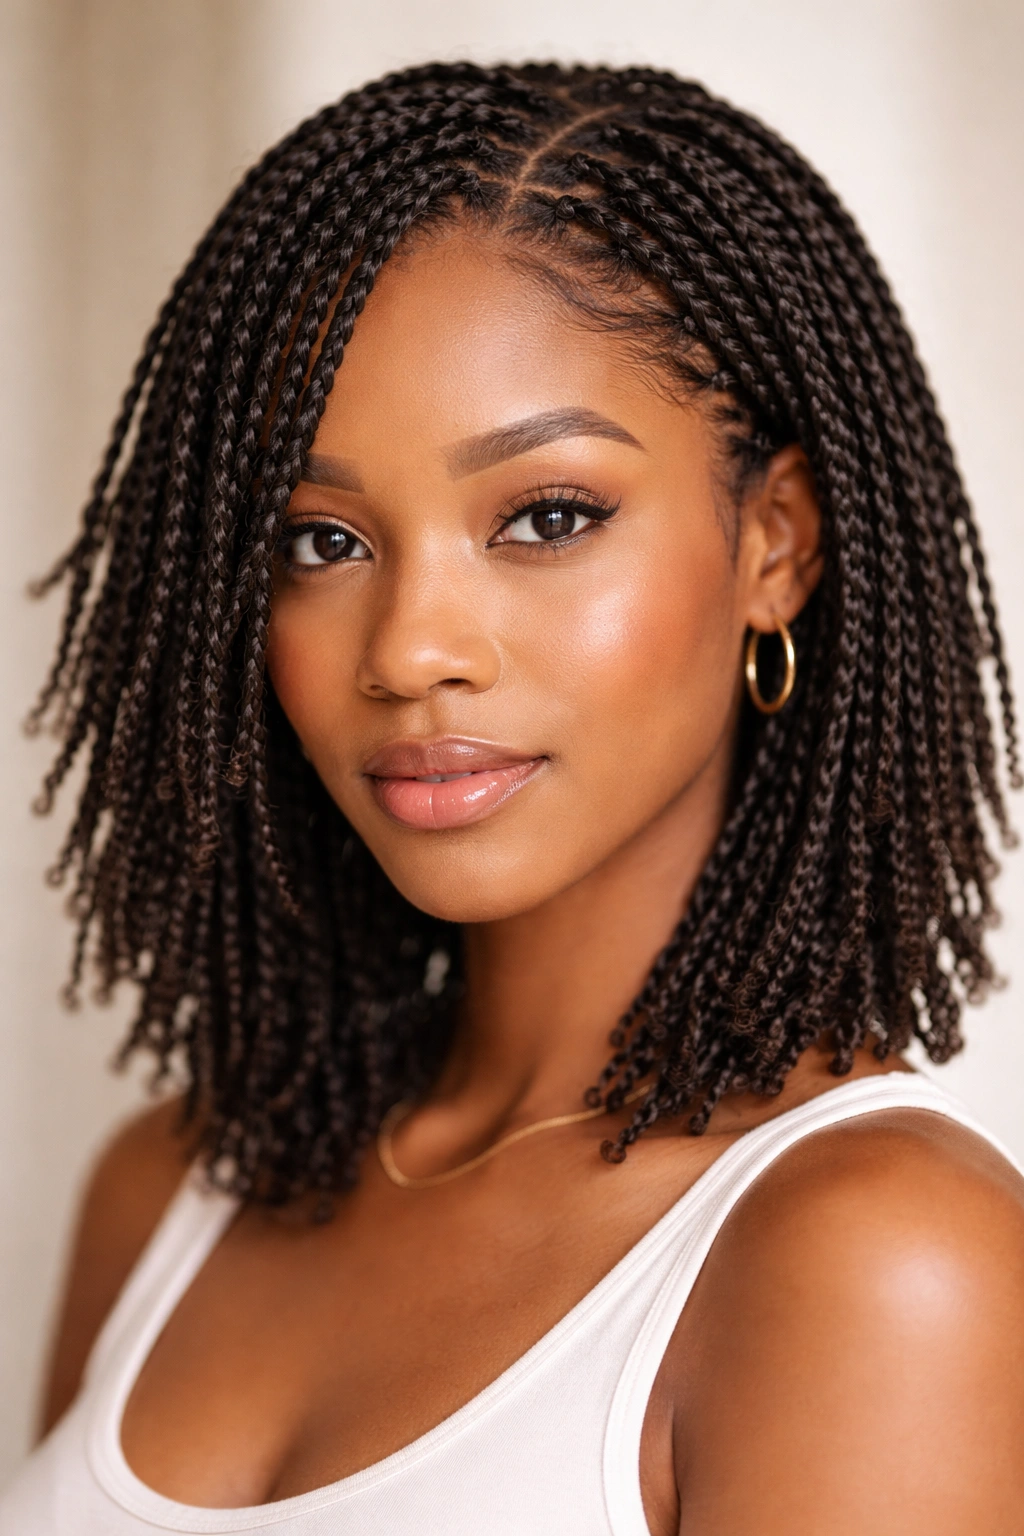
4. Senegalese Twists
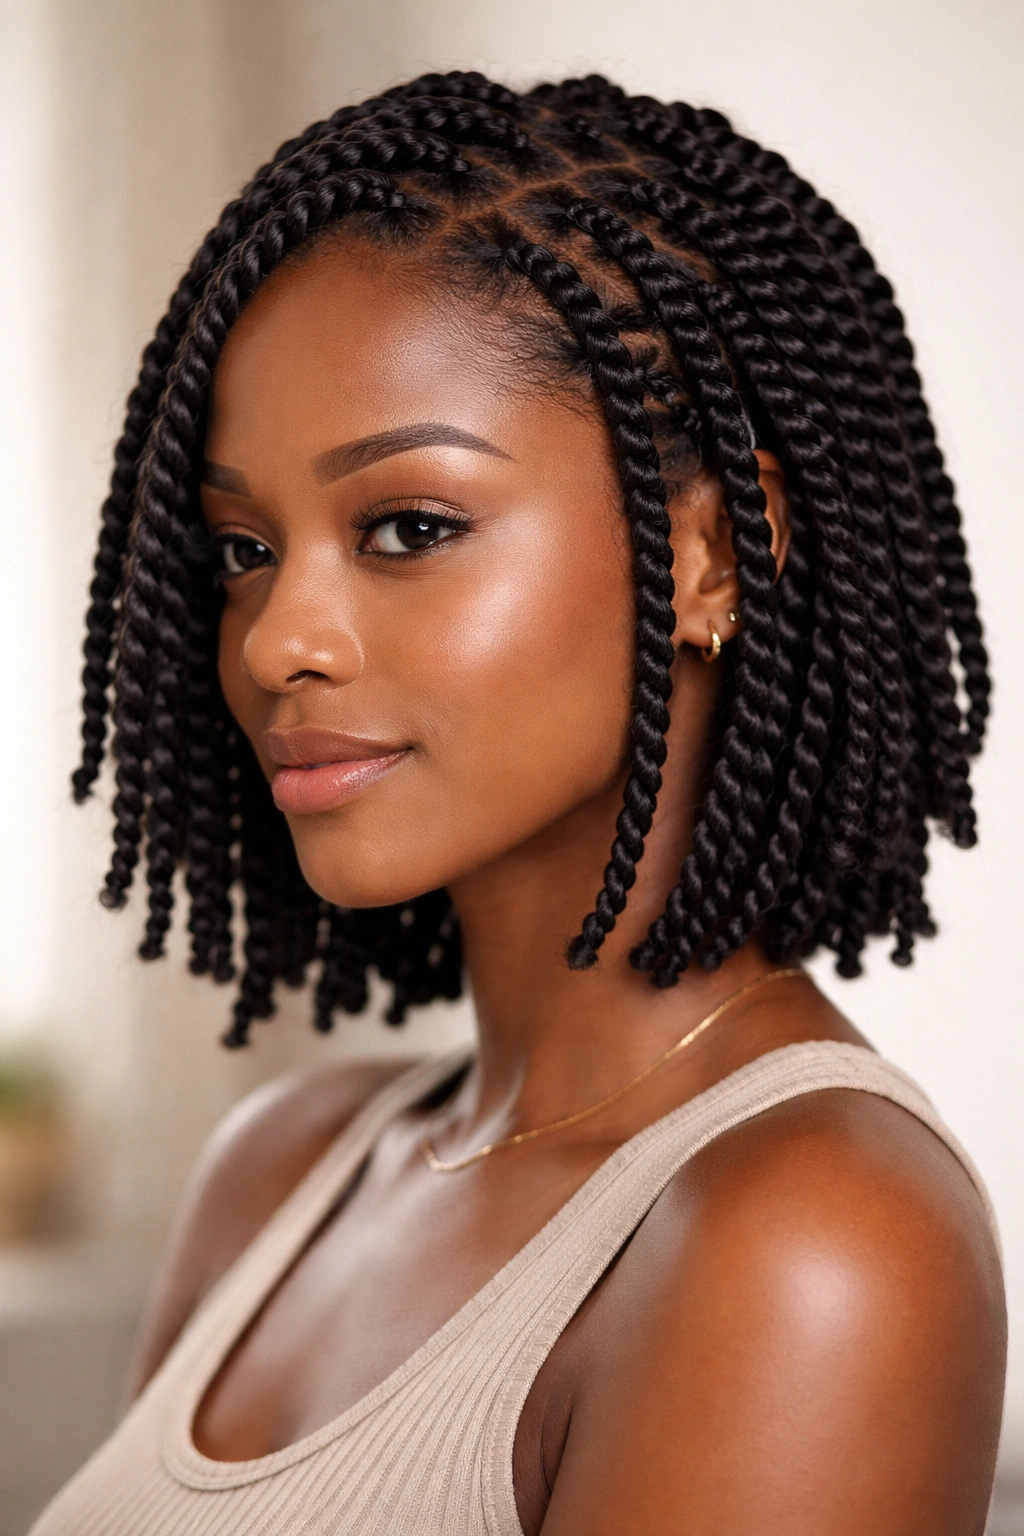
Senegalese twists use three strands of hair wound around each other — technically a braid, but they’re often grouped with twists because of their similar aesthetic and installation technique. On short hair, they create a delicate, refined look with incredible definition and longevity.
The Three-Strand Advantage
Because Senegalese twists involve three strands, they grip and hold together more securely than two-strand twists, which means they last longer and look fresher throughout the wear period. They’re also lighter weight than comparable box braids, making them a gentler protective style for hair that needs a break from tension but still wants full coverage and security.
Texture-Specific Application
- Looser textures (2a–3a): Senegalese twists can feel rigid on wavy hair because of how tightly the three strands interlock. If you love this style, ask your stylist to use thicker sections and a slightly looser tension to let your natural texture shine through.
- Medium curls (3b–3c): This is the sweet spot for Senegalese twists. Your curl pattern adds natural grip, the definition is stunning, and the style feels secure without being uncomfortably tight.
- Coily hair (4a–4c): Senegalese twists look absolutely incredible on coily textures. The dimension, the definition, the way light catches each spiral — it’s genuinely beautiful. These twists can last 5–8 weeks on coilier hair.
Pro tip: Add lightweight synthetic hair to extend your natural hair and create the twists with less stress on your edges. This is particularly important for shorter hair, where you want the style to feel full and dimensional without pulling on the baby hairs around your hairline.
5. Crochet Twists
Crochet twists are installed using a crochet hook to loop pre-twisted extension hair (or yarn) through your braided base sections. The result is uniform, bouncy, textured twists with a lush, full appearance — and they’re installed much faster than traditional twists.
Speed Without Sacrifice
What makes crochet twists game-changing is the installation time. What might take 5 hours to hand-twist can be crocheted in 2–3 hours. You’re not sacrificing quality; you’re just using a different installation method. On short hair, crochet twists look particularly voluminous and textured, with a bouncier, more energetic movement than hand-twisted styles.
Choosing Your Texture and Base
- Extension options: You can use pre-twisted hair (designed specifically for crochet), synthetic braiding hair, yarn, or even human hair extensions. Each option changes the look, feel, and longevity of the style.
- Base choices: Some people braid their hair into thin cornrows first, then crochet the twists into place. Others use two-strand twists or flat twists as the base. The base you choose determines how neat and sculpted the final style looks.
- Best for: All textures can wear crochet twists, but they’re particularly stunning on people who want a fuller, bouncier aesthetic. If you prefer a sleek, defined look, hand-twisted styles might feel more aligned with your style preferences.
- Longevity: 4–6 weeks, depending on how well you care for them and how much manipulation they get during styling.
Worth knowing: Crochet twists require a crochet hook (usually a size E, F, or G depending on your extension thickness) and some practice to get smooth, consistent installations. If you’re new to the style, watching tutorial videos before your first install is genuinely helpful.
6. Chunky Twists
Chunky twists are exactly what they sound like — thick, substantial sections twisted from root to tip, usually without extension hair. On short hair, they create a bold, sculptural look with incredible personality.
When Bold and Graphic Is Exactly Right
Chunky twists work best on coilier hair textures (3c–4c) where the twists are defined and hold their shape well. The appeal is that they’re fast to install, they feel lighter weight on your head, and they create a specific aesthetic — modern, intentional, almost avant-garde. Some people find chunky twists feel more “natural” because they’re primarily your own hair.
Installation and Wear Considerations
- Section size: Each twist should be about the thickness of a pencil or slightly thicker. You might have anywhere from 8–15 twists depending on your hair density and desired aesthetic.
- Installation time: 1–2 hours, making these one of the quickest twist styles you can do at home.
- Best results: Start with damp hair and apply a good hold product (twisting cream, gel, or butter) to help the twists grip and hold shape through drying.
- Wear time: 2–3 weeks for coilier textures; looser textures may not hold chunky twists as well.
Pro tip: Chunky twists look extra dimensional and polished if you alternate the direction of the twists as you move around your head, or create a pattern (like all twists spiraling clockwise, or alternating directions). This small detail completely changes the visual impact.
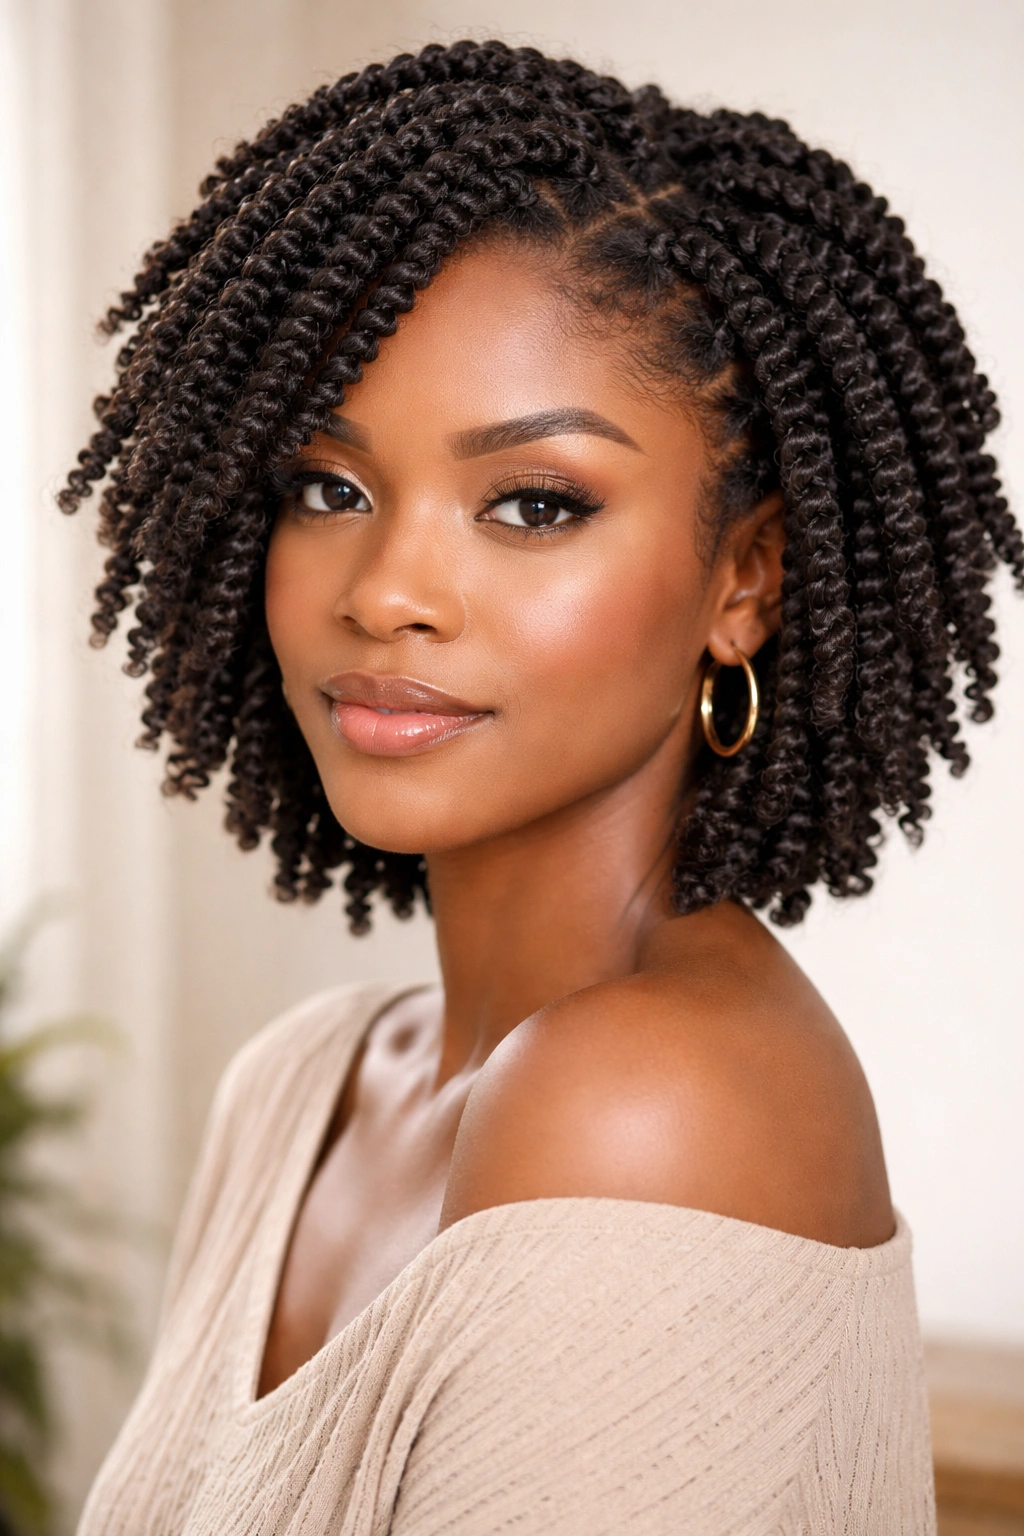
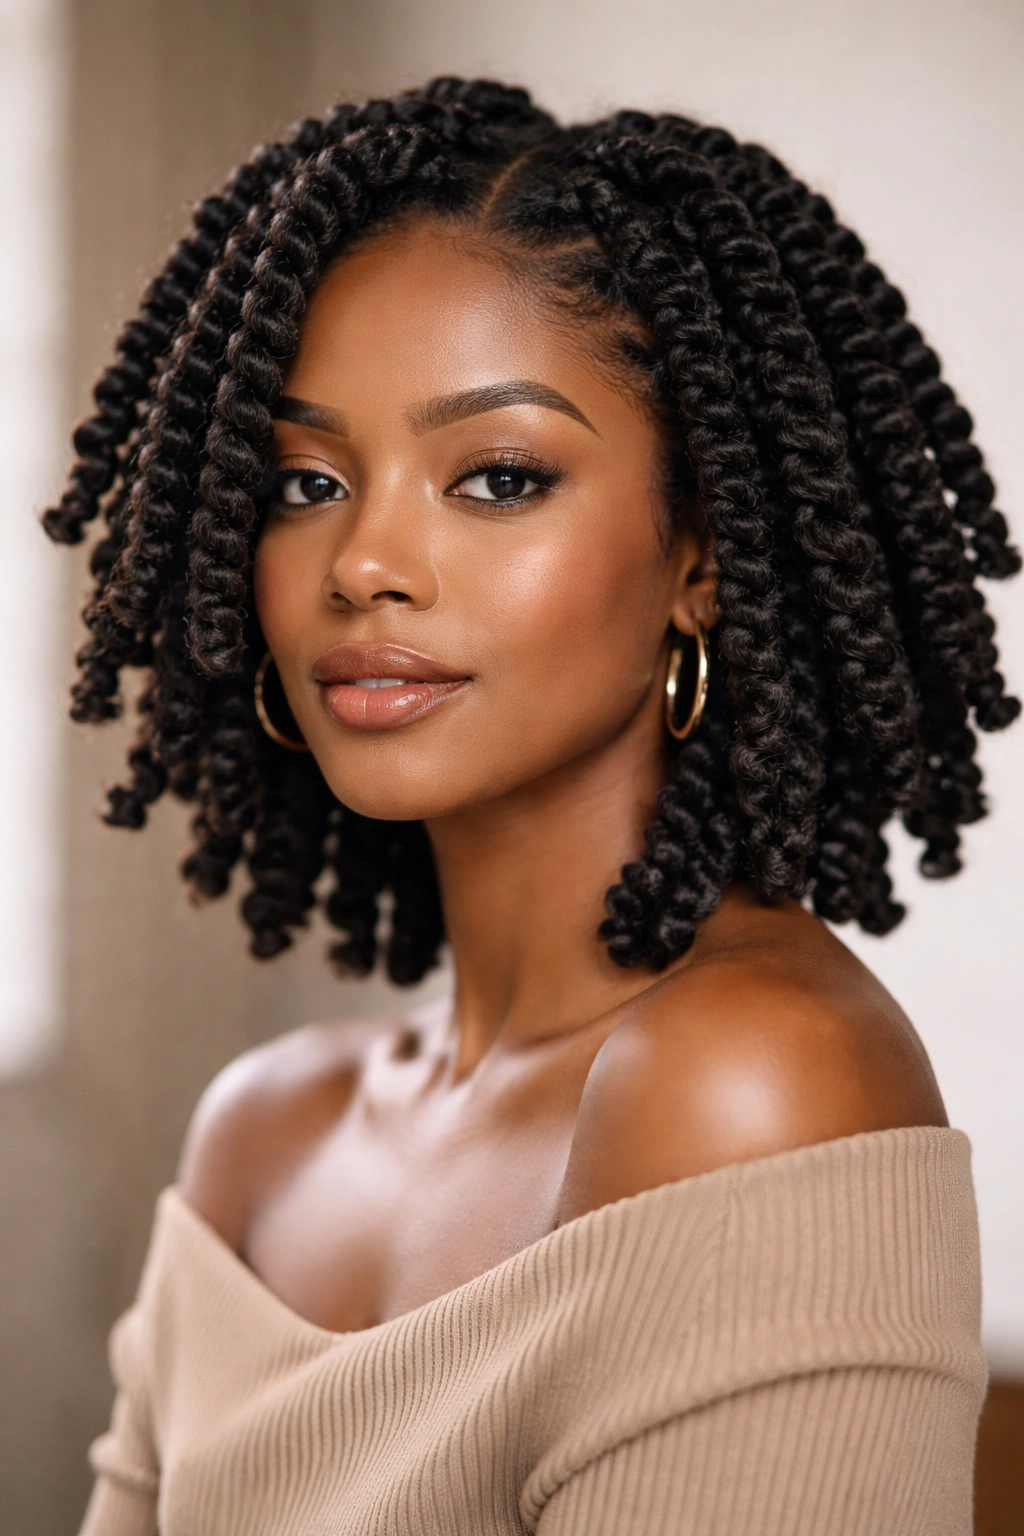
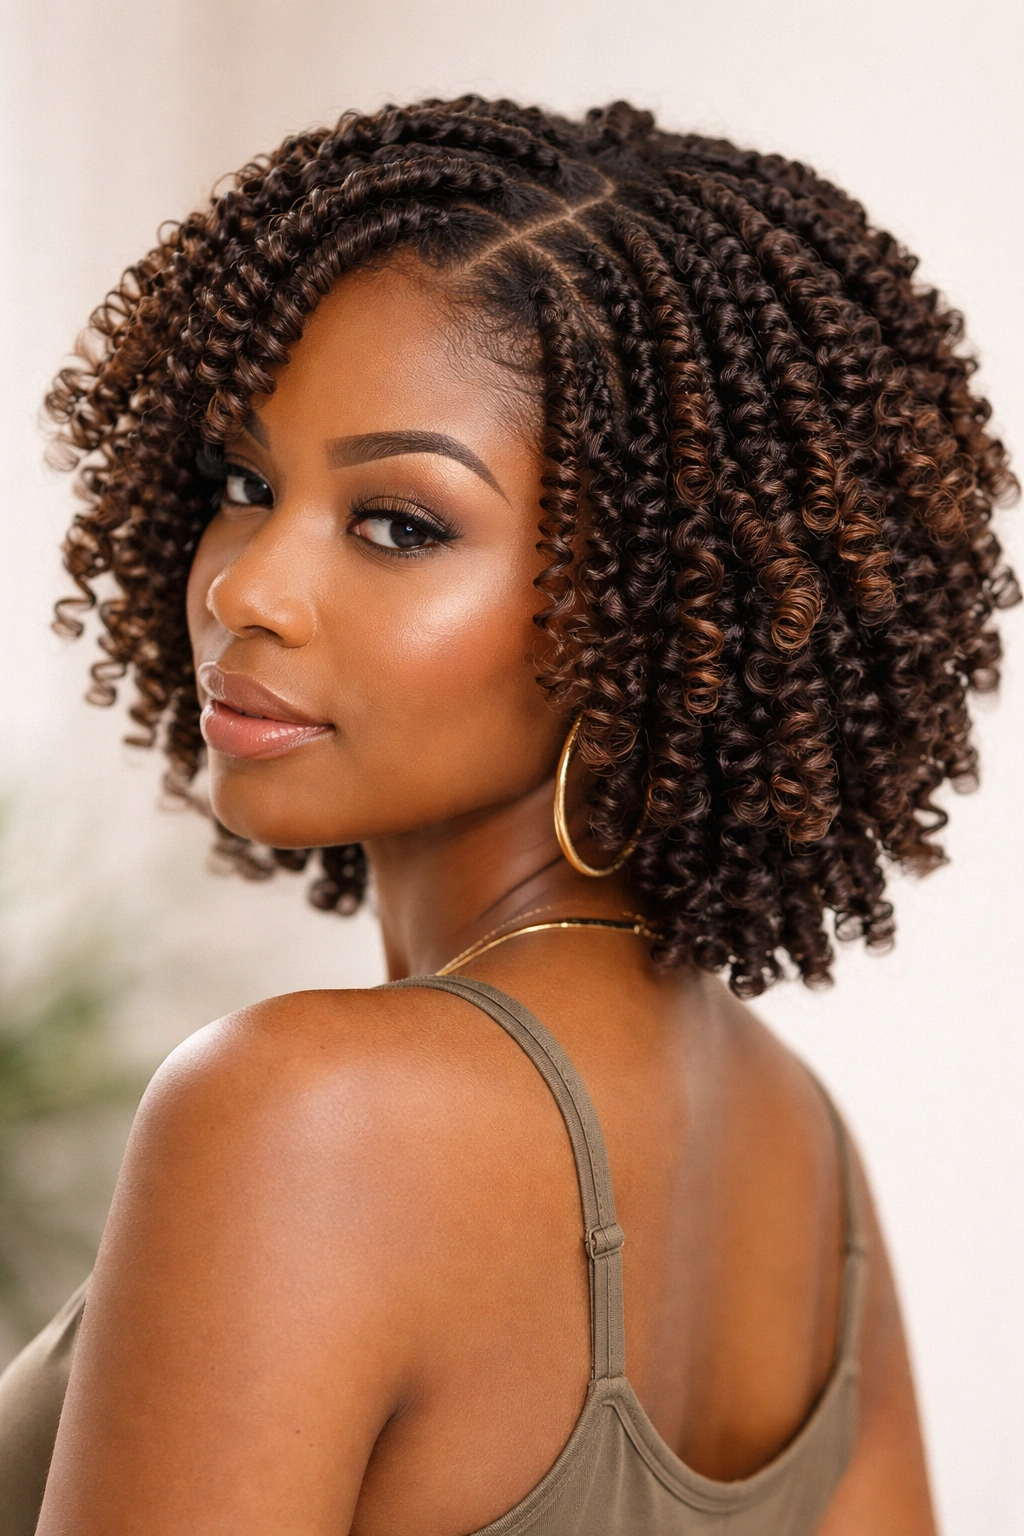
7. Mini Twists
Mini twists are the opposite of chunky — thin, delicate sections creating dozens of twists across your head. They offer incredible versatility, beautiful definition, and a refined aesthetic that works on every hair texture.
Why More Twists Mean More Options
With mini twists, you’re creating a base that’s essentially infinitely styleable. You can wear them down and free, style them into updos, add accessories, or even brush them out into a beautiful fluffy halo. They’re the chameleon of twist styles — they look and feel different depending on how you wear them.
Texture Compatibility and Longevity
- Looser textures (2a–3a): Mini twists hold beautifully on wavy hair and create a neat, polished look. They might require a light hold product to maintain their shape, but the definition is crisp and clean.
- Curly to coily hair (3b–4c): Mini twists are stunning on these textures. The dimensional detail of dozens of defined twists moving around your head is genuinely striking.
- Installation time: 4–8 hours, depending on how many twists you’re creating and your experience level. Many people break this into multiple sessions.
- Wear time: 4–6 weeks with proper care and nighttime protection.
Insider tip: If you’re doing mini twists at home and find your hands getting tired, take breaks and keep your hair damp throughout the process. Dry hair is harder to work with and more prone to breakage. You can also pre-twist sections and then go through and neaten them up, rather than perfecting each twist as you go.
8. Goddess Locs (Twist Variety)
Goddess locs combine the aesthetic of traditional locs with the lighter weight and flexibility of twists. Rather than wrapping extension hair around a single core, you’re wrapping it around 2–3 strands of your natural hair, creating a textured, rope-like look that’s softer and bouncier than traditional locs.
The Best of Both Worlds
Goddess locs give you that protective, polished, elevated aesthetic of locs without requiring you to commit to a multi-month growing process or deal with the weight. On short hair, they read as intentional and intentionally styled — there’s nothing accidental about the look. They also age beautifully; even at week 5 or 6, they look neat and purposeful.
Creating Texture and Longevity
- The wrapping technique: You’re essentially creating a two-strand or three-strand twist, then wrapping lightweight yarn or synthetic hair around it to create definition and fullness. This can be done as you install, or you can hand-twist first and wrap afterward.
- Best for: All textures can wear goddess locs, but they’re especially stunning on coilier hair (3c–4c) where the natural texture of your hair combined with the wrapped locs creates incredible visual depth.
- Installation time: 3–6 hours depending on how many locs and how thick you’re making them.
- Wear time: 5–8 weeks. Because of the wrapping, they hold their shape longer than unwrapped twists.
Worth knowing: Regular maintenance (palm rolling every week or so) keeps goddess locs looking neat and prevents matting. It’s a small time investment that extends the life of the style significantly.
9. Tapered Twist Fade
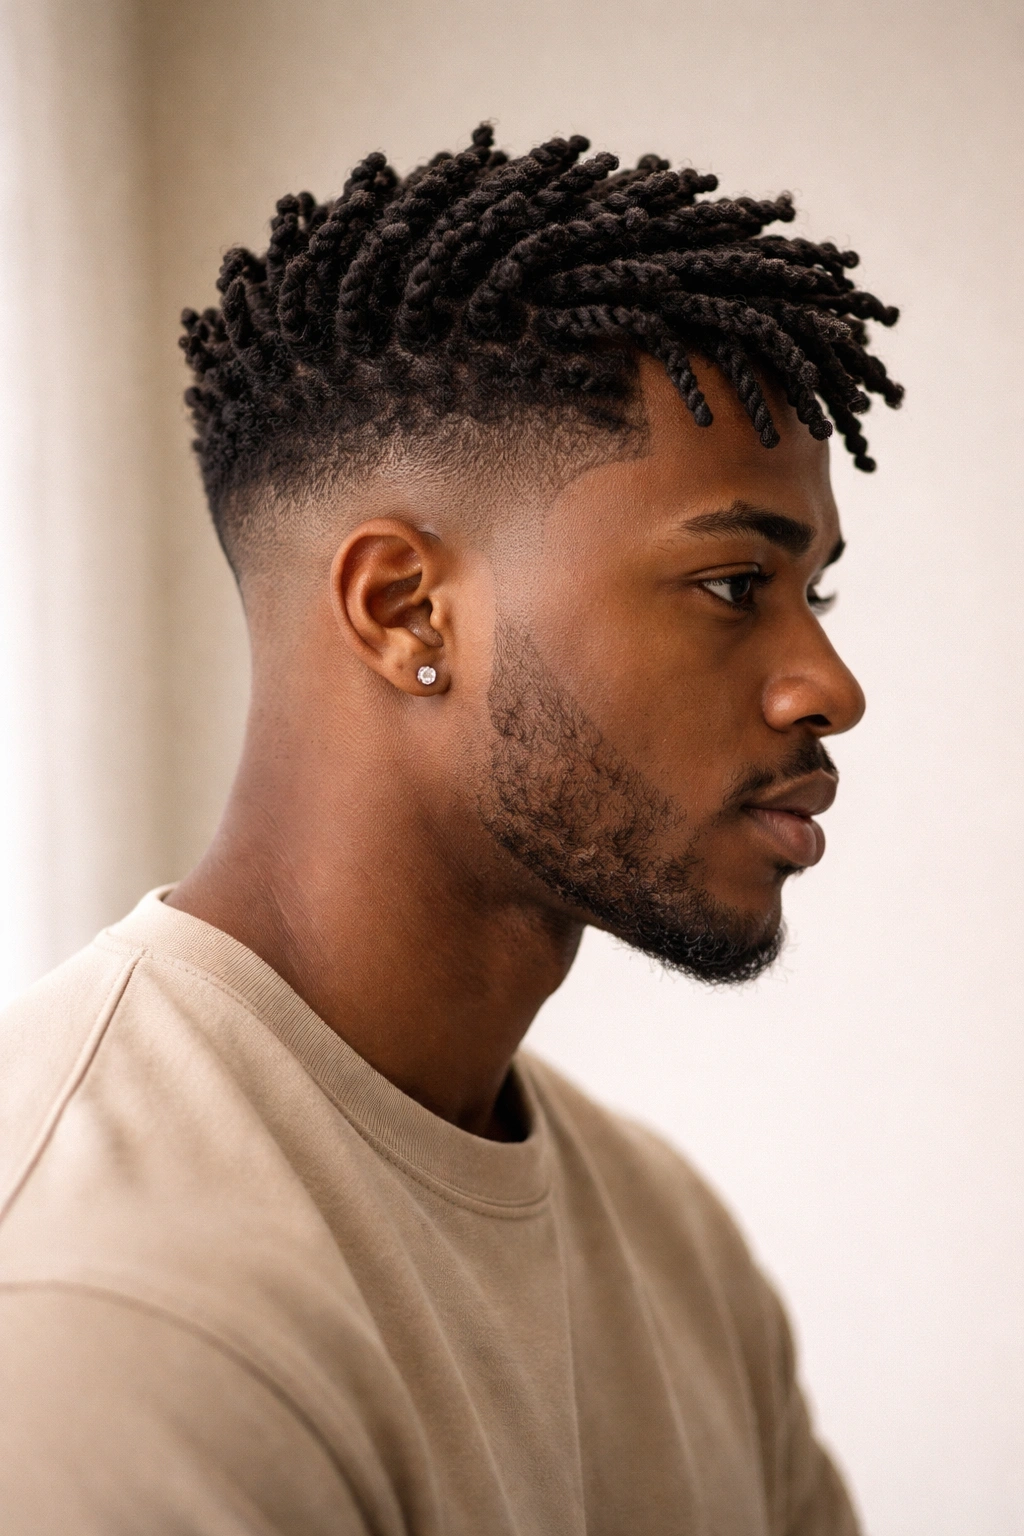
A tapered twist fade combines twisted hair at the crown with gradually shorter, faded sections on the sides. It’s a modern, sharp look that requires some precision but creates an undeniably striking style.
Modern Architecture and Texture Play
This style plays with depth and dimension in a way that’s genuinely creative. The twists on top give you protective styling benefits, while the faded sides create a contemporary, intentional silhouette. It works particularly well on coilier textures where the definition between the twisted crown and the faded sides is really dramatic.
Execution Details You Need to Know
- Cutting precision: This style requires either your own clipper skills or a stylist who understands how to blend twist bases with tapered sides. The magic is in the blending — it shouldn’t look like two separate styles.
- Twist placement: Typically, the twists start at the crown and cover the top half of your head, fading into the clippered sides. Some versions include a twisted back section too.
- Maintenance: You’ll need fresh clippers every 2–3 weeks to maintain the fade, while the twisted sections last 4–6 weeks. Plan your maintenance schedule accordingly.
- Best textures: Coilier hair (4a–4c) shows the contrast most dramatically, but this style works on all textures if executed well.
Pro tip: Take reference photos to your stylist or barber if you’re getting this done professionally. The style has variations in terms of which sections are twisted, how high the fade goes, and how thick the twists are — all of which change the overall look significantly.
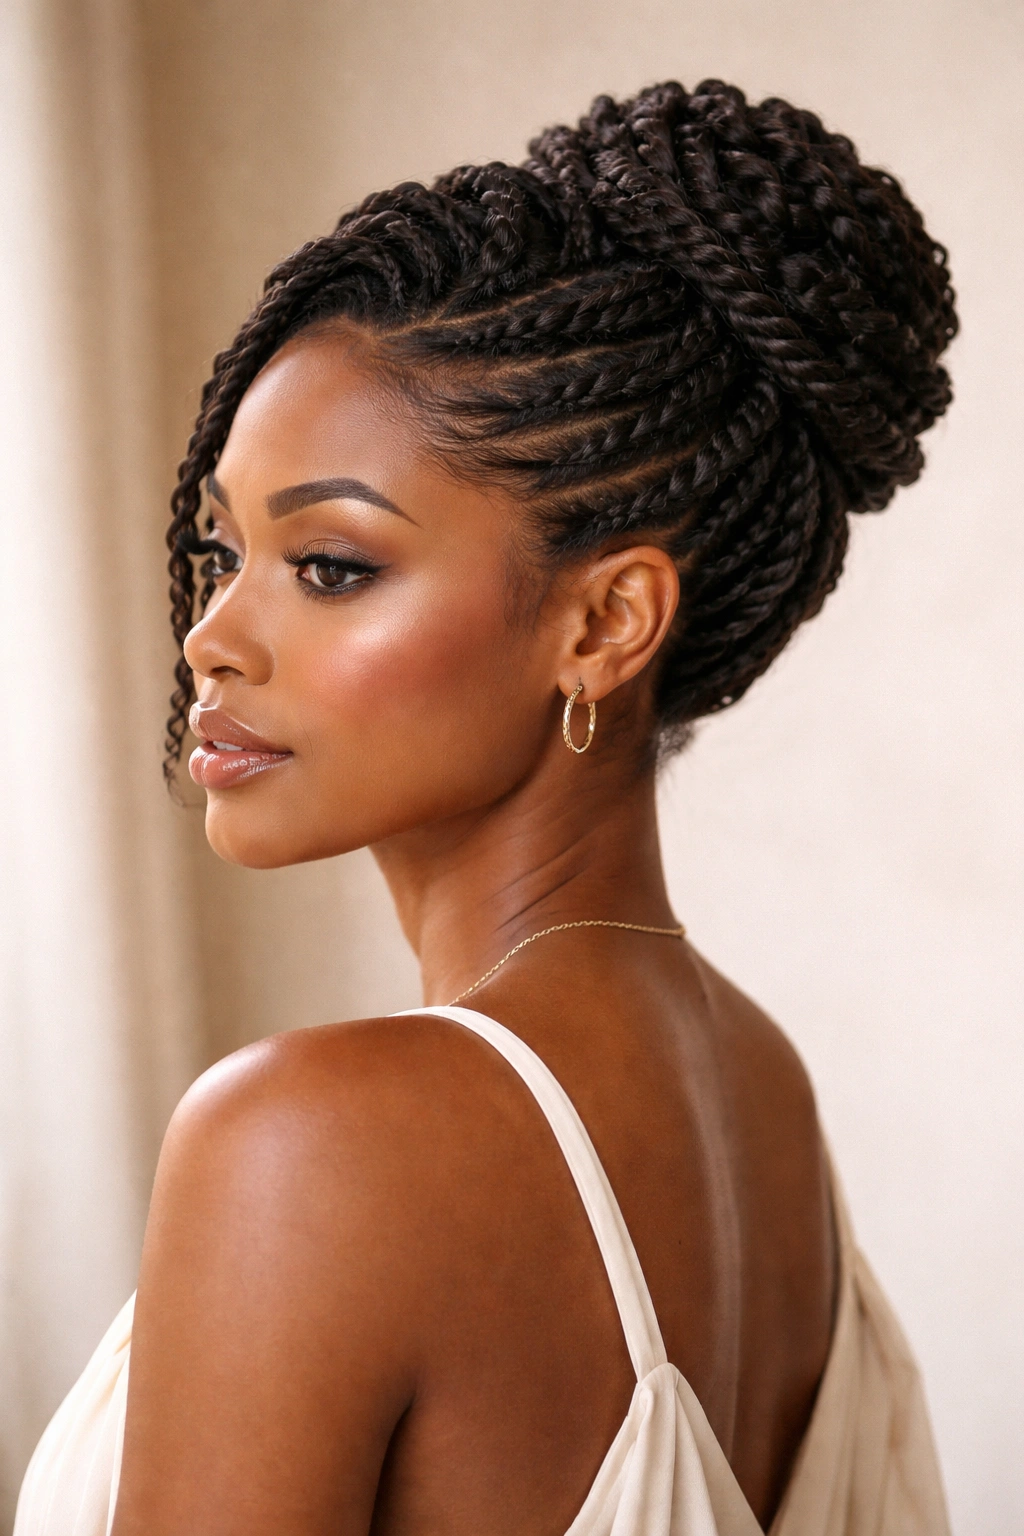
10. Updo Twist Bun
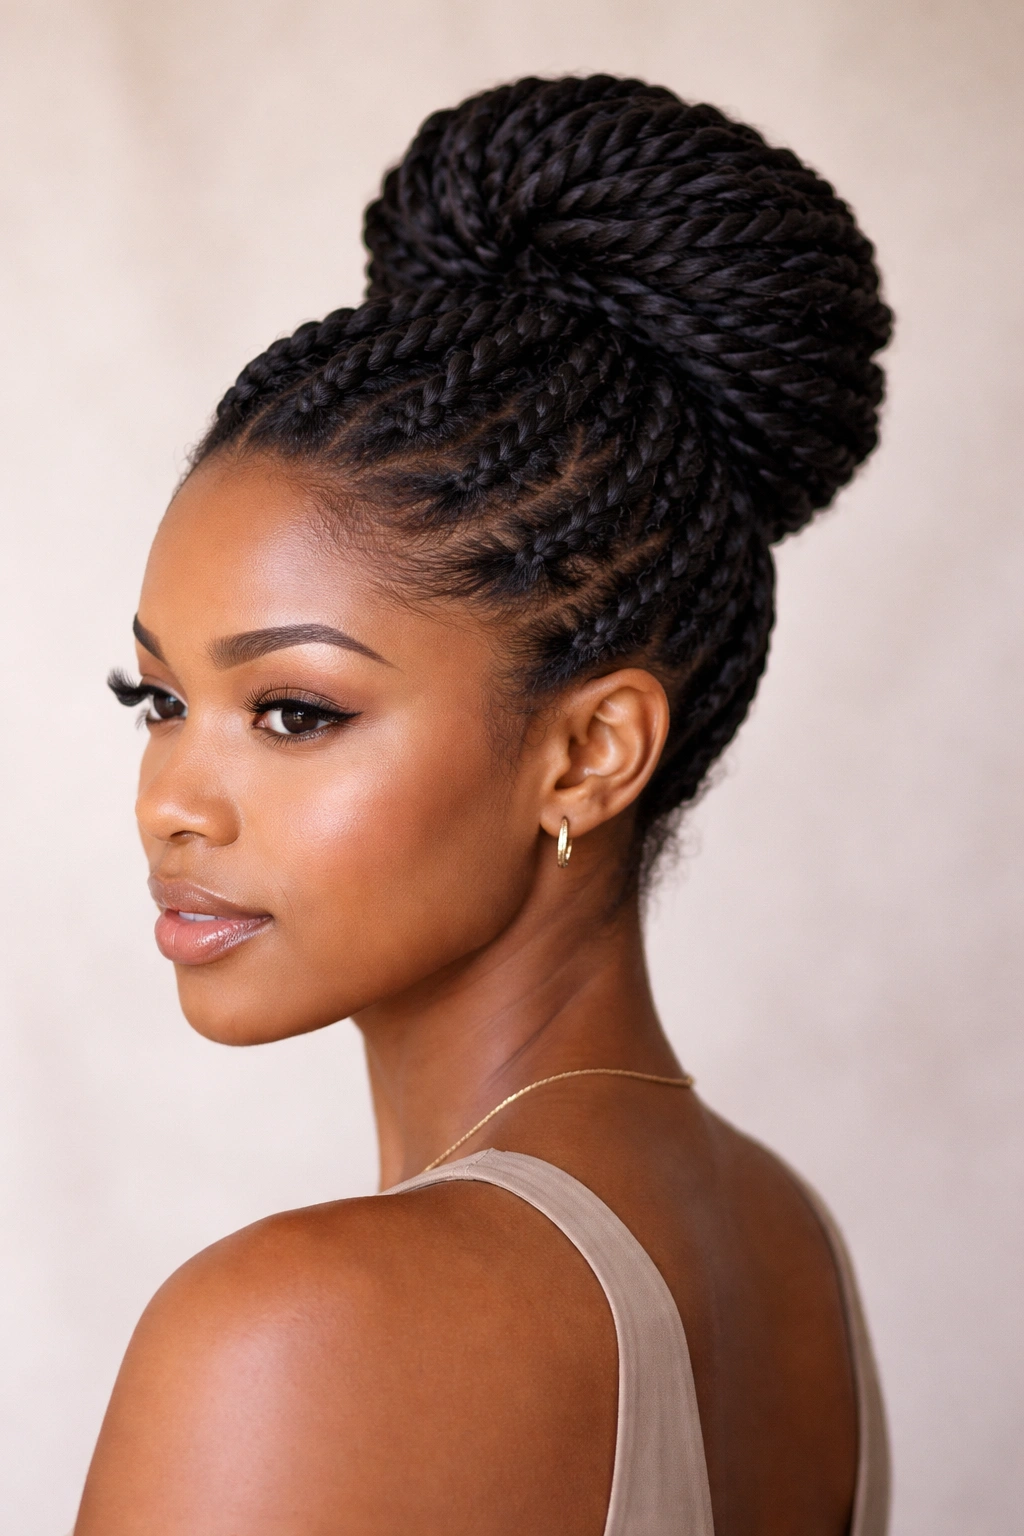
A twist bun is essentially a protective updo where your twisted hair is secured into a bun at the crown, nape, or side of your head. On short hair, it creates an elegant, polished look that works for work settings, special occasions, or everyday wear.
Versatility Through Placement
Where you position the bun completely changes the vibe. A high crown bun feels playful and youthful. A low nape bun is elegant and understated. A side bun is romantic and creative. With short twists, any placement works beautifully because the shorter length means there’s no heavy bulk pulling on your scalp.
Installation Options and Techniques
- Rope twists: Create thick, loose twists that you can wrap around the base of a bun for a soft, romantic look. Minimal styling, maximum elegance.
- Mini twists: Install mini twists throughout your head, then gather and secure them into a bun. This creates a more textured, detailed updo that’s perfect for special occasions.
- Two-strand twists: The classic foundation for an updo. Twist your entire head, then gather the ends into a bun and secure with bobby pins and a cover (a scarf, fabric tie, or bun wrap).
- Hold products: Use a light pomade, edge control, or mousse to smooth any flyaways and keep the bun looking neat. Avoid heavy products that can weigh down shorter hair.
Insider tip: If your twist ends are a bit wispy or thinned out, wrap them around your bun base as you’re securing it — this covers the thin ends and creates a fuller, more polished bun shape.
11. Side-Swept Twisted Crown
A side-swept twisted crown is a detailed updo where twists are styled to sweep across the top of your head and secure at the opposite side. It’s romantic, feminine, and surprisingly versatile — appropriate for work, dates, or casual days when you want something a little more intentional.
Creating Visual Movement
What makes this style work is the diagonal line of the twists. You’re not just securing hair; you’re creating a visual movement that draws the eye and adds dynamism to your look. On shorter hair, this detail really stands out because the twists aren’t competing with lots of loose length.
Styling for Impact
- Twist direction: Create all twists in the same direction (clockwise or counterclockwise) as you move from one side to the other. This creates a cohesive, intentional look. Alternatively, you can create flat twists that follow the line of where your twists will eventually sweep, for extra control.
- Securing: Use bobby pins that match your hair color and hide them behind the twists. A few well-placed pins are all you need if the twists are thick enough to grip.
- Softness: Leave a few thin pieces of hair loose around your face for a softer, less severe look. The tighter the crown, the more formal; the softer the edges, the more casual and romantic.
- Longevity: If you’ve installed this as a one-time style (rather than wearing existing twists), it will last until you wash. If you’ve installed twists ahead of time and are just restyling them into a crown, you can wear this look for a few days, then restyle the twists differently.
Pro tip: Practice this style before a big event. Once you understand the rhythm of the twists and how to secure them effectively, it becomes second nature, but the first attempt might feel fiddly.
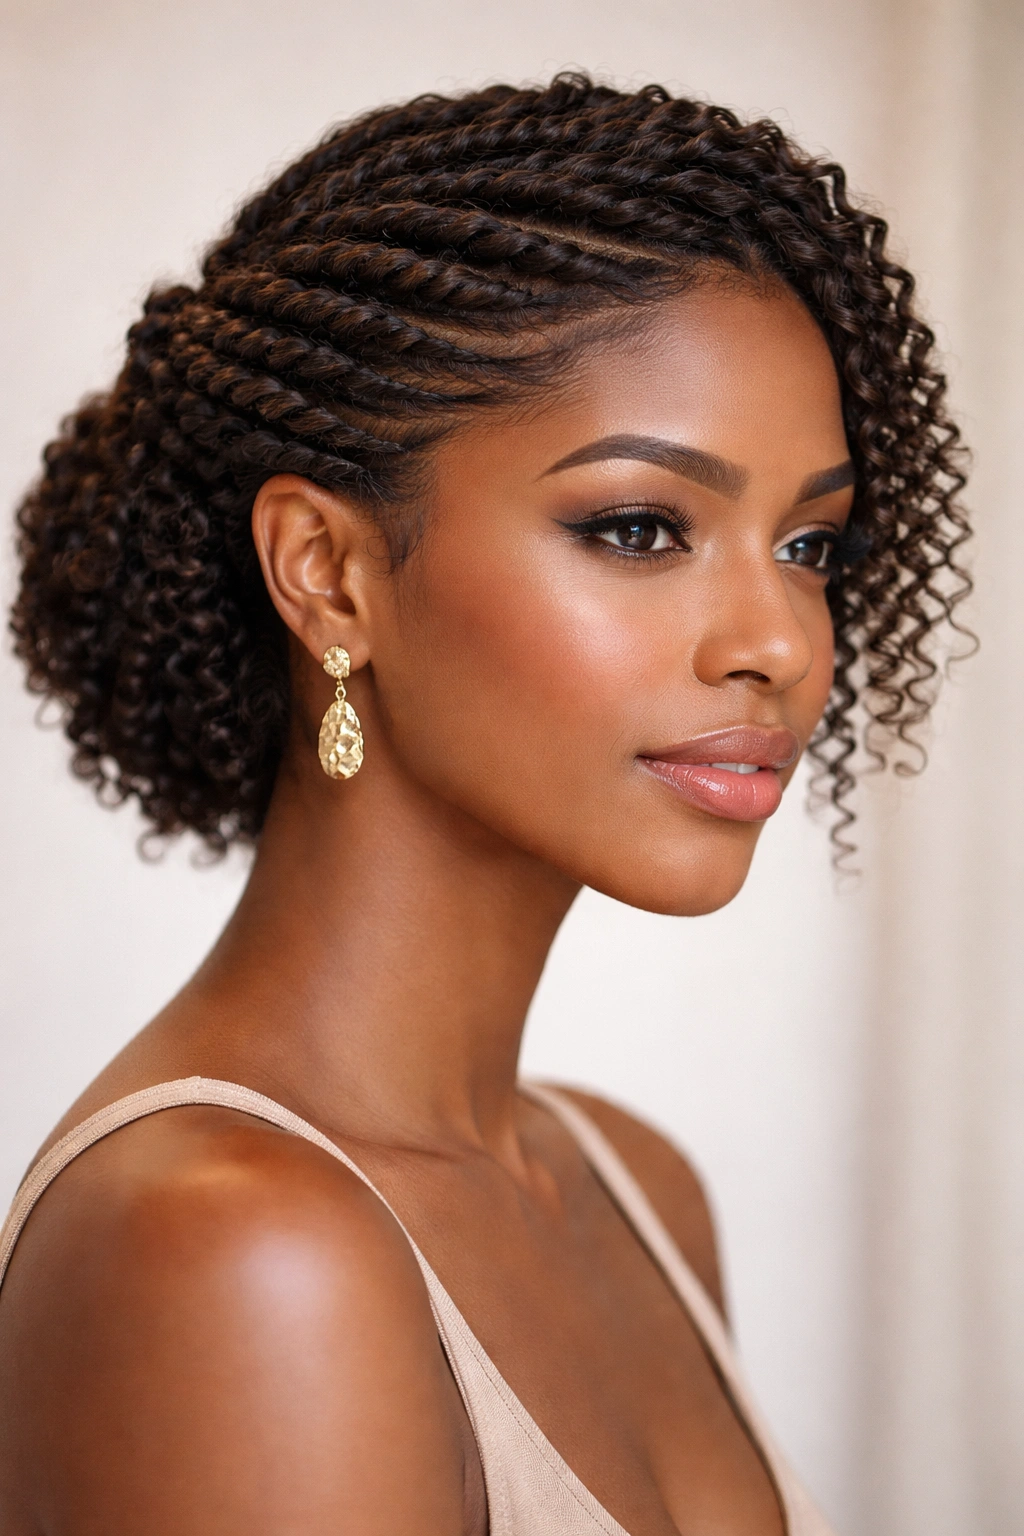
12. Twist-Out Style
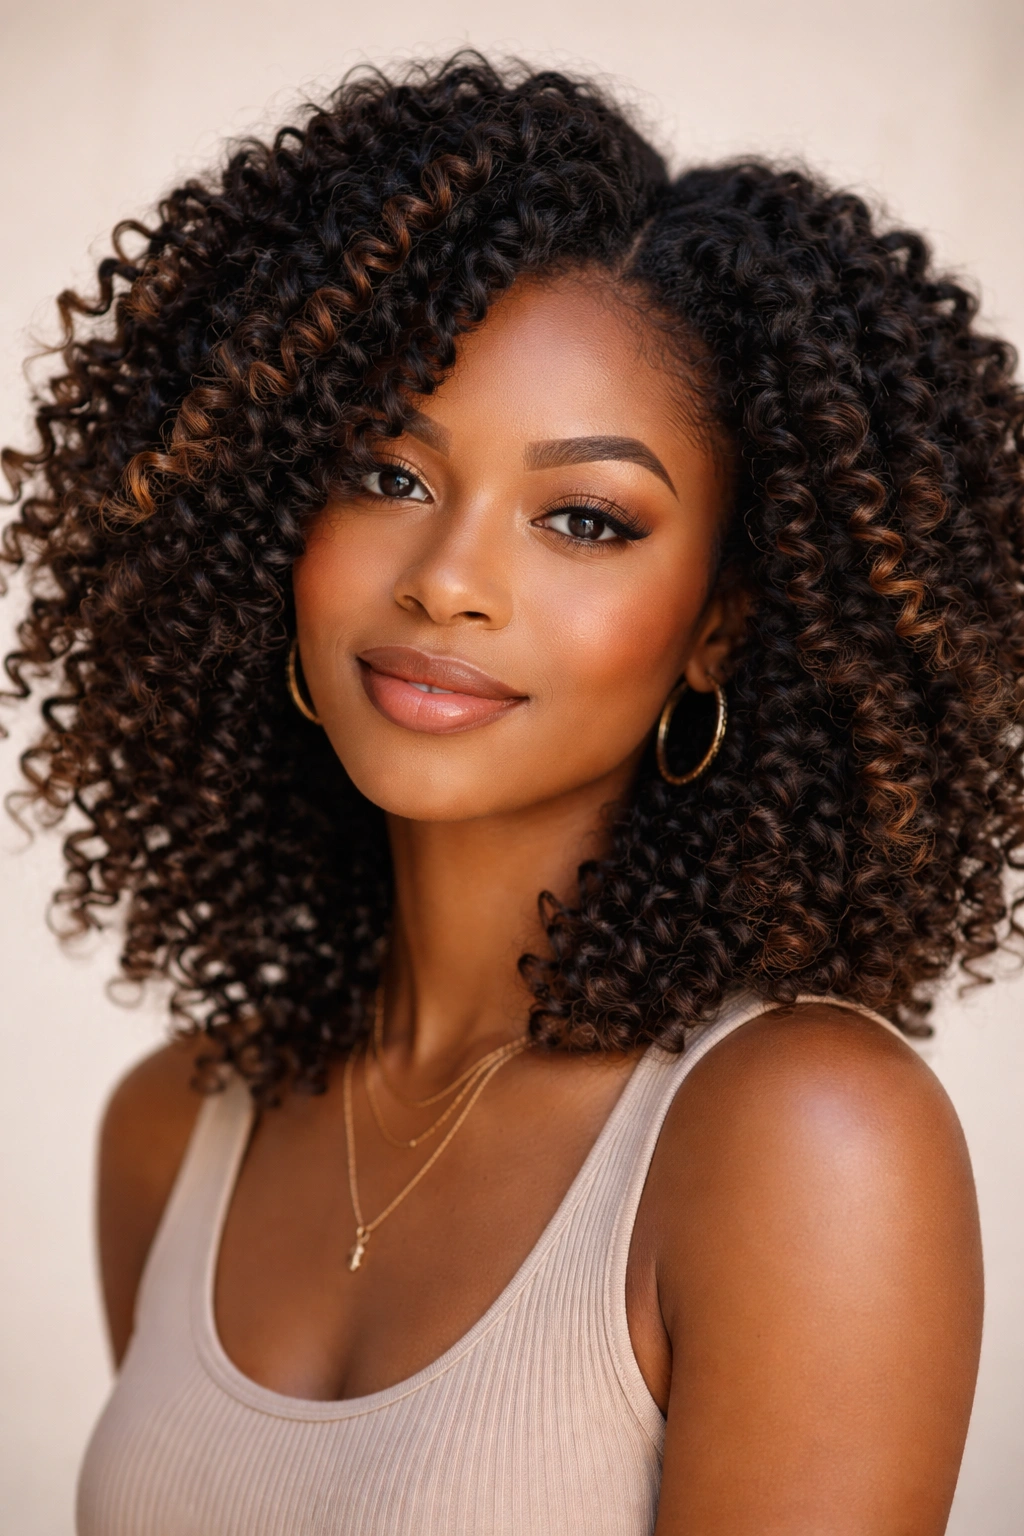
A twist-out is when you unravel pre-installed twists to create a beautiful, textured, voluminous look. It’s one of the most transformative styling tricks — the same head of twists can look completely different as a twist-out versus worn as twists.
The Unraveling Magic
When you unravel twists, you’re not just making your hair bigger (though it often gets significantly more volume). You’re also creating a specific texture pattern that’s incredibly dimensional and photogenic. Twist-outs work beautifully on curly and coily hair because the pattern of the twist creates a wave or spiral pattern once unraveled.
Technique for the Best Results
- Moisture and product: Lightly spritz your twists with water or a light leave-in spray about 30 minutes before you plan to unravel them. Damp hair will hold the twist-out pattern much better than completely dry hair.
- Unraveling method: Start at the ends and gently unravel each twist, using your fingers to separate and define the curls as you go. Don’t rush this process; gentle unraveling creates better definition than tearing through the twists.
- Finishing product: Once unraveled, apply a light curl cream, serum, or oil to enhance shine and definition without weighing down the texture.
- Best textures: Twist-outs are most dramatic on curly and coily hair (3a–4c). Looser textures can do twist-outs too, but the volume and texture aren’t as pronounced.
Worth knowing: Twist-outs look best on day one or day two. After a few days, they’ll start to relax and lose some definition. On shorter hair, this actually works in your favor because you reach the relaxed stage faster, which can be a lovely aesthetic if that’s what you prefer.
13. Layered Twist Bob
A layered twist bob is a short, shaped haircut where some sections are twisted (usually around the crown) while other sections are left loose or brushed out. It’s a modern, playful take on the classic bob that offers extra interest and texture.
Intentional Styling Over a Shaped Cut
This style requires an actual haircut from a stylist who understands how to layer and shape short hair with intention. Once the cut is in place, you can style it different ways — twists one day, brushed out the next — because the shape is built into the cut itself. This versatility is brilliant for people who want a short style with range.
Creating the Look and Maintaining It
- The cut: Layers throughout (not just choppy ends, but internal layers that create movement) are essential. The layered structure is what allows this style to look good multiple ways.
- Twisting specific sections: You might twist the back section and leave the front and sides loose, or vice versa. Experiment to see which combination feels right for your face shape and style preferences.
- Refresh frequency: Because this is a shaped cut, you’ll need trims every 4–6 weeks to maintain the shape. The twisting can happen on top of the shaped structure without additional maintenance.
- Best textures: All textures can wear a layered twist bob, but it’s especially striking on coilier hair where the difference between twisted and untwisted sections is visually dramatic.
Insider tip: Bring photos of what you want to your stylist — don’t just say “layered twist bob.” Show them the specific sections you want twisted, the length you’re aiming for, and how much layering you want.
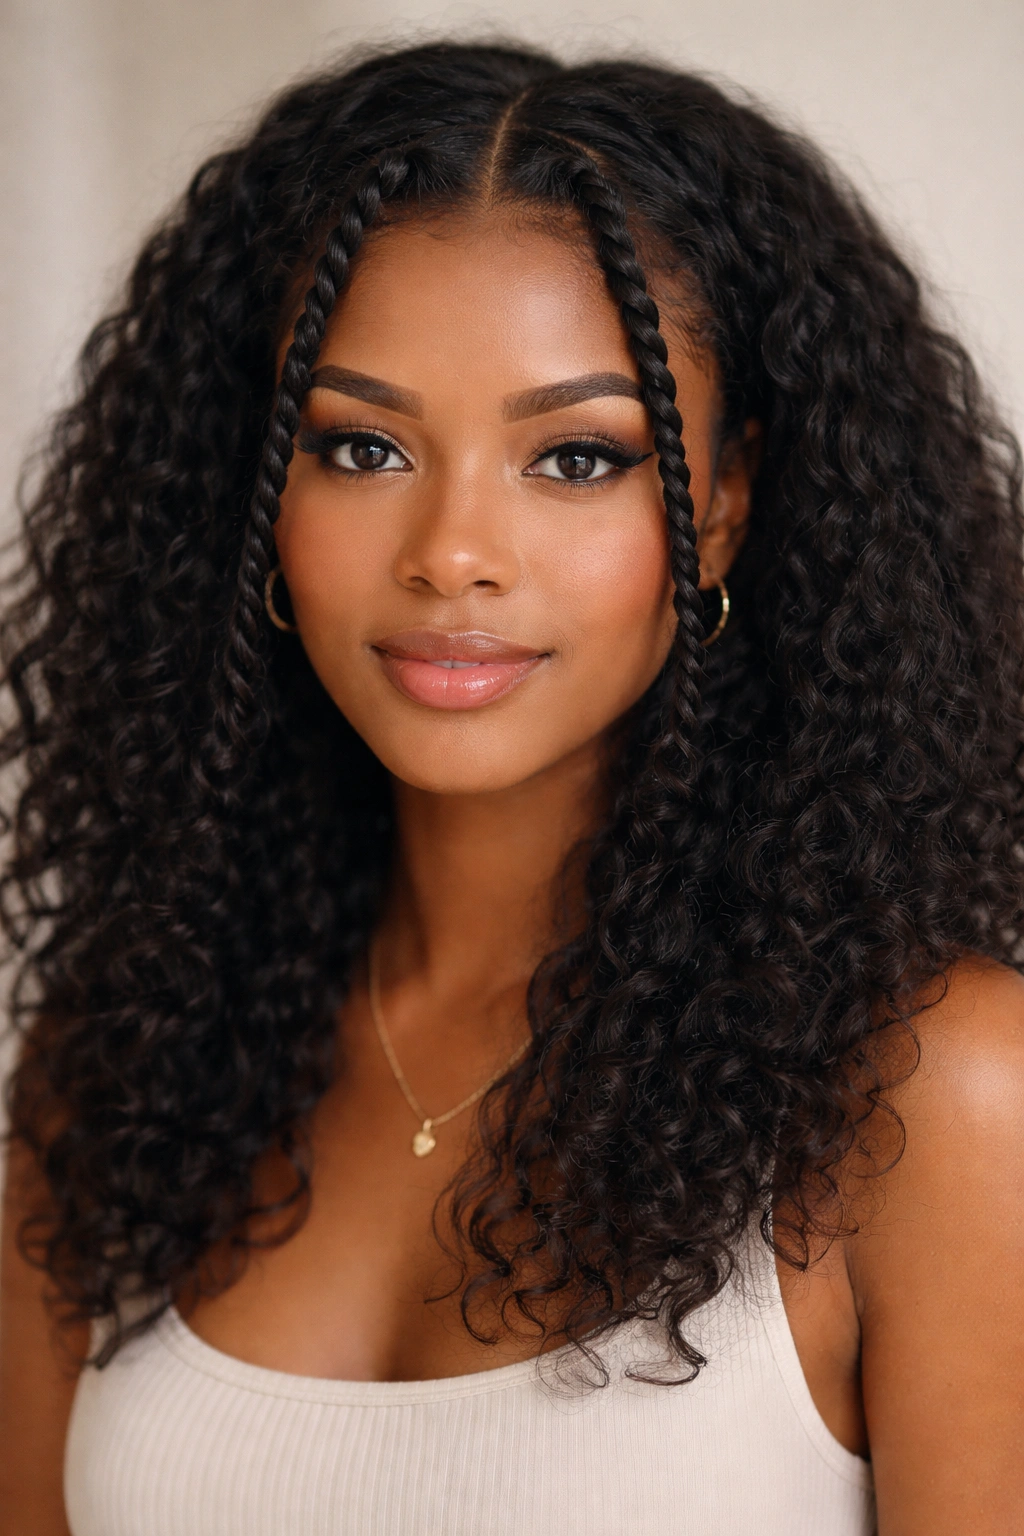
14. Twisted Bangs with Loose Hair
This style leaves most of your hair loose or brushed out while creating a detailed twisted section (usually bangs or a front section). It’s perfect for people who want the protective benefits of twists without committing to full-head styling, or for transition periods when you’re growing out or recovering your hair.
Minimalist Protective Styling
The genius of this approach is that you get the neat, intentional look of styling with minimal manipulation of your entire head of hair. The twisted bangs can frame your face beautifully, create an interesting detail, and take up minimal styling time.
Styling Options and Upkeep
- Front section twists: Create two or four substantial twists along your front hairline, framing your face. This works beautifully on all textures and creates an immediate “styled” vibe.
- Side-sweep twist: Create a twist that sweeps from one temple across to the other side. Secure it discreetly and leave the rest of your hair loose or brushed out.
- Crown detail: Create a small twisted crown section at the very top of your head, leaving the sides and back loose. This adds height and visual interest without a heavy time commitment.
- Integration: Make sure the twisted section flows naturally with the loose sections around it. Abrupt transitions can look unintentional; gradual blending looks polished.
Pro tip: Use a lightweight holding product (mousse or light gel) on the loose sections to maintain definition without the heavy feeling of cream or butter.
15. Straw Sets with Twists
A straw set combines twists with small rods or “straws” (thin foam or plastic rollers) to create spiral curls and waves. Once you remove the rods, you get beautiful bouncy curls with a defined twist pattern underneath.
Texture and Dimension in One Install
The appeal of straw sets is that you’re creating multiple texture layers — the twist pattern, the rod-set curl, and the combination of both. On short hair, this approach creates incredible volume and dimensionality that would be much harder to achieve on longer hair.
Installation and Results
- The process: Create two-strand or flat twists throughout your head, then while the twists are still damp, roll the ends around small rods or straws. Let your hair dry completely (either air dry or use a diffuser), then remove the rods to reveal bouncy, twisted curls.
- Rod options: Thin foam rollers, straw-like rods (hence the name), or even small plastic rods designed for setting work beautifully. The thinner the rod, the tighter the curl.
- Best results: Straw sets work beautifully on all textures, but coilier hair (3c–4c) shows the most dramatic results because your natural curl pattern combines with the installed curl from the rods.
- Wear time: 2–3 weeks if you sleep gently (use a bonnet or silk pillowcase) and don’t disturb the style too much.
Worth knowing: Straw sets take patience — you need to let your hair dry completely before removing the rods, or the curls won’t hold. Plan this install for a time when you have 4–6 hours of drying time available.
Final Thoughts
Short twist styles are among the most versatile, protective, and genuinely beautiful styling options available to natural hair. Whether you’re drawn to the sculptural elegance of flat twists, the playful texture of a twist-out, the modern edge of a tapered fade, or the refined polish of an updo, there’s a twist style for every texture, lifestyle, and aesthetic preference.
The key to finding your favorite is understanding your hair’s specific texture and what maintenance level feels realistic for your life. Coilier textures can often handle finer twists with less product; looser curls might benefit from thicker sections or added extension hair. Some styles are quick to install but require weekly maintenance; others take longer initially but last longer between refreshes. There’s no universally “best” style — only the best style for you, your texture, and your situation.
Start with one style that genuinely appeals to you, invest the time to learn the technique well (or find a stylist who specializes in it), and notice how it makes you feel. That’s where your signature style lives. Every head of twists is an opportunity to show up for your hair’s health and your own sense of beauty.