Embracing your natural hair texture is one of the most empowering styling decisions you can make, and short natural hairstyles offer endless possibilities for expressing your personal style. Whether you’re starting your natural hair journey or you’ve been rocking your coils, kinks, and curls for years, short cuts celebrate the beauty and versatility of Black hair in ways that longer styles sometimes don’t. Short natural hair isn’t just low-maintenance—though it can be—it’s a canvas for creativity, confidence, and bold self-expression.
The beauty of styling short natural hair lies in how quickly you can transform your look, experiment with different textures, and showcase the health and vitality of your hair. From sleek, sculpted fades to voluminous textured crops and intricate twist styles, short natural hair allows your face to take center stage while your hair becomes a statement piece. Many Black women find that shorter cuts actually make maintaining healthy hair easier because you’re dealing with less length to protect, less product to use, and often less manipulation overall.
What makes short natural hairstyles so special is that they work with your hair’s natural texture rather than against it. You’re not fighting your curl pattern or spending hours trying to force your hair into a shape it doesn’t want to take—you’re highlighting what makes your hair uniquely beautiful. The styles below range from low-maintenance wash-and-go options to more intentional styled looks, giving you plenty of inspiration whether you want something you can do in five minutes or a style that makes a bold artistic statement.
1. Tapered Fade with Full Top
A tapered fade keeps the sides and back closely cropped while leaving length and volume on top, creating a sharp, modern silhouette that works beautifully on natural hair. This style puts all the focus on your face while the textured crown gives you room to style—you can wear it as a wash-and-go, twist it, or add designs with your barber. The contrast between the clean tapered sides and the natural texture on top creates dimension and visual interest without requiring intense styling time every morning.
Why This Style Works So Well
The tapered fade is endlessly adaptable because you control exactly how short the sides go and how much length you keep on top. This flexibility means you can adjust it to suit your face shape, hair density, and personal style preferences. The style also photographs beautifully and translates well to professional settings while still feeling edgy and contemporary.
How to Maintain This Look
- Schedule fade touch-ups every 3-4 weeks to keep edges crisp and clean
- Use lightweight styling products on top to avoid weighing down your natural texture
- Sleep on a silk or satin pillowcase to protect the longer hair on top
- Moisturize your scalp regularly where hair is shorter and more exposed
Pro tip: Ask your barber to create a subtle line or design in the fade—it adds personality without being too dramatic.
2. Pixie Cut with Texture
A pixie on natural hair is not the same as a traditional straight-haired pixie—it’s an opportunity to let your natural texture shine in a bold, short style that radiates confidence. With a textured pixie, your hair naturally creates beautiful dimension and movement without requiring any styling. The key is finding a stylist who understands how to cut natural hair texture so it lands exactly where you want it and frames your face perfectly.
The Confidence Factor
Wearing a textured pixie is a statement. Your face becomes the focus, your features are fully visible, and there’s nowhere to hide—which means you’re announcing to the world that you’re comfortable being seen. Many women who transition to a pixie on natural hair report feeling more confident, lighter, and more themselves than they ever have with longer styles.
Styling and Product Tips
- A light gel or edge control on wet hair creates definition while keeping hair from looking crunchy
- Refresh curls with a light mist of water and a tiny amount of leave-in conditioner between wash days
- Wash every 4-7 days depending on your scalp’s oil production and exercise routine
- Experiment with different texturizing products to find your preferred level of definition
Worth knowing: Pixies look stunning on multiple face shapes, but the cut and angle matter enormously—invest in a stylist experienced with natural hair textures.
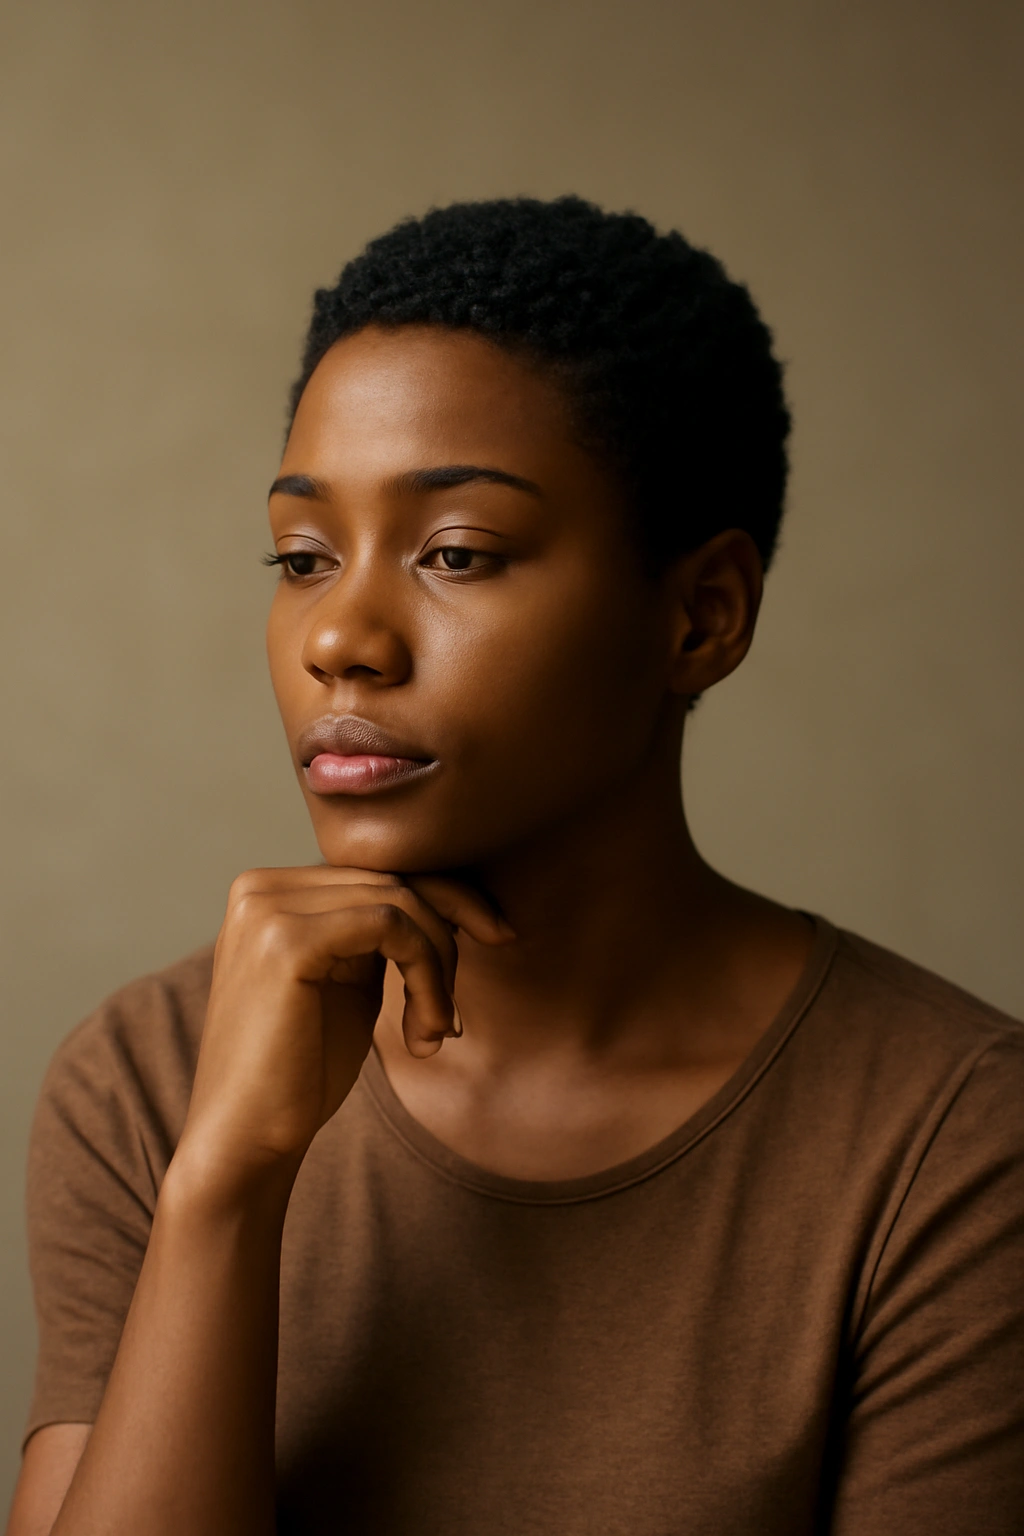
3. Teeny Weeny Afro (TWA)
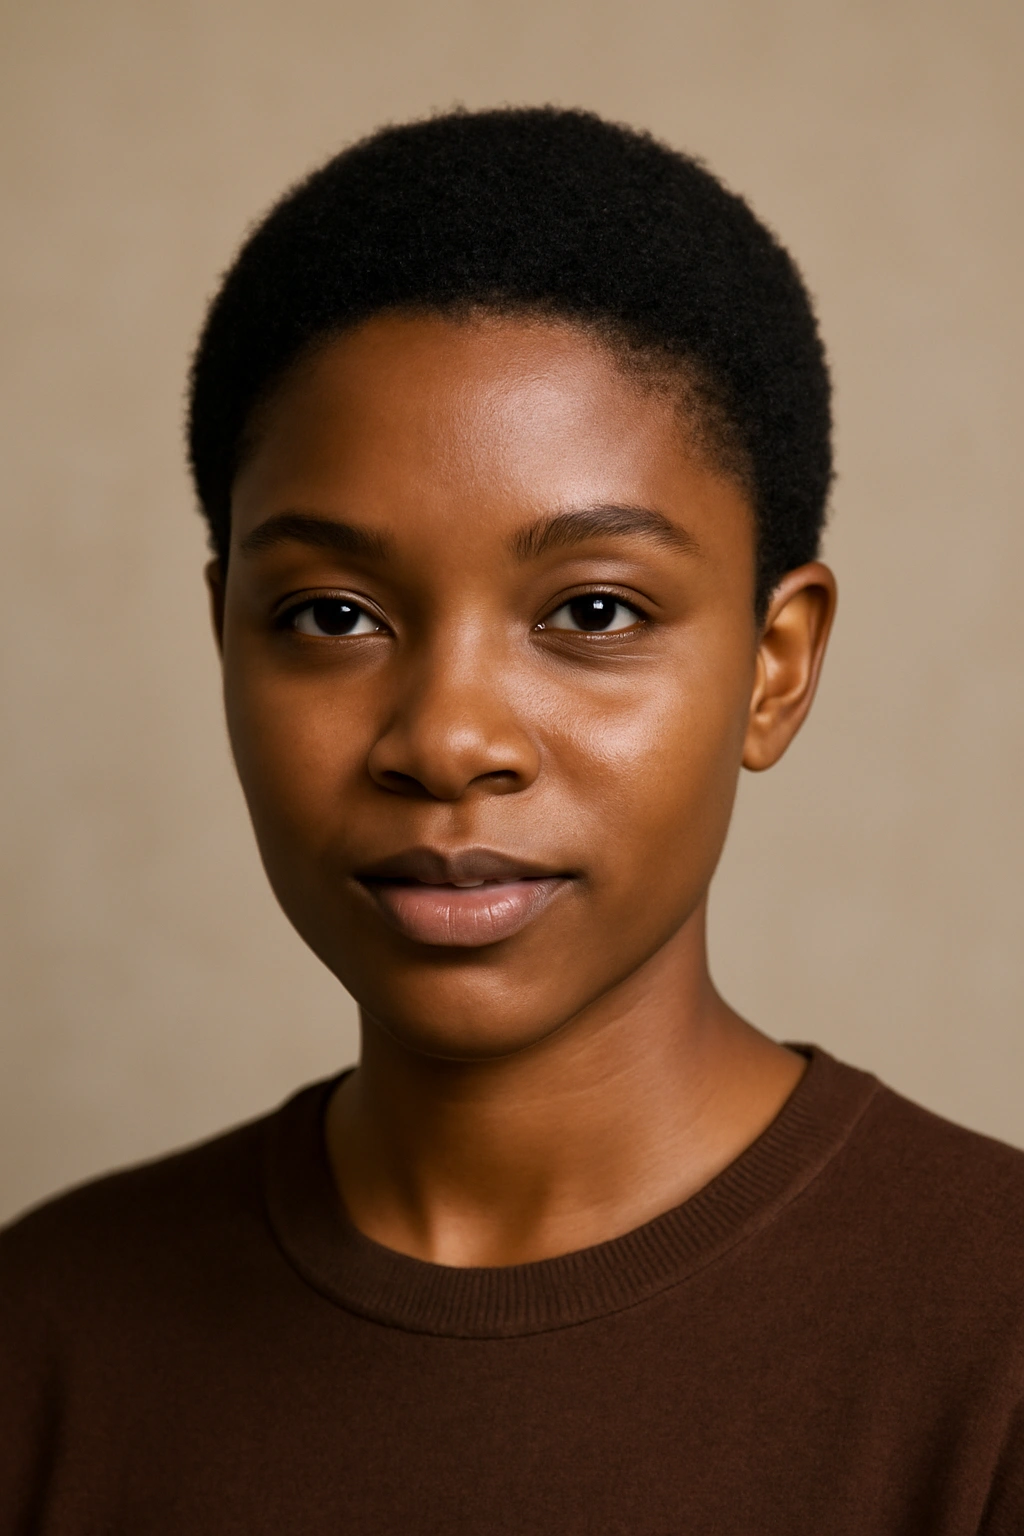
A true TWA celebrates your natural hair at its most vulnerable and strongest stage, usually between half an inch and two inches of growth. This cut is beautifully democratic—it works on every hair texture, every face shape, and every skin tone because it’s pure, unapologetic natural hair in its most basic form. A TWA is also the ultimate low-maintenance style; you can literally wash it, let it air dry, and go about your day.
The Freedom of a TWA
Wearing a TWA means you’re not concerned with length retention or protective styling—you’re just growing your hair healthy and letting it exist as it naturally does. This can be incredibly liberating after years of styling, straightening, or trying to maintain longer lengths. A TWA also allows your scalp to breathe and receive moisture and care directly, which promotes healthier overall hair growth.
Care for Short New Growth
- Moisturize your scalp 2-3 times weekly with lightweight oils like jojoba or argan
- Wash with sulfate-free shampoo every 5-7 days to avoid stripping natural oils
- Use a silk or satin bonnet at night to protect your fragile curls
- Be extremely gentle when wet—this is when hair is most breakable
Insider note: A TWA combined with bold earrings or a statement necklace creates a super-chic look that emphasizes your best features.
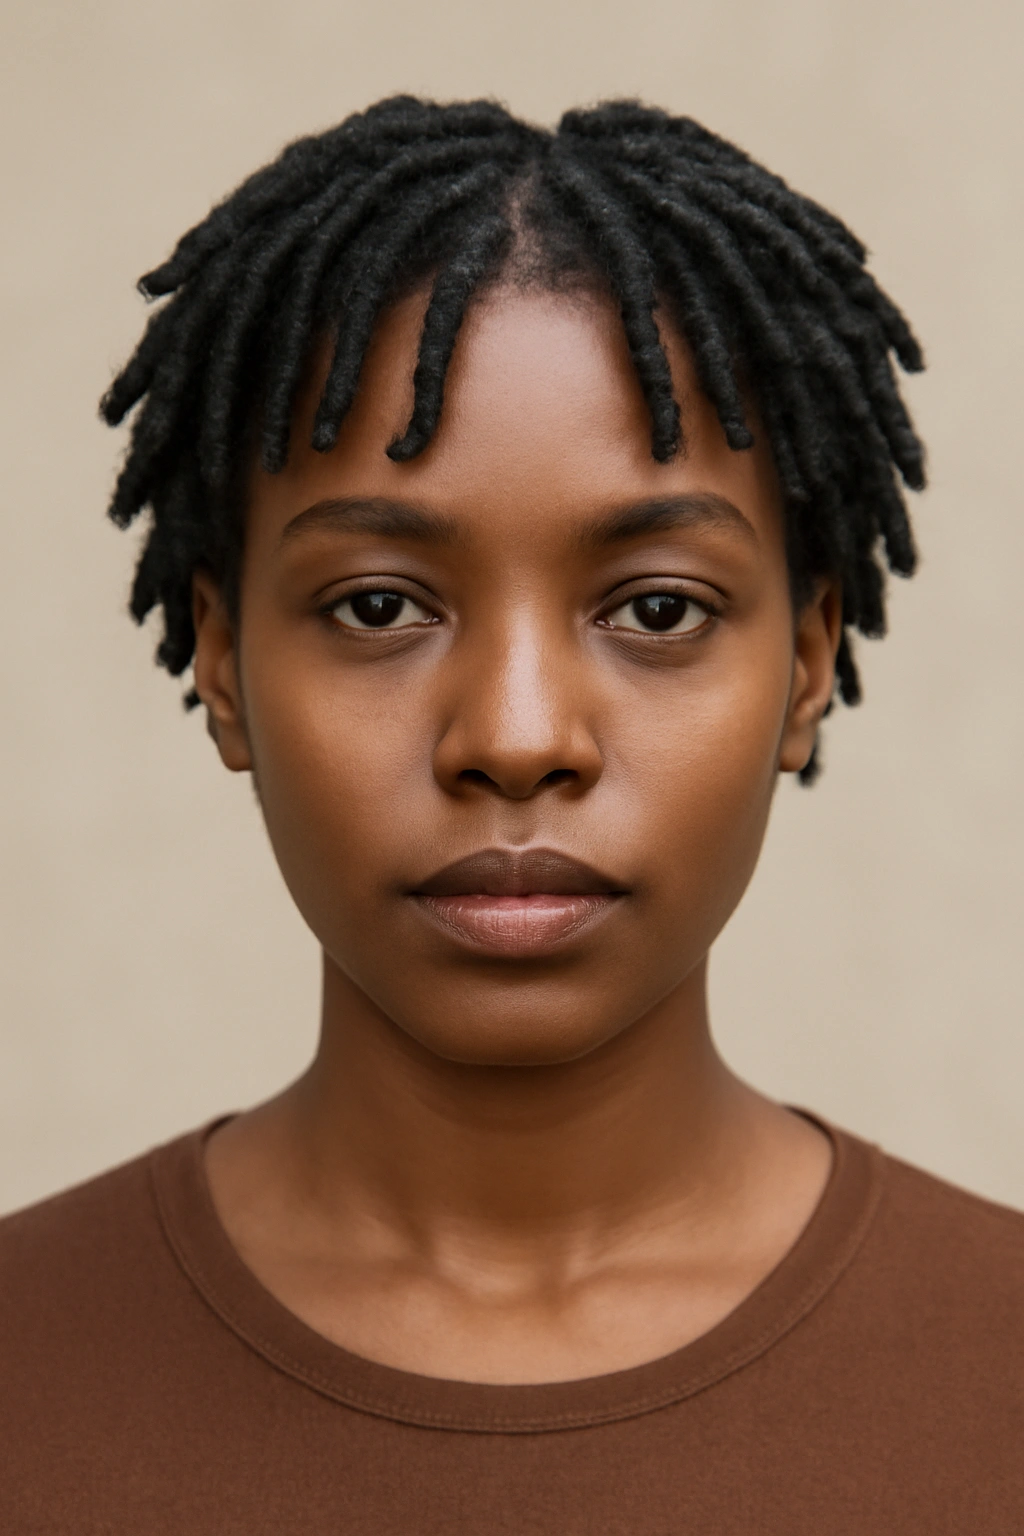
4. Locs and Short Loc Styles
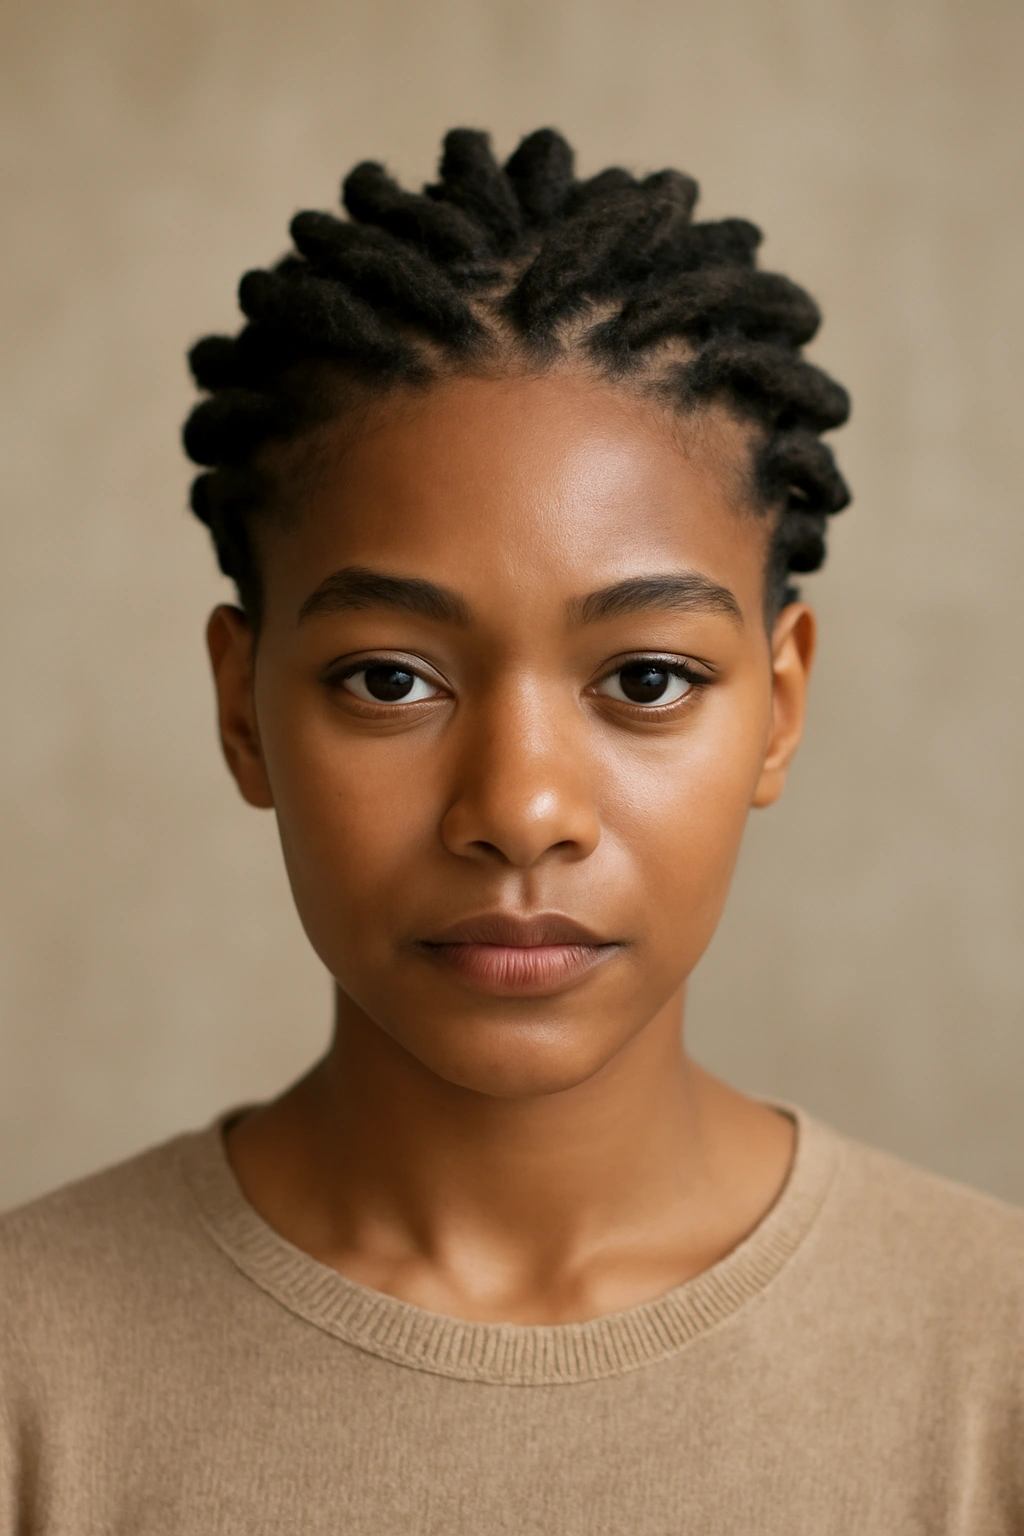
Short locs are a profound styling choice that represents intention, cultural connection, and a long-term commitment to a specific hair texture journey. Whether you’re starting fresh locs or you’ve been growing them for years and decided to go shorter, short locs offer incredible styling versatility—you can wear them down, twist them, pin them, wrap them, or style them into updos. Locs also develop personality and character as they mature, creating a truly unique look that’s completely yours.
Getting Locs Started and Maintained
- Choose your method: traditional locking, interlocking, crochet hook method, or freeform each have different results and timelines
- Expect the first 3-6 months to be an awkward phase where locs aren’t fully locked yet
- Wash and retwist every 4-6 weeks in the early stages, then every 6-8 weeks once locs are mature
- Deep condition regularly—locs need moisture just like any other hair style
Short Loc Styling Ideas
- Create a loc mohawk by pinning sides back and leaving the center free-flowing
- Wrap locs around your head in a crown-like pattern and secure with bobby pins
- Roll locs into bantu knots for an entirely different texture and look
- Combine shorter and longer locs for visual dimension and styling options
Pro tip: Start with clean, well-moisturized hair when beginning locs—healthy base hair becomes healthier locs.
5. Wash and Go with Curl Creams
A true wash-and-go on natural hair is a masterclass in simplicity: wet your hair, apply styling products designed for your curl pattern, and let your curls dry naturally into whatever shape they want to take. For short natural hair, a wash-and-go might literally take ten minutes from shower to completely done hair. This style works best on hair that’s naturally coily or curly—the shorter length means your curls have more bounce and definition.
Finding Your Wash-and-Go Formula
Everyone’s hair is different, so your optimal product combination is unique to you. Some people need heavy creams, others need light gels, and many need a combination of products layered in a specific order. Experiment with curl-defining creams, leave-in conditioners, and gel products designed for natural curls until you find your perfect formula—it’s worth the trial period.
Technique Matters as Much as Products
- Cleanse with a sulfate-free shampoo or cowash (conditioner wash)
- Apply products to dripping wet hair—this helps with distribution and definition
- Use the praying hands method or raking method to distribute products evenly
- Avoid touching hair while it dries to prevent frizz and disrupted curl patterns
- Air dry completely before moving around significantly
Worth knowing: A wash-and-go still requires consistent product investment and regular deep conditioning—it’s low-styling maintenance, not no-maintenance.
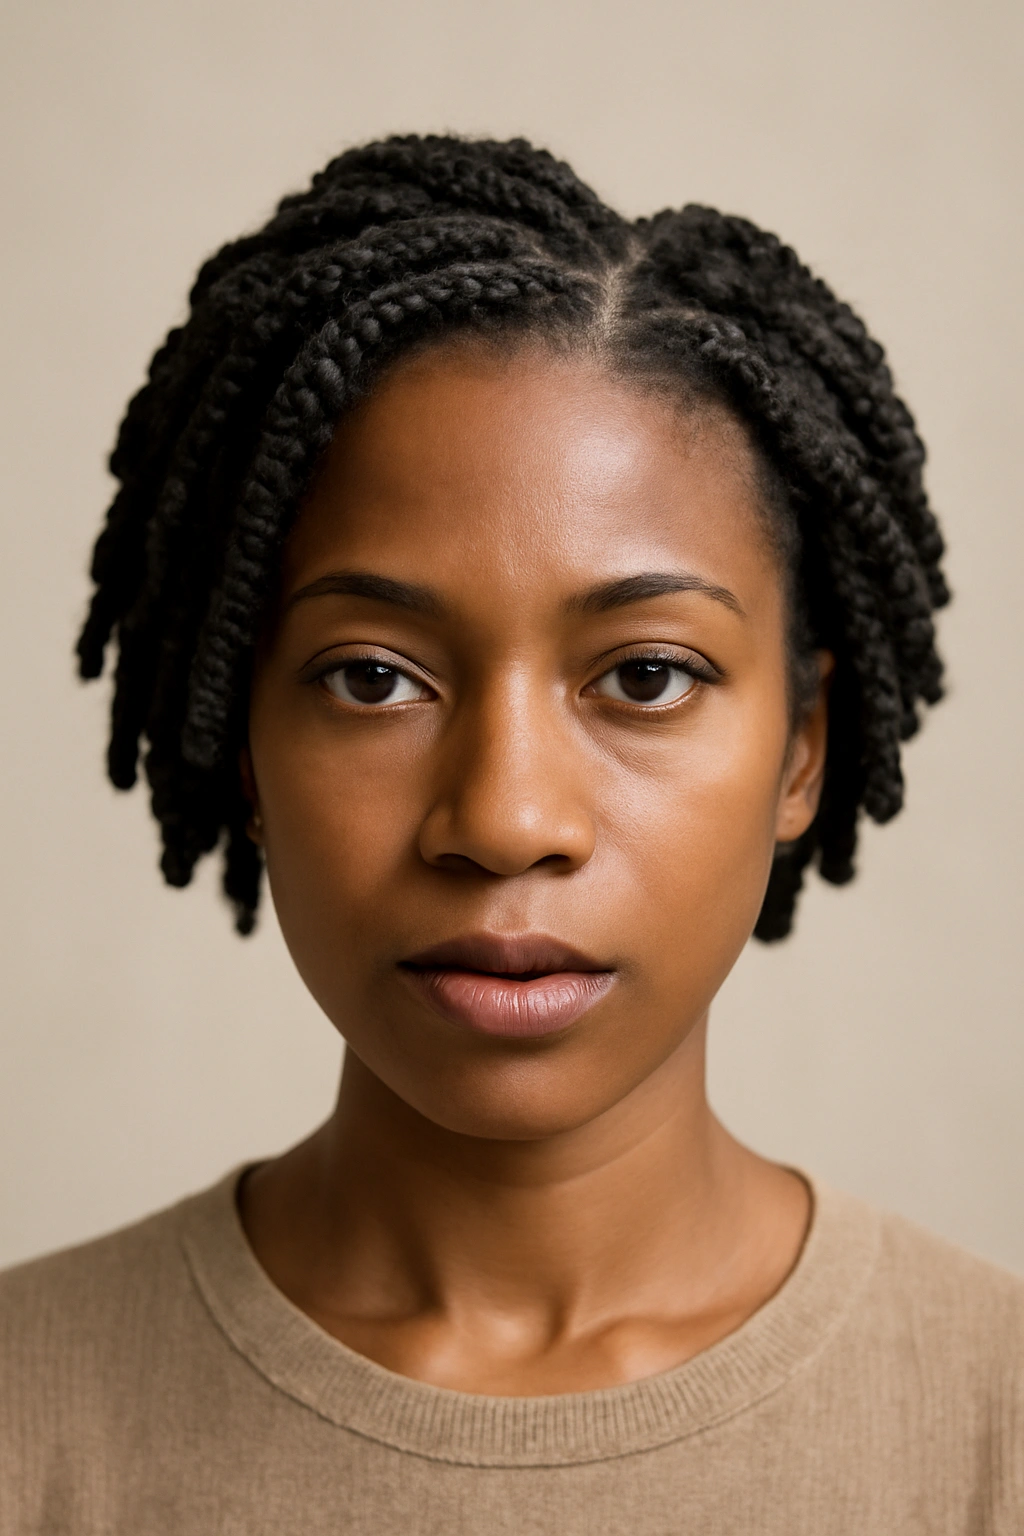
6. Flat Twists as a Protective Style
Flat twists are a gorgeous protective style that works beautifully on short natural hair, creating raised, defined lines that add visual interest and texture to your look. Unlike regular two-strand twists that twist away from the scalp, flat twists sit directly on the scalp in a braided pattern, making them perfect for keeping the front or sides of your hair styled while leaving other sections free. Flat twists are also gentler on hair than tight braids because the tension is more distributed along the length of the twist.
Creating Beautiful Flat Twists
- Start with clean, moisturized hair and apply a light styling cream or gel
- Section hair into the pattern you want—diagonal lines, geometric shapes, or scattered placement
- Take two strands of hair and twist them around each other while rotating them toward the scalp
- Keep tension even but not tight—you should be able to fit your finger comfortably under the twist
- Secure the end with a small elastic or bobby pin that matches your hair color
Wearing Flat Twists Successfully
- Protect at night with a silk bonnet or scarf to maintain the style longer
- Keep your scalp moisturized by applying oil directly to parted sections
- Wear flat twists for 5-7 days before removing to minimize breakage
- Remove gently by unraveling from the ends rather than pulling from the scalp
- Follow with a deep conditioning treatment to restore moisture
Pro tip: Flat twists create the perfect canvas for hair jewelry, beads, or metallic clips to add glamour to a simple protective style.
7. Braided Crown or Halo Braids
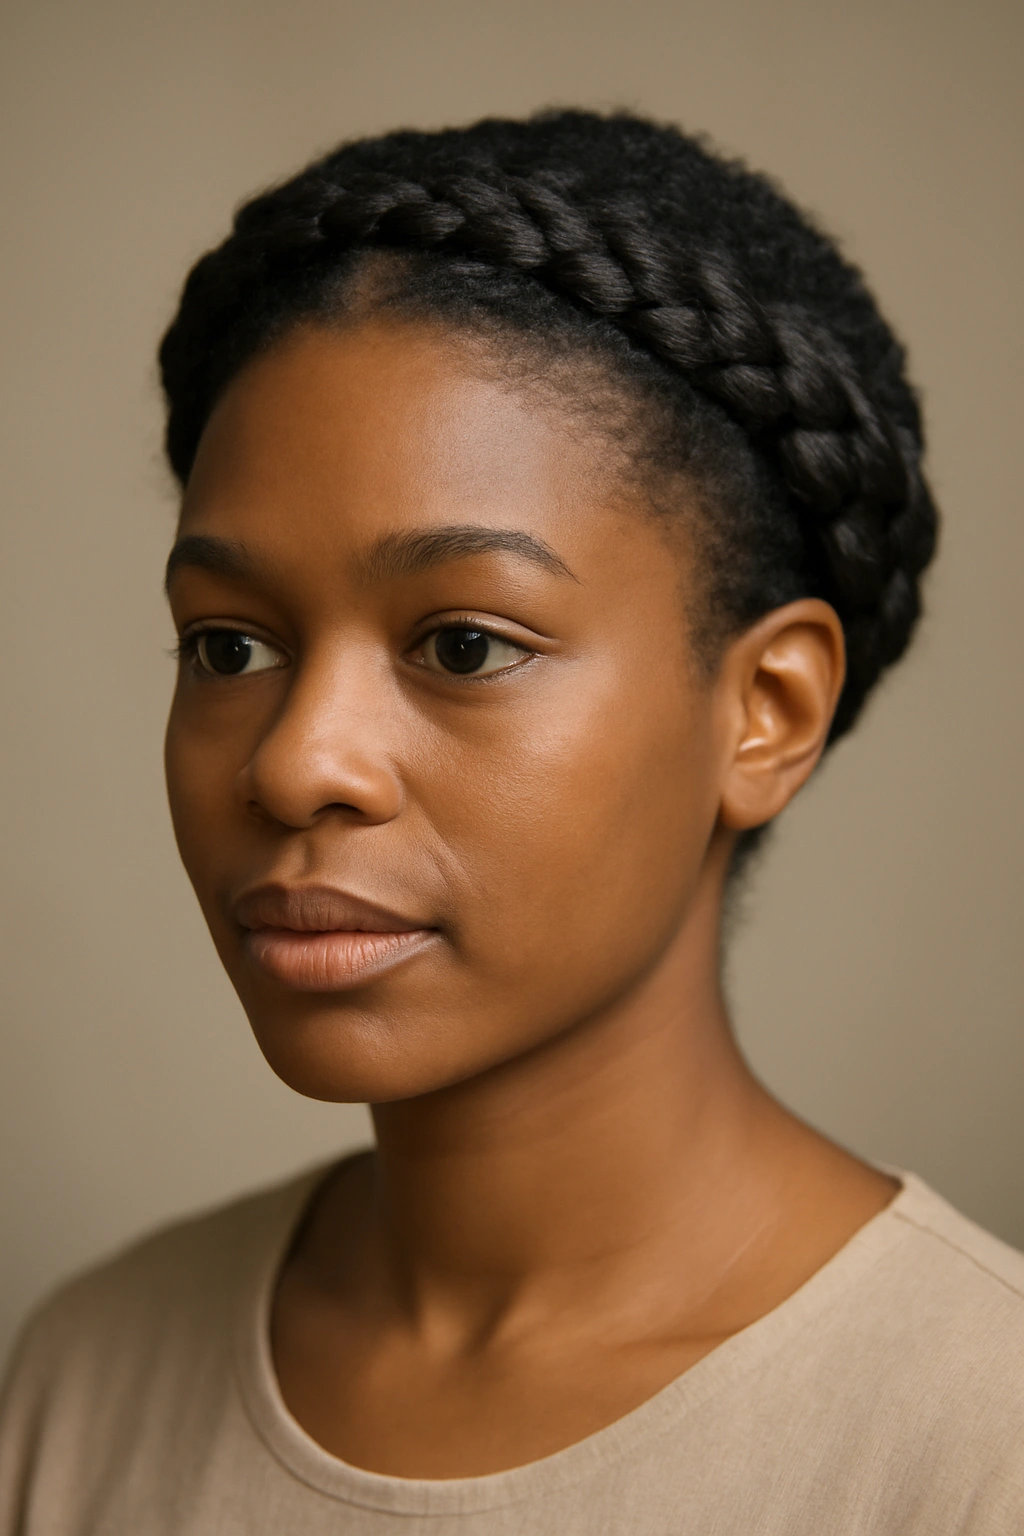
A braided crown or halo braid wraps around your head like a crown, creating an elegant, timeless look that works on any hair length, including short natural hair. This style is perfect for occasions where you want to look polished and put-together, but it also works for everyday styling when you want your short hair to feel special. On short hair, a crown braid feels more delicate and creates a softer frame for your face than the same braid would on longer hair.
How to Create a Crown Braid
- Start at one temple and begin a three-strand braid going toward the back of your head
- Add small sections of hair from your scalp as you braid (this is called a French braid technique)
- Continue around the back of your head, incorporating hair as you go
- Finish the braid at the opposite temple and secure with a small elastic
- Tuck the end under and secure with bobby pins for a seamless look
Making Crown Braids Last
- Braid damp hair that’s been lightly moisturized with leave-in conditioner for better grip
- Sleep on a silk pillowcase to minimize frizz around the braid
- Refresh frizz and flyaways with a tiny bit of edge control gel
- Wear for 3-4 days before removing to balance style and hair health
- Apply oil to your scalp daily where the braid is pulling
Insider note: A crown braid on short hair looks particularly stunning when paired with a bold lip color, hoop earrings, or a sleek outfit—the braid draws attention upward.
8. Two-Strand Twists as a Signature Style
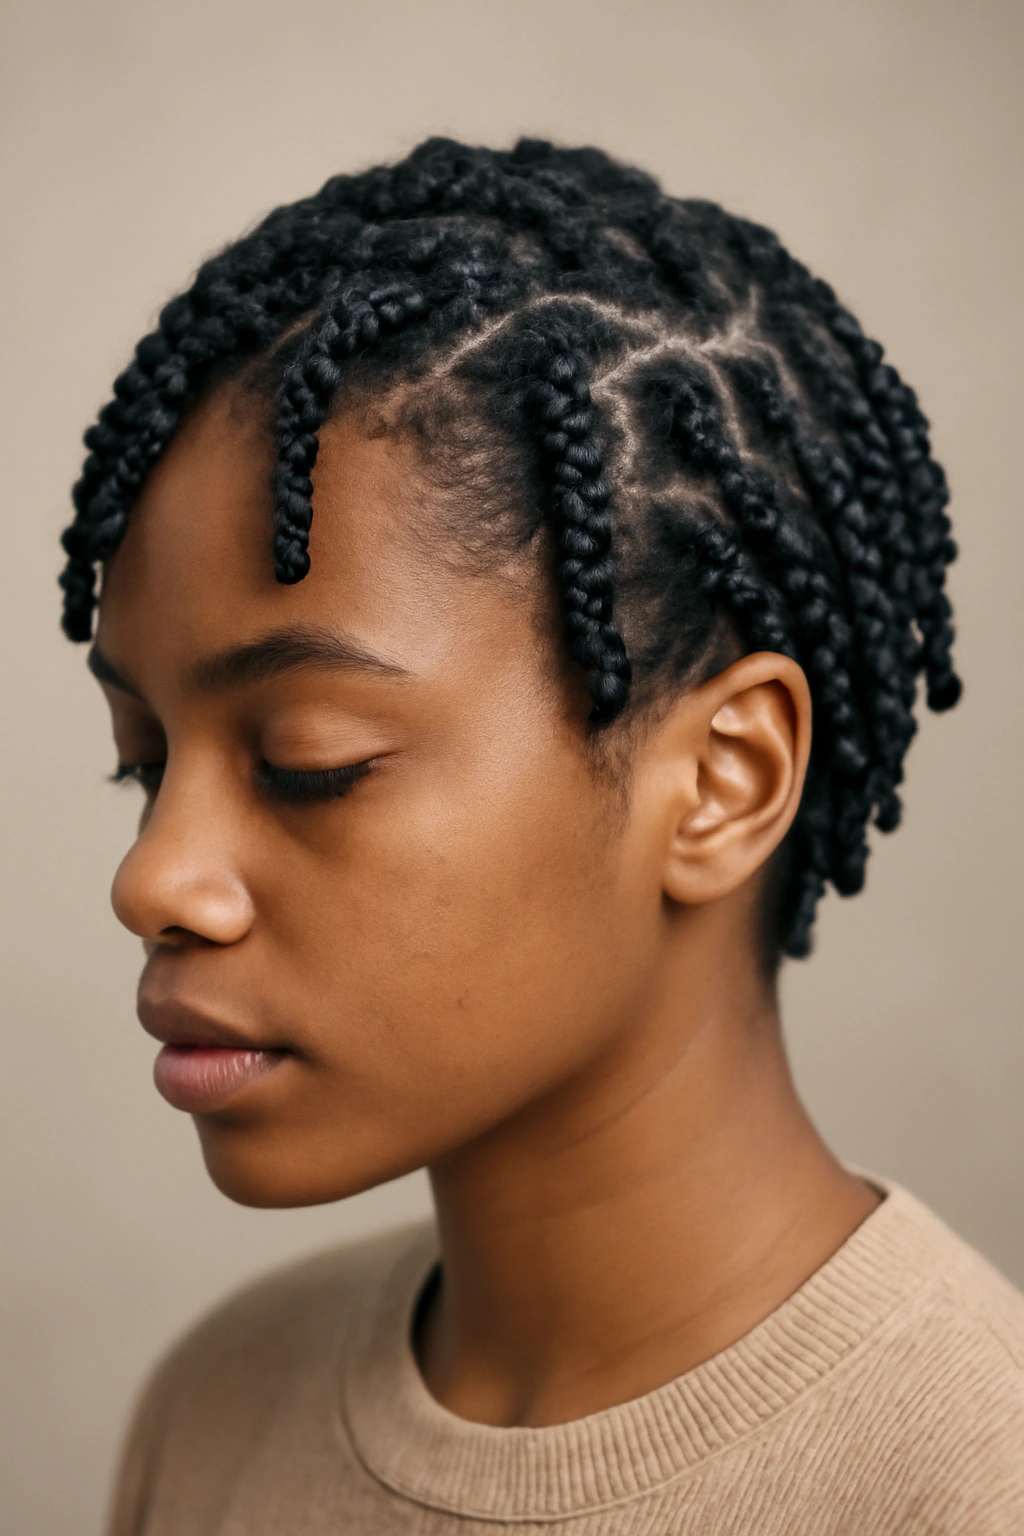
Two-strand twists are one of the most iconic and versatile natural hair styles, created by dividing hair into sections and twisting two strands around each other. On short natural hair, two-strand twists create defined texture that can be styled loose and bouncy or pulled back and secured for a more polished look. Twists are protective when done with medium tension, they last longer than a wash-and-go, and they offer endless styling possibilities once they’re created.
Creating Twists That Last
- Section hair into even parts—the number of sections determines how thick or thin your twists will be
- Apply leave-in conditioner and a styling cream to each section before twisting
- Divide the section into two strands and twist them tightly around each other
- Twist all the way to the ends and secure with a small elastic or by dipping the ends in hot water
- Allow twists to dry completely (at least 8 hours, ideally overnight) before styling
Styling Twist Variations
- Wear twists down and loose for a voluminous, textured look
- Gather twists into a high ponytail for a playful updo
- Pin twists into a crown pattern for an upscale style
- Create a mohawk with twists by pinning the sides and leaving the center free
- Unravel twists after a few days for a beautiful twist-out texture
Pro tip: Two-strand twists hold better and last longer when your hair is in a moisturized, healthy state—focus on consistent deep conditioning.
9. Bantu Knots with Volume and Definition
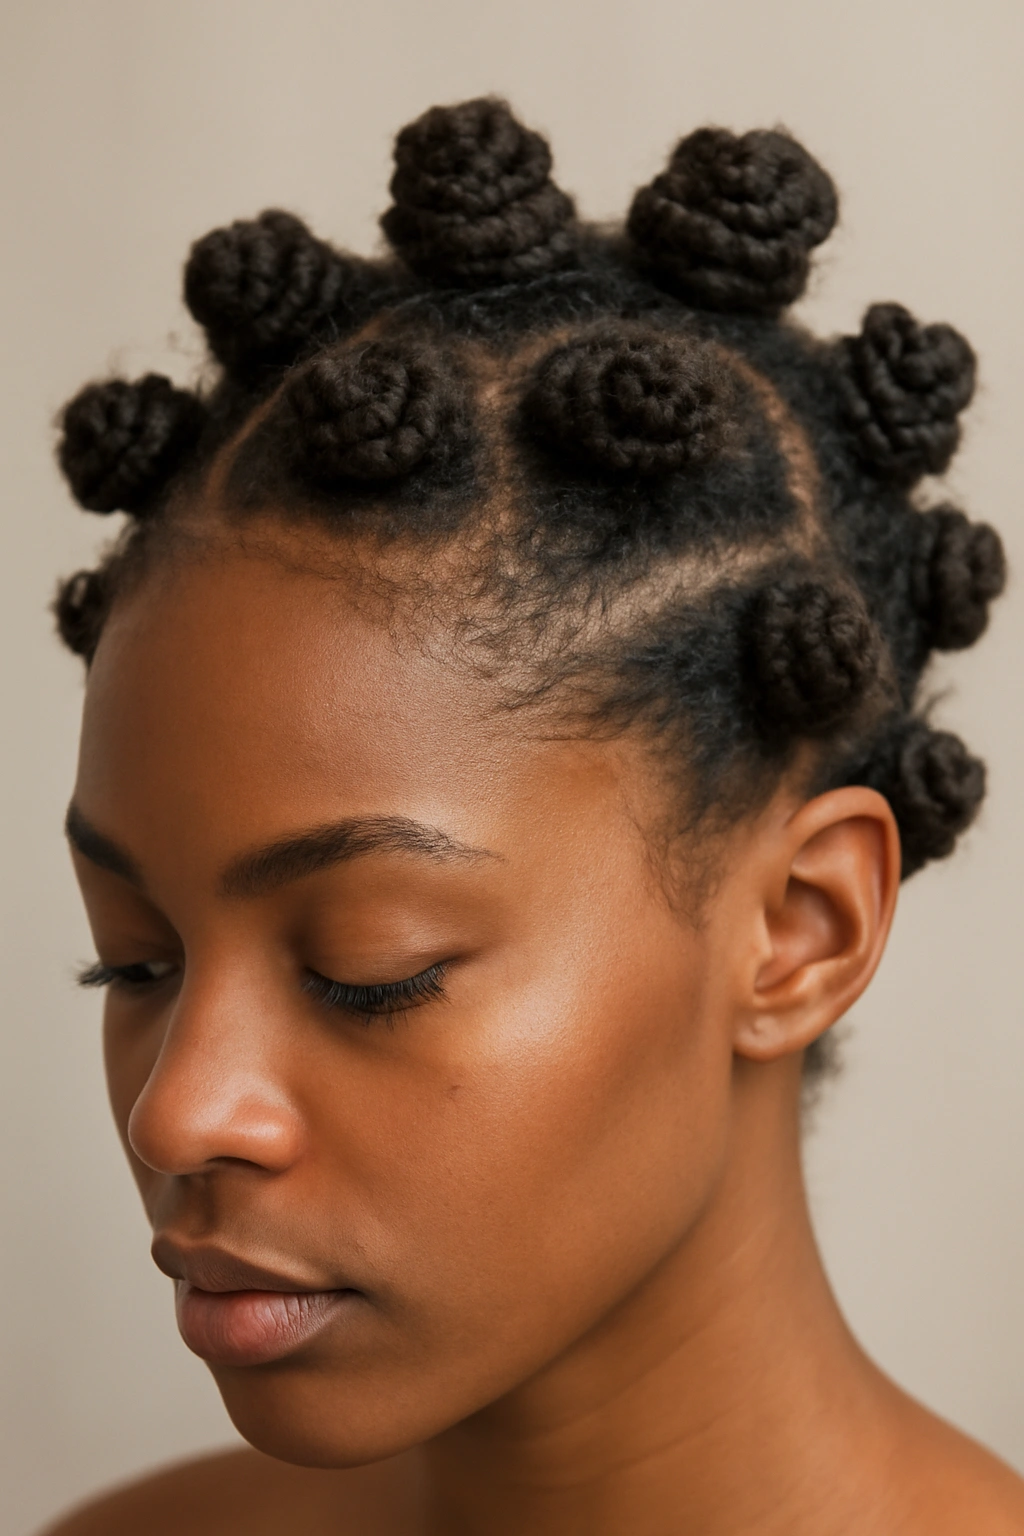
Bantu knots are a stunning style rooted in African tradition, created by twisting sections of hair and wrapping them around themselves in spirals that form knots close to the scalp. Bantu knots serve double duty: they’re a gorgeous style on their own when you wear them out, and they create absolutely beautiful curls when you unravel them for a “bantu knot-out.” On short natural hair, bantu knots create impressive volume and definition because the short strands curl tightly and spring upward.
Creating Bantu Knots That Stay Put
- Start with clean, damp hair and apply a light styling cream throughout
- Divide hair into sections—smaller sections create more knots and tighter curls, while larger sections create fewer, looser curls
- Twist each section tightly, then wrap it around itself to form a knot
- Secure knots with small elastics or bobby pins—they should feel snug but not painful
- Allow knots to dry completely before touching them (at least 12 hours)
The Bantu Knot-Out for Lasting Curls
- After bantu knots have dried completely, gently unravel each knot
- Apply a light oil or curl cream as you unravel to prevent the curl from falling out immediately
- Use your fingers to gently separate and define the curls
- Avoid brushing or combing; use your fingers for a softer, more defined curl pattern
- Wear the knot-out for 3-5 days before the curls start to relax
Worth knowing: Bantu knots work beautifully on very short hair and on longer hair, but on short natural hair, the knots create particularly striking sculptural volume.
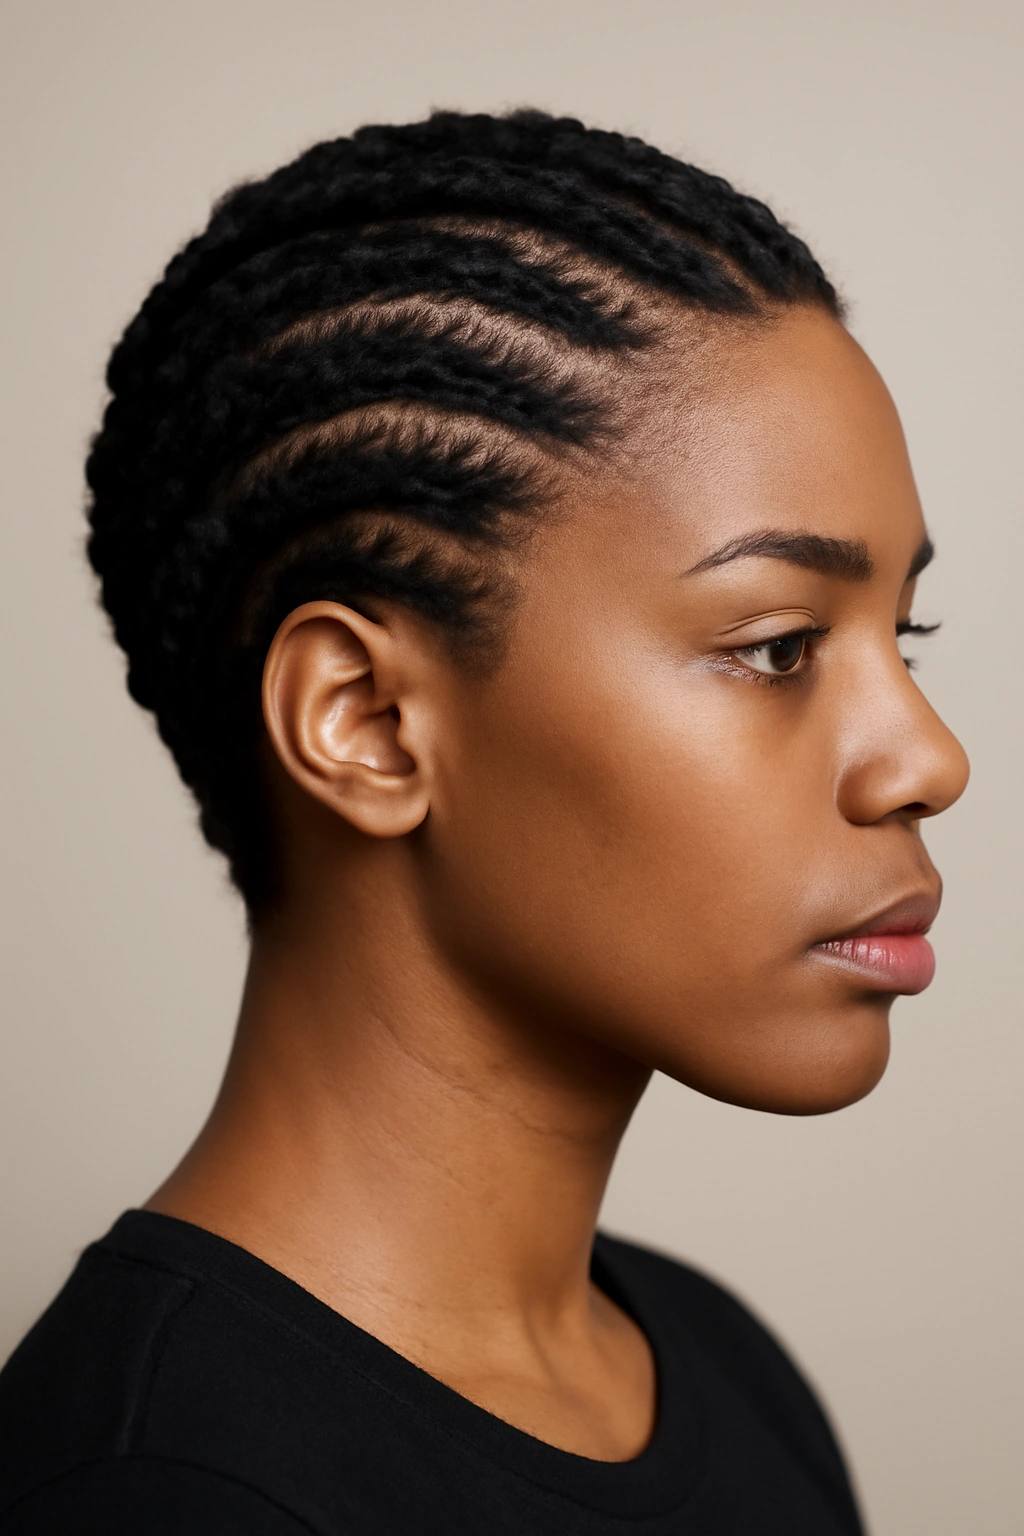
10. Cornrows in Multiple Patterns
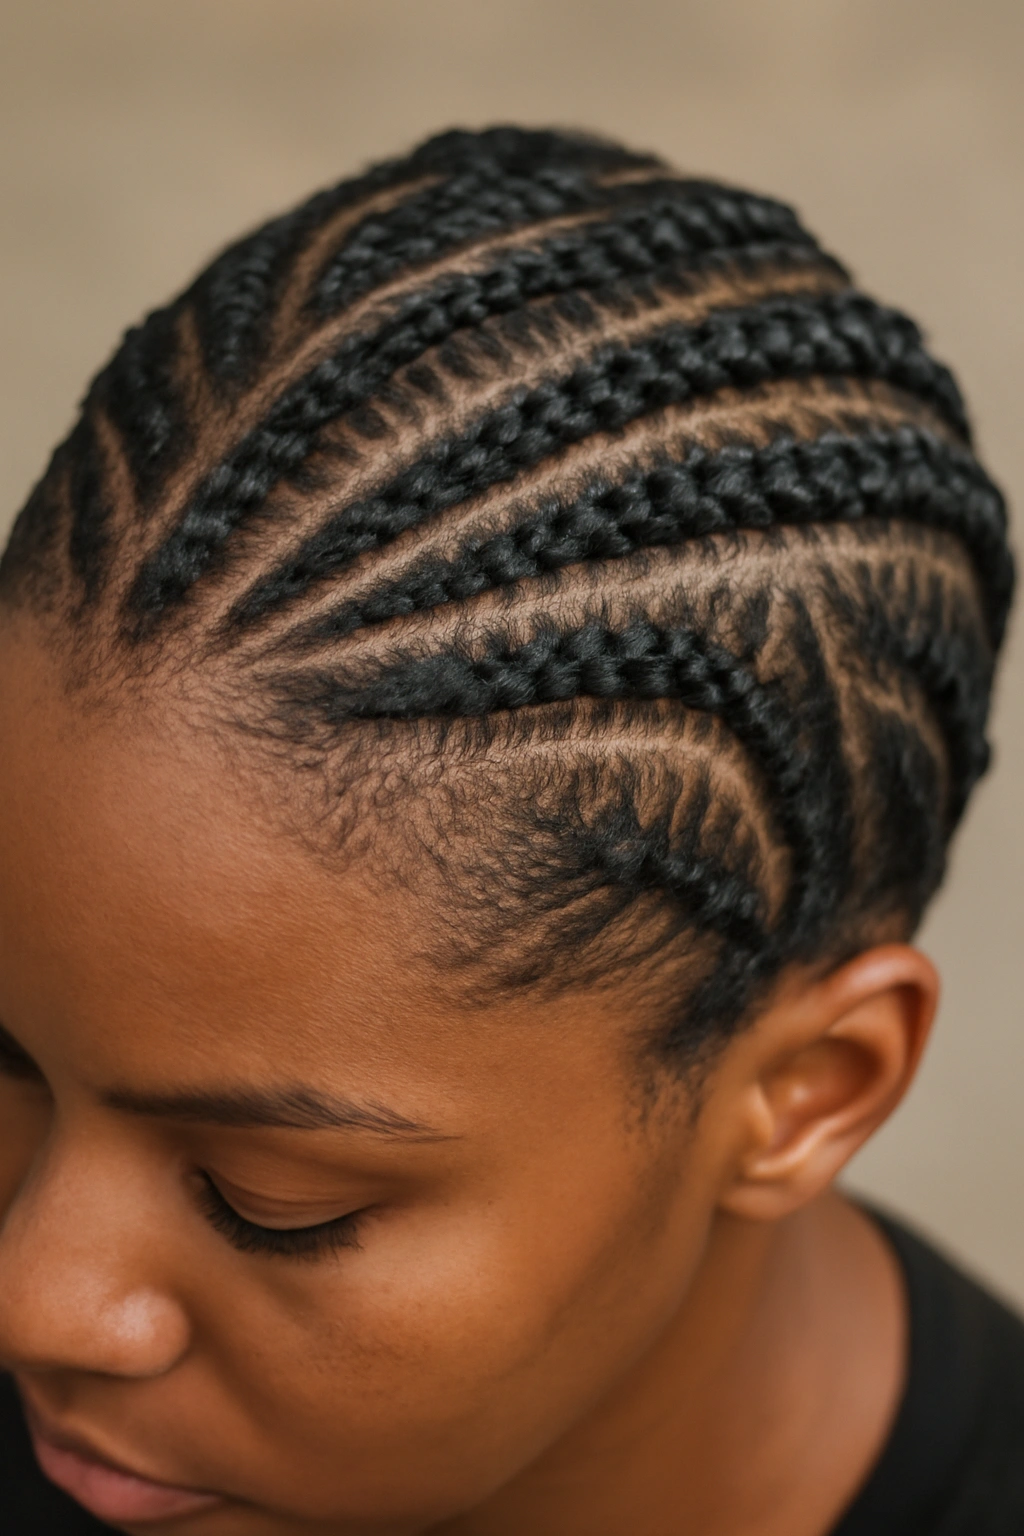
Cornrows are a foundational protective style that involves braiding sections of hair close to the scalp, creating raised rows that are both beautiful and functional. On short natural hair, cornrows require less hair to work with but still offer incredible style potential. You can create geometric patterns, go for simple straight rows, combine thick and thin braids, or even create curved and diagonal patterns that follow the natural contours of your head.
Planning Your Cornrow Pattern
- Consider the shape of your head and your face to determine the most flattering pattern
- Sketch out your design before you start if you’re creating a complex pattern
- Thin, intricate cornrows work beautifully on short hair but require more time and skill
- Thick, chunky cornrows are faster to create and work well on shorter lengths
- Diagonal or curved cornrows follow head shape more naturally than straight lines
Maintaining Cornrows on Short Hair
- Moisturize your scalp every 2-3 days by applying oil or moisturizing cream to the parts
- Protect cornrows at night with a silk scarf or bonnet
- Wash your hair by wetting the cornrows, applying shampoo to your scalp and the braids, rinsing thoroughly, and allowing to air dry
- Keep cornrows in for 2-4 weeks depending on how you feel and how fast your hair grows
- Remove cornrows gently by unbraiding from the bottom of each braid
Pro tip: Add beads, rings, or cuffs to cornrows for extra personality—small gold rings scattered throughout create an especially elegant look.
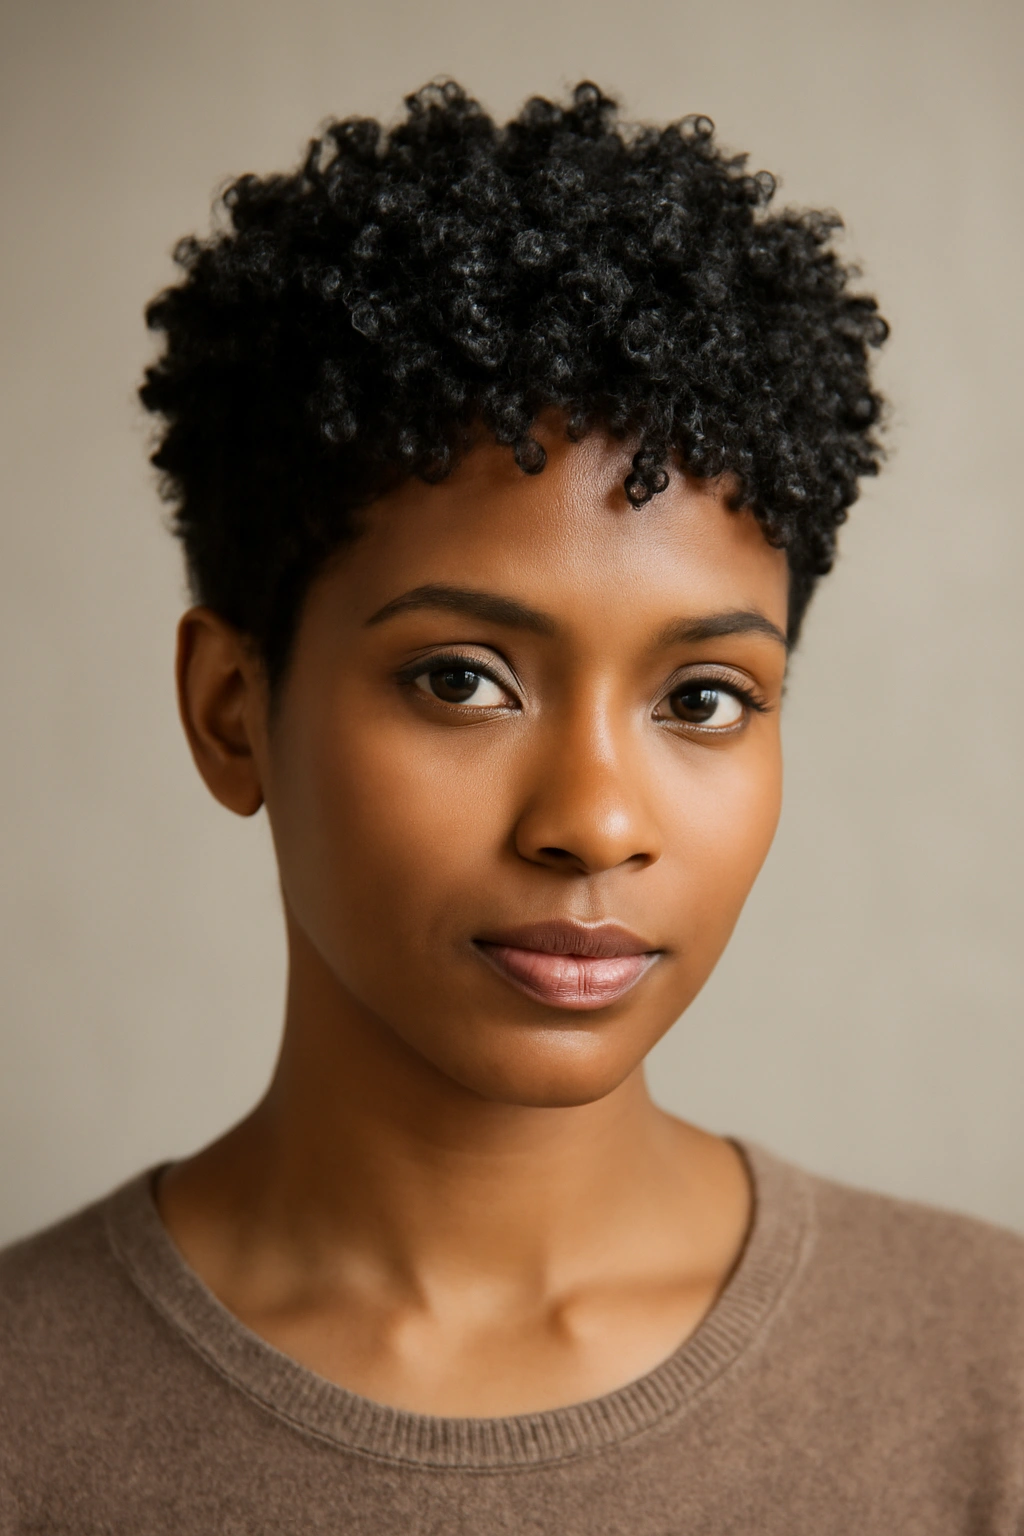
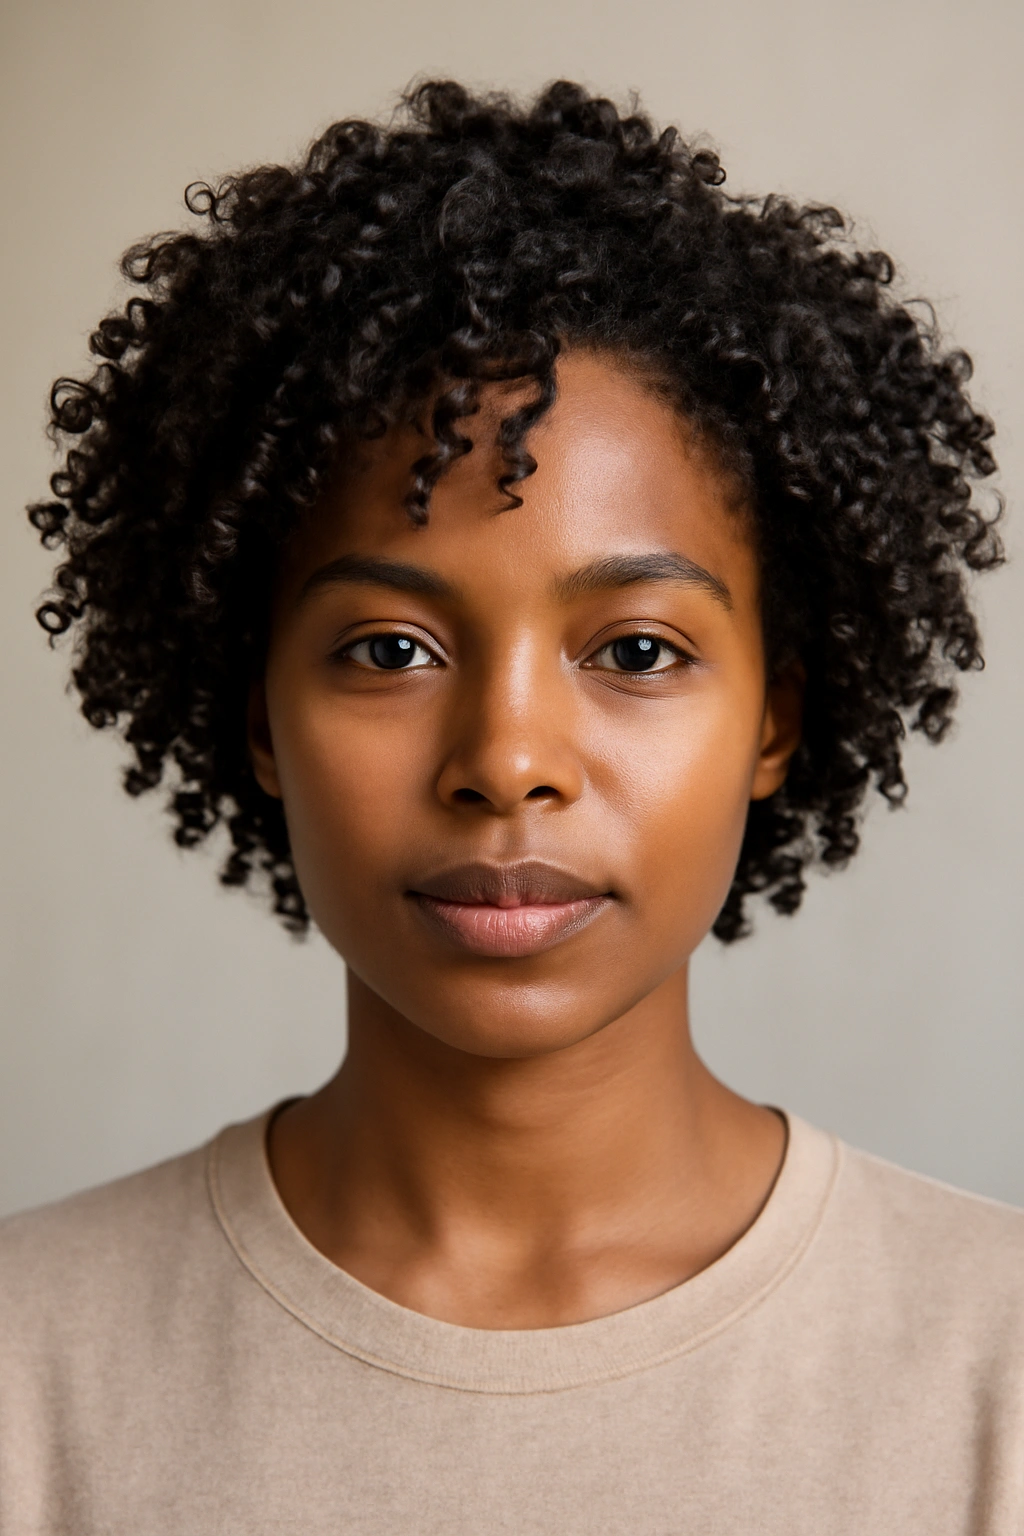
11. Short Textured Crop with Dimension
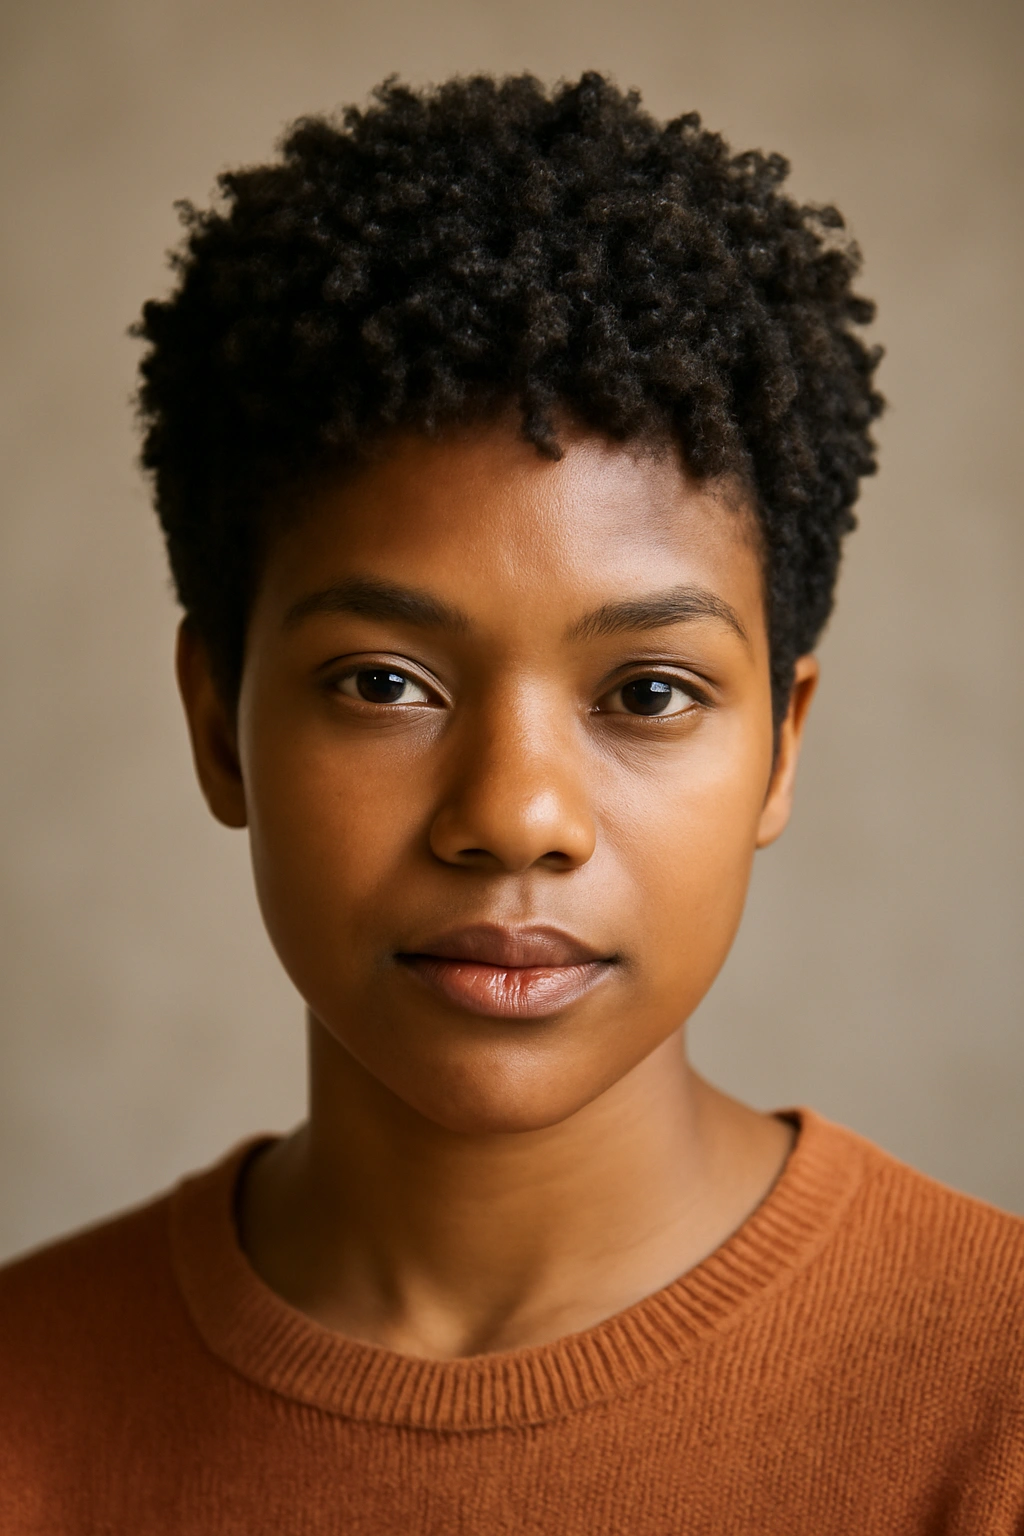
A short textured crop cuts hair to roughly one to two inches all over, then texturizes it so that your natural curl pattern creates beautiful shape and dimension throughout. This is different from a TWA because the hair is deliberately cut and styled for texture rather than just grown out naturally. A textured crop requires a skilled stylist who understands how to cut natural hair to enhance its texture and create the shape you want. The result is incredibly chic and modern.
Getting a Textured Crop That Works
- Find a stylist who specializes in cutting natural hair—this is not the place to experiment with someone new
- Bring reference photos showing the exact level of texture and dimension you want
- Discuss your hair’s texture and curl pattern with your stylist so they can cut accordingly
- Plan for a touchup every 4-6 weeks to maintain the shaped style
Styling a Textured Crop Daily
- A light hold styling gel applied to damp hair creates definition
- You can also wear it completely product-free for a more natural, undone look
- Sleep on a silk pillowcase to maintain your style overnight
- Refresh with water and a tiny bit of gel in the morning if needed
- Most mornings you can literally roll out of bed and be ready to go
Insider note: A textured crop is perfect if you love the idea of short hair but want something that feels more intentionally styled than a TWA.
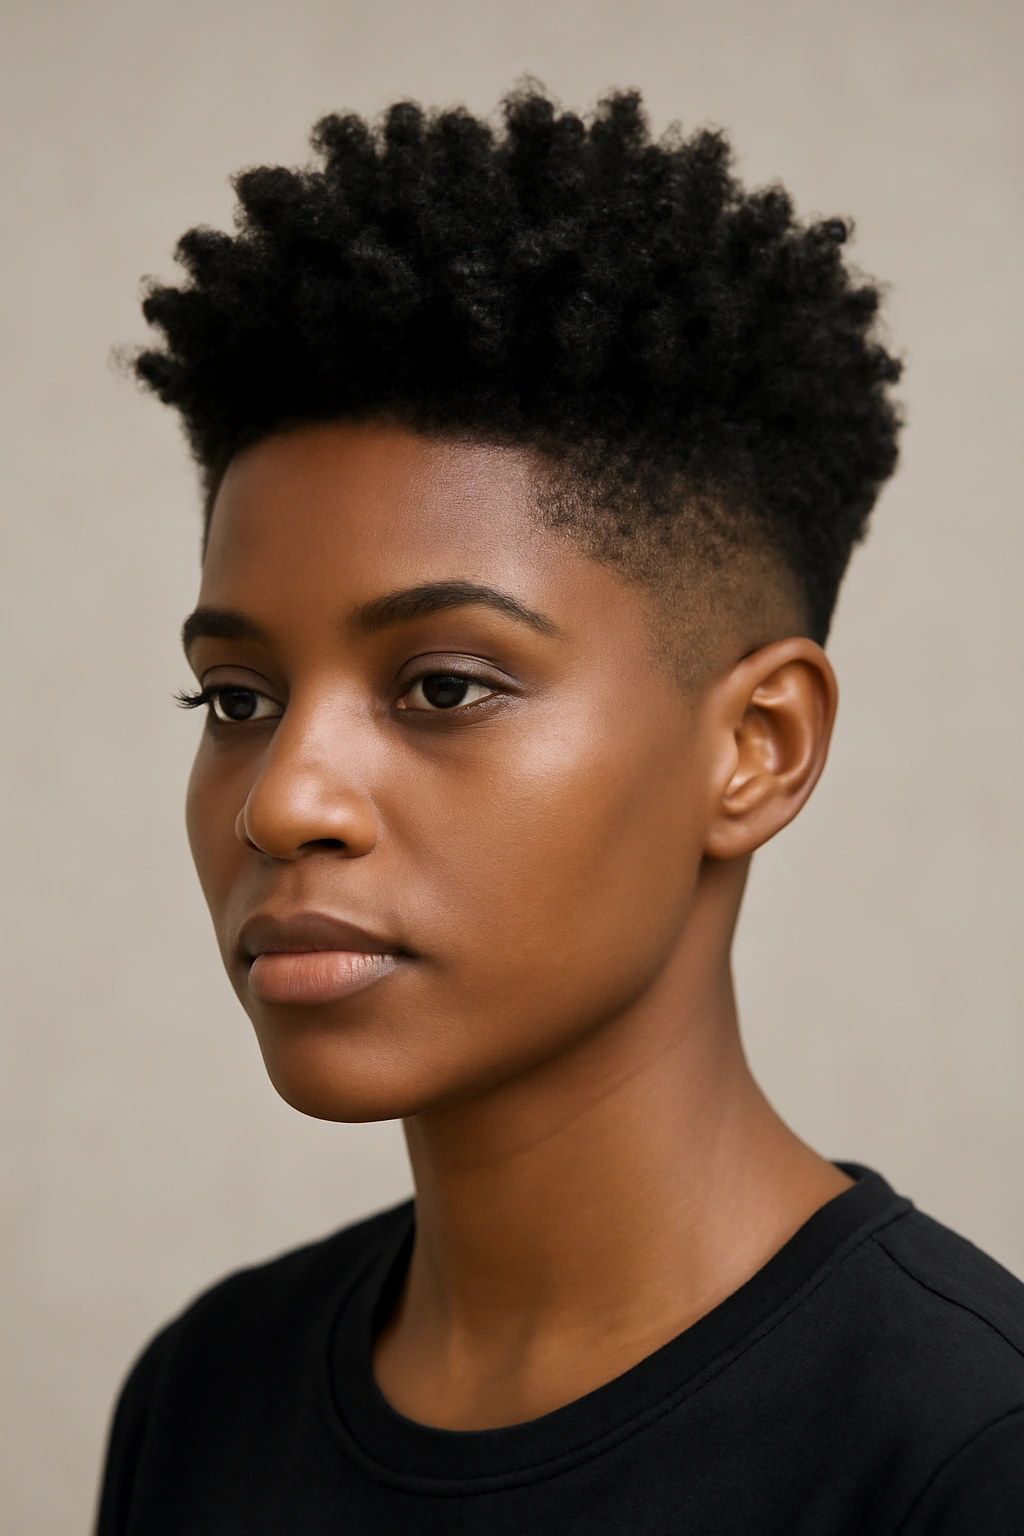
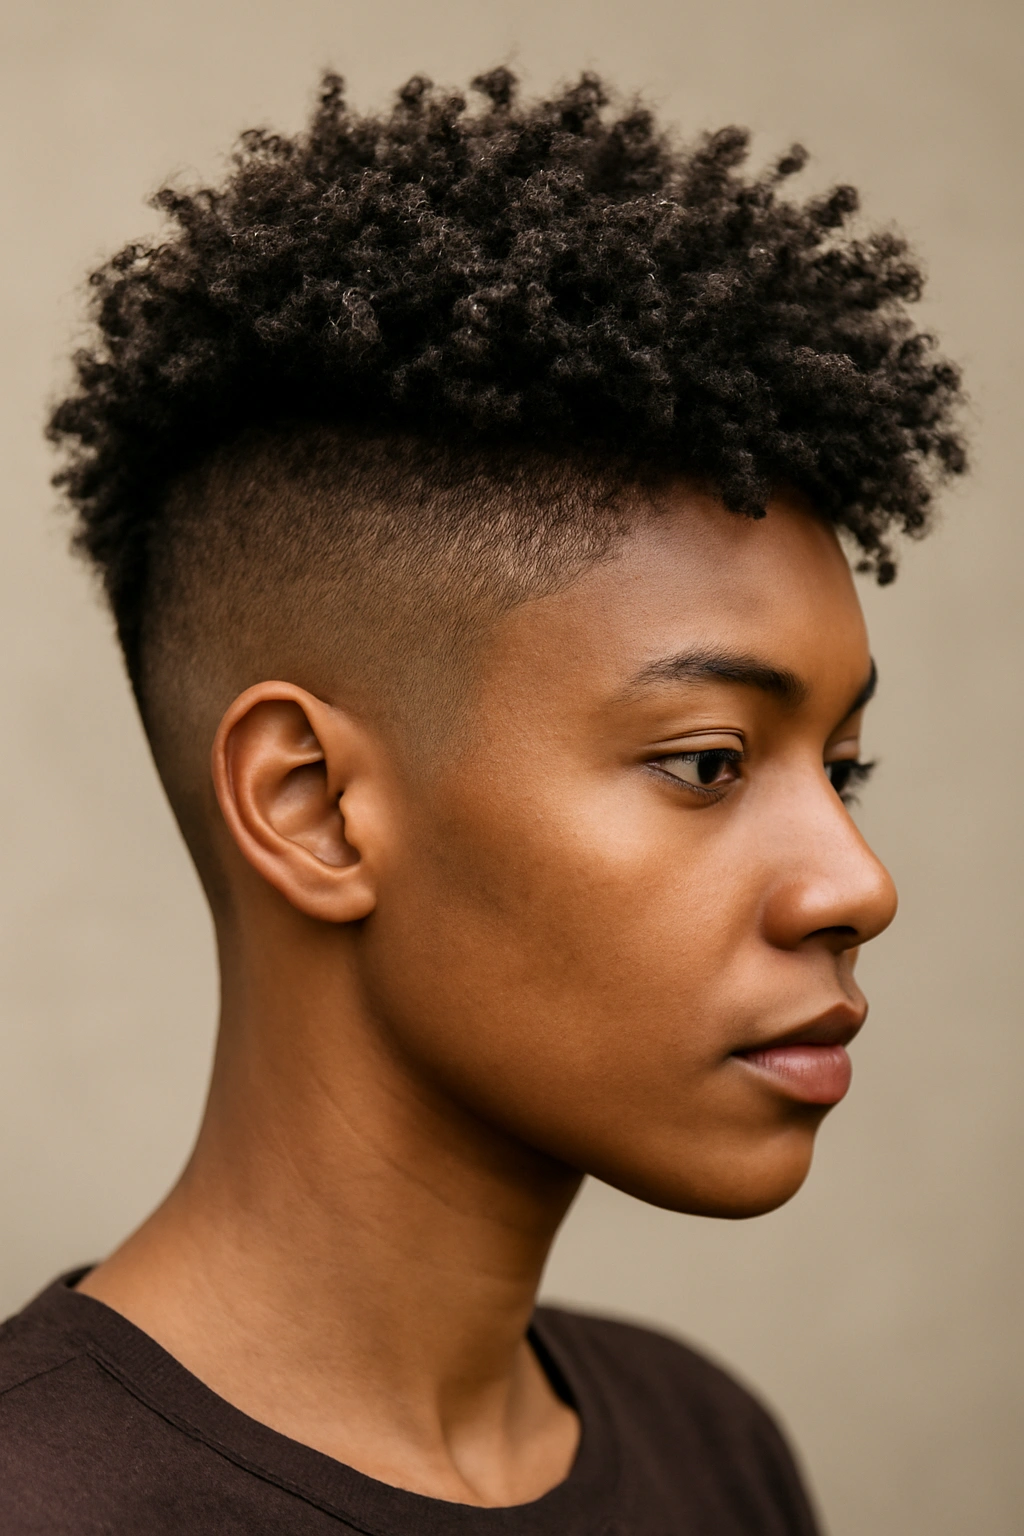
12. Shaved or Faded Sides with Length on Top
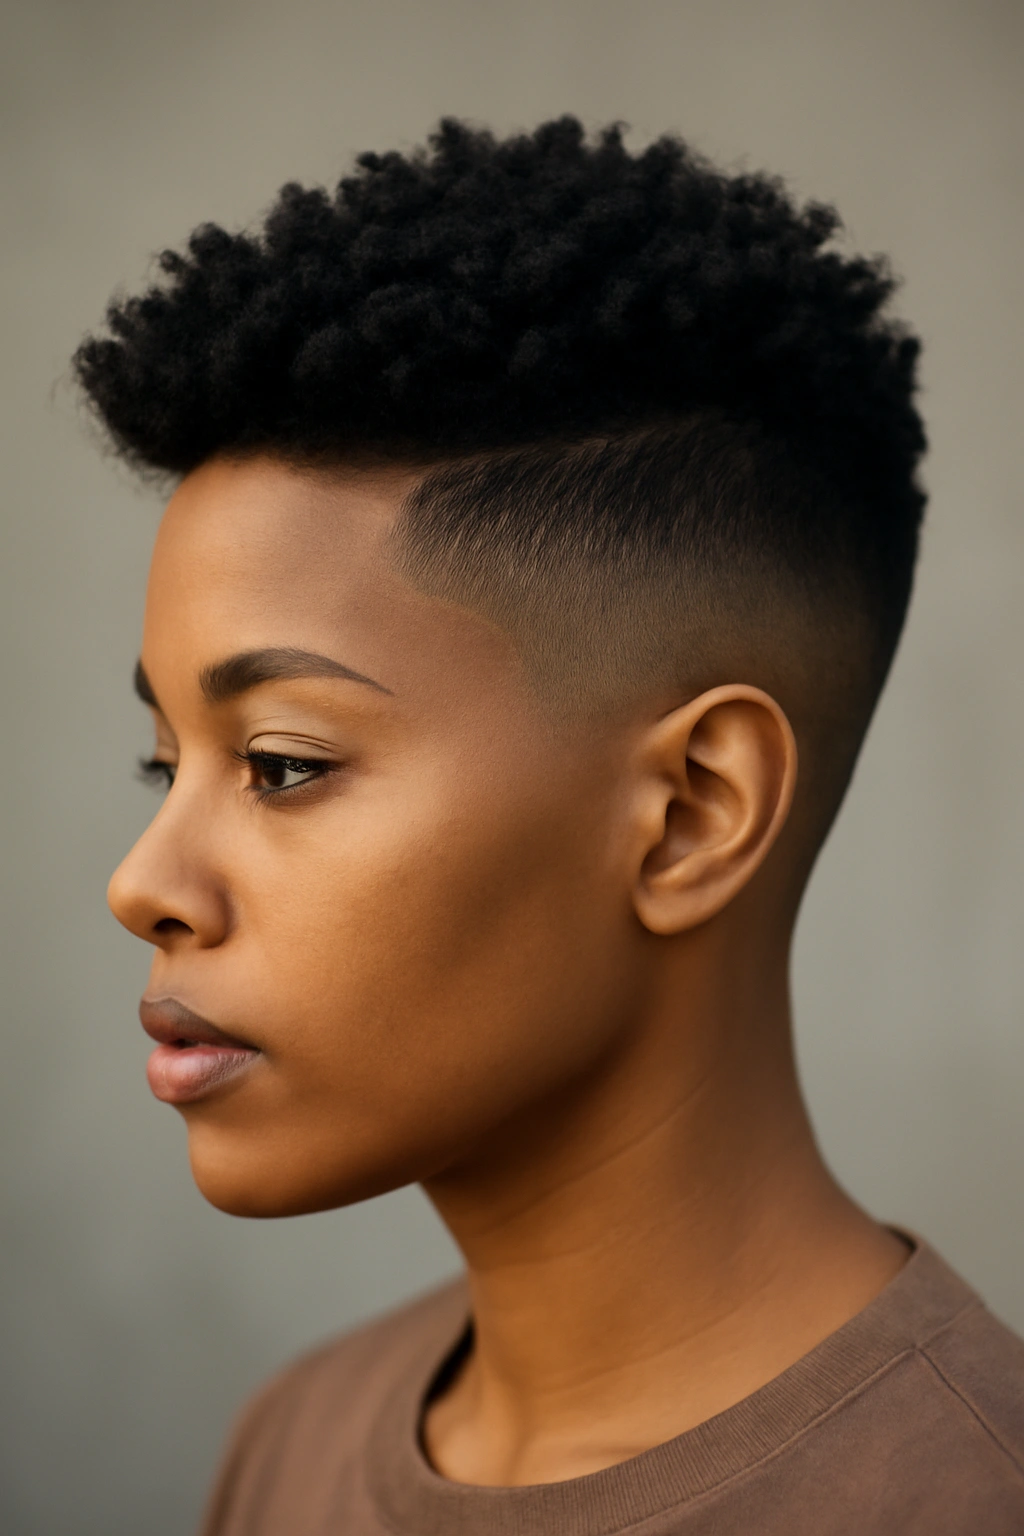
An undercut style with shaved or faded sides and longer natural hair on top creates dramatic contrast and modern edge. This style lets you have some length to play with while keeping maintenance and manipulation minimal because the shaved sections require no styling at all. You can style the top section as a fro, twist it, braid it, or do whatever you want—all the styling focus goes to your crown while your sides look clean and deliberate.
Creating Shaved Sides That Look Sharp
- Work with a skilled barber who can create clean, even shaves
- Decide how high up the fade goes—some people fade just the sides, others take it higher
- Consider whether you want a hard line between the shaved section and longer hair, or a tapered fade
- Shaved sides require touch-ups every 1-2 weeks depending on your hair growth
Styling the Top Section
- The longer hair on top can be styled countless ways—fros, twists, braids, or loose curls
- You could even have a design cut into the shaved section for extra personalization
- This style photographs incredibly well and makes a bold statement
- It’s ideal for people who want some styling versatility but don’t want to style their entire head
Pro tip: Shaved sides with a naturally textured crown and bold jewelry creates an extremely confident, fashionable look that works in creative and professional settings.
13. Short Curly Bob with Bangs

A curly bob on natural hair is a shorter version of the classic bob, usually chin-length or shorter, that celebrates your natural curl pattern. When you add bangs to a natural curl bob, you create a playful, youthful style with lots of personality. The key is finding a stylist who can cut a bob into natural hair texture so it lands at the right length and frames your face beautifully—straight-hair techniques don’t translate well to curly cuts.
Cutting a Curly Bob Correctly
- Your stylist should cut your curly bob while your hair is naturally curly, not stretched or blown out
- Dry curls shrink up significantly, so your stylist needs to account for that shrinkage
- Bangs on curly hair are tricky—they need to be cut slightly longer than you think because they shrink
- Ask your stylist to show you how to style the bob and bangs at home
Styling a Curly Bob with Bangs
- Apply curl cream and gel to damp hair and allow it to air dry
- You can also diffuse dry if you want more volume and faster styling
- Bangs might need a light touch of gel to stay in place throughout the day
- Refresh curls between wash days with a light mist of water
- Trim your bob every 6-8 weeks to maintain the shape and keep bangs at the right length
Worth knowing: A natural curly bob is high-maintenance in terms of salon visits and precision, but once it’s cut right, daily styling can be very simple.
14. High-Top Fade with Natural Hair
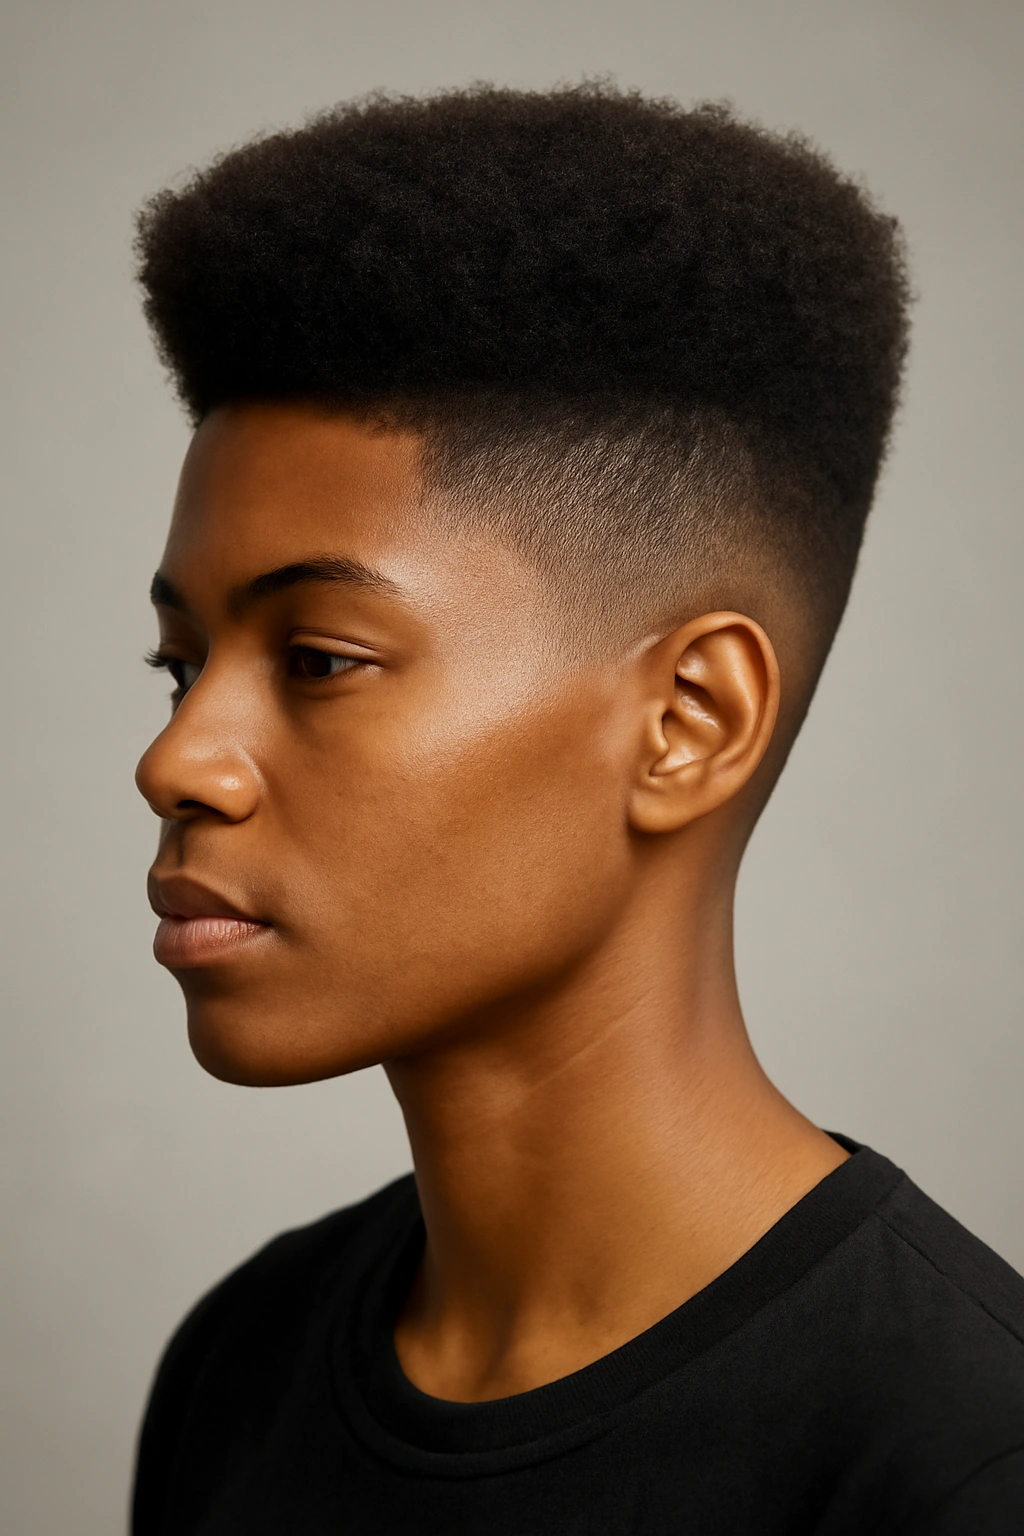
A high-top fade is an iconic style where the sides and back are faded very short while the top is left long and full, creating a distinctive silhouette that’s both stylish and statement-making. On natural hair, a high-top fade looks absolutely striking because your natural texture creates volume and shape on top while the faded sides keep the overall look clean and intentional. This style works beautifully on textured hair and photographs incredibly well.
Achieving the Perfect High-Top Fade
- Find a barber experienced with fading natural hair—technique matters immensely
- Discuss exactly how high you want the fade to go and how much length you want on top
- The top section can be shaped like a block, rounded, or even tapered depending on your preference
- Touch up your fade every 2-3 weeks to keep edges sharp and defined
Styling the Top of a High-Top Fade
- Most high-top fades work beautifully as wash-and-goes with minimal product
- You could also style the top into twists, coils, or braids if you want more structure
- The contrast between faded sides and textured top creates built-in visual interest
- This style requires confidence because it makes a definite statement
Pro tip: A high-top fade paired with a shaped beard or outlined edges on the sides creates an extremely polished, intentional look.
15. Coiled or Coily Updo
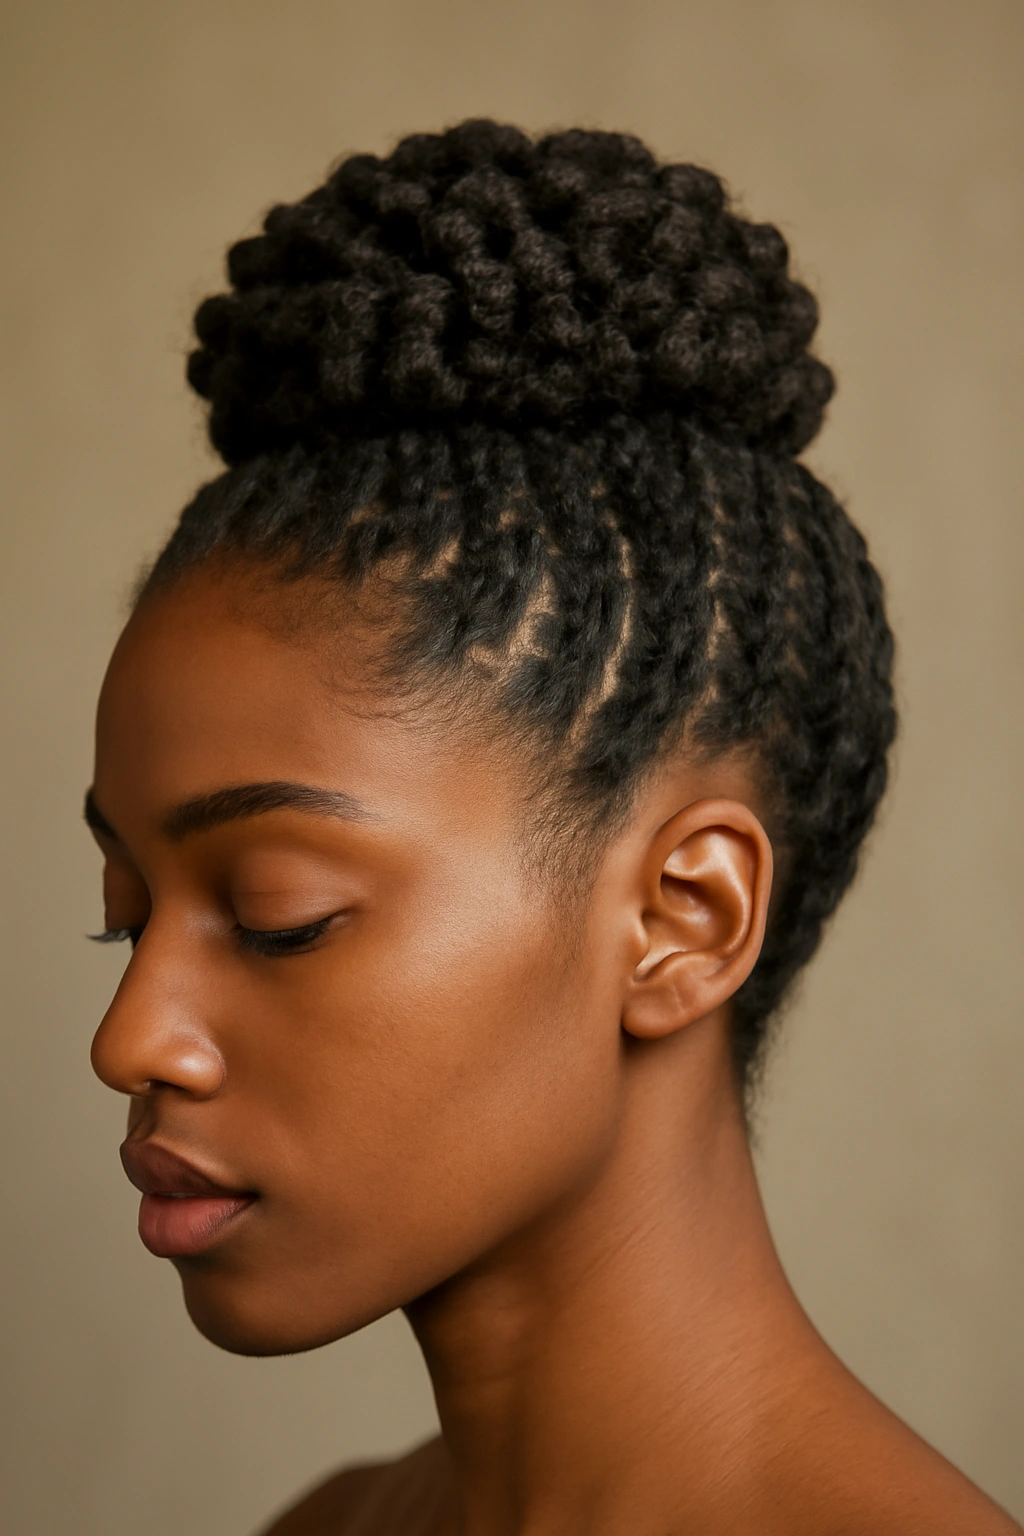
Taking your natural coils and securing them into an updo creates an elegant, polished style that works for everything from casual days to special occasions. Coils are created by wrapping strands of hair around a tool or your finger to form tight spirals, and they’re distinct from twists. When you create coils all over your head and then gather them into a bun or secured updo, you create tremendous texture and visual interest in a compact style.
Creating Coils for an Updo
- Apply leave-in conditioner and a light styling product to your hair
- Wrap small sections of hair tightly around your finger, then slide your finger out while keeping the coil intact
- Use bobby pins to secure each coil in place while it dries
- Allow coils to dry completely (overnight is ideal) before styling them into an updo
- Coils can also be done using a small curling iron if wrapping by hand feels tedious
Styling Coils into an Updo
- Once coils are set, you can gather them into a high bun, low bun, or side bun
- Secure with bobby pins and a light-hold gel to keep flyaways in place
- Leave some coils loose around your face for a softer, more romantic look
- Coiled updos look especially stunning with statement earrings visible
Insider note: A coiled updo is perfect for first dates, job interviews, or any time you want to look polished while still showcasing your natural hair’s texture.
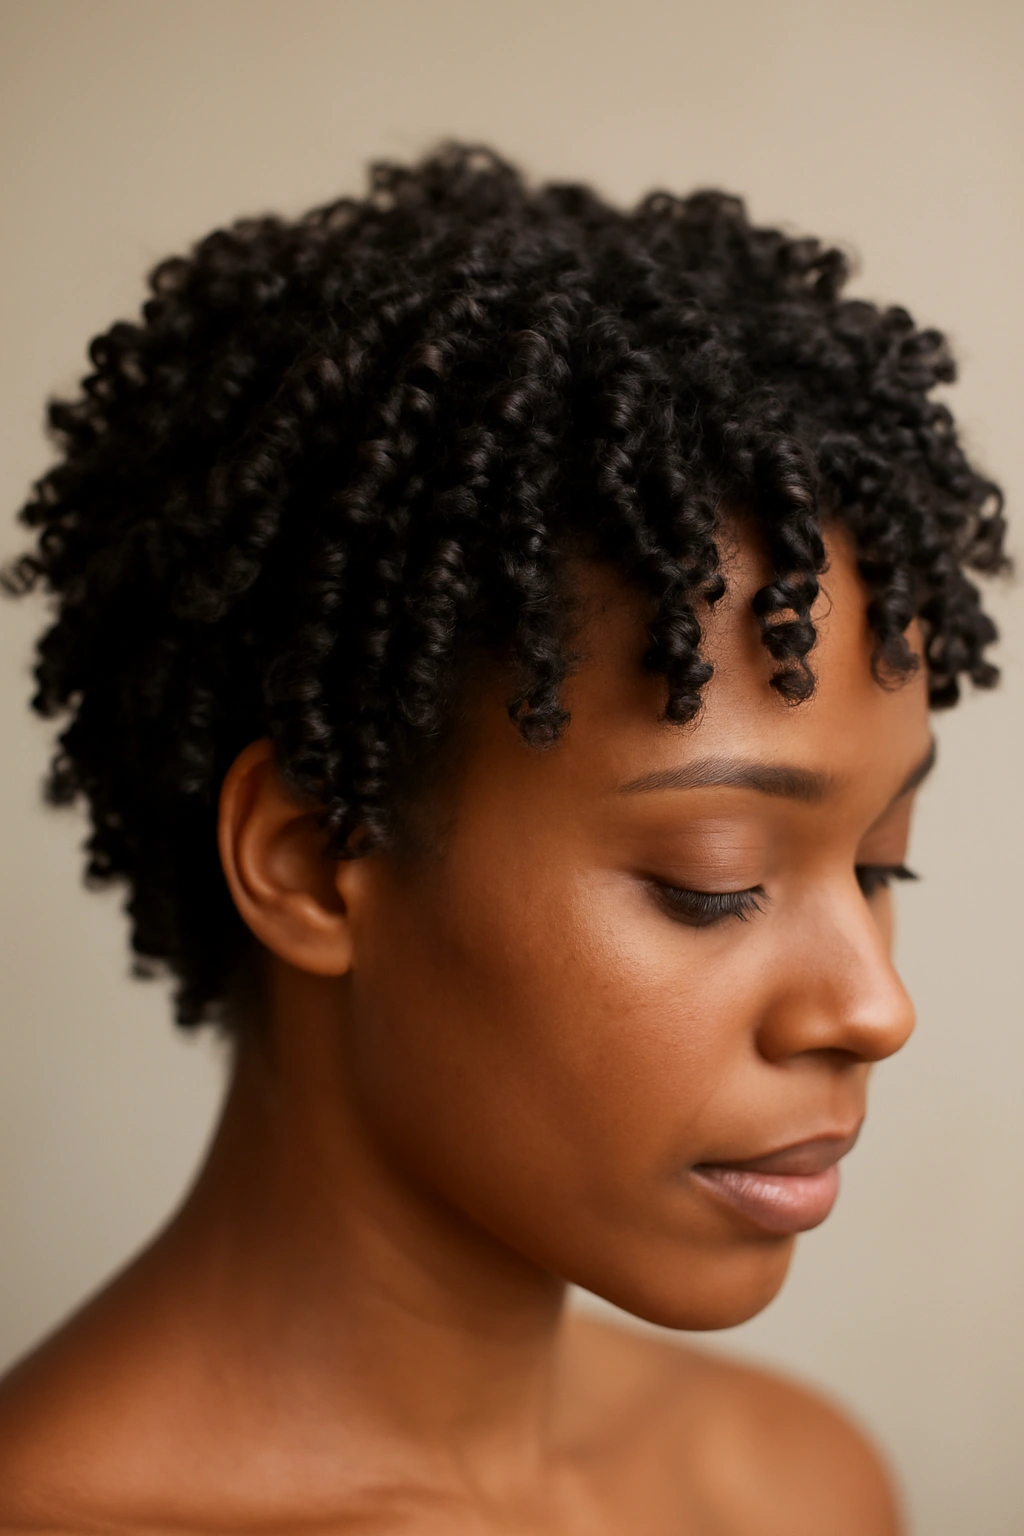
16. Finger Coils for Effortless Texture
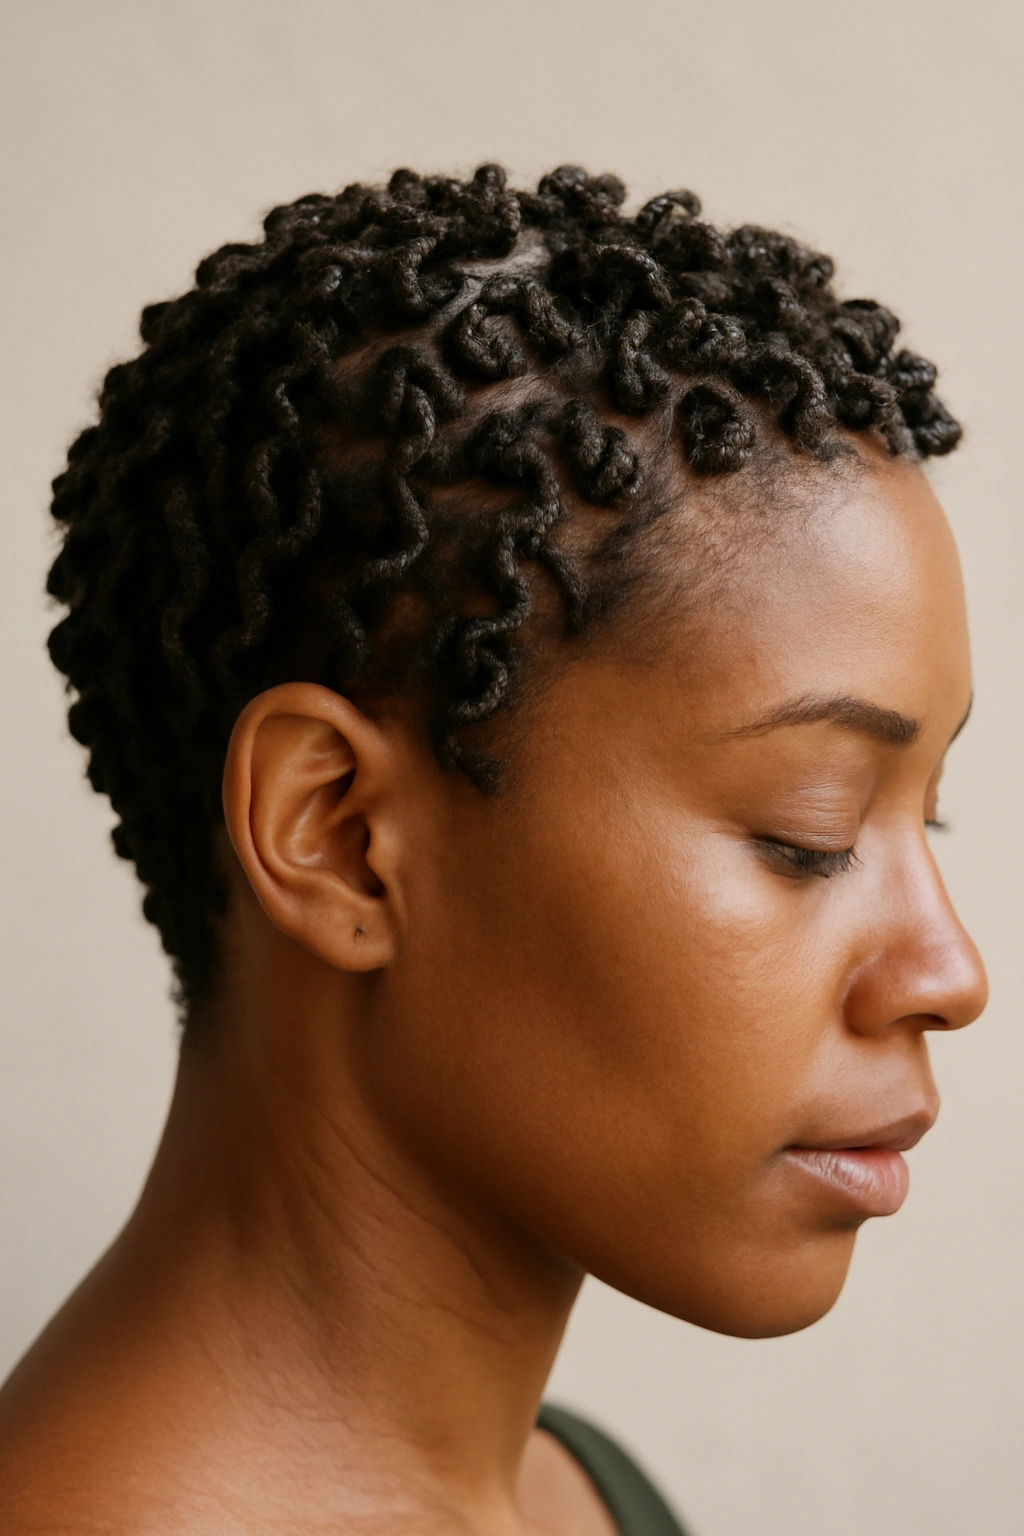
Finger coils are created by wrapping strands of hair around your finger to form spiraling coils, and they’re one of the easiest textured styles to create on your own. Unlike other styling methods that require specific tools or a lot of tension, finger coils just require your finger, a moisturizing product, and a little patience. On short natural hair, finger coils create impressive texture and definition with minimal effort, and they work on almost any curl pattern.
Creating Finger Coils Quickly
- Start with damp hair and apply a curl cream or leave-in conditioner
- Take a small section of hair and wrap it tightly around your index finger
- Slide your finger out while keeping the coil structure intact
- Use a bobby pin to secure the coil if it doesn’t want to stay, or just leave it to air dry
- Create finger coils all over your head or just in specific sections for a mixed texture
Wearing Finger Coils
- Finger coils can be worn out loose and bouncy for a textured, voluminous look
- You can also gather them and secure them into a ponytail or bun
- They last several days before needing to be redone, depending on your hair texture
- Sleep on a silk pillowcase to minimize frizz
- Refresh finger coils with a light mist of water and a tiny bit of product
Pro tip: Finger coils are perfect for people who want a styled look but don’t have access to a stylist—you can create them yourself in 30 minutes to an hour.
17. Short Faux Locs
Faux locs are a protective style that mimics the appearance of dreadlocks without the permanent commitment, created by wrapping your natural hair with thread or yarn. Short faux locs create an edgy, artistic look that’s completely different from your natural hair texture. This style works beautifully on short natural hair and is an excellent protective style if you want to take a break from styling your own hair while protecting it from manipulation.
Installing Short Faux Locs
- Faux locs are typically installed by a stylist experienced with this technique
- Your stylist will braid or twist your hair, then wrap thread or yarn around each braid
- Installation takes 3-5 hours depending on how many locs you’re getting and how short your hair is
- Short faux locs require less hair than longer locs and take less time to install
- Cost varies widely based on length, thickness, and where you have them done
Maintaining Faux Locs
- Wash your locs every 2 weeks by wetting them, applying shampoo, rinsing, and allowing to air dry
- You can also use dry shampoo between washes if you prefer
- Sleep on a silk pillowcase or wear a silk bonnet to maintain the locs
- Faux locs typically last 4-8 weeks before they need to be removed and reinstalled
- Your natural hair underneath grows while wearing faux locs, so you’re getting a break from manipulation
Worth knowing: Faux locs are an investment in both time and money, but many women find them worth it for the protective benefits and the opportunity to try a dramatically different look.
18. Twisted Bob Style
A twisted bob is a shorter style where sections of hair are twisted and secured close to the scalp, creating a defined, textured look that’s sleeker than wearing twists down but more textured than a straight bob. This style works beautifully on short natural hair where you want something styled and intentional but not as low-maintenance as a wash-and-go. A twisted bob is also a great in-between style for people deciding whether they want to commit to locs or braids.
Creating a Twisted Bob
- Divide your hair into sections in a pattern that appeals to you
- Twist each section tightly and pin it close to your scalp with bobby pins
- Alternatively, braid each section instead of twisting for a slightly different look
- Your stylist can help you determine the best sectioning pattern for your head shape and face
- Allow twists to set overnight for better hold
Wearing a Twisted Bob
- The style is complete once you’ve pinned all sections—you can wear it down like this
- Alternatively, gather the twisted sections into a bun or ponytail
- You could also leave some twisted sections loose and pin others for a mixed texture
- Protect at night with a silk bonnet or scarf
- Twisted bobs typically last 7-10 days before needing to be redone
Pro tip: A twisted bob looks especially chic with bold statement jewelry, a sleek outfit, and confident makeup—the style demands a complete look.
19. Undercut with Textured Crown
An undercut combines shaved or heavily faded sides with longer, textured natural hair on top, creating dramatic contrast and a modern aesthetic. The “crown” of longer hair on top gives you texture and styling options while the undercut keeps the style from feeling heavy. This is similar to the shaved sides style but with an emphasis on creating a distinct crown section with more defined length and shape on top.
Creating Your Undercut
- Discuss with your barber exactly how defined you want the line between undercut and crown to be
- You can have a sharp, clean line or a tapered fade between the two sections
- The undercut is typically quite short—sometimes shaved completely, sometimes faded to 1-2mm
- Touch up your undercut every 2-3 weeks to maintain sharp definition
Styling Your Crown Section
- The longer hair on top can be styled into an afro, twists, braids, or a combination
- The contrast between undercut and crown allows each style to stand out more
- This look works beautifully for artists, creative professionals, and anyone who loves making a statement
- You can change how you style your crown while keeping the undercut consistent
Insider note: An undercut with a textured crown is an excellent choice if you want a dramatic transformation but aren’t ready to commit to changing your entire hair texture.
20. Short Twist-Out for Lasting Curls
A twist-out is created by twisting your hair when it’s wet, allowing the twists to set and dry, then unraveling them to reveal beautiful curls that last for days. On short natural hair, a twist-out creates impressive curl definition and hold because the short hair curls tightly and springs into shape. A twist-out is perfect if you want a styled, intentional look that lasts longer than a wash-and-go but don’t require a more permanent style like locs or braids.
Creating a Lasting Twist-Out
- Start with clean, damp hair and apply a leave-in conditioner and styling cream
- Divide your hair into sections and twist each section tightly, wrapping it around itself
- Secure each twist with a small elastic or by dipping the ends in hot water
- Allow twists to dry completely—at least 8-12 hours, ideally overnight
- For extra hold, you can use a light gel on each twist before allowing it to dry
Unraveling and Styling Your Twist-Out
- Once twists are completely dry, gently unravel each one from the bottom up
- Avoid combing or brushing; use your fingers to separate curls gently
- Apply a light oil or curl cream as you unravel to prevent the curl from falling out
- Shake your hair gently to add volume and separate curls
- Your twist-out will last 5-7 days depending on your hair texture and how much you manipulate it
Pro tip: Sleeping on a silk pillowcase and using a silk bonnet will help your twist-out last longer—most of the curl loss happens from friction against your pillow.
Final Thoughts
Short natural hair is genuinely liberating—it’s a celebration of your natural texture, a statement of confidence, and a practical choice that can actually make maintaining healthy hair easier. The styles above represent only a fraction of what’s possible when you work with your hair’s natural texture instead of against it. Your short natural style is uniquely yours, and the beauty lies in how it frames your face, expresses your personality, and honors your heritage.
What matters most is finding styles that make you feel like yourself. Some of these will require regular salon visits, others you can do at home, and many offer versatility that lets you change your look whenever the mood strikes. Start with the styles that excite you most, don’t be afraid to ask your stylist questions about maintenance and daily styling, and remember that your natural hair is worthy of celebration exactly as it is. The confidence you gain from embracing your natural texture is just as important as the style itself—that’s what makes short natural hair truly stunning.