The mullet has made its triumphant return, and if you’ve got natural curls or coils, this is your moment. The beauty of a curly mullet lies in its paradox: it’s simultaneously edgy and effortless, rebellious and refined. Curls and coils bring a distinct advantage to this cut that straight-haired versions simply can’t match — the texture creates natural volume and movement that makes the style look intentional and alive, whether you’re going for understated cool or full-blown statement hair.
What makes curly mullets so compelling right now is that they work across virtually every hair type and curl pattern. From loose waves to tight coils, the cut adapts beautifully. The key is understanding how texture interacts with the mullet’s core structure: business in the front (usually shorter and more controlled), party in the back (where your curls get to breathe and shine). When a stylist understands how to shape curls rather than fight them, the result is a haircut that grows with you, maintains personality between appointments, and requires a fraction of the styling effort of straighter versions.
We’re going to walk through 12 distinct curly mullet variations that showcase different curl patterns, fade styles, length combinations, and styling approaches. Whether you want something subtle or a full curly revolution on your head, there’s a version here that matches your vibe. Each cut demonstrates how the mullet framework can be reimagined for textured hair, with the texture itself becoming the star.
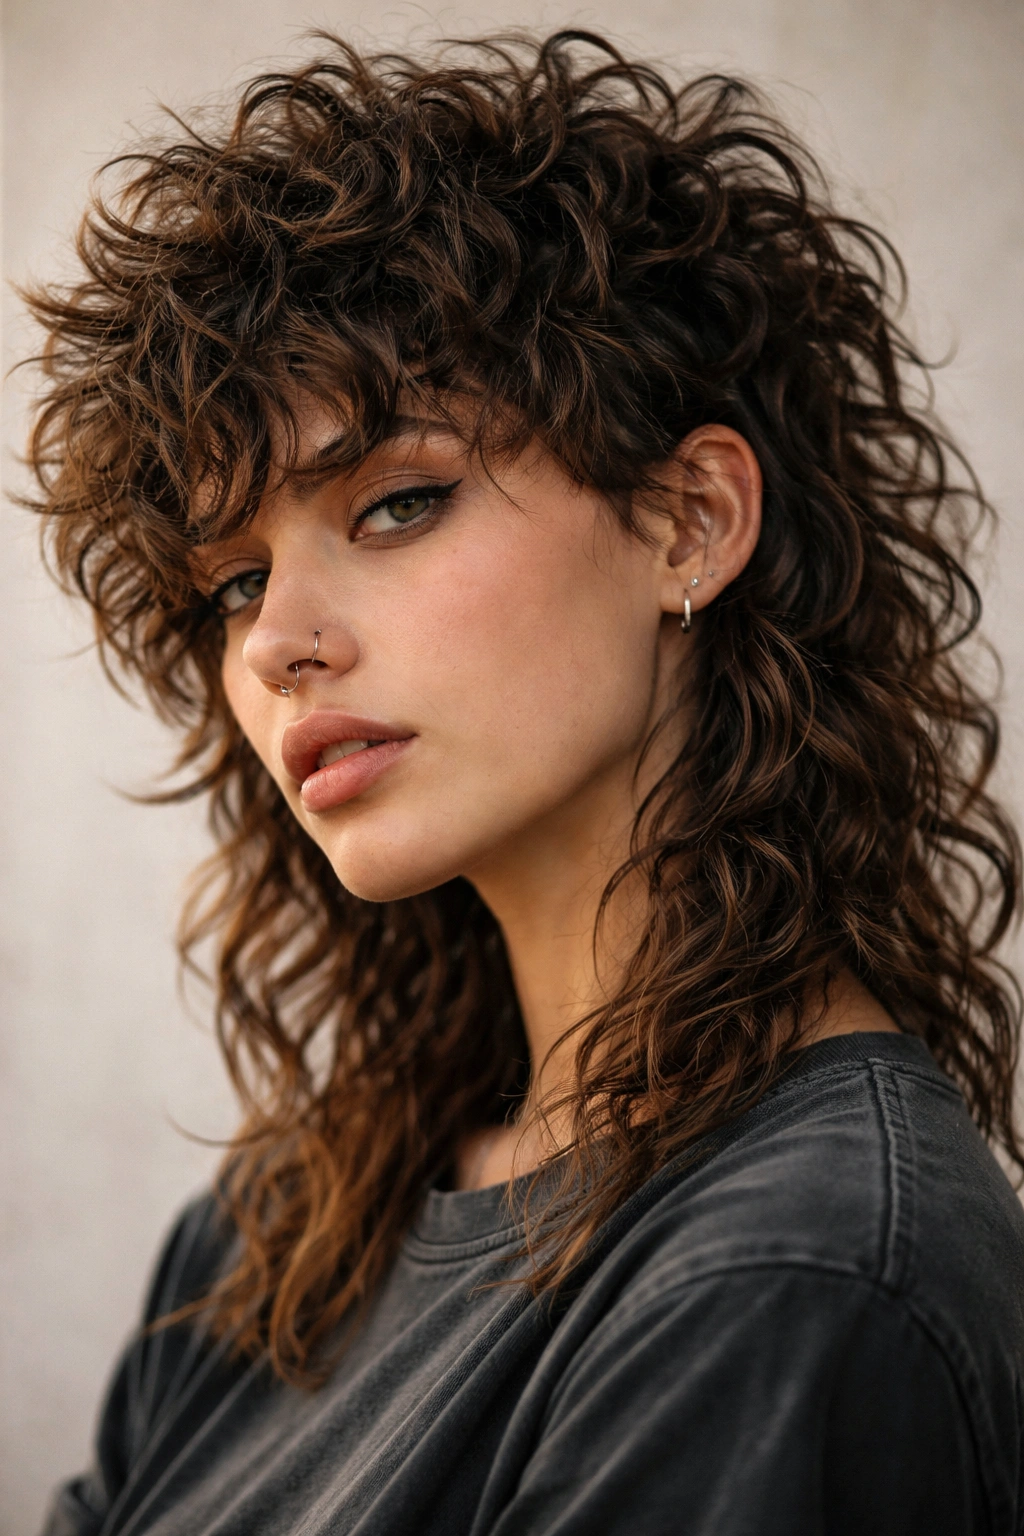
1. Textured Shag Mullet
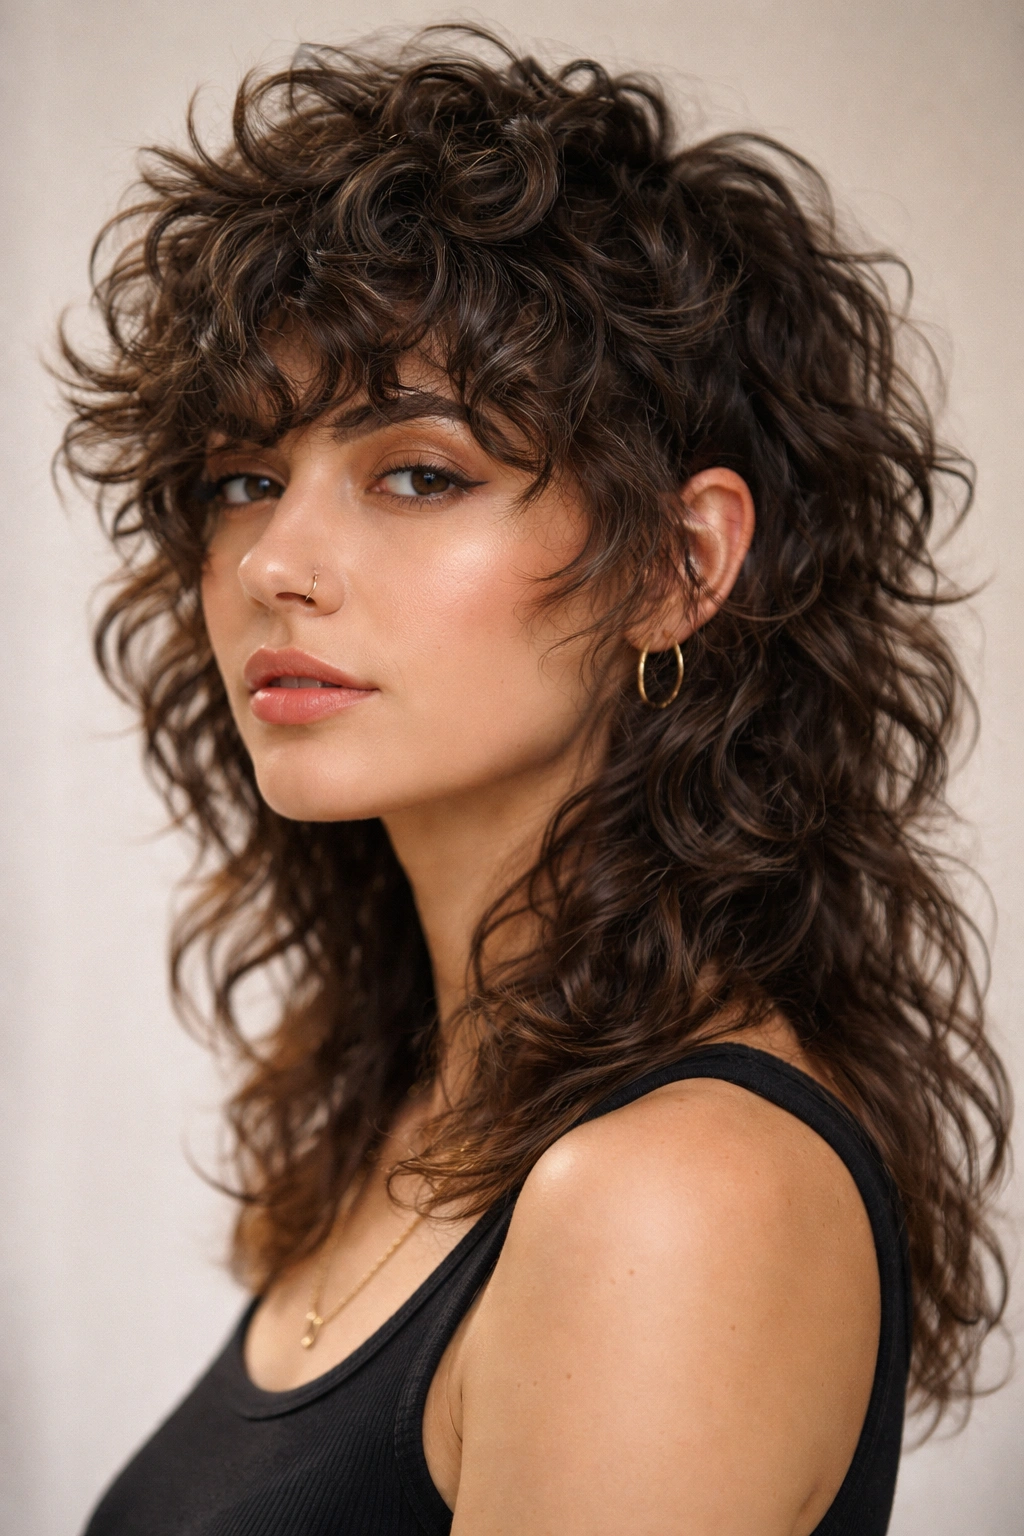
A shag mullet stacks layers throughout the crown and back, creating a lived-in, deliberately undone aesthetic that curls amplify beautifully. This cut intentionally leaves longer face-framing pieces that curl naturally, while the back layers are cut at varied lengths to maximize movement and reduce bulk. The shag’s signature choppy layers work with curls rather than against them — each layer hits at a slightly different point, preventing the dreaded flat-top look that can happen when curls are blunt-cut.
Why This Cut Works for Curls
The shag’s multi-layered approach is actually ideal for textured hair because it removes weight strategically. With curls, weight often flattens volume at the crown. By cutting layers at different lengths, you create a framework that encourages each curl ringlet to spring independently. The front stays shorter and more defined, while the back layers are long enough to showcase your curl pattern’s full glory. This creates visual balance — the busy texture of the back is grounded by the shorter, cleaner front.
How to Style and Maintain
- Ask your stylist for a point-cut or razor-cut shag rather than blunt layers — this creates texture within the layers themselves
- Dry curls with a diffuser and rake your fingers through for separation, or let them air-dry for a more organic shape
- Use a medium-hold curl cream or gel that doesn’t create crunch or stiffness
- Refresh between cuts with a curling iron or braids to reactivate curl pattern where needed
- Expect to revisit your stylist every 6-8 weeks to maintain layer definition
Pro tip: If your shag looks too flat on top after a few weeks, try sleeping in loose braids or pineapple styling to encourage the crown curls to set with more height.
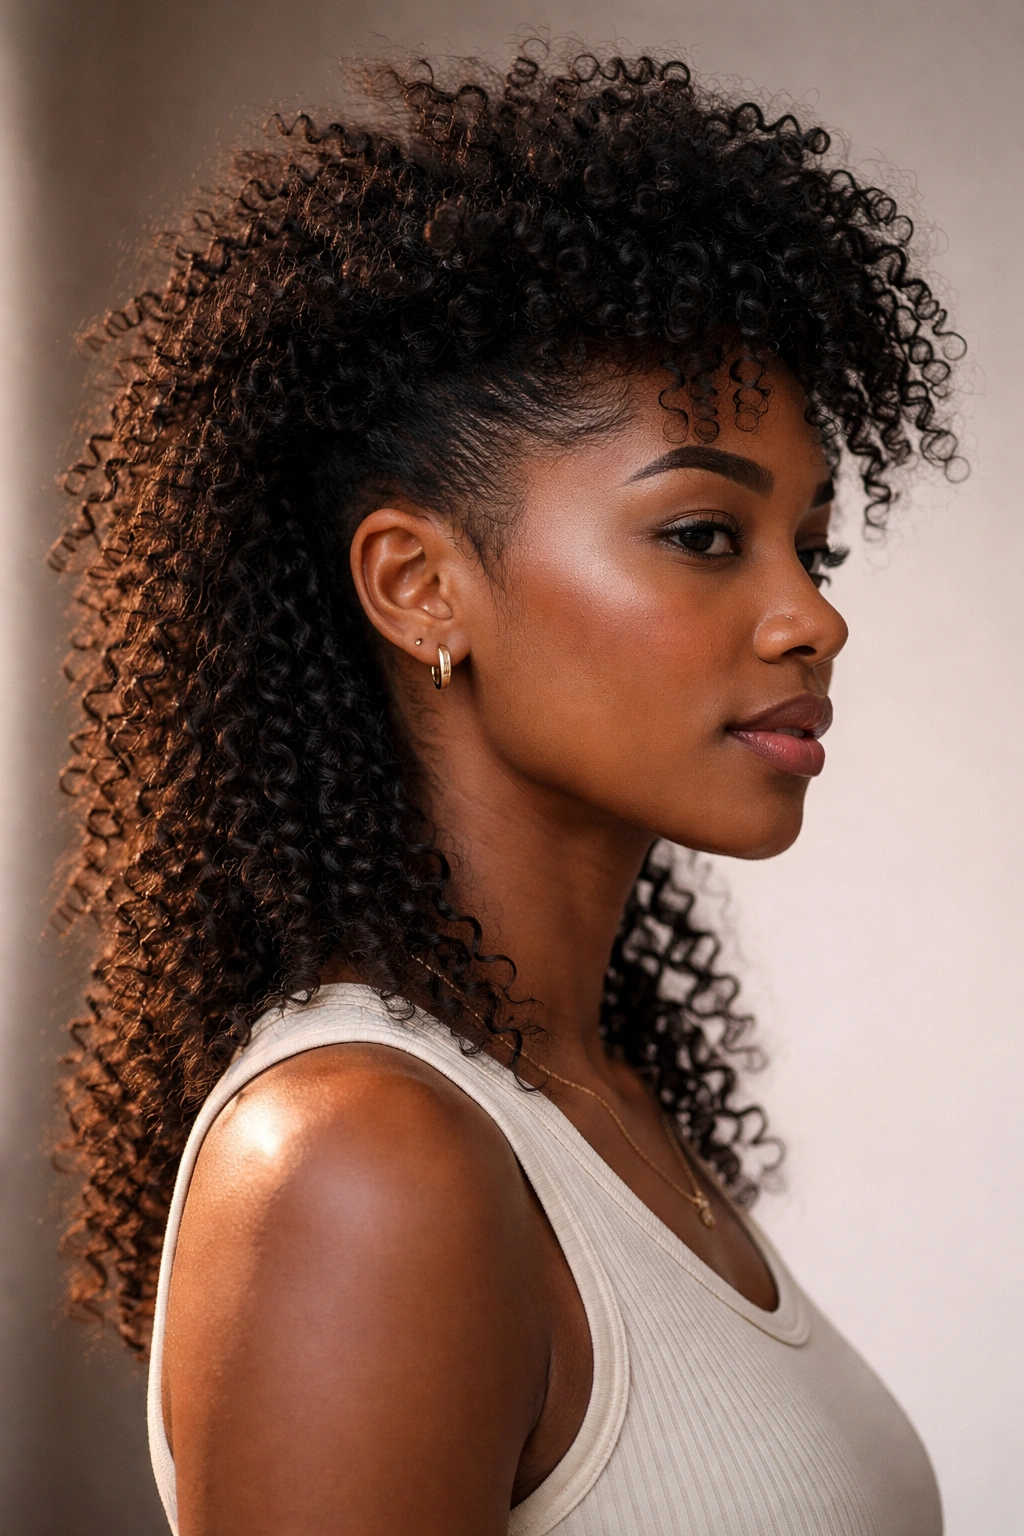
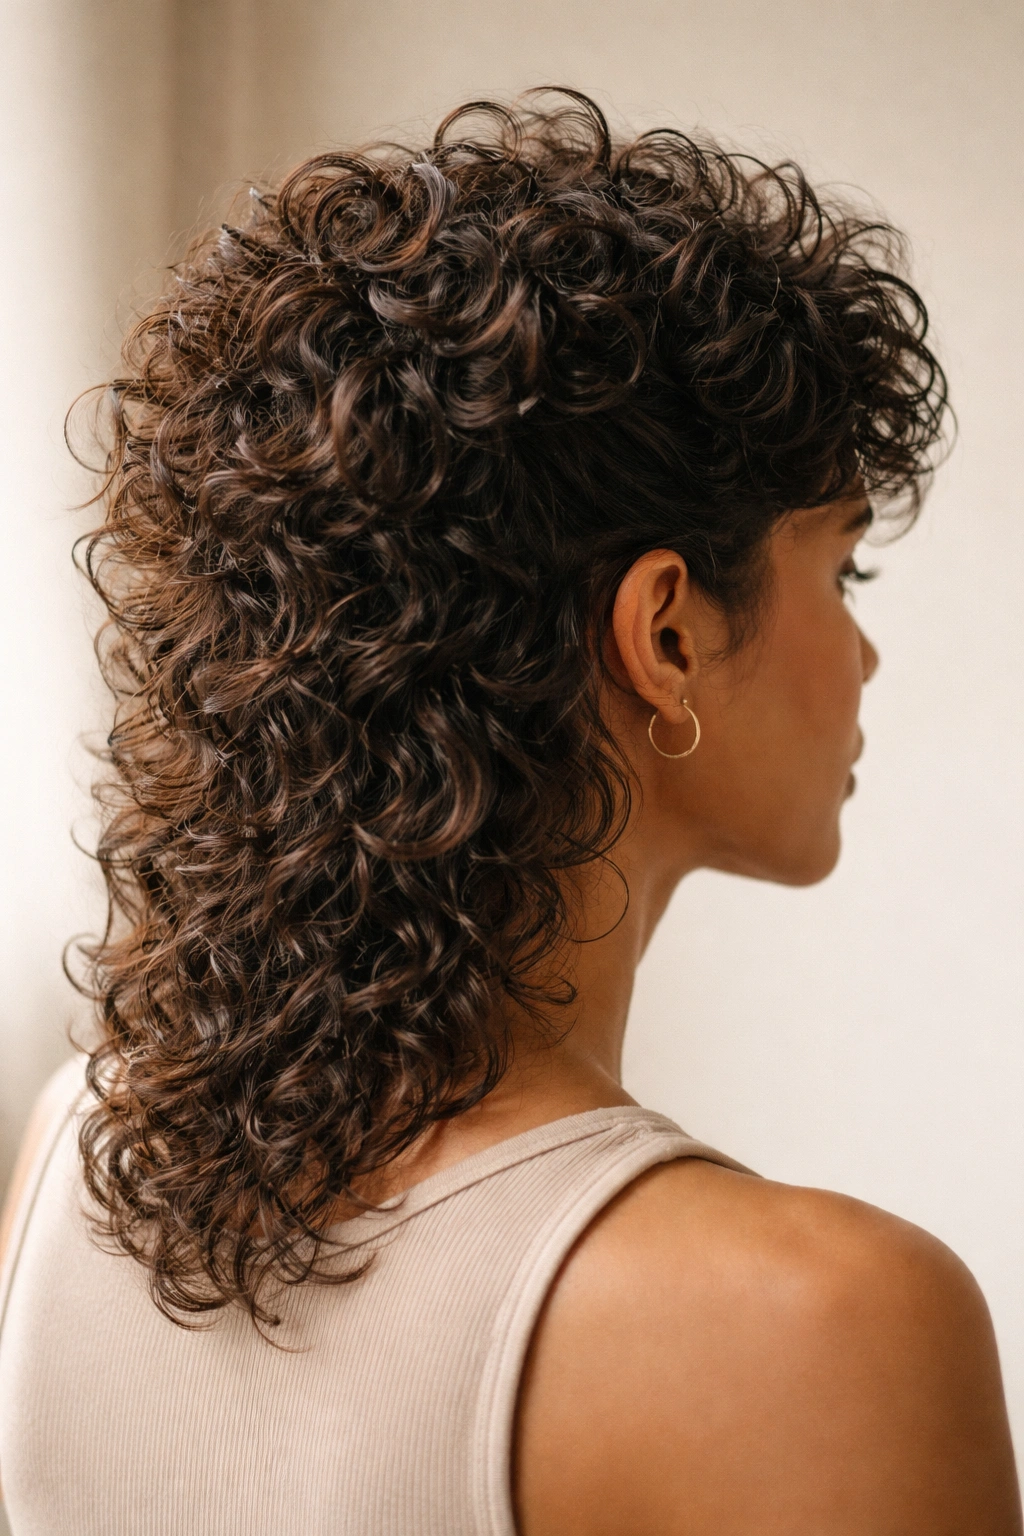
2. Spiral Curl Mullet
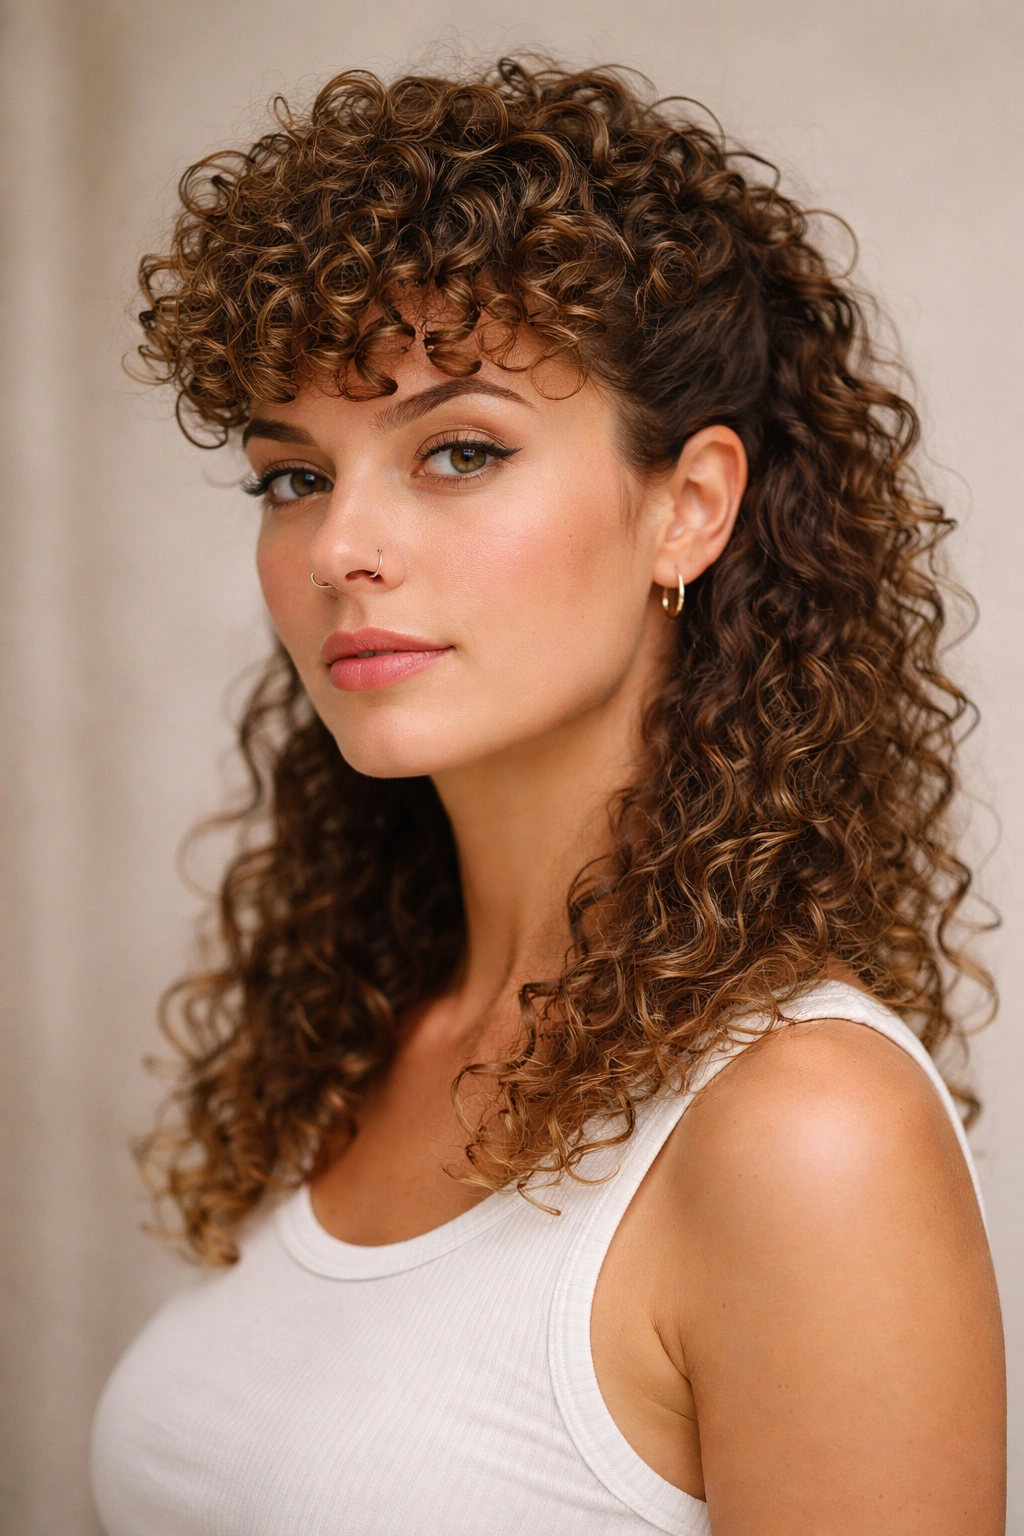
For those with defined, springy curl patterns that naturally form tight spirals, this cut celebrates the curl itself as the primary visual element. The front is cut short enough (usually 1-3 inches) that individual spirals are visible and distinct, while the back is left long enough for curls to fully express their spiral structure — anywhere from 6 to 12+ inches depending on your preference. The contrast between tight, compact front spirals and loose, bouncy back spirals creates visual interest and movement.
The Spiral Pattern Advantage
Tight, defined spirals have a naturally attractive form that doesn’t require heavy styling. This cut trusts your curl pattern to do the heavy lifting visually. The short front spirals create a precise, almost sculptural quality, while the back spirals drape and move with each step. This variation works exceptionally well if your curls have good natural curl definition without frizz — the simpler the styling, the better the spirals show through.
Styling and Upkeep
- Keep styling minimal — a lightweight leave-in conditioner and water-based curl cream are usually all you need
- Plopping or air-drying works beautifully because the cut itself encourages curl formation
- Avoid heavy gels or creams that weigh spirals down or create cast
- Refresh curls by misting with water and re-scrunching — the curl pattern should bounce back naturally
- Schedule trims every 8-10 weeks to keep the back from becoming overly long and heavy
Worth knowing: Spiral curls can appear to have more volume than they do because of how light plays off the shaped surface. This cut looks especially striking in photos and catches light beautifully in person.
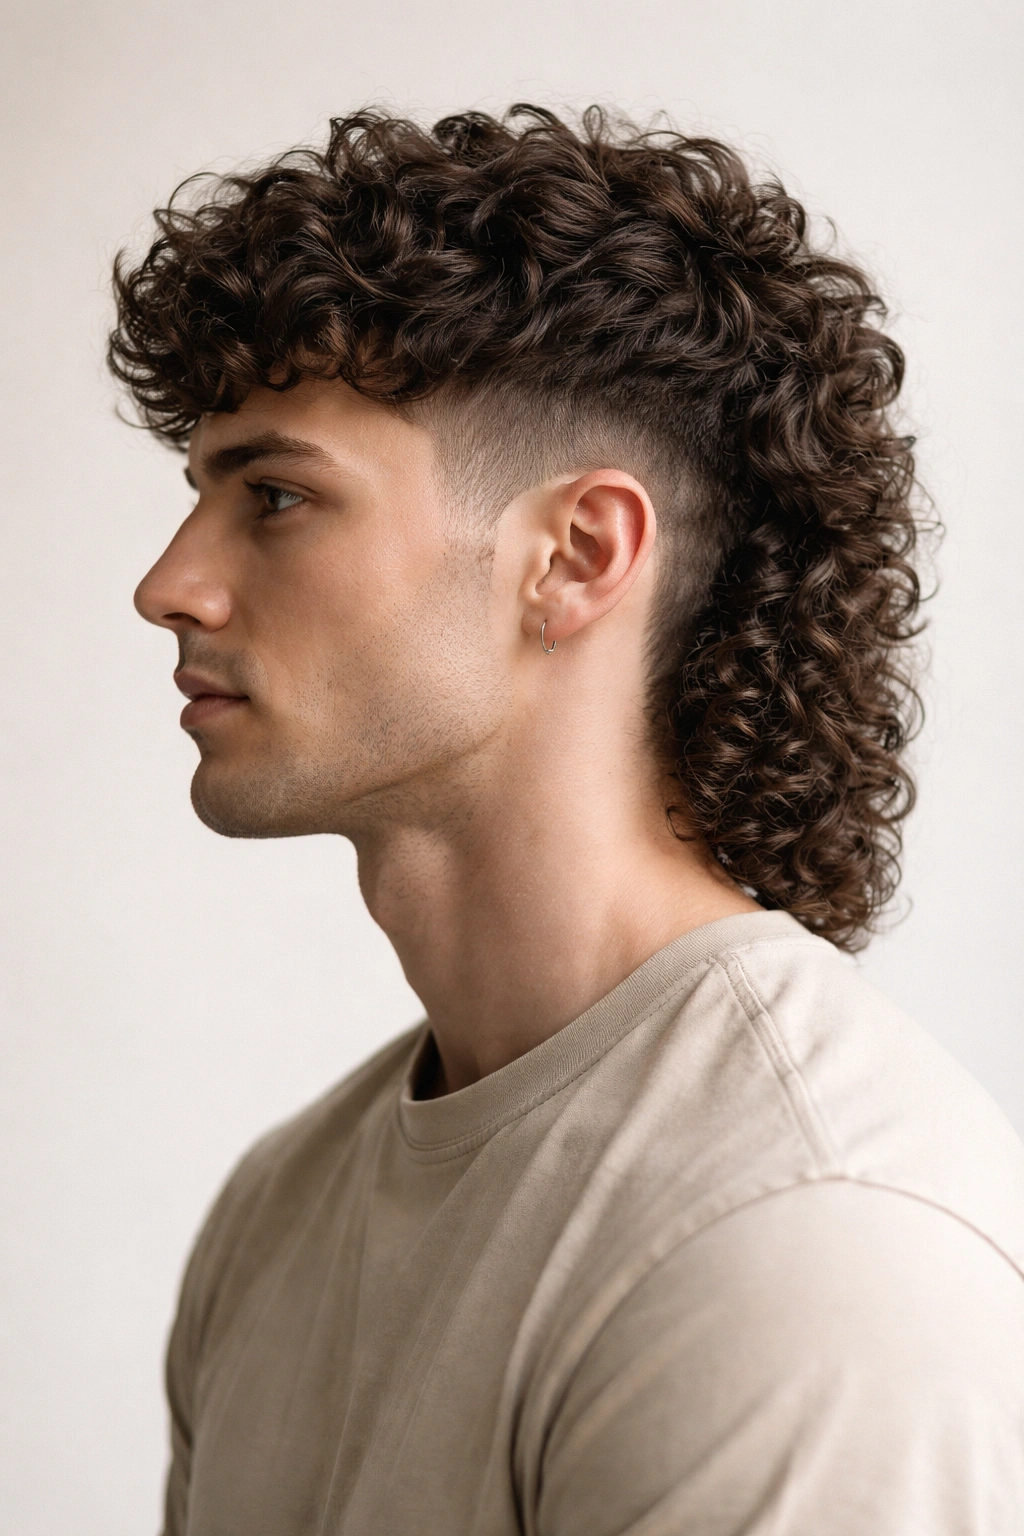
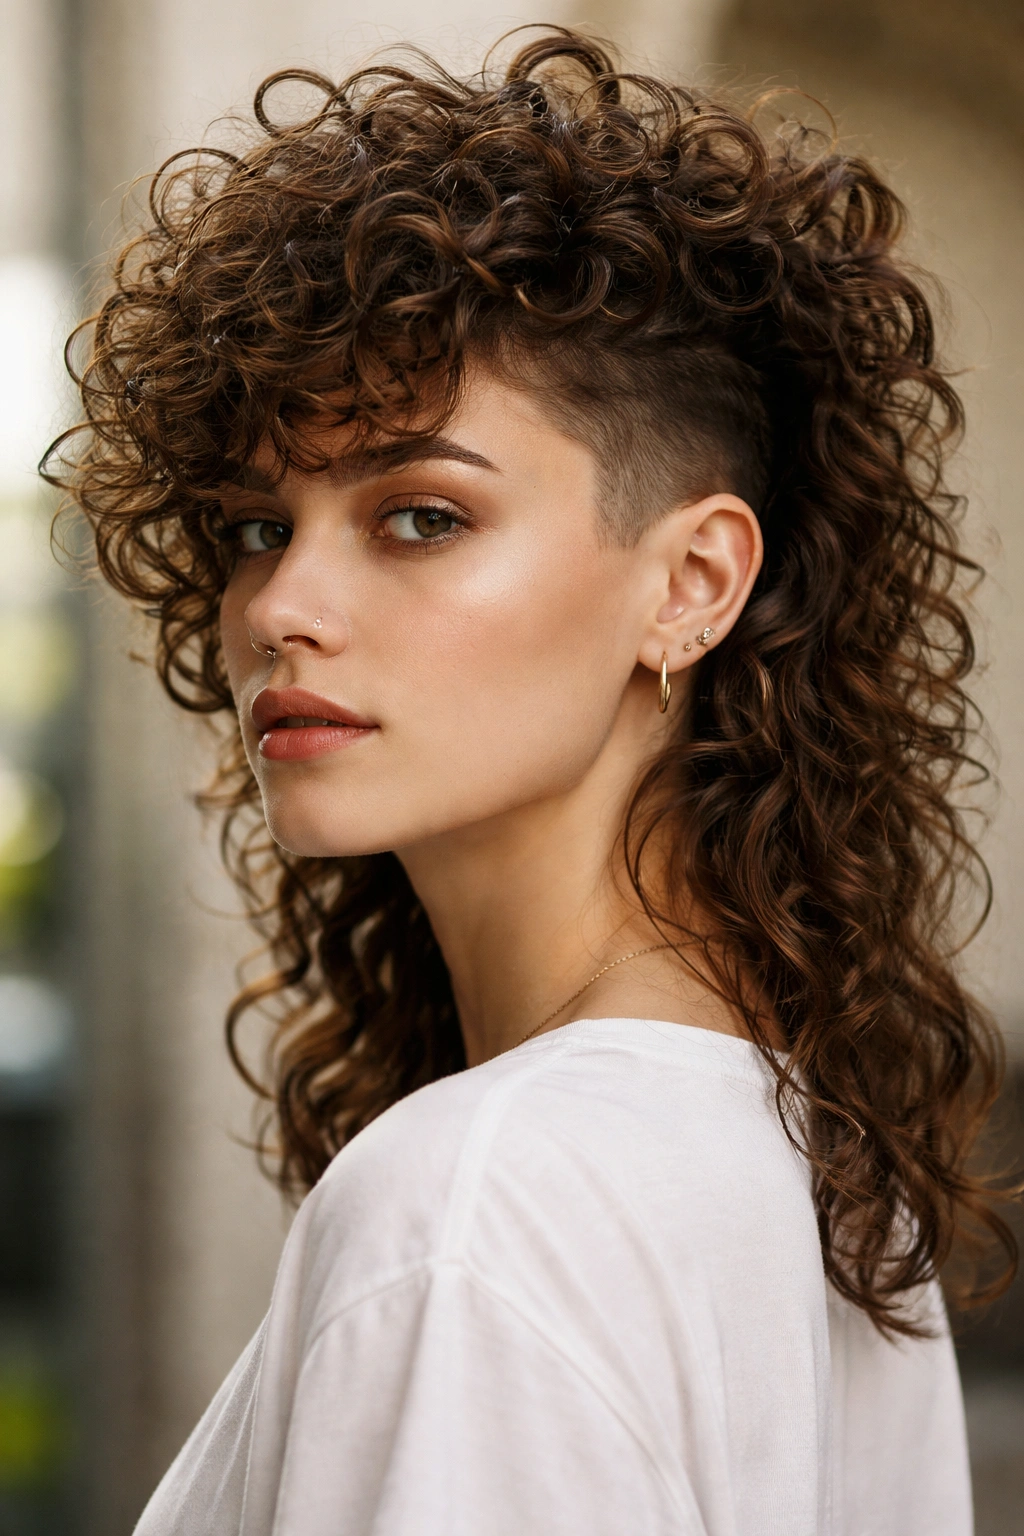
3. Coily Fade Mullet
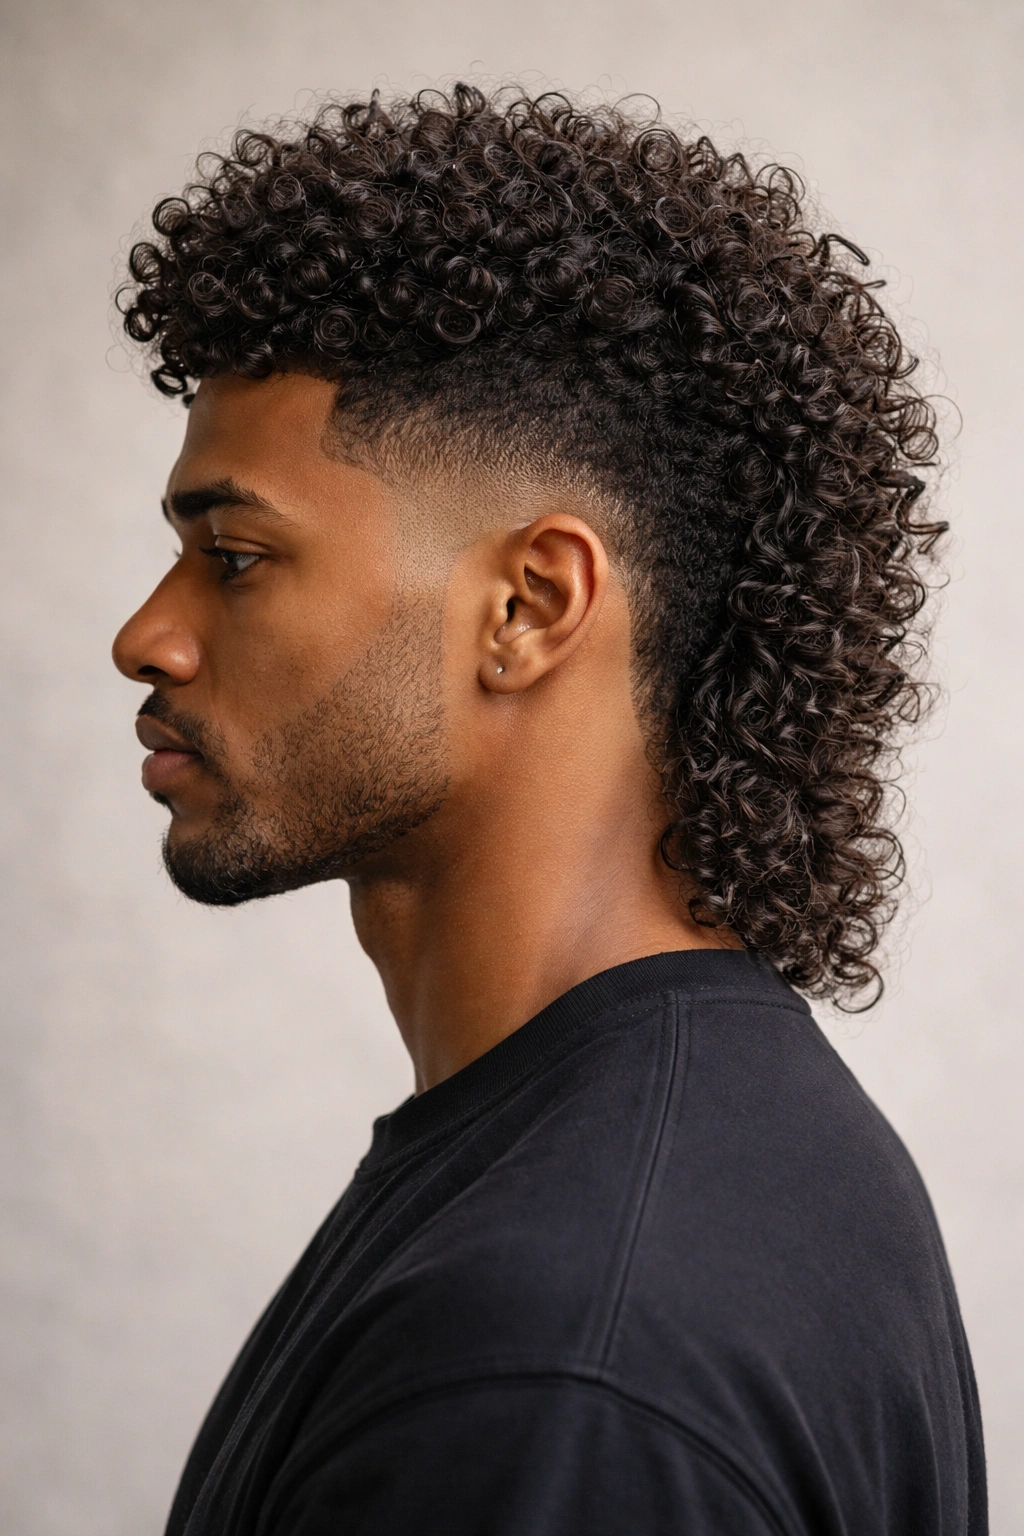
This version pairs a sharp, clean fade on the sides with a textured, voluminous coil crown and back. The fade creates deliberate contrast — structured and geometric on the sides, free-form and textured on top and back. The coils remain untouched by clippers, developing full lift and bounce as they grow. This cut works especially well for tighter coil patterns (4C and other densely coiled textures) because the fade keeps the overall silhouette clean while the coils get their moment of glory up top and in the back.
Fade Precision with Curls
A clean fade requires a skilled fade specialist who understands curly hair. The goal is a fade that’s sharp enough to frame the textured top without damaging curl-producing cells or creating uncomfortable clipper lines. The transition from fade to coil should feel intentional, not abrupt. Some clients prefer a gradual taper fade, while others love a crisp, super-short fade that emphasizes the textured crown. Either way, the fade creates a modern aesthetic that reads contemporary and intentional.
Maintenance and Styling
- Recut fades every 2-3 weeks to maintain crisp lines — coils grow quickly upward, so frequent maintenance keeps the cut from looking shaggy
- Style the top and back with a curl cream, gel, or butter depending on your coil’s moisture needs
- Try braiding or twisting the coils overnight for defined texture, or wash and go for a more organic shape
- Use the fade as a visual anchor — it keeps the style looking groomed even on days when coils are less defined
- Consider edge control on the fade line for an extra polished look
Pro tip: Coily fade mullets photograph beautifully because the contrast between the clean geometry of the fade and the organic texture of the coils is visually striking.
4. Voluminous Perm Mullet
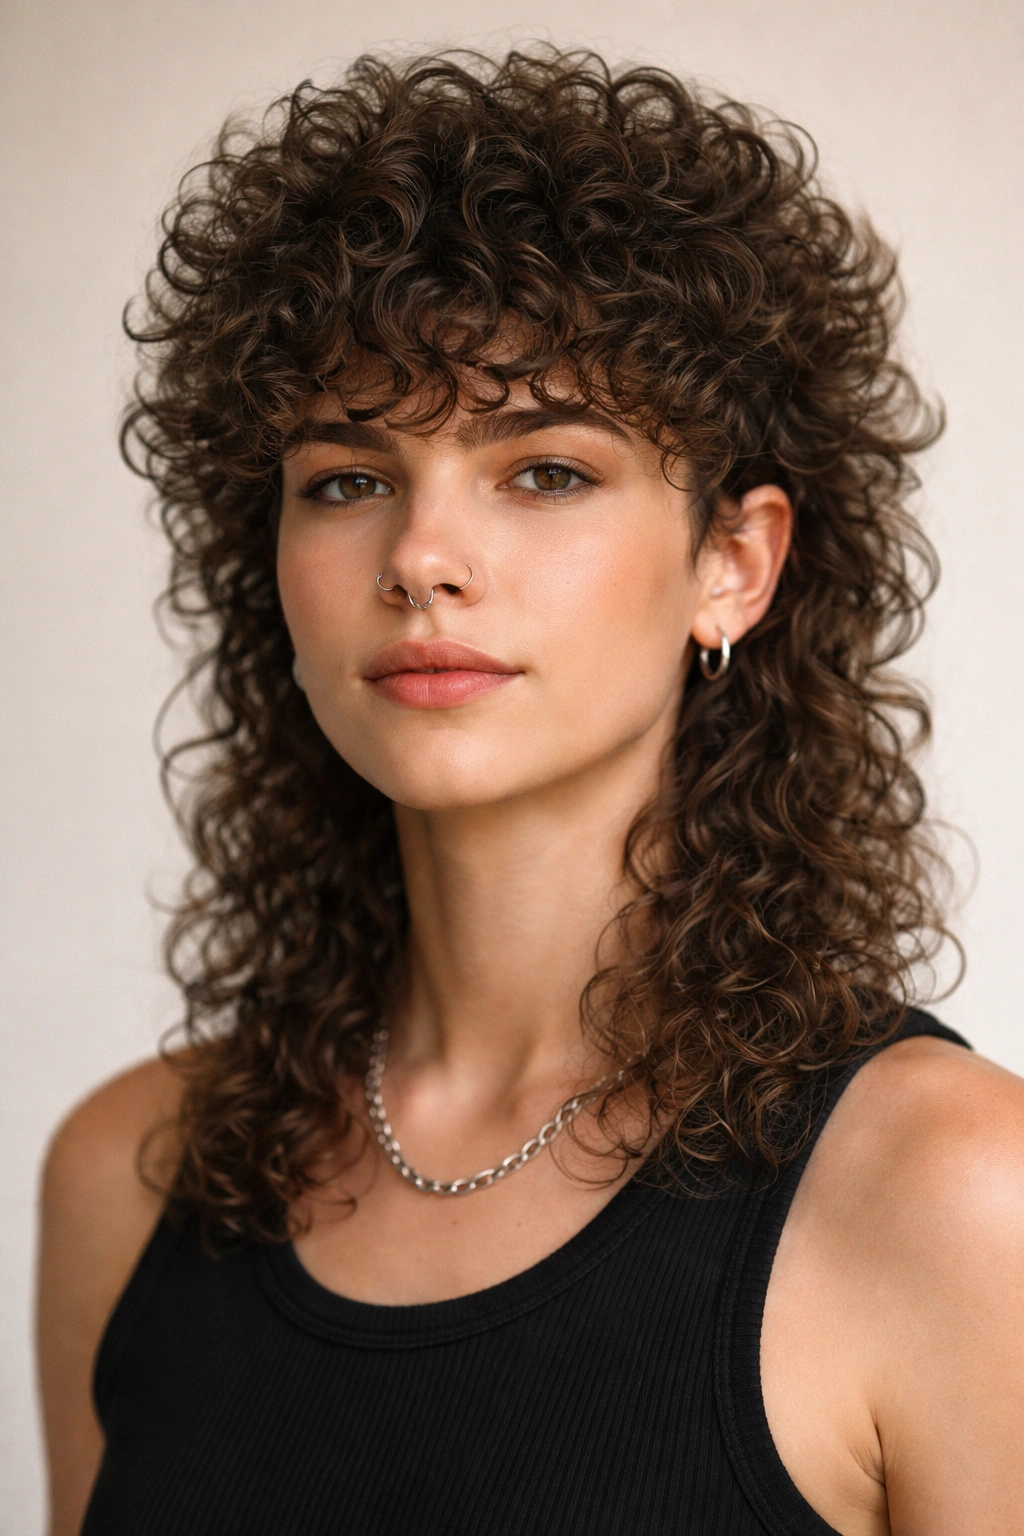
If your curls are subtle or you want extra definition and fullness, a perm can add structured curl or waves throughout while the cut creates the mullet silhouette. This works especially well for straight or wavy hair that you want to transform into defined curls with lasting volume. The perm plus the mullet cut creates a style that maintains shape between appointments, making it a low-maintenance choice for anyone wanting curly hair without heat styling.
Why Perm Plus Mullet Works Together
A perm creates uniform curl throughout, and when combined with a mullet cut, it ensures that every section — front, sides, back — has consistent texture and holding power. The front’s shorter length means the perm curls are tighter and more defined, while the back’s longer length allows the permed curls to relax slightly and create wave or looser spiral patterns. The result is a haircut that looks sculpted and intentional while maintaining genuine body and bounce.
Care After Perm Installation
- Wait at least 48-72 hours after your perm before shampooing to let the curl set fully
- Use sulfate-free, curl-specific shampoo and conditioner — regular products can fade the perm faster
- Apply curl cream or gel while hair is still damp to enhance and define the permed curl pattern
- Air-dry or use a diffuser; avoid rough toweling which can disrupt the curl structure
- Schedule trims every 6-8 weeks to remove straight growth that will appear at the roots and blunt ends
- Refresh the perm every 8-12 weeks as new growth appears and the perm relaxes slightly
Worth knowing: A quality perm should last 2-3 months before beginning to noticeably relax, especially in humid climates. Plan your maintenance appointments accordingly.
5. Tapered Kinky Mullet
This cut features a precise, geometric taper on the sides (shorter near the ears, gradually longer as you move up) paired with a full, kinky crown and an extended kinky back. The taper isn’t a fade — it’s a deliberate shape that sits somewhere between a fade and a longer side section. This works beautifully for kinky or coily textures because the taper creates frame and shape while the kinky sections on top and back get all the volume and presence. The taper is clean and modern without being clipper-sharp.
Taper Technique for Kinky Hair
A proper taper on kinky hair requires understanding that coils and kinks need more length to fully express themselves. A stylist cutting a kinky taper will usually use shears to create a textured, shaped outline rather than clippers, preserving more curl-defining length. The goal is a visual line that frames the face while keeping enough hair length for the curl pattern to bounce. This creates a softer aesthetic than a fade while still maintaining clear shape and structure.
Styling the Tapered Mullet
- Use a curl cream, gel, or butter suited to kinky textures — these typically need richer moisture than looser curl patterns
- Braid or twist the kinky sections overnight to set them into defined shapes, or wash and go for an organic texture
- The taper can be styled slicked back and defined, or left fluffy and voluminous — both look intentional
- Refresh the shape every 4-6 weeks to maintain the taper line and prevent the style from looking grown-out
- Consider protective styling with the back section — braids, twists, or bun styles keep the mullet interesting while protecting the ends
Pro tip: A tapered mullet shows off your natural kinky texture while the taper keeps the overall look polished and put-together — it’s professional enough for any setting while maintaining personality.
6. Wavy Layers Mullet
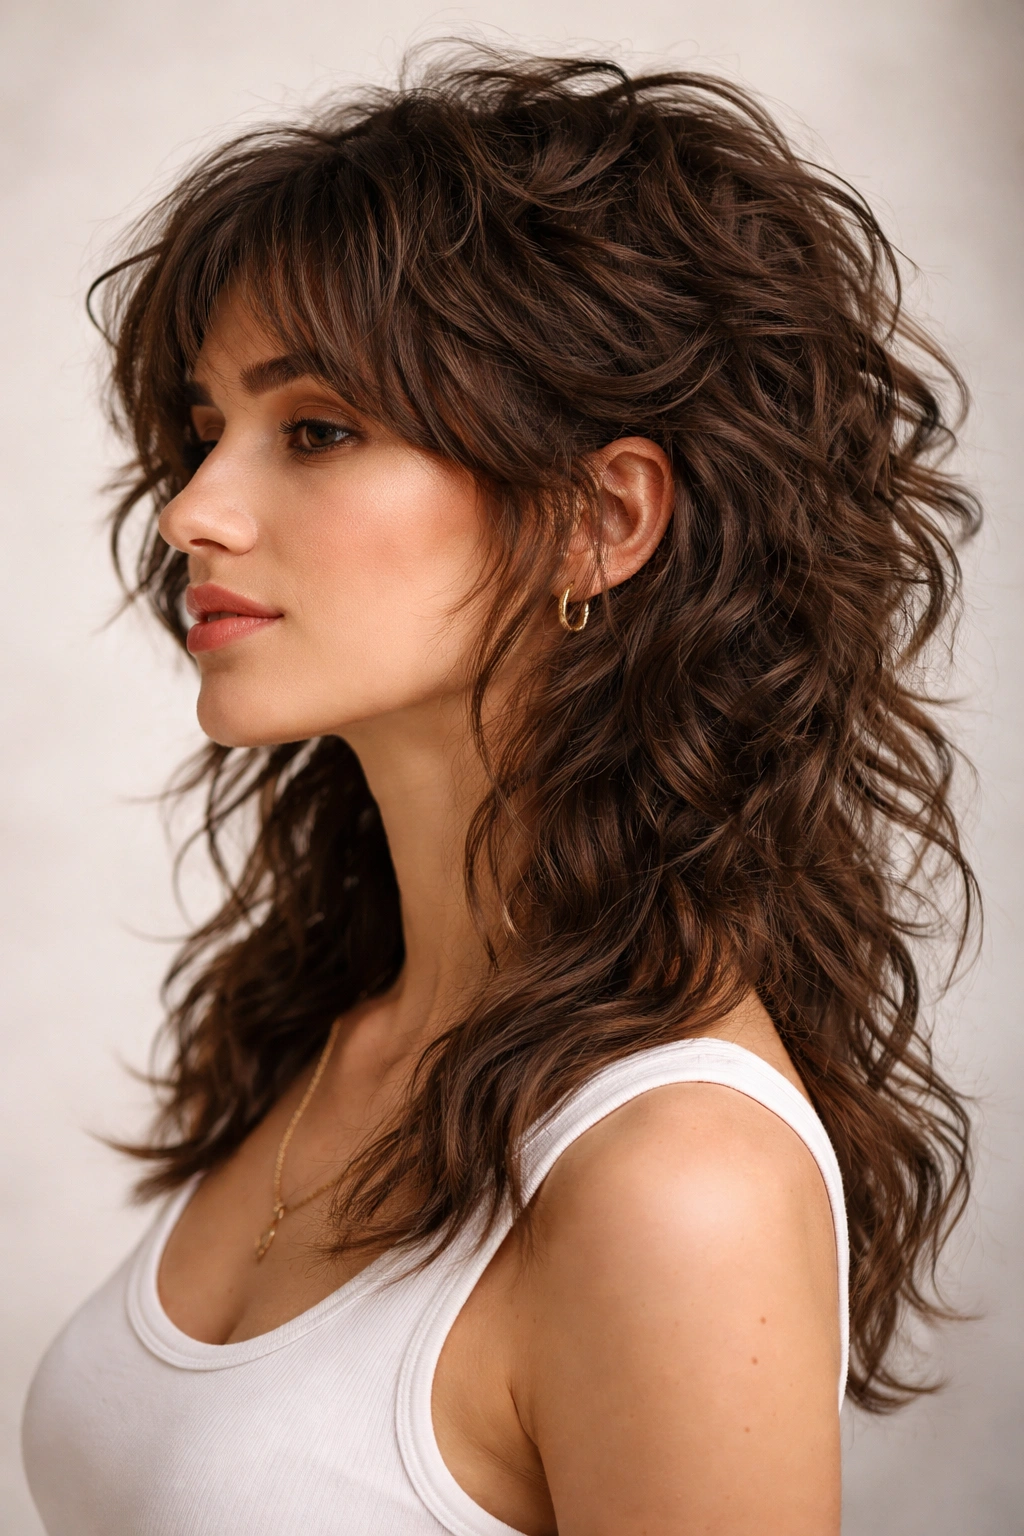
For those with loose waves or beach-texture curls, a layered mullet emphasizes movement and flow. This version features choppy, textured layers throughout that work with the natural wave pattern to create dimension and bounce. The front is cut shorter with face-framing layers, while the back extends longer with progressive layers that encourage waves to flip and move. This cut gives the impression that your hair is constantly in motion, with light playing off different layer heights.
Layer Cutting for Waves
Layering wavy hair requires a different approach than layering straight hair — layers should follow the wave’s natural direction rather than fighting it. A skilled stylist will cut layers that sit with the wave’s line, creating texture within the wave itself rather than disrupting it. This prevents the frizzy, unkempt look that can happen when layered waves lose their structure. The layers actually help define waves and encourage springiness.
Maintaining Wave Definition
- Use a wave cream or curl cream suited to looser curl patterns — you want products that define without creating heaviness
- Dry with a diffuser or air-dry for the most natural wave pattern; blow-drying with a round brush can make waves look straighter
- Scrunch curls while they’re still damp to encourage wave formation, or use a curling iron to refresh waves between washes
- Refresh with braids, buns, or waves overnight to reset the wave pattern where it’s flattened
- Trim every 6-8 weeks to prevent layers from looking ratty or too choppy as they grow
Worth knowing: Wavy hair benefits from slightly heavier styling products than tighter curls because waves need more support to maintain their shape. Lightweight products that work for tight curls might leave waves looking stringy.
7. Short Curly Mullet
This version keeps both front and back considerably shorter than other mullet variations — the front might be 1-2 inches, while the back extends to 4-6 inches. This creates a more subtle mullet effect that reads as modern and current while maintaining the core mullet concept. It’s an excellent entry point for anyone hesitant about committing to a longer back section, or for professional environments where a statement haircut might feel too bold.
Subtlety as Strength
A short curly mullet is all about proportion and shape. Because there’s less length overall, every inch of the cut becomes visually important. The contrast between front and back is less extreme, making the style feel sophisticated rather than theatrical. This version often appeals to people who love the mullet’s edge but want something that works across more settings — boardroom meetings, family dinners, professional photos.
Styling a Short Mullet
- Use a lightweight cream or mousse to enhance curls without weighing them down — these products work better on shorter curls than heavy butters or gels
- Air-drying or diffuser-drying usually works great because there’s less length for moisture to travel through
- Refresh curls daily with water and product for best definition — shorter lengths lose their shape faster between washes
- Trim every 4-6 weeks to maintain the shape; short curls need more frequent maintenance than longer styles
- Experiment with texture using a curling iron or braiding for variation — shorter hair is more forgiving for styling experiments
Pro tip: A short curly mullet is the easiest to style and maintain of all mullet variations. If you’re new to curly cuts or want maximum low-maintenance styling, this is your best starting point.
8. Twisted Curl Mullet

This variation features intentional twists throughout — either salon-set twists or naturally formed twist patterns encouraged by the cut’s structure. The front twists are usually smaller and tighter, creating definition and control, while the back twists are larger and more relaxed, creating drama and movement. This cut works beautifully for locs, faux locs, or twist-friendly textures and creates visual interest without requiring constant definition.
The Twist as Design Element
A twisted mullet treats twists as the primary design element rather than twists just existing within the cut. A stylist will cut and shape the twists themselves — shorter in front, longer in back — ensuring that each twist sits intentionally within the overall silhouette. This creates a sculpture-like quality where the cut literally forms the twists’ shape. The result is a style that reads polished and intentional, never accidental.
Living with Twists
- Retwist the roots every 4-8 weeks to maintain clean definition and prevent locs from becoming matted
- Use a lightweight oil or cream to keep twists shiny and prevent dryness
- Sleep with a silk or satin bonnet to prevent twists from unraveling or picking up lint
- Refresh twists between retwisting appointments using a crochet hook and a small amount of hair and product
- The back twists can be left longer and looser for a more relaxed aesthetic, or kept tight for a more polished look
Worth knowing: A twisted curl mullet actually improves with age — as twists set and mature, they become even more defined and visually striking.
9. Defined Coil Mullet
This cut emphasizes highly defined, individual coils with maximum separation and visibility. Unlike some coil cuts that encourage coils to merge together, this version celebrates each coil as a distinct element. The front features tightly defined coils with clear ringlets, while the back features larger, more loosely formed coils that create a voluminous mass. This cut requires and showcases excellent product definition and coil clarity.
Defining Individual Coils
Achieving distinct coil definition requires the right product and technique. Gel applied in the praying hands or raking method encourages individual coils to stay separate and defined. The cut’s role is creating a framework that allows each coil to spring independently — removing weight where needed and creating shape that encourages upward and outward growth. A skilled stylist will understand how to cut around individual coil patterns rather than blunt-cutting across them.
Product and Styling Strategy
- Use a gel or cream with strong hold that keeps coils separated all day without creating crunch
- Apply products to soaking wet hair for best definition — damp hair won’t create the same hold as soaking wet
- Use the praying hands or finger coil method to apply product and encourage coil pattern
- Plop in a microfiber towel or t-shirt for 15-20 minutes after applying product to set coils
- Air-dry or use a low heat diffuser; blow-drying disrupts the coil pattern
- Refresh curls by misting with water and re-gelling only the sections that have lost definition
Pro tip: Defined coil mullets look absolutely stunning in bright or natural light — the individual coils catch light beautifully and create dimension that’s mesmerizing.
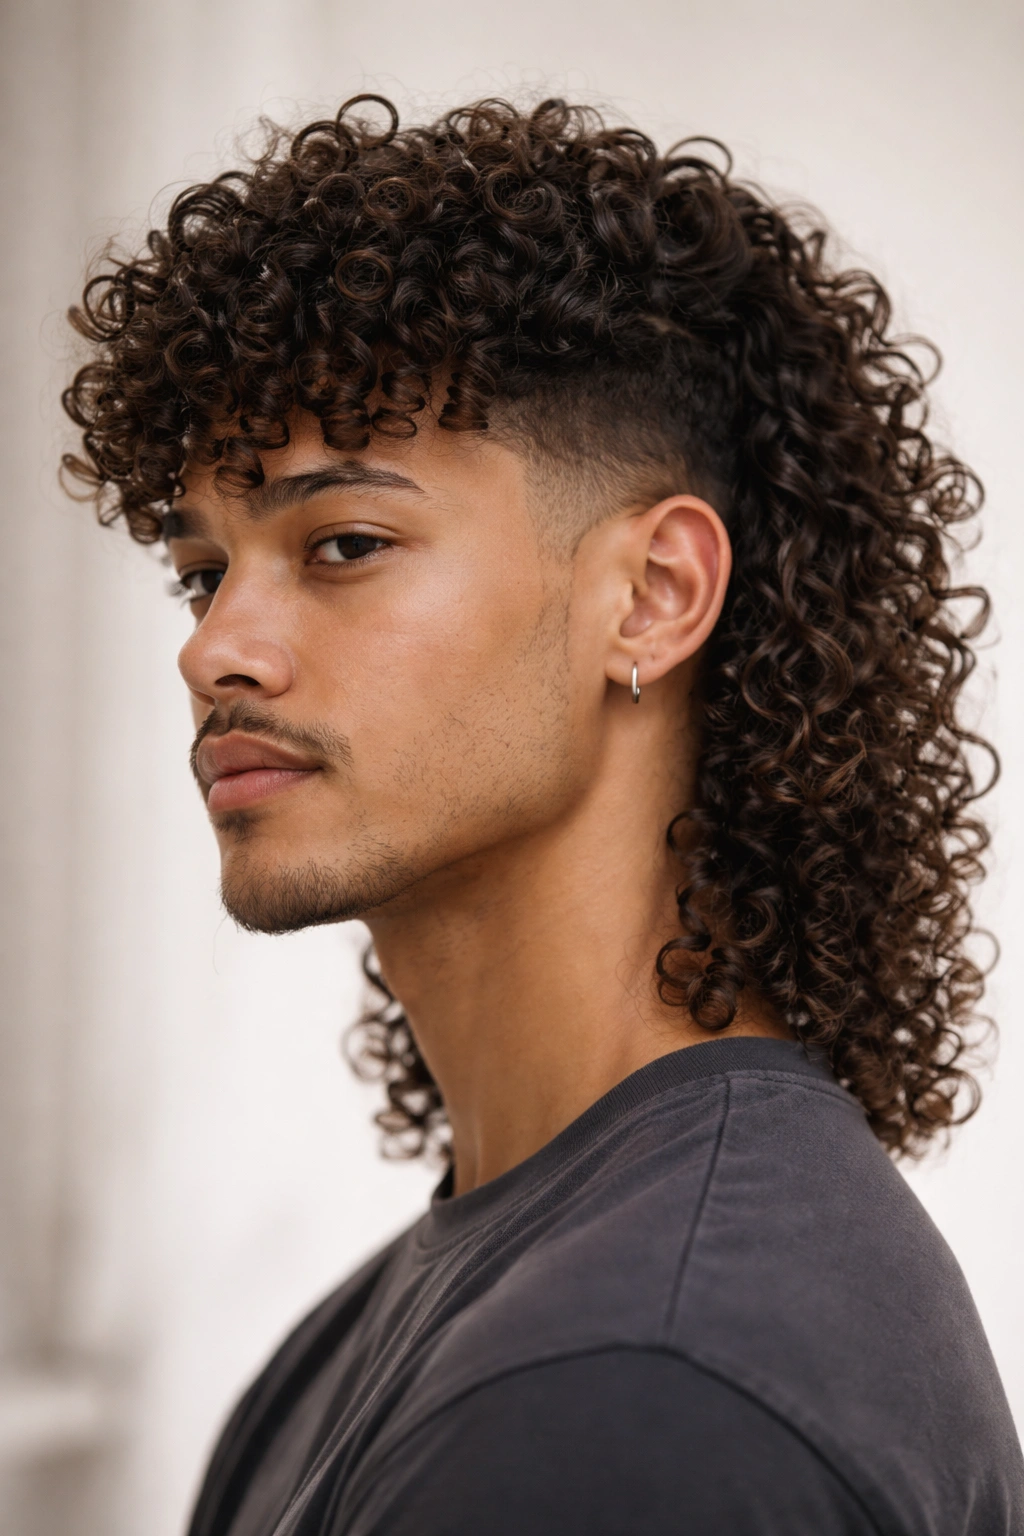
10. Undercut Curl Mullet
An undercut pairs very short, often clippered hair on the bottom back portion with longer, full curls on top and front. The undercut is usually hidden when worn down but becomes visible when curls move or are pinned up. This creates a surprising visual dimension — the style looks traditional and voluminous when hair is down, but reveals an unexpected modern edge underneath. It’s ideal for anyone who wants both polish and personality.
The Hidden Modern Edge
An undercut mullet is essentially a mullet with a secret — the back appears full and traditional until you move your head and glimpse the shaved or faded undercut beneath. Some wearers love this reveal, while others prefer the style to look consistent all the time. The choice is yours: wear curls loose and full to hide the undercut, or pin the top curls back to show it off. This flexibility makes undercuts especially appealing for people with professional environments or varied social settings.
Getting and Maintaining an Undercut
- Have the undercut cut slightly shorter than your preference — it’ll grow out noticeably in 2-3 weeks and look softer
- Trim the undercut every 2-3 weeks to keep it looking sharp and defined (much more frequent than the top needs trimming)
- Use clippers or a very short guard for a clean, sharp undercut, or ask for a fade if you prefer something softer
- The undercut doesn’t require styling — it’s purely structural
- Curls on top can be styled normally; the undercut doesn’t affect styling or product routine
Worth knowing: An undercut creates the illusion of even more volume and height on top because the sides and back are shaved short. This works beautifully for anyone wanting to maximize the appearance of fullness.
11. Long Curly Mullet
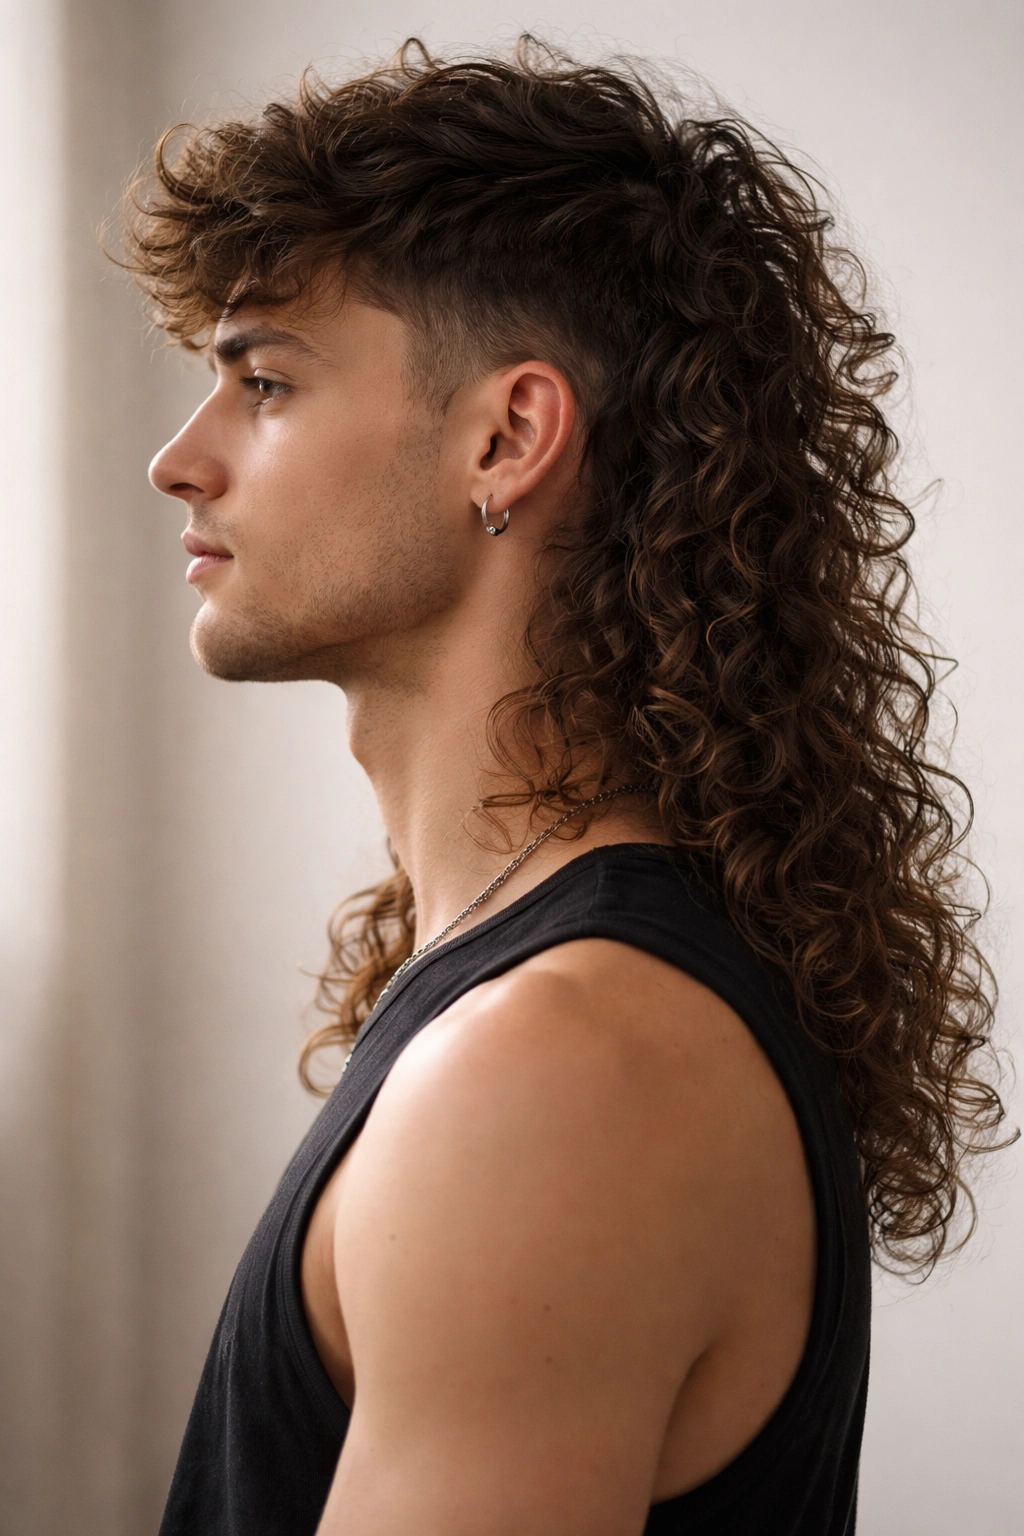
For those ready to embrace the mullet fully, a long curly mullet extends the back to shoulder-length or beyond while keeping the front considerably shorter. This creates maximum contrast and maximum drama. The back curls have room to develop their full length and pattern, often reaching lengths where the curl pattern relaxes slightly from the weight, creating beautiful waves by the ends. This is the most statement-making of all mullet variations.
Embracing the Long Back
A long curly mullet requires confidence and intentional maintenance. The back isn’t just decoration — it requires the same care, styling, and protection that any long curly hair needs. But the payoff is extraordinary. The contrast between short front and long, flowing back creates a head-turning silhouette that makes a clear statement about personal style. Long curl mullets work especially well for people with excellent curl pattern definition — the length showcases the pattern’s full range.
Caring for the Long Back
- Shampoo and condition only the roots and mid-lengths to keep ends from drying out; use rinse-only or co-wash methods if hair is very long
- Apply leave-in conditioner and curl cream to the length and ends, focusing on the back sections
- Sleep with the back curls braided or twisted to prevent tangling and matting
- Trim the back every 8-12 weeks; long curls show split ends quickly and trimming keeps the pattern looking defined
- Consider protective styles — buns, braids, or updos — to protect the back length between washes
- Use a silk or satin pillowcase or bonnet to prevent friction and frizz
Pro tip: A long curly mullet looks most striking when the back is intentionally styled — loose waves, defined curls, or even braids — rather than looking like you just didn’t cut the back. The difference between intentional and neglectful is styling and definition.
12. Choppy Curl Mullet
This final variation features distinctly choppy, textured cuts throughout — both front and back have deliberate choppiness that creates movement and an intentionally undone aesthetic. The difference from a traditional shag is that choppy cuts are more aggressive and less blended, creating visible texture lines and disconnection between sections. The result feels deliberately edgy and modern, never accidental or unkempt.
The Choppy Texture Approach
Choppy cuts work beautifully with curls because the choppiness creates space between curl ringlets, preventing clumping and encouraging individual curl definition. Each choppy layer is a distinct line, creating visual interest and movement. This cut requires a stylist confident with texture and comfortable cutting in a way that might initially look chaotic but resolves into coherent style once curls set.
Styling Choppy Curls
- Use a lightweight gel or cream that doesn’t weigh choppy sections down — you want the choppiness to stay visible and separated
- Dry with a diffuser, breaking up the curls occasionally with fingers to encourage the choppy sections to flip and move in different directions
- The choppiness naturally encourages curl to move upward and outward, so the style often requires minimal hands-on styling beyond product application
- Refresh between washes with water and a quick scrunch to reactivate texture
- Trim every 6-8 weeks to maintain the choppy definition; as choppy cuts grow, they can start to blend together and lose their edge
Worth knowing: A choppy curl mullet looks best when it has slightly textured, piecy ends rather than blunt finishes. Ask your stylist for point-cut or razor-cut techniques rather than blunt scissors.
Final Thoughts
The curly mullet has earned its place as a legitimate, powerful styling option for anyone with texture and courage. What makes these cuts so effective is that curls do the actual work — the cut creates a framework, but the texture itself creates the visual impact and movement. Whether you choose something subtle like a short mullet or make a full statement with a long, choppy version, the key is finding a stylist who understands how to cut curly hair with intention.
The beauty of curly mullets is their adaptability. They work across different curl patterns, professional environments, and personal styles. A spiral curl mullet reads completely different than a choppy curl mullet, even though they’re operating from the same core concept. This means you can own the mullet aesthetic in a way that genuinely feels like you, not like you’re forcing a trend.
If you’re considering taking the plunge, start with consultation photos. Bring multiple examples to your stylist — not to recreate them exactly, but to communicate what you’re drawn to about each one. Is it the choppiness? The length contrast? The fade work? Understanding what appeals to you visually will help your stylist translate it to a version that works specifically for your curl pattern, face shape, and styling reality. The right stylist will take the mullet framework and make it entirely, unmistakably yours.