Finding hairstyles that feel both effortless and polished can be a challenge when you’re balancing style, manageability, and the health of your natural hair. Black hair has incredible versatility and texture that lends itself to some of the most creative, beautiful, and practical styling options available. The good news? You don’t need to spend hours in the salon or invest in complicated techniques to rock stunning looks that work for everyday wear, special occasions, or low-maintenance days when you’re too busy for anything complicated.
The hairstyles in this guide celebrate the natural beauty of textured hair while keeping things genuinely simple. Whether you’re looking for protective styles that let your hair rest and thrive, quick styles you can create in under 20 minutes, or looks that work whether you’ve just washed your hair or it’s been a few days, there’s something here for every mood, occasion, and skill level. Many of these styles double as protective options that reduce breakage and manipulation—a genuine win-win that means you’re not sacrificing your hair’s health for the sake of looking great.
1. High Puff
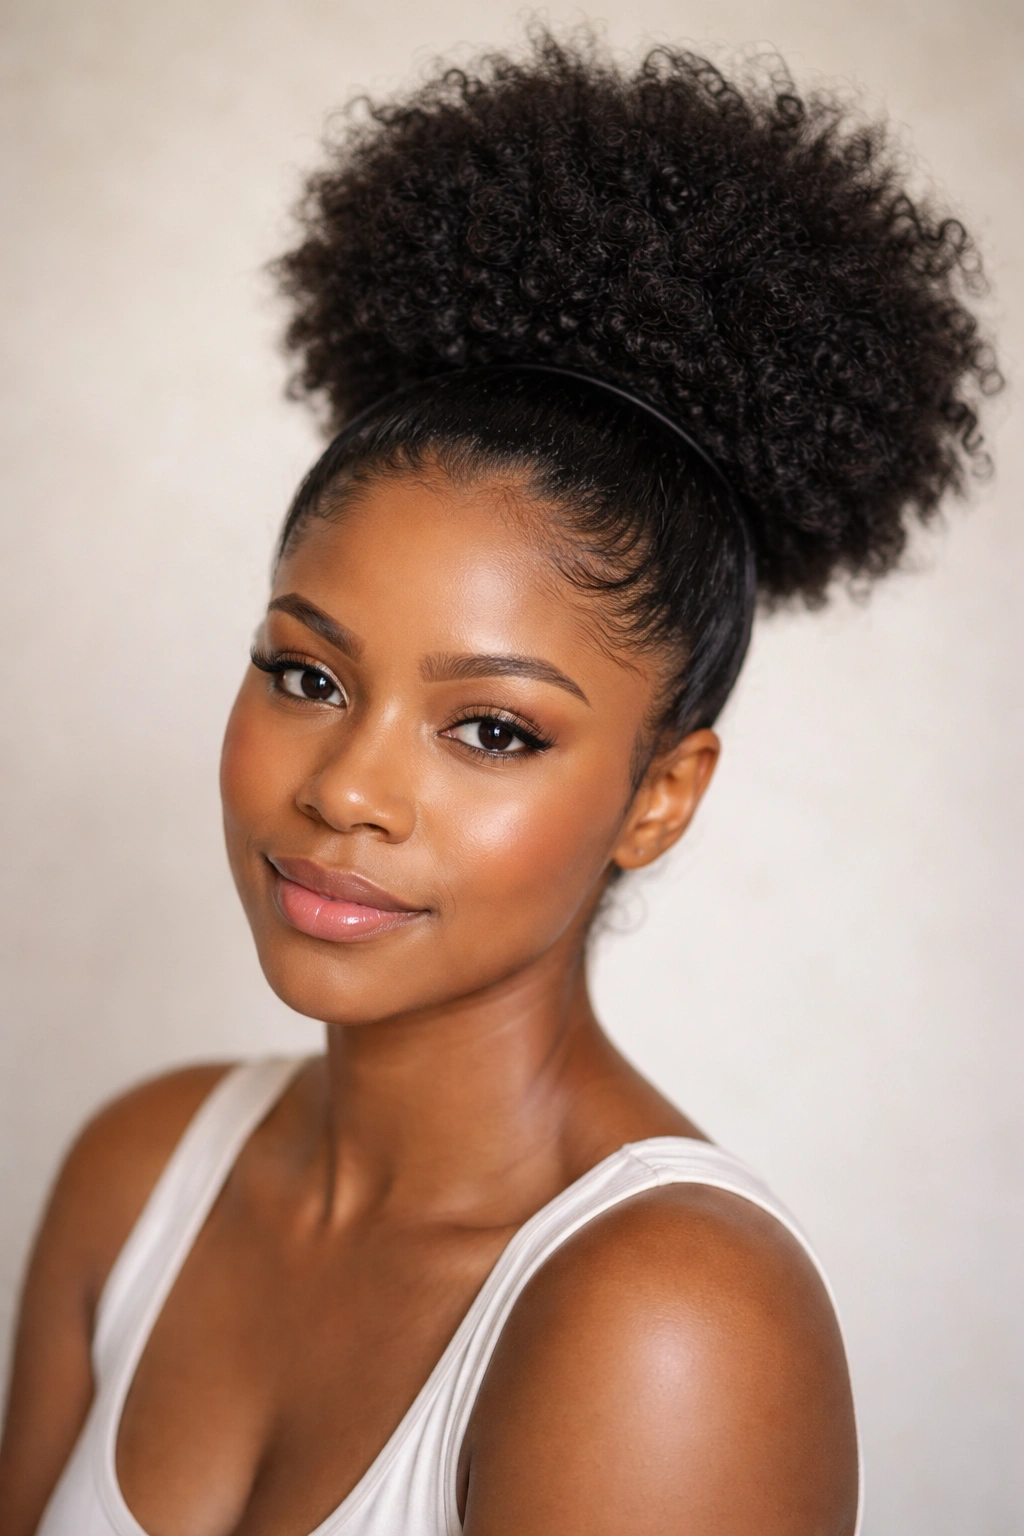
A high puff is the definition of a no-fuss style that somehow looks intentionally chic. This isn’t the flat, scraggly puff you might remember from childhood—it’s a full, voluminous bubble of hair gathered high on top of your head, created by gathering your natural hair and securing it with a elastic band or hair tie, then fluffing it out to create maximum volume.
Why This Style Works So Well
The high puff works beautifully because it takes minimal time but looks put-together without effort. It’s protective because you’re gathering your ends away from your shoulders and friction points, which means less breakage and more moisture retention. The style also adapts to your lifestyle—you can wear it sleek and smooth on a Monday and textured and voluminous on Wednesday, and it reads as intentional either way.
How to Create the Perfect High Puff
- Start with hair that has some moisture in it, whether that’s freshly washed or refreshed with water and a light styler
- Use your fingers or a detangling brush to smooth the hair back gently toward the crown—you don’t need it perfectly smooth, some texture actually adds to the aesthetic
- Gather all your hair high on the crown and secure with a hair tie, scrunchie, or elastic that won’t create too much tension
- Gently pull and fluff sections of the gathered hair upward and outward to create that full, rounded shape
- Use a light-hold gel or edge control to smooth down baby hairs and create a clean perimeter around the puff if you like that finished look
Pro tip: For extra volume, try creating your puff by gathering slightly smaller sections in multiple passes rather than one single gathering—this creates a fuller appearance without all the tension on your scalp.
Styling and Maintenance
Pair your high puff with a front section that frames your face, either smoothed back or left loose for a softer vibe. You can wear this style for a full week before refreshing if you protect it at night with a silk or satin bonnet. This hairstyle pairs beautifully with hoop earrings, gold jewelry, or anything that draws attention to your face and shoulders.
2. Space Buns
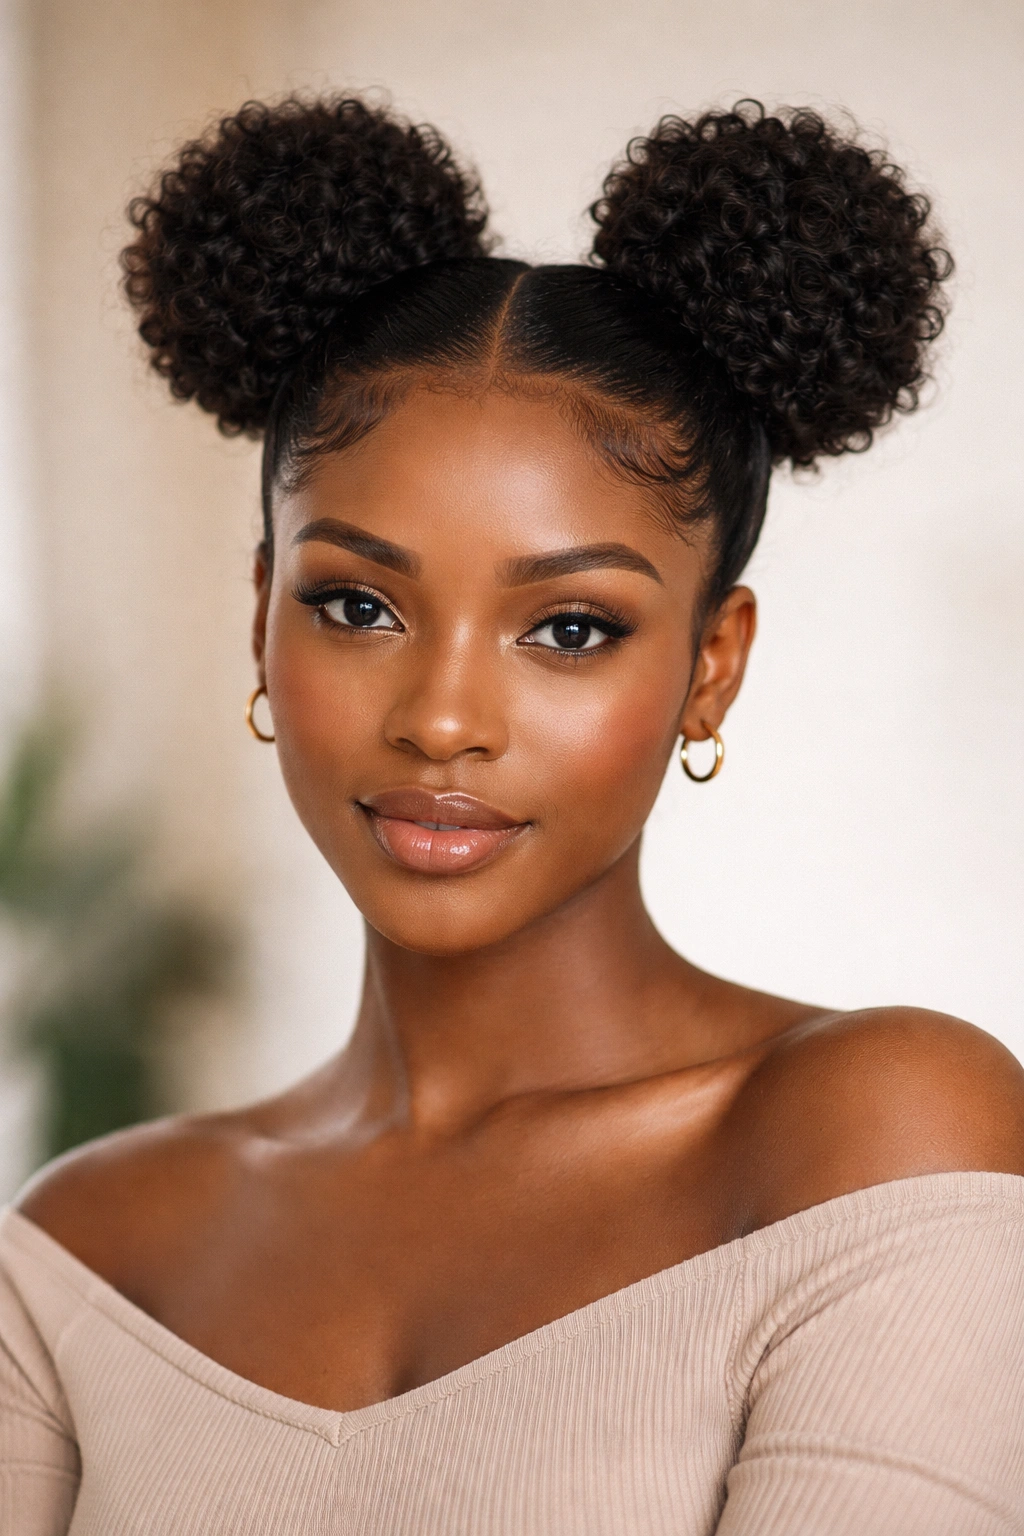
Space buns—two matching buns positioned on the crown area of your head—are playful, youthful, and honestly more versatile than people realize. This style works for casual weekend days, for securing hair while you’re working out, or even as an edgy alternative to a traditional updo for special occasions.
Why This Style Captures Attention
Space buns feel fun and intentional, and they create visual balance across your head in a way that’s flattering from almost every angle. Because you’re securing your hair in two separate buns, you’re distributing the tension load, which means less stress on any single area of your scalp. The style also works beautifully on hair that’s anywhere from freshly washed to a week old, because the texture actually adds to the charm.
How to Create Space Buns Step by Step
- Part your hair down the center from your forehead all the way to the nape of your neck, using a rattail comb for precision
- Gather one side of your hair at the crown and twist it loosely as you wrap it around itself to form a bun, securing with bobby pins and a hair tie
- Repeat on the other side, making sure both buns are roughly the same size for visual balance
- Gently pull at the bun sections to create texture and fullness—tight, perfect buns can look costume-like, but relaxed, slightly undone buns feel intentional and cool
- Smooth down your part and edges with a little edge control if that’s your style
Real talk: The more texture and volume you have in each bun, the cooler this looks. Aim for full, bouncy buns rather than sleek, tight ones.
Styling Ideas and How Long They Last
Space buns work best when you lean into their playful energy. Style them with colorful hair clips, bandanas wrapped around the bun bases, or leave them bare for a cleaner look. This style typically lasts 4-5 days with proper nighttime care, and you can refresh them midweek by lightly misting with water and retightening if needed.
3. Twist-Out
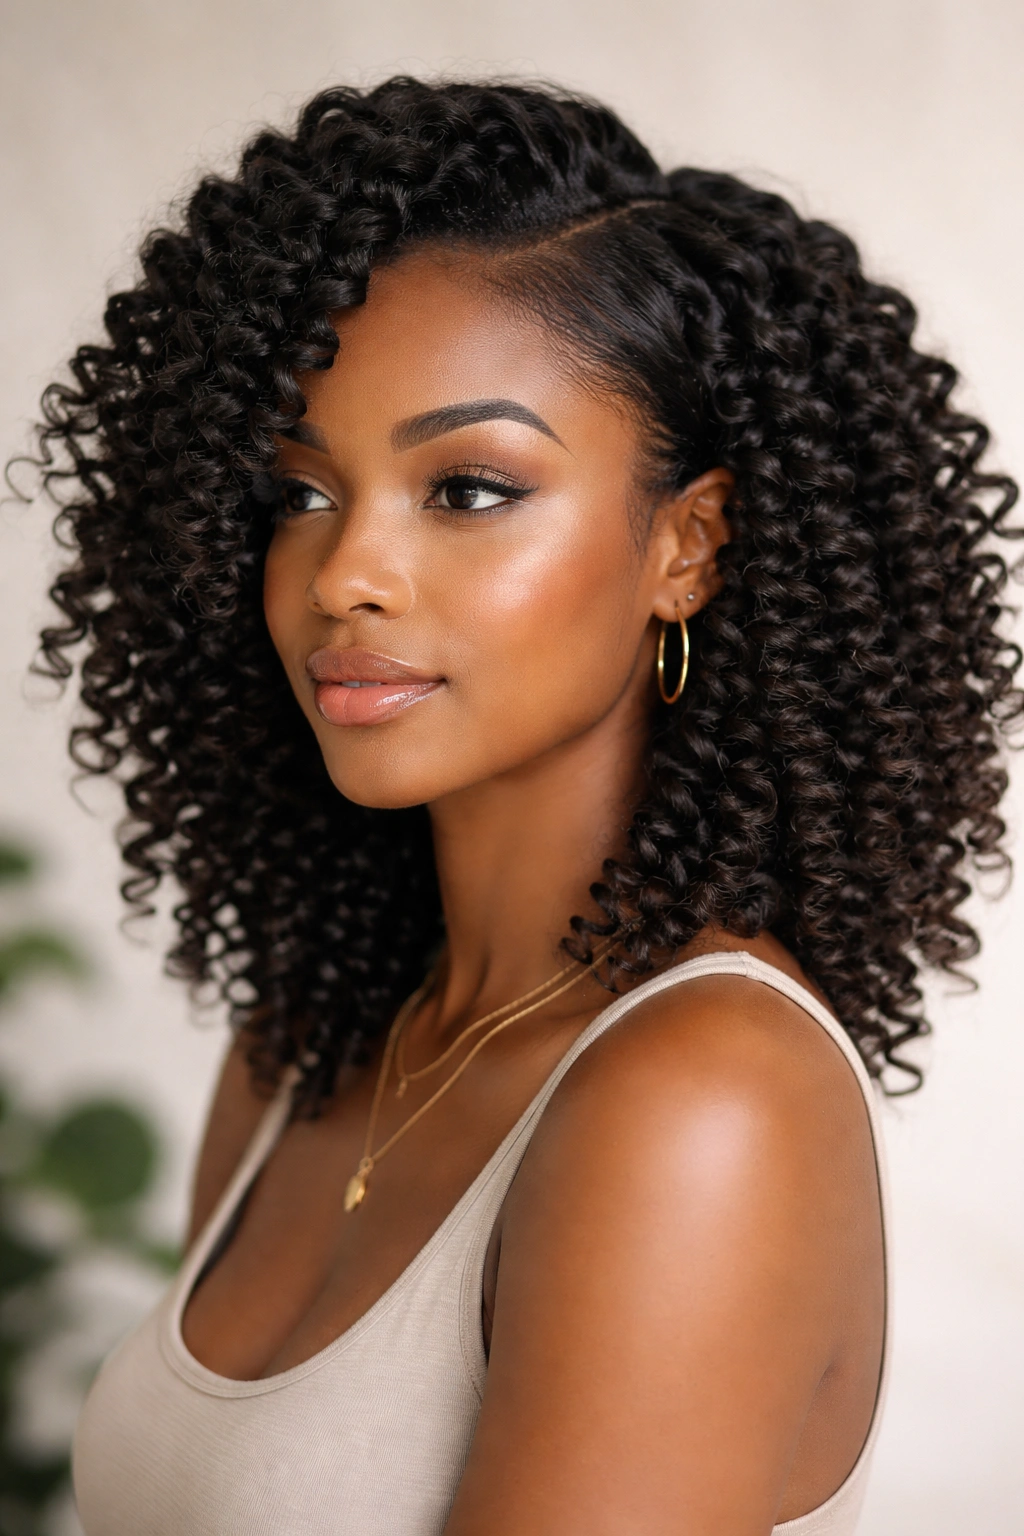
A twist-out is a heatless method for creating defined, wavy curls and coils by twisting damp hair into rope-like sections and allowing them to dry, then unraveling those twists to reveal a voluminous, textured style. It’s one of the most popular and reliable styling techniques for textured hair, and for good reason.
What Makes Twist-Outs So Effective
The beauty of a twist-out is that you’re working with your natural curl pattern instead of against it. The twisting creates the structure that encourages your hair to curl, and because you’re not using heat, you’re protecting your strands from damage while still achieving a styled, intentional look. This style is also incredibly low-maintenance once it’s done—you can literally sleep on it for days and it continues to look fresh.
The Complete Twist-Out Process
- Start with freshly washed, damp hair that’s been conditioned and is still wet enough to define easily
- Section your hair into 6-12 sections (depending on how defined you want the twists and how much time you have) using clip, and work with one section at a time
- Take a section and divide it into two strands, then twist those strands around each other going all the way down to the ends, maintaining some tension as you go
- You can apply styling cream, leave-in conditioner, or a curl-defining gel to each section as you twist for extra definition and hold
- Allow the twists to air-dry completely—this takes anywhere from a few hours to overnight depending on your hair thickness
- Once fully dry, carefully unravel each twist from the bottom up, working gently so you don’t disrupt the curl pattern
Worth knowing: The wetter your hair is when you start and the tighter you twist, the more defined your curl pattern will be. Looser twists create a softer, wavey texture.
Making Your Twist-Out Last
Once unraveled, your twist-out can look beautiful for 5-7 days with proper care. Sleep with a satin bonnet or on a satin pillowcase to preserve the curl definition. On days 3 and 4, you can refresh the style by lightly misting with water and scrunching, or by re-twisting just the pieces that have lost definition.
4. Protective Braids
Protective braids—whether they’re French braids, cornrows, or simple three-strand braids—serve the practical purpose of securing your hair away from daily friction and moisture loss while also looking intentionally styled. These braids can be as simple or as elaborate as your skill level and time allow.
Why Braids Protect Your Hair
When your ends are braided, they’re tucked away and secured, which means less breakage from rubbing against your shoulders, clothing, and pillowcases. Braids also reduce the amount of manipulation your hair experiences daily, which means your natural moisture stays in your strands longer. You can wear protective braids for 2-3 weeks with proper maintenance, during which time your hair is continuously protected while you still have a finished, intentional look.
How to Create Basic Protective Braids
- Start with hair that’s been freshly washed, conditioned, and is completely dry or damp (depending on your preference)
- Section your hair into the number of braids you want—two side braids are quick and flattering, while 4-6 braids across the crown create a fuller, more intricate look
- For each section, divide the hair into three strands and begin braiding by crossing the right strand over the middle, then the left over the middle, continuing down the length of your hair
- Keep tension consistent but not tight—you want the braid to hold without pulling on your scalp
- Secure the end of each braid with a small elastic or braid band
- You can leave braids chunky and textured for a casual look, or smooth them down with edge control for a more polished appearance
Pro tip: Braids hold much better on hair that’s a few days old rather than freshly washed, so don’t hesitate to style them on day 2 or 3 after washing.
Maintaining Braids for Maximum Lifespan
Protect your braids at night with a satin bonnet or sleep on a satin pillowcase to prevent frizz and preserve the braid integrity. Every few days, you can refresh the edges and around your hairline with light edge control to keep the style looking crisp. After 2-3 weeks, gently unbraid and deep condition your hair to restore moisture before your next protective style.
5. Slicked Back Bun
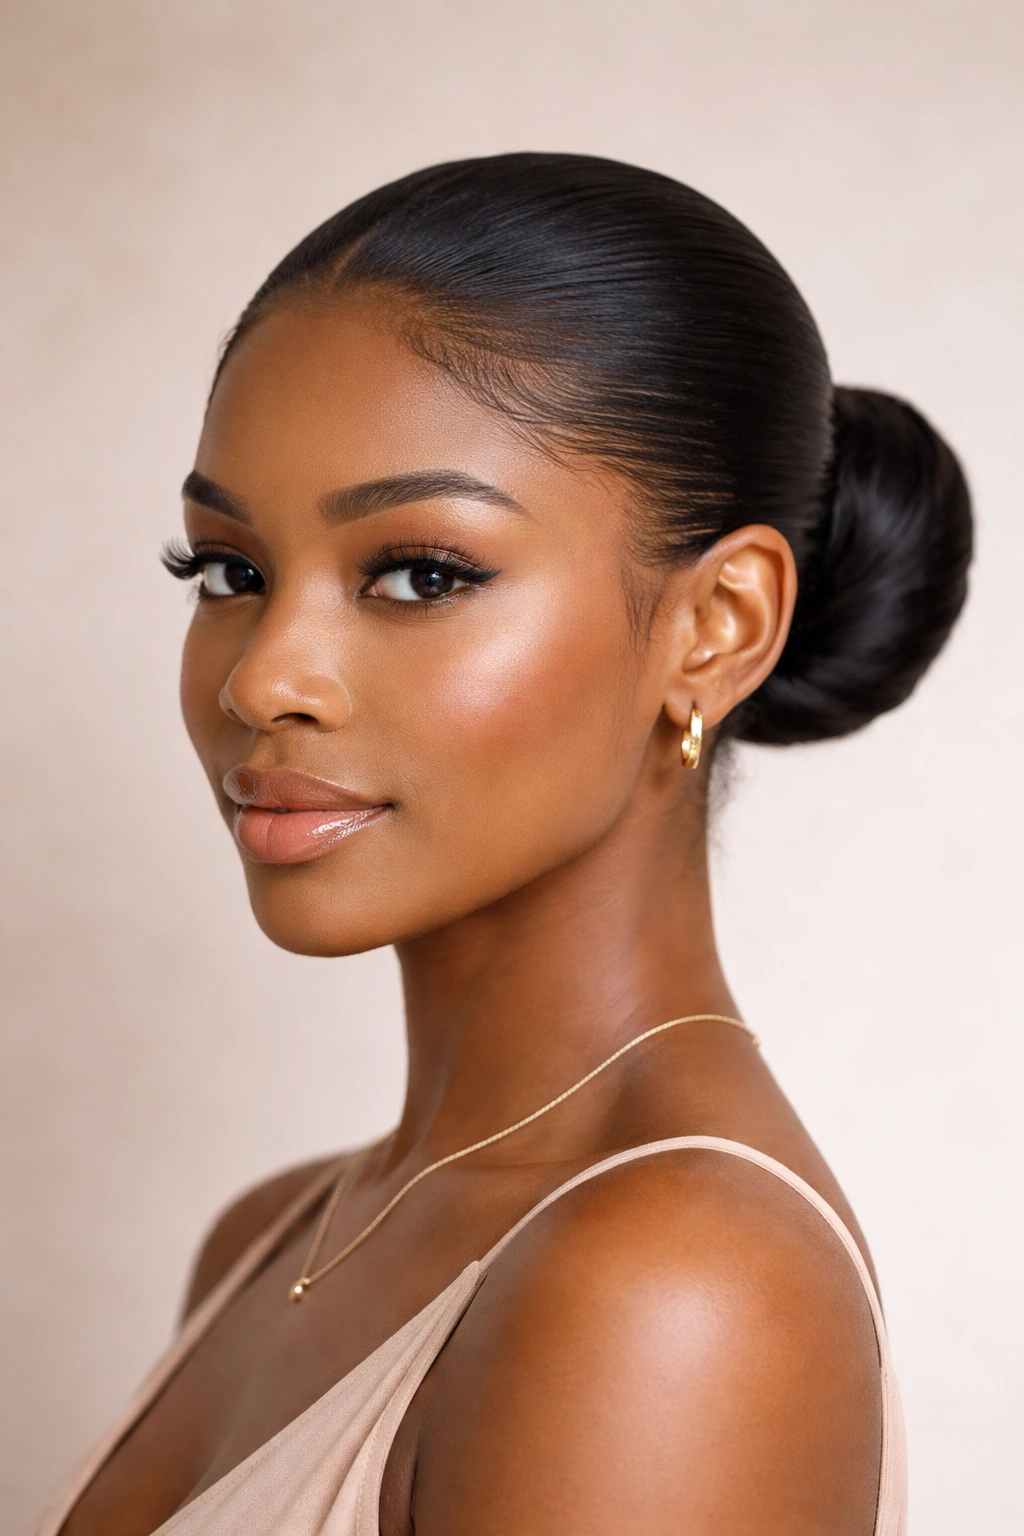
A slicked-back bun is sleek, sophisticated, and works for everything from a casual day at home to a night out or even a professional setting. This style uses edge control or gel to smooth all your hair back away from your face and then gathers it into a bun at the back or side of your head, creating a polished, intentional look.
The Appeal of a Slicked Back Bun
This style is undeniably chic and takes only about 5 minutes to create. It’s also protective because your ends are secured and tucked away, and your entire hairline gets a break from daily manipulation. The slicked-back effect also elongates your face and draws attention to your features, cheekbones, and neck—which is why this style is so beloved for special occasions and professional settings.
Creating a Flawless Slicked Back Bun
- Brush your hair back thoroughly with a paddle brush or wide-tooth comb to remove tangles and smooth the hair back away from your face
- Apply an edge control or styling gel to your hairline, roots, and throughout your hair for hold and smoothness
- Use a fine-tooth comb to comb the hair back smoothly against your scalp, using the comb to guide the hair into a sleek shape as it moves back
- Gather all your hair at the nape of your neck or slightly higher on the crown, depending on the aesthetic you’re going for
- Twist the gathered hair or create a bun by wrapping it around itself, securing with bobby pins and a hair tie
- Smooth down any flyaways or baby hairs with a little more edge control and a fine-tooth comb
Important: Avoid pulling too tightly on your hairline and roots—slicked back doesn’t mean painfully tight. You want smoothness and polish, not tension that damages your hairline over time.
Styling Options and How Long It Lasts
A slicked-back bun is naturally versatile—you can wear it as a casual everyday style or dress it up with jewelry, headscarves, or decorative hair clips. With proper nighttime care, this style can last 5-7 days before needing a refresh. You can also convert it easily into a high puff for variety without actually redoing your hair completely.
6. Bantu Knots
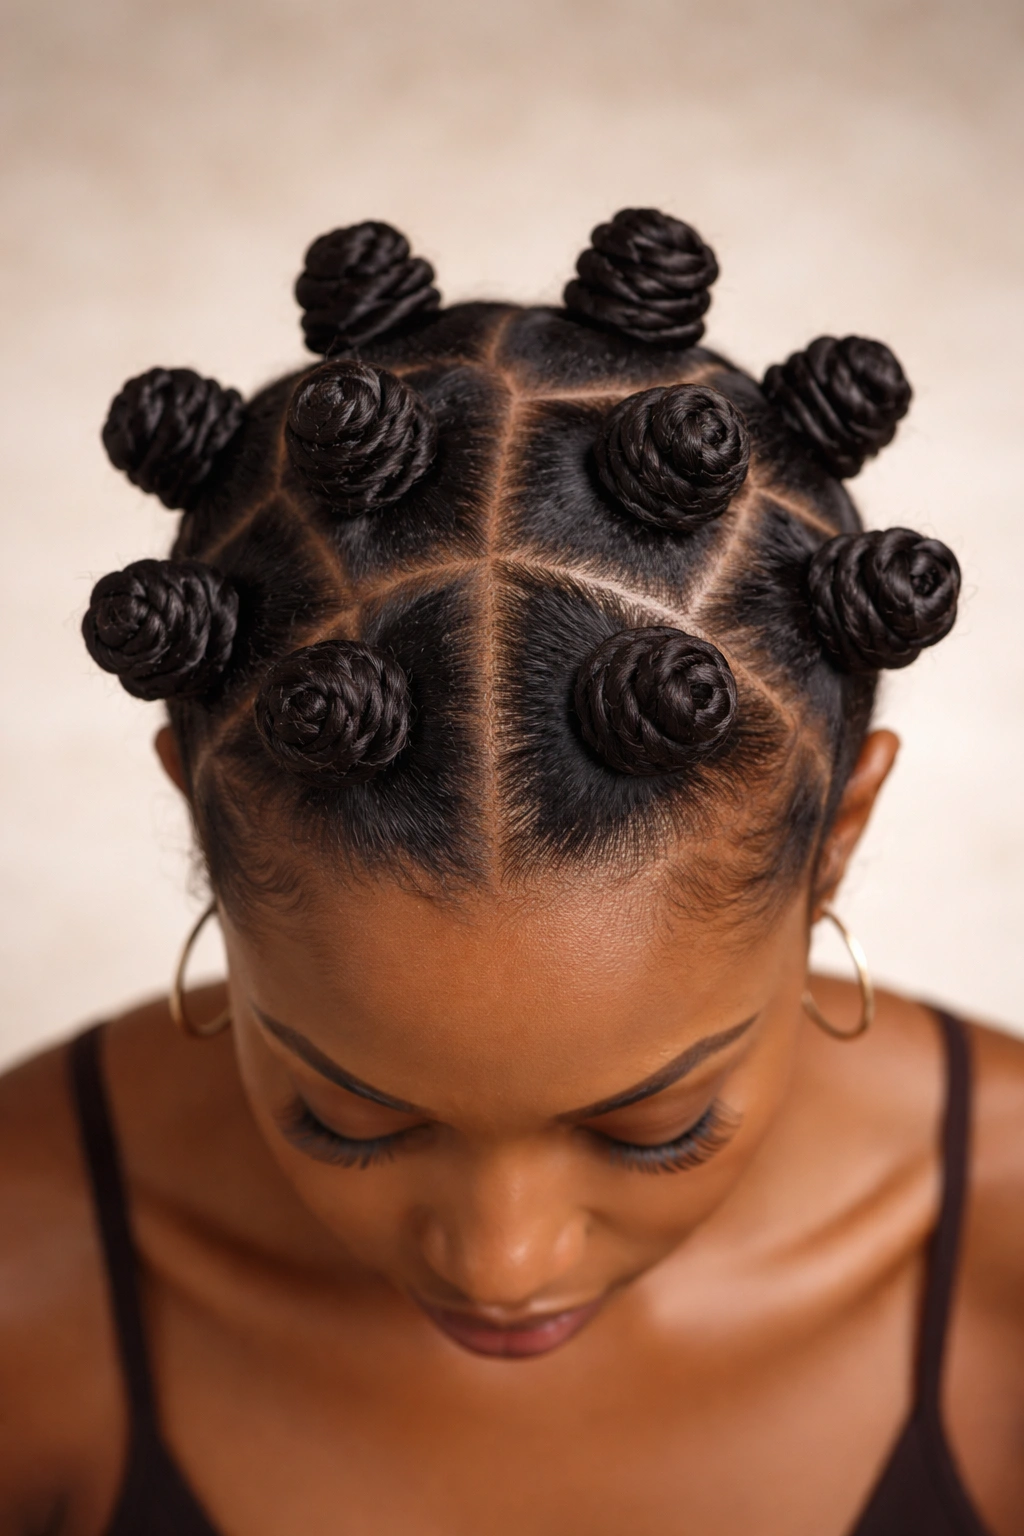
Bantu knots are coiled sections of hair twisted and wrapped around themselves to create a knot-like shape. This protective style is rooted in African heritage and has been used for centuries. Beyond their cultural significance, bantu knots are also a practical styling method that creates beautiful curls when unraveled.
Understanding Bantu Knots and Their Purpose
Bantu knots serve dual purposes—they’re a protective style that keeps your hair secure and tucked away, and they also set your curl pattern for a gorgeous textured look when you unravel them. Unlike braids, bantu knots don’t require specific braiding skills, making them accessible even if you’re new to protective styling. The knots also look intentionally stylish on their own, so you can wear them out as a finished style if you prefer.
How to Create Bantu Knots
- Start with freshly washed, damp hair that’s been conditioned and detangled
- Section your hair into 6-12 sections depending on the size of knots you want and how much time you have
- Take one section and twist it tightly as you wrap it around itself, creating a coil or spiral shape—you’re essentially wrapping the twisted hair around its own base
- Continue wrapping until you reach the ends, then secure the knot with a small bobby pin if needed
- Repeat with each section until your entire head is covered in bantu knots
- Allow the knots to air-dry completely, which typically takes 4-8 hours depending on your hair thickness and texture
- To create curls, carefully unravel each knot from the bottom up, releasing the curl pattern
Real talk: Bantu knots are easier to create than they sound. The key is to twist consistently and wrap tightly enough that the knot holds without being so tight that it damages your hair.
Wearing Bantu Knots as a Finished Style
You can absolutely wear bantu knots as your finished look without unraveling them—they look cute and intentional, especially if you add colorful hair clips or adorn them with jewelry. If you do unravel them for curls, the resulting texture lasts about 5-7 days with proper nighttime care.
7. Half-Up, Half-Down
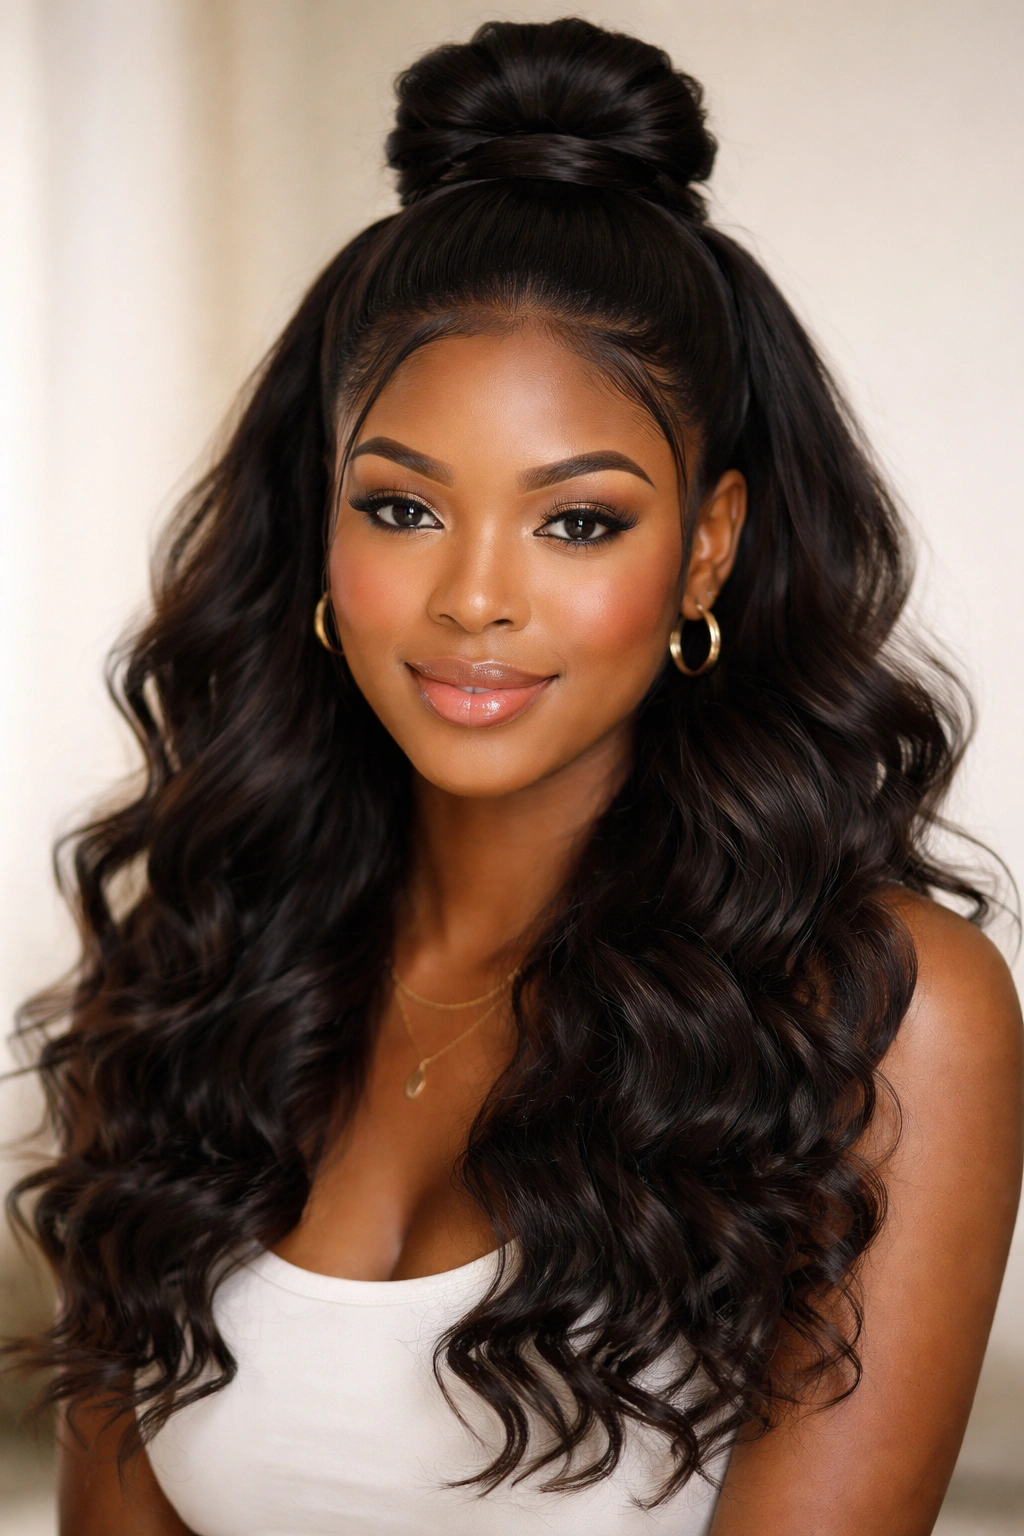
A half-up, half-down style splits the difference between wearing your hair down and pulling it back, creating a balanced, flattering look that works for almost any occasion and any hair texture. You’re securing roughly the top half of your hair into a bun, puff, or ponytail while letting the bottom half flow freely.
Why Half-Up, Half-Down Works for Everyone
This style is universally flattering because it frames your face while keeping hair off your shoulders and neck. It’s also protective in a subtle way—the upper portion of your hair is secure and away from friction, while the length can still move freely. This style works beautifully on hair that’s fresh, textured, wavy, or curly, and it takes less than 10 minutes to create.
Creating a Half-Up, Half-Down Style
- Brush or finger-comb the top section of your hair (from about ear to ear, going up and over your crown) to smooth it slightly
- Gather this top section at the crown or slightly back from the crown
- You can create a puff, a bun, a ponytail, or even small braids with this section—whatever matches your overall vibe
- Secure the gathered section with a hair tie, bobby pins, or both for extra security
- Let the bottom half of your hair fall freely, and style it however feels right—smooth, textured, curly, wavy
- Use edge control around your hairline and part if you want a polished look, or keep it natural and undone for a more relaxed vibe
Pro tip: This style is especially stunning when you leave some face-framing pieces loose around your cheeks and temples, creating a softer, more romantic feeling.
Making This Style Work All Week
Half-up, half-down looks fresh for about 5 days with minimal maintenance. At night, protect the gathered section with a bonnet or wrap, and you can actually sleep on the down section fairly freely because it’s less prone to breakage. Refresh the gathered section midweek by misting it lightly with water and re-securing if needed.
8. Two-Strand Twists
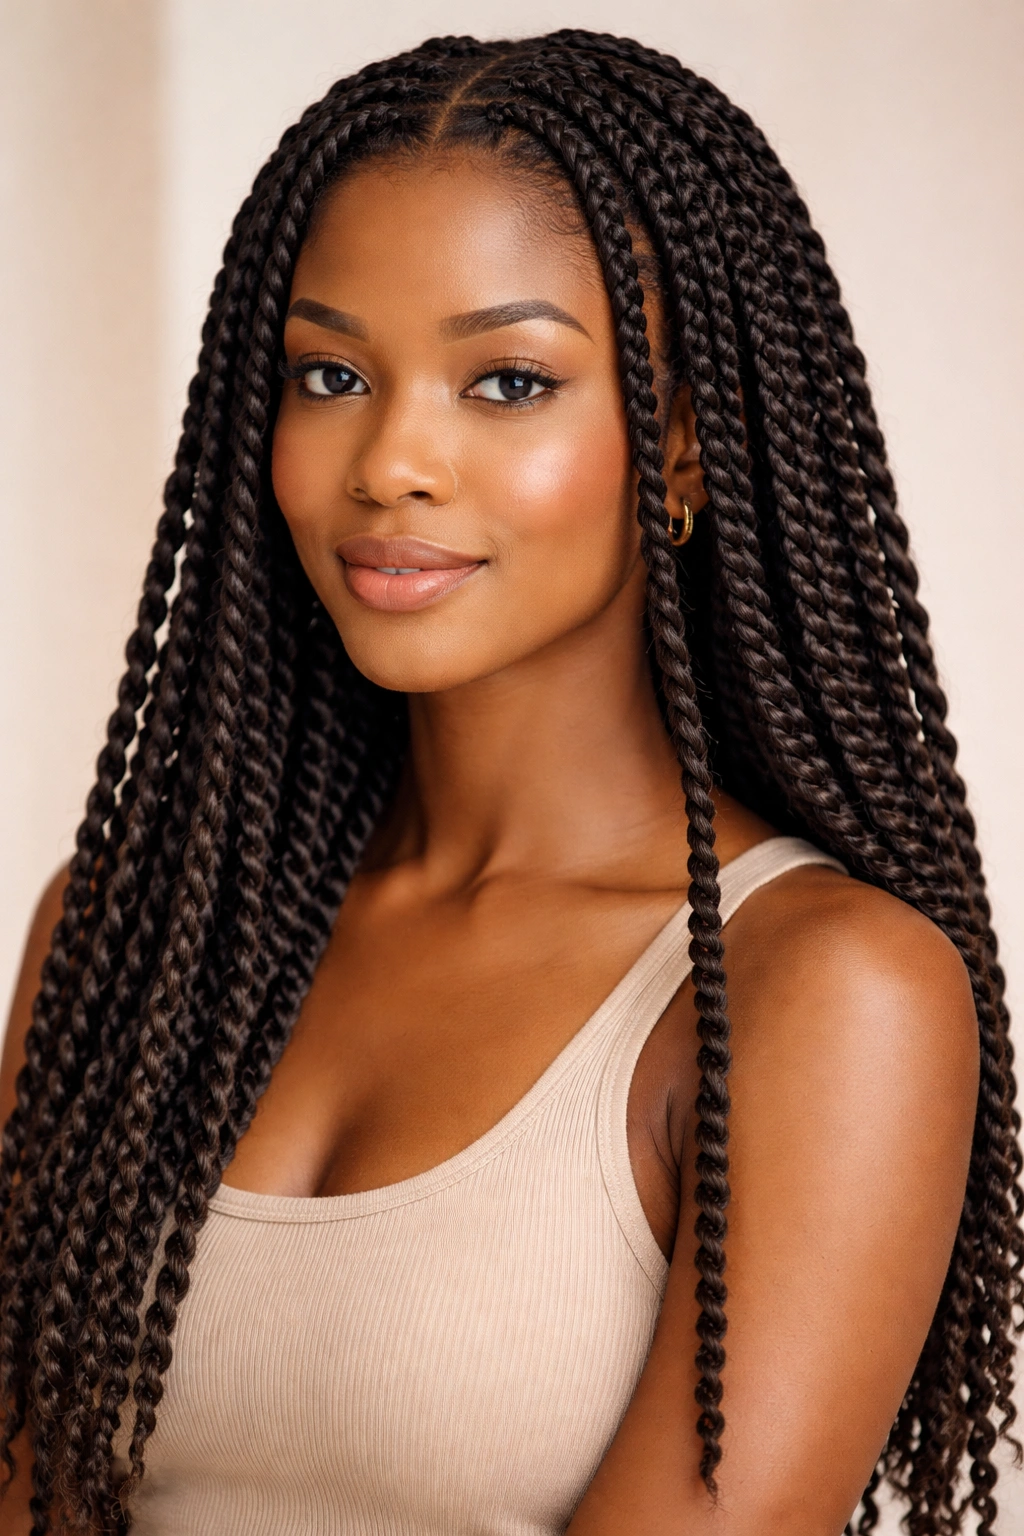
Two-strand twists are created by dividing a section of hair into two strands and twisting them around each other from root to tip, creating a rope-like texture. These twists can be worn as a finished protective style or unraveled later for a wavy, defined texture—they’re incredibly versatile and work on virtually every type of textured hair.
The Versatility of Two-Strand Twists
What makes two-strand twists so appealing is that they’re simple enough for beginners but look polished and intentional. They’re also genuinely protective because your ends are twisted and tucked away, reducing breakage and allowing your hair to retain moisture. You can wear two-strand twists for 2-4 weeks depending on your hair growth and how well you maintain them, and they work on hair of any length and texture.
Creating Two-Strand Twists Step by Step
- Start with freshly washed, damp hair that’s been conditioned and is still wet enough to twist easily
- Section your hair into the number of twists you want (4-6 larger twists are quick, while 10-15 smaller twists create a fuller look)
- Divide one section into two equal strands
- Twist those two strands around each other as you move down the hair shaft, applying slight tension to keep the twist tight
- You can apply styling cream or curl-defining gel to each section before or while twisting for extra definition
- Continue all the way down to the ends and secure each twist with a small elastic or braid band
- Allow twists to air-dry completely, which takes 4-12 hours depending on your hair thickness
Worth knowing: Two-strand twists are tighter and more defined than twist-outs because you’re not unraveling them—they hold their rope-like shape permanently (until you take them down).
Maintaining Twists Over Weeks
Two-strand twists can last 3-4 weeks if you maintain them properly. Protect them at night with a satin bonnet, and refresh your edges and roots every 5-7 days with a little water and styling cream. When you’re ready to take them down, do so gently and deep condition your hair to restore moisture before your next style.
9. Halo Braid
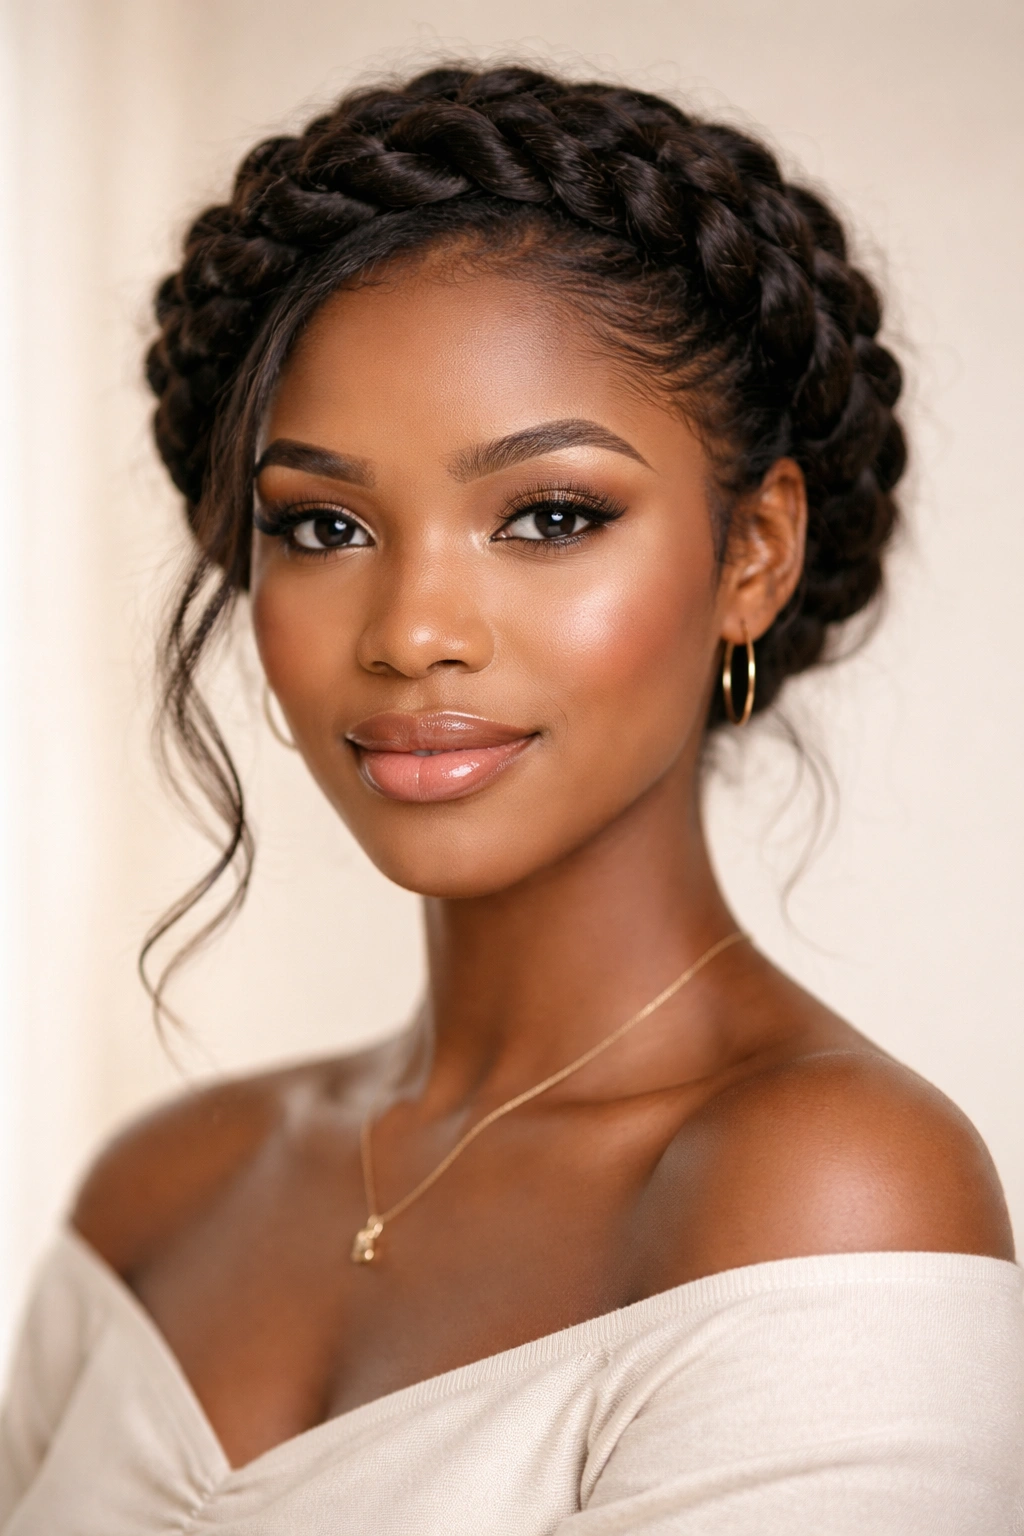
A halo braid is exactly what it sounds like—a braid that wraps around your head like a halo, creating a romantic, ethereal look that’s somehow both soft and polished. This style works beautifully for special occasions, date nights, or whenever you want to feel extra put-together without spending hours on your hair.
Why Halo Braids Are So Stunning
A halo braid creates a frame around your face that’s undeniably flattering, and it has an elegance that simpler styles can’t quite match. Despite looking complicated, halo braids are surprisingly achievable even if you’re not a braiding expert, and they work on straight, wavy, curly, and coily hair. The style also keeps your hair secure and protected while looking intentionally styled.
How to Create a Halo Braid
- Start with damp or freshly washed hair, and brush it back gently away from your face
- Section off a smaller, thinner section of hair from one side of your head, starting near your temple
- Begin braiding this section using a standard three-strand braid technique, but instead of braiding straight down, angle the braid across the back of your head toward the opposite temple
- As you braid, you can add small pieces of hair into the braid from underneath (like a French braid) to incorporate more of your hair as you go around your head
- Braid all the way around your head until you meet the opposite temple where you started
- Secure the end of the braid with bobby pins, tucking it subtly into your hair
- Gently pull at sections of the braid to create texture and fullness, loosening it slightly for a softer, more romantic appearance
Pro tip: This style is easiest if you have someone help you, but it’s absolutely doable solo with a handheld mirror and patience.
Styling and Longevity
A halo braid looks stunning on its own or paired with soft waves in the hair underneath—you can use a curling iron, create a twist-out, or simply work with your natural texture. This style lasts 5-7 days with proper nighttime care, making it perfect for special events or when you want to feel extra put-together for several days in a row.
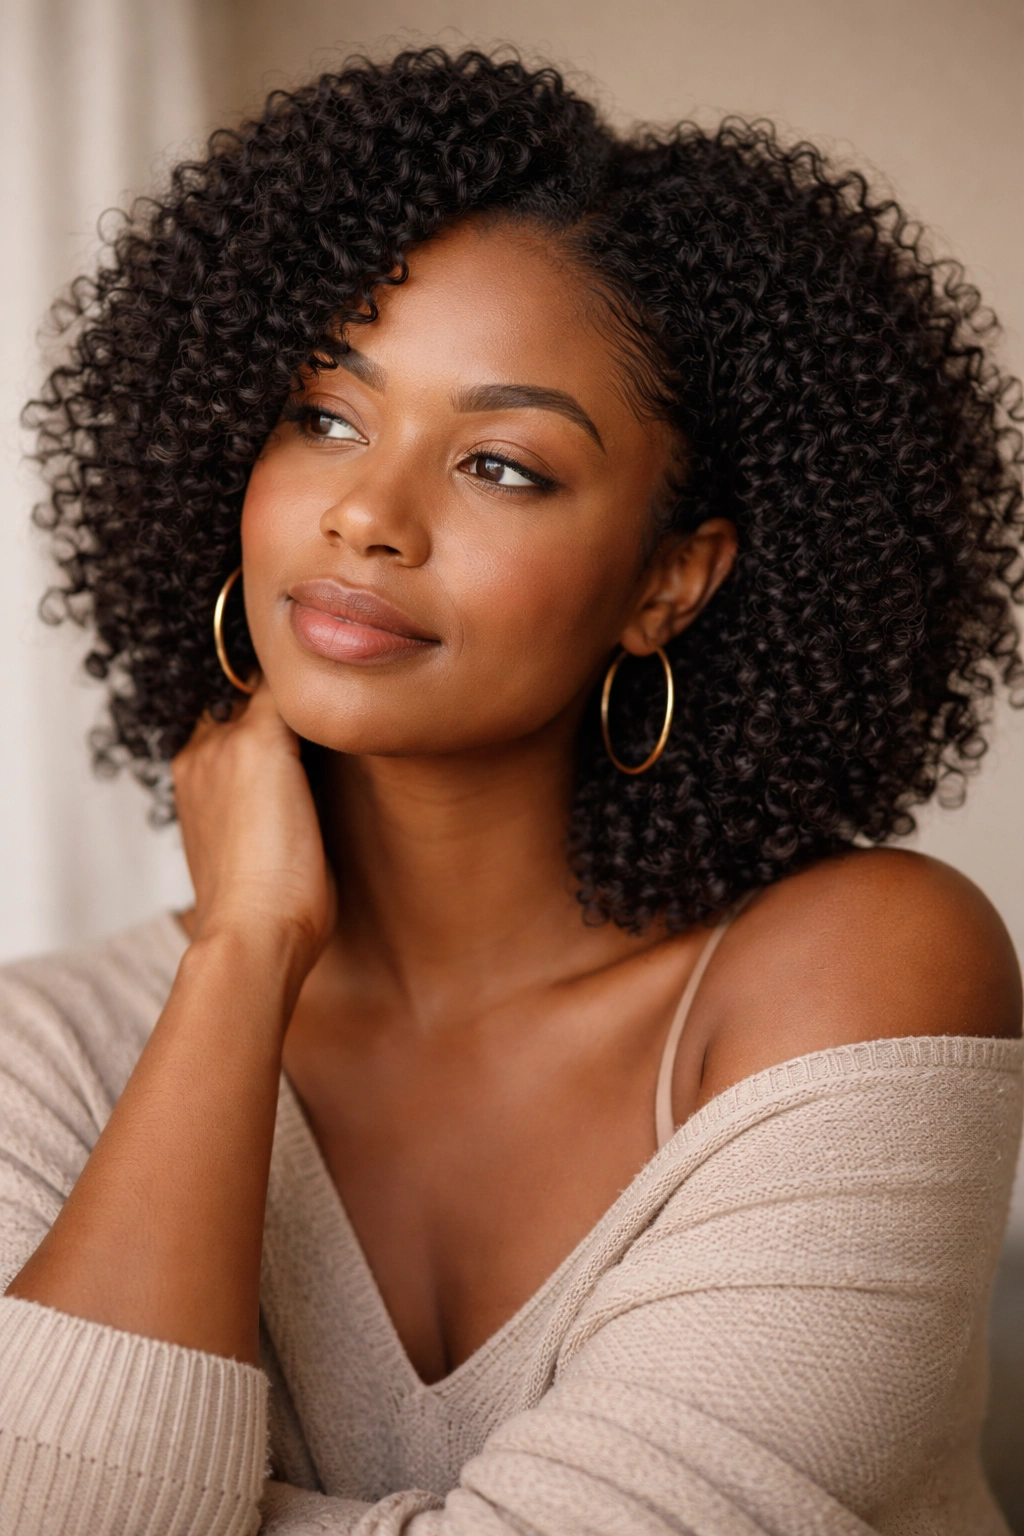
10. Wash-and-Go

A wash-and-go is exactly what the name suggests—you wash your hair, apply styling products while it’s wet, allow it to air-dry, and you’re done. No blow-drying, no styling tools, no braiding or twisting required. For people with naturally curly or coily hair, a well-executed wash-and-go can be the ultimate low-maintenance, high-impact style.
Mastering the Wash-and-Go Technique
A successful wash-and-go starts with the right products. You’ll want a leave-in conditioner or styling cream that defines your curl pattern without leaving your hair crunchy or heavy, and ideally a gel for hold and shine. The key is applying products to soaking-wet hair and then scrunching upward to encourage your curl pattern to form while the hair dries.
Creating Your Best Wash-and-Go
- Wash your hair with a gentle cleanser and deep condition generously
- While your hair is still soaking wet, apply leave-in conditioner from roots to ends, really working it through your strands
- Apply a styling cream or curl-defining product, scrunching it in using an upward motion to encourage curls to form
- If you want extra hold or shine, apply a light gel, again scrunching upward to distribute it evenly
- You can allow your hair to air-dry completely, or you can use a hair dryer on low heat with a diffuser attachment to speed up the process
- Once dry, you can gently separate curls or leave them clumped together depending on the aesthetic you prefer
- Avoid touching or manipulating your hair while it dries to prevent frizz
Real talk: The products you use matter tremendously for wash-and-go success. This is worth investing in a good leave-in conditioner and styling cream that work with your specific curl pattern and hair porosity.
How Long Your Wash-and-Go Lasts
A wash-and-go can look fresh for 3-5 days depending on how you sleep on it and your hair’s natural moisture levels. To extend the lifespan, sleep on a satin pillowcase or in a satin bonnet, and you can refresh curls midweek by misting with water and scrunching them back into shape.
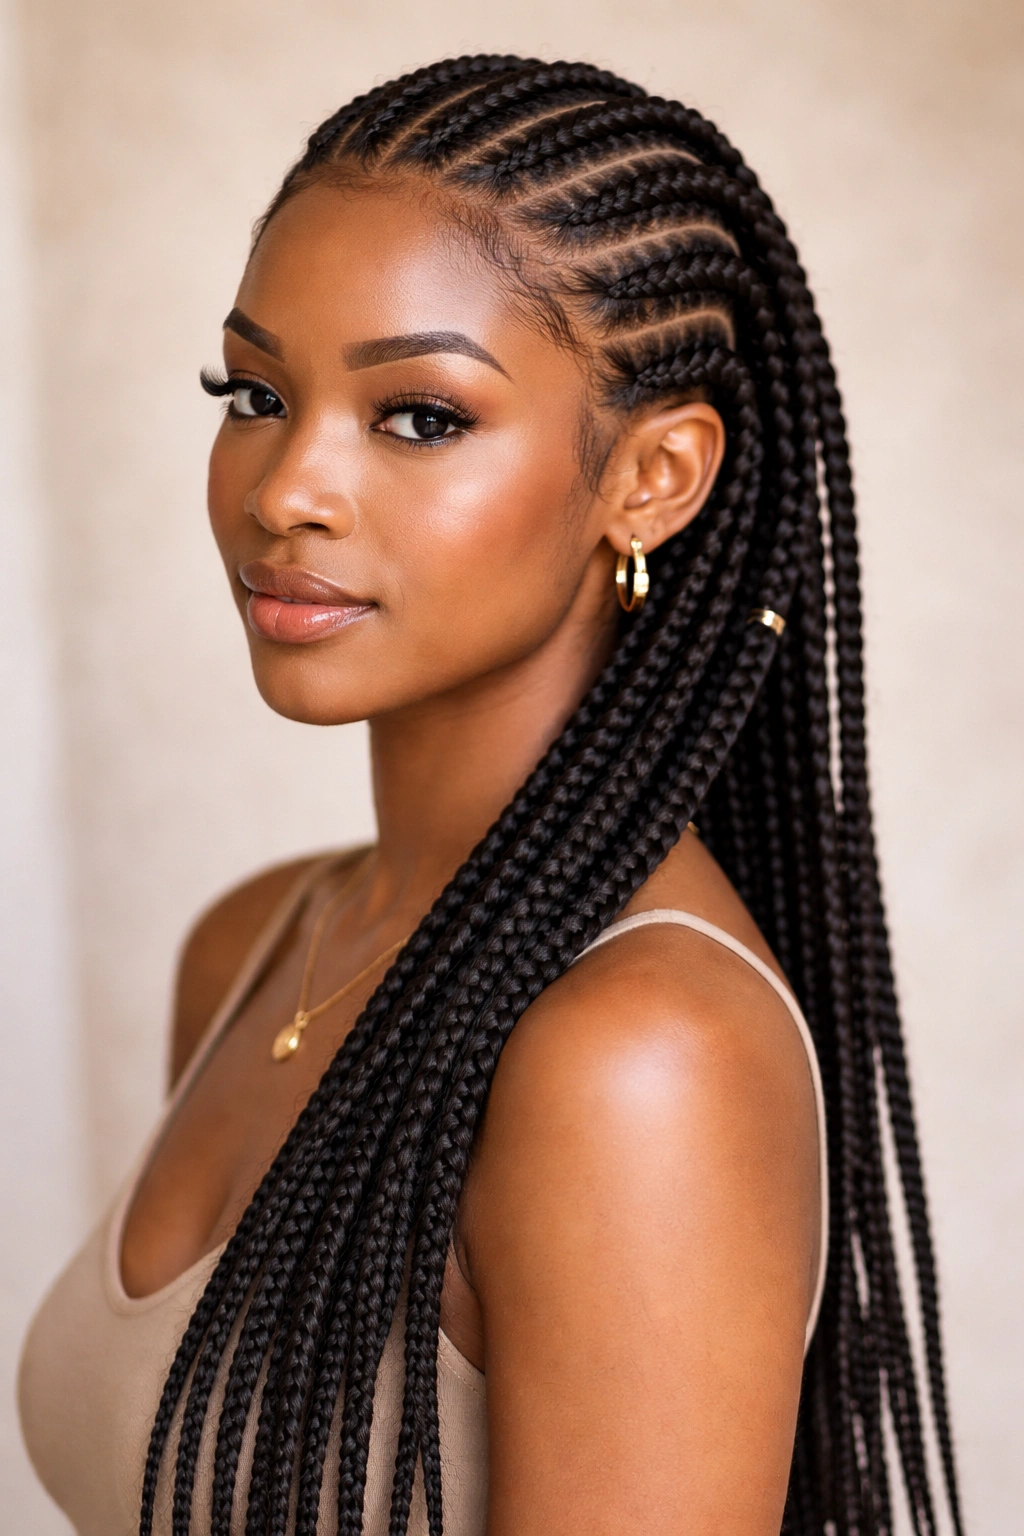
11. Box Braids
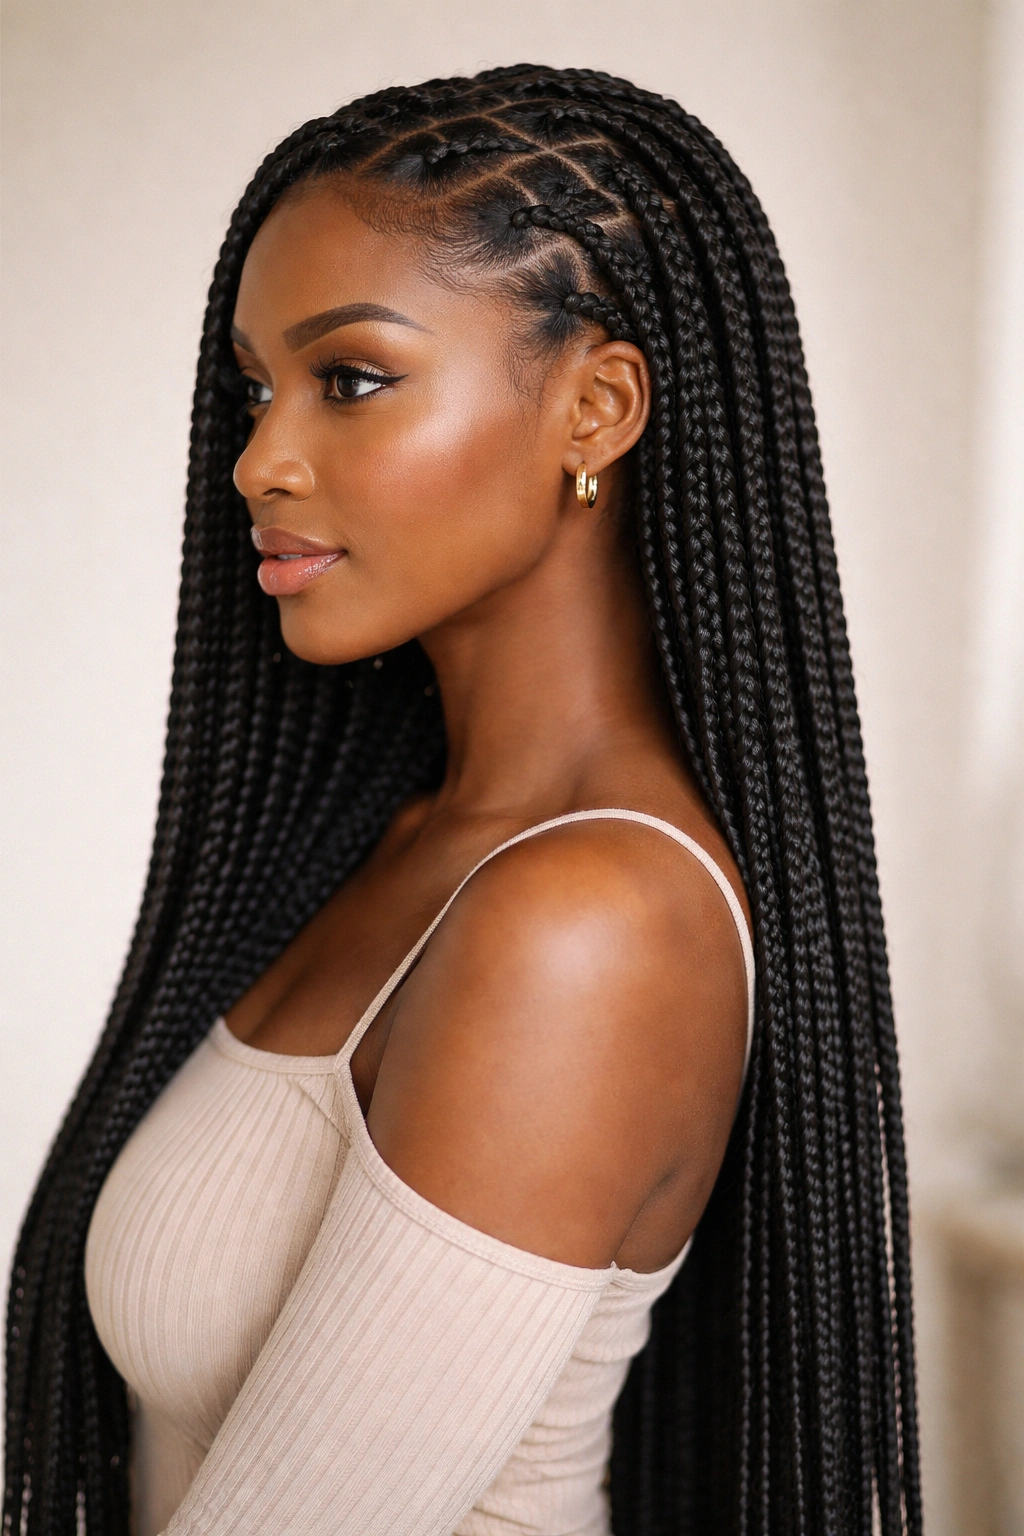
Box braids are individual braids that create square-shaped sections on your scalp, made by dividing your hair into boxes and braiding synthetic hair or your own hair into thick, defined braids. These braids are a classic protective style that can be worn for weeks while requiring minimal daily maintenance.
The Protective Power of Box Braids
Box braids are one of the most effective protective styles because your actual hair is completely tucked away and secure, minimizing breakage and manipulation. You can wear box braids for 6-8 weeks if they’re well-maintained, during which time your hair is continuously protected and able to grow and retain length. Box braids also offer incredible versatility—you can style them up, down, in buns, with jewelry, and in countless creative ways.
Creating Box Braids (Professional vs. DIY)
Box braids can be done professionally or at home. If you’re doing them yourself:
- Section your hair into neat, even boxes using a rattail comb—the more even your sections, the better your braids will look
- Braid each section from the scalp down to the ends, incorporating synthetic hair if you’re using it for length or volume
- Keep tension consistent but not painfully tight—protect your hairline by avoiding excessive tension
- Secure the ends of each braid with a small elastic
Important: If you’re new to braiding, consider getting your first set done professionally so you can see the proper technique and understand what finished braids should look like.
Maintaining Box Braids for Longevity
Keep your braids looking fresh by protecting them at night with a bonnet and washing them every 1-2 weeks with a gentle cleanser applied to your scalp. After 4-5 weeks, you can re-braid the roots (the new growth that’s emerged at your scalp) to extend the life of your braids by another 2-3 weeks. When you’re ready to take them down, do so gently and deep condition your hair thoroughly before your next style.
12. Claw Clip Curls
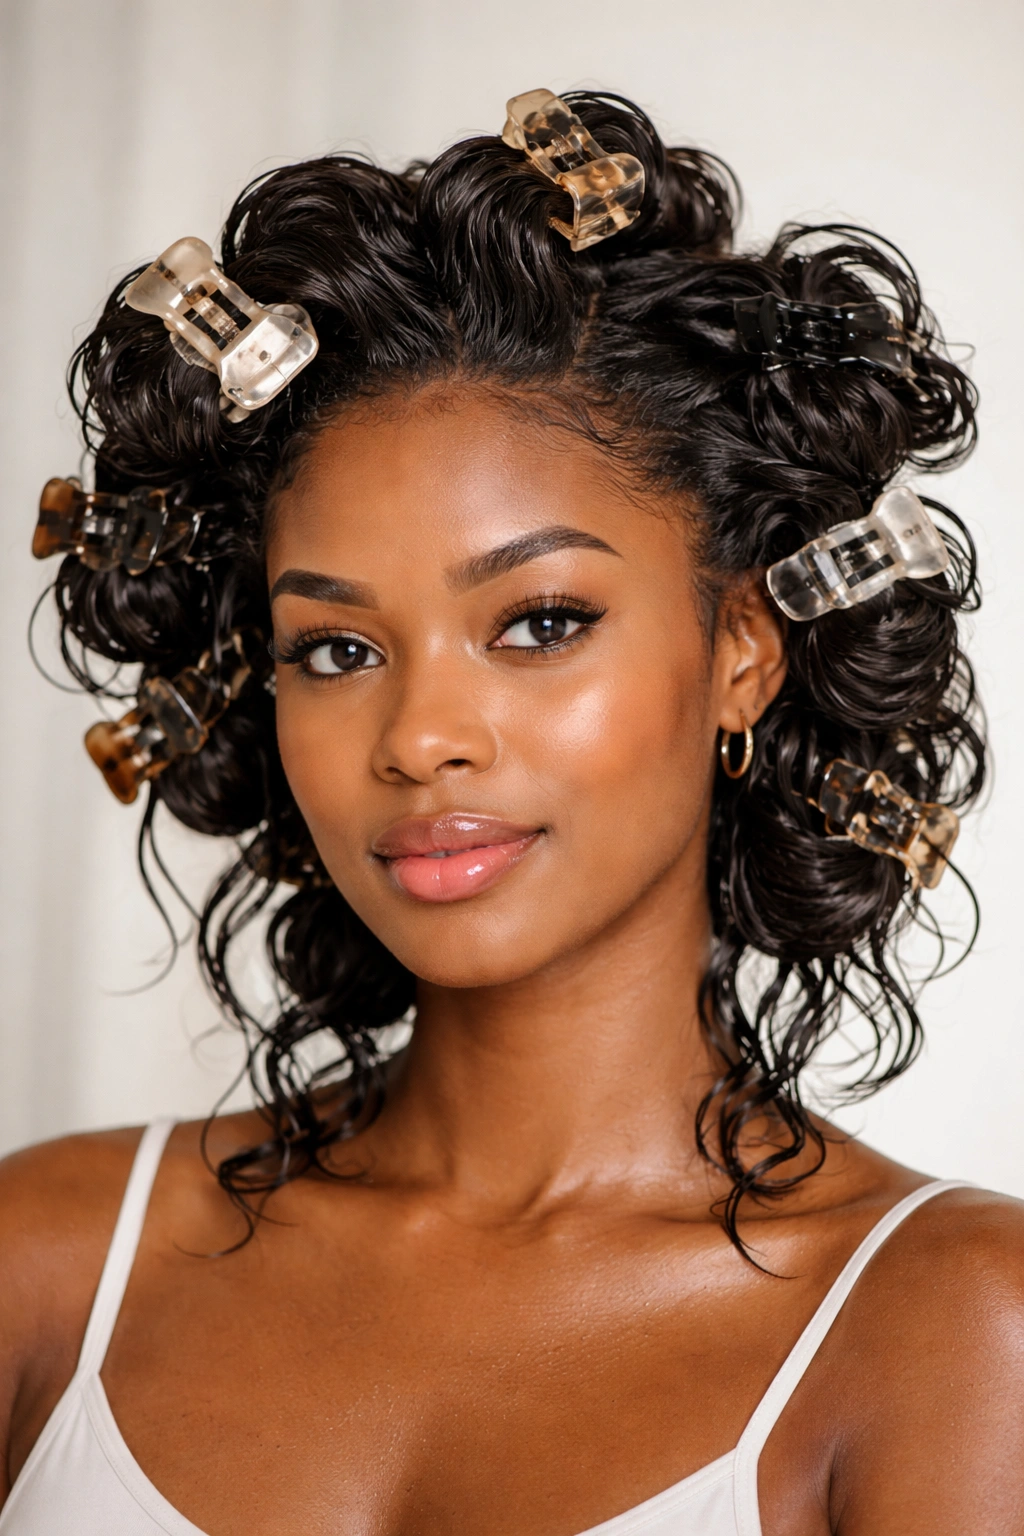
Claw clip curls are created by wrapping damp hair around a claw clip and allowing it to dry, creating soft, bouncy curls without heat. This technique is incredibly simple, works on multiple hair types, and creates a romantic, effortless aesthetic that’s been beloved for good reason.
Why Claw Clip Curls Are Genius
Claw clip curls require literally zero heat and almost zero skill—if you can use a hair clip, you can create this style. It works on straight hair, wavy hair, and curly hair, and it works on damp hair, dry hair, or even lightly moisturized hair. The curls you create are soft and bouncy rather than tight and structured, which means they have a very “I woke up like this” energy that’s surprisingly flattering.
How to Create Claw Clip Curls
- Start with damp hair (not soaking wet, but noticeably damp)
- Take a section of hair about 2-3 inches wide
- Wrap this section around the barrel of a claw clip, with the ends of your hair tucked into the clip
- Secure the clip by closing it, which holds the wrapped hair in a spiral shape
- Repeat with multiple sections all over your head—you can do 4-6 clips depending on how many curls you want
- Allow the clips to stay in until your hair is completely dry, which takes 2-8 hours depending on your hair thickness and the moisture level
- Carefully open each clip and release the curl, gently separating the curl into smaller sections if desired
Pro tip: You can create these curls before bed, sleep in the clips (they’re surprisingly comfortable), and wake up with beautiful curls already set. This is the ultimate low-effort, high-reward styling method.
Styling and Longevity
Claw clip curls look stunning on their own or paired with a half-up section for variety. The curls typically last 3-5 days depending on your hair’s natural curl pattern and how you sleep on them. Protect them at night by sleeping on a satin pillowcase or using a satin bonnet, and you can refresh them midweek by misting with water and re-clipping.
Final Thoughts
Every single one of these hairstyles celebrates what makes textured hair beautiful—the natural curl, coil, and texture that doesn’t require heat styling or complex techniques to look intentional and polished. Whether you’re drawn to the simplicity of a wash-and-go, the protective benefits of braids, or the playful energy of space buns, there’s a style here that matches your lifestyle, your skill level, and your personal aesthetic.
The most important thing to remember is that these styles should feel good on your scalp and look good to your eye. None of them should cause pain, tension, or discomfort—if a style is pulling too tightly or causing headaches, you’re pulling too hard. Your hair health is always the priority, and the most beautiful style in the world isn’t worth damaged edges or a sore scalp.
Give yourself permission to try each style multiple times before deciding if it’s for you. The first time you create a halo braid or twist-out probably won’t look exactly like you imagined, but the third or fourth time, you’ll develop a feel for it and the style will become second nature. Have fun experimenting, lean into your natural texture, and remember that your hair is a canvas for creativity—these styles are just the beginning of what’s possible.