Hair naturally loses density over time, and that’s just biology. But what isn’t inevitable is accepting flat, lifeless hair that doesn’t reflect the vitality and confidence you actually feel. The right haircut can transform your entire appearance — adding dimension where your hair needs it most, creating the illusion of thicker strands, and giving you the kind of bounce and movement that makes you feel genuinely good when you catch your reflection.
The secret isn’t about chasing youth or fighting age. It’s about working with the hair you have right now, understanding which cuts and techniques amplify natural texture, and choosing styles that frame your face while building volume where it matters most. Whether your hair is fine, wavy, curly, or somewhere in between, there’s a volume-boosting style that will feel like it was made specifically for you.
Volume isn’t just about looking fuller — it’s about looking polished, energetic, and intentional. A well-cut, properly styled volumized hairstyle can brighten your complexion, define your bone structure, and give you the kind of confidence that comes from knowing your hair looks genuinely good. What follows are twenty proven styles that do exactly that, each with specific techniques you can ask your stylist to create and simple styling methods you can maintain at home.
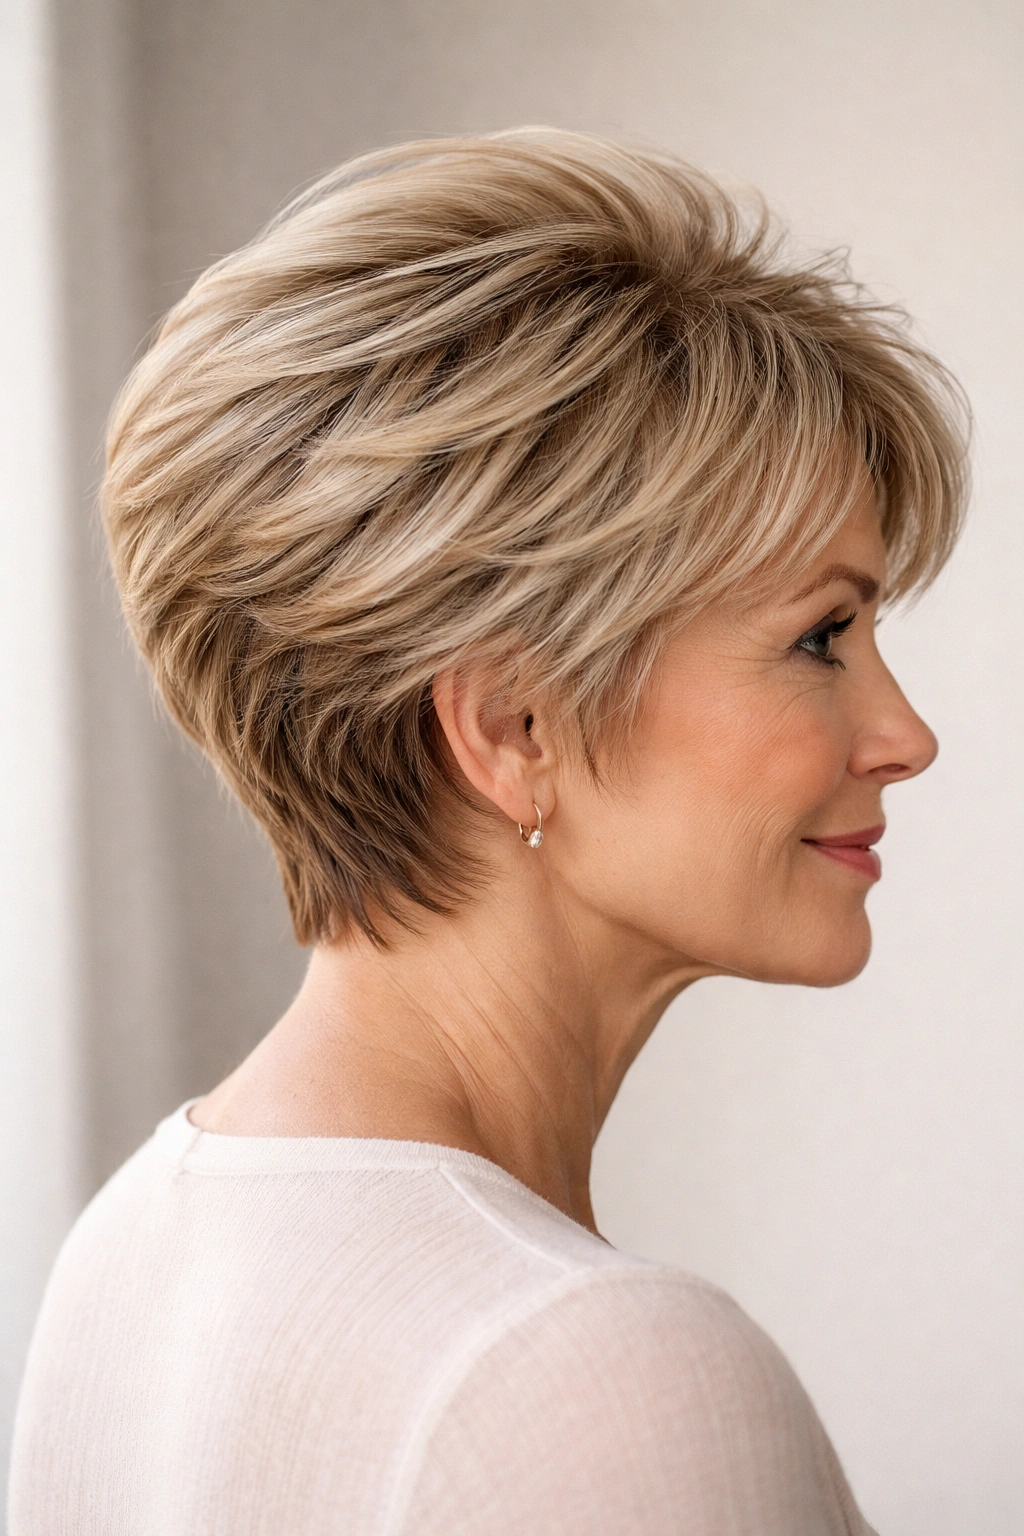
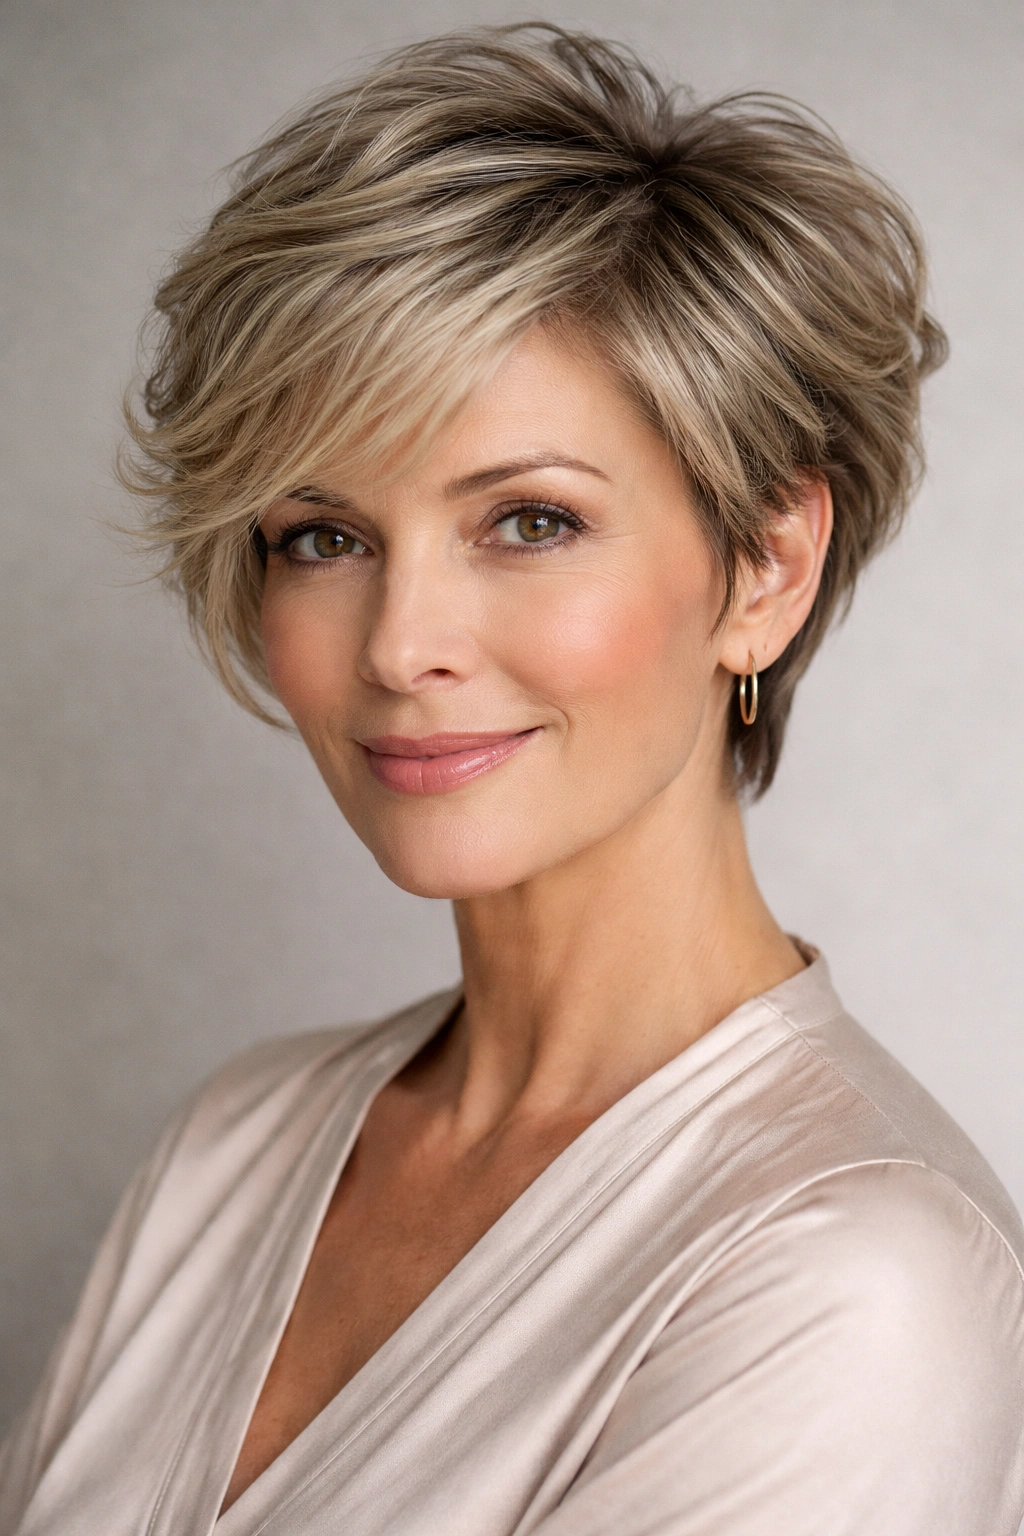
1. The Textured Pixie Cut
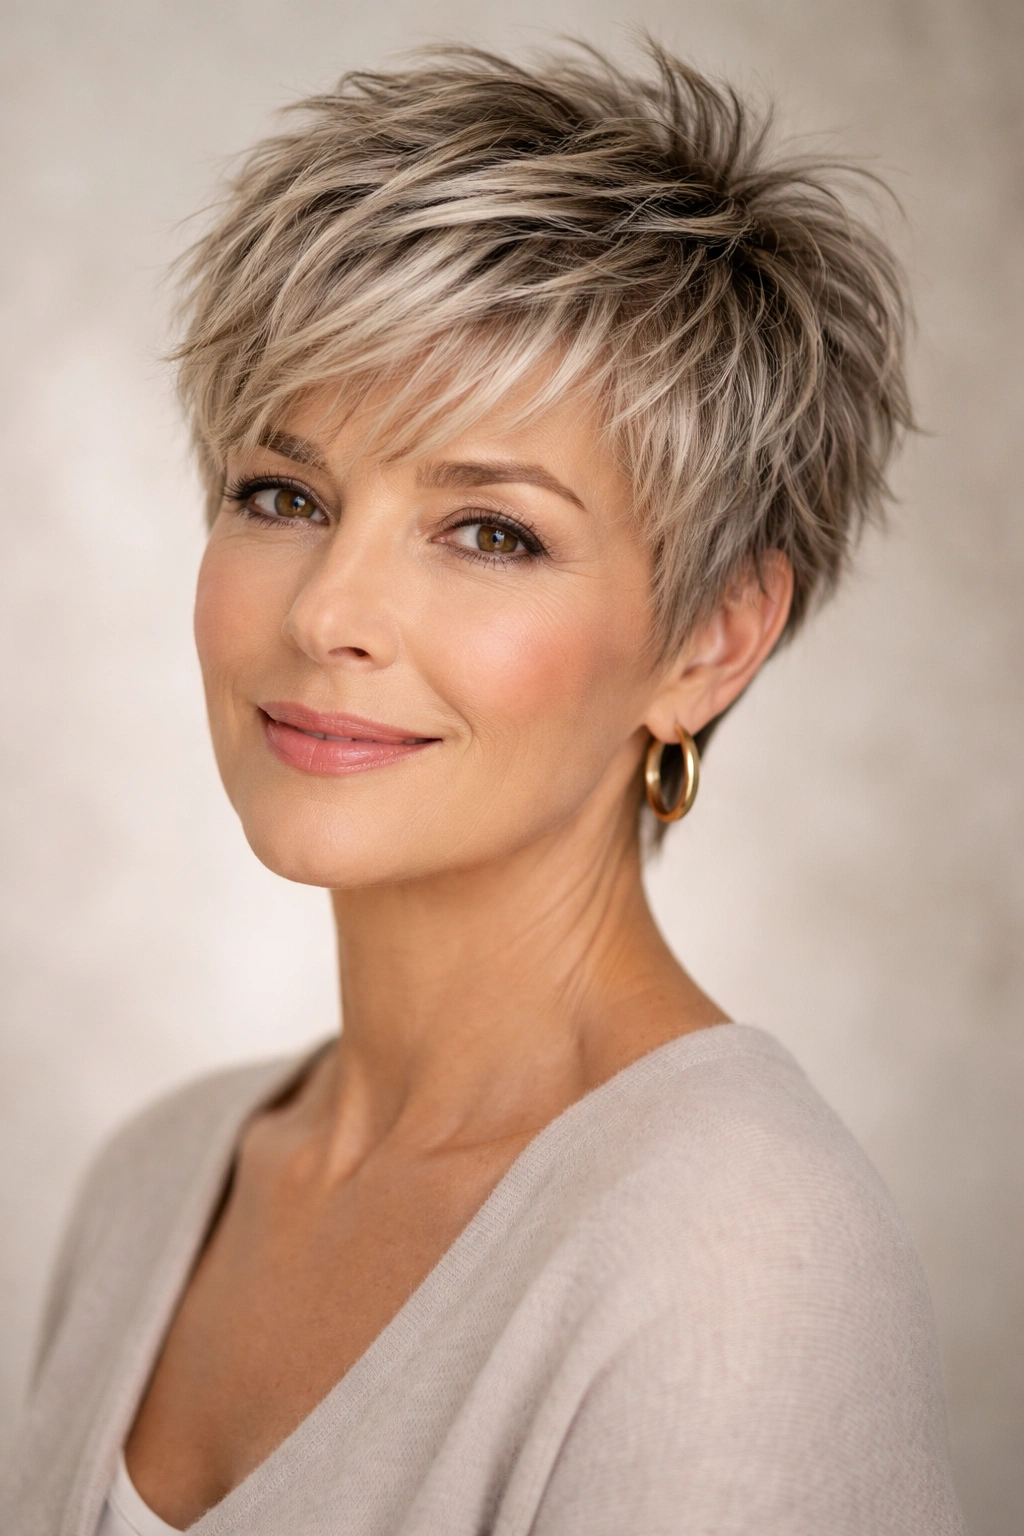
A pixie cut might seem like it’s only for the bold, but a textured version is one of the most flattering styles for adding volume to finer hair. The key is in the layering — your stylist cuts shorter layers on top and around the crown while keeping slightly more length through the sides, creating dimension that makes hair appear thicker from every angle.
Why It Works for Fine Hair
Pixie cuts eliminate the weight that pulls fine hair flat. When you remove bulk and add texture through choppy, disconnected layers, each individual strand has room to move and catch light. The shorter length makes every hair visible and contributes to the overall volume impression — there’s no heavy bottom that drags everything down.
How to Style and Maintain It
- Use a lightweight texturizing spray or sea salt spray on damp hair for grip and movement
- Blow dry with a round brush, lifting roots and directing hair in different directions
- Apply a small amount of matte pomade or clay to separate layers and add definition
- Visit your stylist every 4-6 weeks to maintain the shape and keep layers crisp
Pro tip: Ask your colorist about adding subtle dimension with highlights — lighter tones create the optical illusion of thicker hair by breaking up solid color and adding depth.
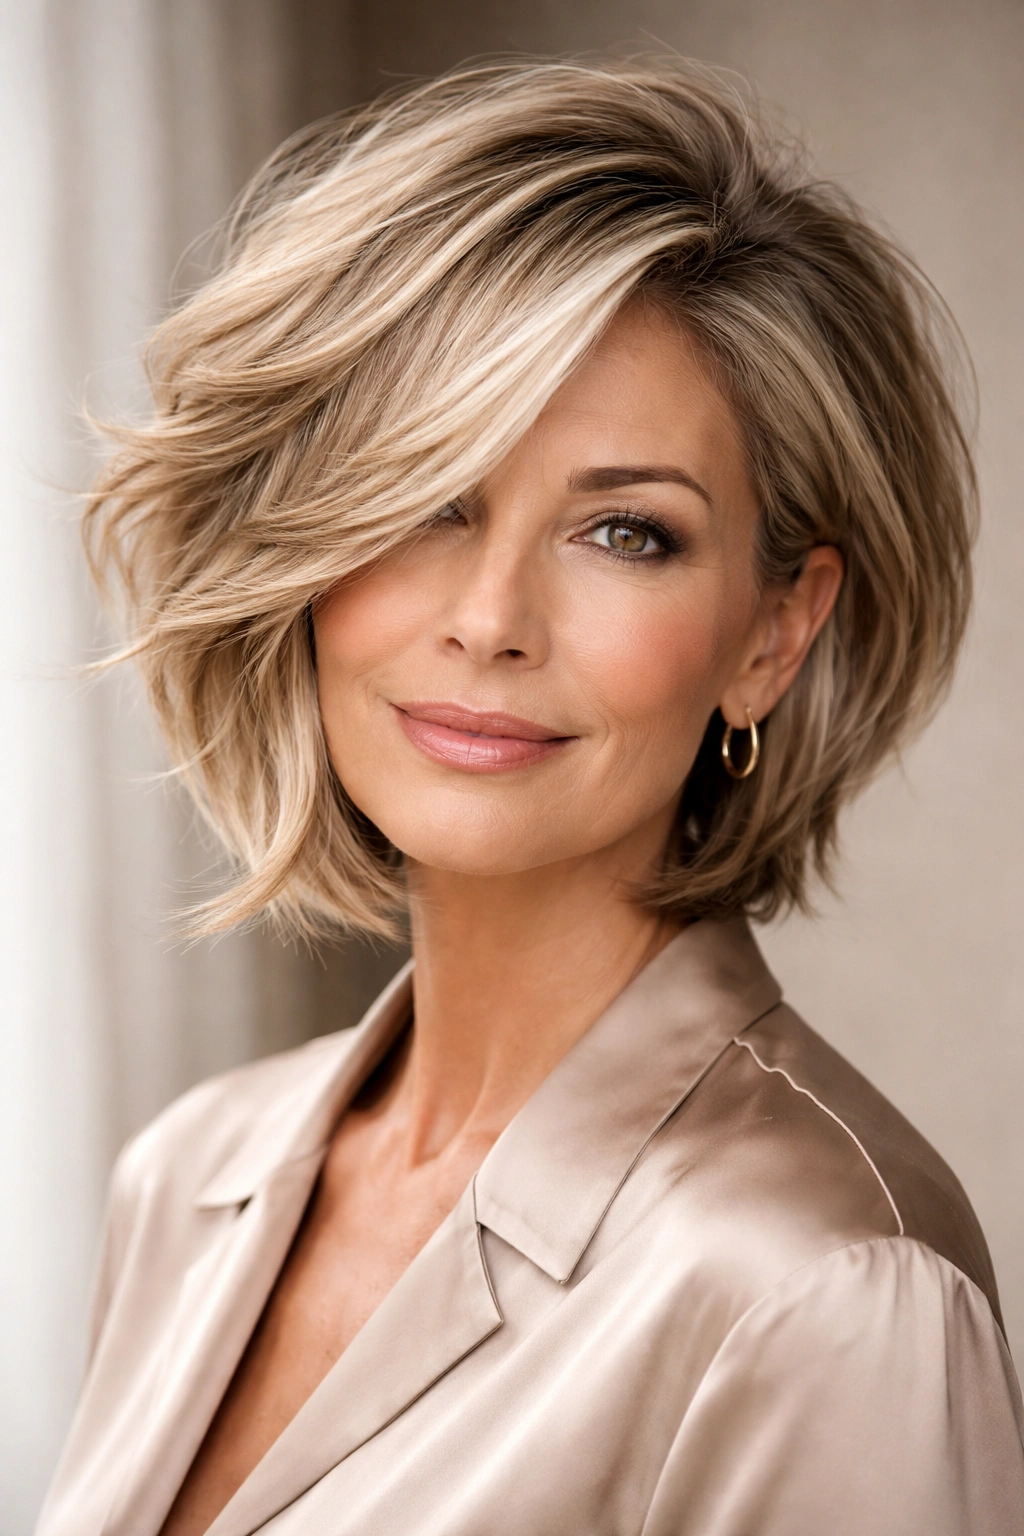
2. Layered Bob with Volume at the Crown
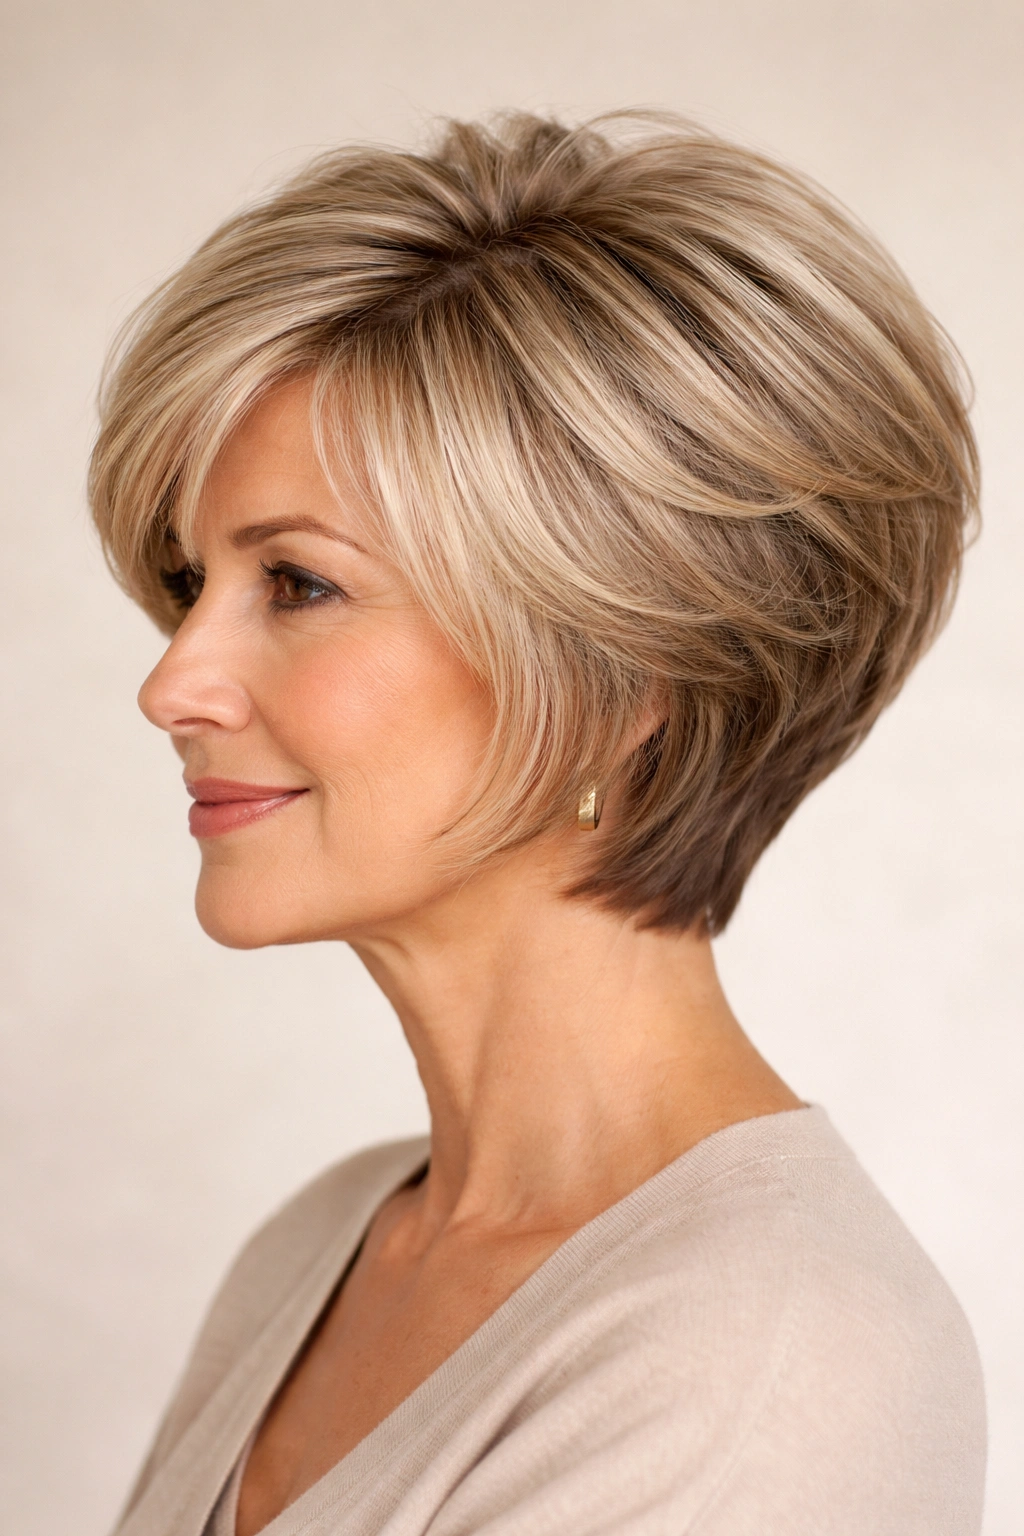
The bob is a timeless choice, but a strategic layered bob is engineered specifically for volume. Rather than a blunt cut that can look flat, this style has shorter, choppy layers concentrated at the crown while maintaining enough length in the back to frame the neck.
The Architecture Behind the Volume
Layers cut perpendicular to the head create lift at the roots. When your stylist adds shorter choppy pieces through the crown area, they’re reducing weight while creating texture that holds a shape. The result is a style that naturally sits away from the scalp rather than clinging to it.
Styling Tips for Maximum Impact
- Blow dry roots first with a round brush, lifting and separating layers as you dry
- Use a blow dryer on medium heat to avoid damaging fine hair while still creating movement
- Apply volumizing mousse to damp roots before blow drying for lasting lift
- Consider a light texturizing spray to enhance the choppy layers and prevent flatness
Insider note: A layered bob works beautifully with both straight and wavy hair — ask your stylist how the layers will interact with your natural texture.
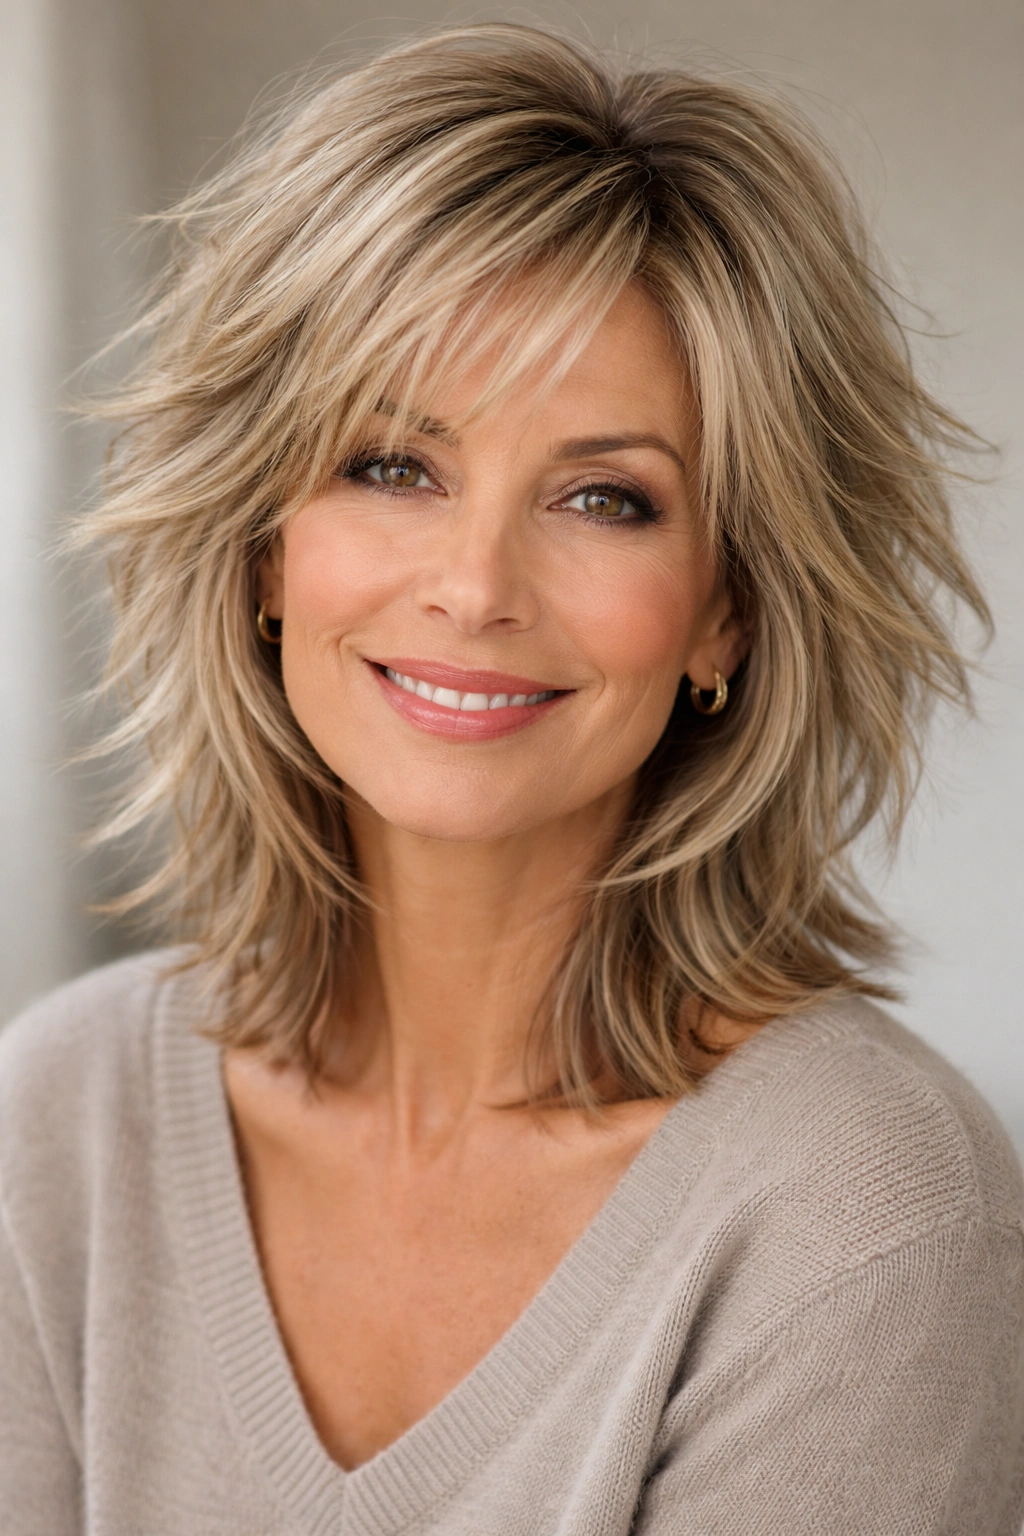
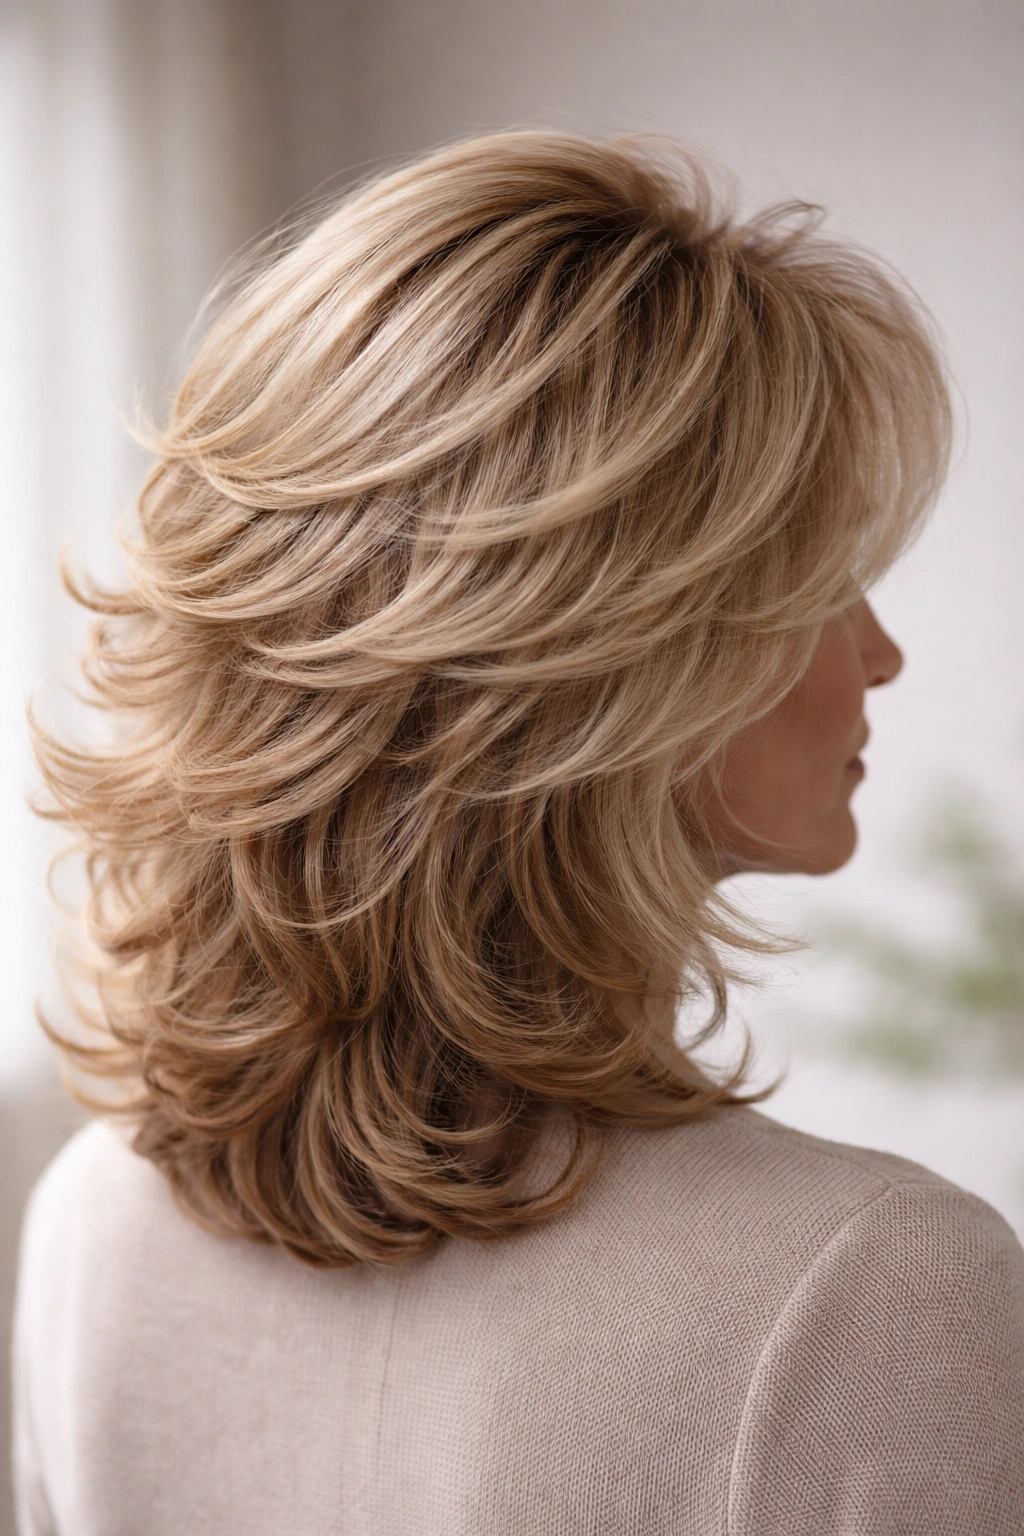
3. Modern Shag Cut
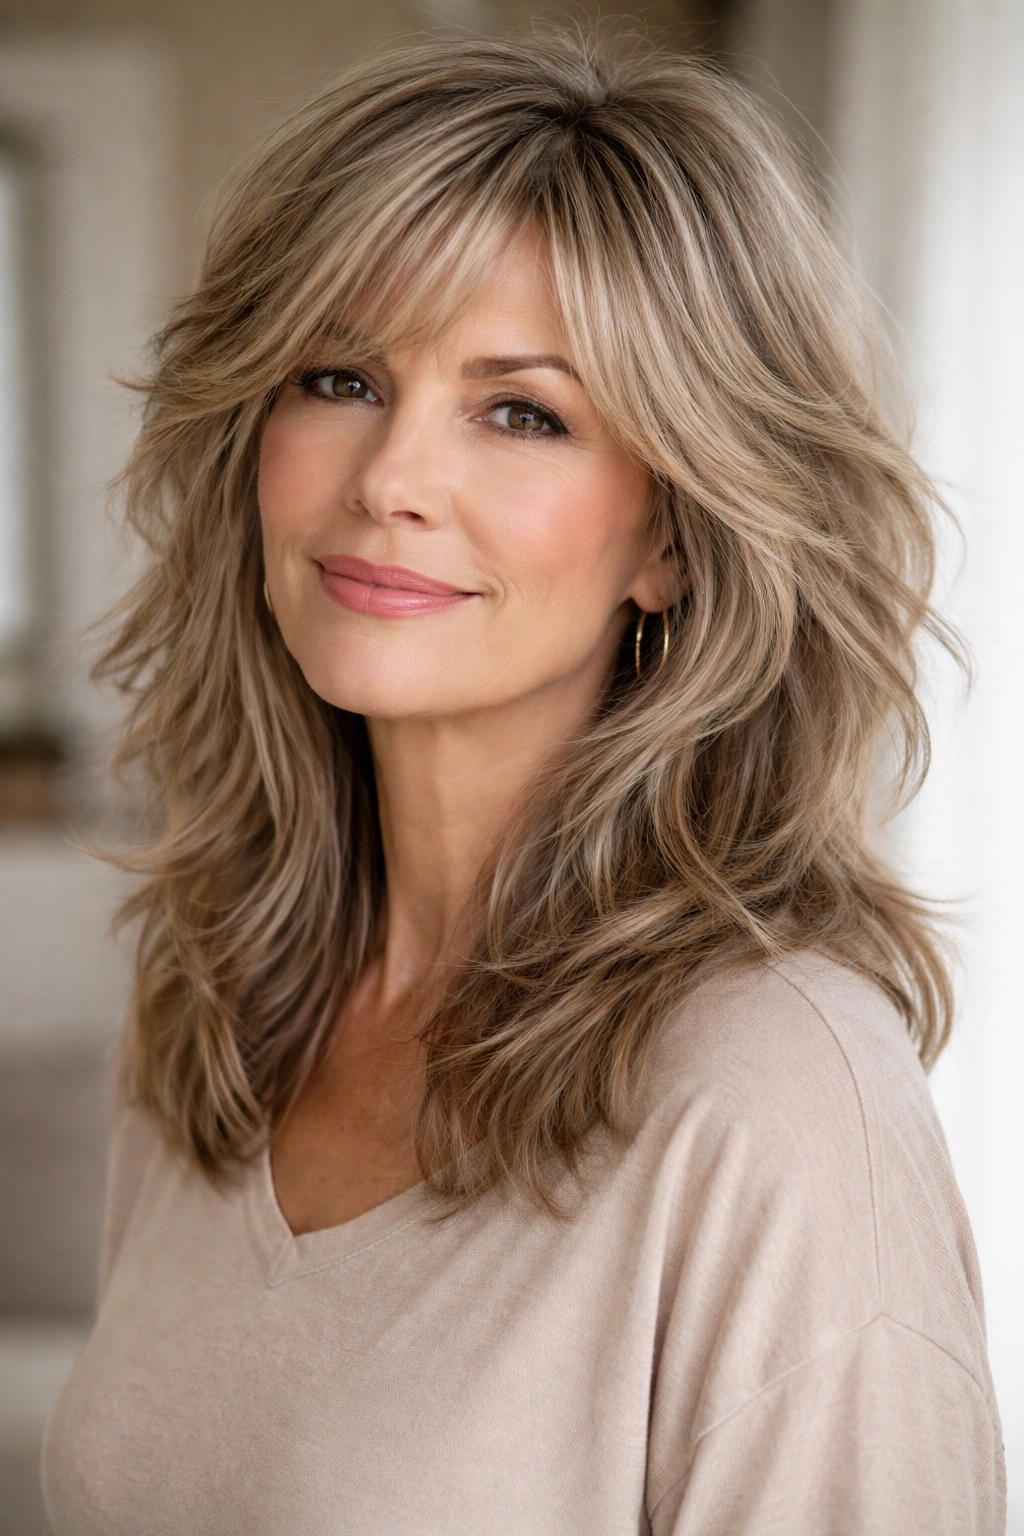
The shag has evolved far beyond the 1970s version into a sophisticated, elegant cut that absolutely excels at creating volume. This style features longer layers that start high on the head, creating movement and texture throughout while maintaining length that many women prefer.
What Makes This Different From a Dated Shag
Modern shags are all about intentional placement. The layers are cut to work with your natural wave or curl pattern, not against it. The choppy texture feels current because it’s refined — not messy, but deliberately undone in the most flattering way.
How to Wear It Confidently
- Enhance your natural wave with a curling iron or ocean-wave spray for definition
- Use a texturizing spray on dry hair to separate layers and prevent clumping
- Consider adding face-framing pieces that fall around your cheekbones for a slimming effect
- Blow dry with a diffuser if you have natural curl, or with a round brush if you prefer straighter texture
A shag truly shines when you embrace some texture — this isn’t a style for sleek, perfectly smooth hair, and that’s exactly what makes it feel current and effortless.
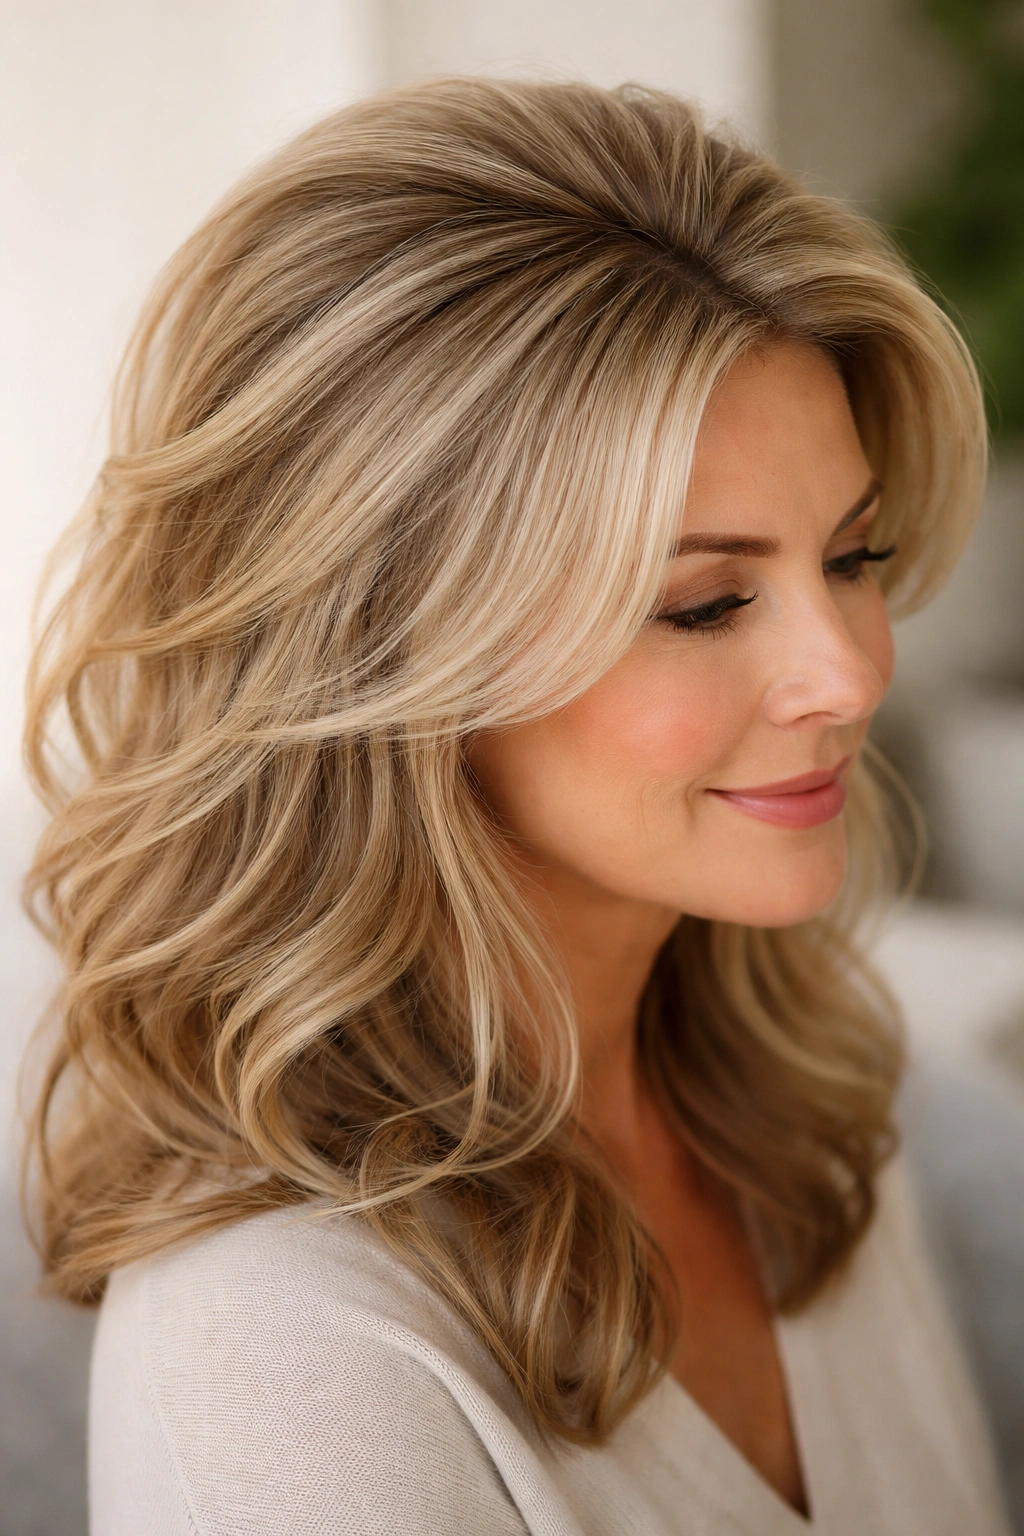
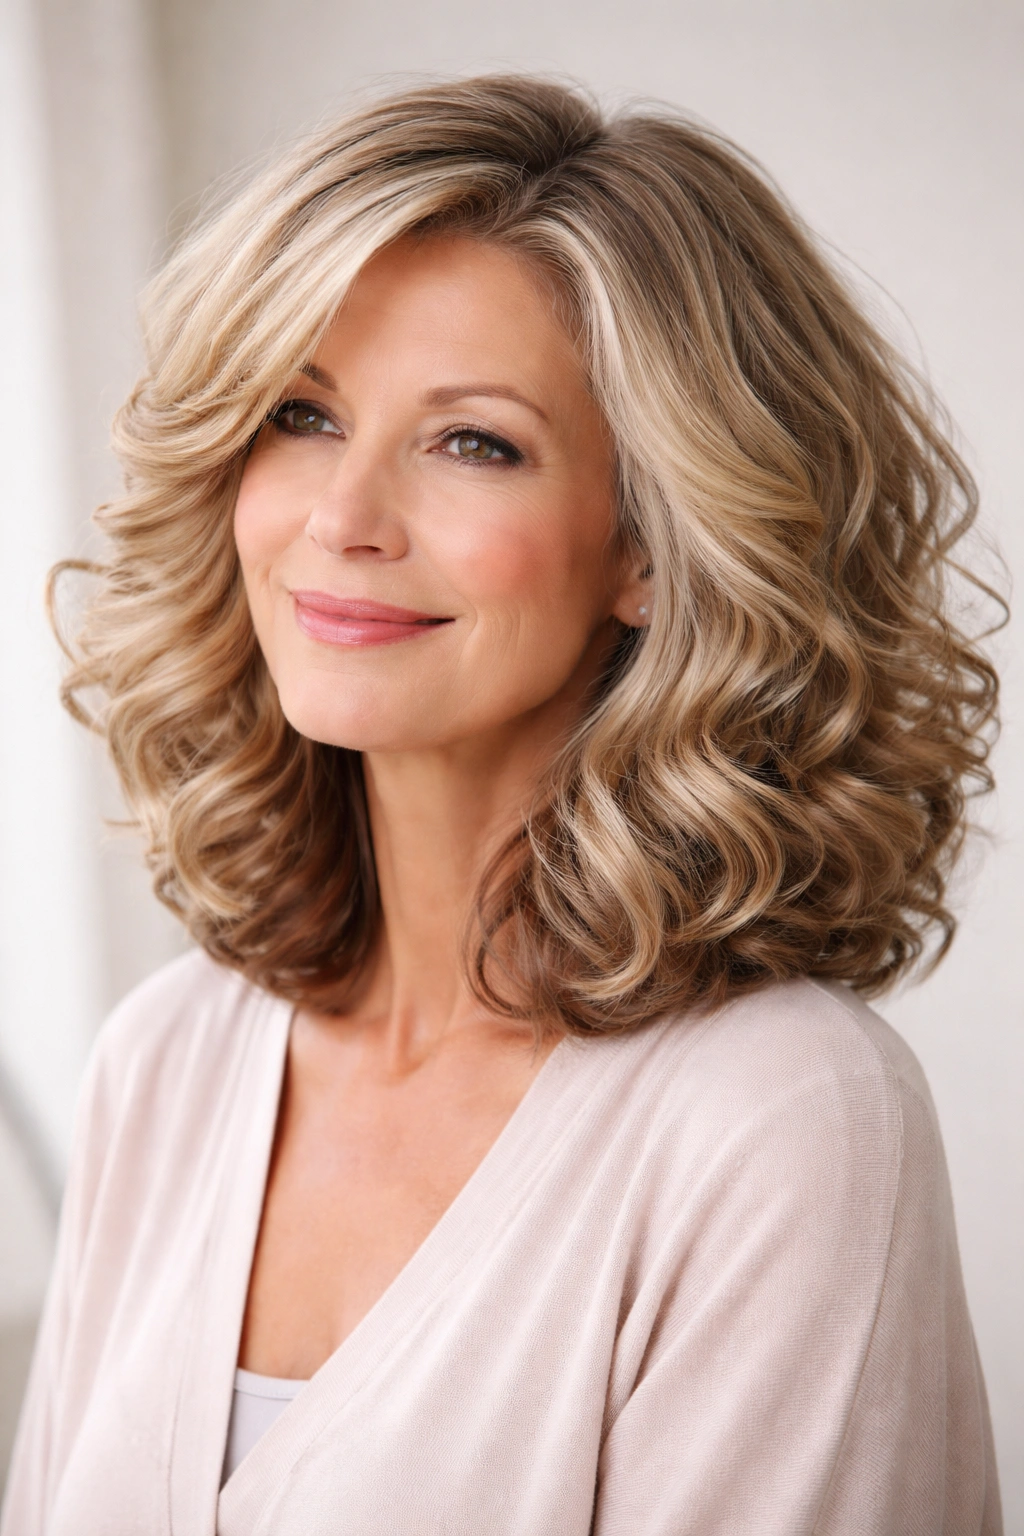
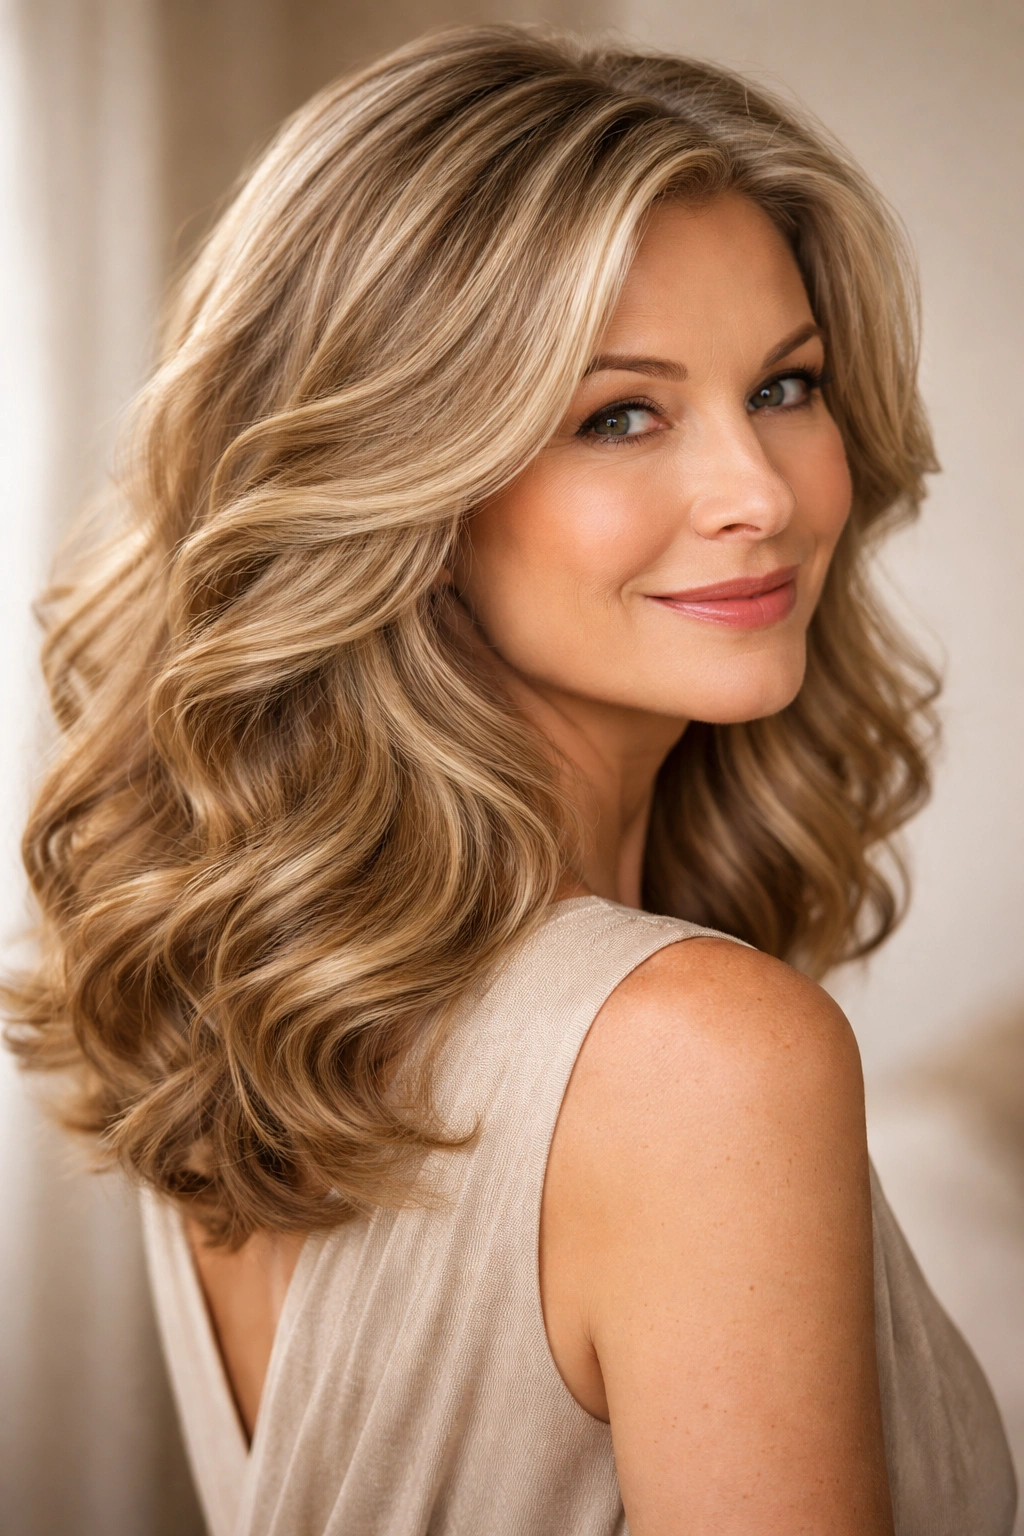
4. Curled Shoulder-Length Style
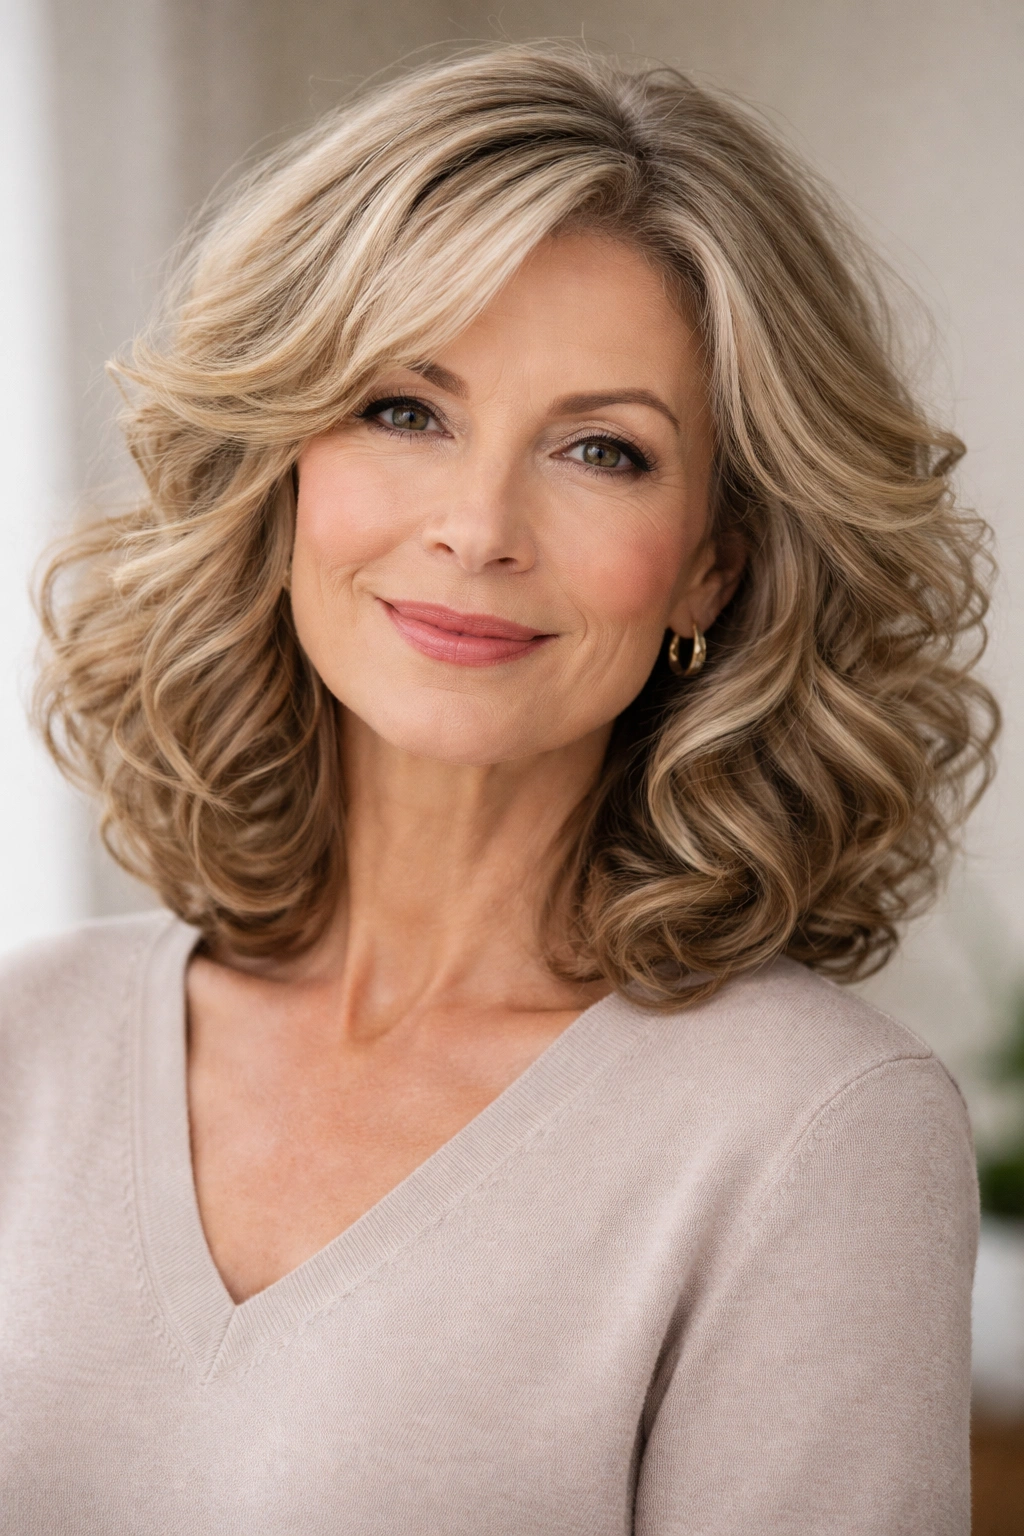
Shoulder-length hair is the perfect canvas for creating volume through curl and wave. This length is long enough to feel feminine and polished, but short enough that curls don’t weigh the hair down — instead, they add body and movement throughout.
The Science of Curl-Created Volume
Curls and waves naturally occupy more space than straight hair. A shoulder-length curl has a smaller surface area pressed against your scalp, which means more of your hair is lifted away from your head. This is why curly hair naturally appears thicker than straight hair of the same density.
Achieving This Look at Home
- Use a 1.25-inch curling iron on damp, product-primed hair for defined curls
- Curl away from your face on both sides for a flattering frame
- Allow curls to cool completely before running your fingers through them
- Finish with a flexible-hold hairspray that keeps curl definition without stiffness
Worth knowing: This style looks stunning with some face-framing layers that curl more loosely — the contrast between tighter curls at the crown and looser waves around your face is incredibly flattering.
5. Voluminous Asymmetrical Lob
An asymmetrical lob — longer in the front, shorter in the back — creates the optical illusion of more volume through movement and flow. The longer front pieces catch light and draw attention to your face, while the shorter back sits higher on the head, creating inherent lift.
Why Asymmetry Creates Volume
When one side is shorter, it naturally sits higher and appears fuller. The longer front pieces create movement that’s independent of the back, so even fine hair appears to have more dimension and texture. There’s also a modern, intentional quality that feels polished rather than like an accident.
Styling This Everyday
- Blow dry the shorter back section with a round brush to create lift at the roots
- Let the longer front pieces air dry or gently curl them toward your face
- Use a dry texturizing spray on the back section to enhance volume
- Consider side-parting to emphasize the asymmetry and add intentionality
The beauty of this cut is that it works beautifully both straight and with some wave — you have flexibility depending on your mood and how much styling time you want to invest.
6. Face-Framing Layers
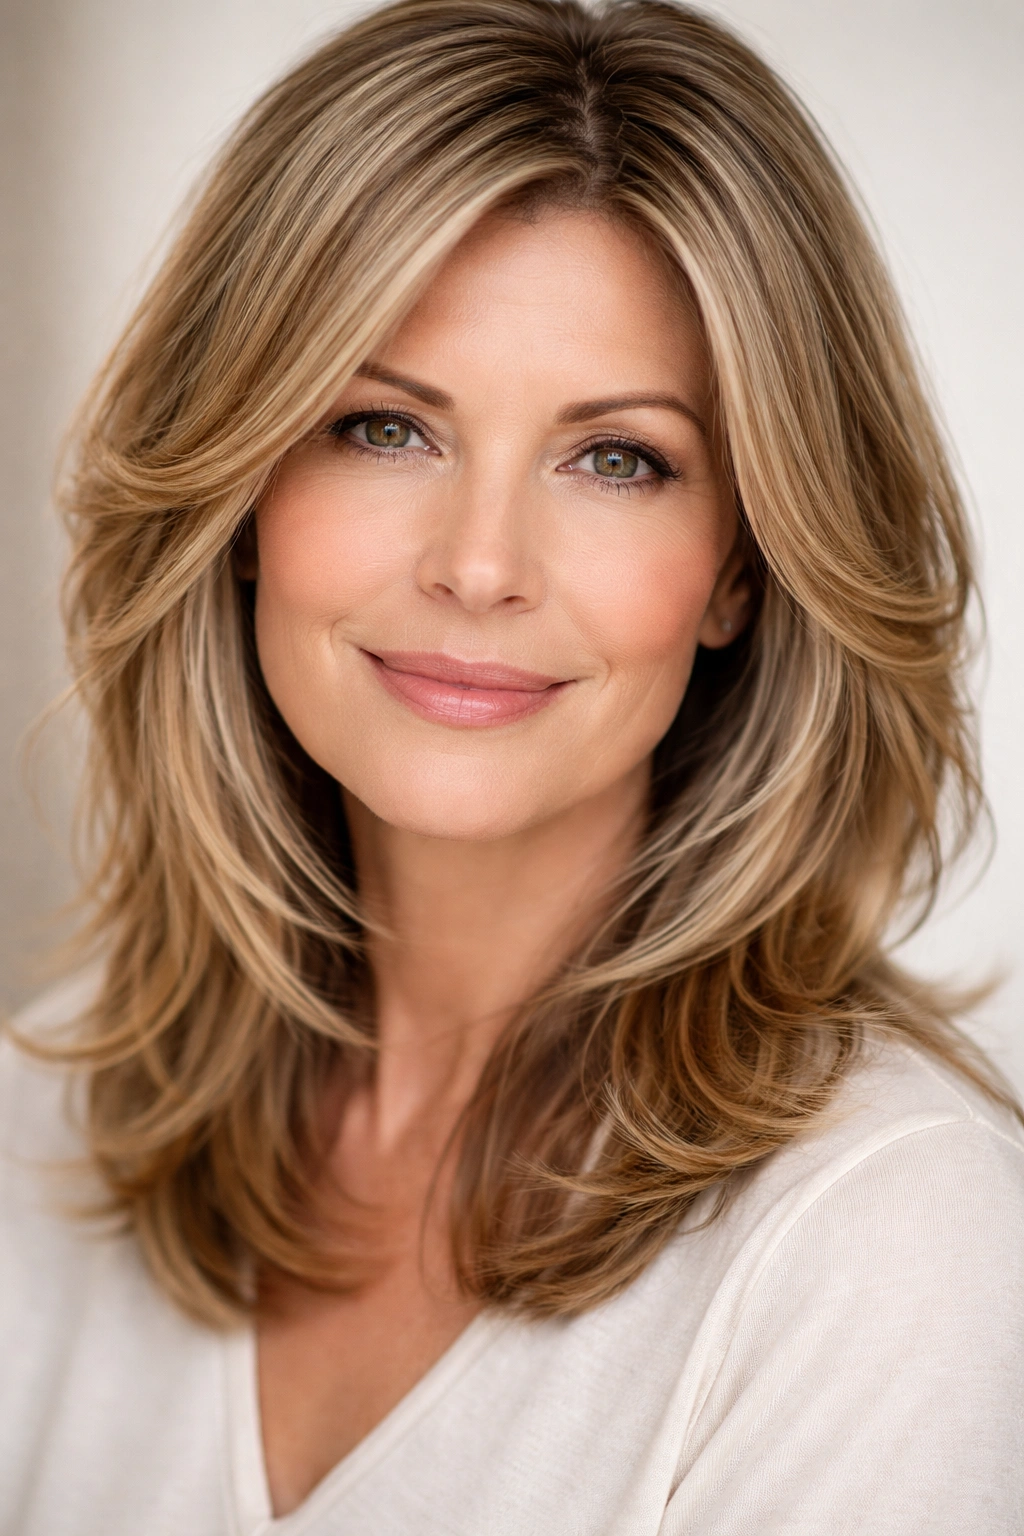
Sometimes the most impactful volume boost comes from strategically placed face-framing layers that are shorter and more textured than the rest of your hair. These pieces sit forward of your face, creating dimension while brightening your complexion through their proximity to your skin.
How Face-Framing Layers Work
Shorter layers around your face create movement and texture in the area that people focus on most. They also catch light differently than longer hair, creating the illusion of thickness through visual interest. These pieces also help blend any grays at the hairline if you have them, since the shorter length cycles through faster and makes touch-ups less noticeable.
Making Them Work for Your Face Shape
- Oval faces: Shoulder-length face-framing layers that start at the cheekbones work beautifully
- Round faces: Slightly longer layers that graze below the jawline create a lengthening effect
- Square faces: Softer, more curved layers around the cheekbones are most flattering
- Heart-shaped faces: Layers that add fullness at the jawline balance a narrower chin
Pro tip: Ask your stylist to cut face-framing layers at a slightly longer length than feels necessary — they’ll shrink slightly as your hair dries and settle into the perfect spot.
7. Tousled Beach Waves
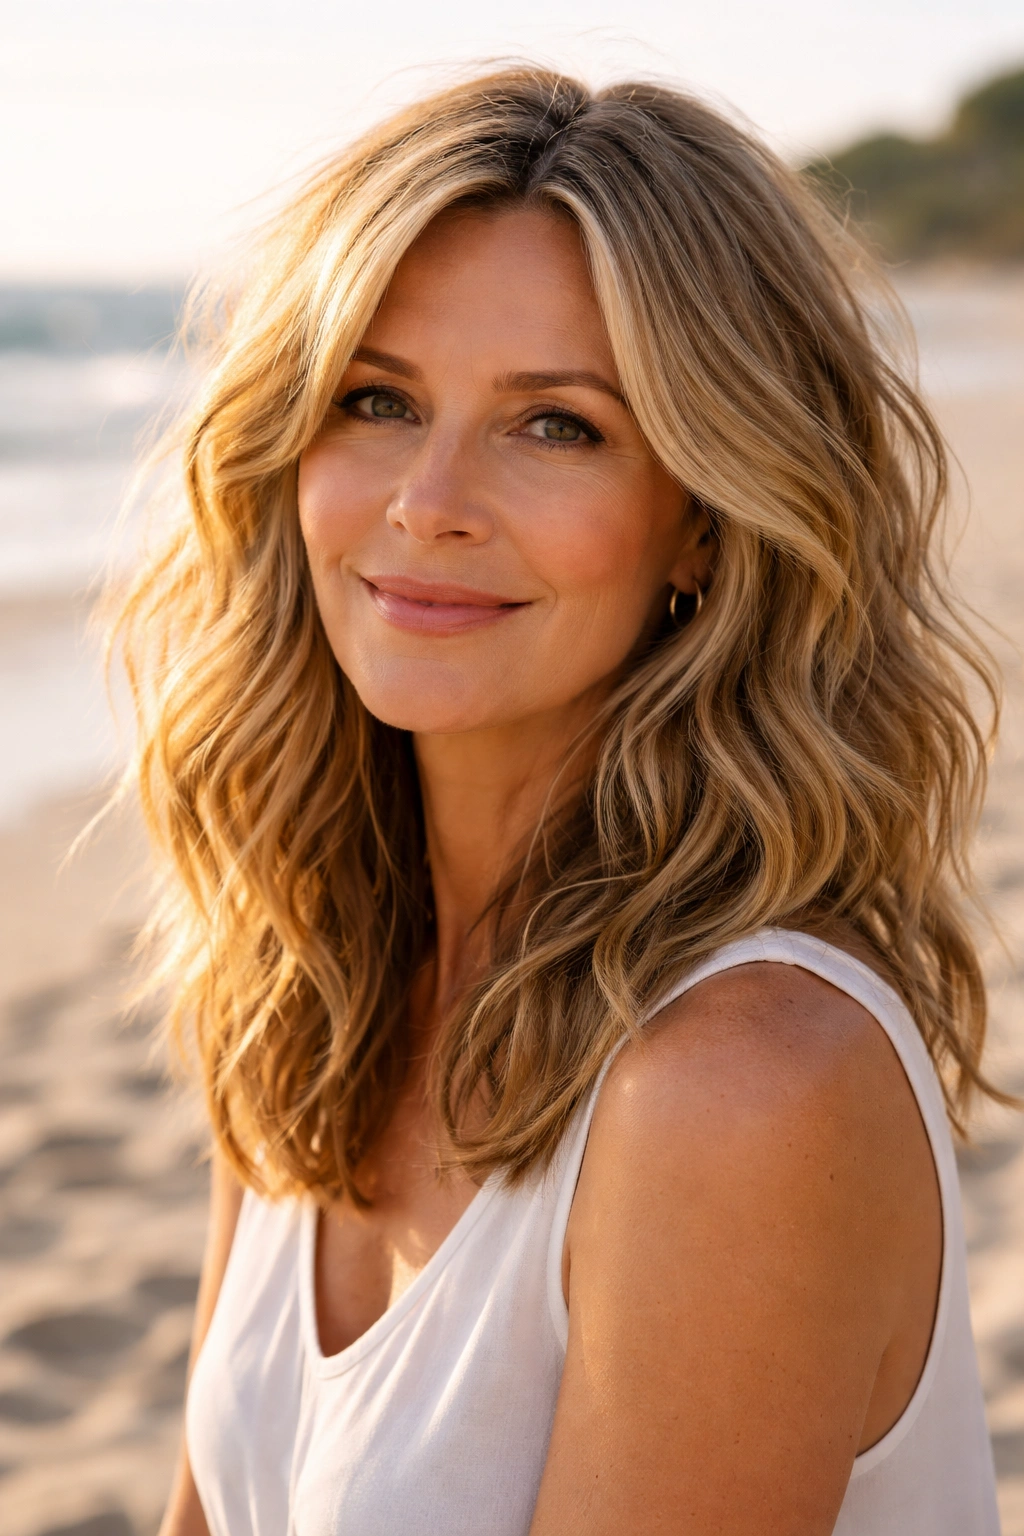
Beach waves create volume through texture and movement rather than bulk. This style relies on wave pattern and styling product to create the illusion of thicker, fuller hair. The slight dishevelment of beach waves is inherently flattering because it suggests movement and energy.
Creating Authentic Beach Waves
True beach waves aren’t random — they’re created through a specific technique where a 1.25-inch curling iron is used on sections of hair, with the iron rotated away from the face. The curl is then gently broken up with fingers once it’s cooled, creating soft waves rather than tight curls.
The Product Strategy for Longevity
- Apply sea salt spray to damp hair before blow drying for grip
- Blow dry with fingers or a diffuser to encourage wave formation
- Use a curling iron to define waves if natural texture needs help
- Finish with a flexible-hold spray that moves with your hair rather than stiffening it
Beach waves look best on shoulder-length or longer hair, and they work with almost every face shape because the softness is so universally flattering. The apparent volume comes from the texture, not from actual density.
8. Teased Crown with Soft Waves
Strategic teasing at the crown creates instant lift without damaging your hair when done correctly. This technique involves gently backcombing a small section at the crown to create a cushion of texture, then smoothing the top layer to look polished rather than messy.
The Right Way to Tease Without Damage
- Use a fine-tooth teasing brush (not a traditional brush) to gently backcomb
- Work in small sections, teasing about an inch away from the roots
- Smooth the top layer with your regular brush to create a polished finish
- Use a light hairspray to set the teased section in place
Teasing works especially well for fine hair because it creates the illusion of more strands at the roots without actually adding weight. The key is keeping the teased section small and focused — you’re not trying to tease your entire head, just the crown area where lift matters most.
Protecting Your Hair While Teasing
- Always tease gently — aggressive teasing breaks hair
- Use a light touch and short strokes rather than aggressive raking motions
- Consider using a dry shampoo or texturizing spray before teasing for better grip
- Gently comb out teased sections at night rather than sleeping on them
9. Short and Stacked Layers
A short, stacked cut uses layering and elevation to create maximum volume with minimum length. The technique involves cutting shorter layers on top that stack on top of longer layers below, creating height and movement throughout.
How Stacking Creates Volume
When layers are cut to stack properly, each layer sits on top of the one below rather than blending into it. This creates visual thickness because you can see multiple lengths of hair at once. The effect is especially pronounced at the crown, where you need volume most.
Styling a Stacked Cut
- Blow dry with a round brush, directing each section upward and away from the scalp
- Use a texturizing spray on damp hair for grip before blow drying
- Separate layers gently with a comb once dry to show off the stacking
- Consider asking your stylist about adding textured layers that separate naturally
This cut works beautifully on straight and wavy hair alike, though it requires a good blow dry to look its best. The trade-off is that you get significant volume payoff for a relatively small styling effort.
10. Swept-Back Styling with Height
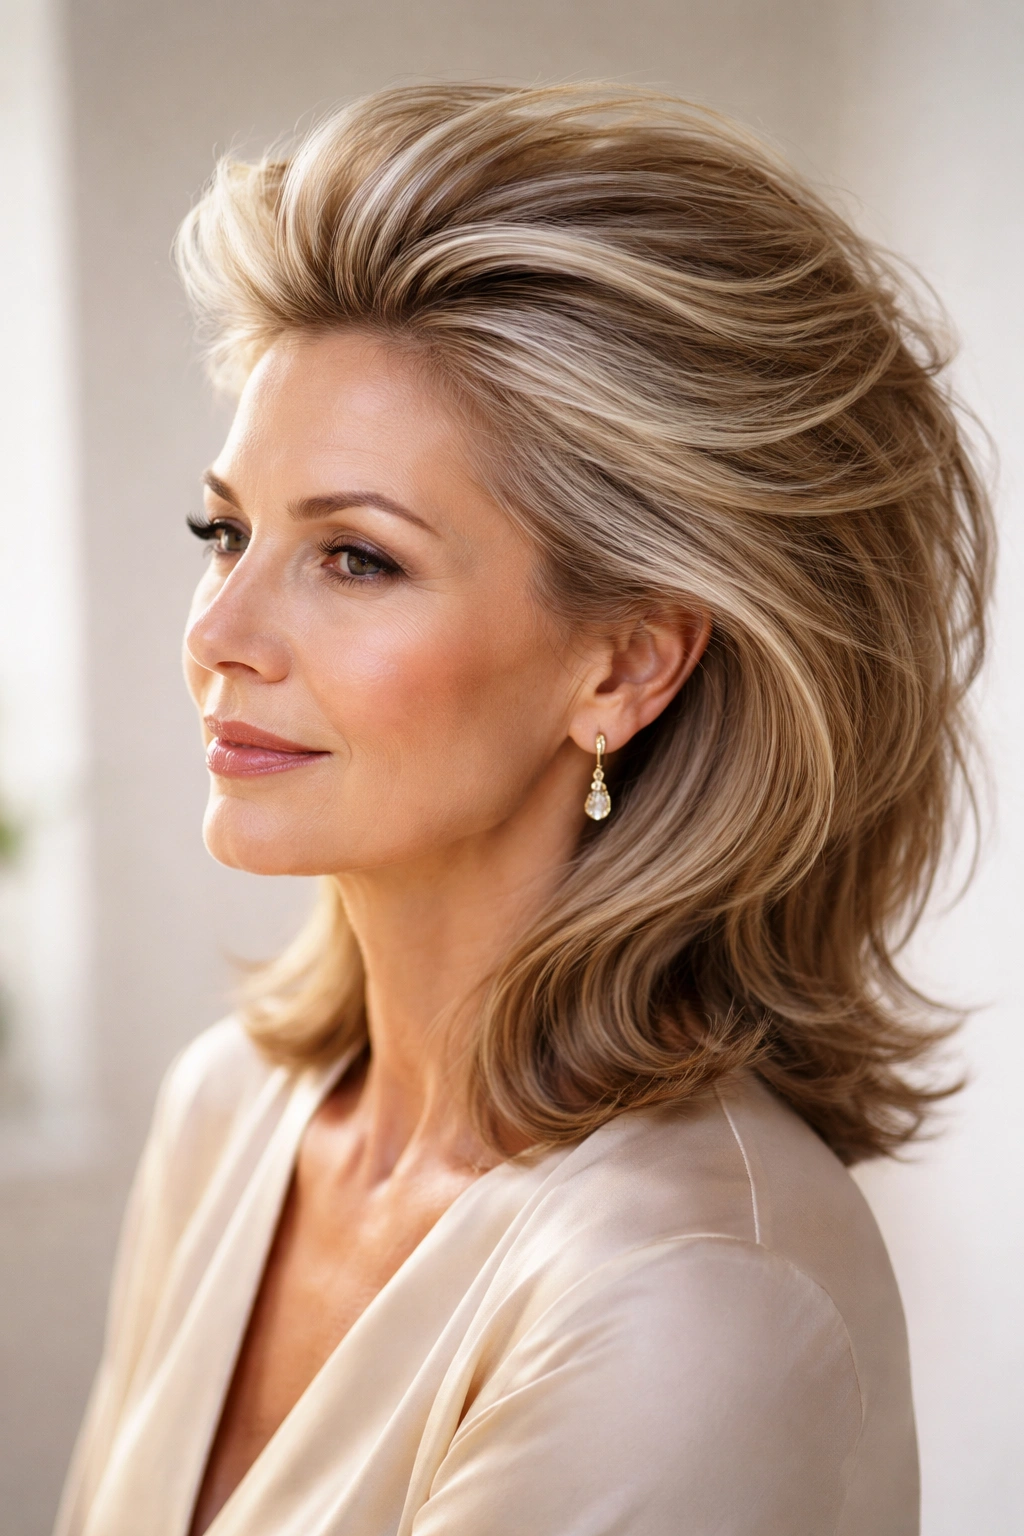
Rather than styling hair down, sweeping it back and up creates the immediate impression of more volume. This style involves blow drying your hair with volume at the roots, then smoothing it back with some product and securing it away from your face — either sleekly or with some piece-y texture.
Creating the Perfect Sweep-Back
- Blow dry roots at the crown with a round brush, lifting upward and backward
- Once your hair is dry, use a smoothing serum or light pomade to shape it backward
- Allow some texture or shorter pieces to fall forward around your face if you prefer softness
- Secure with a flexible-hold spray that doesn’t look stiff
The beauty of swept-back styling is that it works at any length and with any texture. It’s modern, polished, and requires very little styling time once your hair is dry. The volume comes from how you direct your hair during blow drying, not from the cut itself.
Worth knowing: Sweeping hair back also elongates your face and highlights your bone structure, making it doubly flattering beyond the volume benefit.
11. Choppy Layers Throughout
Rather than concentrating layers in one area, choppy layers distributed throughout your hair create texture and movement at every length. This cut is especially flattering on fine hair because every layer contributes to the overall fullness.
The Choppy Layer Advantage
Choppy layers create visual interest and texture that breaks up any appearance of flatness. When each section of your hair is a slightly different length, light hits your hair at different angles, creating the optical illusion of density. The individual pieces also move more independently, giving hair a fuller appearance overall.
Styling Choppy Layers
- Enhance your natural texture with styling products rather than fighting it
- Use a texturizing spray or sea salt spray to separate layers
- Blow dry with a diffuser if you have natural wave, or with a round brush for more control
- Allow some pieces to air dry for a more natural, less styled appearance
The great thing about choppy layers is that they’re forgiving — a day or two of styling imperfection actually enhances the choppy aesthetic rather than detracting from it.
12. Curl-Enhanced Medium Length
Medium-length hair (roughly ear-length to shoulder-length) combined with intentional curl is a volume powerhouse. The curl structure occupies space without being so short that your hair looks boyish, and the length is long enough to feel feminine.
Why This Length Works for Curls
Medium length provides the perfect balance. It’s short enough that curls don’t weigh the hair down, but long enough that curls feel soft and romantic rather than tight and structured. The curl pattern creates natural separation between strands, making fine hair appear significantly fuller.
Creating and Maintaining Curls
- Use a 1-inch curling iron for tighter curls, or a 1.5-inch iron for looser waves
- Curl sections away from your face for a flattering frame
- Allow curls to cool before touching them to increase longevity
- Use a light curl cream or mousse to define and separate curls throughout the day
Pro tip: Sleep in a loose braid to extend curl life through the next day, rather than resetting curls every morning.
13. Lifted Root Blowout

Sometimes the most dramatic volume boost comes not from the cut, but from how you style it. A lifted root blowout uses blow drying technique and product strategy to create volume at the roots that lasts for days, not just hours.
The Technique Behind a Lifted Root Blowout
- Use a volumizing mousse applied directly to soaking-wet roots
- Blow dry roots with your head tilted backward, directing heat upward to encourage lift
- Use a round brush to create and maintain the lifted section
- Finish with a texture spray or dry shampoo on the roots to add grip and longevity
The trick to a blowout that lasts is letting product dry completely into the hair before you move on. Rushing through blow drying is the fastest way to lose volume by afternoon.
Maintaining Lifted Roots Through the Week
- Sleep on a silk or satin pillowcase to reduce friction and preserve volume
- Use dry shampoo to refresh roots between washes without damaging hair
- Avoid touching your roots obsessively — the oils from your fingers break down the lift
- Consider a second light misting of volumizing spray midday if you’re in a dry climate
14. Braided Crown with Volume
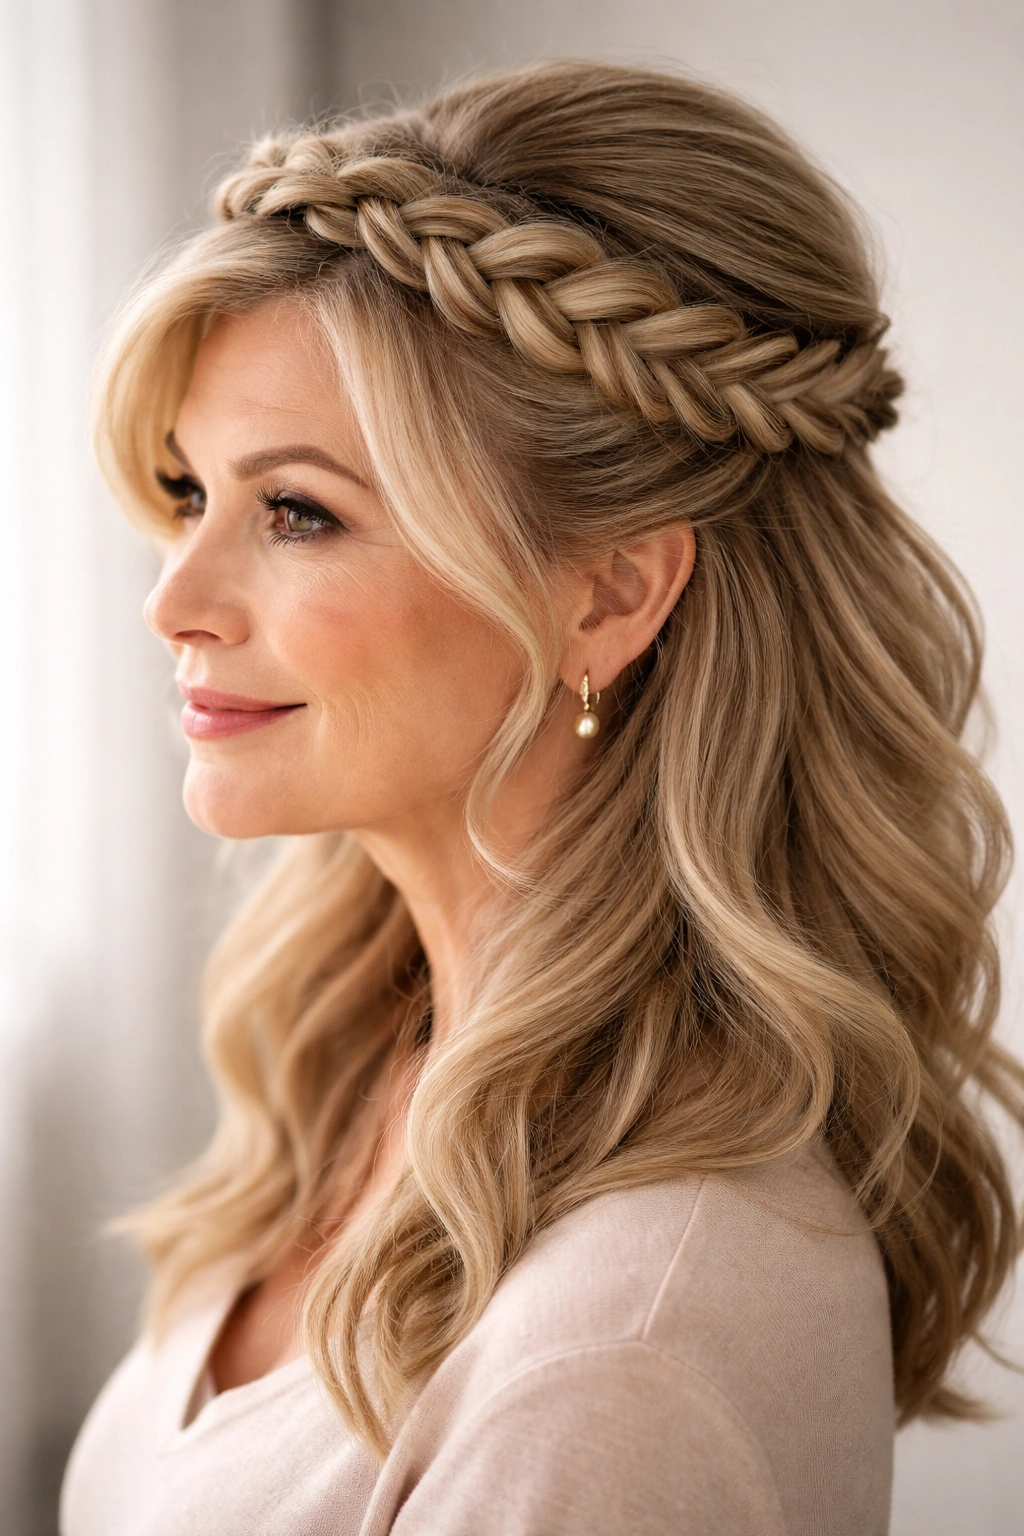
A braided crown creates height and visual fullness while keeping hair off your face — especially practical for finer hair that might look flat when worn down. A Dutch braid or French braid along the crown, combined with loose waves underneath, creates dimension and movement.
Creating a Flattering Braided Crown
- Style your hair with waves first, using a curling iron or braiding method
- Create a Dutch braid (braiding under rather than over) along your crown from one side to the other
- Keep the braid slightly loose and pull gently at the edges to add volume to the braid itself
- Secure with bobby pins hidden underneath and finish with a flexible hairspray
The braid creates height while the waves underneath provide movement and softness. This style works beautifully on any hair length from shoulder-length upward.
Practical Advantages of a Braided Crown
- Keeps hair off your face and neck in warm weather
- Makes fine hair appear fuller through the elevation and braid texture
- Works on second-day hair, sometimes even better than freshly washed hair
- Takes about 5 minutes once you practice a few times
15. Textured Crop with Soft Curls
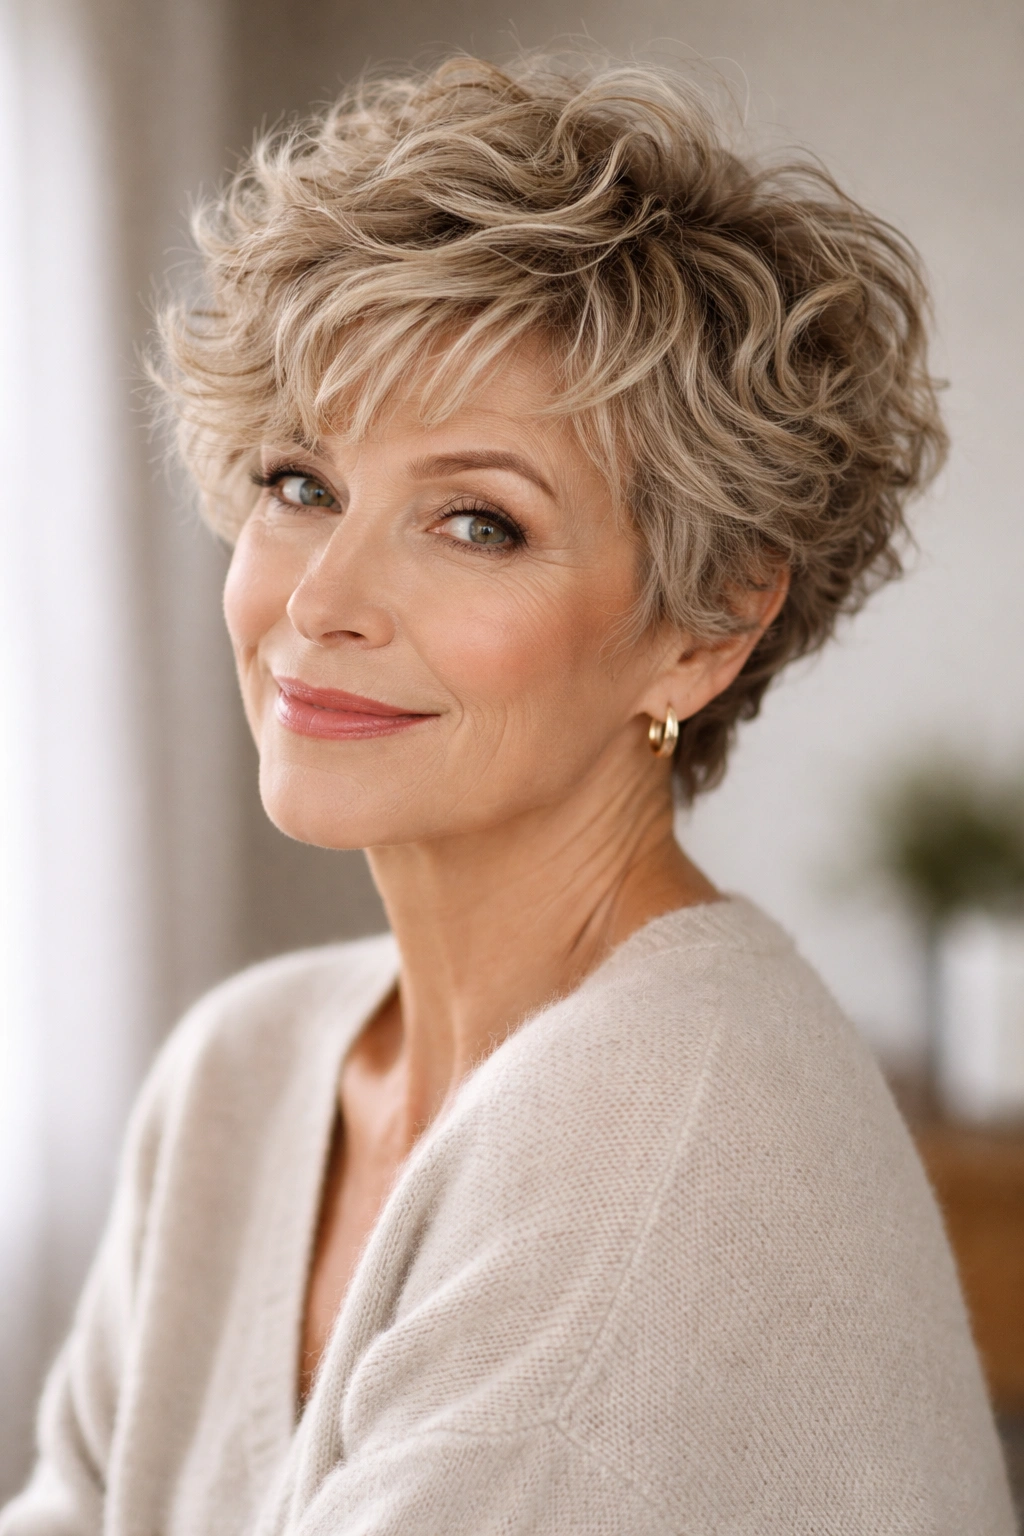
A short textured crop combined with soft curls throughout creates a youthful, modern look that’s incredibly flattering for fine hair. The short length prevents any weight from pulling curls down, and the curl pattern itself creates significant volume.
What Makes a Textured Crop Different
A textured crop isn’t a standard pixie — it’s cut with layers and disconnected sections that create texture and movement. When combined with soft curls, the result is a style that appears fuller while feeling modern and intentional.
Styling This Cut
- Enhance natural wave with a curl cream or light mousse applied to damp hair
- Use a diffuser on low heat while blow drying to prevent frizz and encourage curl formation
- Separate curls gently with your fingers once dry rather than combing through them
- Finish with a light flexible-hold spray that doesn’t weigh curls down
Worth knowing: This style looks stunning on women with gray hair — the texture and curl pattern showcase gray beautifully while the shorter length keeps the style feeling current rather than dated.
16. Side-Swept Bangs with Volume
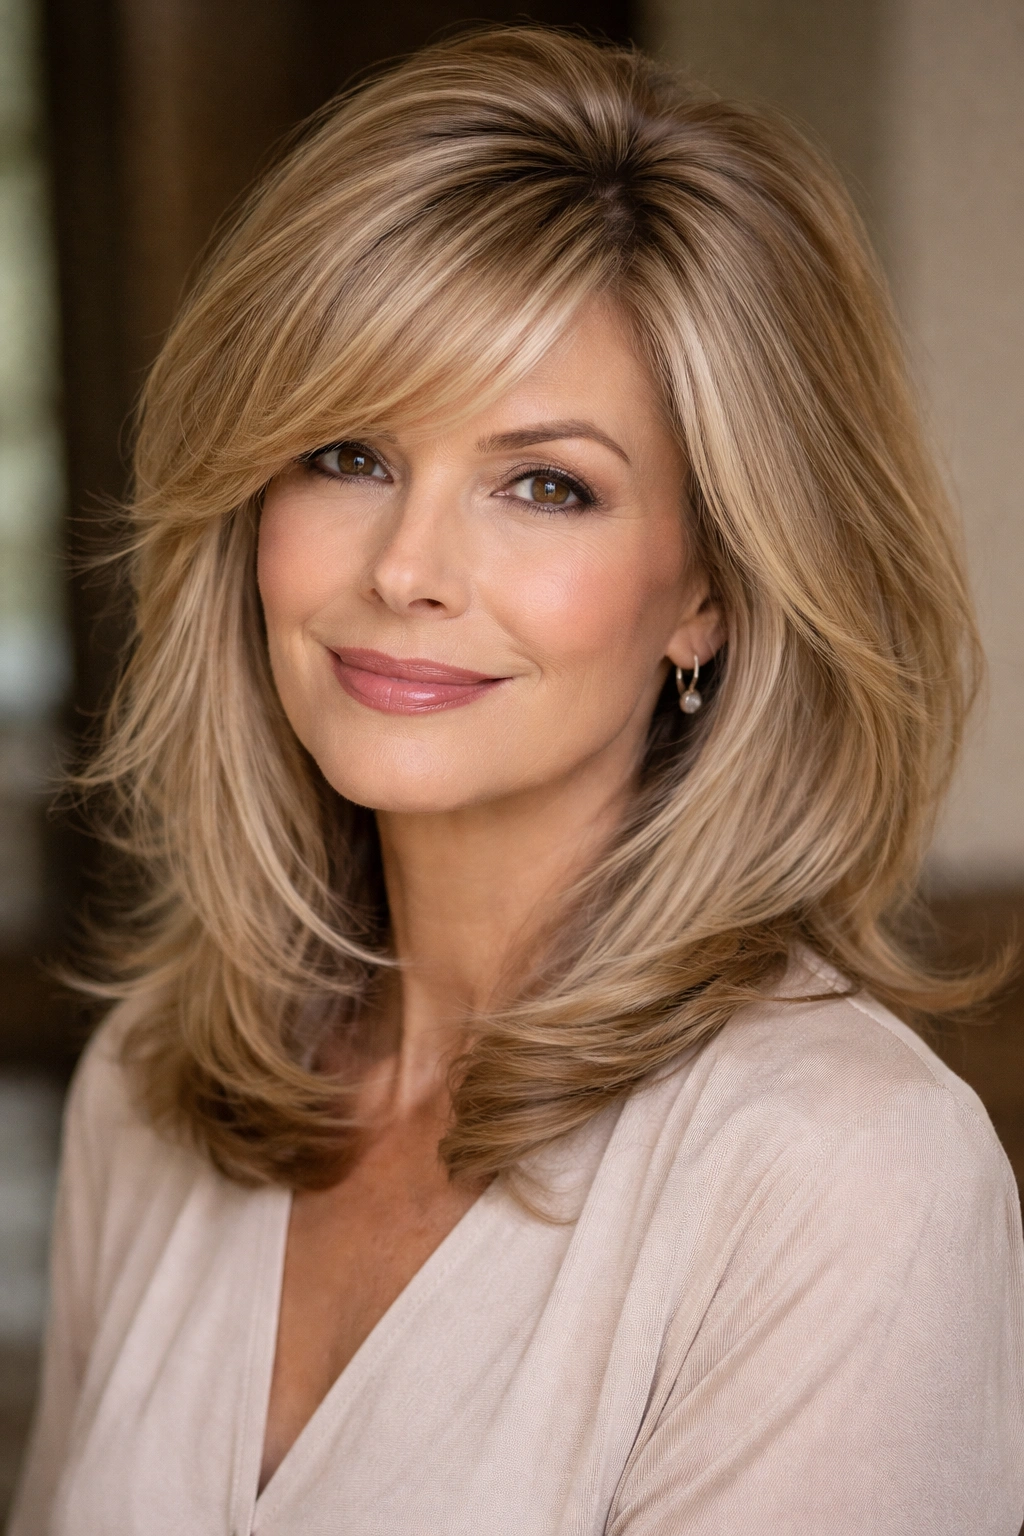
Longer side-swept bangs combined with volume at the crown create an elegant, face-flattering style. The bangs draw attention to your eyes while the volume at the crown elongates your face and prevents a top-heavy appearance.
Creating Beautiful Side-Swept Bangs
- Ask your stylist to cut longer side-swept bangs that graze your cheekbones at their longest point
- Combine with layers throughout the rest of your hair for a cohesive look
- Blow dry bangs with a round brush, sweeping them to the side and slightly backward
- Use a light texturizing spray to add grip and prevent bangs from slipping forward
Side-swept bangs are flattering on almost every face shape because they create a diagonal line that’s universally slimming. The key is keeping them longer rather than blunt — this prevents them from looking heavy.
Maintaining Side-Swept Bangs
- Trim every 3-4 weeks to keep the shape fresh
- Use dry shampoo between washes to maintain texture and prevent slipping
- Sleep on the opposite side from where you want your bangs to sweep for better shaping
17. Half-Up Half-Down with Teasing
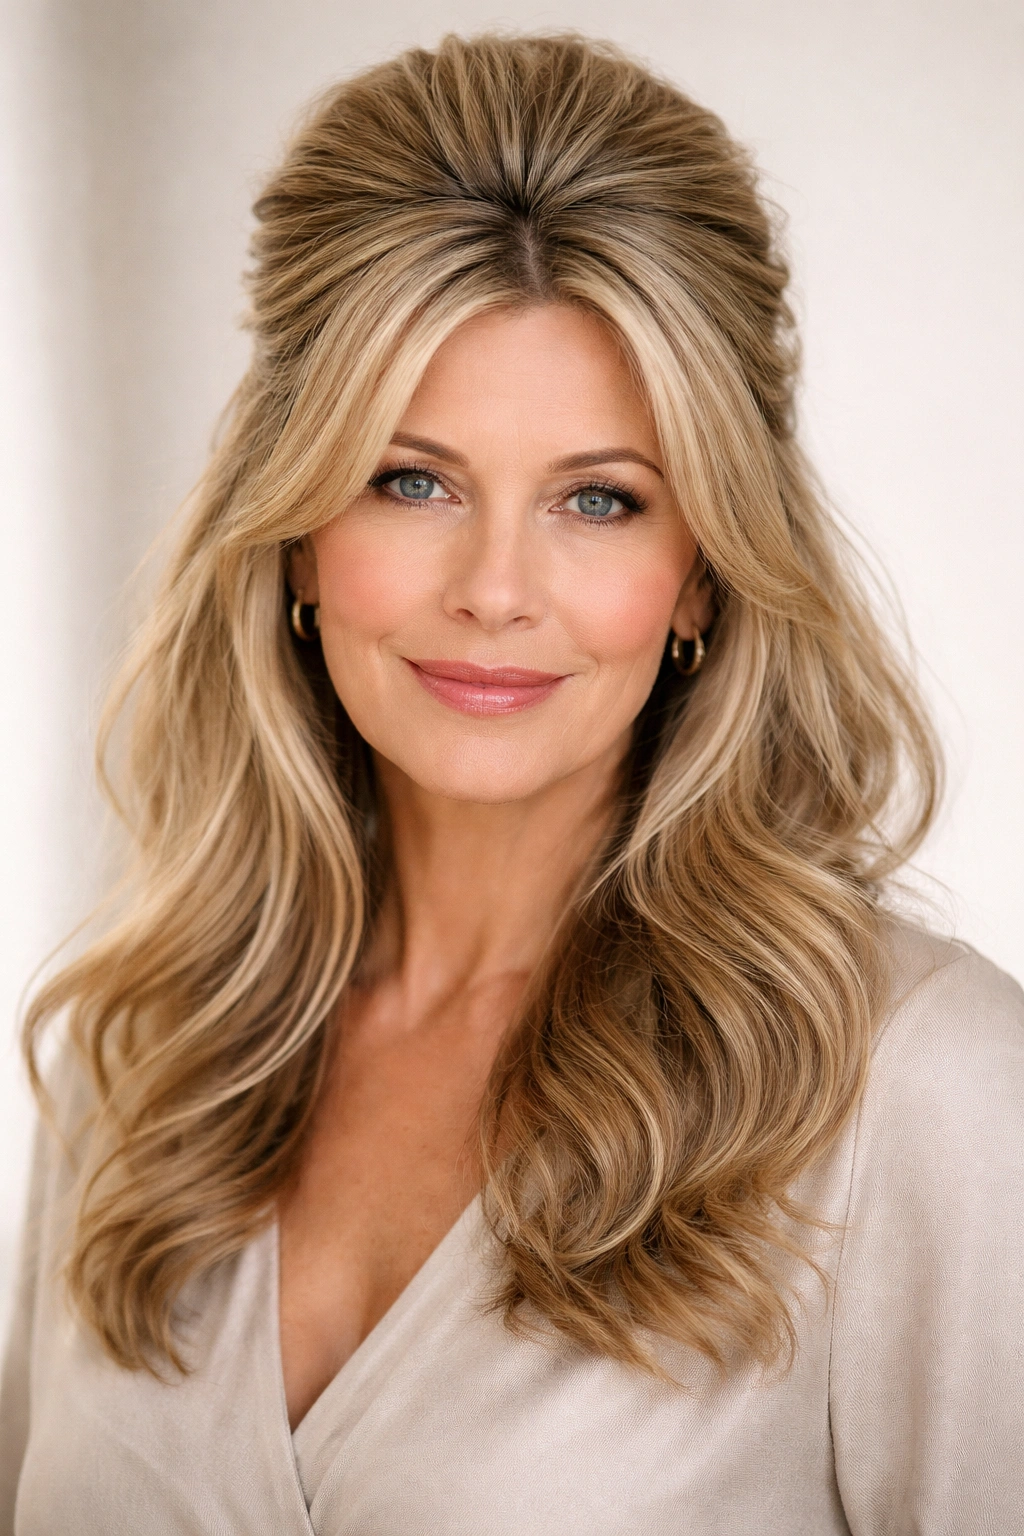
A half-up, half-down style combines the best of both worlds — volume and lift through the upper section, softness and movement through the lower section. Adding strategic teasing to the crown section before pulling it up creates extra height and impact.
Creating a Voluminous Half-Up Style
- Create soft waves through your entire head using a curling iron or braiding method
- Gently tease the crown section with a fine-tooth brush to create volume
- Smooth the top layer with your regular brush to keep it polished
- Gather the top half of your hair and secure with a clip or tie, leaving some face-framing pieces loose
This style works beautifully on shoulder-length and longer hair. The movement and texture throughout create the impression of density while the secured upper section keeps hair off your face.
Variations That Add Volume
- Instead of pulling straight back, gather hair slightly to one side for an asymmetrical, modern look
- Pull the secured section slightly higher on your head to increase the height and lift effect
- Leave slightly thicker sections loose around your face for softness
18. Volumized Bun at the Crown

A strategically styled bun positioned high on your crown creates the impression of significant volume while keeping hair off your neck — practical and flattering simultaneously. The key is using teasing and texture to make the bun itself appear fuller.
Building a Full-Looking Bun
- Create waves or curls throughout your hair before styling
- Tease your crown gently to create a cushion of texture
- Gather your hair into a high ponytail and divide it into 2-3 sections
- Braid or twist each section, then wrap and secure around the base of the ponytail to create a fuller bun shape
- Gently pull at the bun to loosen it and add volume to its appearance
A full, slightly undone bun looks far more flattering and modern than a sleek, tight one. The texture and loose pieces contribute to the volume impression.
Securing Your Bun All Day
- Use bobby pins in a crisscross pattern to anchor the bun securely
- Finish with a flexible-hold hairspray that doesn’t stiffen the style
- Leave some shorter pieces loose around your face to soften the overall effect
- Consider using a bun cuff or velvet scrunchie that adds visual fullness to the bun itself
19. Wavy Pixie-Bob Hybrid
A pixie-bob hybrid combines the short, textured top of a pixie with slightly longer sides and back that can be styled with more softness. This creates maximum volume at the crown while maintaining enough length for feminine styling options.
The Architecture of a Pixie-Bob Hybrid
- The crown is cut very short with choppy, textured layers for maximum lift
- The sides and back are longer — roughly ear-length — creating a soft, feminine shape
- The longer sides can be styled with waves or curls while the top stays short and textured
- The overall effect is androgynous enough to feel modern but feminine enough to feel polished
This cut gives you options — you can style it sleek and textured for a modern look, or add waves to the longer sections for softness. It’s versatile while still maintaining the volume benefit of the short top.
Styling a Pixie-Bob Hybrid
- Blow dry the short top with a round brush for lift and texture
- Style the longer sides with soft waves using a curling iron
- Use a texturizing spray throughout to enhance the hybrid effect
- Finish with flexible-hold hairspray that allows movement
20. Textured Vintage Wave Style
Drawing inspiration from vintage Hollywood but modernized for contemporary styling, this style features waves throughout combined with layers that create both volume and elegance. The result is a sophisticated, intentional look that photographs beautifully.
Creating Vintage-Inspired Waves
- Use a 1.5-inch curling iron to create soft, romantic waves
- Curl sections toward your face for a flattering frame
- Allow curls to cool completely, then gently comb them through to create waves rather than ringlets
- Use a light wave cream or styling mousse to define and hold the wave pattern
The vintage wave style works beautifully on shoulder-length and longer hair. The wave pattern creates significant volume through texture while the softness of vintage waves is universally flattering.
Making This Style Wearable for Everyday
- Use a texturizing spray to refresh waves between wash days
- Sleep in a loose braid or on a silk pillowcase to preserve waves
- Touch up individual waves with a curling iron rather than restyling everything
- Keep product light and flexible-hold so waves move naturally rather than looking stiff
Pro tip: This style photographs even more beautifully than it looks in person, making it perfect if you’re doing headshots or family photos.
Key Takeaways
The right hairstyle can completely transform how you feel about your hair and your appearance overall. Volume isn’t about fighting age or pretending to have more density than you actually have — it’s about working strategically with the hair you have to create movement, texture, and lift that makes everything look better and feel more effortless.
The styles above share common elements: most use layering to remove weight, most incorporate texture or wave rather than relying on blunt density, and all of them benefit from intentional styling that emphasizes lift at the crown. Find a stylist who understands fine hair or thinning hair specifically — this expertise makes an enormous difference in how a cut translates into your everyday styling reality.
Start with a consultation where you bring photos of styles you love and describe specifically what appeals to you about them. Discuss your hair type, your natural texture, how much styling time you’re willing to invest daily, and any concerns you have about maintenance. The perfect volume-boosting style is one that makes you feel confident, requires a sustainable amount of styling effort, and works with your hair rather than against it. That’s when you’ll actually keep the cut looking fresh and styled, and that consistency is what creates the impression of truly full, healthy hair.