Fine wavy hair sits in an awkward middle ground. Your waves want to fall flat by noon, yet they refuse to hold a traditional curl. You’re caught between the straight-hair crowd and the coil-pattern crew, and most styling tutorials seem designed for either thick, bouncy waves or poker-straight strands. The frustration is real: you wake up with beautiful definition, and by afternoon, you’re left with limp, shapeless texture that looks like you didn’t style it at all.
The real issue isn’t your hair type—it’s the styling approach. Fine, wavy hair has a specific gravity problem. Your strands are delicate and lightweight, which means they lack the structural heft to hold traditional waves or curls for extended periods. Humidity softens your wave pattern. Oils from your scalp travel down fine strands faster than they do thicker hair. Even the weight of a styling product can be enough to collapse your waves before you’ve finished your morning coffee. But here’s what most people miss: fine wavy hair actually has a major advantage. Your waves are naturally springy and responsive to the right techniques. You can achieve gorgeous, textured styles that last all day—you just need to know exactly how to work with your hair’s specific needs, not against them.
The styles below aren’t theoretical. Each one has been tested specifically for fine wavy hair and the unique challenge of all-day longevity. You’ll find detailed instructions for creating each look, the specific products that work without weighing your waves down, and honest tips for keeping your style intact from morning through evening.
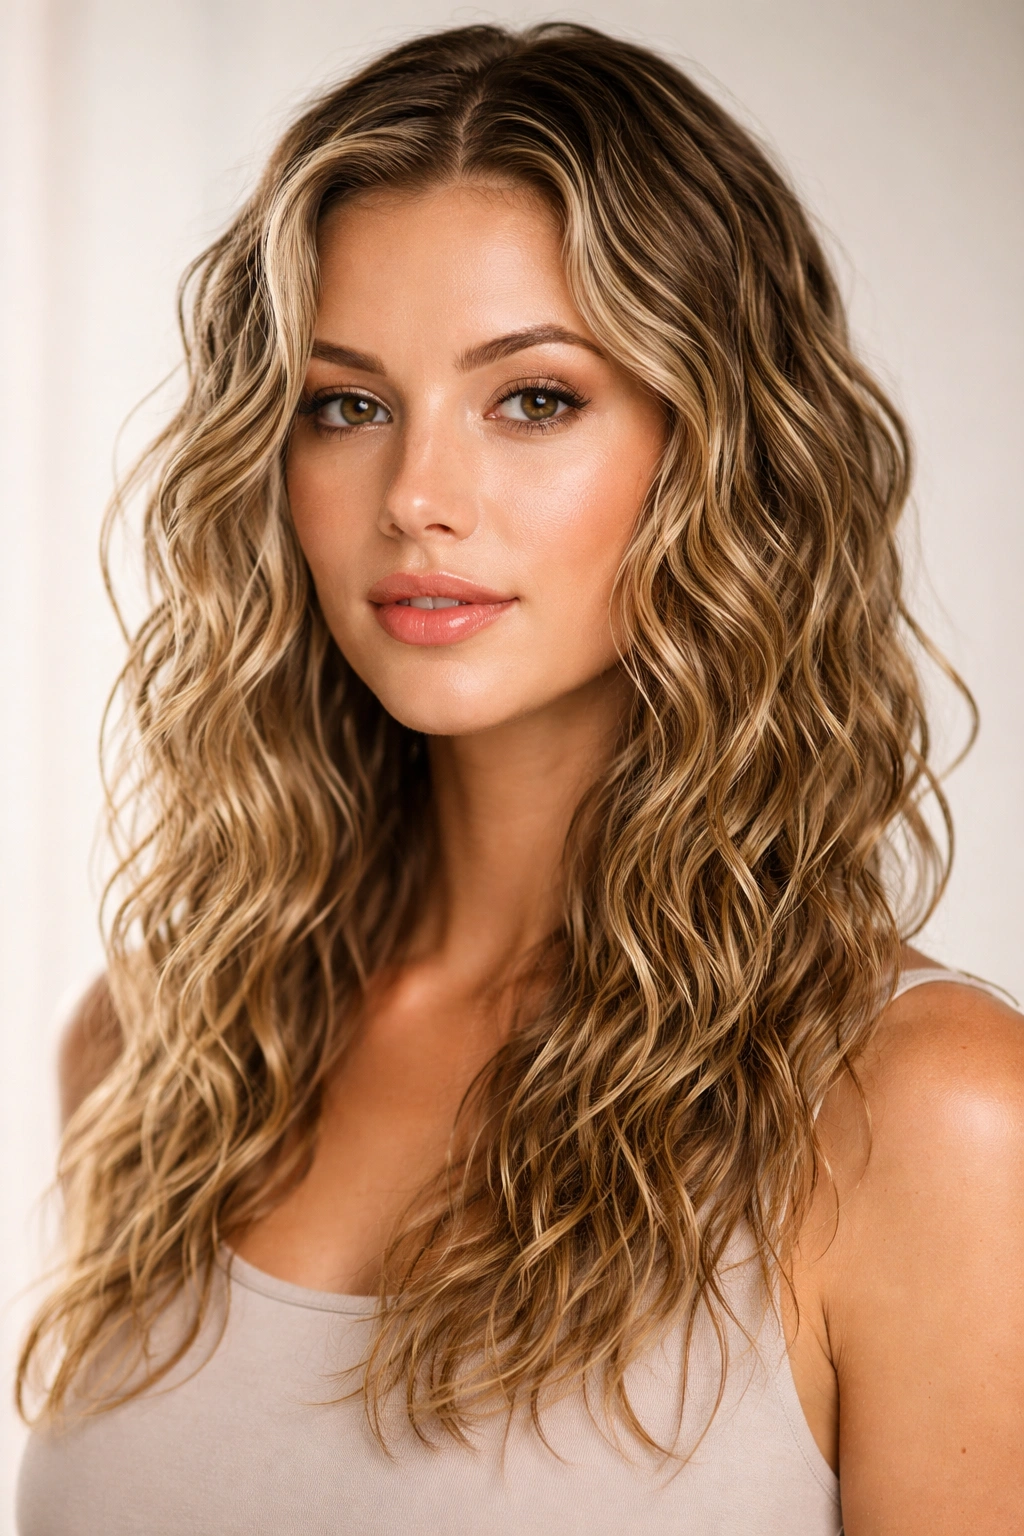
1. The Tousled Beach Wave
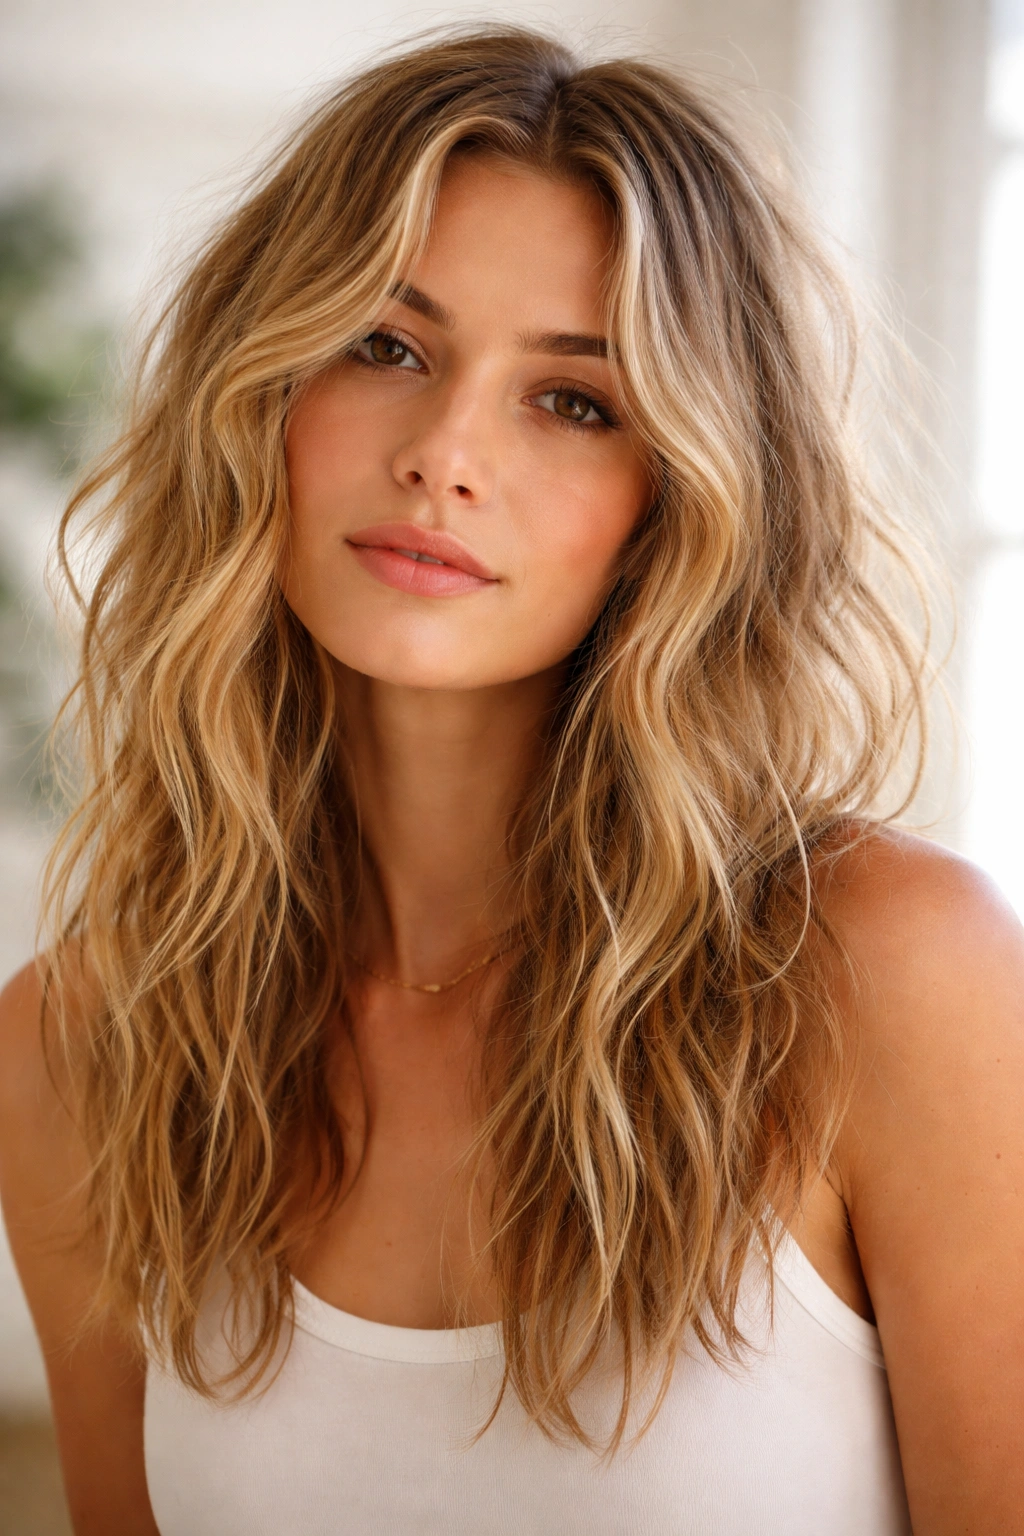
Beach waves are the ultimate fine hair style because they embrace your natural texture instead of fighting it. The tousled version skips the overly polished look and leans into a lived-in, effortless vibe that actually hides the fact that your waves are falling. This style works because it’s intentionally undone—slight separation and a little frizz are part of the design, not a failure.
Why It Works for Fine Wavy Hair
Tousled beach waves require movement and texture, not rigid hold. When your hair is meant to look a little messy, slight flatness near the roots and soft waves midlength read as intentional rather than fallen. The beauty of this style is that you’re not trying to maintain a specific shape—you’re maintaining a general vibe of casual texture. Your fine waves actually provide the perfect base for this look. Even if your waves loosen throughout the day, the overall tousled aesthetic holds up beautifully. The style naturally accommodates the way fine hair moves and shifts.
How to Create Tousled Beach Waves
Start with damp hair and apply a lightweight sea salt spray—this is non-negotiable for fine hair. Traditional mousse or curl cream will weigh your waves down, but sea salt spray adds grip and texture without heaviness. Scrunch the product through your hair, concentrating on the mid-lengths and ends. Use a blow dryer on low heat with a diffuser attachment, moving the diffuser in an upward scrunching motion rather than smoothing downward. This technique encourages your natural wave pattern to form rather than flatten. Once mostly dry, use a 1.25-inch curling iron to wrap random sections around the barrel—you’re not creating uniform waves, just adding extra texture and movement to your natural pattern. Don’t curl every strand; aim for about 60 percent of your hair to get that deliberately casual look.
Pro Tips for All-Day Hold
Finish with a lightweight texture spray rather than traditional hairspray. Regular hairspray can leave fine hair looking stiff or flaky. Texture sprays add grip and definition without the heavy coating. Before bed the night before, sleep on slightly damp hair to enhance your natural waves. This jumpstarts your wave pattern and means you’re working with enhanced texture the next morning. During the day, if your waves are dropping, use a texture spray and gently scrunch the affected sections upward rather than reheating with a tool.
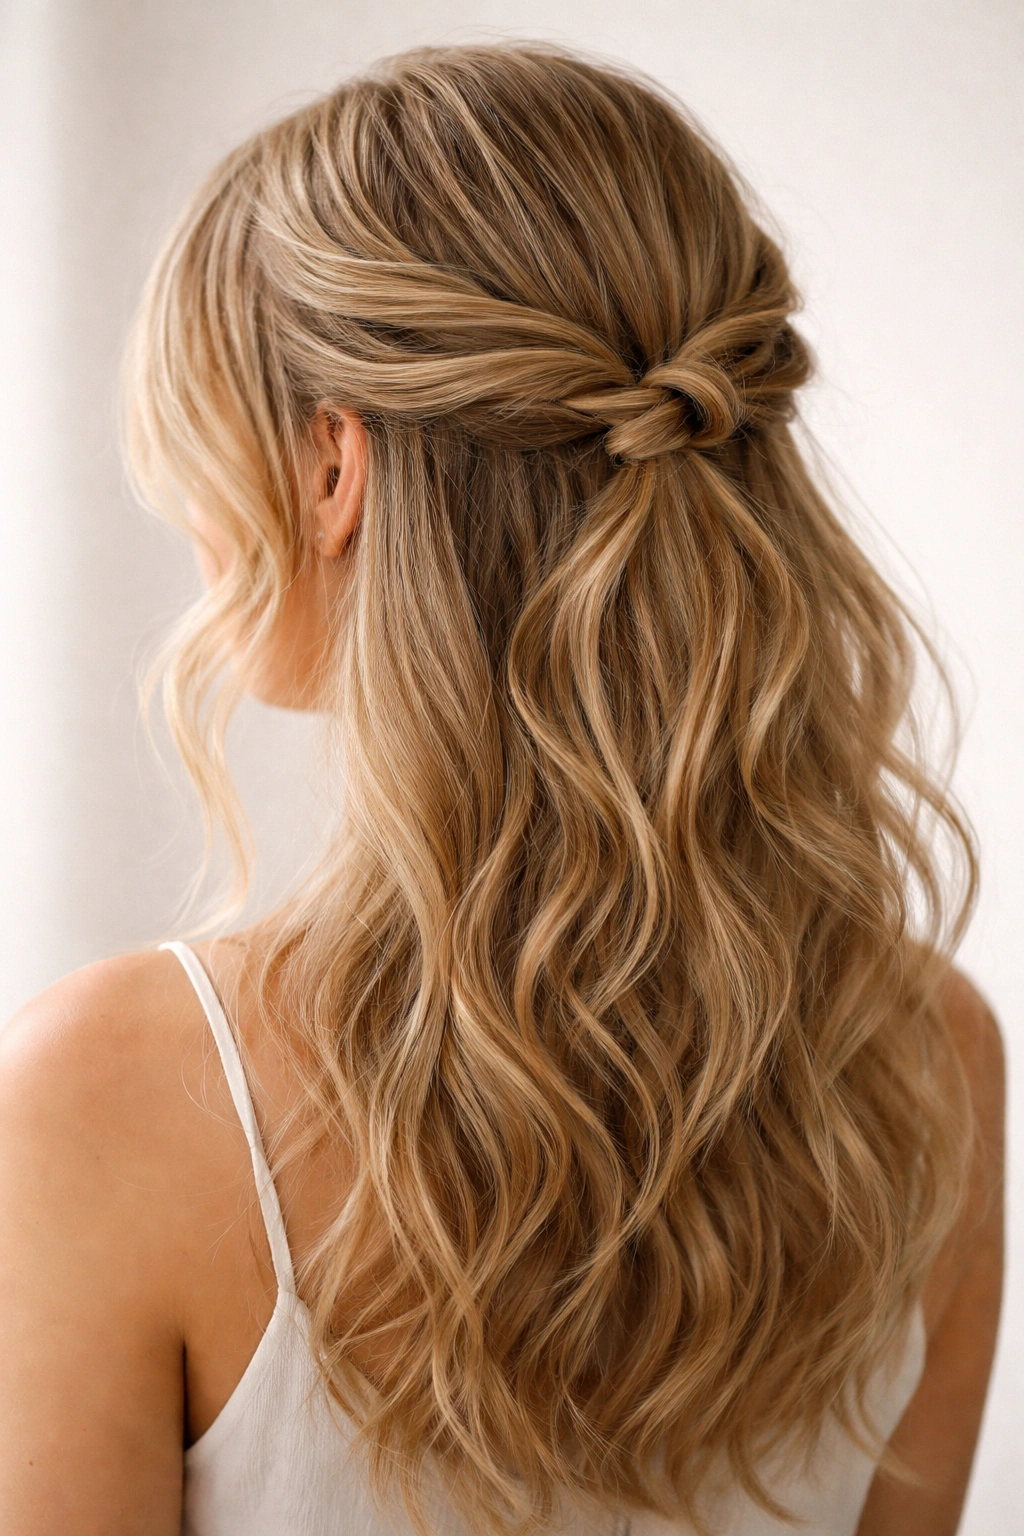
2. The Half-Up Twist Knot
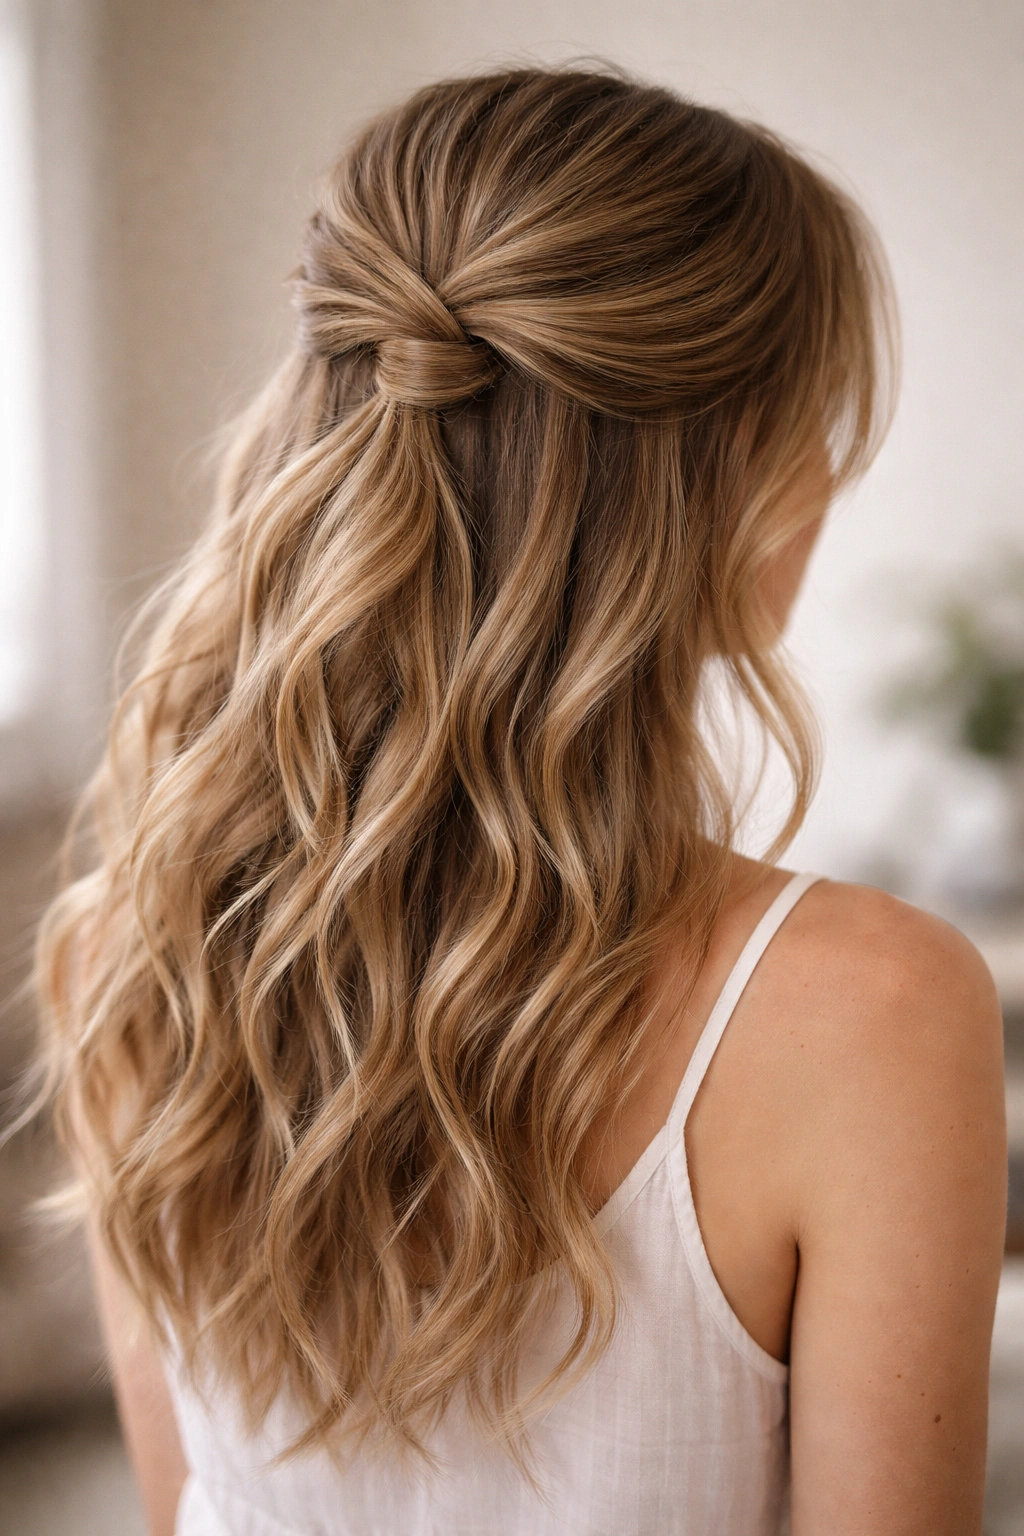
A half-up style is genius for fine wavy hair because it solves two problems at once: it keeps hair off your face while the secured portion adds visual fullness and holds the upper layers in place, which actually helps support your waves throughout the entire length. The twist knot variation looks polished enough for work but casual enough for daily wear.
Why It Works for Fine Wavy Hair
When you pull the upper portion of fine hair back, you’re reducing the weight pulling down on your roots. This means your wave pattern is more visible and holds up longer. The secured section also serves as an anchor point that helps maintain texture in the lower sections. This style works with your hair’s natural tendency to fall rather than against it. You’re deliberately moving weight away from areas prone to flatness, which preserves your waves where they matter most.
How to Create the Half-Up Twist Knot
Section off the top third of your hair at the crown, from ear to ear. Take a small subsection from one side of this top section and twist it loosely as you move toward the center back of your head. Repeat on the other side with another small subsection, twisting in the same direction. As you reach the center back, cross one twist over the other and secure both with a small elastic. Create a small loop by pulling the secured section upward gently, then tuck the ends under and through the base to create a knot shape. Use bobby pins to anchor it in place. The result should look casual, not stiff. If it feels too tight or polished, loosen the twists slightly and redo the knot with a little more texture.
Pro Tips for All-Day Hold
Use a matte finish elastic rather than shiny ones, which can look cheap and slip out of fine hair more easily. Tease the hair at the crown very lightly before creating your twists—this tiny bit of texture at the roots makes a significant difference in how long your style holds. Make sure your wave pattern is already defined before you create this style. Waves that are crisp at the base will hold up much longer once you’ve secured them with this style.
3. The Braided Crown Halo
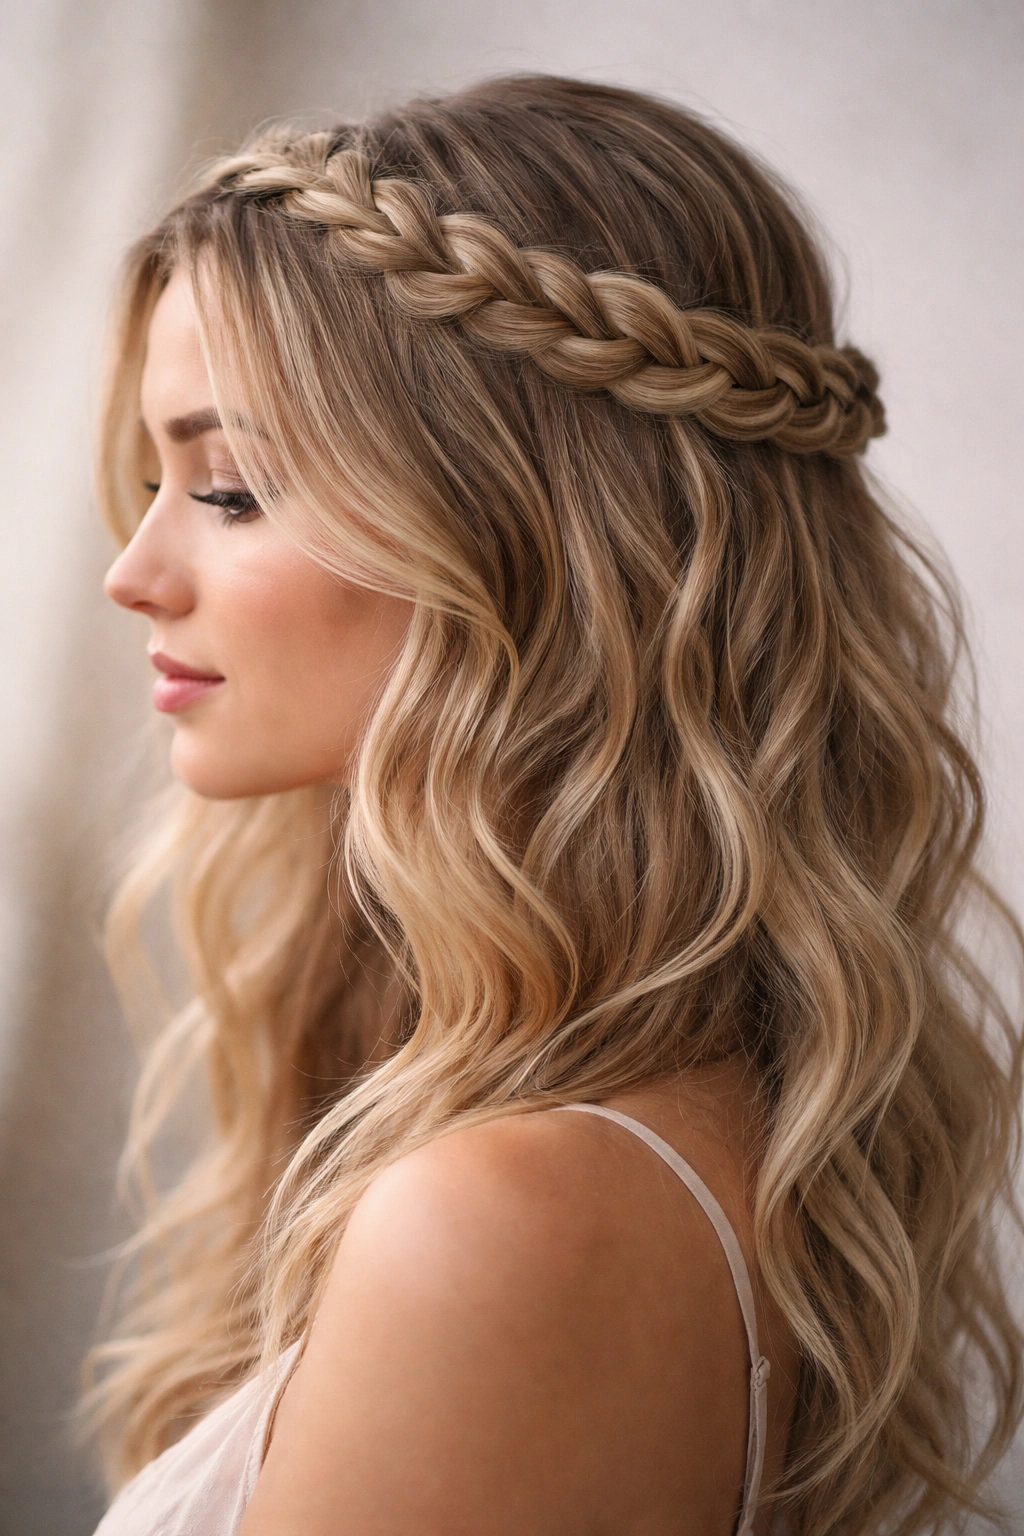
A braided crown feels fancy enough for special occasions but works equally well as an everyday style. For fine wavy hair, this works because the braid structure actually supports your wave pattern and prevents that flat-crown problem that plagues fine-haired people all day long.
Why It Works for Fine Wavy Hair
A braid acts as scaffolding for your waves. When you braid a section of hair, you’re locking the texture in place with the braid structure itself. Even if your individual strands want to relax, the braid maintains that texture throughout the day. The crown positioning means you’re lifting weight off your roots and repositioning it, which tricks the eye into seeing fullness you might not have with hair worn down. A halo braid also naturally accommodates loose, flowing waves without requiring them to be overly tight or perfect.
How to Create a Braided Crown Halo
Start with wavy hair that’s already defined by styling or a gentle overnight wave-setting method. Take a section of hair from one side of your head at temple level. Begin a loose three-strand braid, incorporating sections of hair as you work around the back of your head toward the other side—this is a Dutch or reverse braid if you want to research it, though for fine hair, a simple three-strand braid works beautifully. The key is keeping the braid loose and gently pulling the strands outward as you braid to create a soft, undone look. Secure the end with a small elastic and tuck it under or behind your ear. You can braid just a small section as a crown accent, or braid a larger crown that spans most of the back of your head—both work well with fine wavy texture.
Pro Tips for All-Day Hold
Apply a lightweight gel or braid hold product to the sections of hair you’ll be braiding before you start. This adds grip without heaviness. Braid looser than you think you need to—tight braids pull and stress fine hair, and they also look severe. Loose, soft braids look more sophisticated and last longer because they’re not creating tension on your strands. Create your braid on the second day after washing when your waves are a bit softer and more grippy than freshly washed hair.
4. The Textured Ponytail with Volume at the Crown
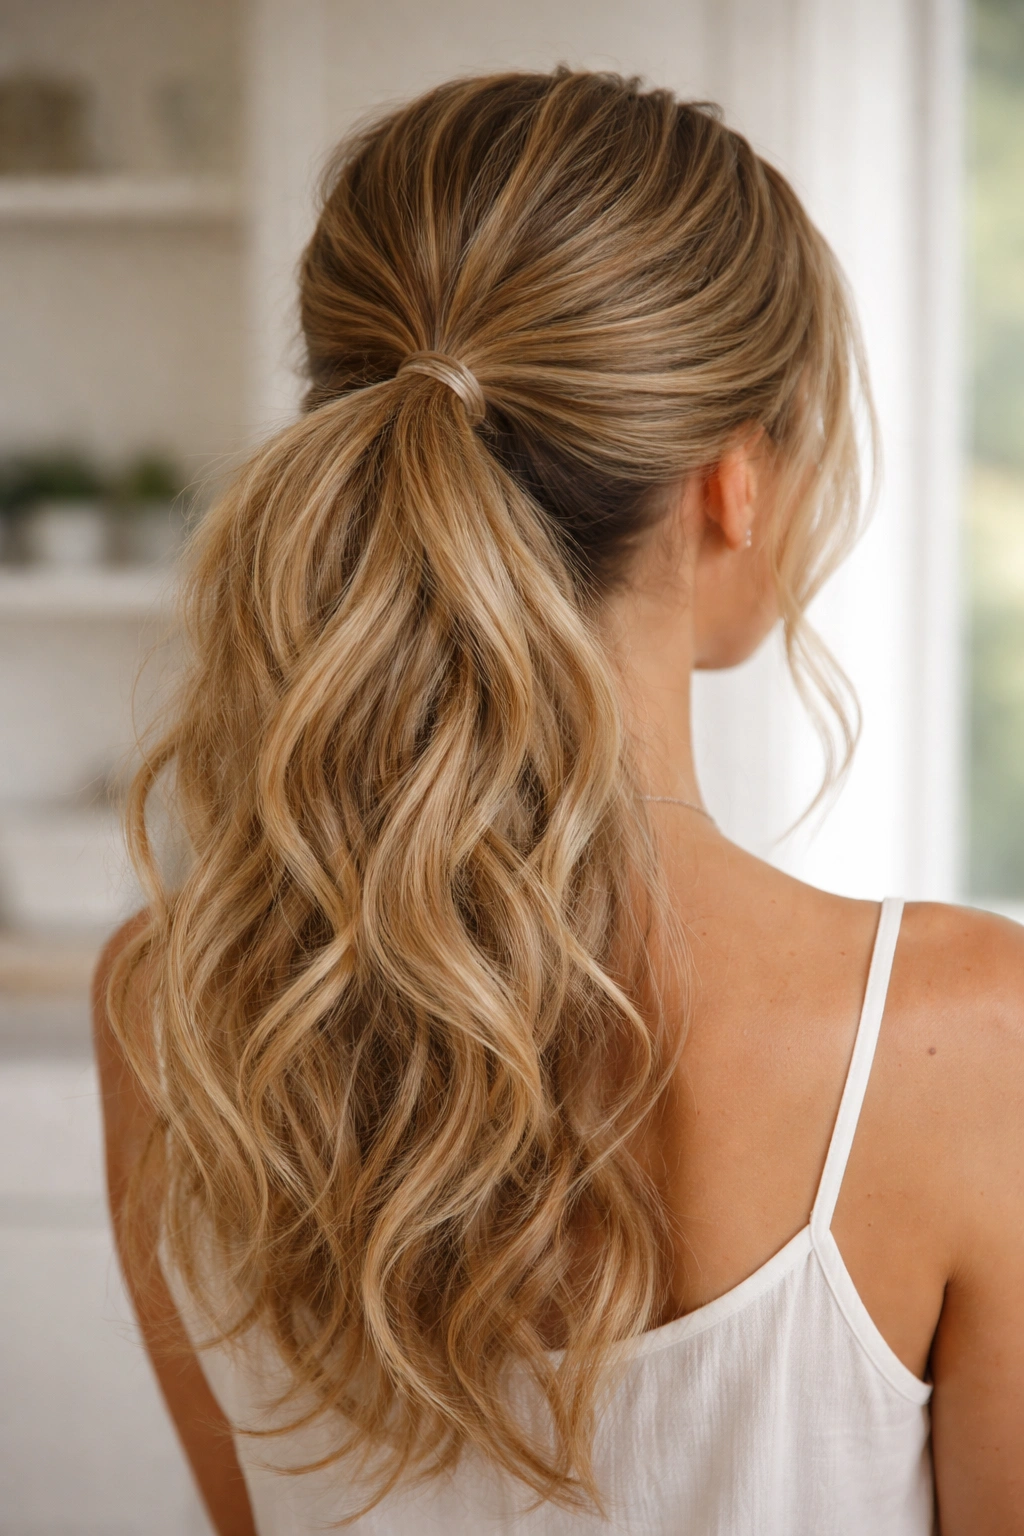
A ponytail is a practical style that most people think doesn’t work for fine hair—but done correctly, it becomes your secret weapon. The trick is creating volume at the crown and using the right technique so your ponytail doesn’t scream “I have thin hair” but rather “I have intentional texture.”
Why It Works for Fine Wavy Hair
A textured ponytail works because you’re controlling where your hair sits and eliminating the flatness that happens when fine waves hang loose. By positioning the bulk of your hair in the ponytail itself, you’re making it look thicker and fuller than it would appear down. The volume at the crown creates the illusion of density, and the waves throughout the ponytail add texture that reads as fullness.
How to Create a Textured Ponytail with Crown Volume
Start by backcombing your hair at the crown gently. You’re not creating massive teasing, just lifting the roots and adding dimension. Flip your head upside down and rough-dry your hair with texture spray to amplify your natural wave pattern. Once you’ve got that tousled base, flip back upright and gather your hair into a low ponytail at the nape of your neck. The key is keeping it positioned low enough that it sits below your crown volume, which actually makes the crown look fuller. Secure with an elastic that matches your hair color. You can wrap a small section of hair from the ponytail around the elastic base and pin it to hide the elastic completely, which instantly makes any ponytail look more polished.
Pro Tips for All-Day Hold
Don’t pull the ponytail too tight. Fine hair breaks easily under tension, and a too-tight ponytail will actually create breakage and make your hair look thinner over time. A slightly loose ponytail is actually more secure for fine hair and looks better too. Use a texture spray at the base of your ponytail midday to refresh your waves and add grip. If you’re creating this style the morning after sleeping on slightly damp hair, your wave pattern will already be enhanced and hold longer in the ponytail.
5. The Wavy Lob with Layered Choppy Layers
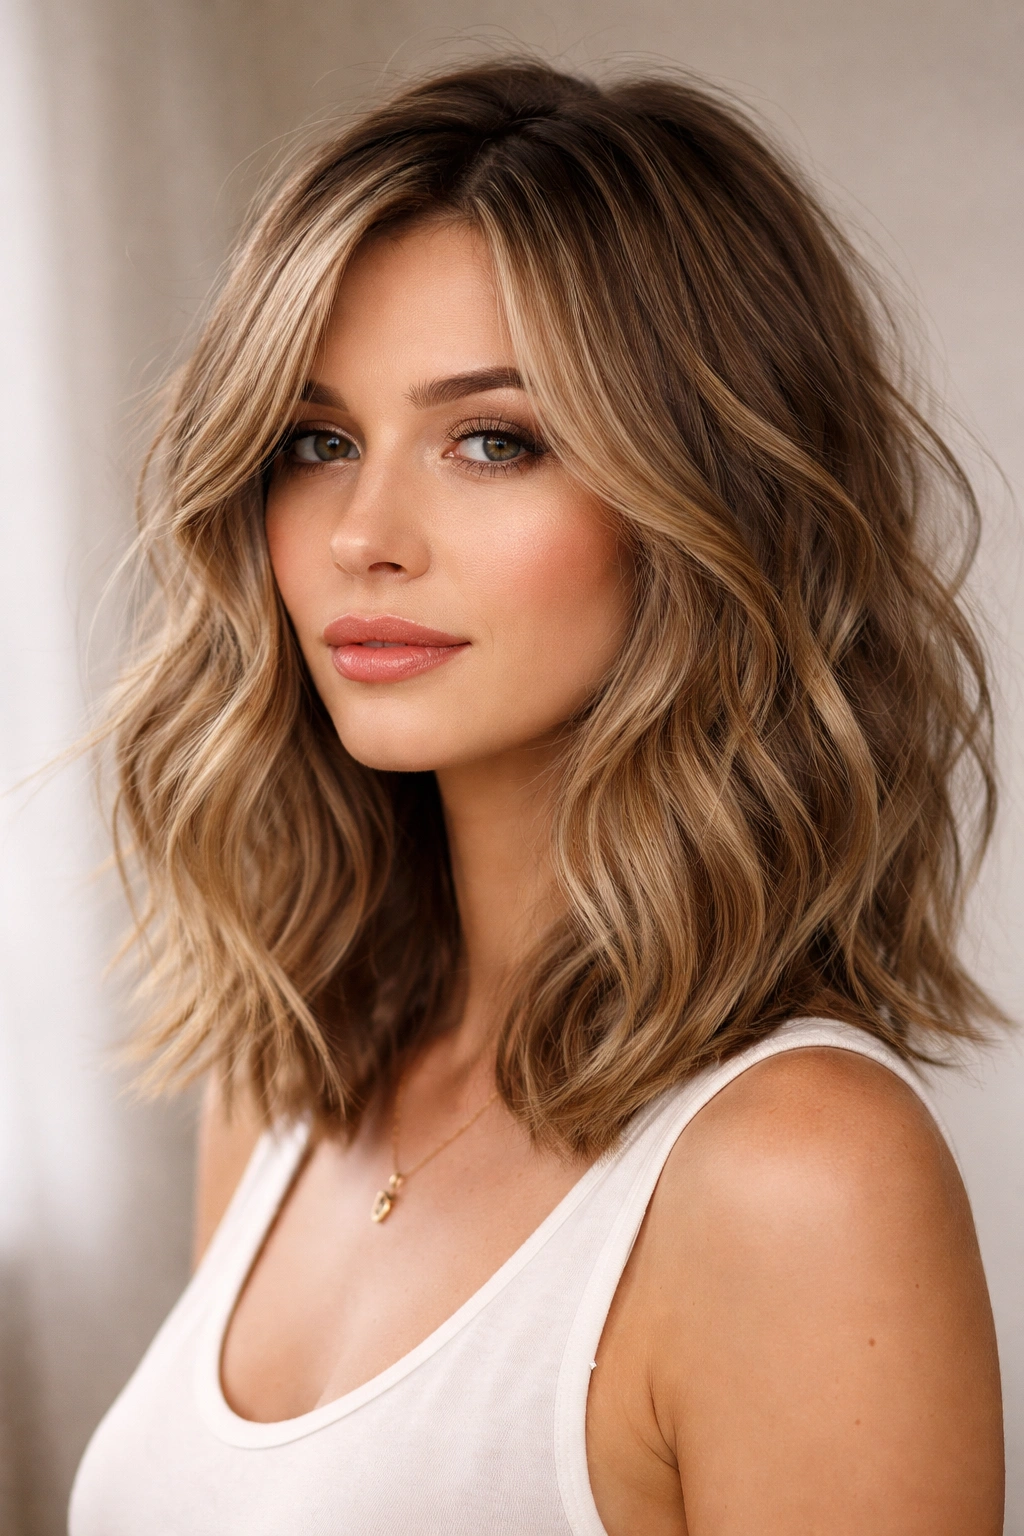
Length matters for fine wavy hair. A long bob (lob) with choppy layers cuts out weight while adding movement. This is one of the few haircut choices that can genuinely transform how well your waves hold throughout the day.
Why It Works for Fine Wavy Hair
Choppy layers remove the bulk that weighs fine hair down. When you have one heavy length, the weight of all that hair together creates flatness. But when a stylist cuts strategic layers, each layer becomes its own section with its own movement. This means your waves have less weight to fight and can hold their shape longer. A lob is also the perfect length for fine wavy hair—long enough to look feminine and full, short enough that weight doesn’t completely destroy your waves by midday.
How to Create Texture in a Wavy Lob
This is where styling technique makes or breaks the look. Blow-dry with a diffuser rather than smoothing down with a paddle brush—that downward smoothing motion kills wave definition. Use a lightweight mousse applied to damp roots before diffusing. Once dry, use a 1.25-inch curling iron to add extra texture to the layers. The choppy layers already have movement, but you’re enhancing that movement so waves are crisp and defined rather than soft and loose. Focus the curling iron on the choppy sections that naturally stick out—you’re not trying to create uniform waves, just intensifying the movement that’s already there from the cut.
Pro Tips for All-Day Hold
Ask your stylist specifically for choppy layers designed for fine, wavy hair. Not all choppy layers are created equal, and some cuts actually create the wrong kind of movement. Layers should graduate in length and be positioned to work with your natural wave pattern, not against it. Have your layers cut when your hair is dry, if possible, so your stylist can see exactly how your waves naturally fall and cut accordingly. Use a sea salt spray on damp hair before styling—this product is specifically formulated for fine, wavy hair and won’t weigh you down the way heavy creams will.
6. The Soft Waves with Face-Framing Pieces
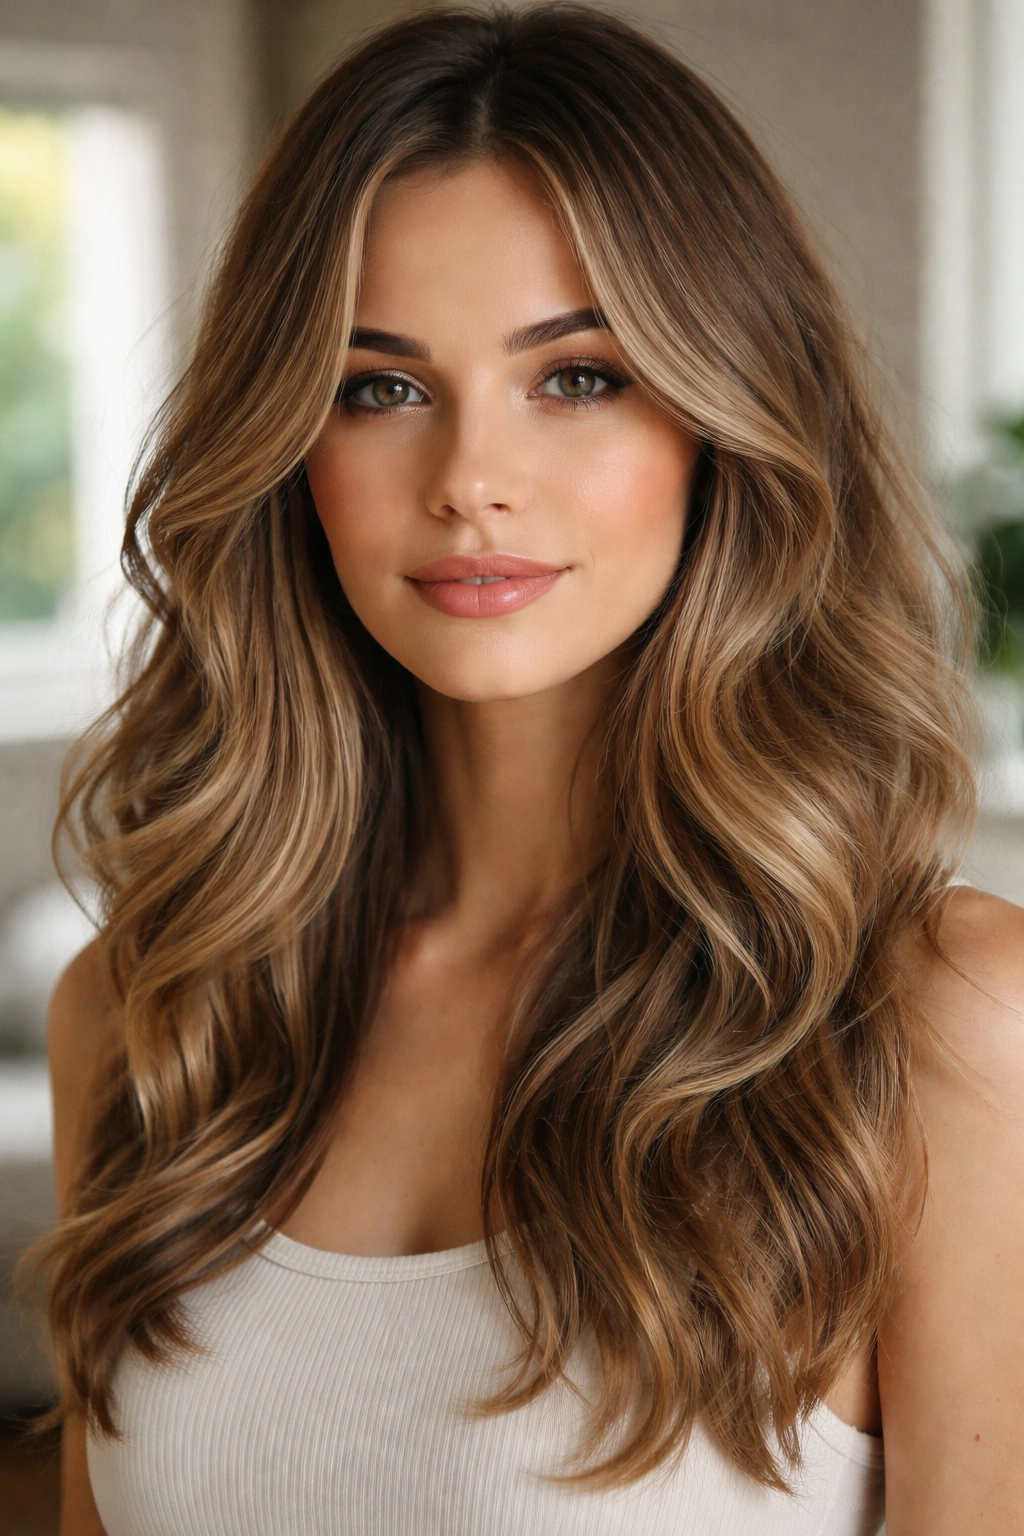
Sometimes the best all-day style is one that looks simple but requires a bit of strategic styling. Soft waves with face-framing pieces keeps your hair off your face while maintaining that flattering, romantic wave pattern throughout.
Why It Works for Fine Wavy Hair
Face-framing pieces create the illusion of fullness around your face, which is exactly what fine hair needs. When you have texture around your face, it draws attention there rather than to any flatness or density issues. Soft waves—not tight curls, but gentle, undulating texture—are actually more forgiving for fine hair than crisp, defined curls. Soft waves naturally relax slightly throughout the day without looking like a complete style failure.
How to Create Soft Waves with Face-Framing Pieces
Start with a texturizing spray applied to damp hair to enhance your natural wave pattern. Blow-dry with a diffuser on low heat. Once dry, use a 1.5-inch curling iron (slightly larger than for tighter waves) to create loose waves. Wrap sections of hair around the barrel and hold for just 8-10 seconds—you’re not cooking the hair or creating defined curls, just gently encouraging waves. Leave face-framing pieces longer so they brush your cheekbones rather than tucking them back. These pieces frame your face and add important visual texture right where people look at you.
Pro Tips for All-Day Hold
Use a flexible hold spray rather than a rigid hairspray. Fine hair needs products that allow movement while providing grip. A flexible spray lets your waves relax naturally throughout the day while maintaining the overall texture. Avoid putting heat on the same section of hair multiple times in one styling session—fine hair is vulnerable to damage and repeated heat will weaken strands. Style efficiently: one pass with the curling iron, then you’re done. Use a lightweight hair oil on the ends if they look dry, which will enhance the overall wave appearance without weighing roots down.
7. The Double-Twisted Half-Up with Texture Knot
This style is slightly more elaborate than a simple half-up, but it still takes under five minutes once you get the technique down. The double twist plus the knot creates a lot of visual interest and texture, which makes fine hair look fuller and more intentionally styled.
Why It Works for Fine Wavy Hair
The beauty of this style is the visual complexity it creates with your own hair. By twisting two sections and knotting them together, you’re creating dimension and movement that makes fine hair look like it has more density than it does. The secured sections also support your wave pattern by anchoring the upper layers, which helps the lower waves hold throughout the day.
How to Create a Double-Twisted Half-Up with Texture Knot
Divide the top third of your hair from ear to ear. Take a small section from one side near your temple and twist it loosely toward the center back. Simultaneously (or one after the other if you need to), take a similar-sized section from the other side and twist it in the same direction. When both twists meet at the center back, cross them over each other like you’re making an X, then bring them around to form a loose knot shape. Secure with bobby pins hidden under the knot. Pull the knot slightly to loosen it and create texture rather than leaving it tight and polished. The looser and more undone this looks, the better it works with fine wavy texture.
Pro Tips for All-Day Hold
Lightly tease your hair at the crown before creating this style. Even just two or three gentle backcombs add enough grip that your twists and knot stay in place longer. Make sure your twists are loose—tight twists on fine hair will actually cause stress and breakage, plus they look severe rather than romantic. Create this style after you’ve already added wave definition to your hair, either through styling with heat or through an overnight wave-setting method. The waves you already have make this style look ten times better.
8. The Wavy Shag with Textured Styling
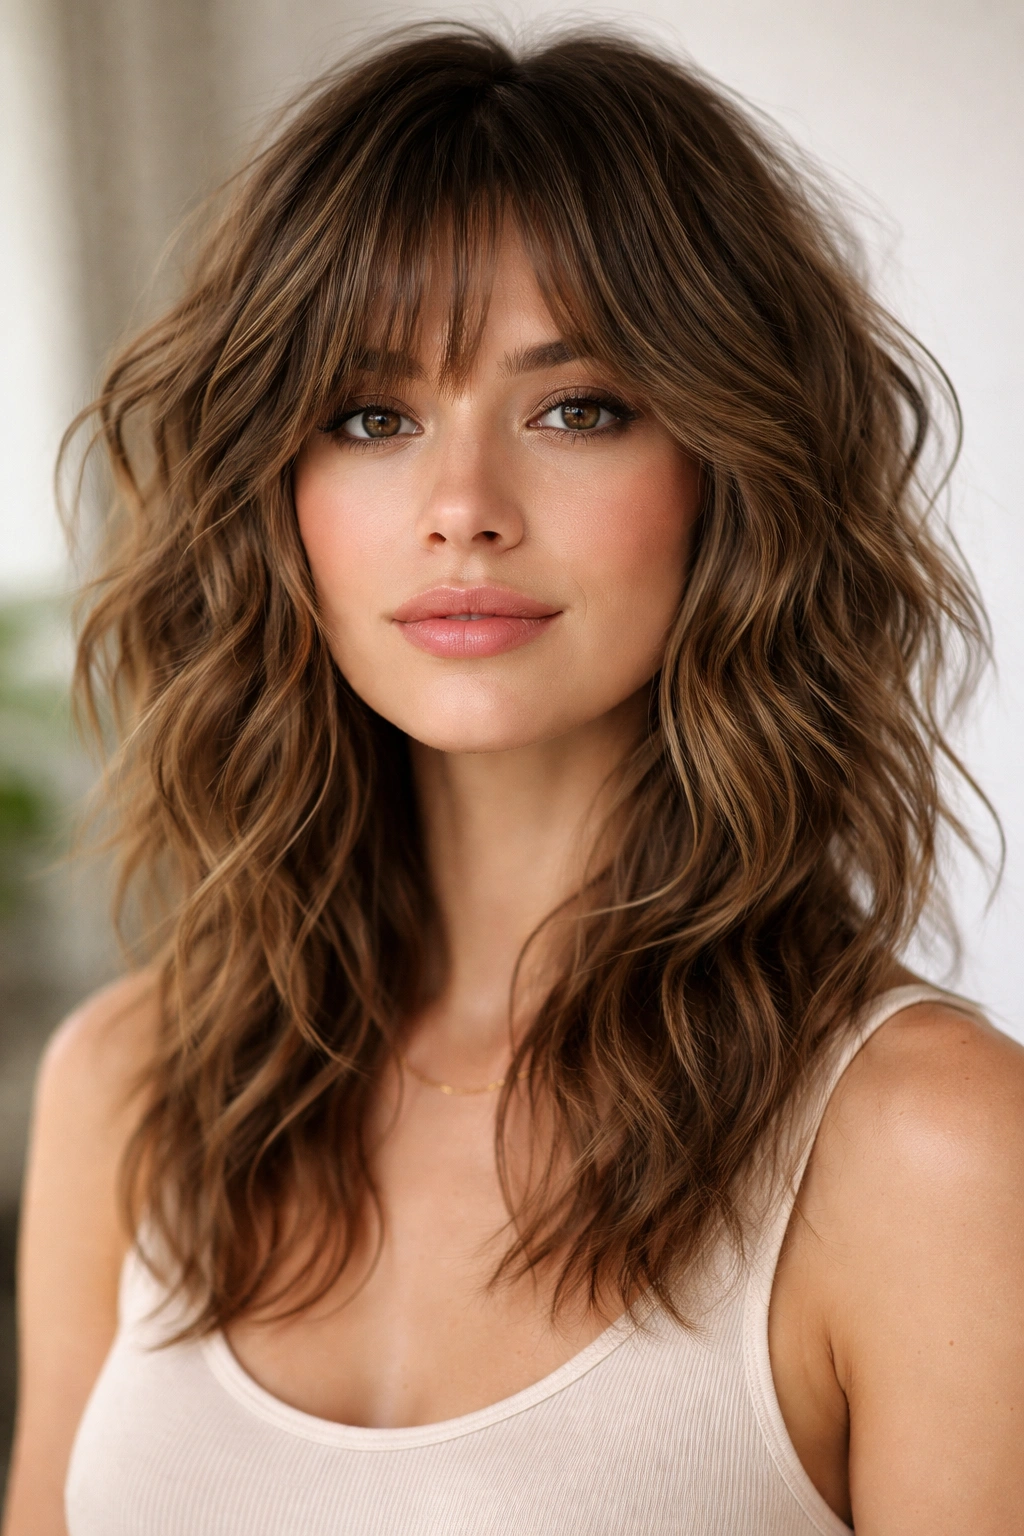
A shag cut is having a major moment, and it’s actually perfect for fine wavy hair. The built-in layers and texture from the cut itself mean you’re starting with a style advantage that holds waves much better than traditional cuts.
Why It Works for Fine Wavy Hair
A shag cut is designed for movement and texture. The choppy layers create natural separation, which means each section of hair moves independently rather than matting down under its own weight. A shag also accommodates your fine waves by working with them rather than against them. The cut literally has built-in texture, so even if your waves aren’t perfectly defined, the shag cut adds that texture element automatically.
How to Create a Textured Shag Style
Blow-dry a shag cut with a diffuser, encouraging your natural waves to form. Don’t smooth anything down—all the texture comes from letting your waves do their thing with the help of the diffuser. Use a lightweight mousse at the roots before diffusing to enhance volume and wave definition. Once dry, use your fingers to separate and scrunch sections, particularly around your face and at the ends. You can use a dry texture spray to add grip and definition. For a more dramatic look, use a curling iron on just the ends and around your face, but often a shag cut requires minimal heat once your natural waves are enhanced with proper styling.
Pro Tips for All-Day Hold
Sleep on damp hair the night before if you want maximum wave definition the next morning. Your natural waves will already be enhanced, and styling time the next day will be minimal. This is particularly helpful for fine hair that struggles with heat damage. Use a sea salt spray specifically designed for textured hair—these products are formulated to enhance your natural pattern without the heaviness of traditional styling products. Get your shag cut trimmed every 6-8 weeks to maintain the choppy shape—shags require more frequent trims than traditional cuts to keep the texture crisp and prevent the cut from becoming shaggy in an unflattering way.
9. The Sleek Low Bun with Braided Details
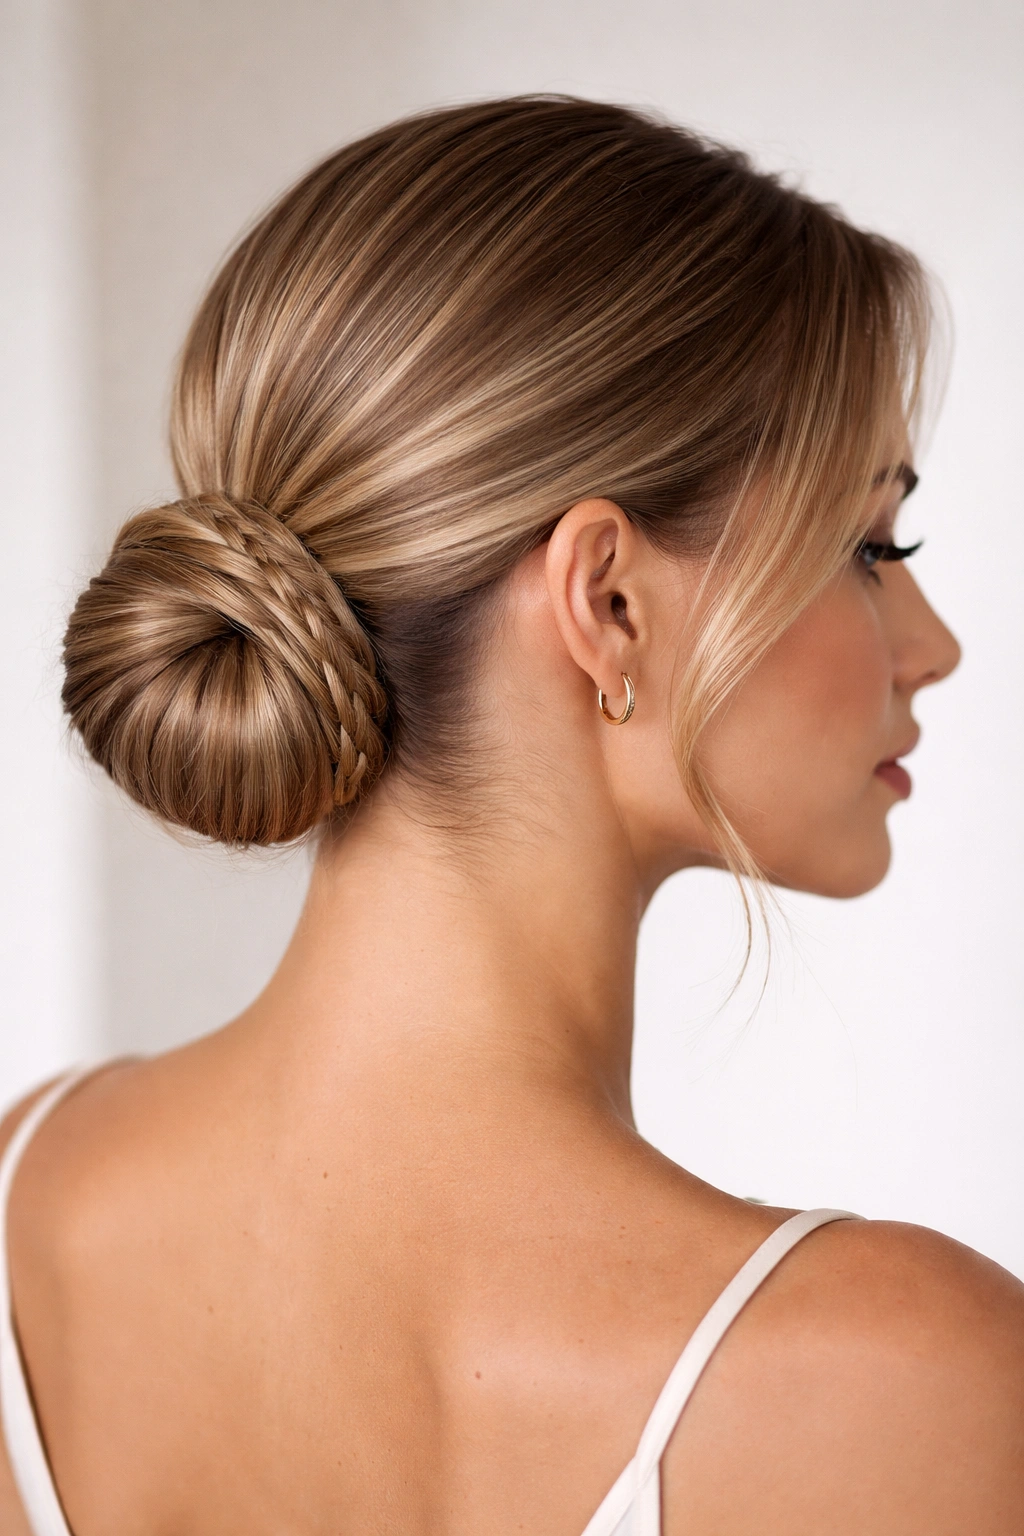
For days when you need a more polished style but still want to work with your waves, a sleek low bun works beautifully—especially when you add braided details that incorporate your waves.
Why It Works for Fine Wavy Hair
A bun solves the weight problem by gathering all your hair in one place. The braid details add visual interest and keep your style from looking too severe, which is important for fine hair that can look wispy or sparse in overly sleek styles. The braid also locks your texture in place, so even if individual strands relax, the overall braid structure maintains that texture throughout the day.
How to Create a Sleek Low Bun with Braided Details
Start with hair that has already been enhanced with wave definition. Apply a smoothing serum to the top section of your hair—you want the outer layer sleek while keeping waves intact in the interior. Use a fine-tooth comb to smooth the top layer back into a low ponytail at the nape of your neck. Take one small subsection from the ponytail and create a loose braid, then wrap that braid around the base of the ponytail to create the bun shape. Secure everything with bobby pins and finish with a flexible hold spray. The result is a bun that looks polished on the surface but actually incorporates your waves in a visible way.
Pro Tips for All-Day Hold
Don’t pull this style too tight, particularly for fine hair. A slightly loose, effortlessly elegant bun is actually more flattering and easier on your hair. Use a smoothing serum rather than heavy gel or wax—you’re creating a sleek look without damaging fine strands under tension. This bun style works best when created on the second day of styling, when your waves are slightly softer and more pliable.
10. The Loose Waves with Strategic Clips
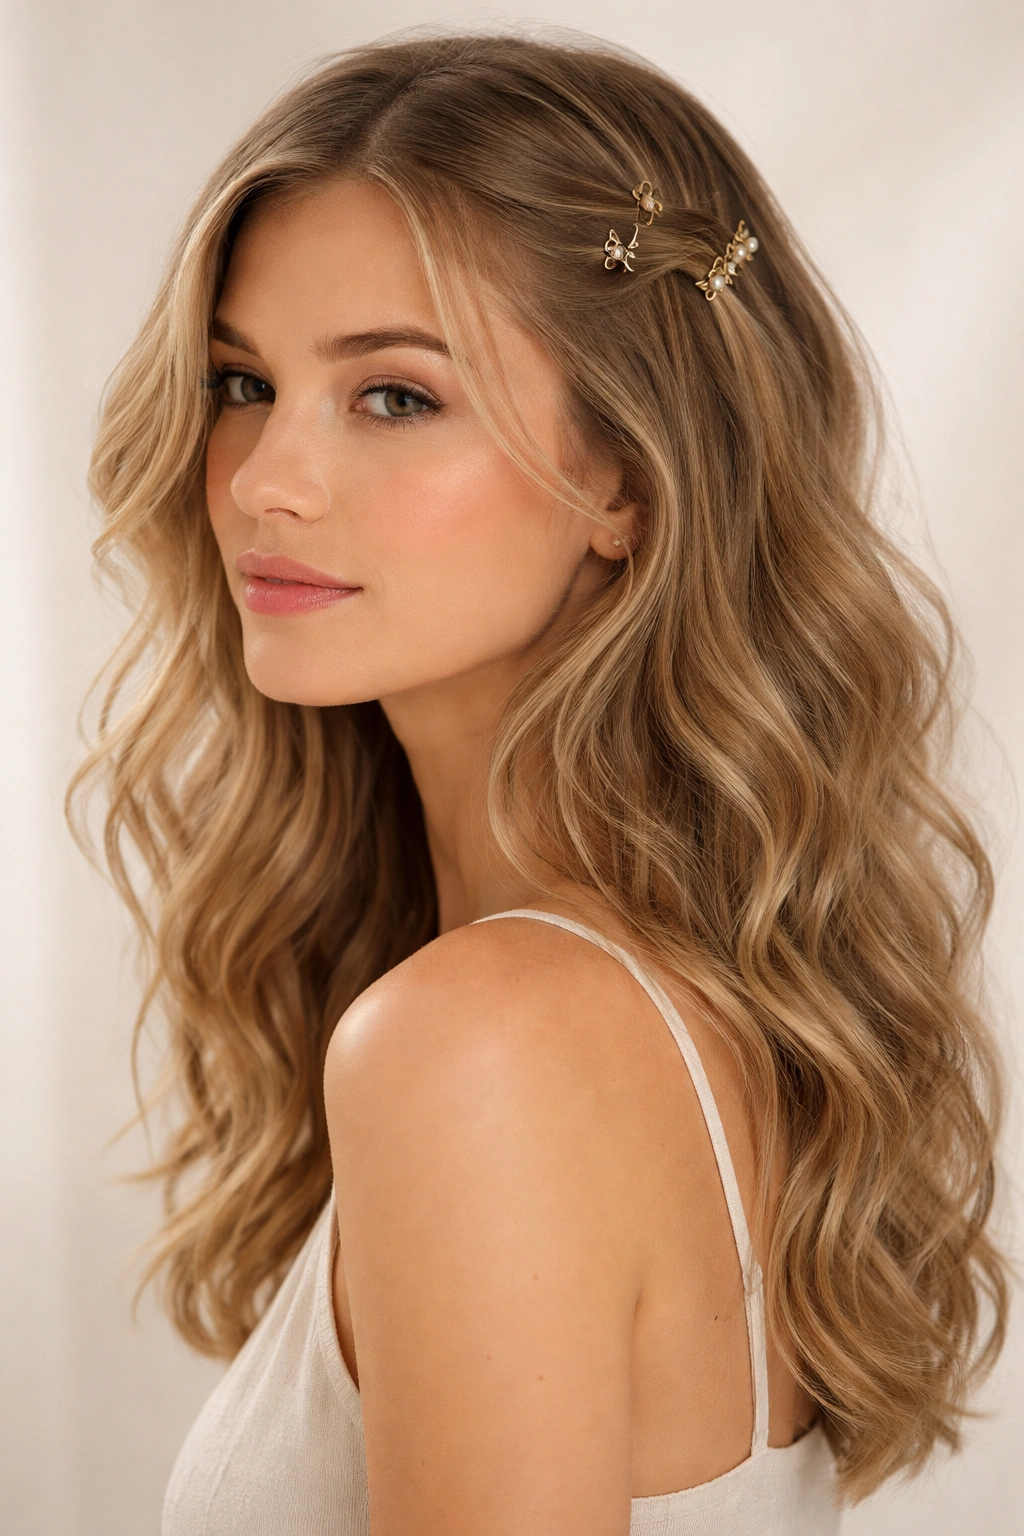
This is the minimalist approach: enhance your natural waves slightly and use small clips or barrettes to add visual interest and keep waves from falling flat.
Why It Works for Fine Wavy Hair
Sometimes less is more with fine hair. Strategic clips add texture and visual interest without the weight of an elaborate style. This approach works because you’re not fighting your hair’s natural tendency to relax—you’re working with it and using accessories to enhance the texture you do have.
How to Create Loose Waves with Strategic Clips
Start with hair that’s been blow-dried with a diffuser to enhance your natural wave pattern. You could add a light mousse beforehand to boost definition. Once your waves are set, place small clips or tortoiseshell barrettes strategically around your head—near your temples, at the back near the crown, or clustered near one ear. These clips do double duty: they look intentionally styled, and they actually help hold your wave pattern by providing small anchor points. The clips make it look like you’ve put thought into your style when really you’ve just enhanced your natural texture.
Pro Tips for All-Day Hold
Choose clips that match your hair color or skin tone so they look intentional rather than like you’re trying to hide something. Place them so they’re visible and actually contribute to the look rather than looking like they’re holding your hair together out of necessity. Use a light hairspray or texture spray to set your waves before adding clips. The clips will help maintain the texture, but your waves need to be defined first for this to work well.
11. The Wavy Gel-Defined Crunch Look
On days when you want maximum wave definition, a gel-based approach creates crisp, defined waves that hold remarkably well throughout the day, even with fine hair.
Why It Works for Fine Wavy Hair
Lightweight gel is one of the few products that can provide hold without heaviness. A gel holds your wave pattern in place while still allowing movement and bounce. The “crunchy” texture you get from gel actually adds dimension and definition that makes fine hair look fuller and more textured.
How to Create a Gel-Defined Crunch Look
Apply gel to damp hair, concentrating on the mid-lengths and ends rather than the roots. Use a lightweight gel formulated for fine or wavy hair—heavy gels will absolutely weigh you down. Scrunch the gel up into your hair with your hands, encouraging your natural waves to form. Blow-dry with a low heat setting and a diffuser attachment, continuing to scrunch as you dry. The gel will set as your hair dries, creating that defined, slightly crunchy texture. Once completely dry, scrunch your hair again gently—this breaks up the crunch slightly and creates a softer final look while maintaining all that definition.
Pro Tips for All-Day Hold
Use a gel designed specifically for waves or curls rather than a general-purpose gel. Wave-specific gels are formulated to enhance your pattern rather than fight it. Start with less gel than you think you need—you can always add more, but removing excess gel from fine hair is nearly impossible. The crunch will soften slightly throughout the day as humidity and natural movement relax it, but the definition should hold. Reactivate your waves midday with a little water and a texture spray if they’re dropping.
12. The Tousled Waves with Volume Powder
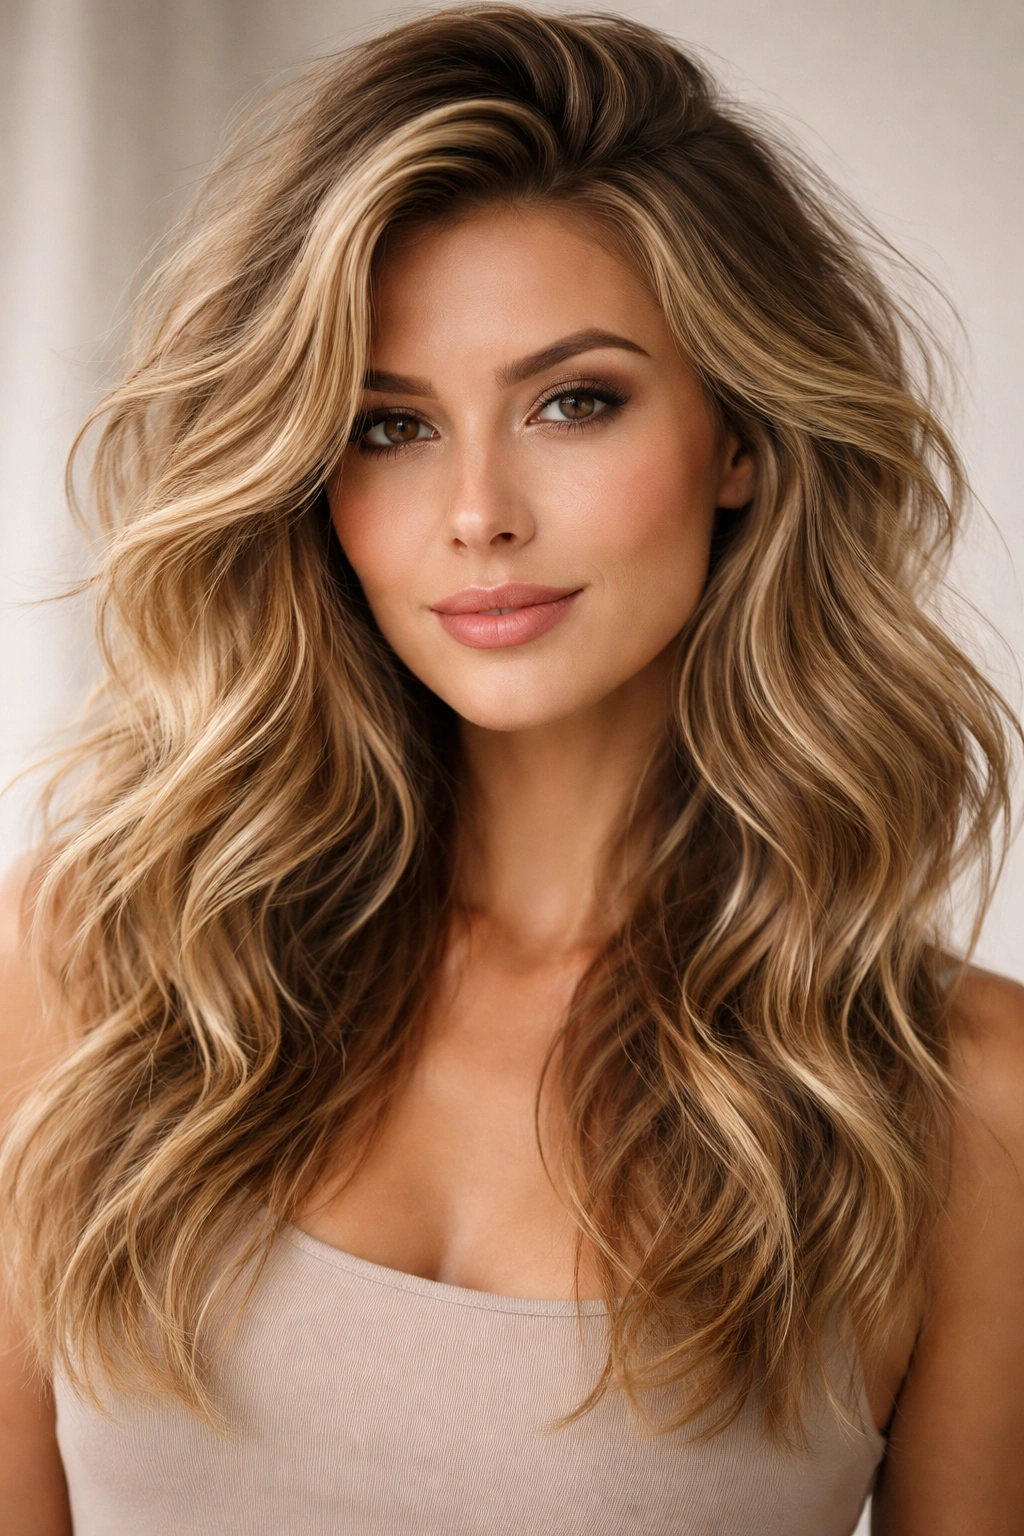
This final style is all about strategic product use: a volumizing powder at the roots plus tousled waves creates an incredibly full-looking style that lasts all day.
Why It Works for Fine Wavy Hair
Volume powder is a game-changer for fine hair because it adds grip and texture at the roots where you need it most, without the heaviness of mousse or gel. Combined with waves, volumizing powder creates the illusion of density and keeps your roots lifted throughout the day.
How to Create Tousled Waves with Volume Powder
Start with dry hair and apply volumizing powder directly to your roots at the crown and around your part line. Massage it in gently with your fingers, working the powder through your hair. The powder will absorb oils and add texture immediately. Next, enhance your wave pattern by scrunching with a sea salt spray or by using a diffuser with a lightweight product applied first. Use a curling iron to add texture to any sections that need extra definition. The combination of root powder plus wave definition creates a style that looks full and textured from root to tip.
Pro Tips for All-Day Hold
Apply volumizing powder only to the roots—applying it throughout your hair will make fine strands look dry and straw-like. Choose a translucent or colored powder that matches your hair color so it blends in rather than looking chalky. Volume powder refreshes throughout the day, so you can reapply midday if your roots start to flatten. Use a light hand—a little powder goes a long way on fine hair.
Final Thoughts
Fine wavy hair has genuine advantages if you work with its specific properties rather than against them. Your waves want to exist; they just need the right techniques, products, and styles to hold up throughout the day. The key is rejecting the idea that fine hair needs to be sleek, flat, and minimalist. Your waves are an asset. Enhanced waves actually make fine hair look fuller because all that texture and movement creates visual density.
Start with the style that sounds most doable for your lifestyle and skill level. You don’t need to master all twelve—pick one or two, practice them, and perfect them. Once you’ve got one reliable all-day style, adding another becomes easier because you understand the principles behind what works. The common thread running through every style here is the same: enhance your natural wave pattern, eliminate weight where it creates flatness, use products formulated for fine hair, and work with gentle techniques that respect your delicate strands. Your waves will reward you by lasting through your entire day.