Curly hair gets a bad reputation for being high-maintenance, but the truth is that some of the simplest, most effortless hairstyles look absolutely stunning when you work with your natural texture instead of against it. The key isn’t spending an hour styling each morning—it’s choosing styles that let your curls do what they’re already inclined to do. A good curly hairstyle should require minimal effort on busy mornings, hold up throughout the day without falling flat, and actually make you feel more confident in your appearance, not less.
The gap between struggling with curly hair every single day and embracing it often comes down to having a reliable rotation of styles you can actually execute. Most people with curls get stuck in a rut—they either wear their hair down and frizzy, or they pull it into a tight bun they’re tired of. But there’s a whole world of simple, wearable styles that fall somewhere in between: loose braids that frame your face, strategic twists that keep curls off your neck while showing off their texture, half-up styles that look intentional without taking forever, and sleeping techniques that set you up for success the next morning.
What makes these styles work is that they don’t fight your curl pattern. Instead, they use your curls’ natural bounce and volume as an asset. Whether your curls are tight coils, loose waves, or somewhere in between, you can adapt each of these approaches to your specific texture. The styling techniques are genuinely easy to learn, the product lists are minimal, and most of these styles get better the second or third day you wear them—because your curls have had time to fully set and define themselves.
1. The Refreshed Wash-and-Go Curls
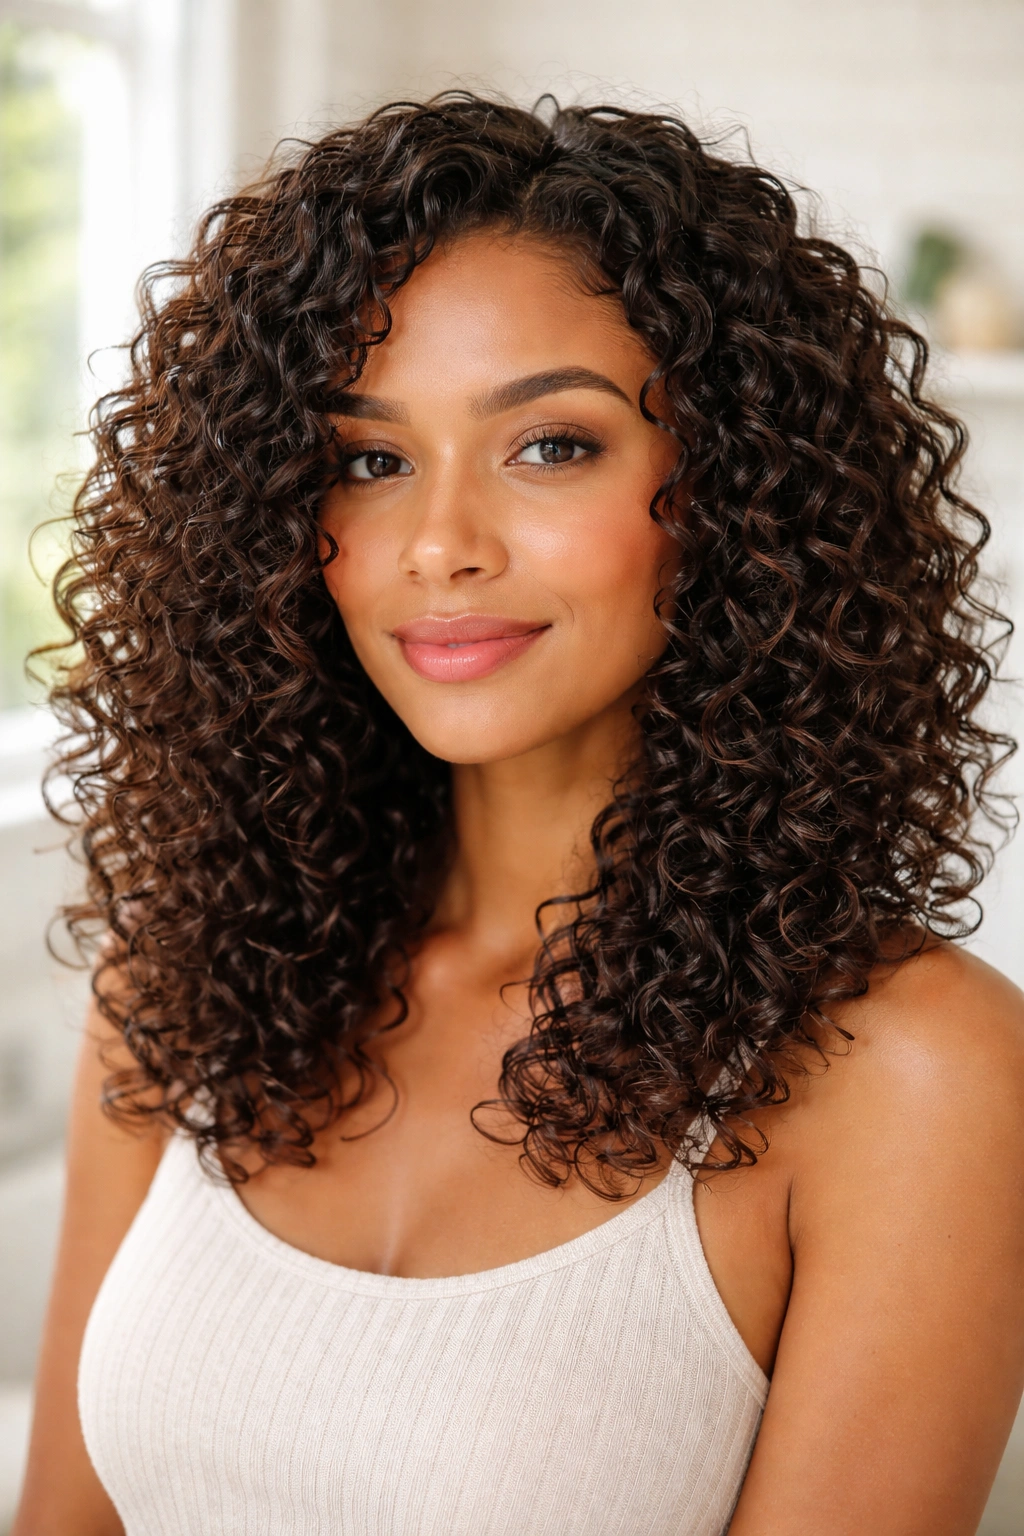
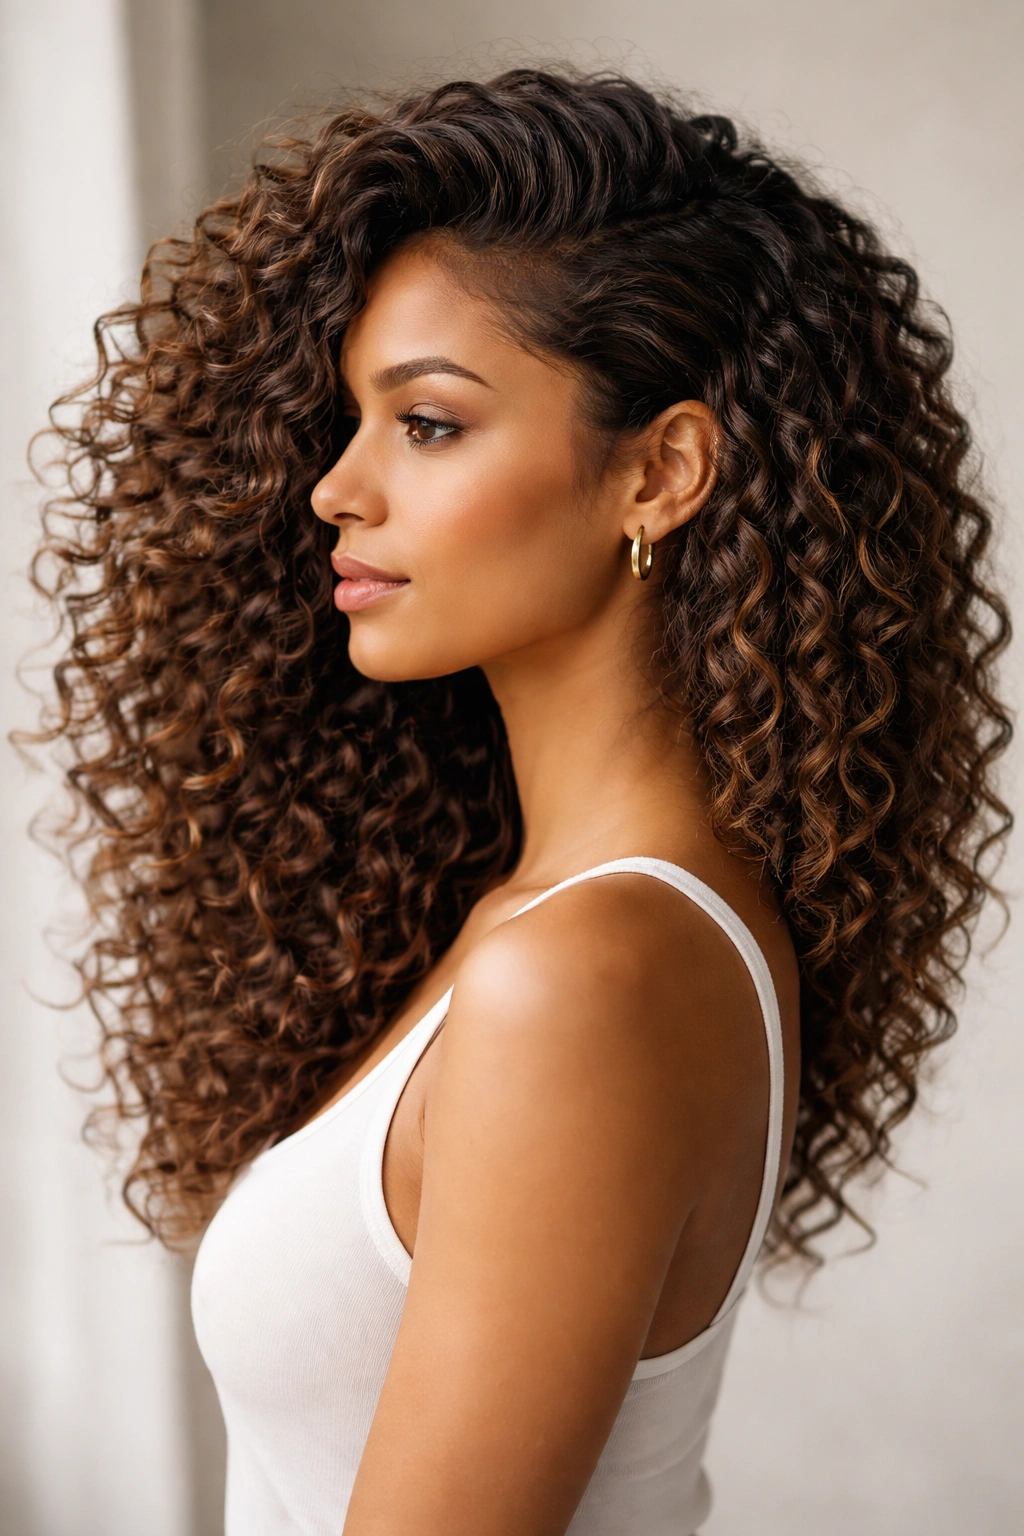
The wash-and-go is the gold standard of curly hairstyles because it requires nothing more than washing, conditioning, applying products, and letting your curls dry—whether that’s air-drying or using a diffuser. On a practical level, this means you’re not spending time with heat tools or fighting your curl pattern, which means your curls stay healthy and bouncy. The secret to making a wash-and-go look polished rather than like you just rolled out of bed lies entirely in product technique and drying method.
Why the Wash-and-Go Works for Daily Wear
A true wash-and-go respects your hair’s natural drying pattern. When you apply leave-in conditioner and styling cream to soaking-wet curls, then either diffuse or air-dry without touching or scrunching excessively, your curls form their own natural shape without the interference that causes frizz and disrupts your curl pattern. You’re essentially letting gravity and air do the work while your products do the protecting. The result is bouncy, defined curls that look like you spent time styling them when you actually just used water and the right formula.
Making Your Wash-and-Go Actually Last
- Apply a nourishing leave-in conditioner to soaking-wet hair from mid-length to ends, avoiding the roots unless your curls are very loose
- Follow with a curl-defining cream or gel that matches your curl type—lightweight for waves, heavier for coils
- If you diffuse, use low to medium heat and medium speed, tilting your head to cup curls against the diffuser without scrubbing
- Never brush or comb your curls when they’re dry (unless they’re loose waves); instead, finger-comb gently while they’re still wet
- Sleep on a silk pillowcase or pineapple your curls in a loose high ponytail to preserve the style for day two and three
Pro tip: If your wash-and-go tends to look limp by afternoon, try applying gel to soaking-wet hair first, then your leave-in conditioner second—the layering order changes how curl clumps form and can mean the difference between floppy and defined curls.
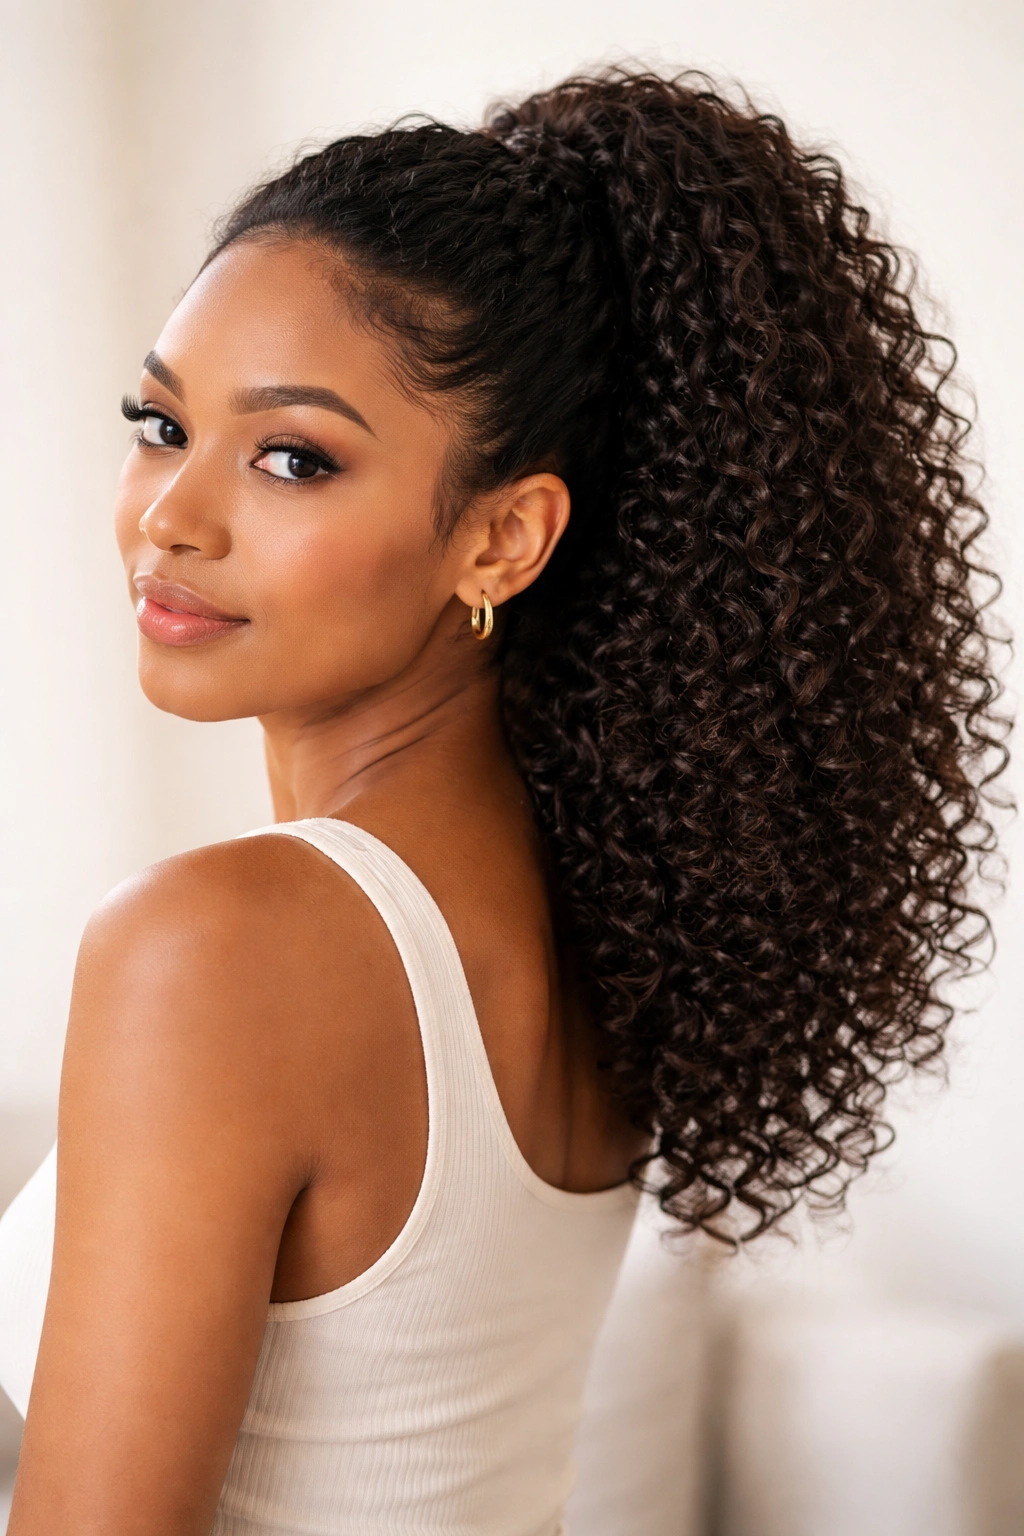
2. The Pineapple High Ponytail

A pineapple is simply a loose, high ponytail made with a soft elastic that sits at the crown of your head. The name comes from the shape—your curls bunch at the top and cascade down, resembling a pineapple. This is equal parts a styling choice and a sleep technique, which means you can do it at night to protect your curls while sleeping, then wear it down the next morning with your curls refreshed. Even if you wear it just as a daytime style, it’s polished enough for work or casual outings while keeping curls off your face and neck.
How the Pineapple Keeps Curls Fresh Overnight
When you sleep on loose curls, friction against your pillowcase causes frizz and disrupts your curl pattern. A loose, high ponytail prevents curls from being crushed under your head or rubbing against the pillow while still letting them breathe. In the morning, you release the elastic, flip your head upside down or side to side, gently separate curls with your fingers, and you have full-volume curls without having to restyle. Over time, your curls will start to spring back into their wash day shape as the style sets.
Executing the Perfect Pineapple
- Flip your head upside down and gather all your curls loosely at the crown—don’t make it tight or you’ll create tension and creasing
- Use a soft cloth elastic or silk hair tie, not a rubber band, which catches and breaks curls
- The ponytail should sit higher than a typical ponytail, closer to the very top of your head
- A few curls can intentionally fall loose around your face and neck—this actually looks more intentional than pulling every single curl up
- In the morning, gently unclip and run your fingers through to separate any clumped sections
Worth knowing: Some people pineapple on day two or three to refresh curls before a night of wear, then release it in the morning with a second day of styling already built in.
3. The Loose Braided Crown
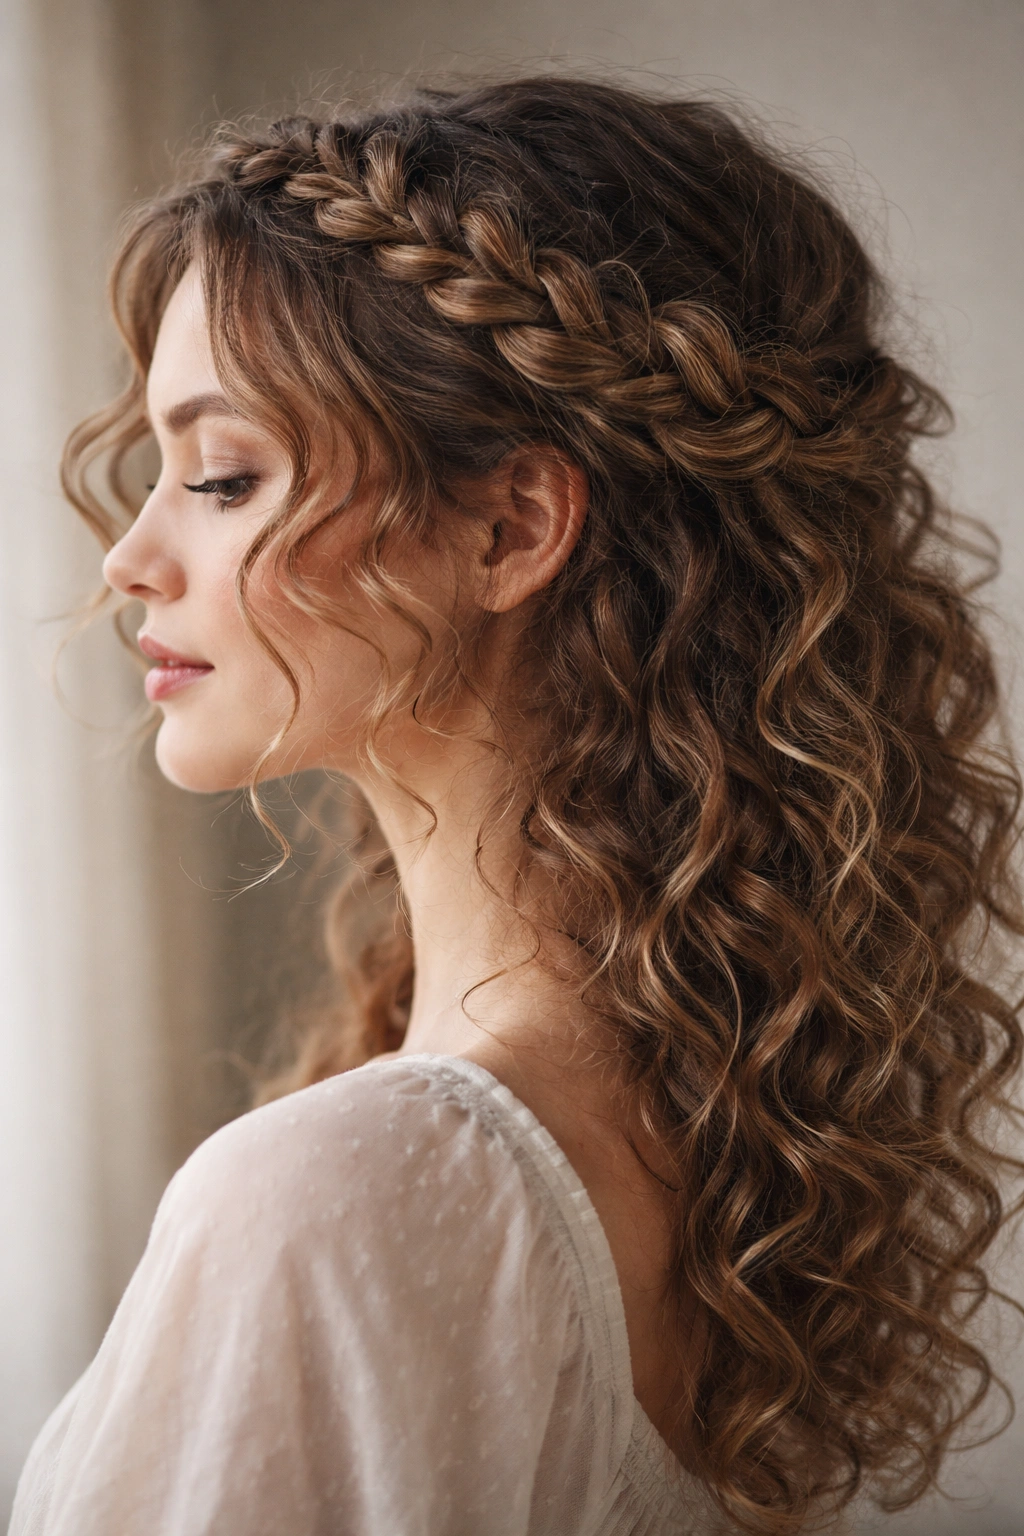
A loose braid that wraps around the crown of your head is an easy, elegant style that works for straight-haired people and curly-haired people alike, but curls benefit uniquely because the braid doesn’t need to be tight or smooth—a slightly messy, piece-y braid with your natural texture showing through actually looks intentional and romantic. It keeps curls off your face and neck while showing off your curl pattern, and it works on both freshly washed curls and day-two or day-three curls that need a refresh style.
Why Crown Braids Work With Curly Texture
A crown braid works because you’re not forcing smoothness onto your curls. Instead, you’re loosely gathering them into a braid pattern and letting your natural waves or coils show through the braid structure. Flyaways and loose strands read as texture and softness rather than messiness. This is one of the rare hairstyles where your curls looking a little wild actually enhances the look rather than detracting from it. You can make the braid with a few loose sections or multiple thin braids woven together—whatever feels natural to your hand.
Creating a Loose Crown Braid From Scratch
- Start on one side of your head near your ear, taking three small sections of hair for a basic three-strand braid
- As you braid, gradually pull in hair from the crown area, adding new sections with each braid cross (like a French braid)
- Keep the braid deliberately loose—your goal is texture, not tightness, so don’t pull the strands taut
- Continue braiding around to the other side of your head until you reach your opposite ear
- Secure the end with a small silk elastic or bobby pin tucked beneath your curls
- Gently pull and loosen sections of the finished braid with your fingers to create a fuller, more relaxed look
Insider note: If braiding feels awkward or your braid looks too neat, twist sections loosely instead of braiding them—two strands twisted together is just as pretty and often easier to execute.
4. The Half-Up Twist and Pin
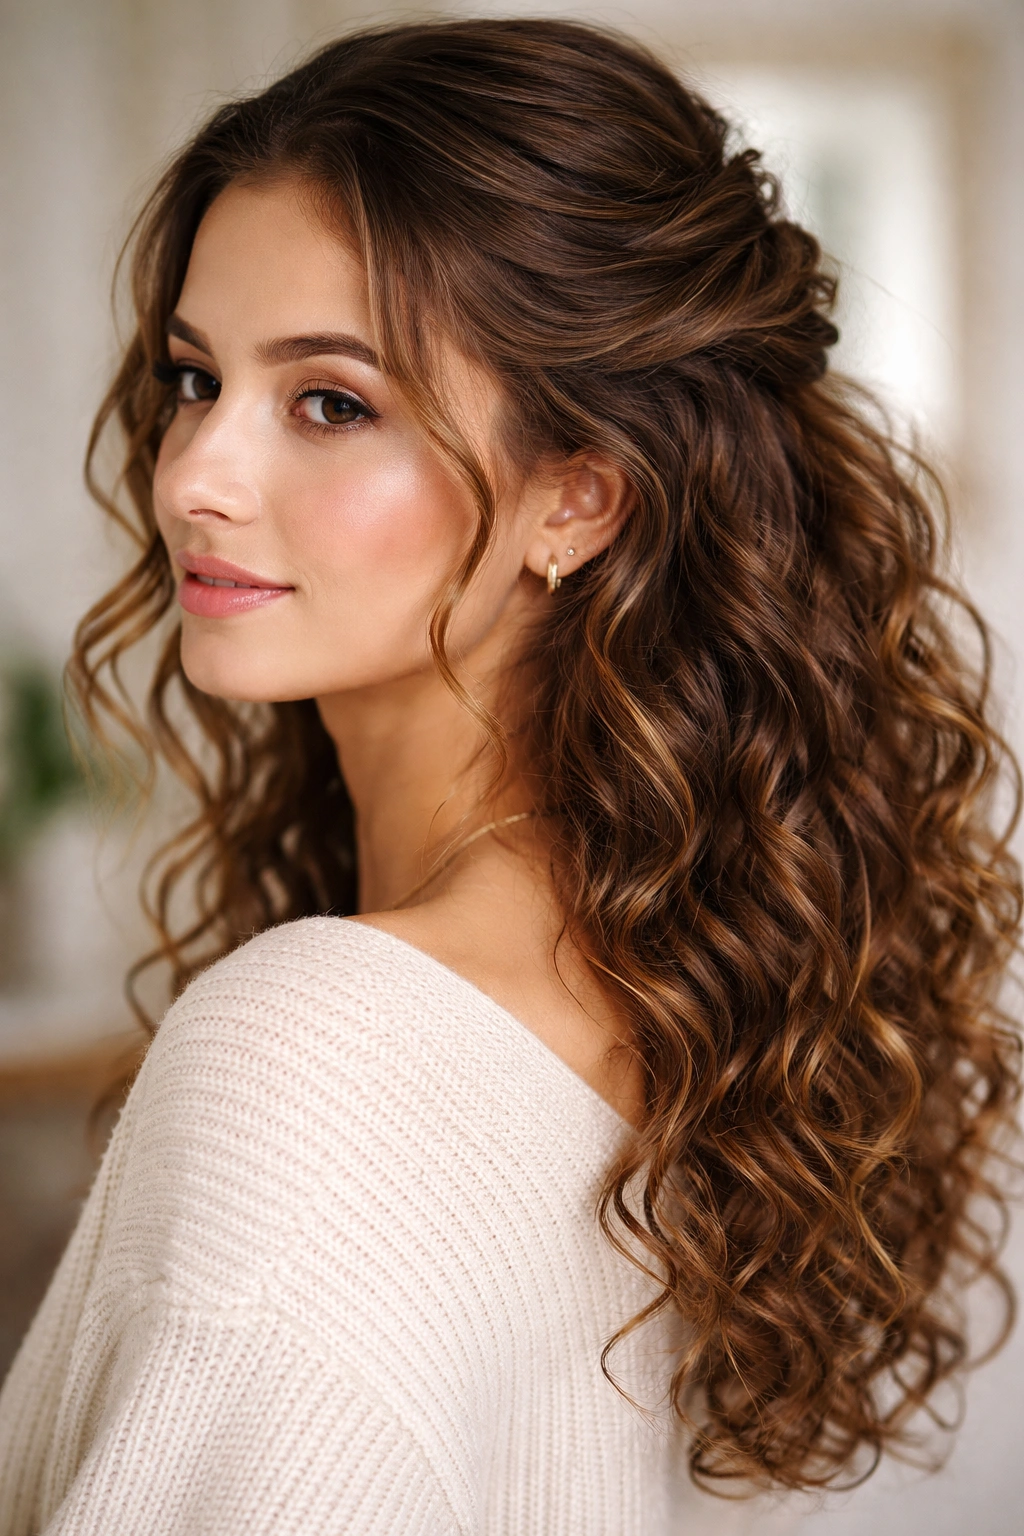
The half-up style keeps curls off your face and neck while leaving the bottom half of your hair down and free. A half-up twist is even easier than a half-up braid because you’re simply taking a section of hair from each side of your face, gently twisting them (they don’t have to be tight), and pinning them together at the back of your head. It looks intentional and polished enough for work or meetings, but it’s so quick that you can execute it on a rushed morning or even refresh it mid-day if curls start to feel heavy.
The Mechanics of a Half-Up Twist
A twist is the gateway to relaxed styling—it requires no braiding skill, no intricate technique, just the ability to loosely turn hair around itself. When you twist curly hair, the natural texture creates visual interest and definition on its own. The twist holds loosely and doesn’t require a super-tight grip, which means less tension on your strands. By pulling only half your hair up, you’re keeping the bulk of your volume down while creating a focal point at the crown that draws the eye upward and frames your face.
Step-by-Step Half-Up Twist Technique
- Take a 2-3 inch section of hair from just above your ear on one side
- Gently twist it loosely toward the back of your head (not tightly coiled, just a loose spiral)
- Repeat on the other side with a matching section
- Meet both twisted sections at the back of your head and pin them together with bobby pins tucked underneath so they’re not visible
- Let the bottom half of your curls cascade down freely
- Pull a few face-framing curls loose if the style feels too pulled back
Pro tip: If your curls are particularly thick or heavy, twist slightly thicker sections (3-4 inches instead of 2-3) to handle the weight better, and use two bobby pins crossed in an X pattern for added security.
5. The Twisted Topknot Bun
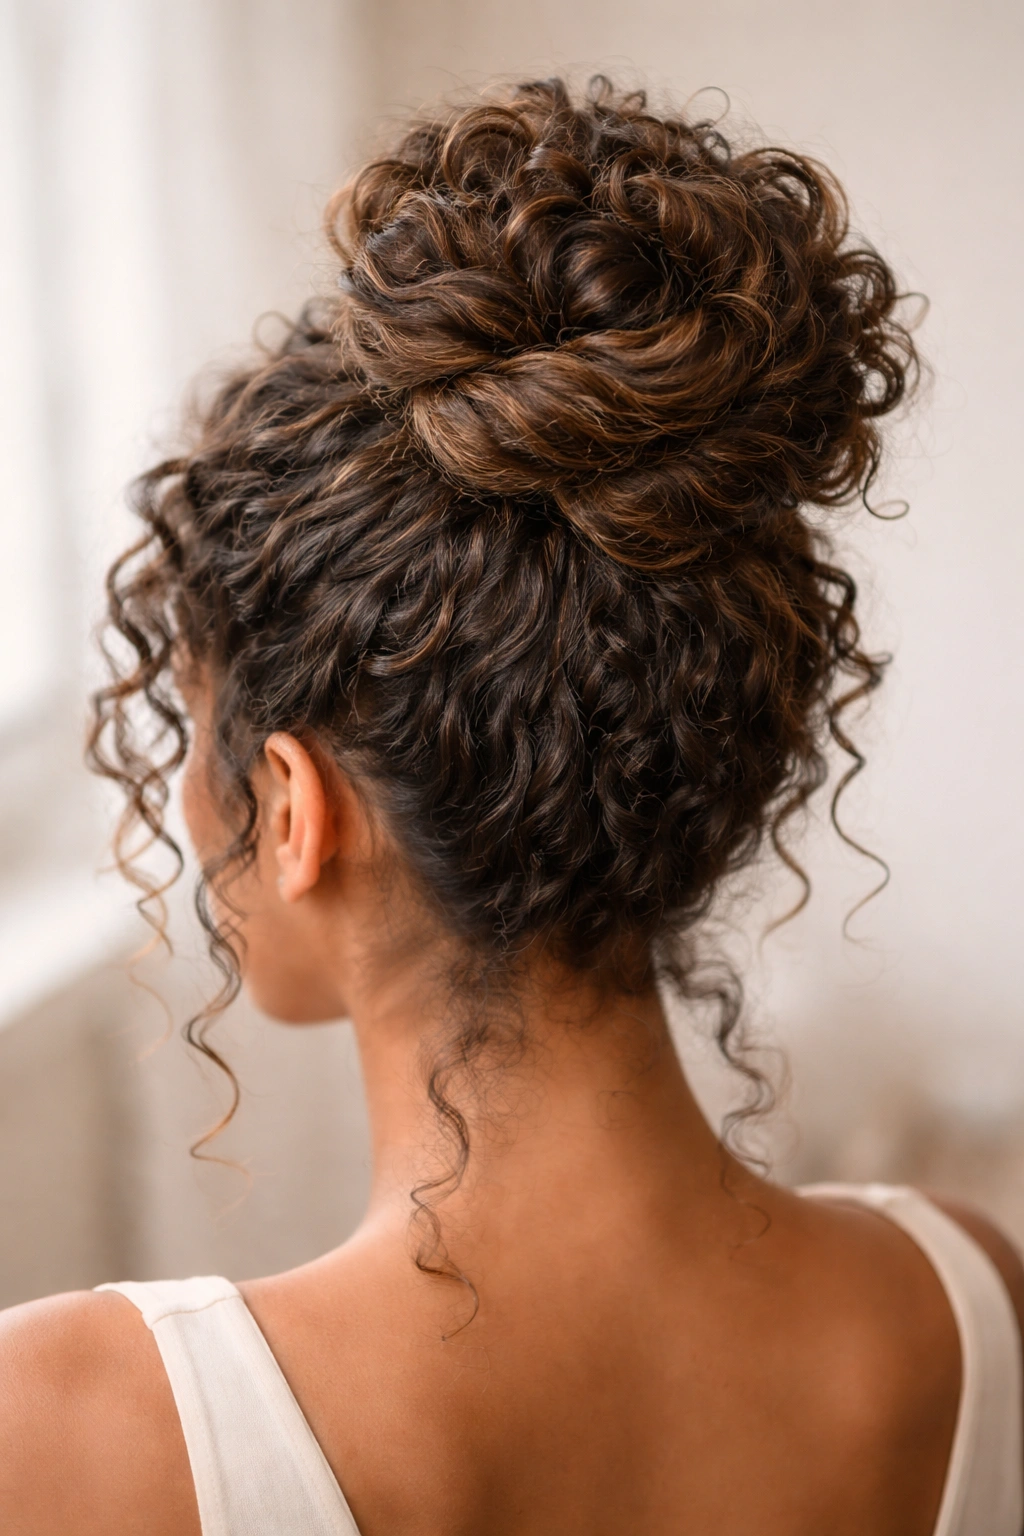
A topknot is a high bun positioned at the crown of your head, and when you create it by twisting instead of braiding or rolling, it’s nearly impossible to do wrong with curly hair. The bun doesn’t need to be tight or perfectly smooth because your curl texture naturally creates a fuller, more interesting knot than straight hair does. A twisted topknot bun works for casual days at home, gym visits, or even relaxed office environments—it keeps all your hair off your neck and shoulders while looking intentional.
Why Curls Look Better in a Twisted Bun
A twisted bun made from curly hair has inherent volume and texture that a sleek bun made from straight hair doesn’t. You’re not trying to smooth or compress your curls; instead, you’re gathering them loosely and letting them puff slightly as you twist and coil them. This creates a bun that’s soft and romantic-looking rather than severe. Your curls also hold the bun’s shape naturally because they’re already textured, so the bun actually gets more stable and defined as it dries and sets throughout the day.
Building Your Twisted Topknot Bun
- Gather hair loosely at the crown of your head into a high ponytail using a soft elastic
- Twist the entire ponytail loosely (not tightly—you want it to look relaxed, not strained)
- Coil the twisted ponytail around itself in a spiral, then pin it at the base with bobby pins
- Gently pull and loosen sections of the bun with your fingers to add volume and create a softer, fuller shape
- You can leave a few curls loose around your face if you want a softer look, or keep it all pulled up for a cleaner profile
Worth knowing: A topknot bun on day-two or day-three curls is actually easier because the curls have already set and have more grip, which means the bun holds more securely without needing to be tight.
6. The Side Sweep with Texture
A side sweep is simply all of your hair moved to one side of your head, creating a dramatic asymmetrical look. With curly hair, you don’t need to create smoothness or use heat tools to make this work—the natural volume and movement of your curls creates all the drama you need. A side sweep works beautifully on wash-day curls that have full definition, but it also works on softer, wavier textures. You’re creating a visual line that moves across the crown and down one side, which is flattering for most face shapes and draws attention to your features.
Creating Dimension With a Side Sweep
The appeal of a side sweep on curly hair isn’t sleekness—it’s the way your textured curls create movement and dimension when they’re all flowing in one direction. The sweep creates a shape that frames one side of your face while opening up the other side. This simple repositioning of your existing curls can completely change how a style looks and feels, and it requires nothing more than a little finger-combing and possibly one bobby pin to keep curls from drifting back to center.
How to Execute a Side Sweep
- Flip your head upside down and gently flip to one side so all your curls naturally fall in that direction
- Flip your head back upright while maintaining the side orientation—your curls should now be swept predominantly to one side
- Use your fingers to encourage curls in that direction without creating tension
- If curls keep drifting back to center, tuck a few sections behind your opposite ear or use a single bobby pin at the crown to anchor the sweep
- The goal is a relaxed, natural look, not a severe side part—pieces falling softly across your face are part of the style
Pro tip: A side sweep is an excellent refresh style on day-two or day-three curls that are starting to lose their wash-day shape—the directional change makes the curls look freshly styled even though they’re a day or two old.
7. The Twisted Side Ponytail
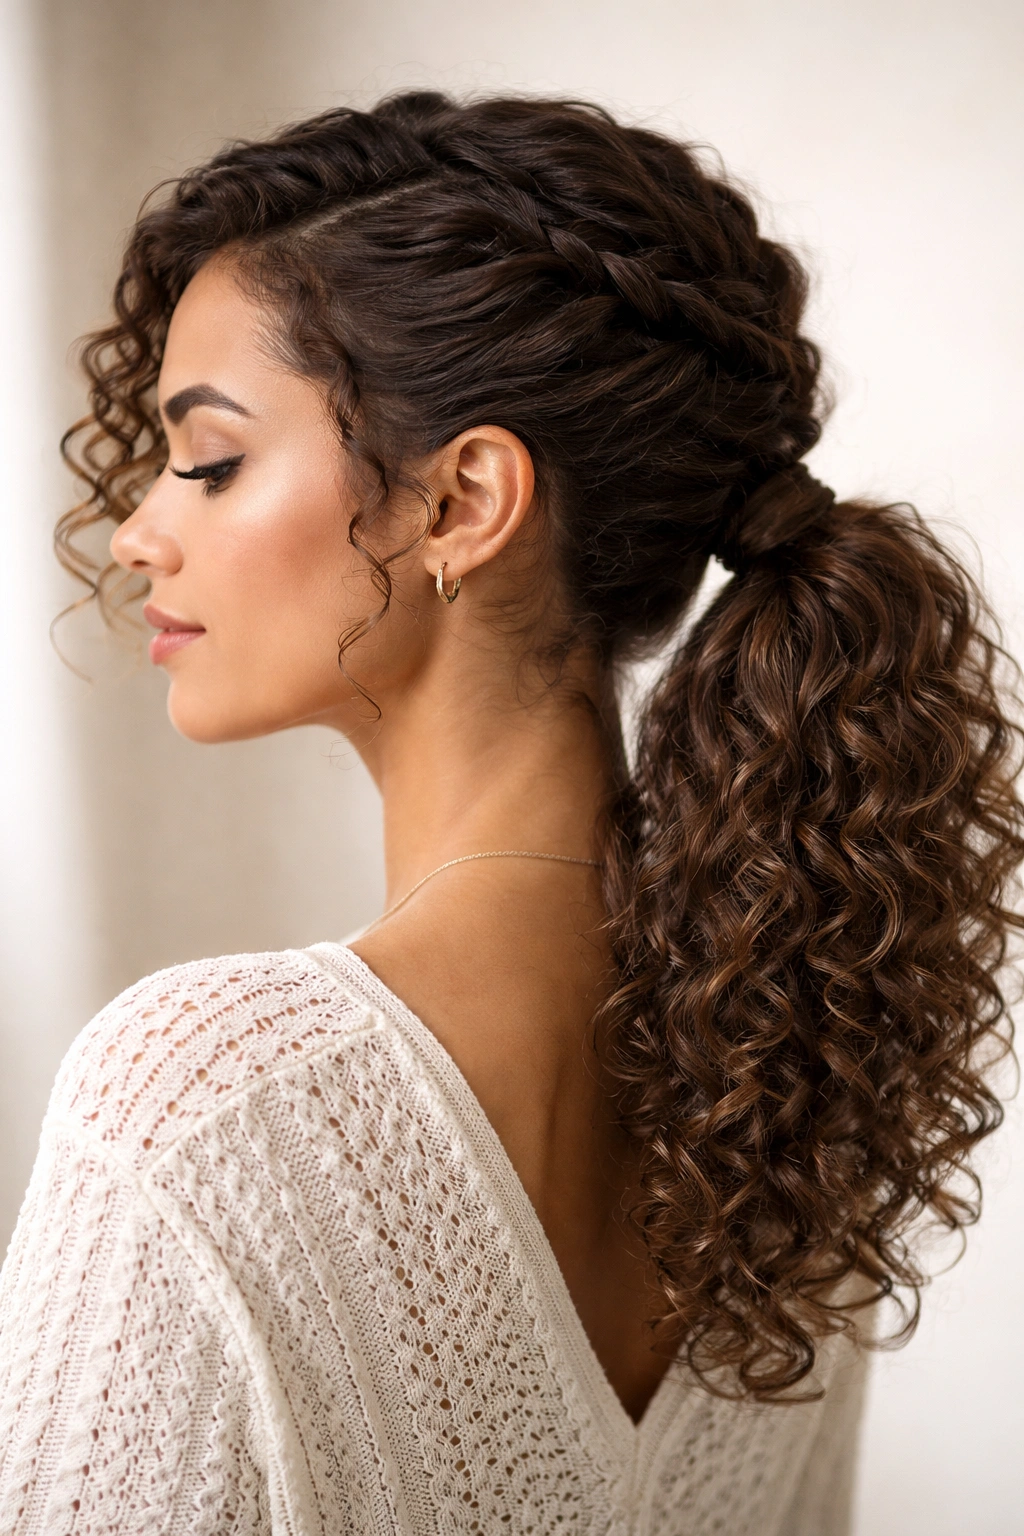
A side ponytail is a ponytail gathered at the side of your head rather than the center back, and when you create it by twisting small sections before gathering, it adds visual interest and texture that makes it feel less casual and more intentional. It’s a practical style that keeps curls completely off your neck and shoulders, works for active days or gym sessions, and looks polished enough for casual work settings. The side placement automatically looks more dynamic and modern than a centered ponytail.
Why Twisted Sections Add Polish
When you twist three or four small sections of hair from the front and sides of your head before combining them into a ponytail, you’re creating a style with multiple textures and visual interest. The twists guide curls in a specific direction and create a focal point at the nape of your neck where the ponytail begins. This is more sophisticated than simply gathering all your hair straight back, but it’s still quick and requires no special skills—just the ability to loosely twist hair.
Building a Twisted Side Ponytail
- Take a small section of hair from above your ear on one side and twist it loosely toward the back
- Take another small section from the top of your head and twist it in the same direction
- Repeat on the other side with two more twisted sections
- Gather all four twisted sections plus any remaining hair into a ponytail on one side (typically the side where you created the initial twist)
- Use a soft elastic that matches your hair color so it blends in
- Release and loosen the twists slightly by gently pulling sections to add texture and volume
Insider note: If you want extra softness, leave a few curls framing your face intentionally untwisted, or create one single large twist from temple to nape instead of multiple sections for a bolder look.
8. The Clip-In Curly Ponytail Refresh
Even if you’re trying to work with your natural texture, having a clip-in curly ponytail extension in your arsenal is genuinely useful on mornings when your curls feel flat, your scalp feels oily, or you just want more volume than your natural hair is providing that day. Clip-in extensions designed for curly hair match your texture and add immediate fullness. You gather your hair loosely into a ponytail, clip the extension into place, and suddenly you have a high-volume, full, styled-looking ponytail in under two minutes. It’s not “all-natural,” but it’s a practical styling tool that lives in the middle ground between “I’m starting from scratch” and “my natural curls are cooperating perfectly today.”
How Clip-Ins Amplify Your Existing Curls
Clip-in extensions for curly hair are designed to match curl patterns and texture, so they blend seamlessly with your natural curls rather than looking like an obvious addition. By clipping them into a ponytail base made from your own hair, you’re creating a fuller, more voluminous style that would take significantly more time and product to create from scratch. On days when time is short or you need your hair to cooperate immediately, a clip-in extension solves the problem while still keeping your natural curls visible and part of the finished look.
Installing Clip-Ins for a Curly Ponytail
- Create a high or mid-height ponytail with your natural hair using a soft elastic
- Teasing the base slightly (especially if your ponytail feels slick) helps the clip grip more securely
- Open the clip mechanism and slide it horizontally into the teased base of your ponytail, sliding all the way toward the elastic
- Close the clip firmly and check that it’s secure by gently tugging the extension
- Let the clip-in curls cascade down and blend with your natural ponytail curls
- If visible gap remains between your natural hair and the clip-in, tease that section slightly more and reposition the clip lower
Worth knowing: Clip-in extensions for curly hair are worth the investment because you can use them repeatedly, they don’t damage your hair like glued-in extensions do, and they take seconds to remove when you’re done styling.
9. The Loose Low Bun With Face-Framing Pieces

A low bun positioned at the nape of your neck is soft, elegant, and works for both casual and professional settings. When you create a low bun by loosely gathering curls instead of braiding or tightly wrapping, it looks relaxed and romantic rather than severe. Intentionally leaving a few curls loose around your face softens the overall look and shows off your curl pattern. This style works beautifully on second or third-day curls because you don’t need fresh definition—in fact, slightly softer curls are perfect for this approach.
The Appeal of a Loose Low Bun
A low bun is essentially the French twist’s more casual cousin. By positioning it lower on your head rather than at the crown, you’re creating a style that feels more relaxed and everyday. The natural volume of your curls makes a low bun look fuller and softer than the same bun would on straight hair. Leaving face-framing pieces loose adds personality and softness without requiring you to achieve perfect smoothness anywhere—your curls’ natural texture actually enhances this style by creating dimension and movement.
Creating a Loose Low Bun
- Flip your head upside down and gather hair loosely at the nape of your neck
- Gently coil the gathered hair around itself and pin it in place with bobby pins, leaving it slightly messy rather than pulling it tight
- Flip your head back upright and use your fingers to pull out and loosen sections of the bun
- Create face-framing pieces by releasing a few curls from around your hairline on both sides
- The finished bun should look soft and slightly undone, not sleek and tight
Pro tip: Mist your low bun lightly with flexible-hold hairspray to keep it secure throughout the day without making it feel stiff or weighed down.
10. The Plopped Curls With a Headwrap

Plopping is a technique where you wrap damp curls on top of your head in a towel (or microfiber cloth) for 15-30 minutes while your product sets and your curls partially dry. During this time, you can do your skincare, makeup, or get dressed. When you unwrap the plop, your curls are already setting into their final shape with tons of volume at the crown. A plopping session followed by diffusing or air-drying the remainder gives you bouncy, well-defined curls without any real styling effort. You can redo a plop on second-day curls that need a refresh, or use it as your primary daily styling technique if you have the time in your morning routine.
Why Plopping Creates Better Curl Definition
When curls dry while gathered on top of your head, they form clumps and define together rather than drying in random directions. Gravity pulls curls upward, which increases volume at the crown. A soft microfiber cloth or cotton t-shirt catches water and product better than a towel, which reduces frizz and encourages definition. The controlled environment of plopping means your curls have time to set into their final shape before any air movement or handling disrupts them. The result is curls with clear definition and minimal frizz compared to letting them air-dry free or diffusing immediately.
Executing a Successful Plop Session
- After washing and applying products, flip your head upside down
- Place a microfiber cloth or cotton t-shirt on a flat surface and position your head so all your wet curls land on the cloth
- Gather the cloth up and around your curls, twisting it loosely at the top to create a wrapped bundle
- Secure the bundle with the cloth ties or a hair clip—it should feel snug but not painfully tight
- Leave the plop in place for 15 to 30 minutes depending on how wet your hair was
- Unwrap gently and either diffuse on low heat or allow the remaining moisture to air-dry completely
- Avoid touching or scrunching your curls during the plop—they’re setting into their final shape, so minimal handling is best
Worth knowing: Plopping isn’t mandatory every single day—use it when you want maximum curl definition, and use quicker air-drying methods on mornings when you’re short on time.
Final Thoughts
The thing about curly hair is that once you stop fighting your natural texture and start choosing styles that actually use it, getting ready becomes genuinely easier. Each of these styles works because it respects how curls behave and what they naturally do well—they create volume, they hold shape, they look textured and interesting. You’re not using heat tools to smooth them straight. You’re not fighting against the shape they’re already forming. Instead, you’re choosing styles that let your curls be exactly what they are.
The rotation doesn’t need to be complicated. Pick three or four of these styles that resonate with your hair type and your lifestyle—maybe a wash-and-go for your busiest days, a half-up twist for work or casual outings, a pineapple for nighttime, and a topknot for gym days. Practice each one a few times so your hands know how to execute it without thinking. After that, getting ready becomes a matter of choosing which style matches your day and your current curl state, then spending five minutes making it happen.
The curls you have right now are the texture you’re supposed to work with. These styles prove that you don’t need expensive treatments, complicated procedures, or hours of styling time to make that texture look intentional, polished, and genuinely beautiful. You just need approaches that match what your curls actually want to do.