There’s something undeniably powerful about an afro. It’s a statement, a celebration, and an expression of identity all rolled into one gorgeously textured crown. Whether you’re wearing your natural hair or exploring protective styling options, afro hairstyles offer incredible versatility across every hair length, texture, and personal preference. From the low-maintenance wash-and-wear to more intricate styled versions, there’s an afro look for literally every mood, occasion, and lifestyle.
What makes afro styling so compelling isn’t just the aesthetic—it’s the cultural significance and the practical reality that afro hair is uniquely equipped to create volume, dimension, and shape that other hair textures simply can’t achieve. The spiral and coil patterns that are natural to afro-textured hair create lift and hold styling in ways that feel effortless once you understand your hair’s needs. The key is finding the specific afro style that aligns with your texture, your daily routine, and the look you’re going for.
The styles below span from completely natural to more manipulated versions, from short and tight to voluminous and expansive. Each one works on different hair lengths and comes with its own maintenance reality. Whether you’re looking for something you can roll out of bed wearing, a style that protects your hair while you sleep, or an intentional statement look for a special occasion, you’ll find multiple options that actually work with your hair rather than against it.
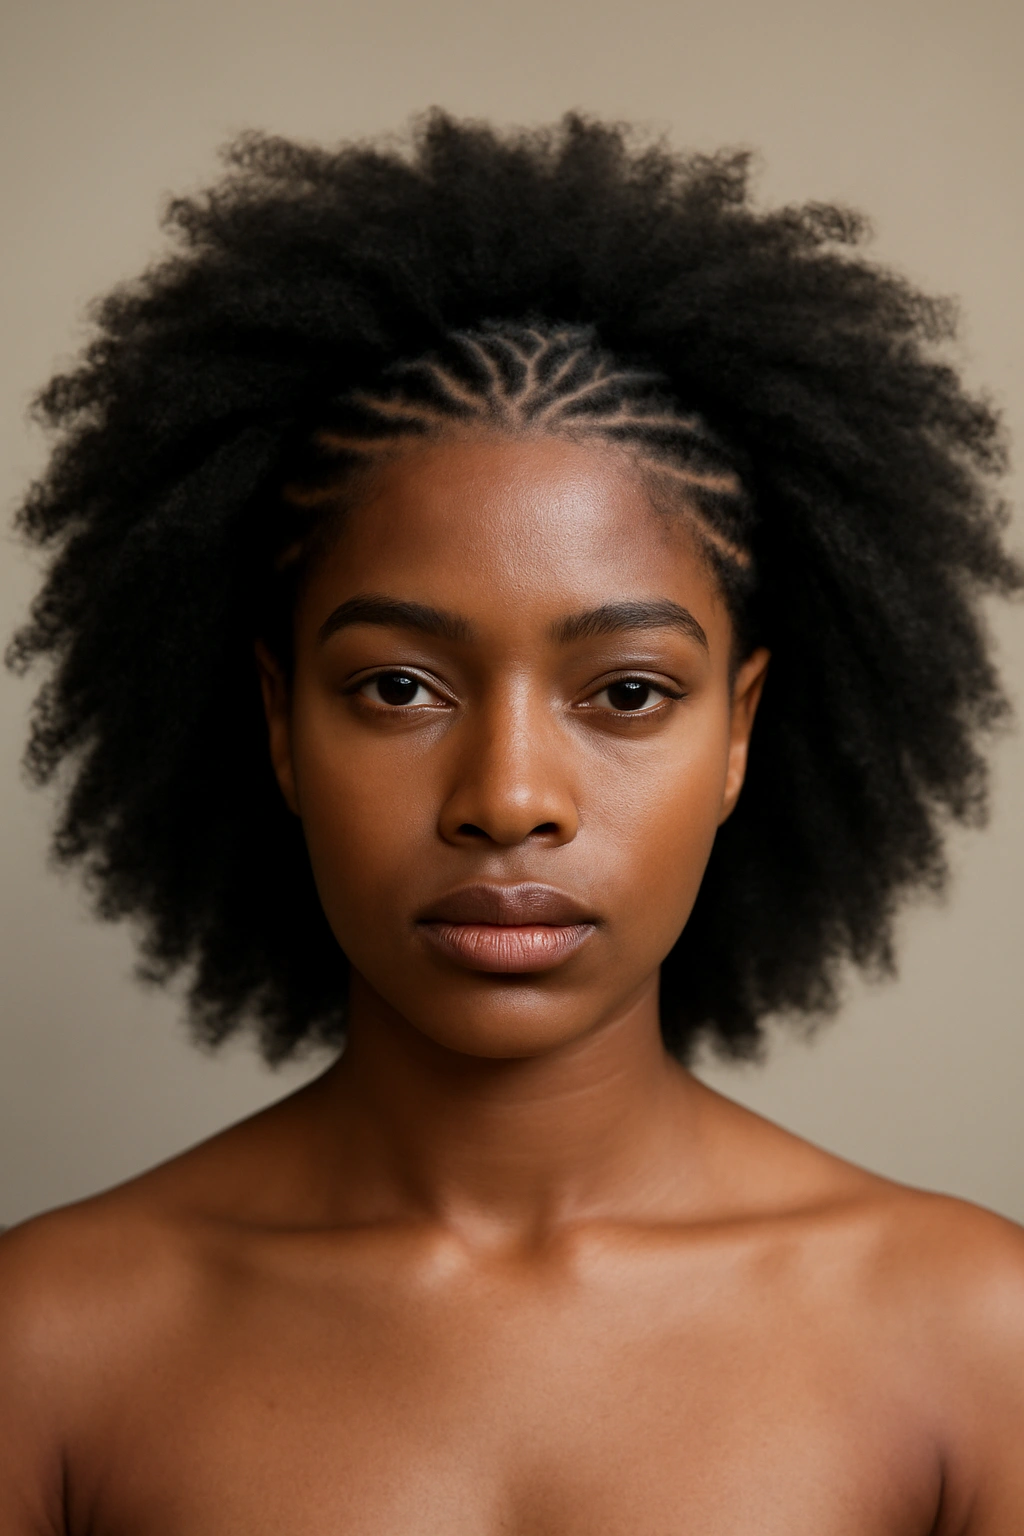
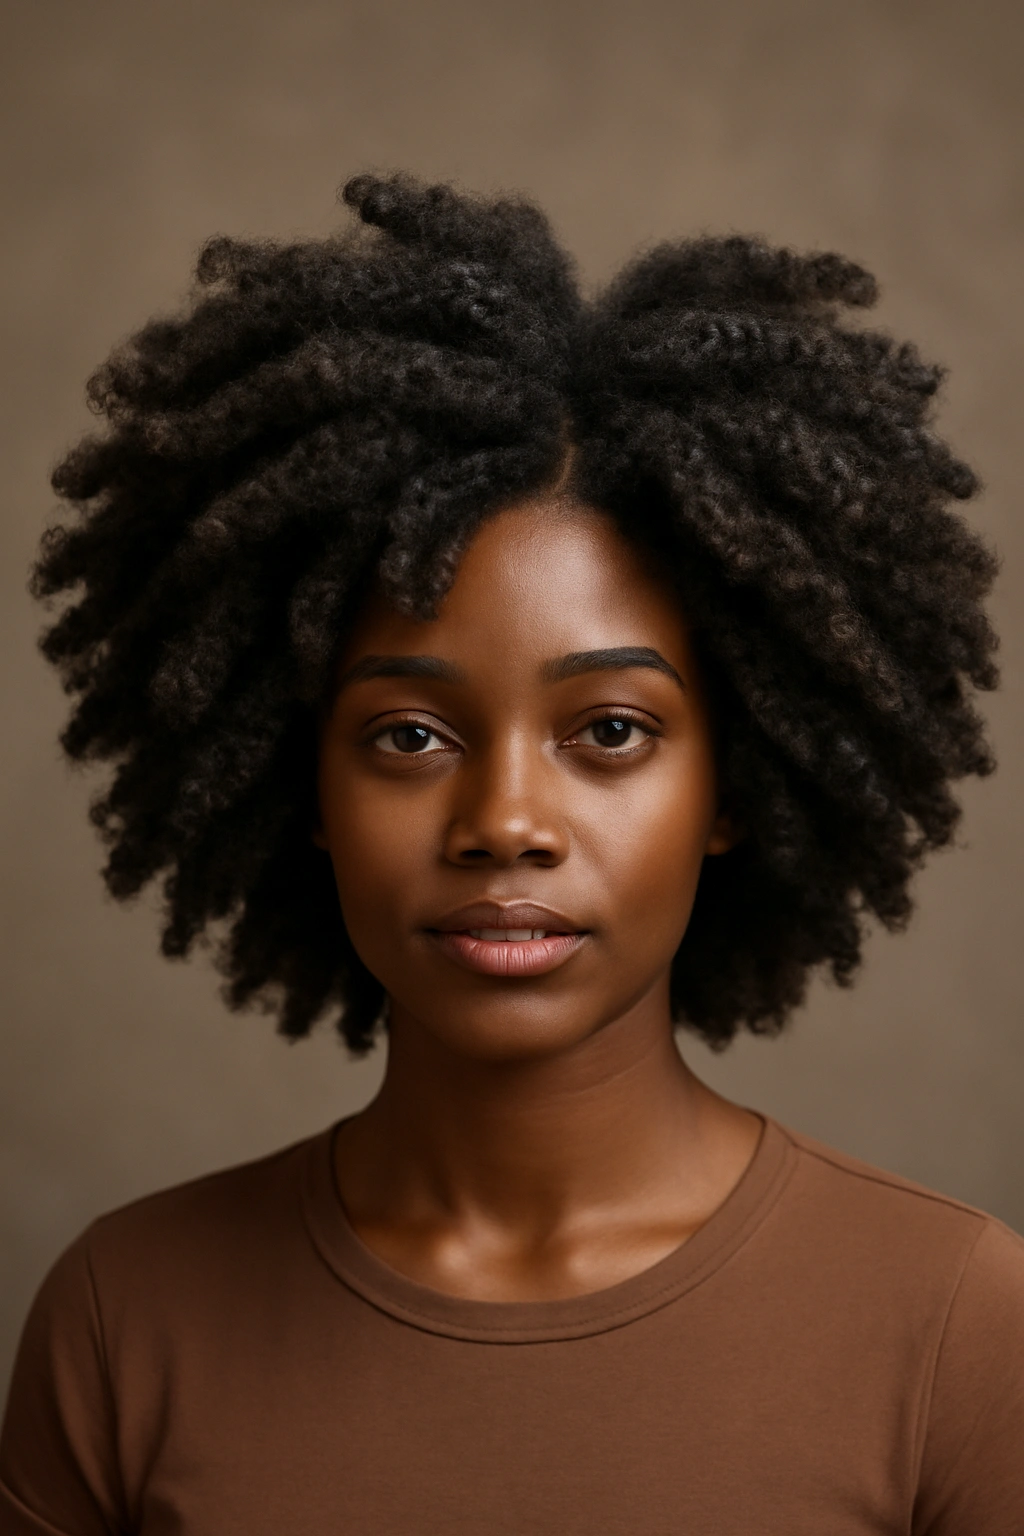
1. Natural Afro (Classic Wash-and-Wear)
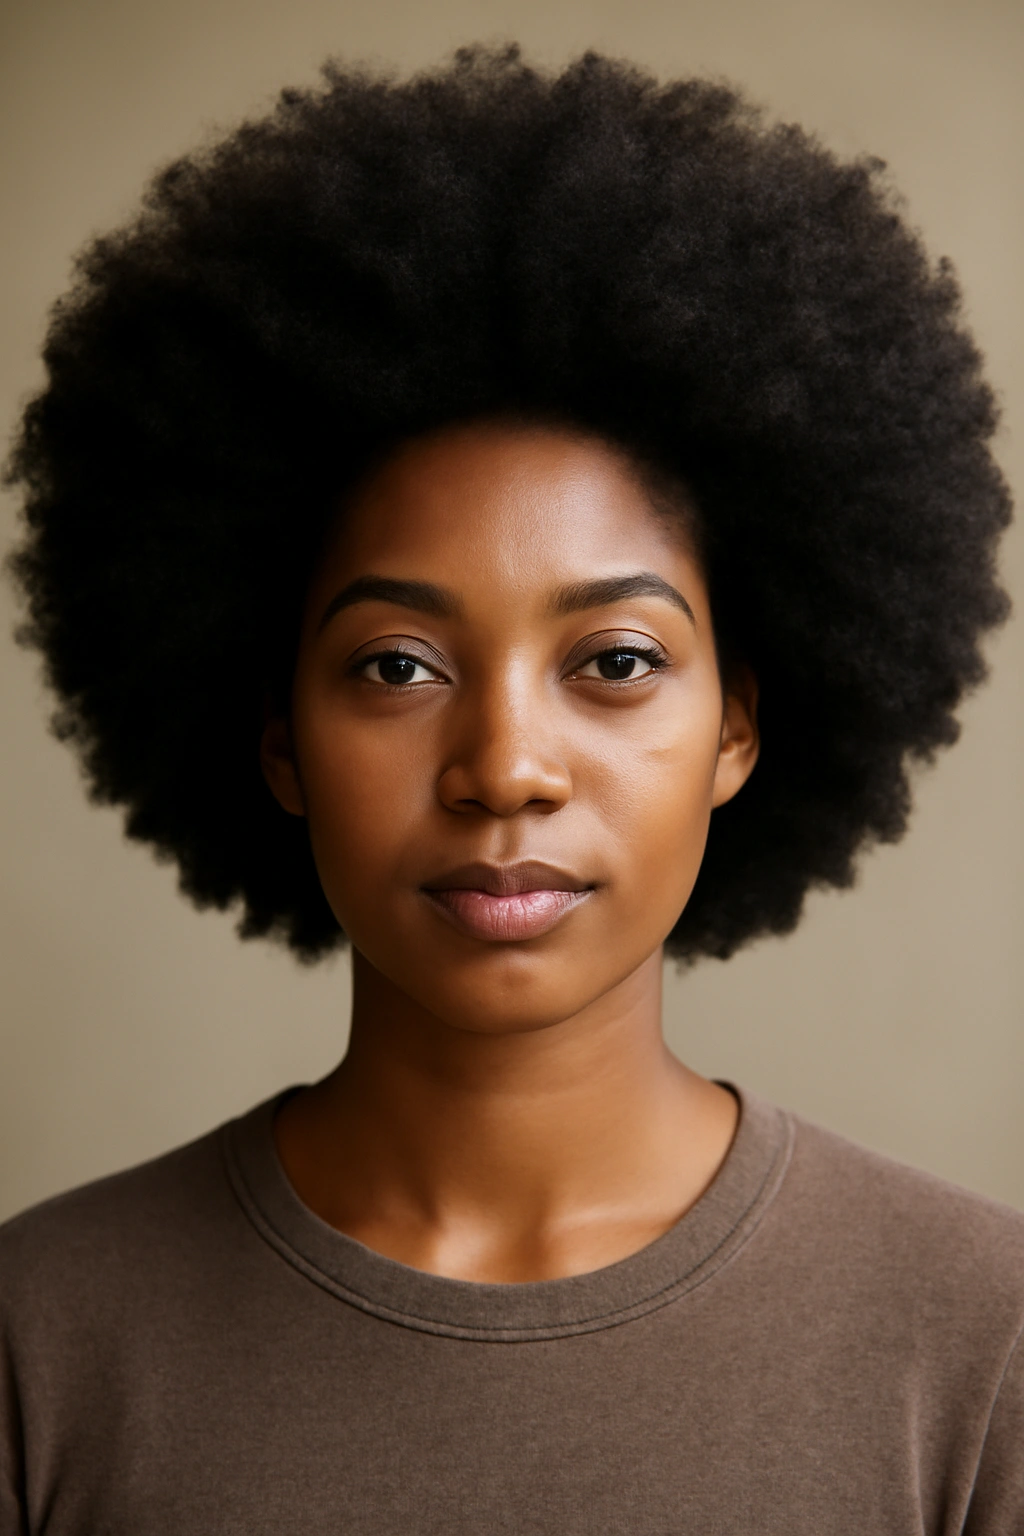
The foundational afro—shrinkage and all—is the most authentic expression of natural texture. This style is exactly what it sounds like: you wash your hair, apply a light leave-in conditioner or curl cream, pick through gently while damp, and let the natural coil pattern do the work. The result is a voluminous, textured crown that showcases your hair’s true form without any heat, chemicals, or manipulation beyond basic grooming.
Why It Works for True Texture Lovers
The natural afro celebrates coil definition and the way your hair naturally falls when it’s clean and moisturized. There’s no fighting against your curl pattern, which means less manipulation, less breakage, and less daily styling time. This style genuinely gets better over several wash days as you build layers and let the coils settle into their natural shape. It’s also the most forgiving option if your curl pattern is tightly coiled—the tighter the curl, the more bounce and volume you naturally create.
Best Practices and Maintenance
- Wash every 5-7 days with a gentle, sulfate-free cleanser to avoid stripping moisture
- Apply leave-in conditioner or curl cream to soaking-wet hair, not damp hair
- Use a wide-tooth comb or your fingers to work through tangles gently—comb from ends to roots, never the reverse
- Diffuse on low heat if you want to speed up drying, or air dry completely for the healthiest hair
- Sleep with a silk or satin bonnet to minimize frizz and preserve the curl pattern overnight
- Refresh between wash days with a light mist of water and a bit of curl cream
Works best on: All lengths from short cropped cuts to longer, grown-out afros; tighter curl patterns naturally create more volume and definition.
2. Twisted Afro
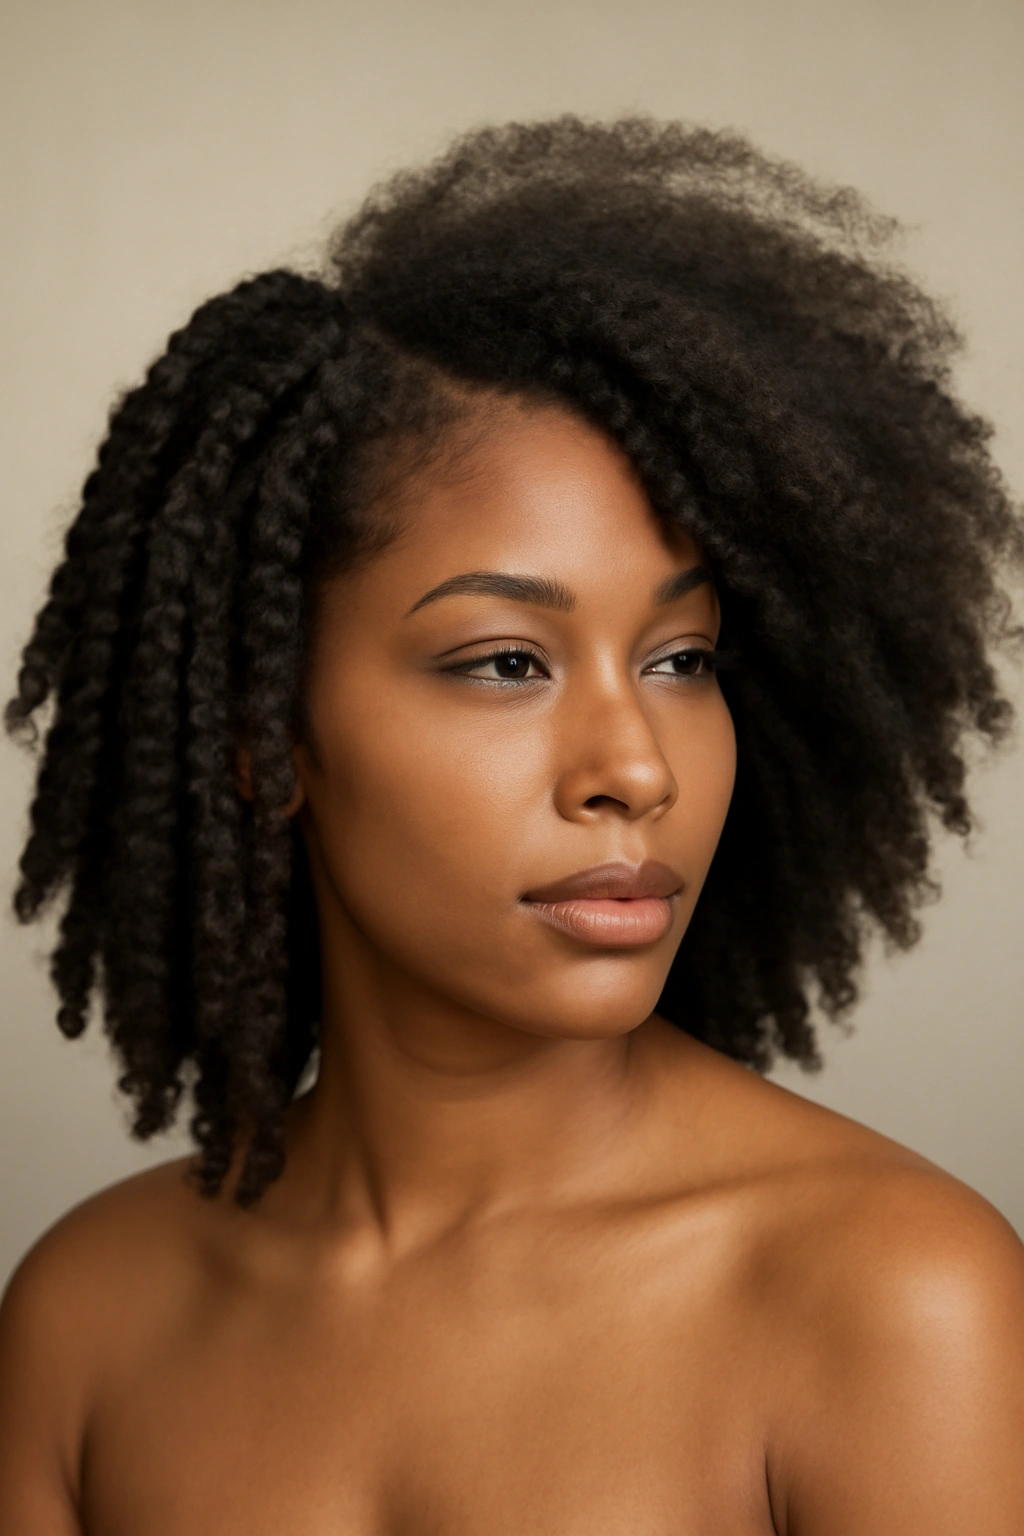
Two-strand twists installed throughout the hair and then unraveled after several days create a stretched, more defined texture than a completely natural afro. The twists actually elongate the curl pattern slightly while you wear them, and when you take them down, you’re left with a bouncier, more textured version of your natural afro—somewhere between wash-and-wear and a fully styled look.
The Science of Twist Manipulation
When you twist hair while it’s damp or wet and let it dry in that configuration, you’re basically training the curl pattern into a slightly different shape. The twists anchor the coils in a stretched position, so when you unravel them, the hair springs back with more definition and less of the shrinkage you see in a completely unmanipulated afro. This style is genuinely protective—you’re not applying heat, you’re not using chemicals, you’re just using moisture and tension strategically.
Installation and Styling Tips
- Divide hair into 20-40 sections depending on the look you want (fewer twists = chunkier texture, more twists = finer definition)
- Install on soaking-wet hair with a leave-in conditioner or mousse for hold
- Dry completely—either air dry for 24-48 hours or use a diffuser on low heat
- After the twists are set, unravel them gently by working from the root up, letting the hair spring back naturally
- Don’t manipulate right after unraveling; let it settle for several hours before styling or wearing out
- Refresh with light moisture spray and finger-fluffing for the next few days before washing again
Works best on: Shoulder-length to longer hair; textures from loose waves to very tight coils benefit from this stretched-and-released pattern.
3. Coily Afro
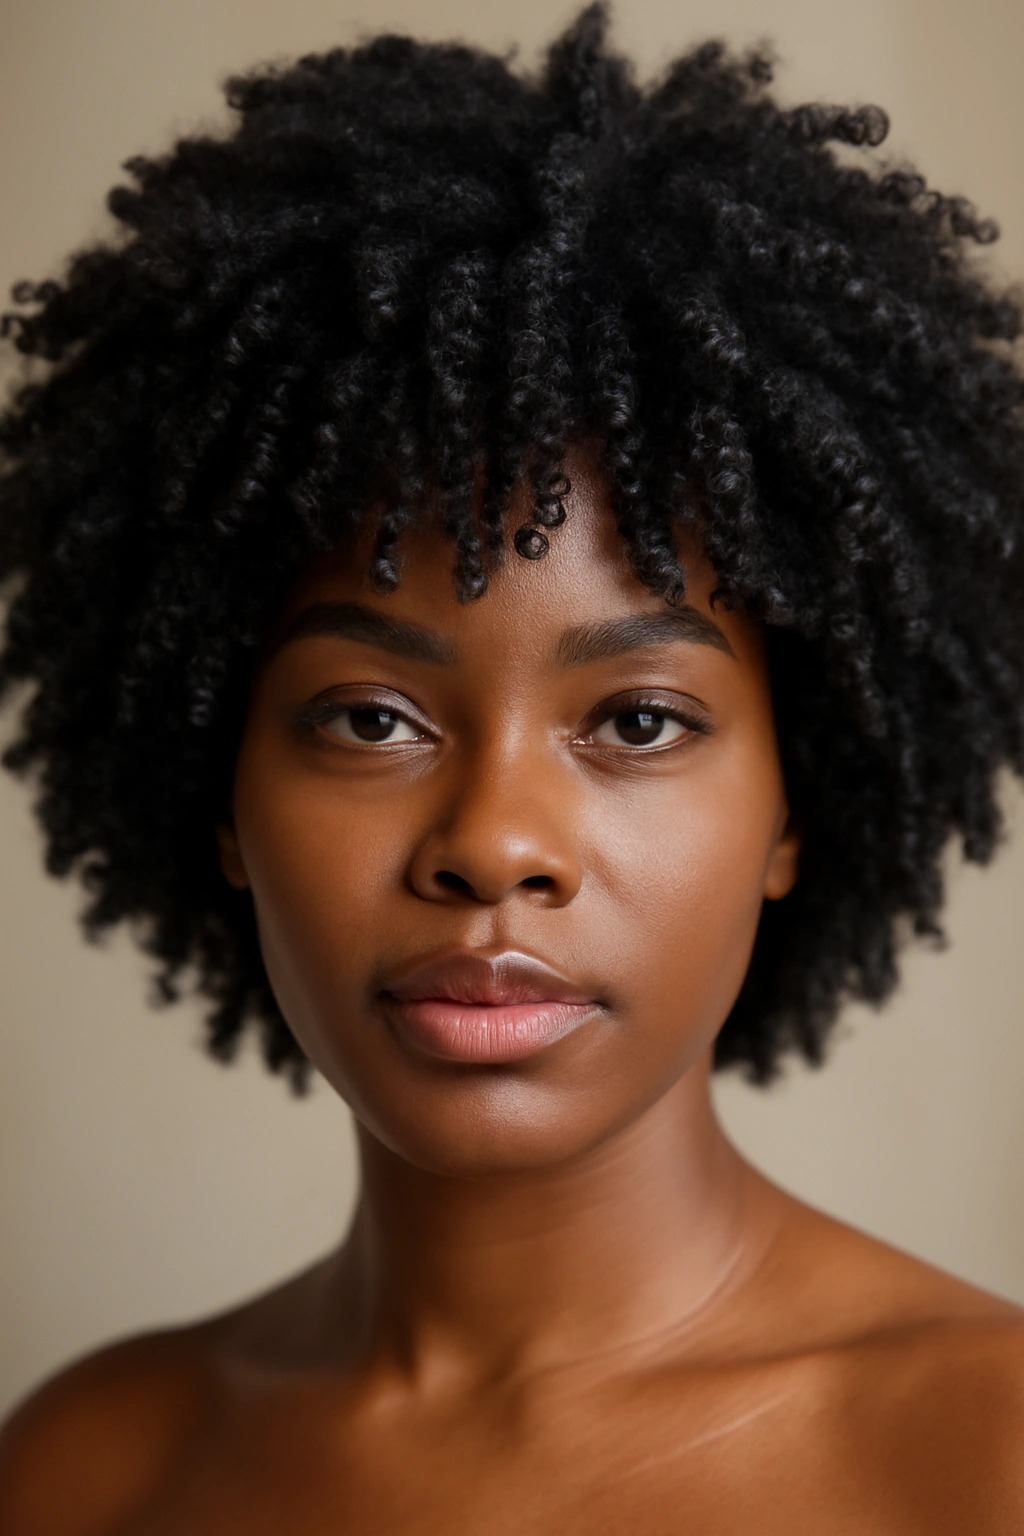
This is specifically for those with naturally coily hair—not tightly coiled, but defined curl pattern with visible loops and spirals. A coily afro emphasizes those defined rings by focusing on moisture, product application, and the right styling technique to enhance what’s already there. The result is a more structured-looking afro with visible curl definition rather than a fuzzy, densely voluminous look.
Enhancing Natural Coil Definition
Coily hair needs moisture and hold in equal measure. The right styling technique—called praying hands or raking—determines whether you get frizz and fuzzy separation or defined, intact curl clumps. Apply your styler (gel, cream, or mousse) by raking it through with your fingers while your hair is soaking wet, then smooth those sections together using the praying hands method to keep curl clumps intact. This prevents your coils from breaking apart into individual strands and instead keeps them as unified spirals.
Product and Technique Essentials
- Use a gel or styler with hold but without crunchiness—you want definition, not crispness
- Apply to soaking-wet hair only; waiting until it’s damp means it won’t absorb properly
- Rake through first to distribute, then smooth sections between your palms using the praying hands technique
- Diffuse with a microfiber towel or t-shirt first to remove excess water, then air dry or use a diffuser
- Scrunch when dry to break up any crunchiness from gel
- For refresh days, lightly mist with water and smooth any fuzzy bits with a tiny bit of cream or edge control
Works best on: Shoulder-length to longer hair with defined curl pattern (not super tight coils, not loose waves).
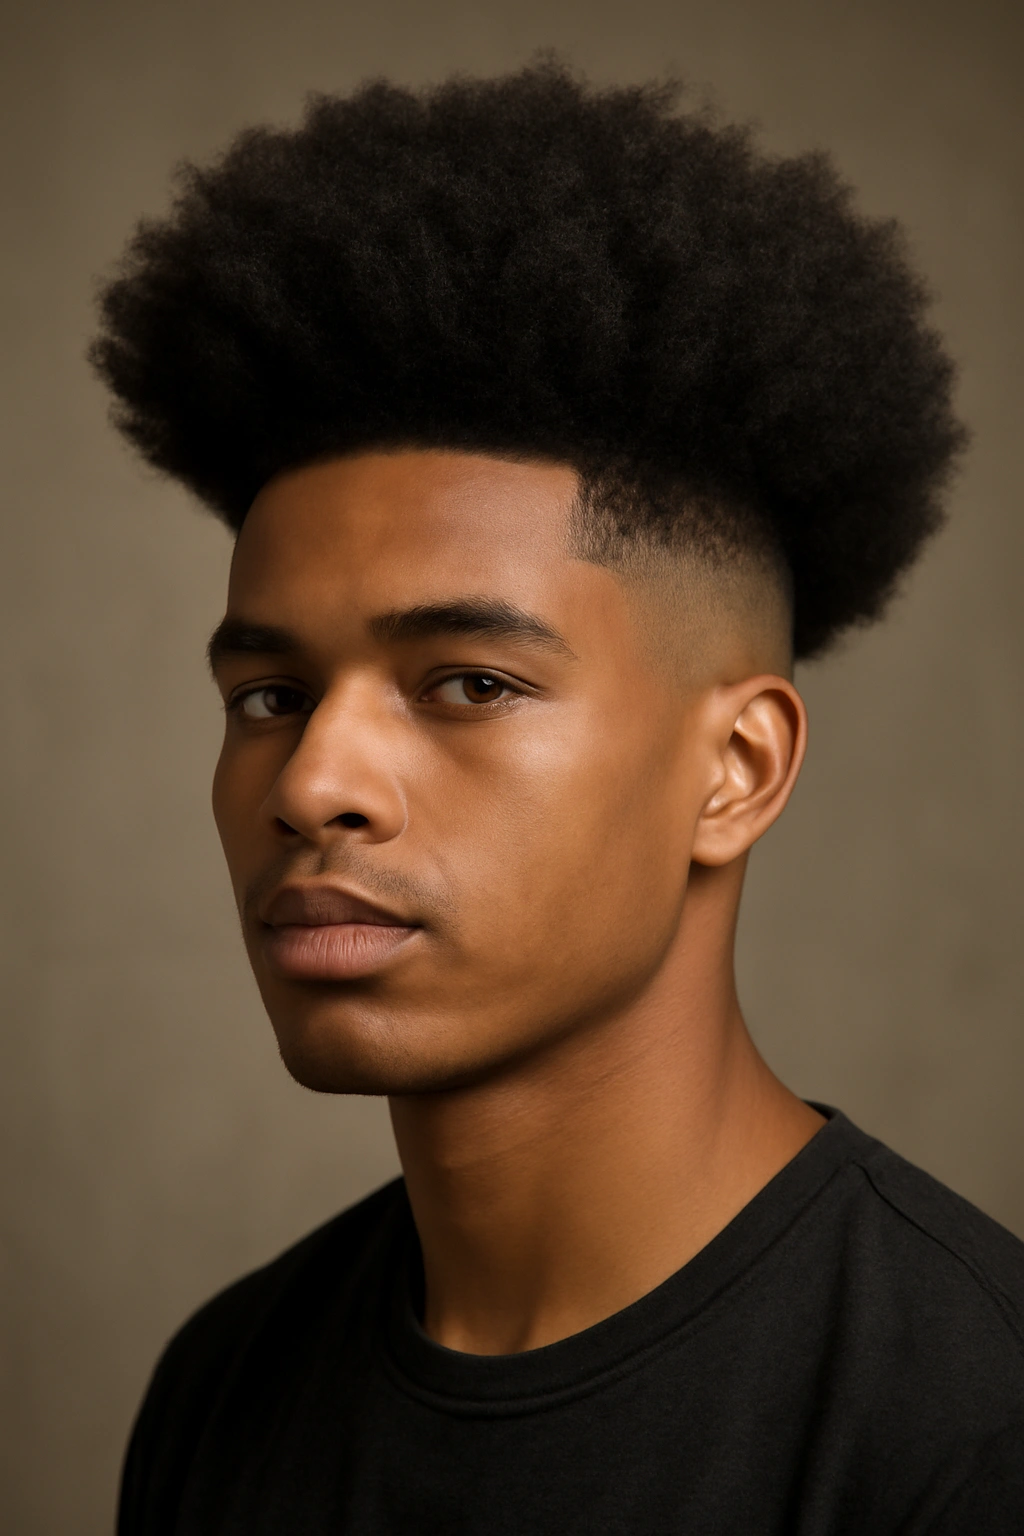
4. High-Top Fade with Afro
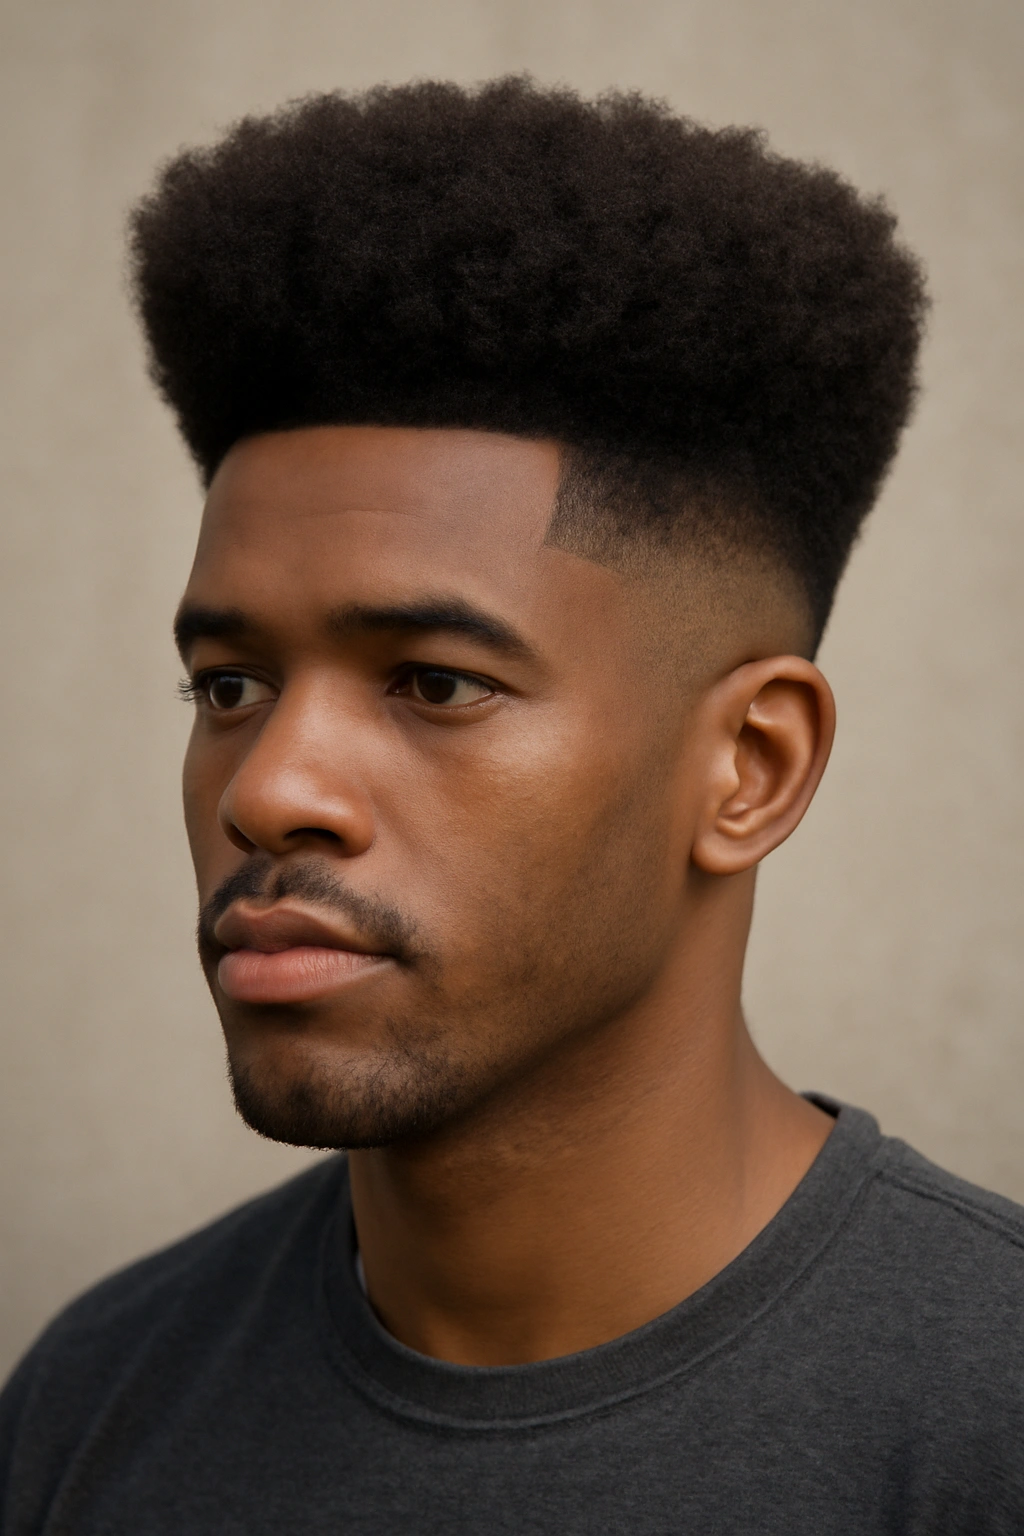
This modern silhouette combines the clean, sharp lines of a fade on the sides and back with a voluminous afro on top. The contrast between the tapered sides and the full crown creates dramatic shape and visual impact. It’s especially striking on shorter to medium-length afros and works particularly well if you like the idea of low maintenance on the sides while still rocking maximum texture on top.
Creating the Contrast
The fade—whether it’s a low fade, mid fade, or high fade—creates a clean boundary between your longer top and shorter sides. This style requires regular maintenance at a barber familiar with fade work on textured hair, ideally every 3-4 weeks to keep the lines sharp. The top can be worn completely natural or with light styling, and it automatically looks intentional because of the precise shape beneath it.
Maintenance and Upkeep
- Visit your barber every 3-4 weeks to maintain the fade as your hair grows
- Choose a barber experienced with textured hair—they’ll understand how to cut without causing damage or excessive breakage
- The top can be a simple wash-and-go, or you can style it with light product if you prefer more definition
- Between cuts, keep the fade clean by maintaining moisture and avoiding rough handling that could create breakage
- The contrast looks best when the top reaches at least 2-3 inches of length, so plan your cutting schedule accordingly
Works best on: Short to medium-length hair; this style requires enough length on top to see the afro definition against the faded sides.
5. Afro Puff (Single or Double)

This is the style that’s practical, cute, and infinitely adjustable. One puff at the crown, two puffs on either side of your head, or multiple smaller puffs throughout—the concept is the same: gather sections of your afro and secure them with a clip, elastic, or tie to create rounded, voluminous shapes. It’s protective, takes minutes to style, and genuinely works with literally any length and texture of afro hair.
Styling the Perfect Puff
Start with hair that’s either freshly washed or refreshed with a light moisture spray. Gather your hair into one or more sections depending on the look you want, and secure with a smooth elastic, a silk scrunchie, or a decorative clip. The key to a full, rounded puff is not pulling too tight—you want the elastic at the base to create shape, but loose enough that the hair fluffs out naturally around it. Smooth the front and sides with edge control or a light cream if needed, and fluff the gathered section upward with your fingers for maximum volume.
Variations and Styling Options
- Single crown puff: Gathers all hair at the very top of your head for a high, centered look
- Double puffs: One on each side for a playful, symmetrical silhouette
- Side puff: Positioned toward one side for an asymmetrical, modern vibe
- Multiple scattered puffs: Smaller puffs throughout the head for texture and visual interest
- Sleek puffs: Smooth the gathered sections with gel for a more polished look
- Curly puffs: Leave the gathered hair completely unfretted for a wild, textured finish
Works best on: Every length from short cropped cuts to waist-length natural hair; this style adapts to whatever you’re working with.
6. Braided Afro
Box braids, feed-in braids, or even cornrowed sections that flow into loose afro hair create a hybrid style that combines protective braiding with the volume and texture of a natural afro. The braids can be small and intricate, medium and chunky, or anywhere in between—and they can cover your entire head or just sections of it. This style offers protection while you’re braiding your hair, and it looks intentional and put-together.
Protective Benefits of Braiding
Braids keep the ends of your hair tucked away and protected from manipulation, weather, and friction that causes breakage. They also distribute the weight of your hair more evenly across your scalp, reducing tension and stress on individual strands. The braided sections can stay in for 4-6 weeks depending on how well you maintain them, and you can wash your hair and let the unbraided sections air dry between washings.
Installation and Care
- Have braids installed by a professional—DIY installation often results in tension that’s too tight and causes traction alopecia
- Ask for a tension level that feels secure but not painful; if your scalp aches after installation, the braids are too tight
- Keep braids moisturized by spritzing with water and light oil or leave-in conditioner 2-3 times per week
- Wash every 7-10 days with a lightweight, sulfate-free shampoo; focus on the scalp and the roots of the braids
- Sleep with a silk or satin bonnet to minimize frizz and reduce friction on the braids
- Remove braids after 4-6 weeks; leaving them in longer increases the risk of damage and hair loss
Works best on: Shoulder-length to longer hair; you need enough length for the braids to look intentional and for the style to feel balanced.
7. Loc’d Afro
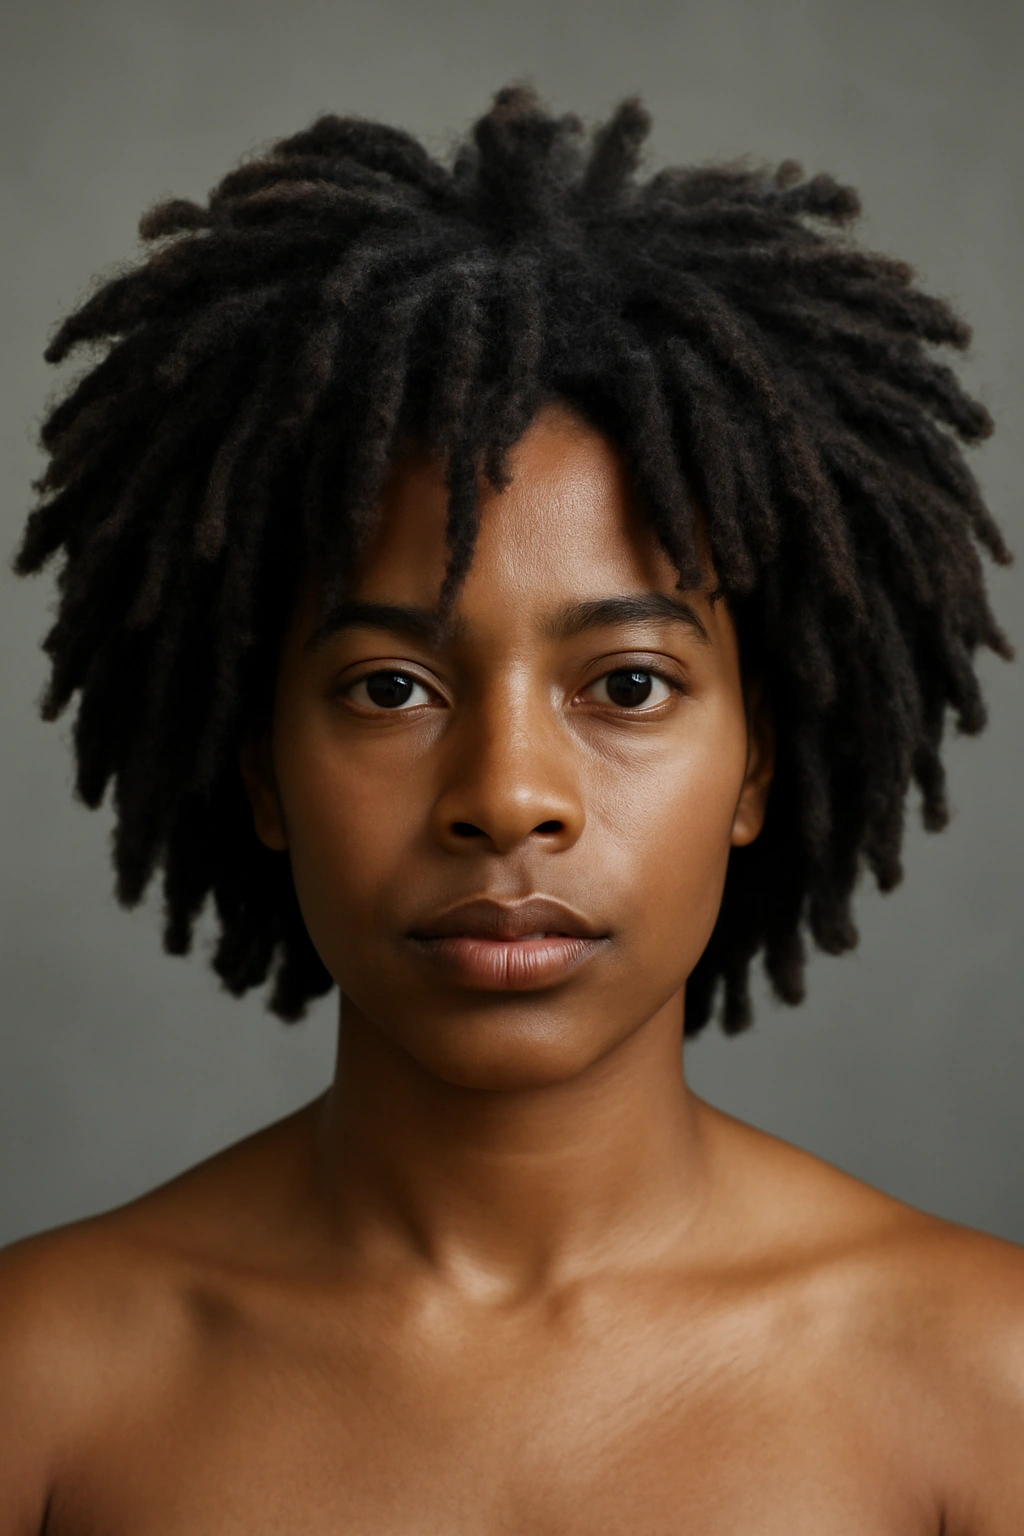
Locs—whether they’re freeform, started with twists, or installed with a specific technique—create a completely different aesthetic while still maintaining the afro silhouette. New locs (sometimes called baby locs in their first few months) have a softer, more textured appearance than mature, set locs, and both versions can absolutely rock an afro shape. This is a long-term commitment, but it’s genuinely one of the lowest-maintenance protective styles once they’re established.
Understanding Loc Maturation
New locs are loose and flexible, often resembling chunky twists. Over several months, they gradually lock (tighten and compress) and mature. During this stage, they need moisture, regular washing, and careful handling to avoid unraveling. Once mature (usually 6-12 months depending on your texture), locs become much more stable and require less frequent manipulation. At any stage, locs can be styled into an afro shape by shaping and palm-rolling them upward.
Long-Term Loc Maintenance
- Wash locs every 7-10 days with a residue-free shampoo; buildup causes stagnation and odor
- Moisturize with oil or leave-in conditioner after washing, focusing on the roots and the length of each loc
- Retwist or palm-roll roots every 4-6 weeks during the first year, then monthly or as needed after that
- Sleep with a silk or satin bonnet to minimize friction and frizz
- Avoid excessive tension and pulling; tight updos and protective styles are fine, but don’t be rough with your locs
- Plan for this commitment: locs are semi-permanent, and removing them requires patience and often professional help
Works best on: Anyone willing to commit long-term; locs work on all hair lengths and textures, though your specific texture determines how quickly they loc and how they’ll look.
8. Afro with Undercut
This style takes the fade concept a step further: the sides and back are cut very short or even completely shaved, while the top remains a full, voluminous afro. It’s a bold, modern look that creates maximum contrast and visual drama. The undercut can be a hard line or a gradual fade, and it can include designs, patterns, or edge designs for extra personalization.
Design and Shaping Possibilities
The undercut offers a clean canvas for creative expression. Some people get simple, clean lines; others choose geometric patterns, designs, or detailed edge work. The key is working with a barber who has experience with textured hair and who understands how to blend the undercut with the afro so it looks intentional and polished, not choppy. The style looks best when maintained every 3-4 weeks as your hair grows.
Styling and Maintenance
- Schedule regular trims every 3-4 weeks to keep the undercut clean and defined
- The afro on top requires the same care as any natural afro: regular washing, conditioning, and moisture
- The shaved or very short areas require minimal care—just regular moisturizing to prevent dryness
- The contrast looks most dramatic when the top reaches at least 2-3 inches, so plan your cutting schedule with that in mind
- You can style the top however you’d normally style your afro: natural, twisted, braided, or with light product
Works best on: Shorter to medium-length afros; the style works best when there’s visible height and volume on top to contrast with the shaved sides.
9. Mini Afro
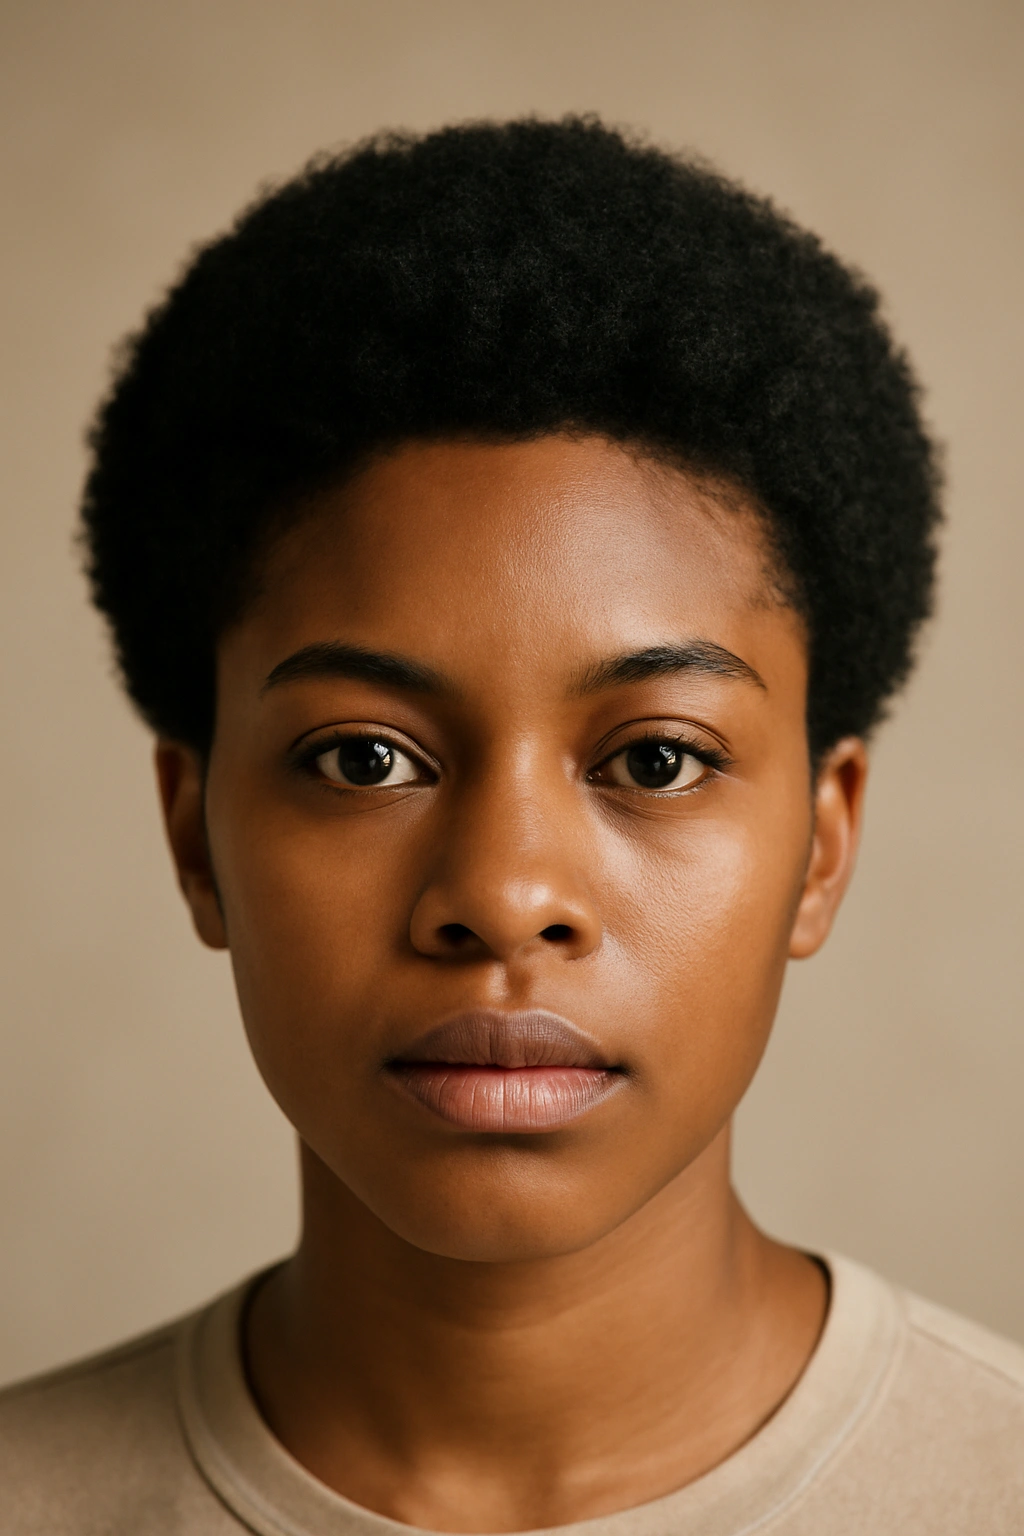
A mini afro is exactly what it sounds like: a small, compact, tightly coiled afro, usually 1-3 inches tall at maximum. This is the perfect style if you’re wearing your hair very short, if you’re new to natural hair and still learning to manage longer lengths, or if you prefer a low-profile, minimalist aesthetic. Mini afros are easy to maintain, quick to style, and genuinely chic.
Growing and Maintaining Short Afros
If you’re transitioning to natural hair from relaxed hair, a mini afro might be your first natural style as your hair grows out and you cut away the relaxed ends. Once you’re fully natural, a mini afro is simply a matter of regular trims to maintain the length you want. At this length, your hair will likely shrink significantly, so a 2-inch wet afro might be just 1 inch when dry—that’s completely normal and doesn’t mean your hair isn’t growing.
Styling a Short Afro
- Wash every 5-7 days with a gentle, sulfate-free shampoo
- Apply leave-in conditioner or curl cream while damp, and pick through gently with a wide-tooth comb
- Air dry or diffuse on low heat—at this length, drying time is minimal
- Skip heavy products; light leave-in conditioner or curl cream is all you need
- Sleep with a silk or satin bonnet or on a satin pillowcase to preserve moisture and minimize frizz
- Trim every 6-8 weeks to maintain shape and remove split ends
Works best on: Anyone who prefers minimal styling time and low manipulation; mini afros work on all curl patterns and textures.
10. Afro Textured Waves
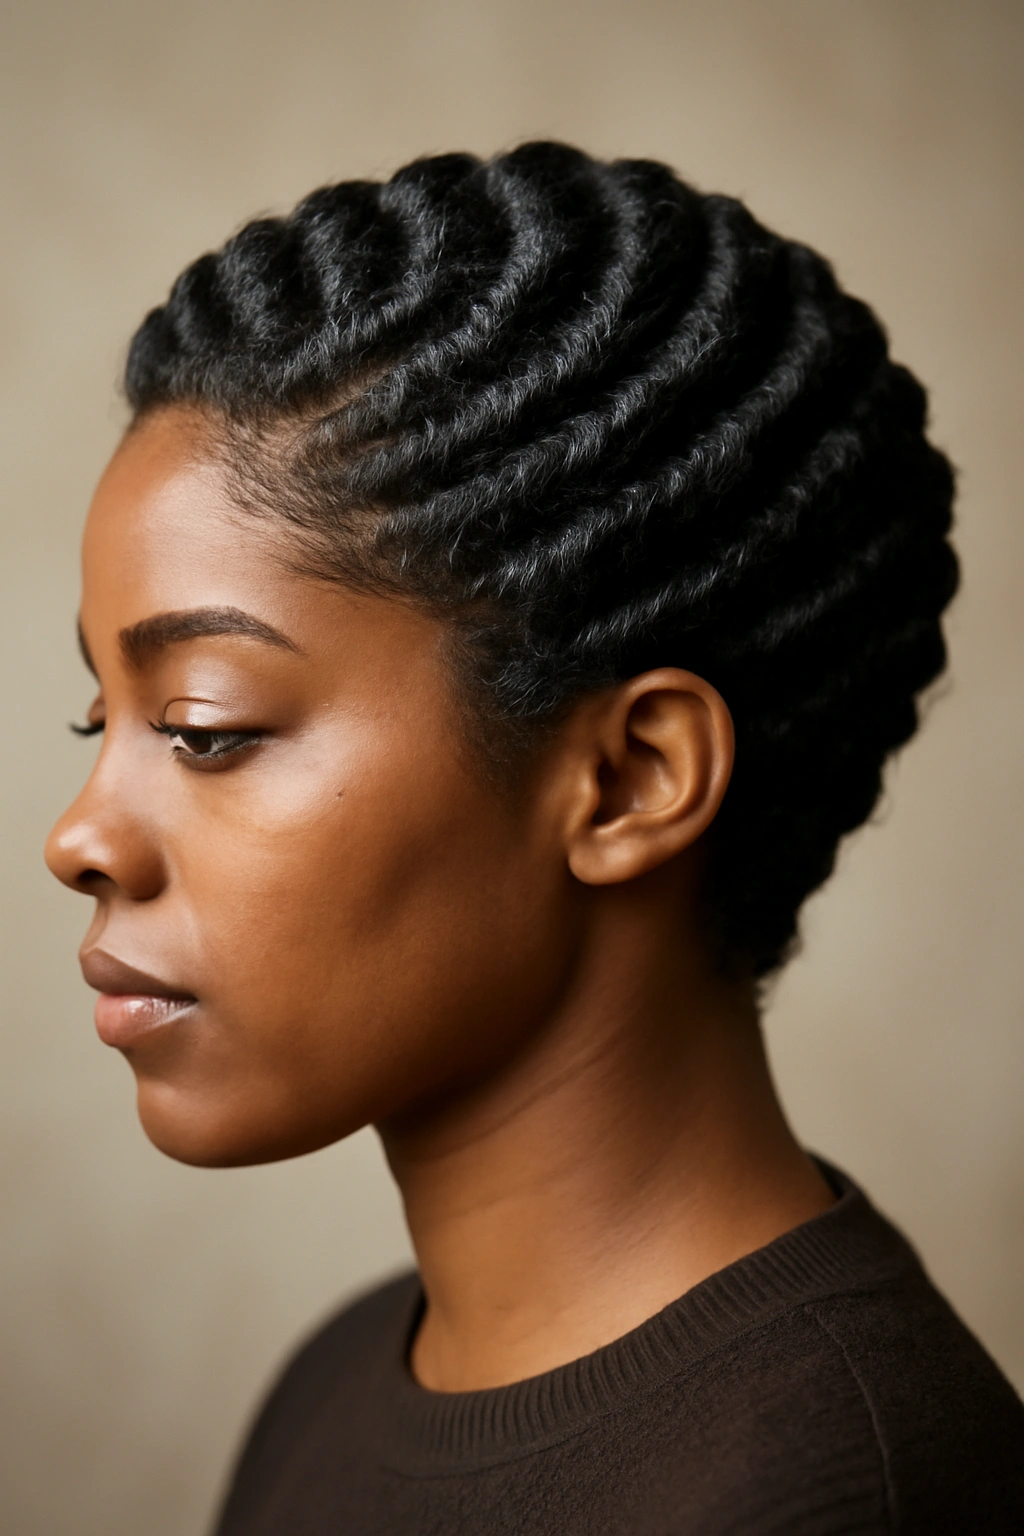
This style takes your natural afro texture and shapes it into wave-like patterns that flow across your head. It’s created through a combination of moisture, product, and styling technique—sometimes with a wave brush or comb, sometimes with your hands using specific directional techniques. The result is an afro with movement and dimension rather than the typical round, voluminous silhouette.
Creating Wave Patterns in Afro Hair
Waves form when you apply product directionally and train your curls to follow a specific pattern rather than springing up freely. Using a wave brush on damp hair with hold product, or using your hands to smooth sections in one direction while they’re setting, creates the wave pattern. This style requires more deliberate daily styling than a wash-and-go afro, but it’s a beautiful option if you want movement and visual interest.
Wave Maintenance and Styling
- Apply product (usually a curl defining gel or mousse) to damp hair
- Use a wave brush or your hands to smooth sections in the direction you want the waves to flow
- Air dry or diffuse while maintaining that directional smoothing
- The pattern will relax as the day goes on, so expect it to loosen as you go about your day
- On refresh days, lightly mist with water and resculpt the waves with your hands or brush
- Sleep with a silk bonnet to preserve the wave pattern as much as possible
- You may need to restyle waves daily, so consider this if you prefer low-manipulation styling
Works best on: Shoulder-length to longer hair; you need enough length for the waves to be visible and for the pattern to have room to develop.
11. Tapered Afro
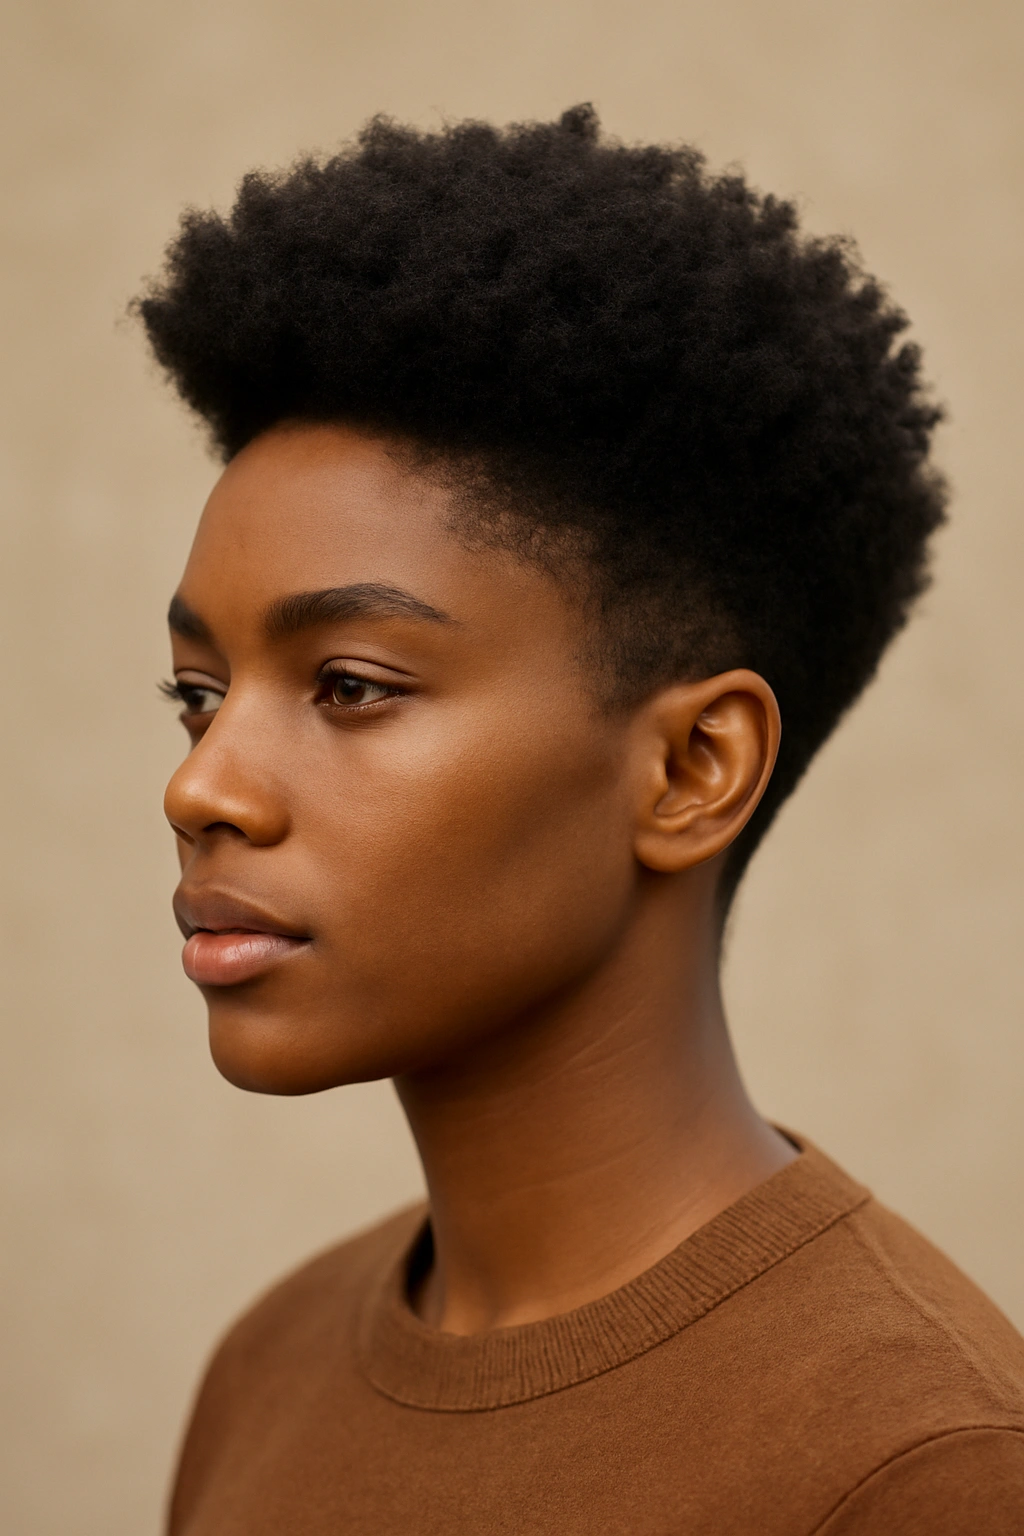
A tapered afro is shorter at the nape and sides and gradually gets longer as you move toward the crown, creating a rounded, sculptural shape. It’s different from a fade because it’s all your natural hair—nothing is cut super short—but the gradual length difference creates shape and dimension. This style requires regular trims to maintain the taper, but it’s exceptionally chic and works on virtually every face shape.
The Taper Aesthetic
The taper creates an elegant silhouette that frames your face and head beautifully. Unlike an afro puff or a completely even-length afro, a tapered cut shows off the shape of your head and provides visual balance. It’s a more intentional, groomed-looking style that still celebrates your natural texture—you’re not fighting against it, you’re just shaping it strategically.
Achieving and Maintaining a Taper
- Work with a barber experienced in cutting textured hair
- Explain exactly where you want the length to increase—some people prefer a subtle taper, others want more dramatic length difference
- Trim every 6-8 weeks to maintain the tapered shape as your hair grows
- The top can be styled naturally, twisted, braided, or with light product—all the normal afro options apply
- Between trims, your afro will fill out as the shorter sections grow in, but the overall shape will remain tapered
- This style works beautifully as a transition style when you’re learning to manage natural hair
Works best on: All hair lengths and textures; the taper can be subtle or dramatic depending on your preference.
12. Bantu Knot-Out Afro
Bantu knots are small, tight coils formed by twisting sections of hair and wrapping them into knots. When you take them out after they’ve dried, you get a textured, voluminous, zigzag-patterned afro that’s visually striking and genuinely unique. This style is protective while the knots are in and creates beautiful definition when you take them down.
Creating Bantu Knots
Section your damp hair into 10-20 sections (depending on the size and look you want). Twist each section tightly, then wrap the twisted section around itself in a spiral and secure the knot with a small elastic, pin, or by tucking the end underneath. Let them dry completely—either air dry for 24-48 hours or use a diffuser on low heat. Once dry, unravel each knot gently and watch the textured pattern emerge.
Styling the Knot-Out
- Install Bantu knots on freshly washed, damp hair with a styling product for hold
- Smaller knots create finer, more defined texture; larger knots create chunkier, bouncier waves
- Dry completely before unraveling; partially dried knots won’t hold their pattern
- Don’t manipulate right after unraveling; let the pattern set for several hours
- This style lasts 5-7 days before becoming too fuzzy to wear; it’s not necessarily meant to be worn for weeks
- Refresh by lightly misting with water and finger-fluffing; you might need to retwist sections that have loosened
- Sleep with a silk bonnet to preserve the knot-out pattern as long as possible
Works best on: Shoulder-length to longer hair; you need enough length for the knots to hold and the pattern to be visible when unraveled.
13. Afro Topknot
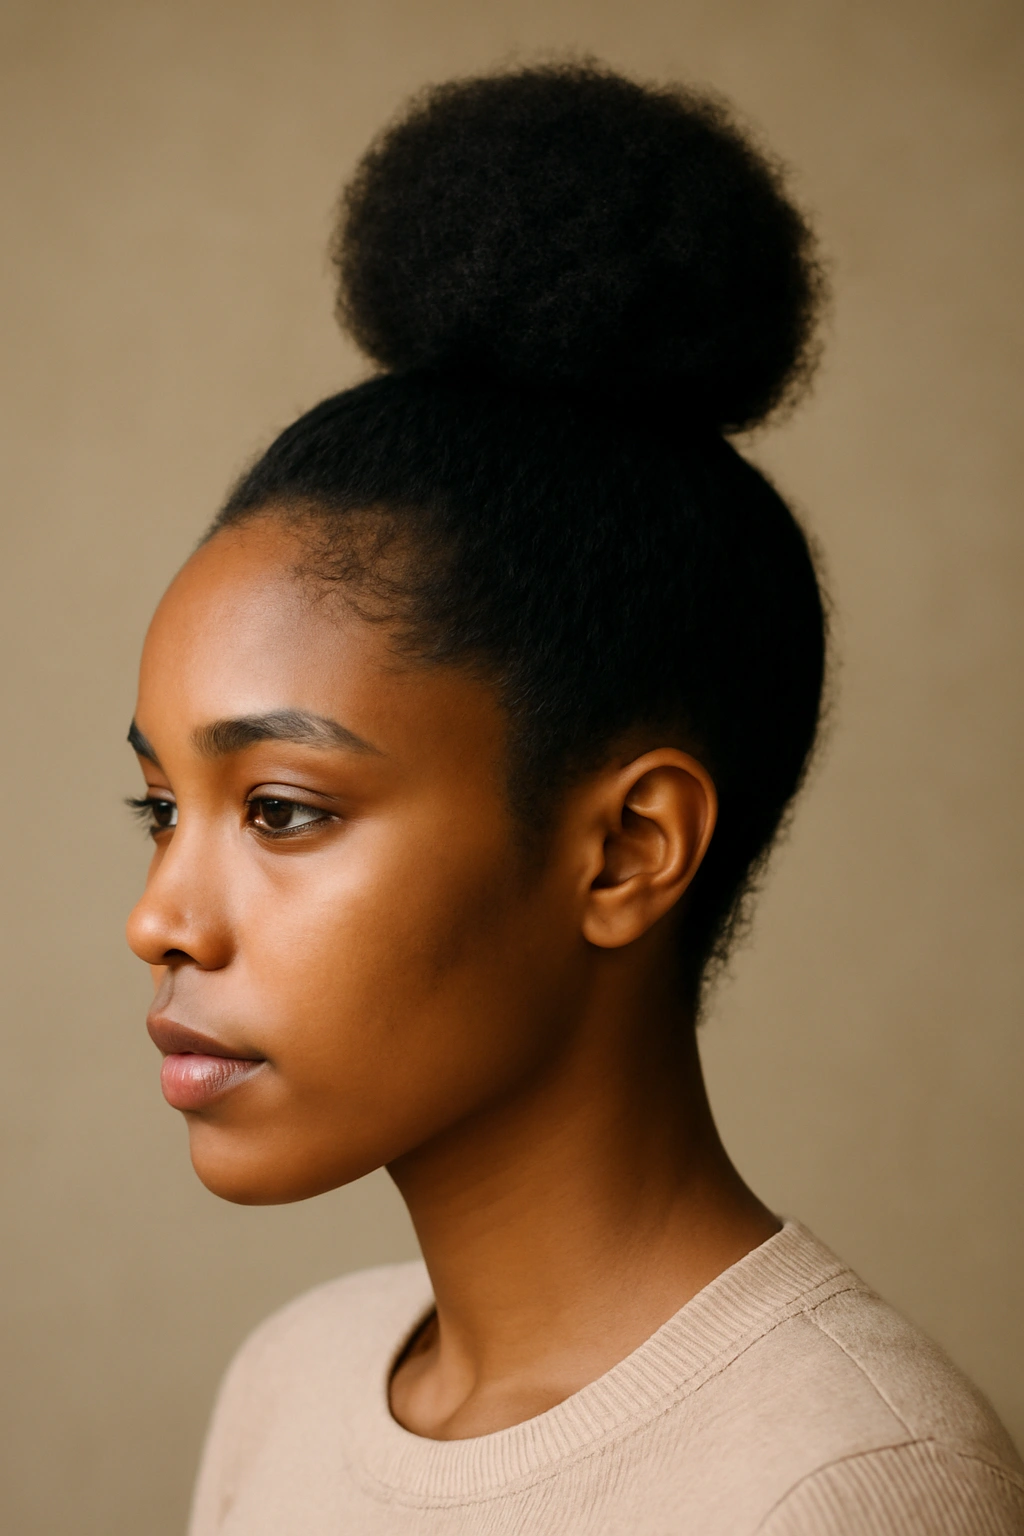
Gather your afro into a high knot at the crown—sleek or textured, tight or loose depending on your vibe—and secure it with an elastic or decorative clip. It’s a polished, put-together style that works for work, casual days, or anytime you want your hair out of your face without sacrificing the afro aesthetic. The result is an elevated, intentional look that takes maybe two minutes to create.
Creating Different Topknot Variations
A sleek topknot uses edge control or gel to smooth your hair at the crown before gathering it, creating a polished, formal look. A textured topknot skips the smoothing and lets your natural texture show at the base, creating a more casual, effortless vibe. A half-up topknot gathers only the top half of your hair, leaving the bottom free for fullness and movement. Each version works depending on your mood and what you’re doing that day.
Styling and Care Tips
- Start with clean or freshly refreshed hair for the best-looking knot
- Use a smooth elastic or silk scrunchie to avoid creating creases and snagging hair
- Don’t pull too tight; you want the knot to stay secure, but tight tension causes breakage and scalp pain
- For a sleek knot, apply a small amount of edge control or gel to the roots before gathering
- For a textured knot, just gather and go—let your natural texture show
- The knot creates a slight indent where the elastic sits; this relaxes within an hour of removing it
- This style works best if you’re planning to wear your hair down again later that day, not as an all-day, every-day style
Works best on: Shoulder-length to longer hair; you need enough length to gather into a knot that feels substantial and looks intentional.
14. Two-Toned Afro

Add color—whether it’s dye, temporary color, color extensions, or highlights—to create visual dimension and personal style within your afro. Two-tone could mean a light base with darker roots, contrasting colors throughout, pastel streaks through the texture, or any combination that expresses your style. It’s a bold choice that can be permanent, semi-permanent, or temporary depending on your comfort level.
Color Options for Textured Hair
Permanent dye is the most commitment; your hair will show regrowth as your new growth comes in, and it’s difficult to go back to your natural color. Semi-permanent color fades gradually over 6-12 weeks depending on how often you wash, giving you flexibility to change your mind. Temporary color like color-depositing conditioners or rinses provides color without chemical damage, though it also requires more frequent reapplication. Color extensions (clip-in or sewn-in braids in different colors) let you experiment without touching your actual hair.
Maintaining Colored Afro Hair
- Use sulfate-free, color-safe shampoo and conditioner to prevent color fading
- Wash in cool water; hot water opens the cuticle and releases color faster
- Deep condition weekly; color processing can be drying, and textured hair needs extra moisture
- Protect your hair with a silk or satin bonnet and sleep on a silk pillowcase to minimize friction
- Trim regularly to remove color-processed ends and maintain healthy, vibrant-looking hair
- If using permanent dye, plan for regrowth management—touch-ups typically need to happen every 4-6 weeks
- Consider the commitment before going permanent; removing or covering unwanted color in textured hair is challenging
Works best on: Any length and texture; color can add dimension to any afro style.
15. Afro with Accessories (Wraps, Scarves, Cuffs)

Wrap your afro with colorful scarves, add decorative cuffs to sections, interweave fabric or ribbon through your hair, or combine multiple accessories to personalize your look. Accessories can completely transform your afro’s appearance and allow for creative, expressive styling. They’re also practical—scarves can protect your hair while adding style, and cuffs help define and secure sections.
Accessory Styling Techniques
Headwraps involve wrapping fabric around your afro in specific patterns or simply draping a large scarf artfully around your head. Hair cuffs are small rings or tubes that slip over sections of your hair to add visual interest and keep sections contained. Beads and clips can be threaded through your afro or attached to the ends of twists or braids for texture and movement. Fabric interweaving involves threading ribbons or strips of cloth through sections of your afro for color and dimension.
Styling with Confidence
- Choose fabrics that won’t snag or pull your hair; silk or satin wraps are gentler than cotton
- Keep accessories secure but not so tight that they create tension on your scalp
- Change accessories frequently to keep your look fresh without changing your actual hair
- Consider the occasion: bold colors and patterns work great for casual and creative spaces; more subtle accessories might suit professional environments
- Accessories can also serve a protective function: wearing a wrap or scarf protects your edges from friction and environmental stress
- Mix and match accessories to create endless variations on your base afro style
- Remove accessories gently and carefully to avoid snagging or breaking hair
Works best on: Every length and style of afro; accessories are infinitely adaptable and work with natural afros, styled afros, braided afros, and anything in between.
Final Thoughts
Your afro is uniquely yours, and the style you choose should reflect both your hair’s texture and what feels manageable and beautiful for your life. Some of these styles are genuinely wash-and-wear minimal effort, while others require more daily styling or professional installation. The beautiful part is that you’re not locked into one option—you can rotate between a natural wash-and-go when you want simplicity, try braids or twists when you want something more structured, and experiment with color or accessories when you want to express creativity.
The most important thing isn’t which style you pick; it’s that you’re caring for your hair with moisture, gentleness, and consistency. Every afro style thrives when your hair is well-hydrated, when you’re minimizing unnecessary breakage through manipulation and friction, and when you’re getting regular trims to keep your ends healthy. Your afro is a celebration of your natural texture—whether you’re wearing it completely natural or with intentional styling, protective braiding, or creative color.
Start with whichever style speaks to you and your lifestyle. You’re not committing to one forever; you can pivot, switch, grow, and evolve your look as your hair grows and as your preferences change.