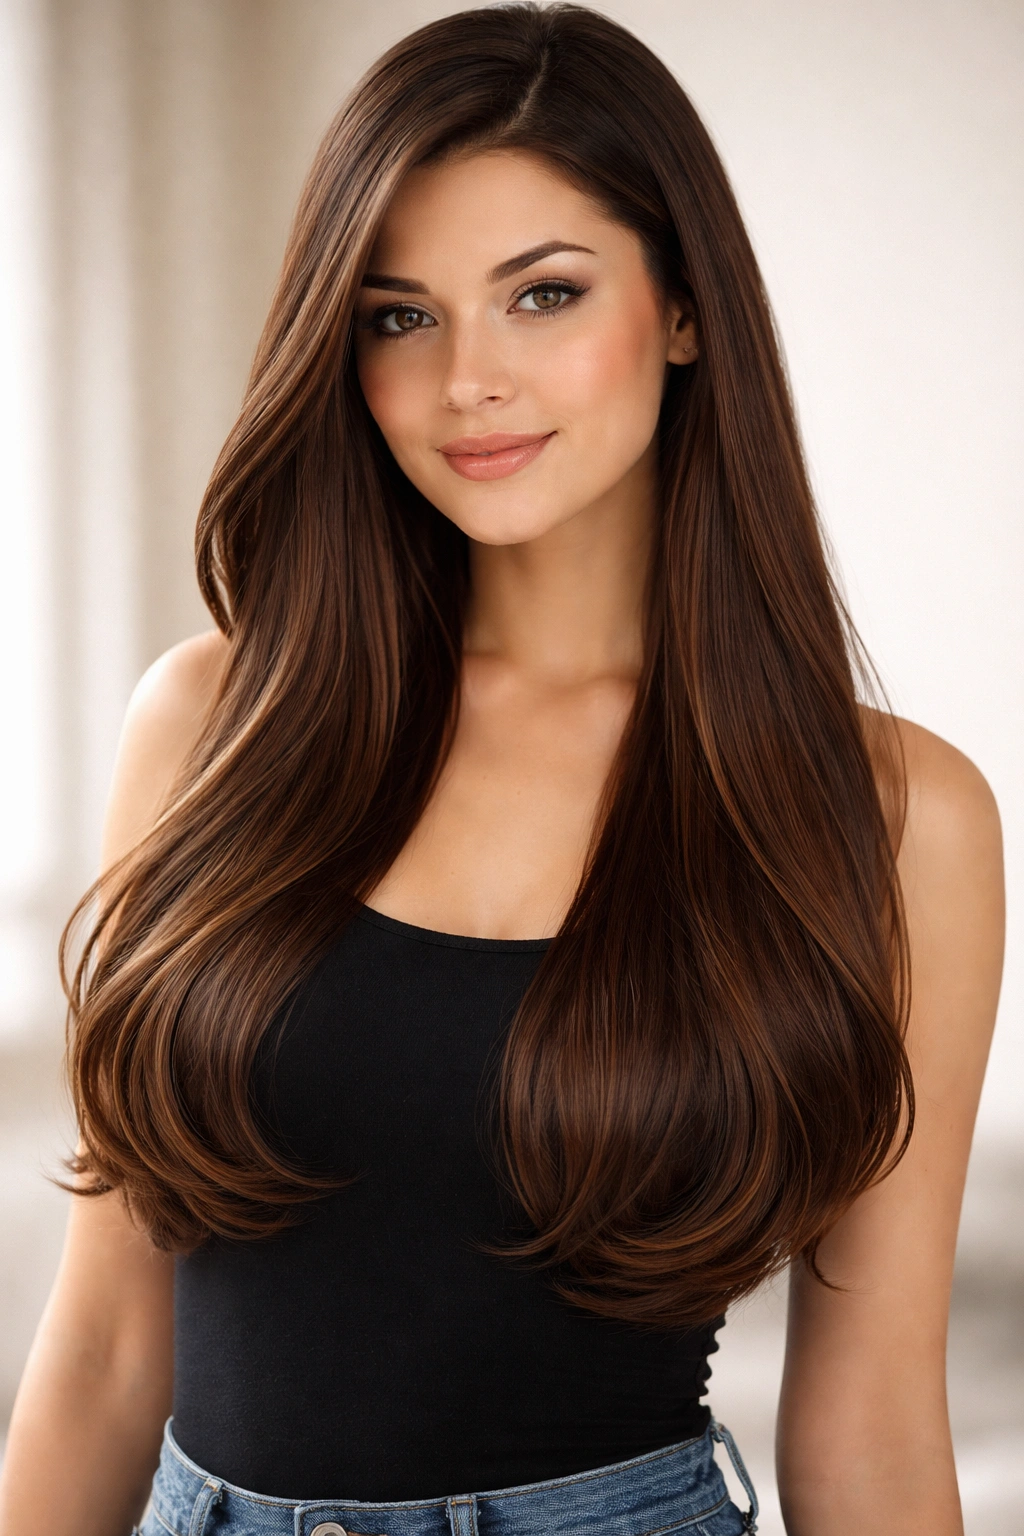
Round faces are beautifully soft and youthful, but without the right hairstyle, they can sometimes look wider or shorter than you’d like. The secret to flattering a round face isn’t about hiding it — it’s about creating the illusion of length and dimension through strategic cuts, angles, and styling techniques that draw the eye vertically instead of horizontally. The good news? There are countless stunning hairstyles that work beautifully with your face shape, and most of them are effortless to style once you understand the core principle: angles and movement are your friends.
What makes a hairstyle flattering for round faces comes down to a few key factors. Vertical lines — whether created through layers, length, or a side part — make a face appear longer and narrower. Volume at the crown lifts the proportions of your face and creates better balance. Face-framing pieces that skim your cheekbones create subtle angles that add definition. And movement, whether it’s waves, texture, or a tousled finish, breaks up the roundness and adds visual interest.
The hairstyles that follow work across different hair types, lengths, and styling abilities. Some are low-maintenance cuts that look good with minimal effort, while others reward a little daily styling time. The common thread? Each one is specifically designed to complement and celebrate a round face shape by creating lines that lead the eye upward and outward. Whether you’re looking for something dramatic or subtle, short or long, blunt or textured, you’ll find options here that feel authentically you.
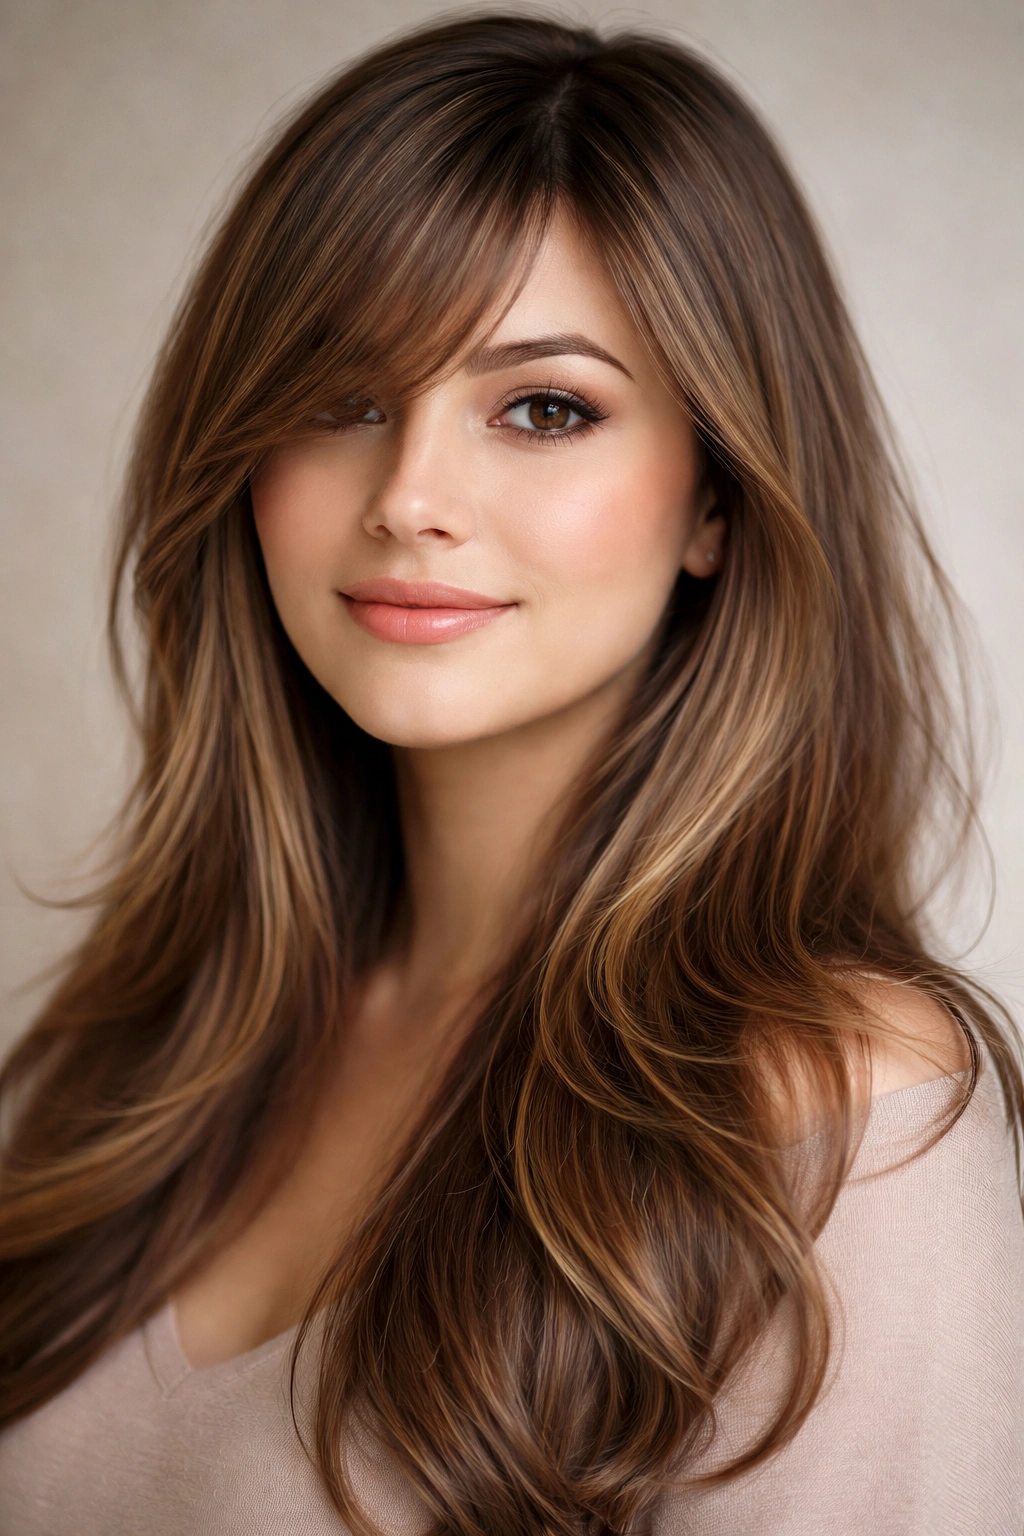
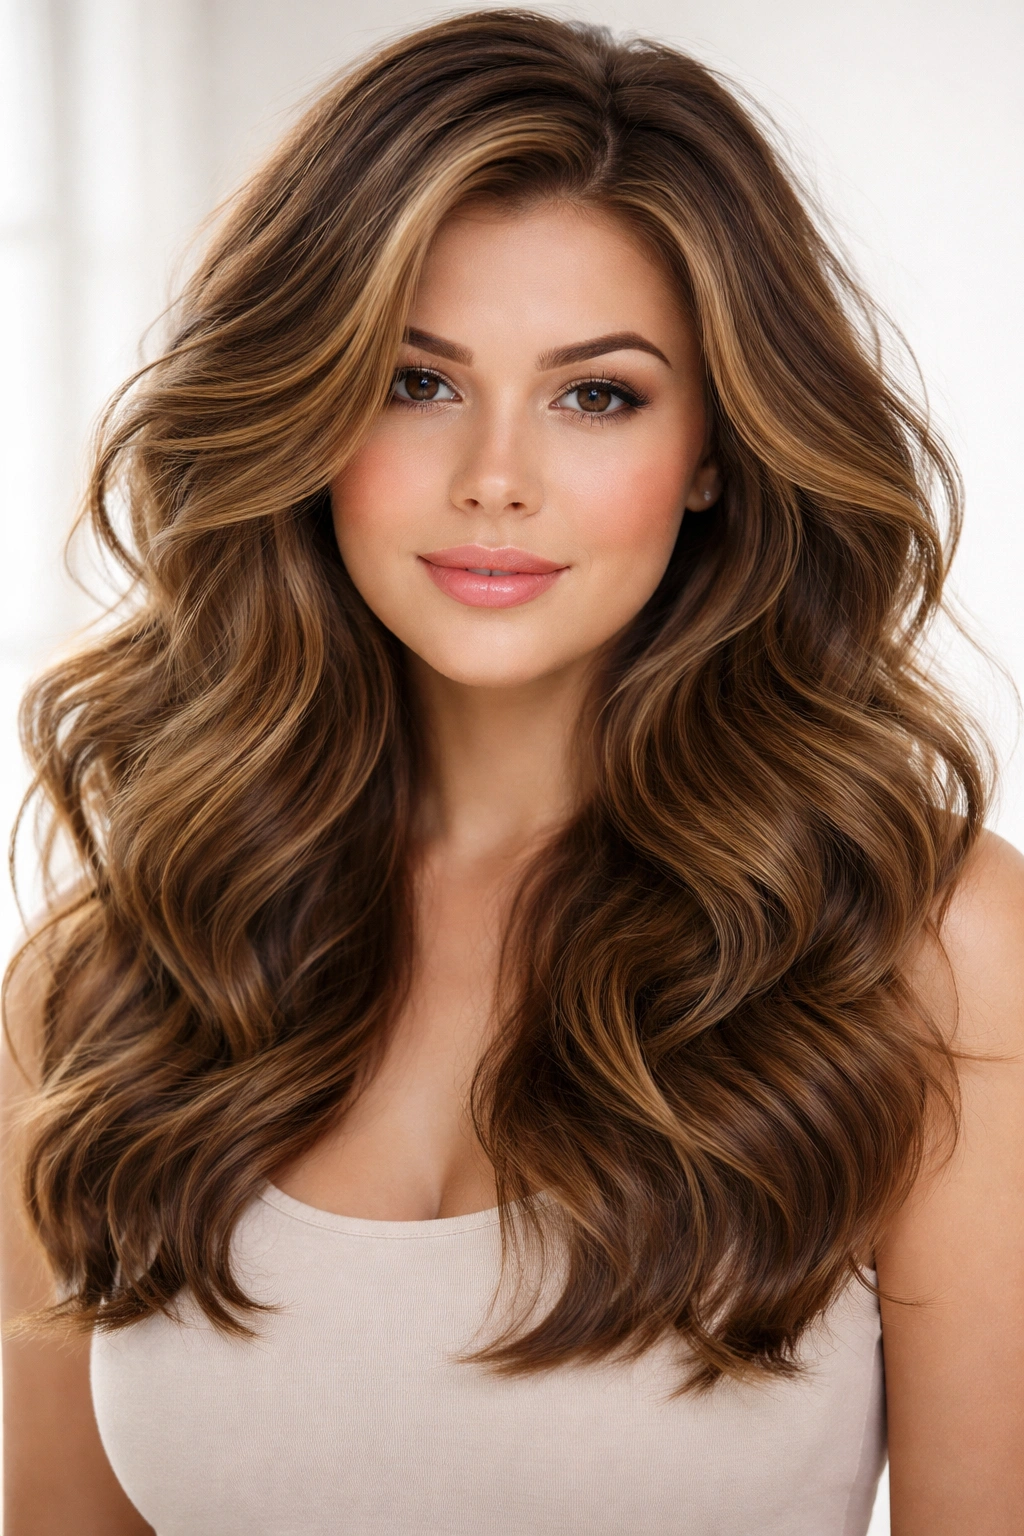
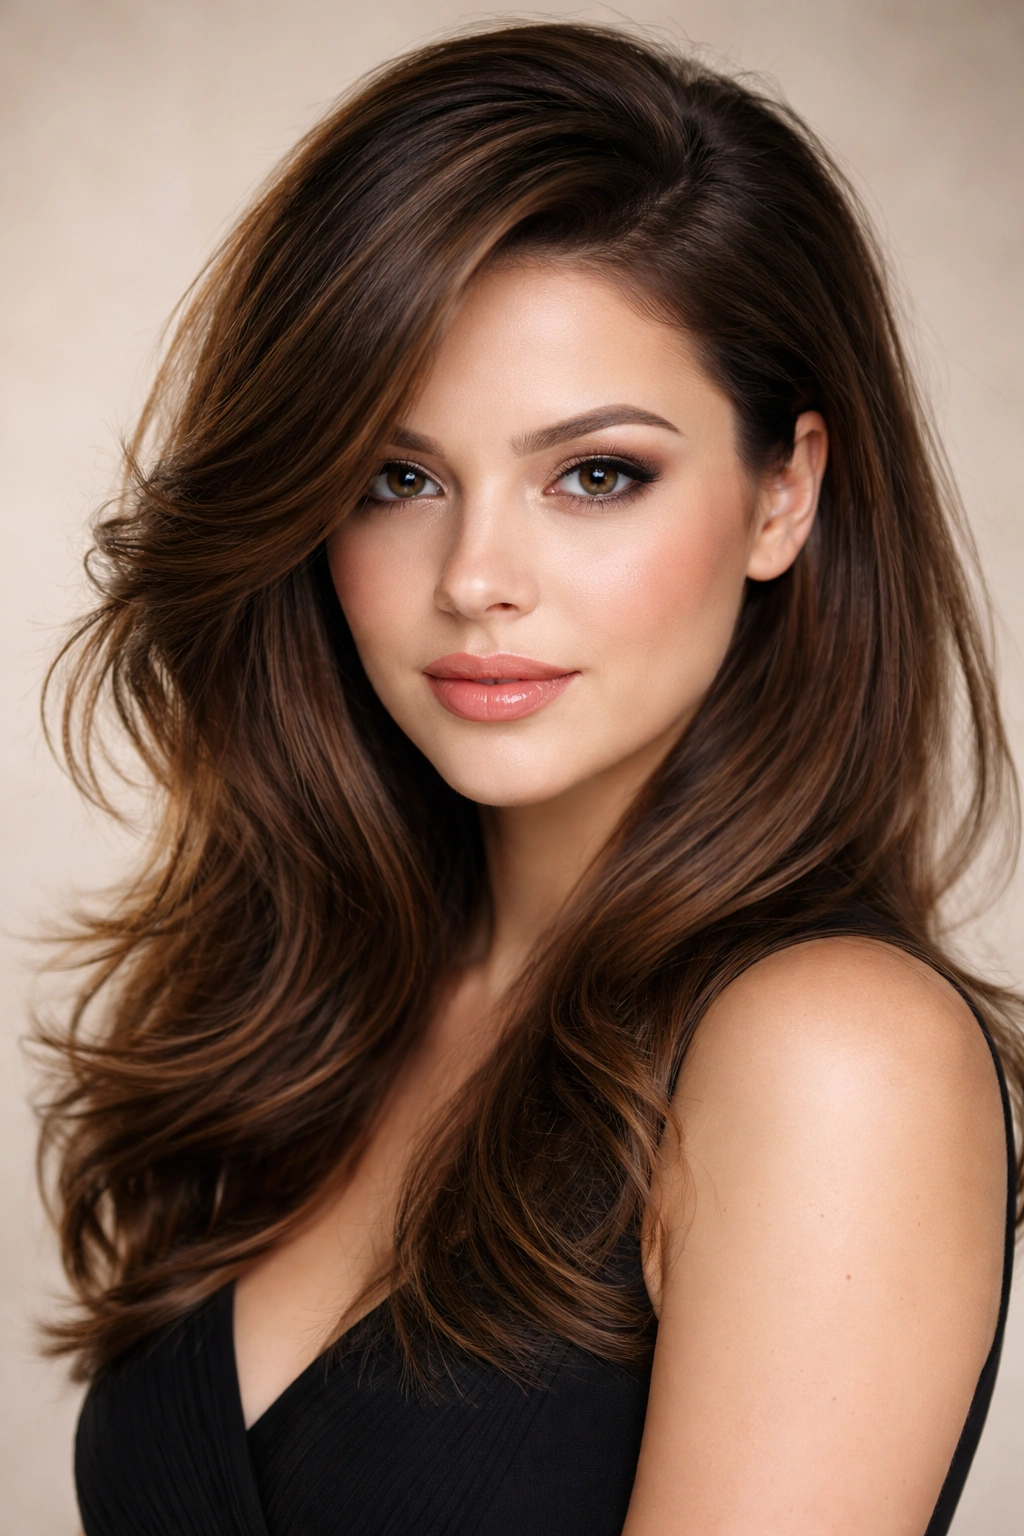
1. Long Layers Throughout

Long layers are one of the most universally flattering choices for round faces because they create movement that breaks up the face’s width while maintaining length that naturally elongates. The key is layering that starts around cheekbone length and continues down, with each layer slightly shorter than the one beneath it, creating a cascading effect that flows beautifully when you move.
Why Layers Work for Round Faces
Layers add an essential element of texture and movement that instantly makes a round face appear narrower and more sculpted. Because each layer catches the light differently and moves independently, the overall effect is less heavy and solid, more dynamic and interesting. The graduated lengths also create natural face-framing pieces that draw attention to your cheekbones and jawline rather than the width of your face.
How to Get the Best Results
- Request layers that begin at your cheekbone or slightly below and continue through the ends in a tapered style
- Ask your stylist to point-cut the ends for a softer, texturized finish rather than blunt layers that can look choppy
- Style with a texturizing spray and your fingers rather than a brush for a more intentional, tousled look
- Blow-dry sections with a round brush to add subtle waves that enhance the flattering movement
- The length should hit somewhere between mid-back and bra-strap for the most flattering proportions
Pro tip: Darker roots with lighter ends (a balayage or shadow root) add depth that further enhances the narrowing effect of long layers.
2. Side-Swept Bangs with Length
Side-swept bangs create an immediate diagonal line across your face, which is exactly what a round face needs to appear more angular and defined. Unlike straight-across bangs that can emphasize width, side-swept bangs elongate the face by creating a visual line that travels from one side of your face to the other, drawing the eye diagonally rather than straight across.
The Power of the Diagonal
A side-swept bang works because it creates an instant angle where the eye can follow a line from forehead to cheek, breaking up the circular proportion of a round face. The longer side of the bang skims your cheekbone, creating subtle definition and shadow that adds dimension. This simple geometric shift makes an enormous difference in how balanced and proportional your face appears.
Styling and Maintenance Tips
- Side-swept bangs work best on longer hair (at least mid-length) so the rest of your hair can balance the swept angle
- Blow-dry your bangs to one side while they’re still damp, using a round brush to curl them slightly under
- Keep the bangs slightly longer — they should hit between your cheekbone and jawline for the most flattering placement
- Tousled or wavy hair works better with side-swept bangs than ultra-straight styles, as the texture softens the line
- A light texturizing spray helps bangs stay swept and adds movement
Worth knowing: Side-swept bangs require regular trims every 3-4 weeks to maintain the angle, so factor that into your commitment level before committing to this look.
3. Textured Pixie Cut
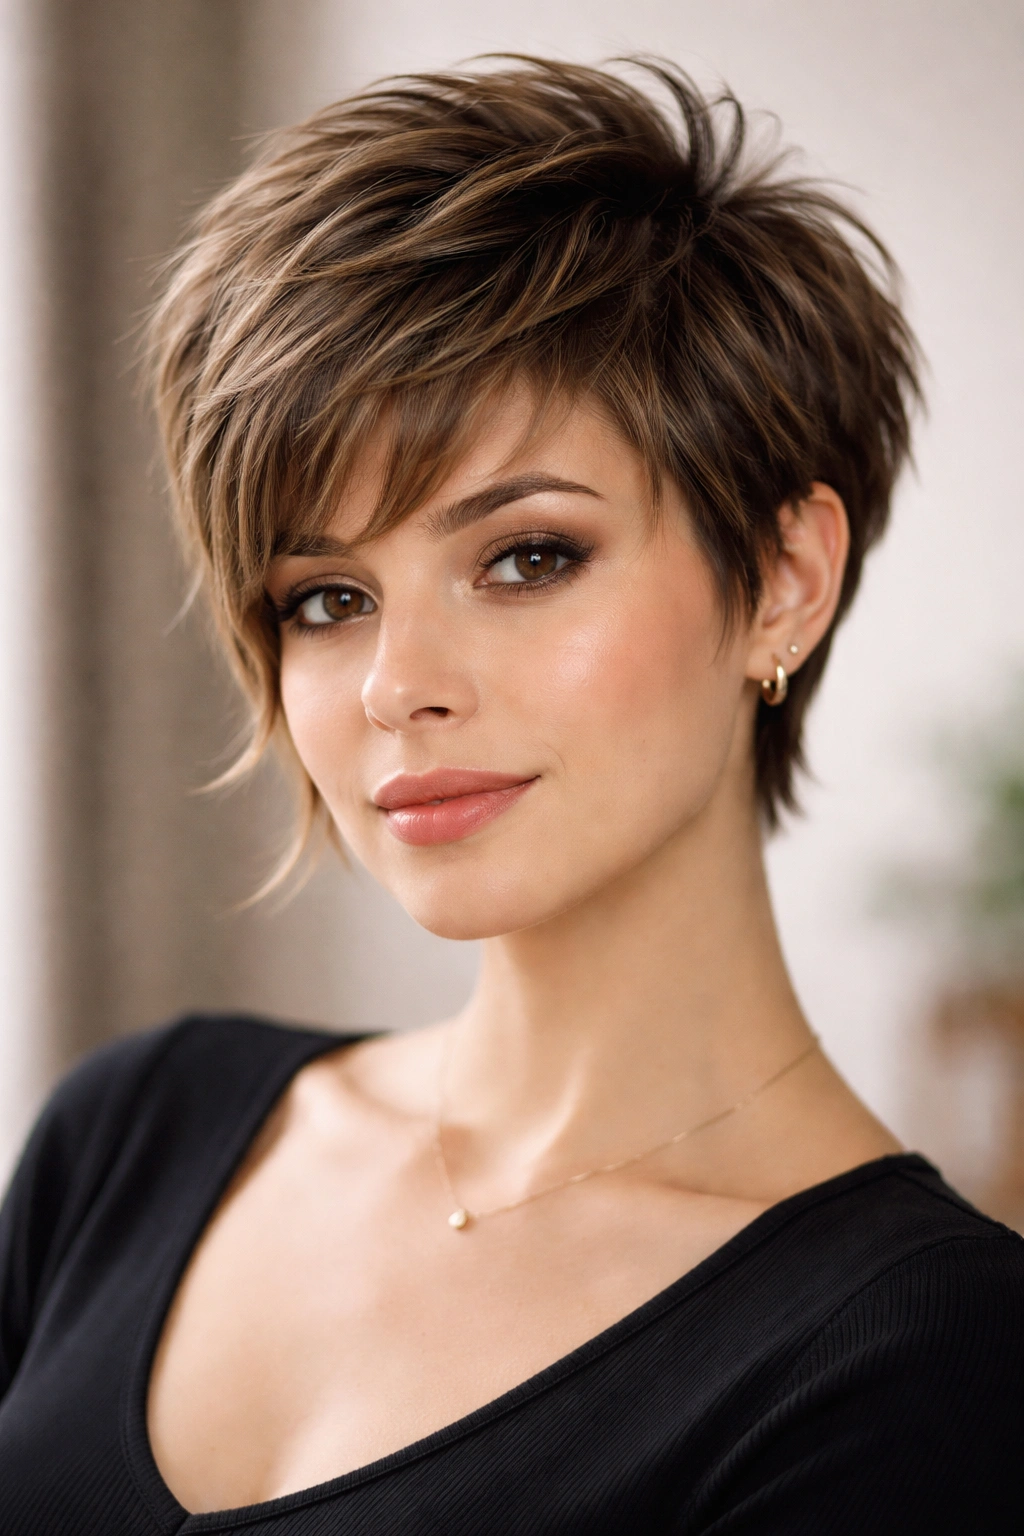
A pixie cut might seem counterintuitive for a round face, but a textured pixie — one with movement, volume at the crown, and longer sides — can be incredibly flattering. The key is avoiding a blunt, close-cropped pixie and instead opting for one with dimension and variation in length that creates angles rather than a uniform round shape.
Why Texture Changes Everything
The difference between an unflattering pixie and a face-flattering one is texture and strategic length variation. A textured pixie has choppy layers throughout, longer pieces around the ears and jawline, and maximum volume at the crown. This creates visual interest and prevents the cut from emphasizing the roundness of your face. The longer pieces frame your face and add angles your cheekbones need.
Cut and Styling Specifics
- Request a choppy, textured pixie with longer sides (at least an inch or two) that skim your jawline
- Ask for significant volume at the crown — this is non-negotiable for round faces
- The back can be shorter and layered, but the sides should be long enough to frame your face
- Style by applying a texturizing paste or pomade to damp hair and tousling it with your fingers
- Blow-dry sections upward and outward to maximize the height at the crown
- Never comb through it smoothly — the texture is what makes this cut work
Insider note: This cut shines with thick, wavy, or curly hair that naturally holds texture. Straight hair requires daily styling to maintain the tousled effect.
4. Angled Bob with Longer Front Pieces
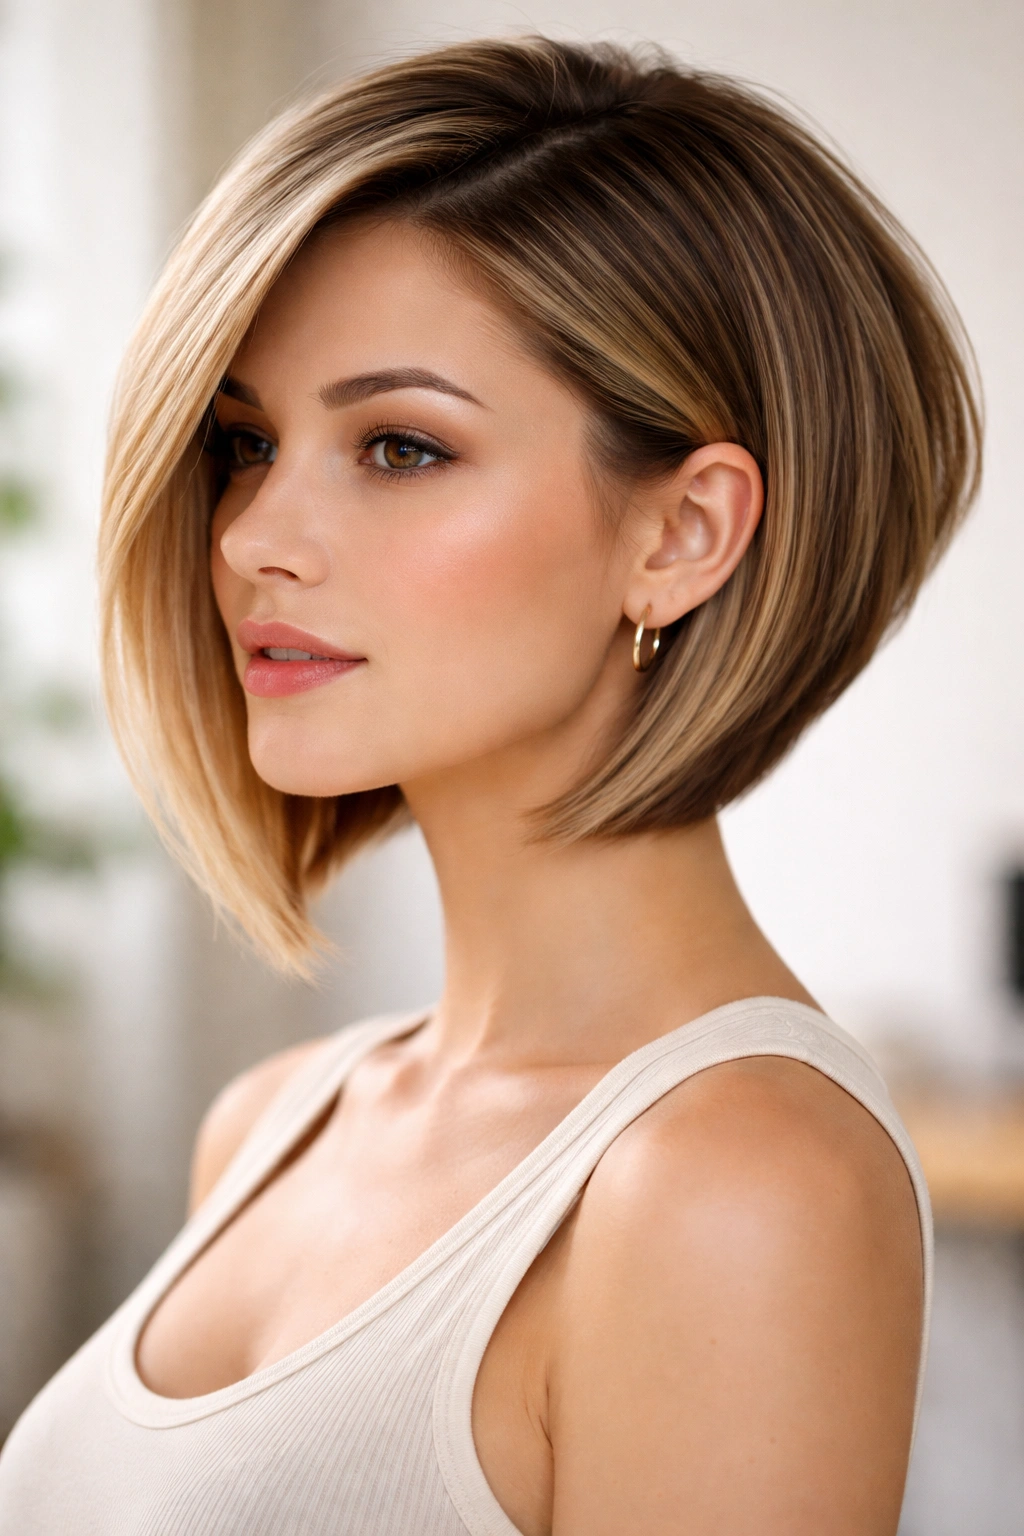
An angled bob — sometimes called a “grown-out pixie” or “disconnected bob” — angles up from longer front pieces to a shorter back, creating diagonal lines that flatter a round face. The longer front pieces frame your face and jawline while the shorter back adds volume at the crown where you need it most.
The Angle Does the Work
An angled bob is specifically constructed to create vertical and diagonal lines that counteract the horizontal roundness of your face. The longer front pieces extend past your jawline and cheekbones, creating shadow and definition, while the shorter back creates the lifted, face-lengthening effect. This combination is nearly foolproof for round faces.
Getting This Cut Right
- The front pieces should extend at least to your jawline, ideally an inch or two below it
- The back should be noticeably shorter — typically 2-3 inches above where the front pieces end
- Ask your stylist to layer the front pieces so they have movement and don’t sit flat against your face
- The overall shape should have a distinct angle, not a rounded transition
- Blowout-style styling with a round brush emphasizes the flattering shape
- The cut works best on straight to wavy hair; curly hair can blur the angles
Pro tip: Side-parting an angled bob enhances the already-diagonal shape and adds even more length to one side of your face.
5. High Ponytail with Face-Framing Pieces
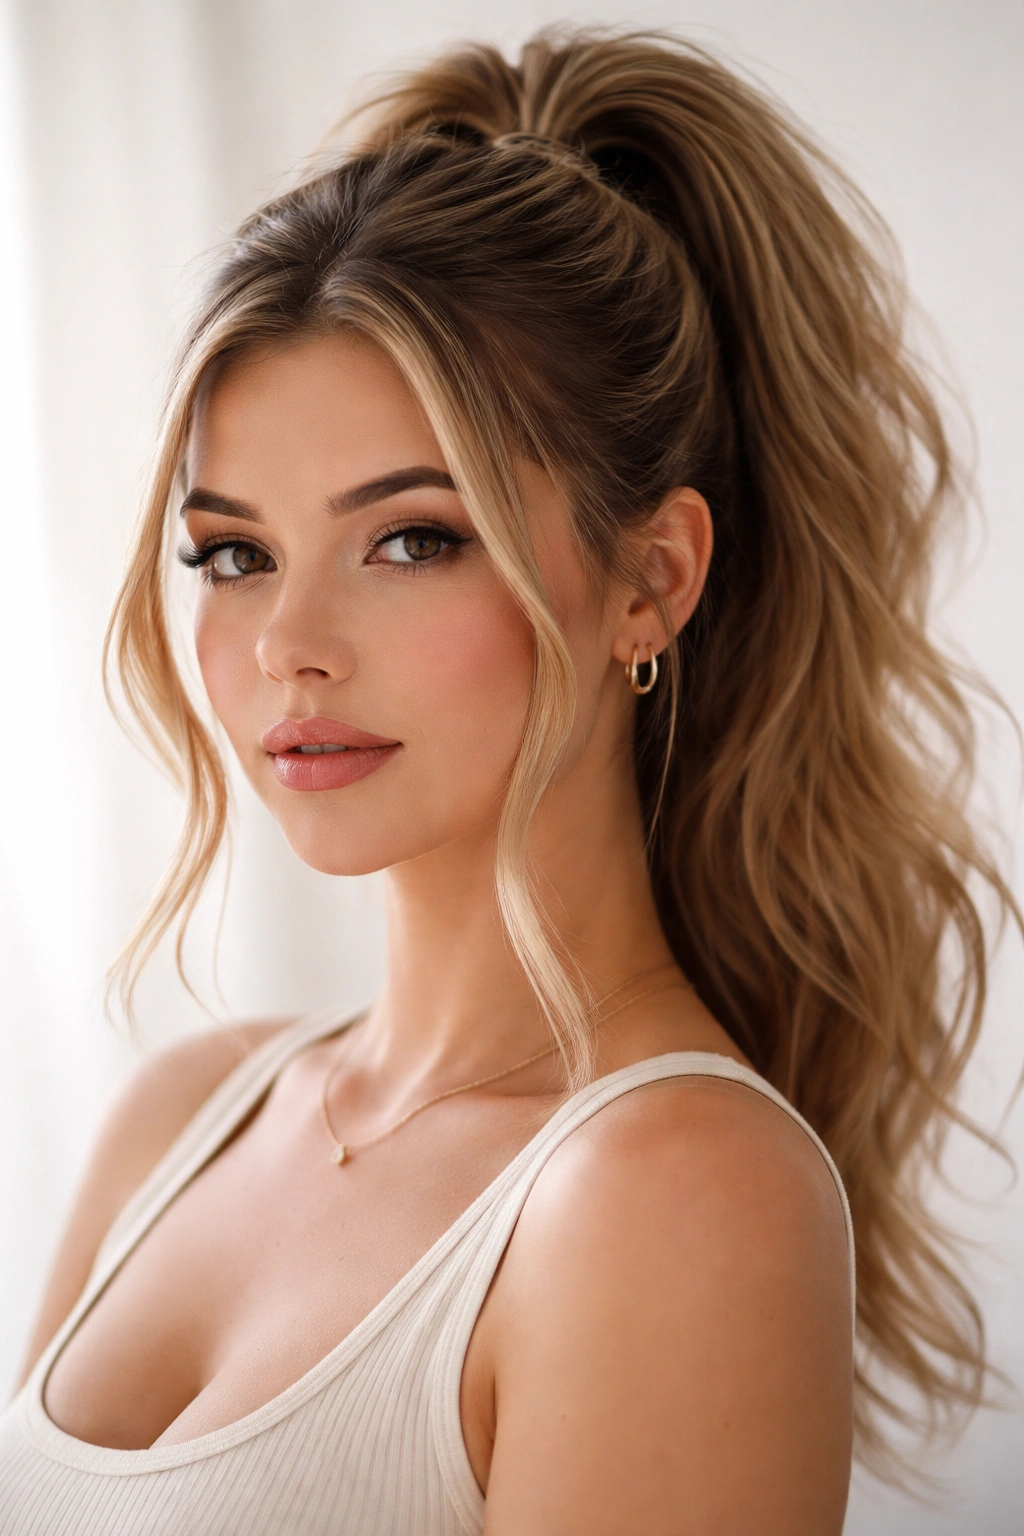
A high ponytail pulls hair away from your face and creates maximum height at the crown, both of which make a round face appear longer and narrower. The addition of a few strategically placed face-framing pieces softens the effect and adds dimension so your face isn’t completely exposed.
Why Height Matters
Pulling hair up and away from your face elongates your features immediately by exposing your full forehead and creating vertical space. The height at the crown adds lift that makes your entire face appear more sculpted. The face-framing pieces prevent the look from being too severe while maintaining the lengthening effect.
How to Execute This Look
- Gather hair into a high pony positioned slightly forward of the crown (not directly at the very top)
- Before securing, gently pull out 2-3 small pieces near your face, framing your cheekbones
- Use a round brush to wave or curl the face-framing pieces slightly for softness
- The ponytail itself can be sleek, textured, braided, or curled depending on your preference
- Tease the crown slightly before securing to add volume where you need it
- A small velvet elastic or a metal cuff finishes the look more elegantly than a basic rubber band
Worth knowing: This style works best when you have layers or some shorter pieces throughout your hair; if you have all one length, the face-framing pieces are harder to achieve and may look choppy.
6. Voluminous Waves with Texture
Soft, voluminous waves create movement and texture that break up the roundness of your face while the height and dimension make the face appear longer. The key is creating waves that are full and bouncy rather than flat curls, with emphasis on volume at the crown.
The Science of Flattering Waves
Waves work because they create multiple points of visual interest rather than the single unified circle of your round face. The peaks and valleys of the waves cast shadows and highlights that add dimension and angles to your face. The volume, especially at the crown, provides the vertical lift that makes your face appear more proportional.
Creating and Maintaining Voluminous Waves
- Start with damp hair and apply a volumizing mousse or texturizing spray to the roots and mid-lengths
- Blow-dry with your head upside-down to create maximum root lift, then flip over and style sections upward
- Use a large barrel curling iron (1.5 to 2 inches) to create loose waves, curling away from your face
- Leave waves loose and tousled rather than brushing them out into smooth curls
- Finish with a light hold hairspray that doesn’t weigh the waves down
- Refresh waves the next day with a curling iron and texture spray for second-day texture
- Side-part the waves to enhance the elongating diagonal line
Pro tip: Sleeping in a loose braid and refreshing with a curling iron the next morning creates texture with less daily heat styling.
7. Side Part with Dramatic Blowout
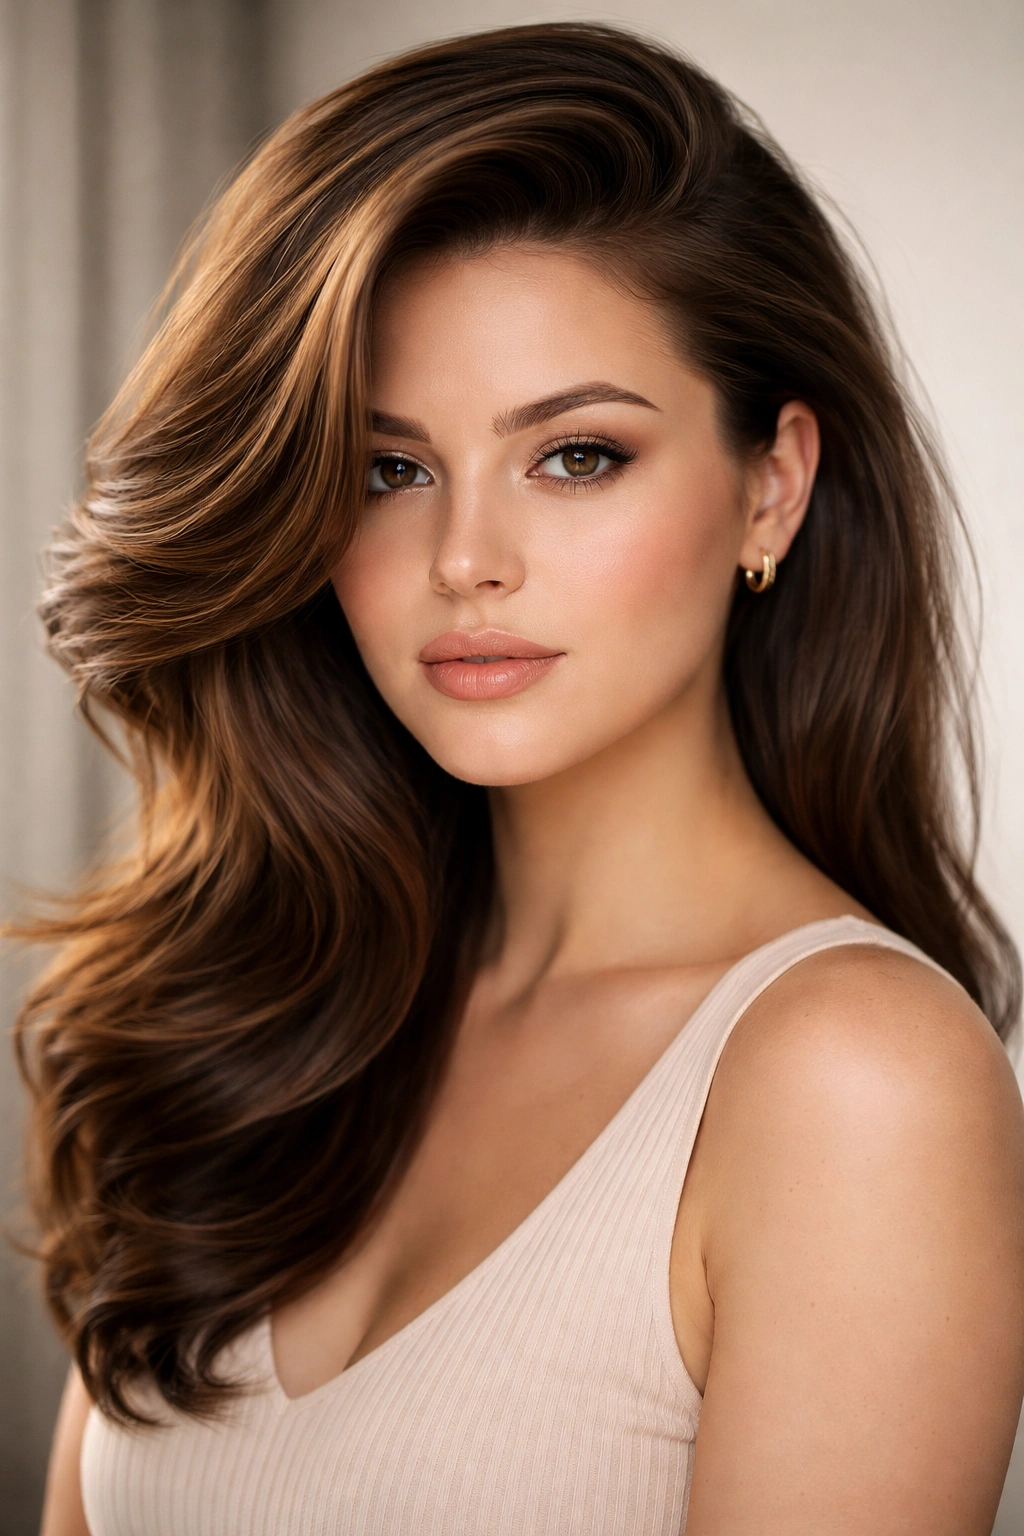
A deep side part creates a strong diagonal line across the top of your head that visually narrows a round face. Paired with a blowout-style smoothness, this look is polished and flattering, with the side part doing the heavy lifting of creating the angles you need.
The Power of the Side Part
A deep side part — one that creates a clear diagonal from one side of your hairline to the opposite side — establishes an immediate angular line that counteracts roundness. The side part also creates the illusion of height and length, as the longer side has more volume, making your face appear narrower.
Achieving the Blowout Effect
- Create your part when hair is damp, making it deep and deliberate
- Blow-dry the larger side of your part with a round brush, directing hair slightly back and away from your face
- Use a flat iron to smooth the underside and create polished dimension
- Add a light bounce at the ends with a curling iron for movement rather than complete flatness
- Use a smoothing serum on damp hair before blow-drying to enhance shine and reduce frizz
- Finish with a flexible hold hairspray that maintains movement
- The overall effect should be sleek but not stiff, with subtle texture and shine
Worth knowing: This look requires regular blow-drying to maintain; it’s less about the cut and more about the styling technique.
8. Wispy Bangs with Long Hair
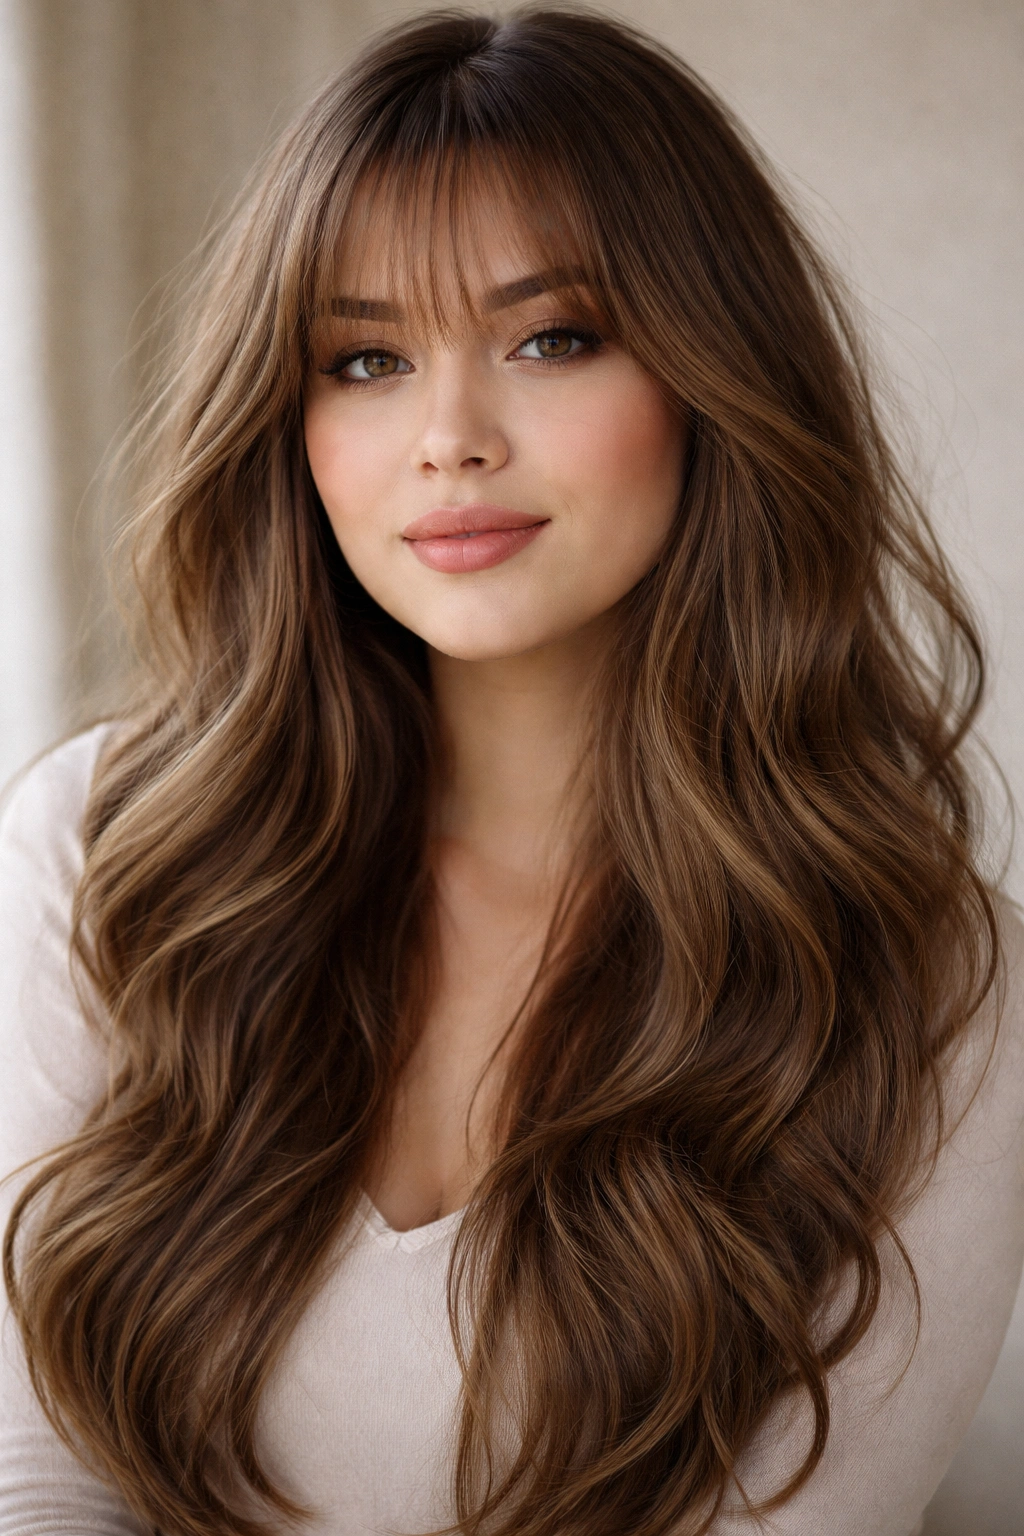
Wispy bangs are longer, lighter bangs that graze the top of your eyebrows and create a soft, face-framing effect. Unlike heavy bangs that can emphasize width, wispy bangs add texture and movement that flatter a round face without being too dramatic.
Why Wispy Works
Wispy bangs break up the roundness of your face with soft layers that frame your forehead and eyes, while the longer length means they don’t cover your entire forehead. They create movement and texture rather than a heavy, solid line, which keeps a round face from appearing wider.
Styling Wispy Bangs Successfully
- Wispy bangs should be choppy and layered, not blunt — ask your stylist for lots of texture
- They work best on longer hair (shoulder-length or longer) for balance
- Blow-dry bangs upward and slightly to the side, never straight down
- Use a light texturizing spray to enhance the wispy, separated look
- Keep bangs the same length or slightly longer than your eyebrows for the most flattering effect
- Trim every 4-6 weeks to maintain the wispy texture and prevent them from becoming heavy
Insider note: Wispy bangs are particularly flattering on people with thick hair, as the layering creates the right amount of texture. On very fine hair, they can look stringy and thin.
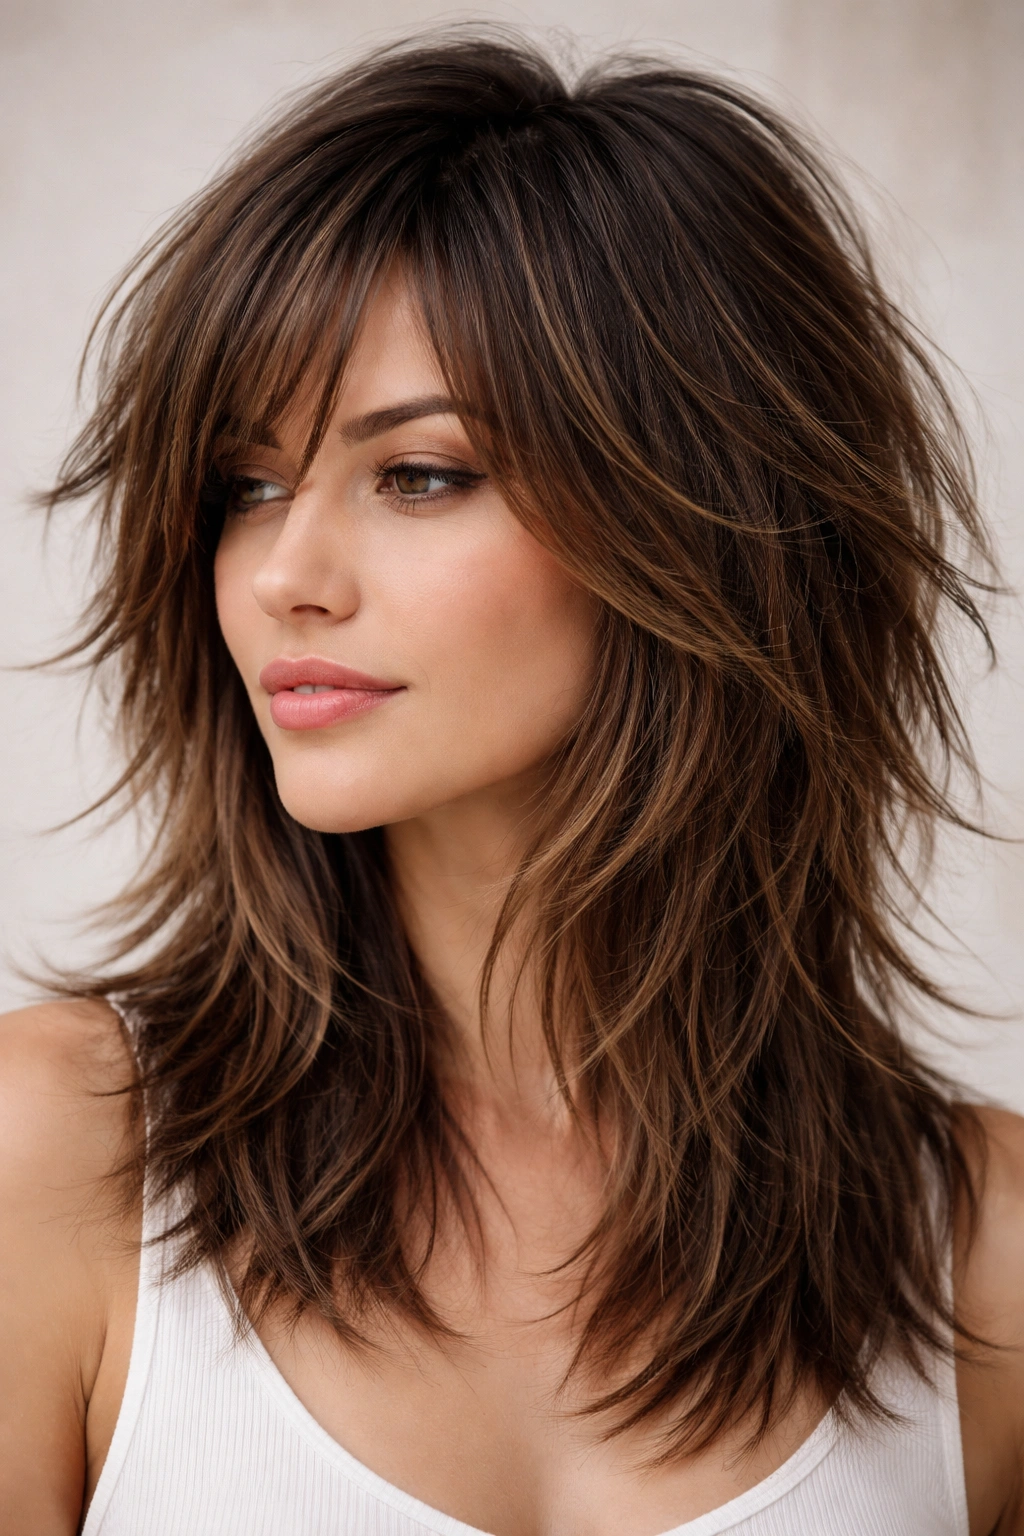
9. Shaggy Layers with Choppy Texture
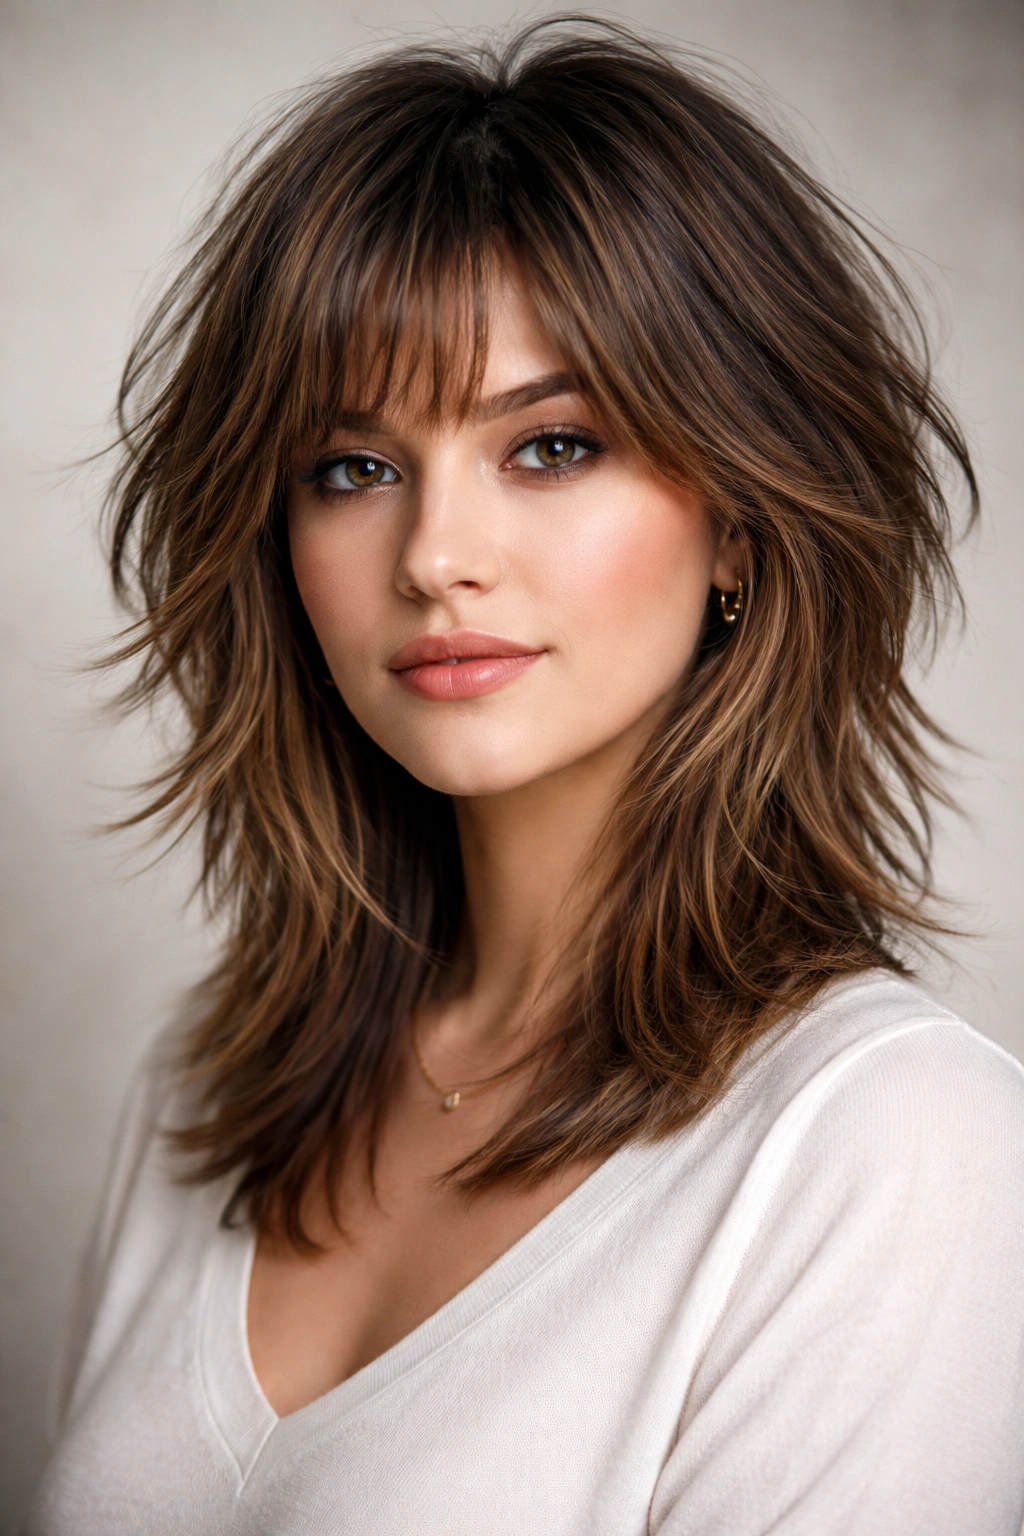
A shaggy layered cut is all about choppy texture, lots of movement, and varying lengths throughout that create a rock-and-roll vibe. This style works beautifully for round faces because the choppy texture and multiple layers create visual interest that moves the eye around rather than settling on the width of your face.
The Magic of Shag
A shag cut incorporates multiple lengths and textures throughout that prevent any single line from defining your face shape. The choppy layers catch light differently, the varied lengths create angles, and the overall effect is so textured and dimensional that the round shape becomes less noticeable.
Getting the Shag Right
- Request layers throughout with shorter choppy layers on top for height and movement
- The cut should have an intentionally undone, effortless texture — think lived-in, not neat
- Layers should start at the crown and continue through the ends, with varying lengths
- Ask for longer face-framing pieces to add angles to your cheekbones
- Style with a texturizing spray or sea salt spray and tousle with your fingers
- Blow-dry sections with a round brush to create soft movement, not sleekness
- A shag works best with naturally wavy or curly hair that holds texture, but straight hair can work with daily styling
Pro tip: A shag paired with dark roots and lighter, choppy ends (like a modern mullet influence) is especially flattering and on-trend.
10. Deep Side Part with Volume at Crown
A deep side part shifted far to one side creates an asymmetrical silhouette that makes a round face appear less symmetrical and therefore less obviously round. Paired with strategic volume at the crown, this styling technique is simple but remarkably effective.
Asymmetry Works
When you shift your part to one side and create height on the opposite side, you create an overall asymmetrical head shape that visually lengthens your face and moves away from the circular proportion. The eye follows the diagonal lines created by the deep part, skimming vertically rather than horizontally across your face.
Creating Maximum Impact
- Create your part at least an inch or two from your natural center parting line
- Tease and volumize the crown, especially on the side opposite your part
- Use a round brush to blow-dry the crown upward and slightly back
- Smooth the side closest to the deep part for a slight asymmetrical effect
- Keep hair long enough that the volume at the crown is substantial, not just a small teased section
- The overall shape should create a diagonal line from forehead to ear, emphasizing length
Worth knowing: This works best on shoulder-length or longer hair; short hair can’t create enough volume contrast to make the asymmetry work.
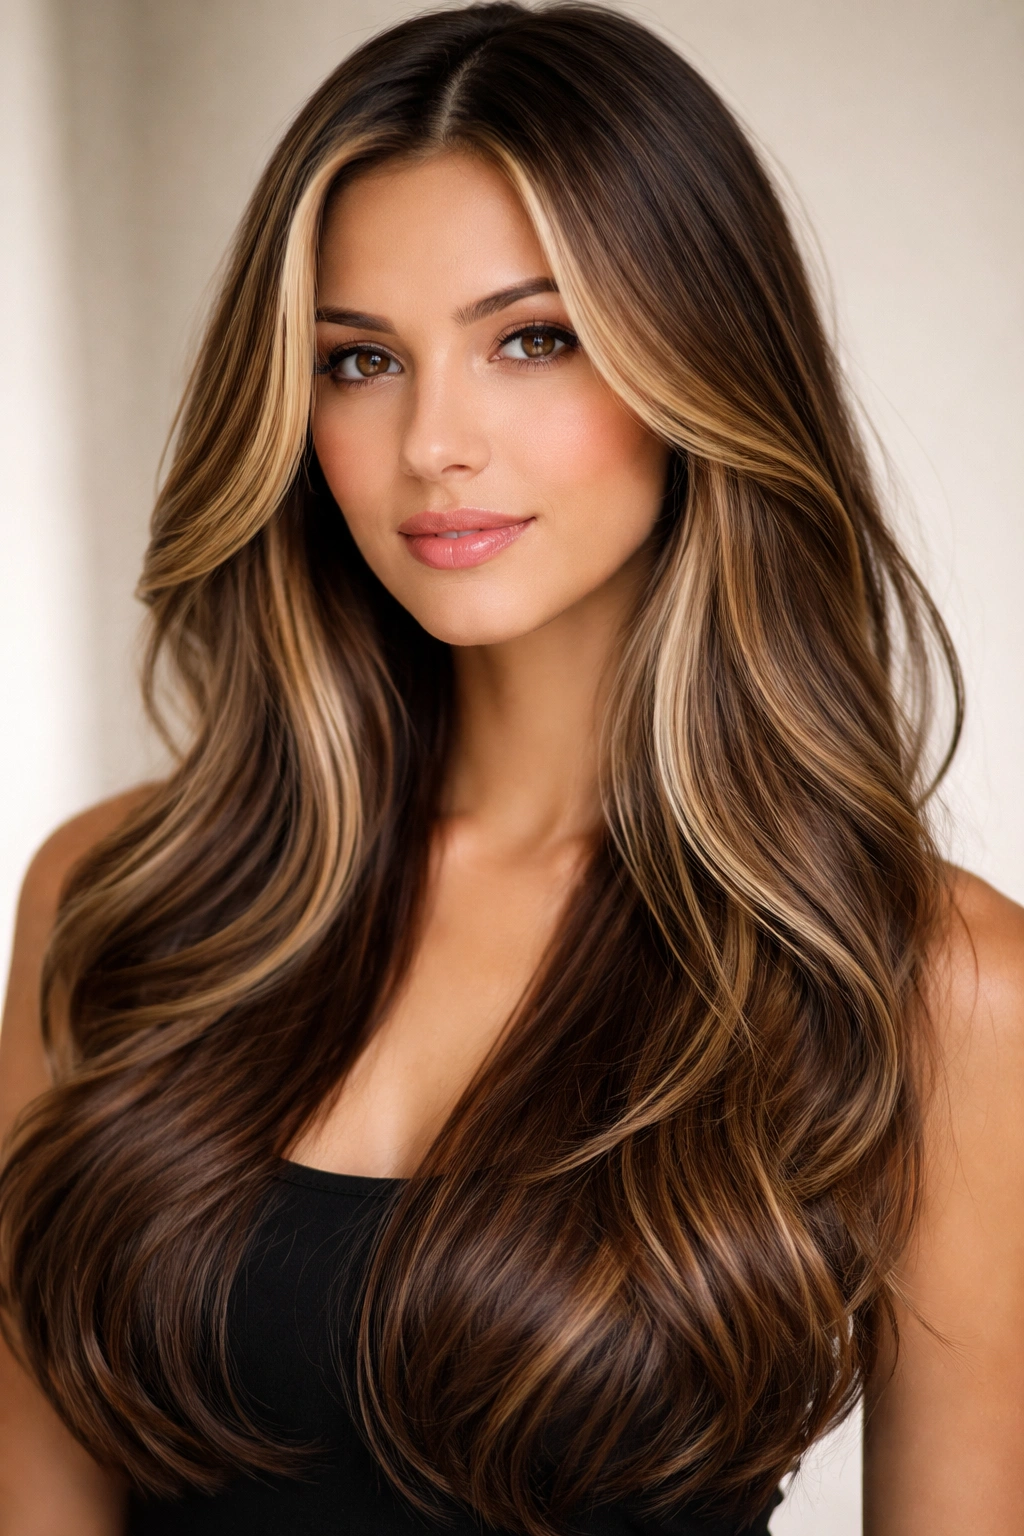
11. Face-Framing Highlights with Long Layers
Strategic highlights placed around the face — framing your cheekbones, jawline, and forehead — add dimension and light that creates the illusion of angles where a round face might seem flat. Combined with long layers, this color technique enhances the face-flattering effect of the cut.
Color Creates Contour
Face-framing highlights use light and shadow to create contour similar to makeup contouring. Brighter highlights near your face catch the light and draw attention, while darker roots or lowlights add depth. This interplay of light and dark creates dimension that makes a round face appear more sculpted and defined.
Placement and Color Technique
- Request highlights that frame your cheekbones, placed roughly where blush would go
- Add lighter pieces around your face’s perimeter — near your temples and jawline
- Pair highlights with subtle lowlights or darker tones underneath for depth
- A shadow root (darker roots fading to lighter ends) enhances the narrowing effect
- Balayage or hand-painted color looks more natural than uniform foil highlights
- The contrast between light and dark should be noticeable but not harsh
- Combine this color technique with long layers for maximum flattery
Pro tip: Warm-toned highlights (honey, caramel, champagne) tend to be more flattering on warm skin tones, while cool-toned highlights (ash, platinum, silver) suit cool undertones better.
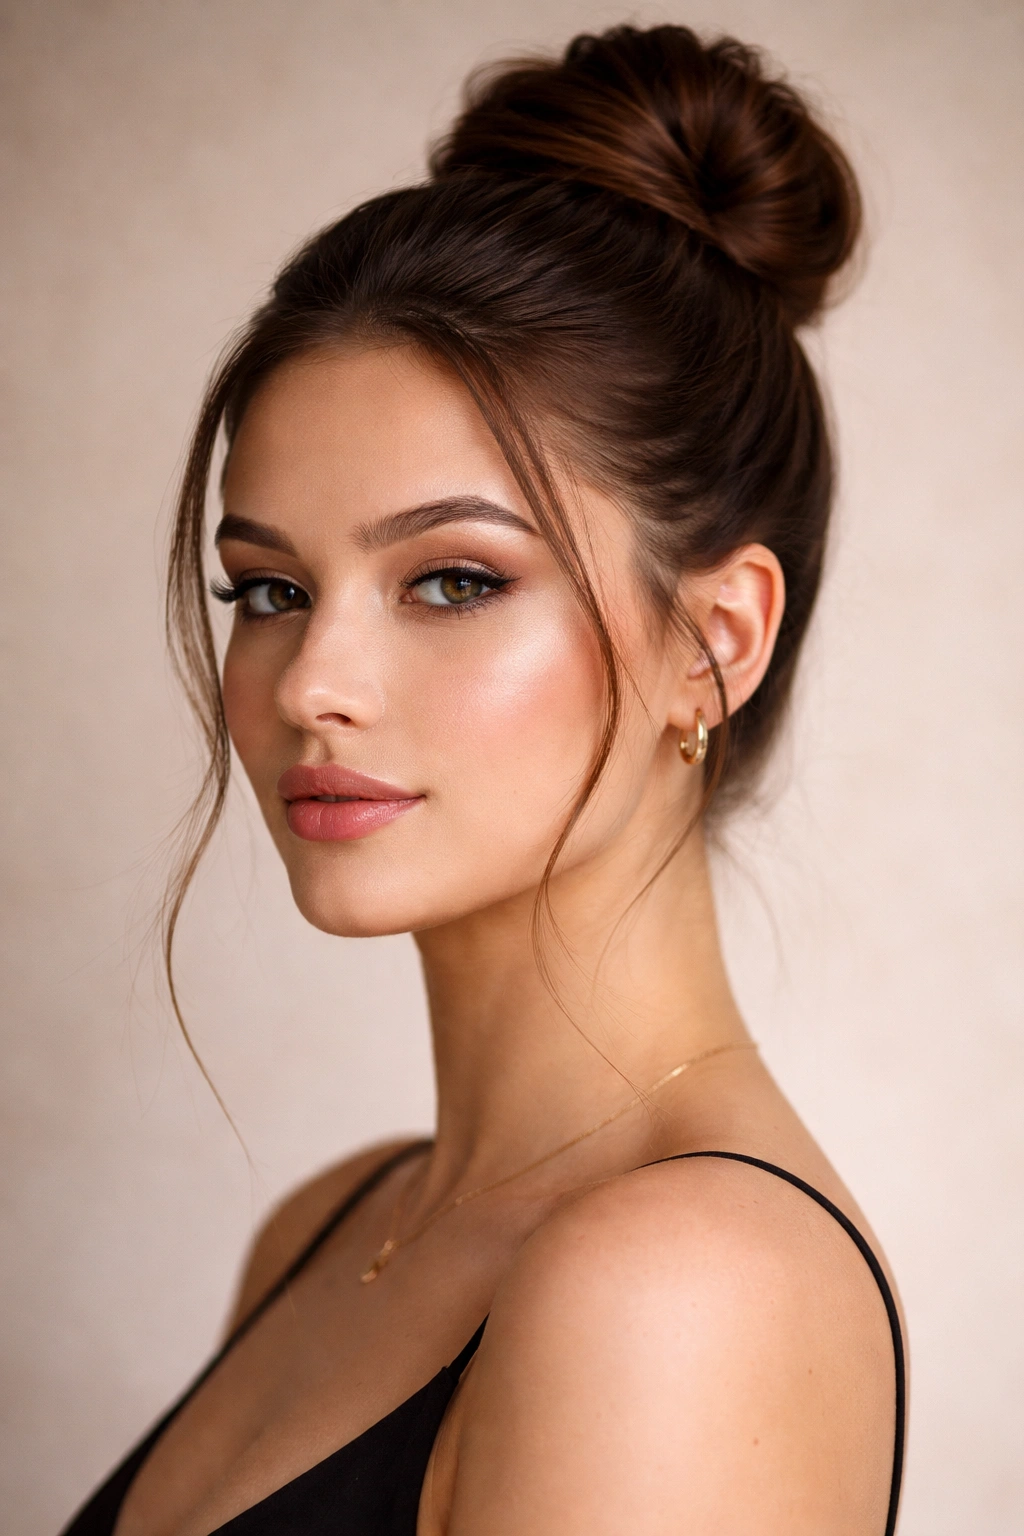
12. Sleek High Bun with Wispy Strands
A polished high bun pulled away from your face elongates by creating height and fully exposing your face shape, while a few intentionally loosened wisps at the temples soften the effect and add dimension. This look is both practical and flattering.
Height Plus Softness
A high bun creates maximum vertical height at the crown, instantly making a round face appear longer. The pulled-back style exposes your full face, which can seem counterintuitive, but combined with strategic wispy pieces, it’s deeply flattering because the height and the soft face-framing pieces balance each other.
Executing the Look
- Gather hair into a high pony (positioned slightly forward of center) before securing
- Twist or braid the ponytail before wrapping it into a bun for texture
- Gently pull out 2-3 small strands near your face, roughing them up slightly for a soft, wispy effect
- Leave a few longer wisps down the sides of your face, near your temples
- Use a strong-hold elastic and bobby pins to secure without creating a severe pulled appearance
- Apply a lightweight smoothing serum to the bun itself for shine
- The overall effect should be polished but not austere — the wisps prevent it from being too severe
Worth knowing: This style requires enough hair length and density to create a full bun; very fine or short hair may not create the desired effect.
13. Tousled Beach Waves

Loose, undone beach waves create the same movement and texture as voluminous waves but with a more casual, effortless aesthetic. The soft, messy nature of beach waves breaks up the roundness of your face while the length and dimension flatter.
Casual Texture Works
Beach waves create multiple points of visual interest through their unstructured texture and movement. Unlike defined, perfect waves, beach waves are intentionally undone, which prevents the eye from landing on any single feature. The softness and movement create angles through light and shadow.
Creating Effortless Beach Waves
- Apply a sea salt spray or texturizing spray to damp hair from mid-length through ends
- Blow-dry with a round brush for slight movement, or let air-dry partially for more texture
- Use a 1.5-inch curling iron on sections, curling away from your face, and don’t brush through the curls
- Focus waves more heavily on the lower half of your hair for a lived-in effect
- Leave the roots slightly smoother for a natural appearance
- Refresh waves the next day with a texturizing spray and light curling — they improve with age
- Pair with a side part to enhance the diagonal flattering lines
Pro tip: Beach waves are forgiving and get better as they age, making them perfect for a long-wearing, minimal-maintenance style.
14. Choppy Layers Throughout All Lengths
Choppy layers differ from traditional layered cuts in their degree of texture and variation. While traditional layers have a more polished look, choppy layers are deliberately jagged and uneven, creating maximum texture and movement.
Choppy Texture Breaks the Roundness
Choppy layers eliminate any smooth, continuous line that might emphasize your round face shape. The jagged, uneven texture creates countless points of visual interest, drawing the eye in multiple directions rather than around the perimeter of your face. The texture itself acts as camouflage for roundness.
Cutting and Styling Choppy Layers
- Request choppy, piece-y layers throughout your hair, varying in length noticeably
- Ask for shorter choppy pieces at the crown for height and longer choppy pieces around your face
- The layers should be clearly visible and textured, not subtly graduated
- Avoid having any smooth sections; ask your stylist to point-cut throughout
- Style with a texturizing spray or wax, tousling with your fingers rather than smoothing
- Blow-dry sections individually, working them upward and outward
- This cut looks best with some natural wave or curl, or with daily styling effort
- The overall effect should be intentionally undone, like you just rolled out of bed looking good
Worth knowing: Choppy layers require regular trims (every 4-6 weeks) to maintain the sharp, textured appearance.
15. Long Straight Hair with Movement at the Ends
Long, straight hair might seem like it would emphasize a round face’s width, but when styled with subtle movement and dimension at the ends, it can actually be quite flattering. The key is avoiding poker-straight hair in favor of subtle waves or curls that begin around the level of your jawline.
Length Plus Movement
Long straight hair with movement at the ends provides the elongating effect of length combined with the dimensional, angle-creating effect of waves. The movement isn’t so pronounced that it looks curly, but it’s present enough to create visual interest and prevent the hair from looking like a solid column.
Styling for Flattery
- Keep your overall length long (at least mid-back or longer) for maximum elongating effect
- Create subtle waves or curls starting around your jawline — the upper half stays relatively straight
- Use a large-barrel curling iron (2 inches or larger) for loose, subtle waves
- Avoid frizz with a smoothing serum applied to damp hair before blow-drying
- Blow-dry the upper portion straight and smooth, curling just the lower half for movement
- A side part enhances the flattering effect by creating a diagonal
- The overall look should be sleek on top with undone movement on the bottom
- A subtle balayage or shadow root adds dimension without requiring extensive color maintenance
Pro tip: This style is incredibly versatile — you can wear it down with subtle waves, half-up with face-framing pieces, or in a sleek high ponytail, and it’s flattering in every configuration.
Final Thoughts
The most flattering hairstyle for your round face ultimately depends on your hair type, lifestyle, and personal style preferences. What matters most is understanding the principle: vertical lines lengthen, angles define, texture breaks up roundness, and movement creates dimension. Whether you choose a dramatic angled bob, long layers with highlights, a textured pixie, or any of the options here, the goal is the same — creating lines and dimension that work with your face shape rather than against it.
The beautiful truth is that you don’t need to hide your round face; you simply need to style it in a way that emphasizes its best features and creates the visual balance that makes you feel confident. A skilled stylist who understands round face flattery can help you choose the right cut and technique for your specific hair type and lifestyle. And once you have a flattering cut, most of these styles require just minimal daily effort to look polished and intentional.
Experiment, trust the process, and remember that the best hairstyle is the one that makes you feel like the best version of yourself.