Short hair often gets stereotyped as having limited styling options, but the truth is the complete opposite. Some of the easiest, most flattering updos happen on shorter lengths—they require less hair to create shape, hold better without weights dragging them down, and honestly feel less fussy once you know the right techniques. The challenge isn’t whether updos are possible on short hair; it’s learning which styles actually work with your specific length and texture, and understanding the small adjustments that make the difference between something that falls apart in an hour and something that lasts all day.
The updos that work best on shorter lengths lean into movement, texture, and strategic pinning rather than trying to pile everything into a tall crown. A carefully placed twist can create the illusion of more hair. A few well-positioned bobby pins can secure what seems impossible. Texture—whether it’s from waves, curls, or intentional tease—becomes your best friend because it gives pins something to grip and makes the whole updo feel intentionally relaxed rather than strained.
What makes these styles genuinely wearable is that they’re designed around the reality of having, say, 2-6 inches of hair, not the fantasy of 12. You’ll discover that many updos feel better when they’re just slightly undone, when a few pieces escape, when they emphasize the shape of your head and face instead of fighting against your length. This is where short-hair updos actually win—they look polished and put-together while still feeling natural and effortless.
Why Short Hair Updos Actually Work Better Than You Think
There’s real physics working in your favor when your hair is shorter. Shorter strands have less weight pulling downward, which means pins grip more effectively and styles hold longer without the constant need for reinforcement spray or panic-adjusting throughout the day. The friction between shorter hair and bobby pins is actually stronger because there’s less leverage for gravity to use against you.
Short hair also forgives texture imperfections that would show up glaringly in a long, smooth style. A slightly uneven braid, a wonky twist, or pieces that don’t cooperate? These become charming details in a short-hair updo rather than styling failures. Your face shape is more visible in a short updo, which means these styles are incredibly flattering when chosen thoughtfully—they frame your features instead of overwhelming them.
The styling timeline is completely different too. What takes 15 minutes to perfect on long hair might take you 5 minutes on short hair. You’re working with less volume to wrangle, fewer bobby pins to secure, and simpler hand movements to master. Most of these updos use the same core techniques—twisting, pinning, and strategic teasing—so once you nail two or three, the rest become intuitive.
Essential Tools and Products for Short-Hair Updos
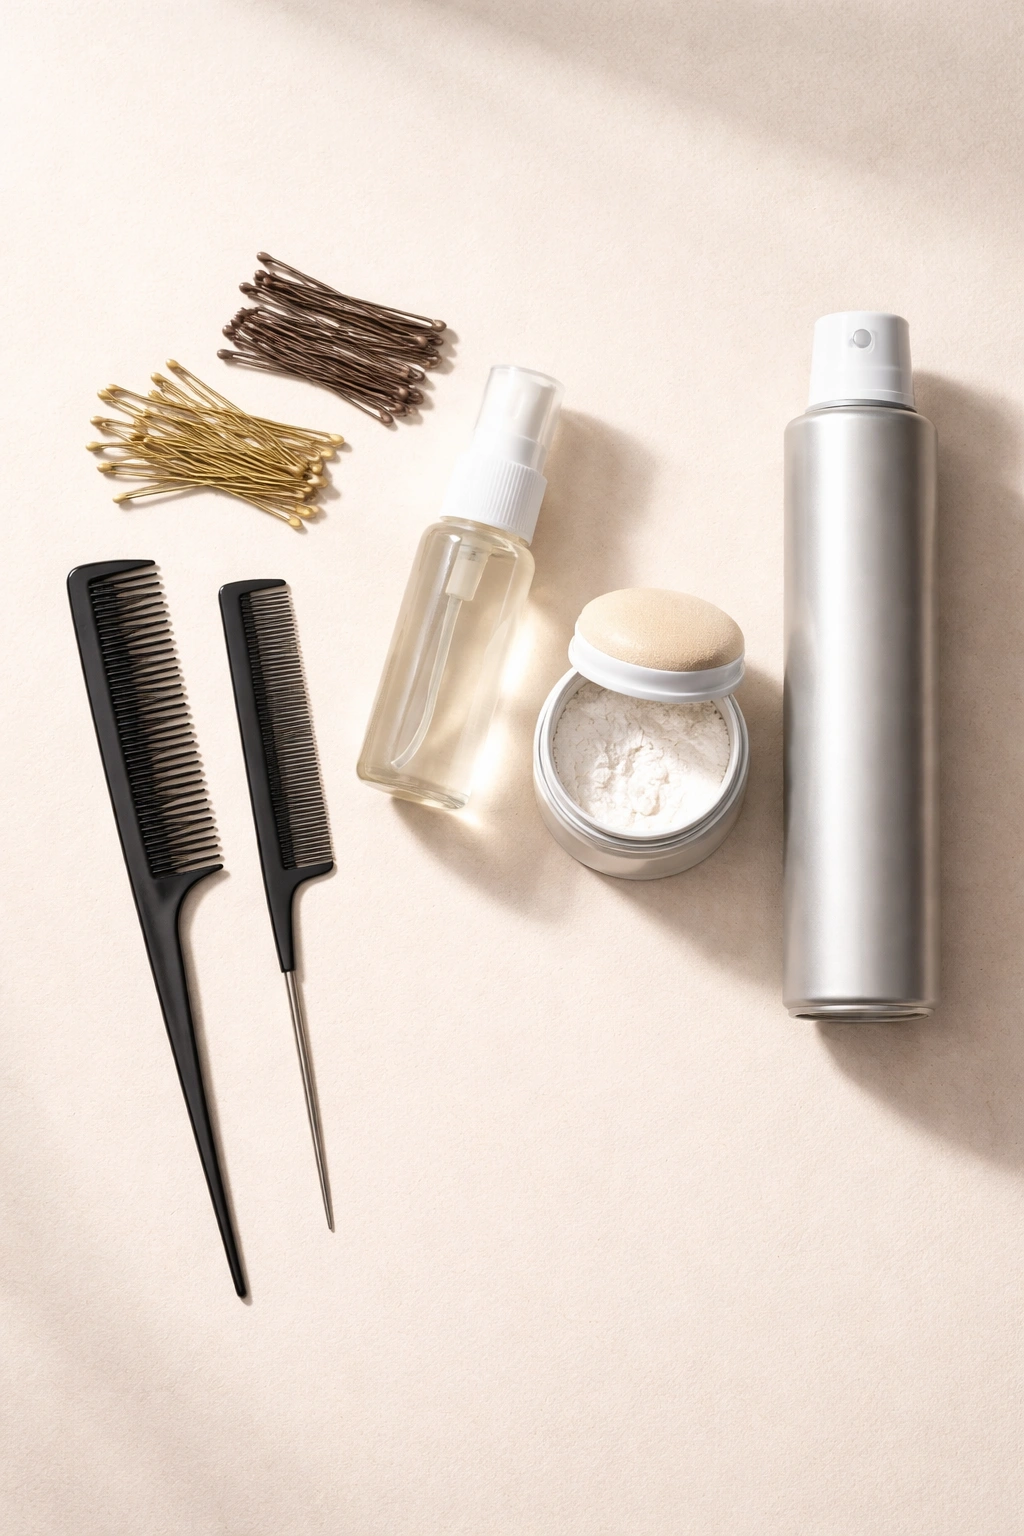
You don’t need an arsenal, but having the right few items makes everything feel easier. Bobby pins in your exact hair color matter more on short hair where they’re more visible—mismatched pins stand out against your scalp in ways that are noticeable in photos and in person. Grab a pack and test them against your hair in natural light before you need them for an event.
Texture spray or dry shampoo is genuinely essential for short-hair updos, even on freshly washed hair. It provides grip, which means pins hold better and twists stay twisted. A light mist is all you need—you’re not trying to look greasy, just creating friction between your hair and the pins.
A fine-tooth comb and a rattail comb (the pointy kind) let you section hair precisely and pick up exactly the amount you need without creating accidentally chunky pieces. Precision matters more on short hair because every section is visible.
Light-hold hairspray—not heavy-duty, because that can weigh down shorter styles—acts as a finishing layer that holds the whole style without making your hair feel stiff or crusty. Apply it after you’ve pinned everything in place, using short bursts rather than long sprays.
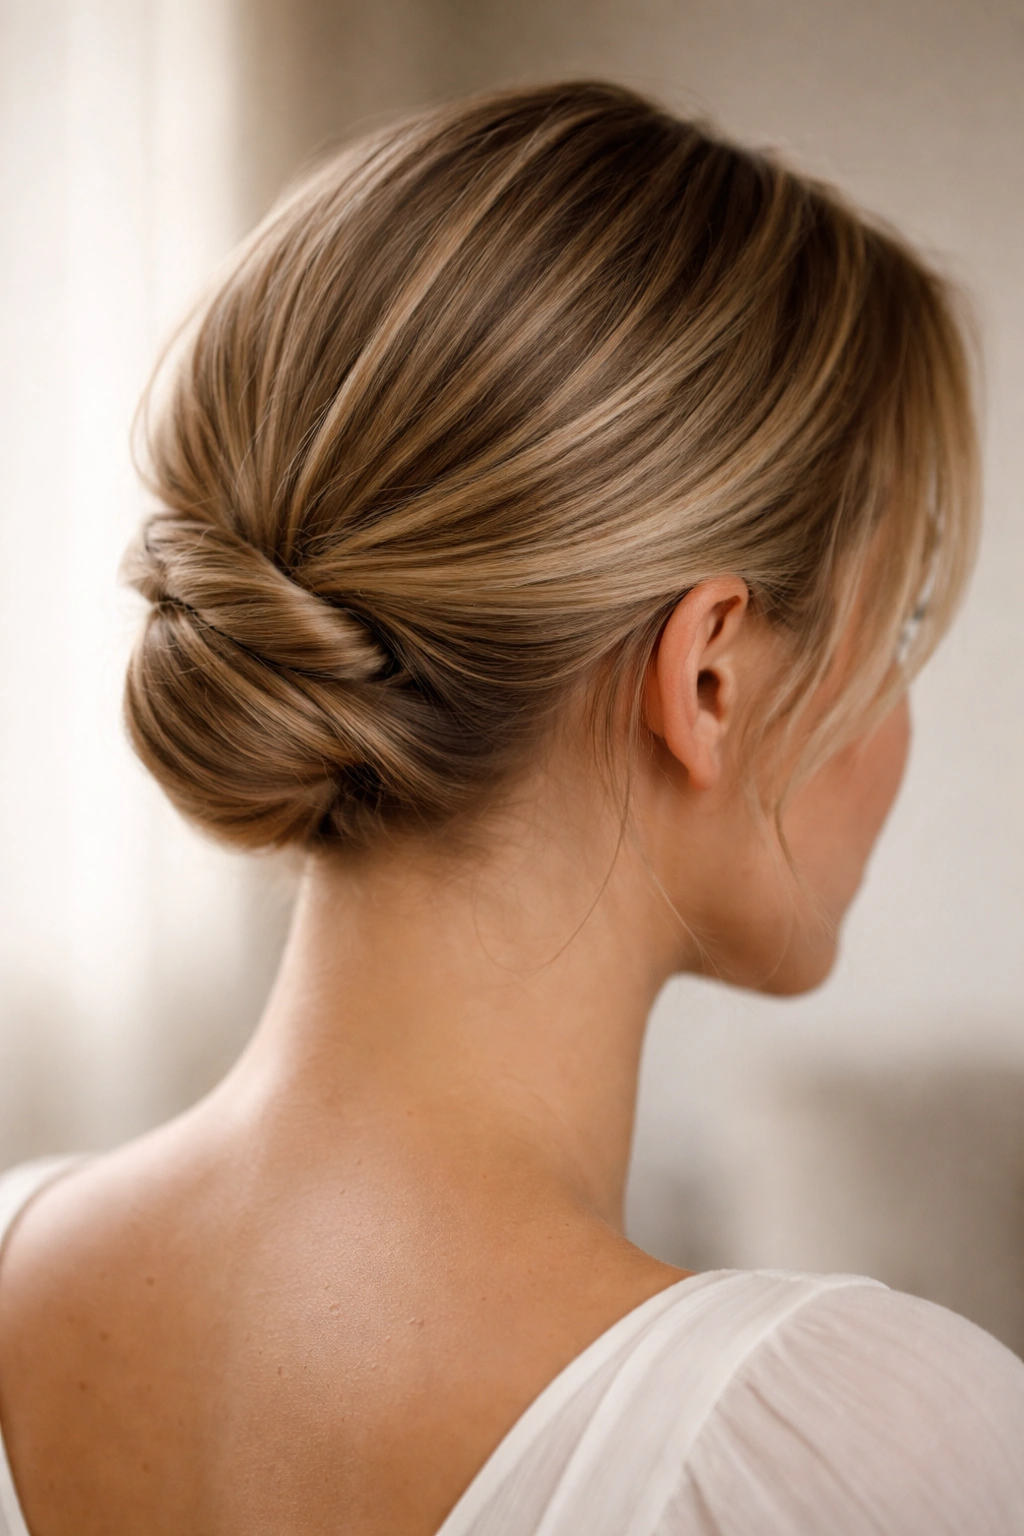
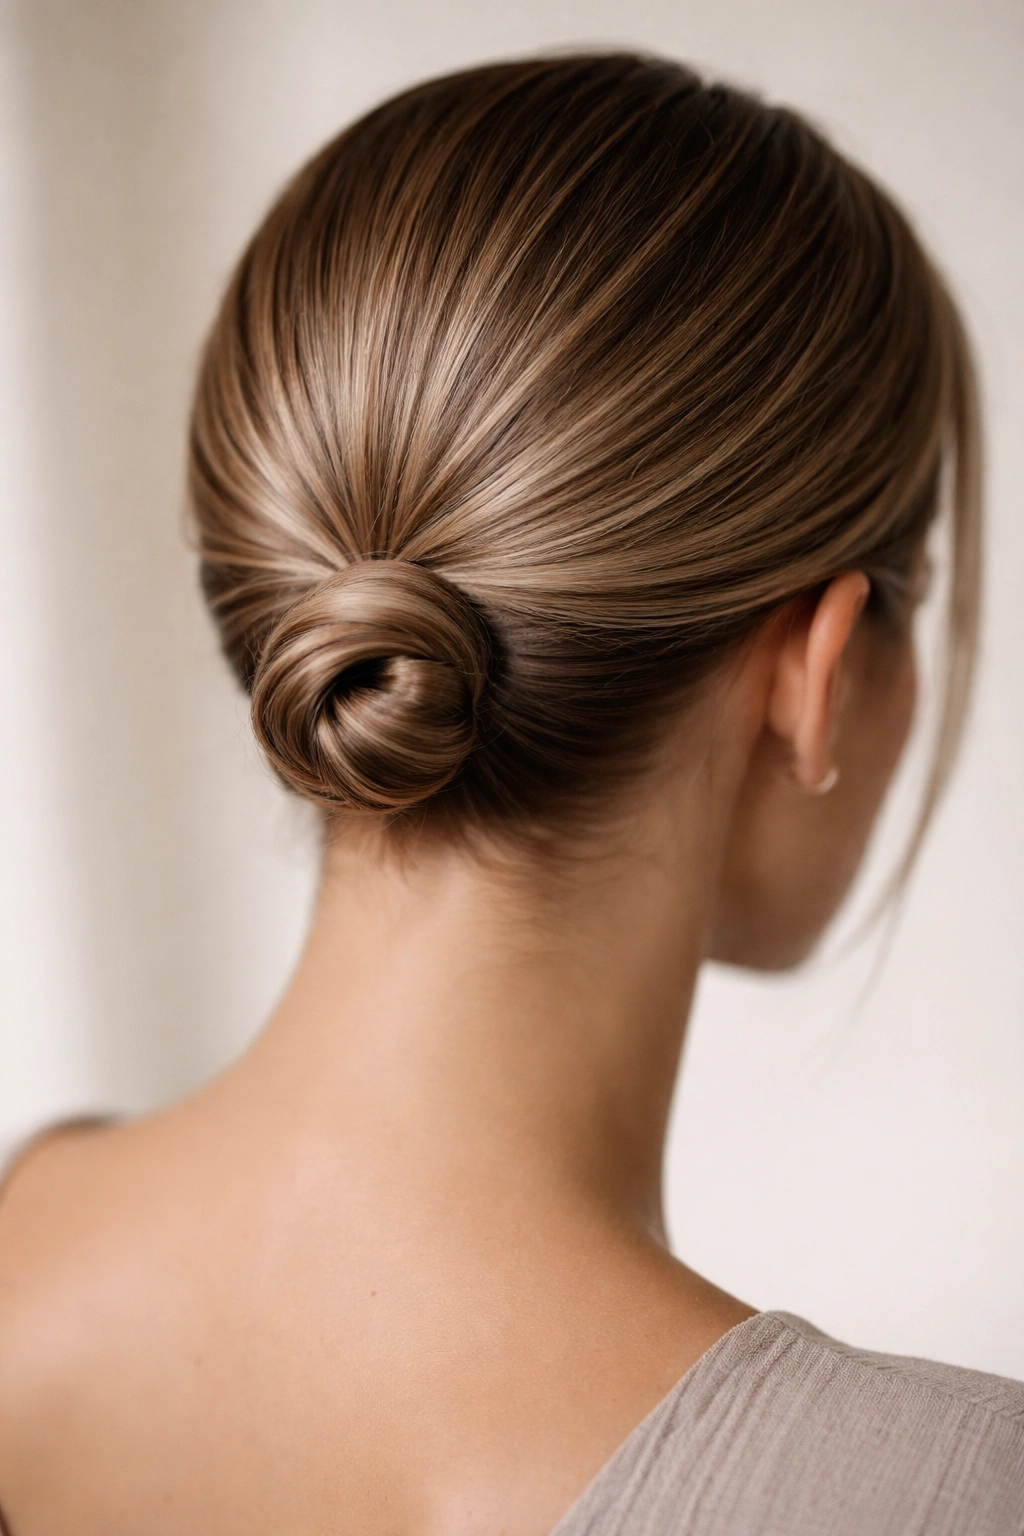
1. The Low Twisted Knot
This is one of the most beginner-friendly updos and works on hair as short as a chin-length bob. The magic is that it looks deliberately undone rather than like something that fell out, which is the sweet spot for short hair. You’re creating a small knot at the nape of your neck using just two twisted sections, which takes literally 60 seconds once you’ve practiced it twice.
Why It Works on Short Hair
The low placement means you don’t need volume or length to create visual interest. The twisting technique adds texture and shape without requiring you to backcomb or tease aggressively. Because the knot sits at the nape, pieces naturally frame your face, and shorter strands actually contribute to this effect rather than fighting against it.
How to Create It
- Start with slightly textured hair (dry shampoo helps enormously)
- Take a small section from one side of your head at ear level and twist it loosely toward the back
- Take an equal section from the opposite side and twist it the same direction
- Cross the two twisted sections over each other at the nape of your neck
- Wrap one twist around the base of the other, creating a loose knot
- Secure with 2-3 bobby pins tucked underneath where they’re hidden
- Gently pull the twists slightly to create softness and release some face-framing pieces
Pro tip: If your hair is very fine or slippery, insert pins as you wrap instead of waiting until the end—they’ll hold better through the twisting motion.
2. The Textured Half-Up
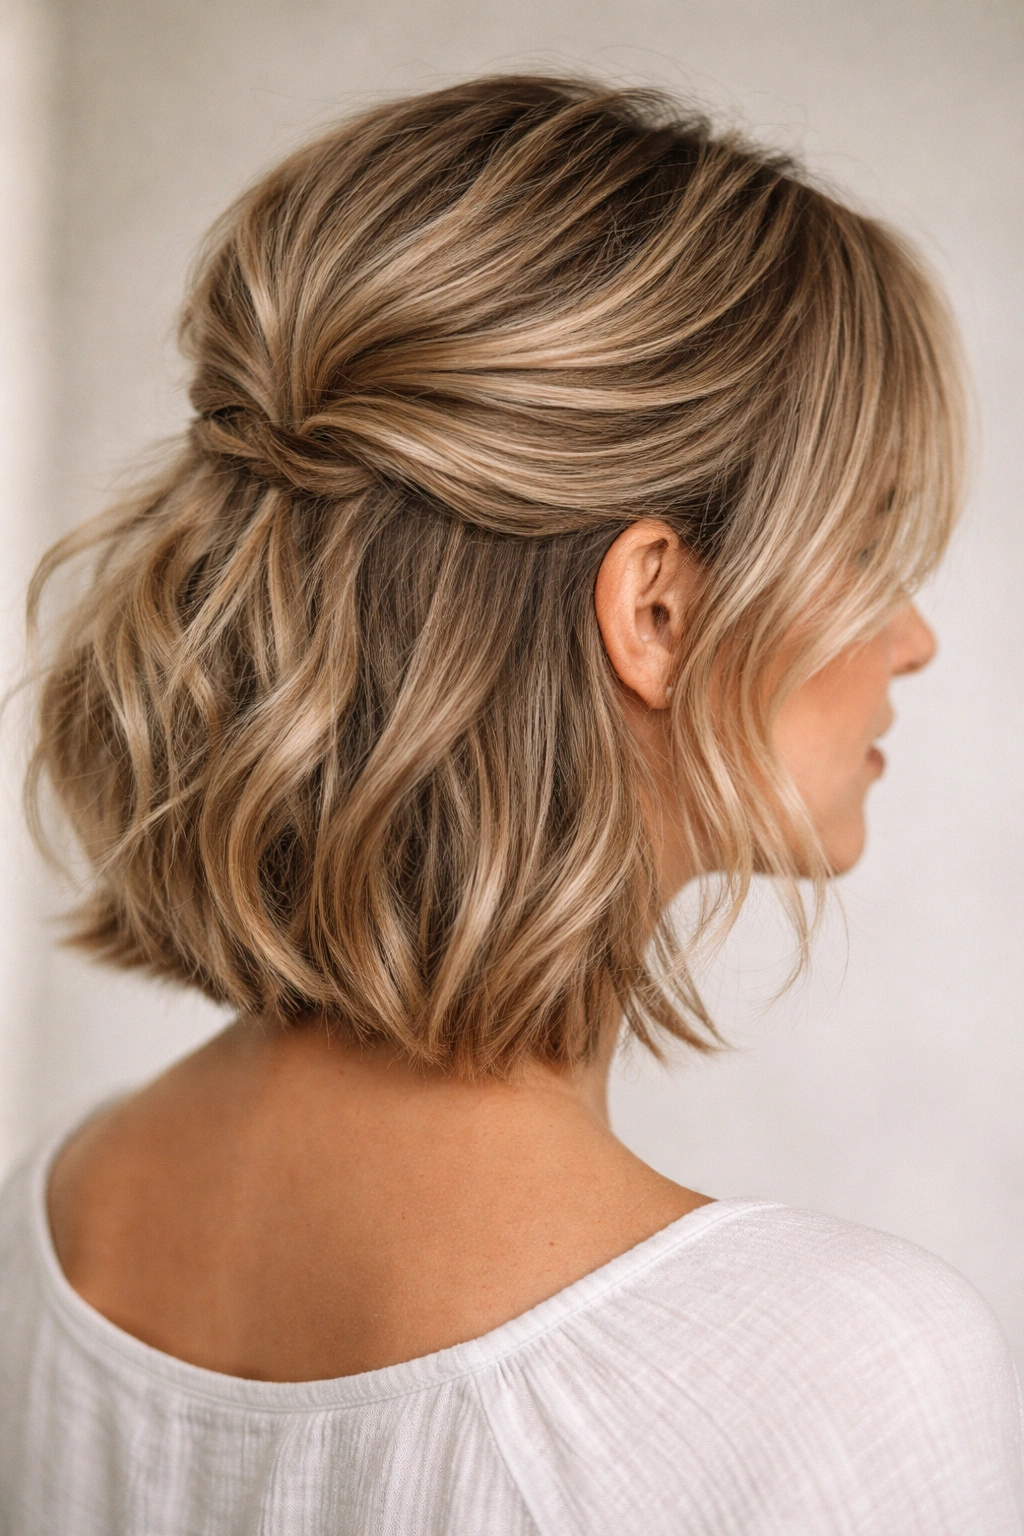
This is the updo equivalent of a everyday style that reads as “put-together” without looking like you tried hard. It works beautifully on pixies, short bobs, and even shoulder-length hair with texture. The key is using texture (curls, waves, or intentional tease) to create volume rather than relying on length.
Why It Works on Short Hair
Half-ups leverage what short hair does naturally—they don’t burden shorter strands with the full weight of a complete updo. The top portion gets pinned, while the bottom stays down and frames your face. On short hair, this creates perfect balance because neither section looks sparse.
How to Create It
- Apply texture spray to damp roots and let it dry, or use a curling tool to add waves throughout
- Tease the crown area gently with a fine-tooth comb, smoothing the surface layer slightly
- Take a section from each temple and twist loosely back toward the crown
- Cross the twists and pin where they meet at the back of your crown
- Leave the bottom half completely down
- Use your fingers to gently separate the pinned section so it looks soft, not tight
Styling note: This works especially well if you’ve been wearing your hair down for a few days—second-day hair has natural texture that holds much better than freshly washed hair.
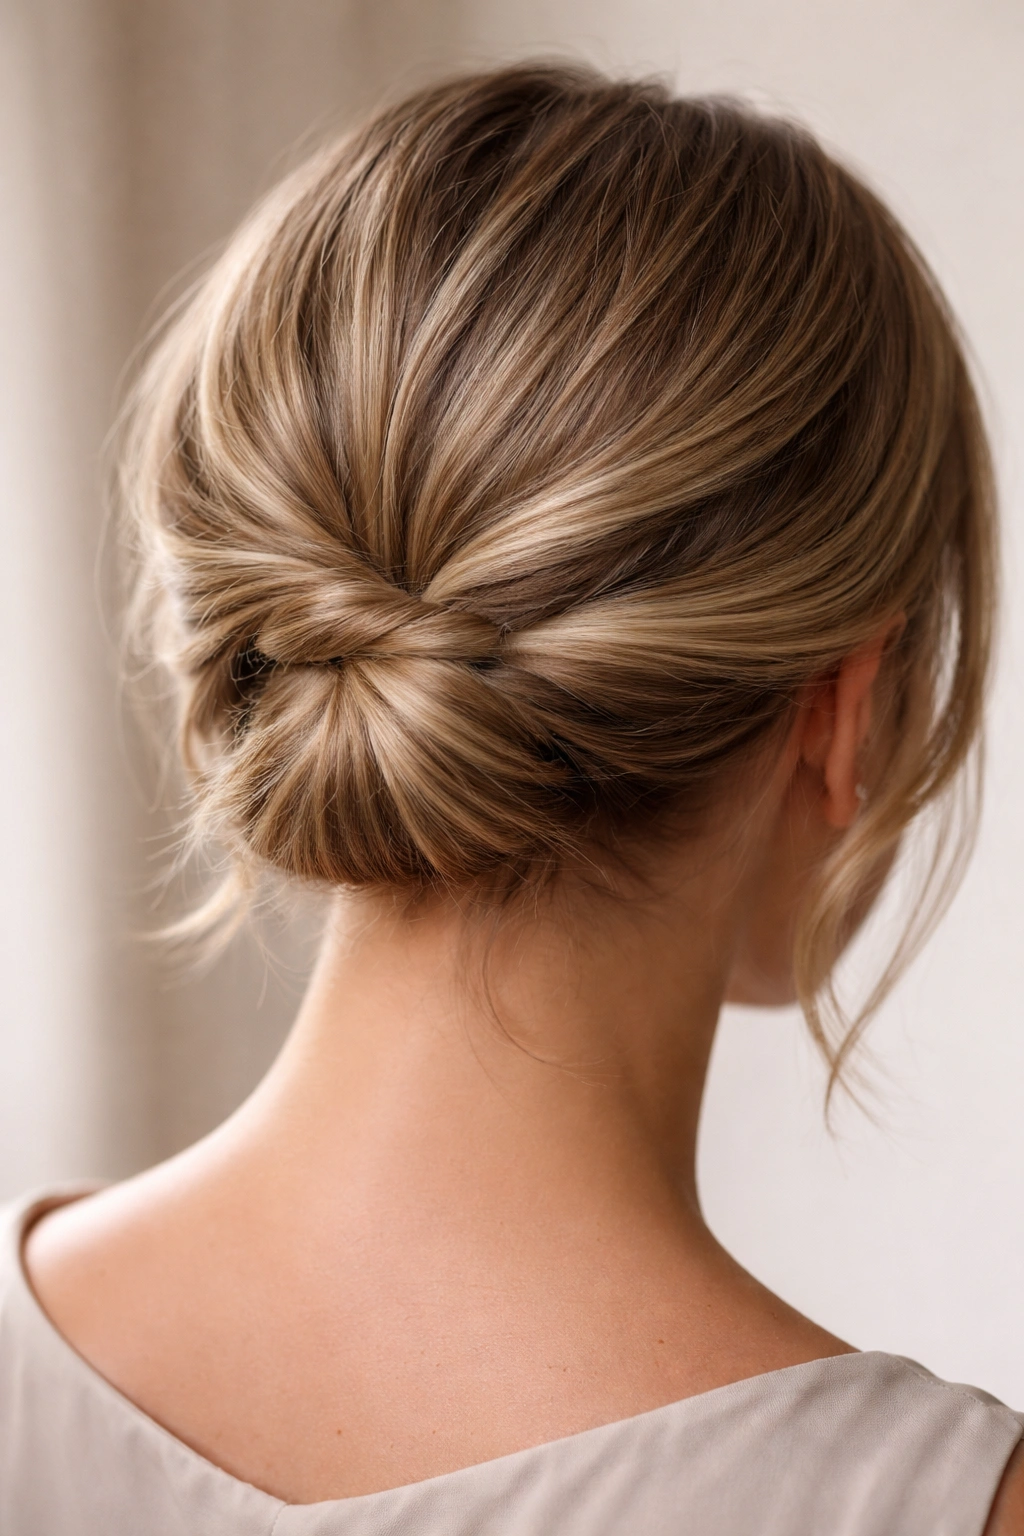
3. The Sleek Pencil Bun
Despite its name, this isn’t a traditional bun—it’s more like a flat, polished twist coiled at the nape, and it looks surprisingly elegant on very short hair. It works on any hair type, though straighter textures show the shape most clearly. The “pencil” thickness makes it look intentional rather than like you’re trying to fake volume you don’t have.
Why It Works on Short Hair
Because it’s small and positioned low, it doesn’t require length. It actually works better on shorter hair because the compact size reads as sophisticated rather than strained. Straighter hair shows the detail of the twist and coil, which is where the visual interest comes from.
How to Create It
- Smooth hair with a light smoothing serum (this is non-negotiable for the sleek look)
- Use a rattail comb to create a clean center or side part
- Gather hair at the nape of your neck and secure with a small clear elastic
- Divide the secured section in half and twist the two halves around each other tightly
- Coil the twist into a small spiral at the base of the elastic
- Wrap the coil around the elastic base and pin securely underneath
- Smooth the surface with the flat of your hand and a dab of smoothing product
Pro tip: This works best on hair that’s been blow-dried straight or straightened—the sleekness is part of the whole aesthetic.
4. The Messy Pixie Pin
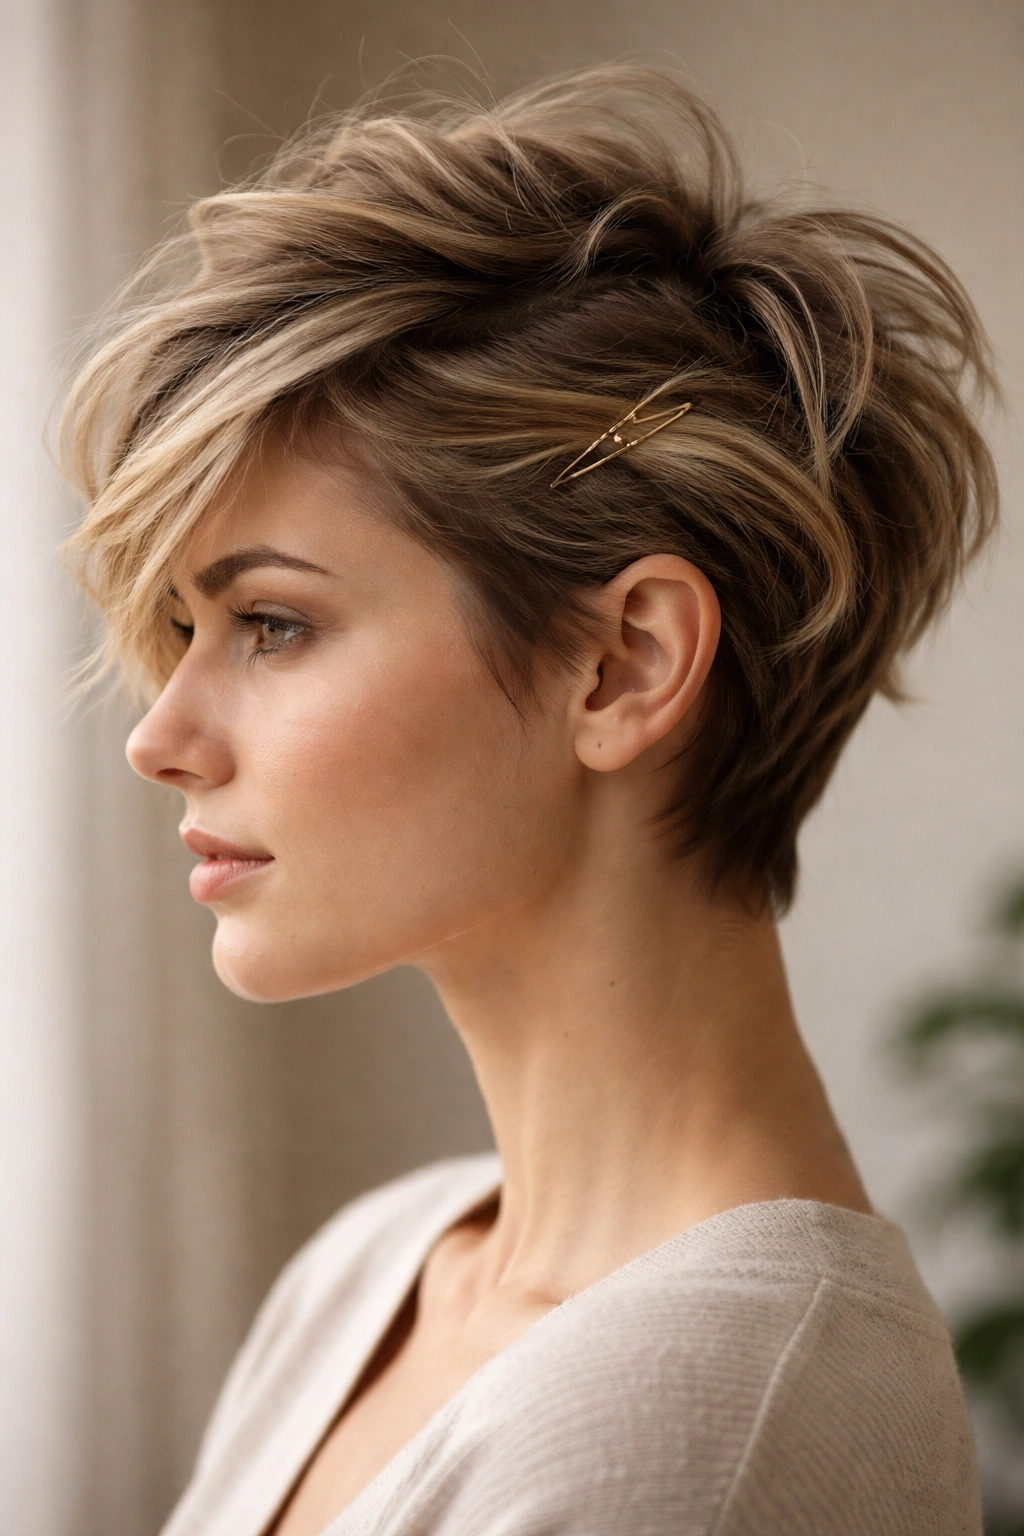
If you have a pixie or very short crop, this is your answer when you want something slightly more styled than your everyday look. You’re using the natural texture and movement of short hair to create something that looks intentionally tousled rather than just styled.
Why It Works on Short Hair
Pixies are actually perfect for updos because you’re not fighting against length or weight—you’re just adding direction and shape to what you have. The “messy” quality is the whole point, so imperfection becomes the aesthetic.
How to Create It
- Dry your hair with your fingers, scrunching to enhance your natural texture or waves
- Work a light texture spray or mousse through while damp
- Once dry, use your fingers and a fine comb to tease gently at the crown
- Push the teased section toward one side, creating a small swoosh or side-swept shape
- Secure with 2-3 bobby pins positioned underneath the swoosh where they’re hidden
- Let a few pieces fall naturally—don’t try to smooth everything
- Mist lightly with light-hold spray
Real talk: This style actually looks better if you’ve slept on your hair the night before—the texture is already doing half the work for you.
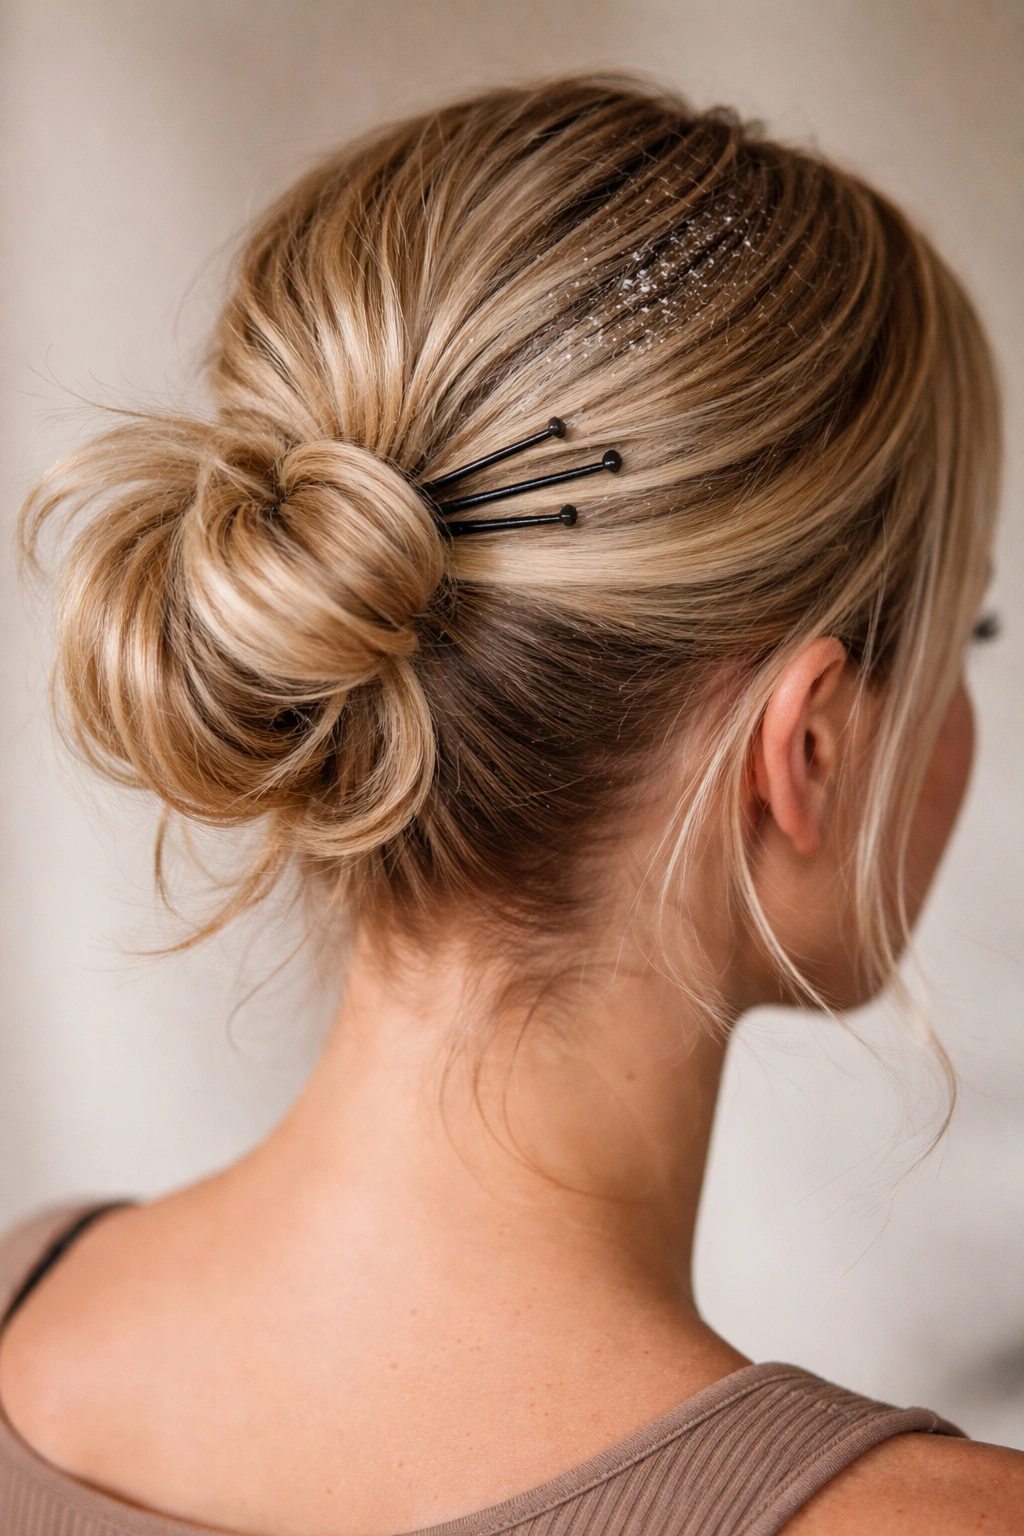
5. The Side-Swept Bobby Pin Stack
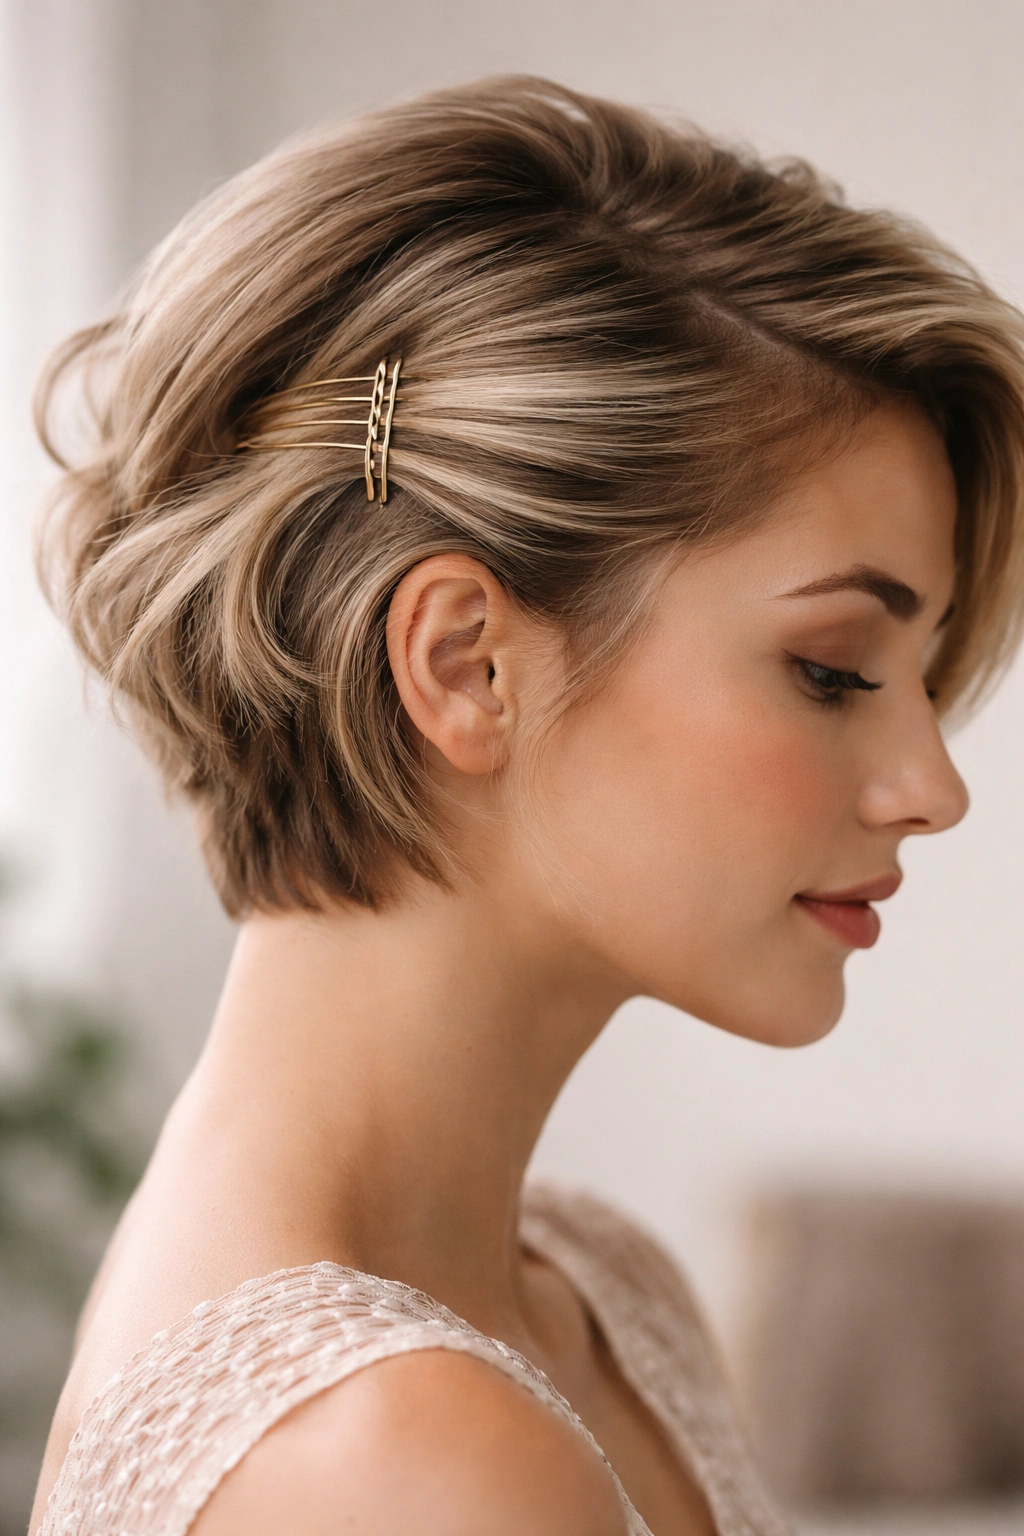
This is almost absurdly simple, yet it transforms short hair completely. You’re sweeping the top section of hair to one side and securing it with a vertical stack of bobby pins, which sounds basic until you see how elegant it looks and how well it actually holds throughout the day.
Why It Works on Short Hair
The pins become a deliberate design element rather than something hidden. On short hair, they’re visible, so grouping them vertically actually looks intentional—like a chic hair cuff. The side-sweep adds asymmetrical interest to round or full faces.
How to Create It
- Apply texture spray to damp hair and blow-dry with your fingers for loose waves
- Brush the top section smoothly to one side, creating a diagonal line from above your opposite ear toward the crown
- Position your first bobby pin horizontally to secure the sweep at the crown area
- Stack a second pin directly below the first, then a third below that, creating a vertical line
- Tuck all pins underneath so they’re hidden from the front but visible from the side profile
- Let the swept section create soft waves—don’t smooth it too much
Worth knowing: This works especially well with contrasting hair (darker roots with lighter ends, or vice versa) because the pin stack becomes more visually interesting.
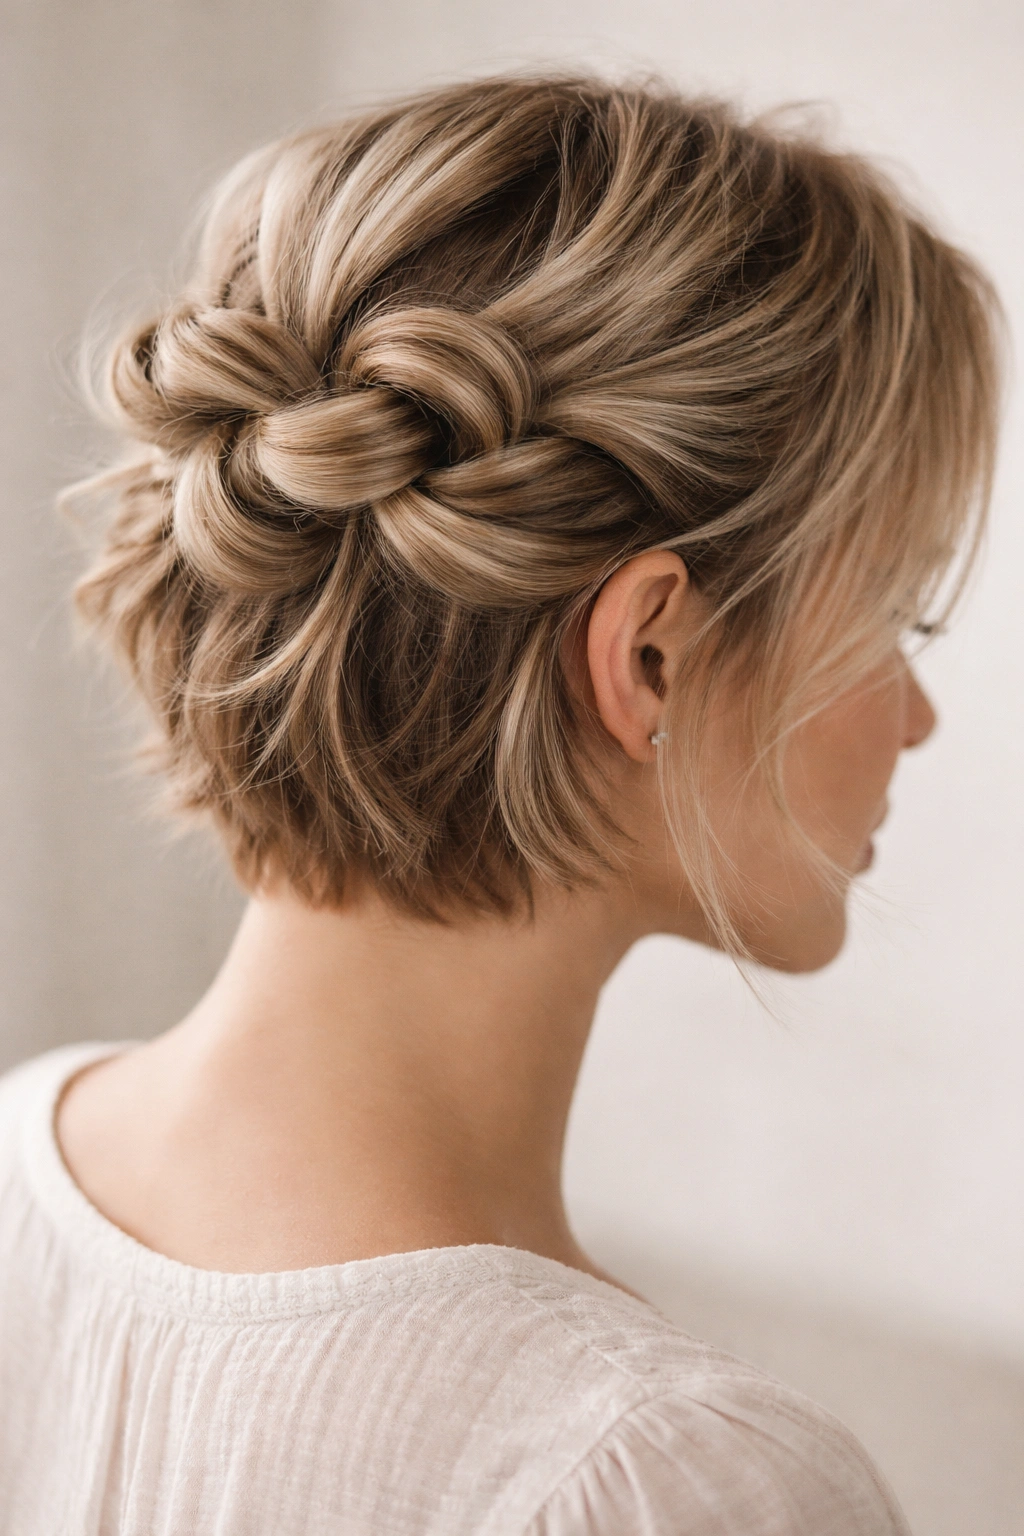
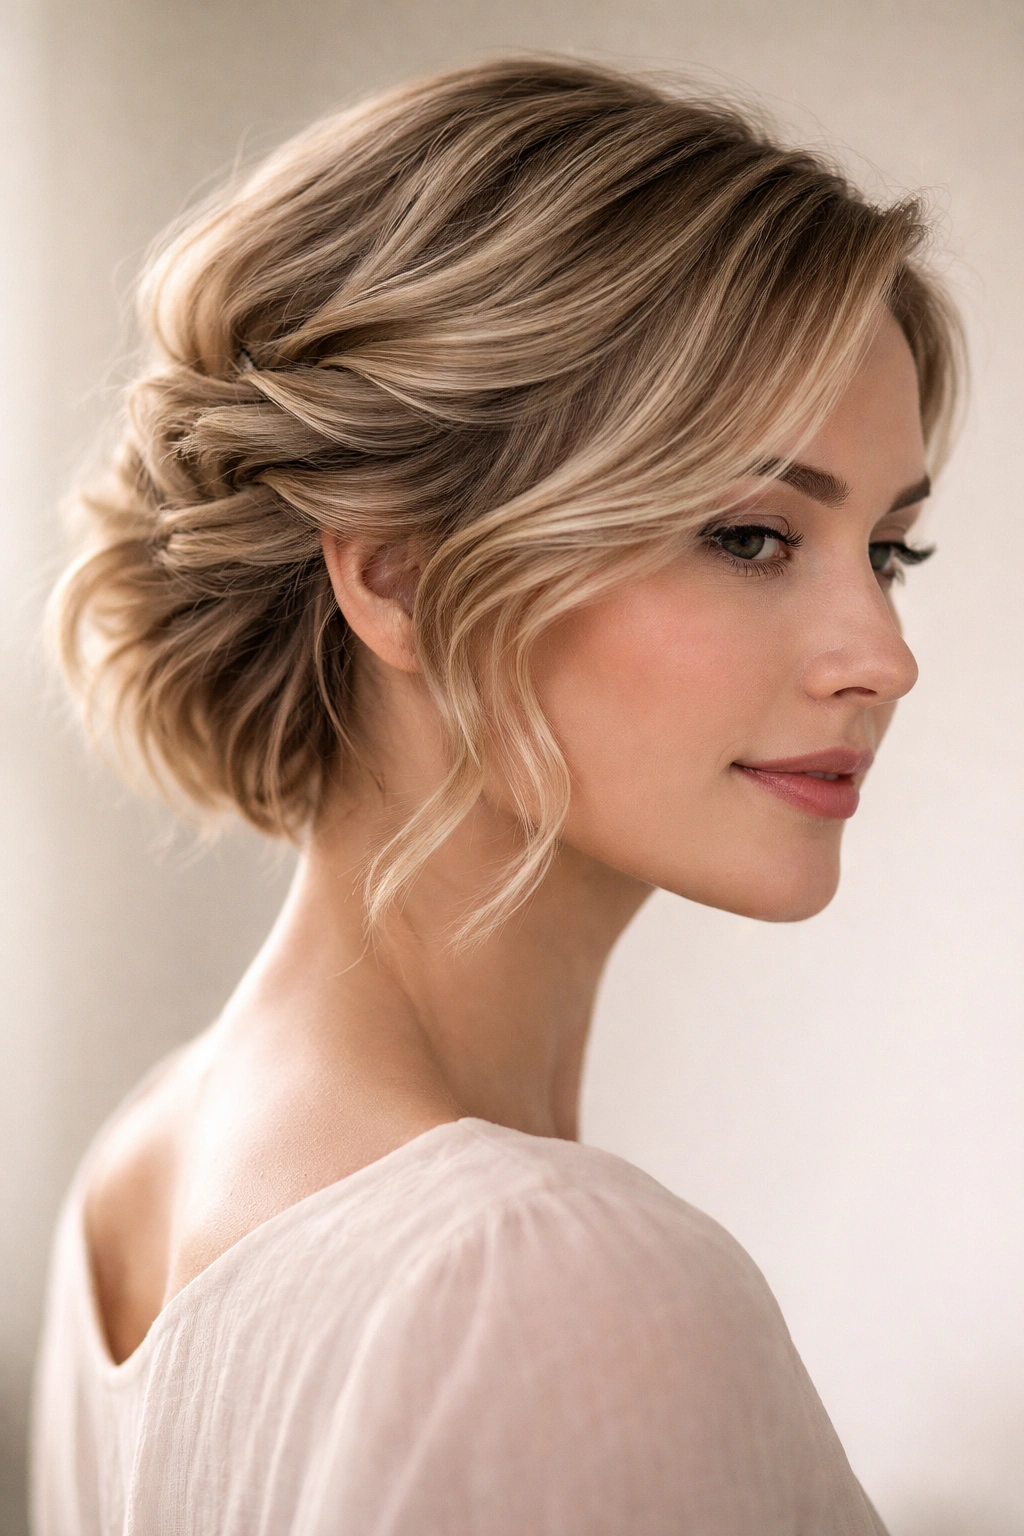
6. The Twisted Crown
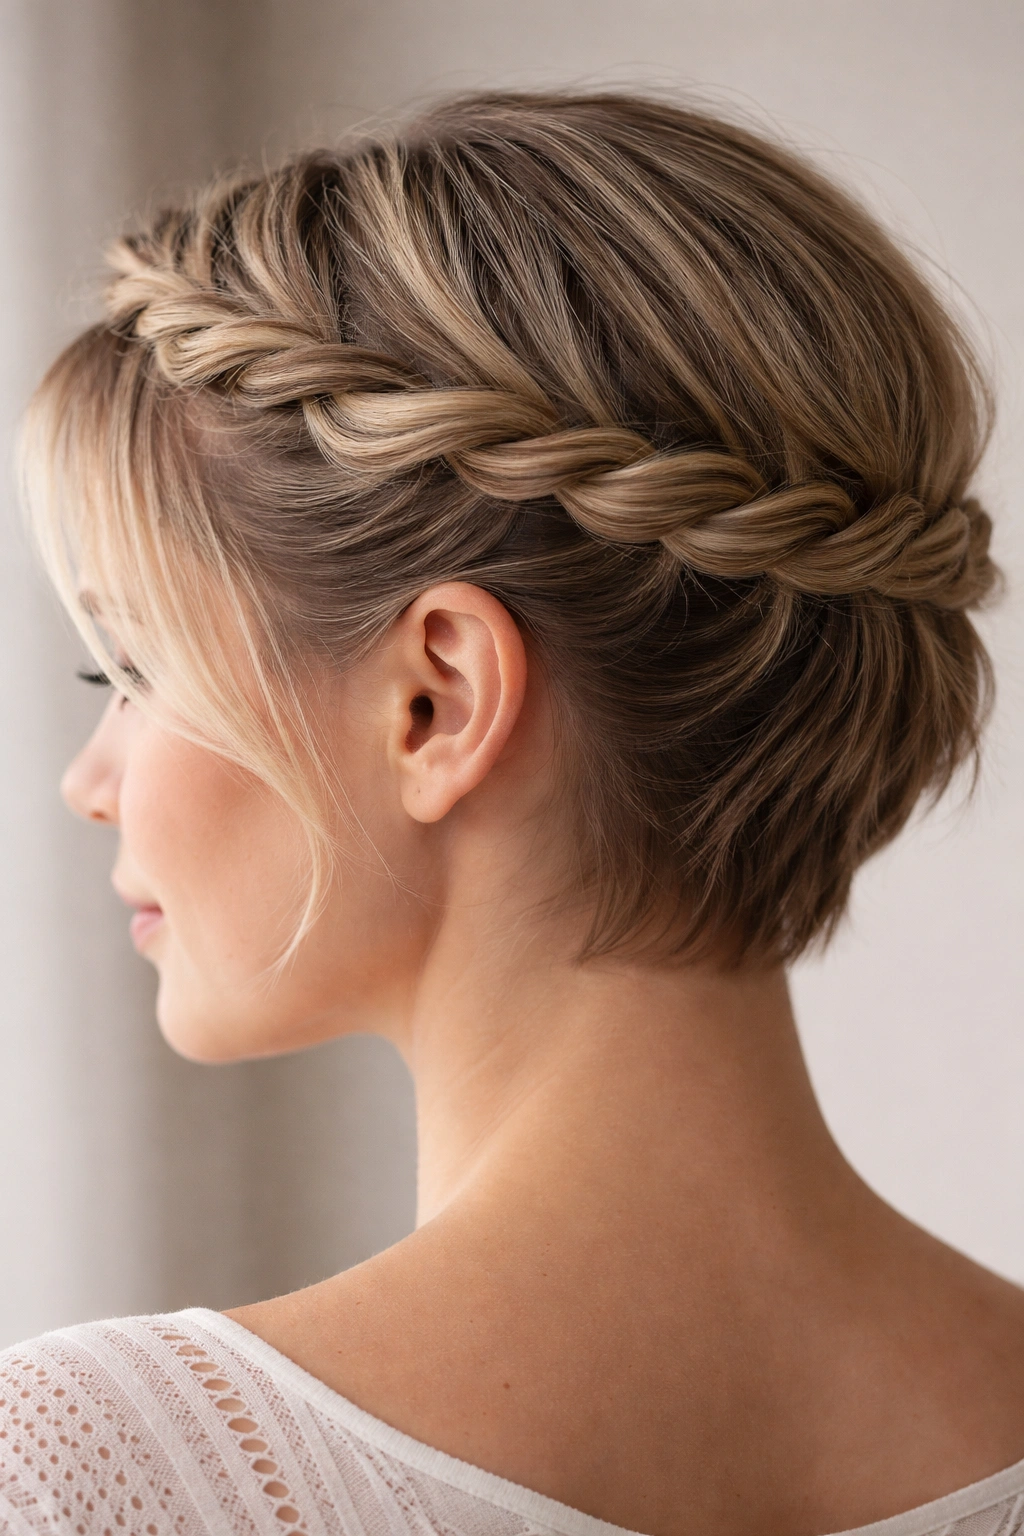
Yes, this works on short hair—you’re creating a narrow twisted crown around the perimeter of your head using small sections of hair. It feels delicate and looks more intricate than it is, which is exactly what you want.
Why It Works on Short Hair
A full bun or wrap is impossible on very short hair, but a thin, decorative twist crown works beautifully. It frames your face, adds visual interest at the sides, and holds surprisingly well because you’re pinning small sections frequently rather than relying on one big section to stay in place.
How to Create It
- Start at one temple with a small section of hair
- Twist that section loosely while moving horizontally toward the opposite temple
- As you twist, gradually add small pieces from along the hairline to make the twist thicker
- Pin the twist down every 2-3 inches using bobby pins tucked underneath and into the twist
- Continue until you’ve created a crown effect around the head from temple to temple
- The back section can stay down, or you can wrap it slightly and pin
- Gently pull the twist to soften it and create a relaxed texture
Pro tip: Do this on day-two or day-three hair—freshly washed hair is too slippery for all those small pins to hold securely.
7. The Braided Faux Hawk

Despite the punk-rock name, this can be incredibly elegant on short hair, especially if you’re comfortable doing a simple three-strand braid or two. You’re creating one or two thin braids that run from the front to the back of your head, which adds movement and interest without requiring length.
Why It Works on Short Hair
The braids add visual height and dimension without needing thick volume. The “faux hawk” effect comes from the placement and the braiding technique rather than teasing or height, so it works on any texture.
How to Create It
- Part your hair down the center or to one side, depending on the look you want
- Take a small section at the front hairline on one side and braid loosely toward the back
- Add small pieces into the braid as you move back, incorporating hair from the crown area
- Pin the end of the braid at the nape of your neck, tucking the end underneath
- Repeat on the other side if you want a balanced effect, or create just one braid for asymmetry
- Gently pull each braid section to widen it slightly and create softness
- Tuck any loose pieces behind your ears or let them frame your face
Styling note: This looks amazing on wavy or curly hair because the texture naturally separates the braid sections. On straight hair, you might tease slightly before braiding for more texture.
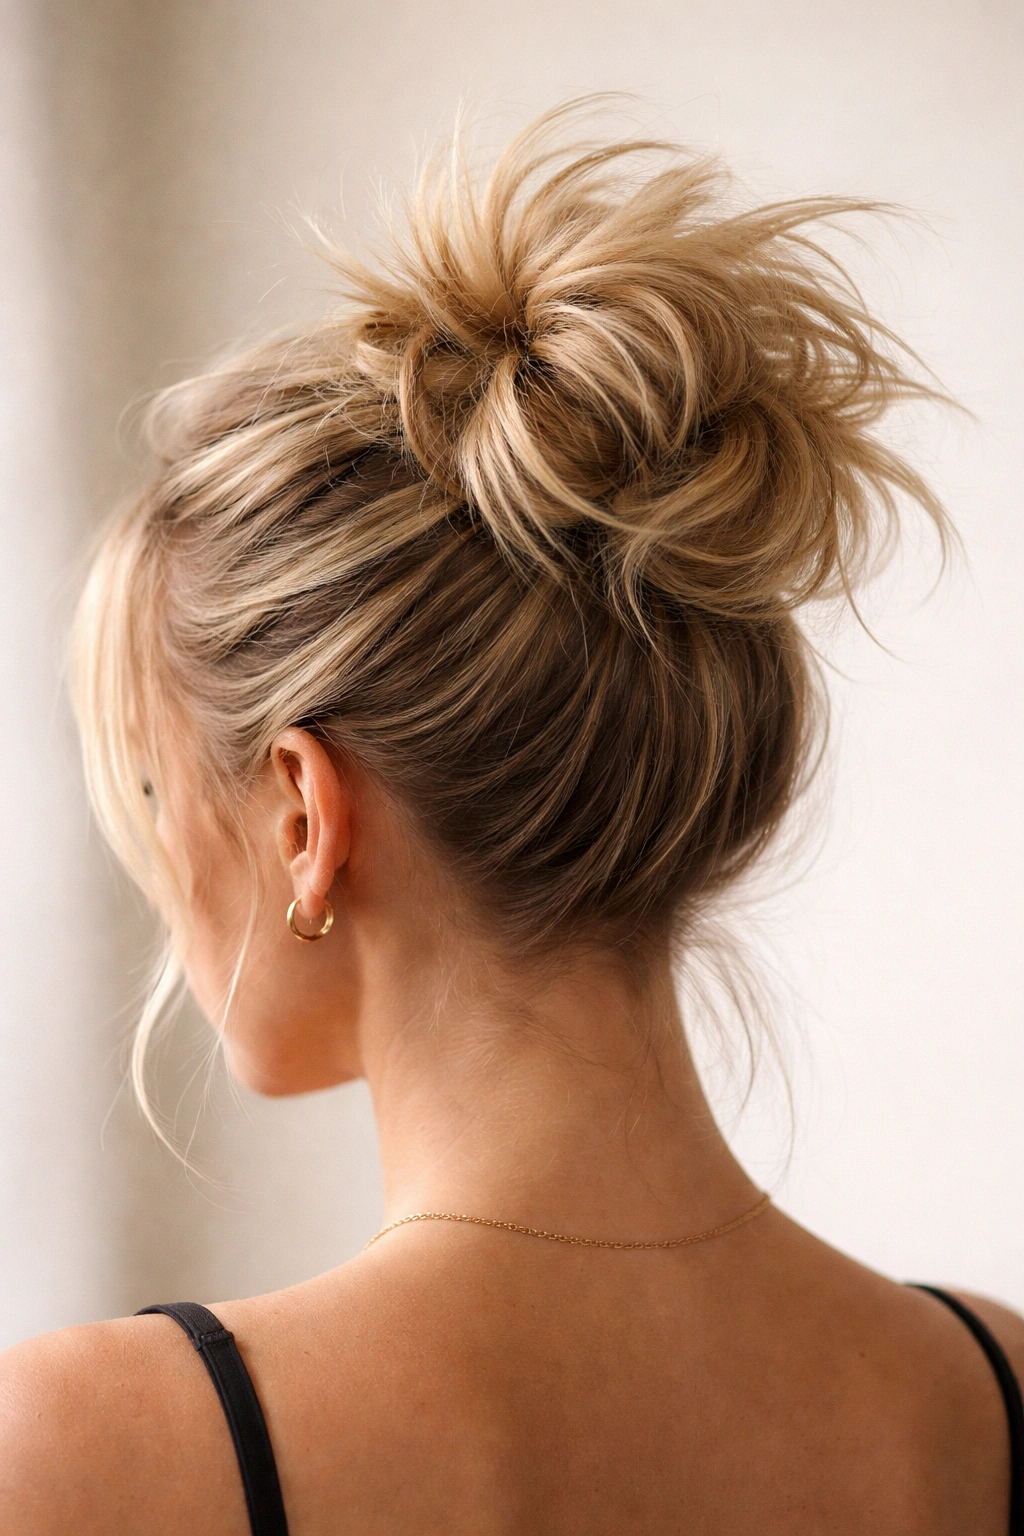
8. The Chaotic Top Knot
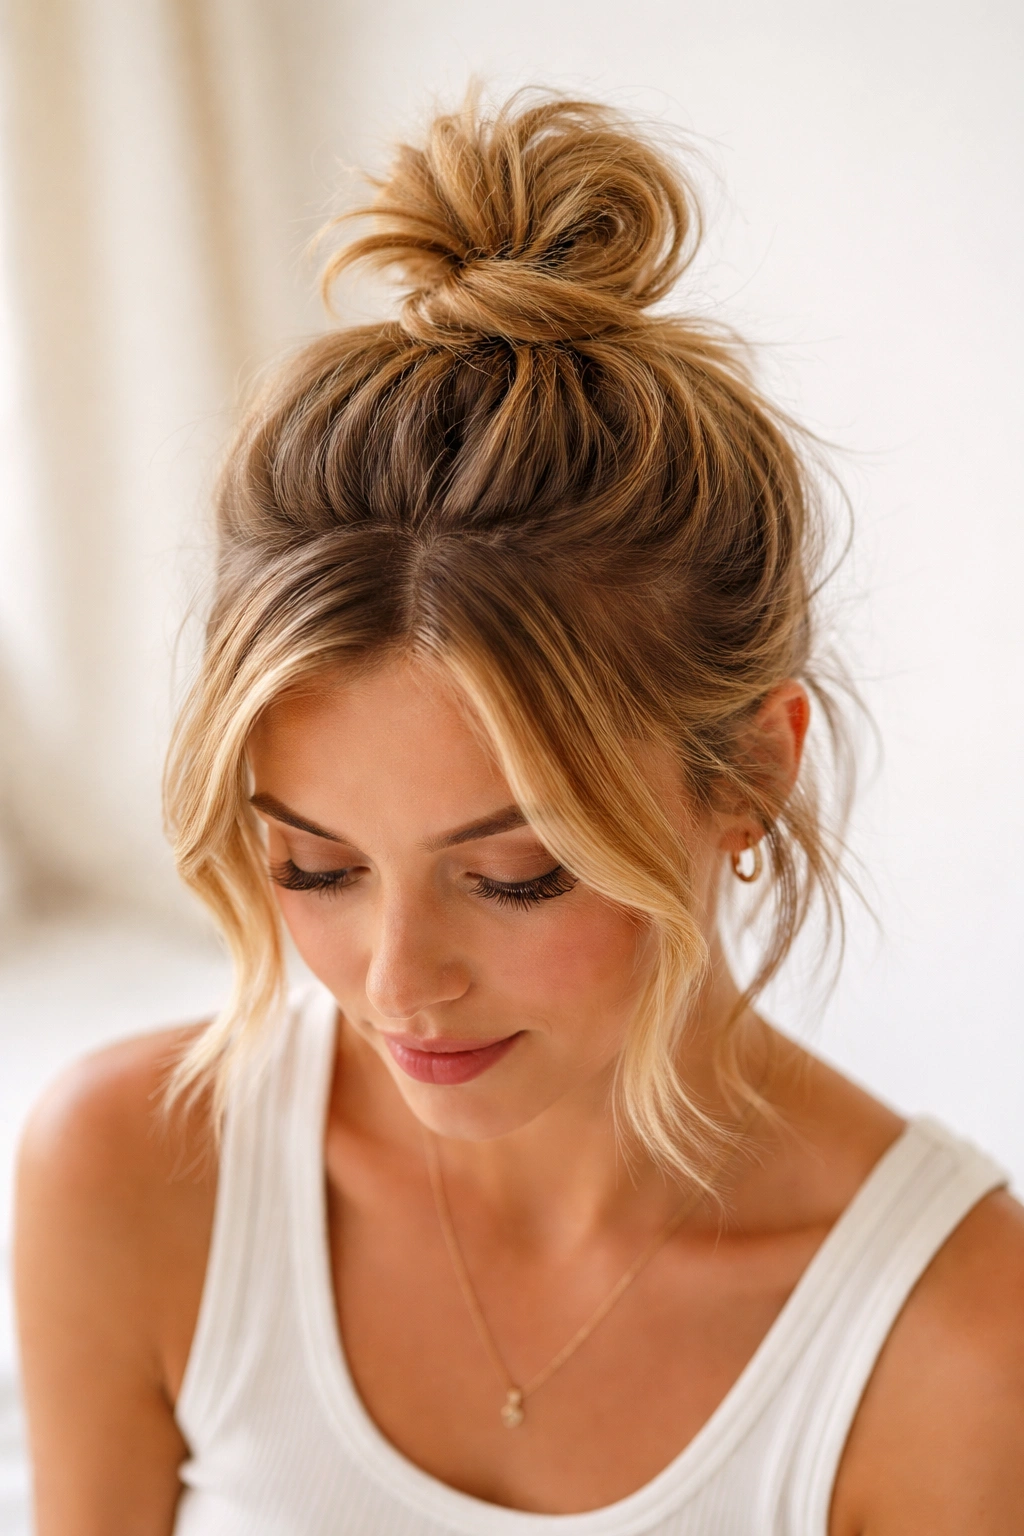
This is the completely opposite aesthetic from the sleek pencil bun, and it’s perfect for short hair because you’re embracing the “barely-there” look and making it intentional. It works on any hair type and looks better when it’s not perfect.
Why It Works on Short Hair
Since you don’t have a ton of hair to work with, the knot is naturally small and sits high on your crown. This works beautifully—it’s playful, young, and the imperfection is the whole point. You’re not trying to create a full, voluminous bun; you’re creating a small, textured detail at the crown.
How to Create It
- Apply texture spray to slightly damp hair and let it dry, or scrunch in some wave if you have straight hair
- Gather all your hair at the crown and secure loosely with a small elastic
- Don’t make the ponytail tight—about 60% is perfect
- Twist or loosely braid the ponytail section and wrap it around the elastic base
- Secure with bobby pins, but leave some pieces sticking out intentionally
- Gently pull the whole knot section to loosen it and create a relaxed texture
- Let 2-3 pieces fall around your face frame naturally
Real talk: The messier this looks, the better it reads. A too-polished version looks like something went wrong rather than intentional styling.
9. The Wrap-Around Twist
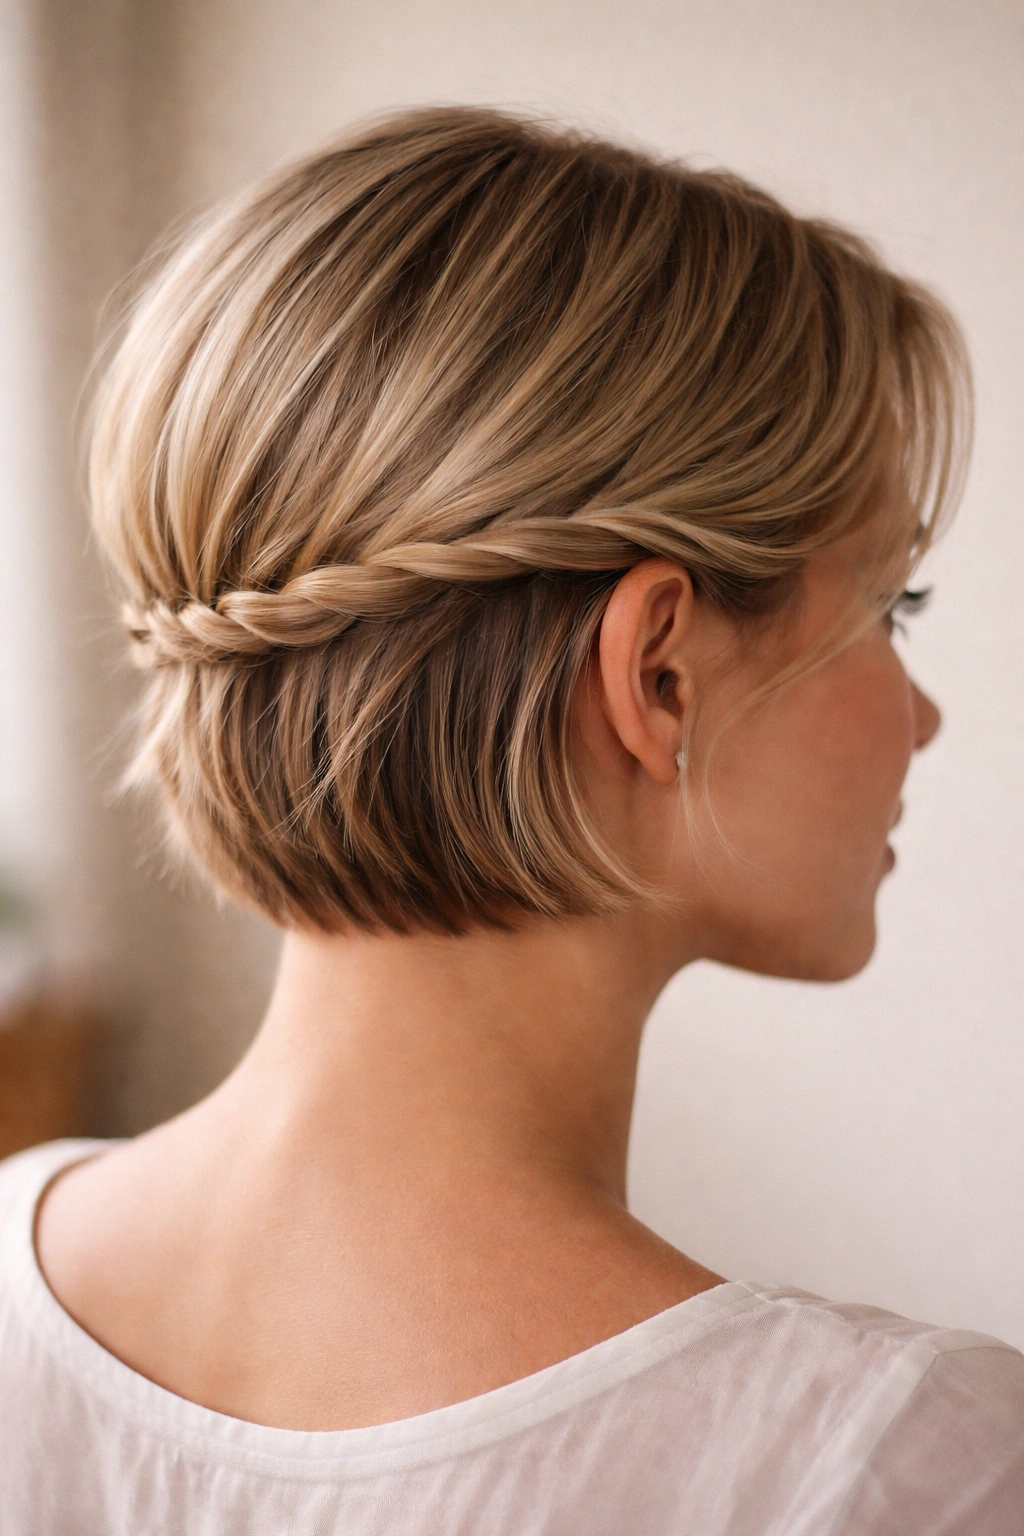
This is a forward-thinking style that works on even very short hair—you’re creating a thin twist that wraps around the back of your head from one side to the other, almost like a headband made of your own hair. It’s secure, elegant, and works with your hair length rather than fighting it.
Why It Works on Short Hair
The wrap-around placement means you don’t need length, just small sections from each side of your head. It adds dimension and draws attention to your face shape rather than trying to create volume at the crown.
How to Create It
- Take a small section of hair from behind one ear
- Twist it loosely while moving toward the nape of your neck and around toward the opposite side
- As you twist around, pin it to your scalp every 2-3 inches using bobby pins tucked underneath
- Continue until the twist reaches behind your opposite ear
- Secure the end with a bobby pin tucked into the twist
- Gently pull the twist to create softness and release texture
- Let the back section fall naturally, or wrap it into the twist if you want a more polished look
Worth knowing: This actually works better if you create the twist loosely—a tight, precise twist looks severe on short hair, while a relaxed one looks modern and elegant.
10. The Dutch Braid Band

This is basically a Dutch braid (the reverse of a French braid) that runs along your hairline from one side to the other, creating a decorative band effect. It works on any hair length and looks especially striking on short hair because it’s so visible.
Why It Works on Short Hair
Since the braid is small and runs along the perimeter of your head, it doesn’t need length to create visual impact. The Dutch braid sits on top of your other hair, so it’s always visible and becomes the main styling detail.
How to Create It
- Create a small three-strand braid starting at one temple, using the Dutch braid technique (pulling strands under instead of over)
- Keep the braid along your hairline, moving toward the opposite temple
- Make the braid as loose or as tight as you like—loose reads modern, tight reads more polished
- Pin the end of the braid at the opposite temple, tucking the end behind your ear
- Gently pull each section of the braid to widen it and create texture
- Leave the rest of your hair down or create a second braid on the other side for symmetry
Pro tip: If you’re not confident with three-strand braiding, practice with a small section on a day when you’re just at home. Once you nail the hand motion, this becomes second nature.
11. The Looped Pieces
This is technically not a full updo, but it’s a hairstyle that works beautifully on short hair when you want something more styled than completely down but less committed than a true updo. You’re creating small loops or pin curls using pieces of your hair and bobby pins, concentrating them at the crown or sides.
Why It Works on Short Hair
Looped pieces add dimension and visual interest without requiring length. They’re perfect for short styles because they work with the natural perimeter of your hair—you’re not trying to create the illusion of more hair, you’re enhancing what you have.
How to Create It
- Take a small section of hair from the crown or side area
- Curl it loosely around your finger, creating a loop
- While holding the loop, secure it with a bobby pin positioned underneath, hidden inside the curl
- Repeat this 3-5 times around your head, creating loops at different spots
- Use texture spray between loops to help everything hold
- Gently pull each loop to soften it and create a romantic texture
- Leave the rest of your hair down or partially down
Styling note: This works gorgeously on wavy or curly hair because the texture naturally holds the loops. On straight hair, apply some texture spray or use a curling tool first.
12. The Tucked Half-Ponytail
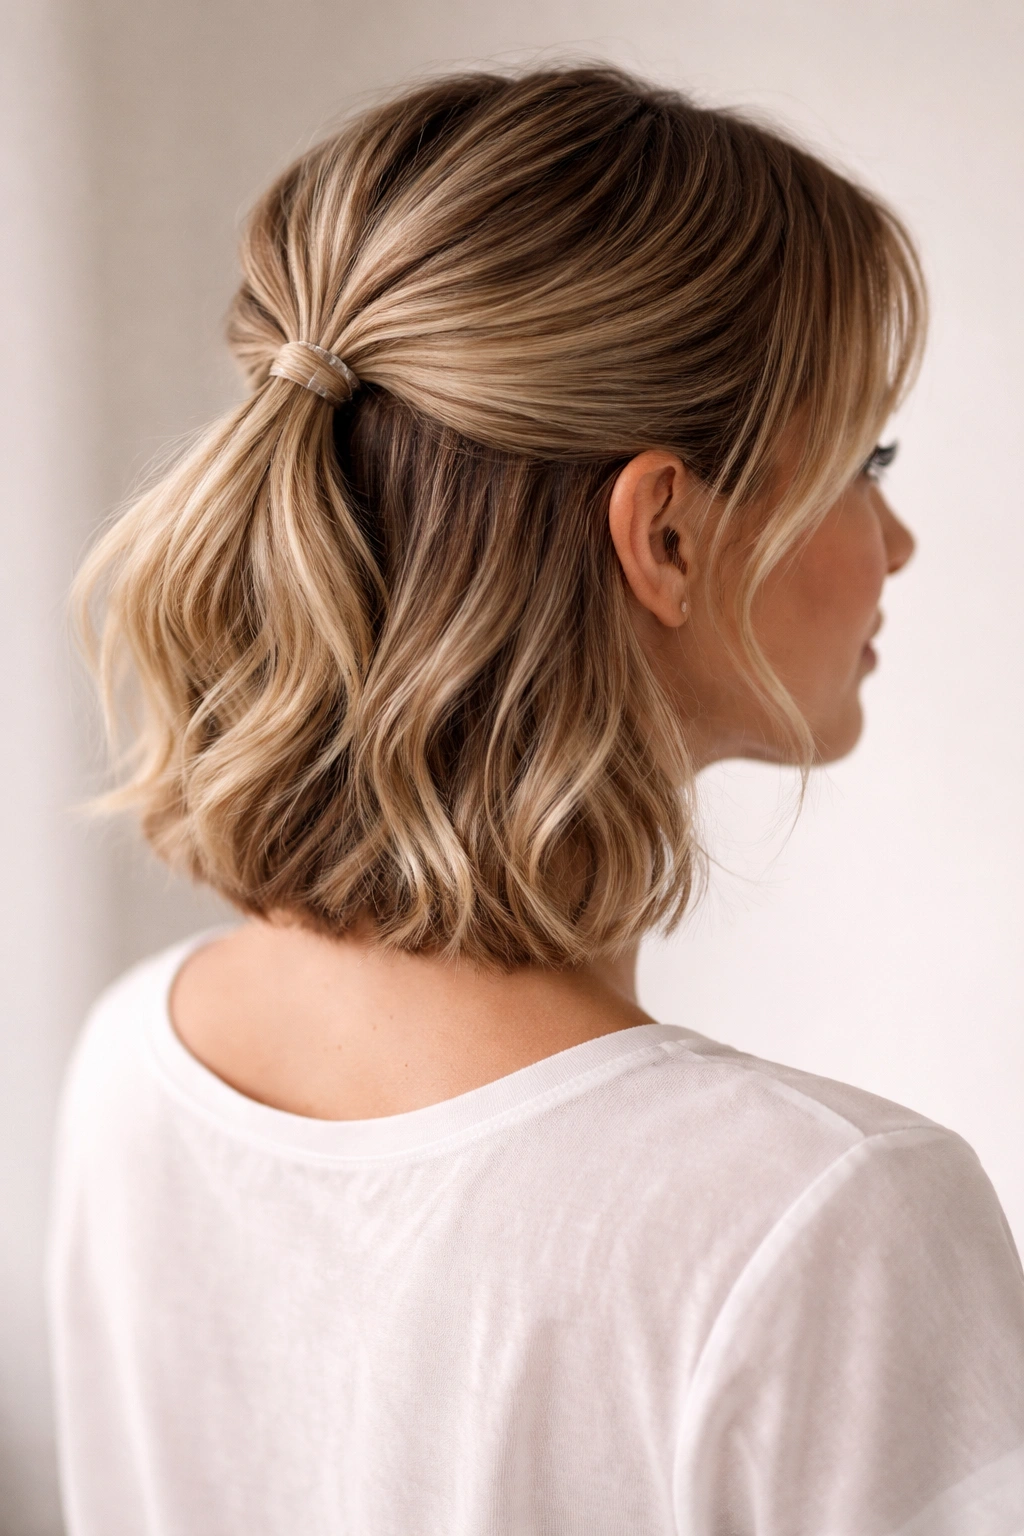
Don’t dismiss this as too simple—the half-ponytail is elegant on short hair when you use the right technique and pin placement. You’re securing just the top half of your hair, then doing something unexpected by tucking the ends back under rather than leaving them out.
Why It Works on Short Hair
This works specifically because of the tucking element. On short hair, tucking the ponytail ends underneath and pinning them creates more visual interest than leaving them out. It reads as polished and intentional rather than like you’re trying to fake more length than you have.
How to Create It
- Brush the top half of your hair straight back toward the crown
- Secure with a small clear elastic positioned right at the crown area
- Gather the short ponytail you just created and fold it up, tucking the ends underneath the elastic
- Pin the tucked section in place using 2-3 bobby pins positioned horizontally underneath
- Leave the bottom half of your hair completely down
- Use your fingers to gently smooth the crown area and create softness around your face
Real talk: Wet hair holds this style better than dry, so consider styling it while damp or using a light hairspray after securing.
13. The Spiky Tease Bun
This takes the chaotic top knot concept and pushes it further—you’re creating intentional spikes and texture throughout a small bun at the crown, which gives it a modern, almost sculptural quality. It works on any hair type and looks better with some length (at least 2 inches) to work with.
Why It Works on Short Hair
Teasing is the secret to making a full bun look full on short hair. You’re not creating volume through length; you’re creating it through texture and strategic backcombing. A spiky tease bun acknowledges short hair’s natural limitations and turns them into an aesthetic.
How to Create It
- Tease your hair at the crown using the backcombing technique (comb backward from ends to roots with a fine-tooth comb)
- Gather the teased hair loosely at the crown and secure with a small elastic
- Leave the bun slightly loose rather than smoothing it tightly
- Use a rattail comb to pull out small spikes or pieces from around the bun
- Tease these pulled pieces slightly to add texture and hold them in place
- Secure everything with bobby pins, leaving some of the spikes sticking out intentionally
- Mist with light-hold spray to keep everything in place without looking crunchy
Worth knowing: This style actually looks better if you rough it up slightly with your fingers before spraying—the messier texture reads as more intentional.
14. The Secured Wave Style
This is a barely-there updo that’s really just your natural waves secured in place with strategic pinning, perfect for days when you want your hair styled but not severely pulled back. You’re not creating structure; you’re creating direction and keeping loose waves from falling in your face.
Why It Works on Short Hair
Short hair with waves is incredibly versatile, and securing those waves with pins creates a styled look without looking stiff. This works because you’re working with your hair’s natural movement rather than fighting it.
How to Create It
- Create loose waves using a curling tool or braiding method the night before
- Run your fingers through the waves gently to separate them
- Sweep the waves to one side or back, whatever direction suits your face shape
- Using bobby pins, secure specific wave sections individually at different spots—not one continuous section, but multiple small placements
- Hide the pins by tucking them underneath or into the waves where they’re hidden by hair
- Leave most of your hair down and let the waves frame your face
- Use light-hold spray to keep everything in place without flattening the waves
Pro tip: This works best if your waves are 1-2 days old—freshly curled waves are too springy, while aged waves have relaxed into a more natural shape that holds with pinning.
15. The Clip-Only Twist Back
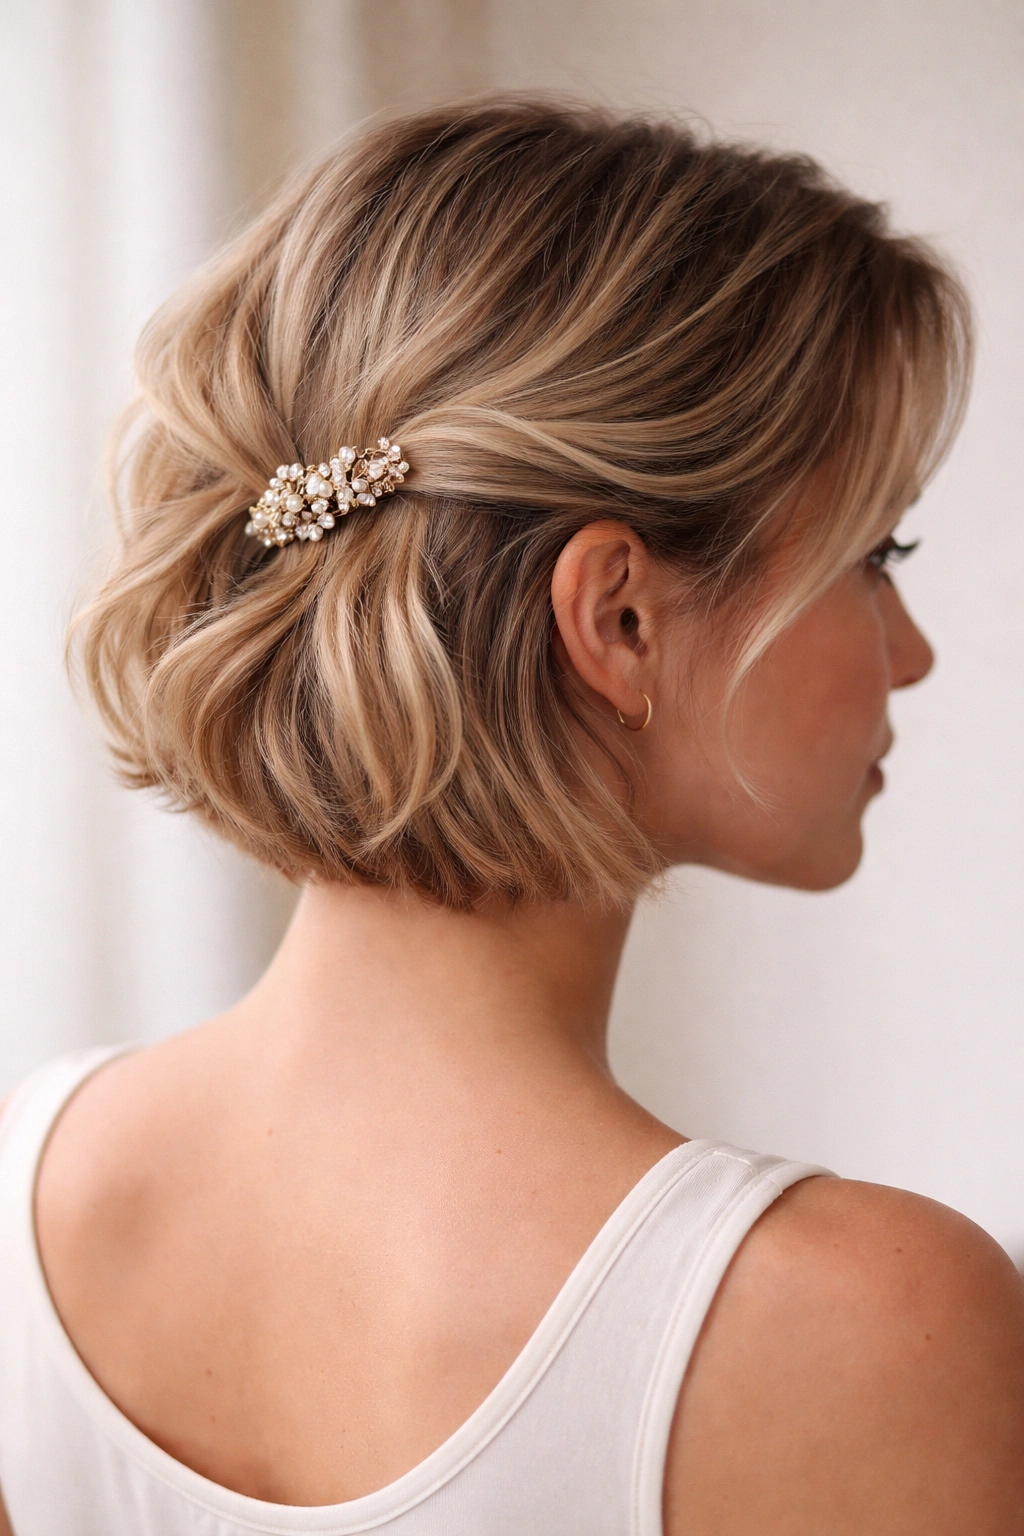
This final style uses a decorative clip to secure twisted hair back—no bobby pins, no elastic needed. It’s incredibly quick (literally 30 seconds), works on any hair type, and the clip becomes a statement piece rather than a functional necessity.
Why It Works on Short Hair
Since you don’t have much hair to secure, a single clip can do the job. This means you can use a decorative clip that becomes part of the style rather than disappearing into your hair. It’s modern, practical, and flattering.
How to Create It
- Take the hair at one temple and gently twist it back, moving toward the opposite side
- Continue twisting around the back of your head, adding small pieces as you go if you want it thicker
- Stop when you reach the opposite temple or when you’ve created the amount of twist you want
- Secure the twisted section with a decorative clip positioned so it’s visible
- Gently pull the twist to create a relaxed texture
- Leave the rest of your hair down
- Use texture spray beforehand so the twist holds without the clip doing all the work
Styling note: This works beautifully with tortoiseshell, metal, or embellished clips. The clip is visible, so choose one that complements your outfit or aesthetic.
Common Short-Hair Updo Mistakes and How to Avoid Them
The biggest mistake is using too much product too early. A tiny amount of texture spray on damp hair makes everything hold better than slathering on dry shampoo and hoping for grip. Start minimal and add more only if you’re struggling.
Never try these updos on freshly washed, product-free hair. Seriously. Your pins won’t grip, your twists will slip, and you’ll spend 20 minutes fighting with something that should take 5. Second or third-day hair, or hair that’s been textured with waves or curls, holds everything infinitely better.
Stop trying to create buns that look full. You don’t have enough hair for that, and trying to fake it reads as strained rather than charming. Instead, embrace small buns, messy textures, and the kind of updos that look intentionally undone rather than overcomplicated. This is actually easier and looks better.
Don’t skimp on bobby pins. One pin won’t hold anything on short hair—you need at least 2-3 pins per section, even for small sections. This isn’t overkill; it’s the difference between a style that falls out in an hour and one that lasts all day.
Final Thoughts
Short hair updos aren’t about creating an illusion of more hair—they’re about working with what you actually have and leaning into the advantages short hair provides. Your styles hold better, they take less time, and they’re incredibly flattering when you choose shapes and placements that flatter your face rather than fighting against your length.
The techniques here—twisting, pinning, teasing strategically, and using texture—become muscle memory after you’ve done them a few times. Pick two or three styles that appeal to you first, master those, then branch out to others. You’ll be amazed at how quickly you can go from “I can’t do updos with short hair” to rotating through five different looks depending on your mood and occasion.
The real secret? Stop thinking about what you can’t do with short hair and start thinking about what you can do faster and better. That’s where the confidence comes from, and that’s what actually makes these styles work.