Long oval faces have a beautiful natural balance that deserves a hairstyle equally thoughtful. The challenge with this face shape isn’t that few options work—it’s that so many styles look great that choosing can feel overwhelming. The real opportunity lies in understanding which cuts and styles add width where you want it, create movement that complements your proportions, and let your facial features shine without competing for attention.
An oval face is longer than it is wide, with a gently rounded jawline and forehead that taper slightly toward the chin. This means you want to avoid styles that emphasize length even more or create a stark, pulled-back appearance. Instead, the goal is to introduce texture, layers, and strategic width at the sides that harmonize with your face’s natural dimensions. The hairstyles below work because they create visual balance through smart layering, purposeful texture, and styles that land at jaw-length or slightly beyond—the sweet spot where your face shape truly shines.
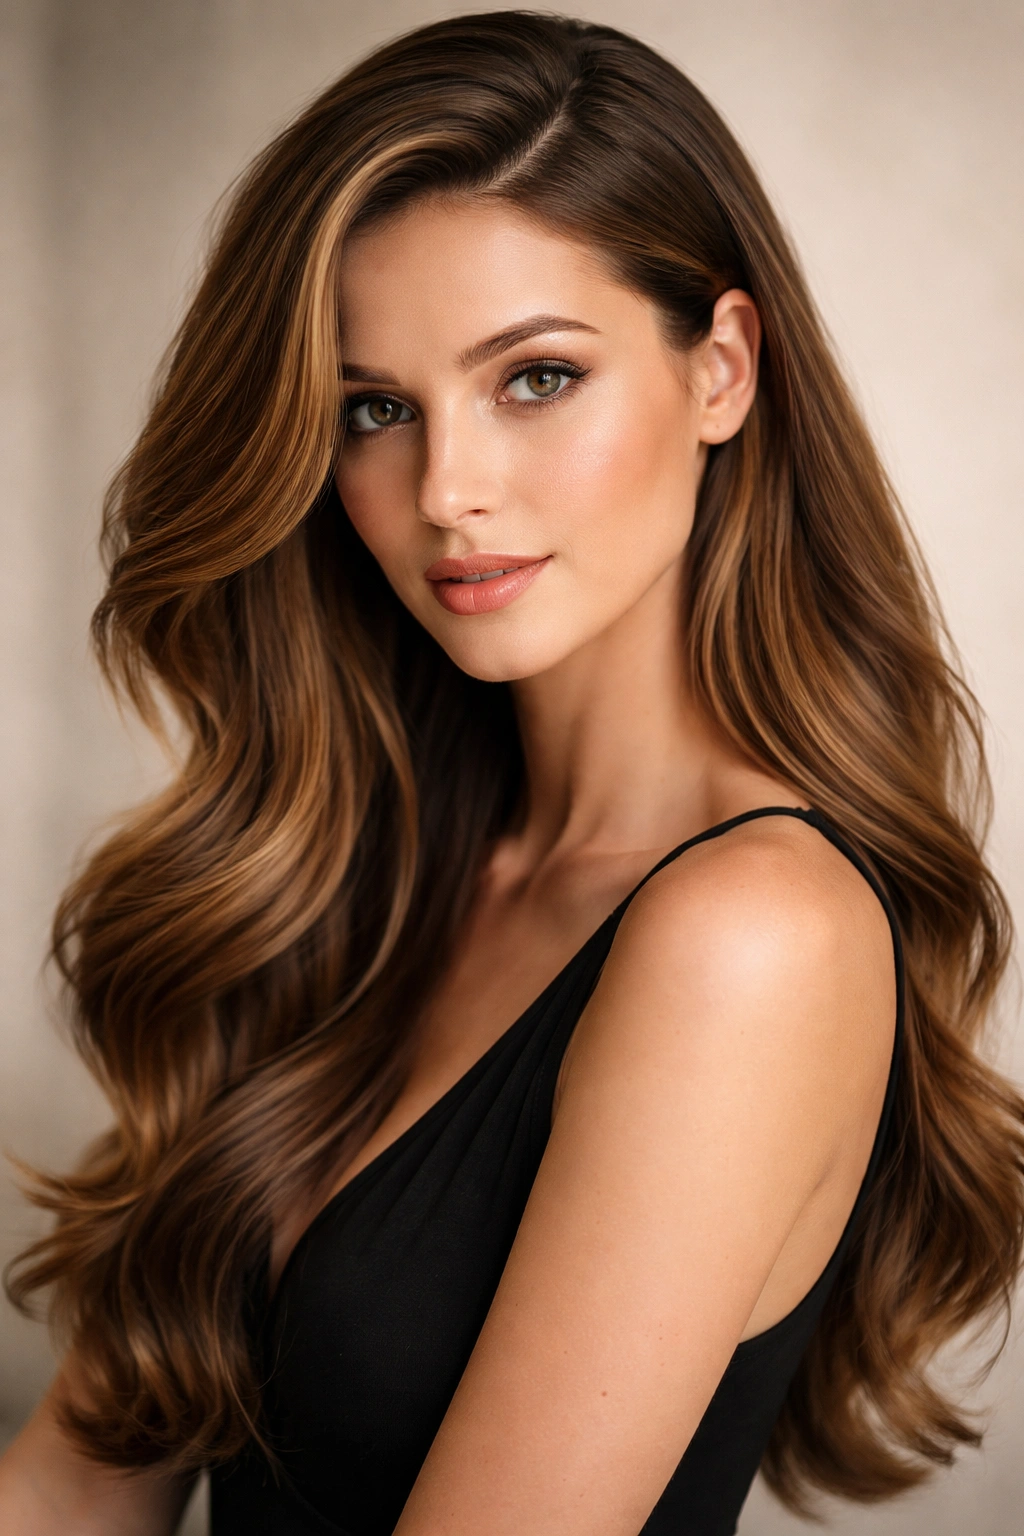
1. Textured Layers with Soft Waves
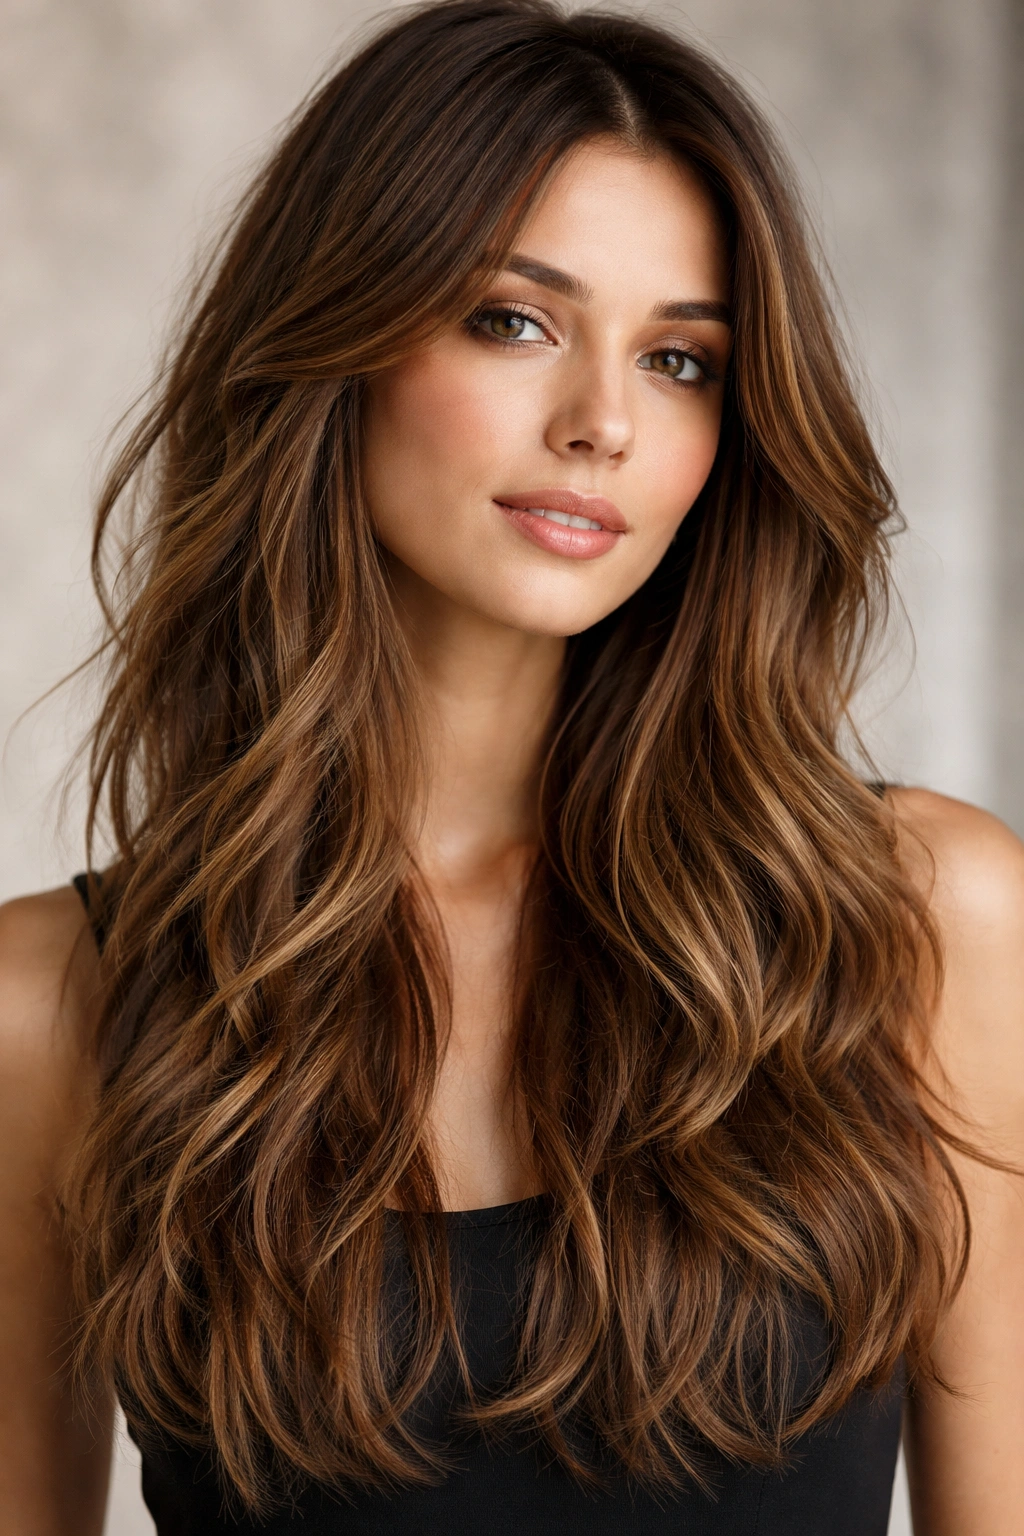
Soft waves combined with choppy layers create an effortless, modern look that feels custom-designed for longer oval faces. The texture breaks up any severe length and introduces movement that catches light and creates dimension. This style lands somewhere between beachy and polished, depending on how you style it, making it incredibly versatile for different occasions and seasons.
Why This Works for Oval Faces
Layered texture instantly adds width across the mid-lengths and ends of your hair, which counterbalances the length of your face beautifully. The soft waves prevent the style from looking too severe or overly straight, which can sometimes elongate your features. The movement also creates visual softness that complements the natural curves of an oval face rather than fighting against them.
How to Style and Maintain It
- Use a curling iron or wand to create loose waves, focusing on sections from the mid-length down
- Apply a lightweight texturizing spray or sea salt spray before waves to enhance hold and texture
- Let waves cool completely before running your fingers through them for a softer, more lived-in appearance
- Refresh waves between washes using a curling iron or by misting with sea salt spray
- Sleep on silk pillowcases to preserve wave definition overnight and reduce frizz
Pro tip: Ask your stylist to add choppy layers throughout, not just at the ends. Layers dispersed from mid-length upward create more overall texture and visual width than layers concentrated only at the bottom.
2. Blunt Bangs with Long Straight Hair
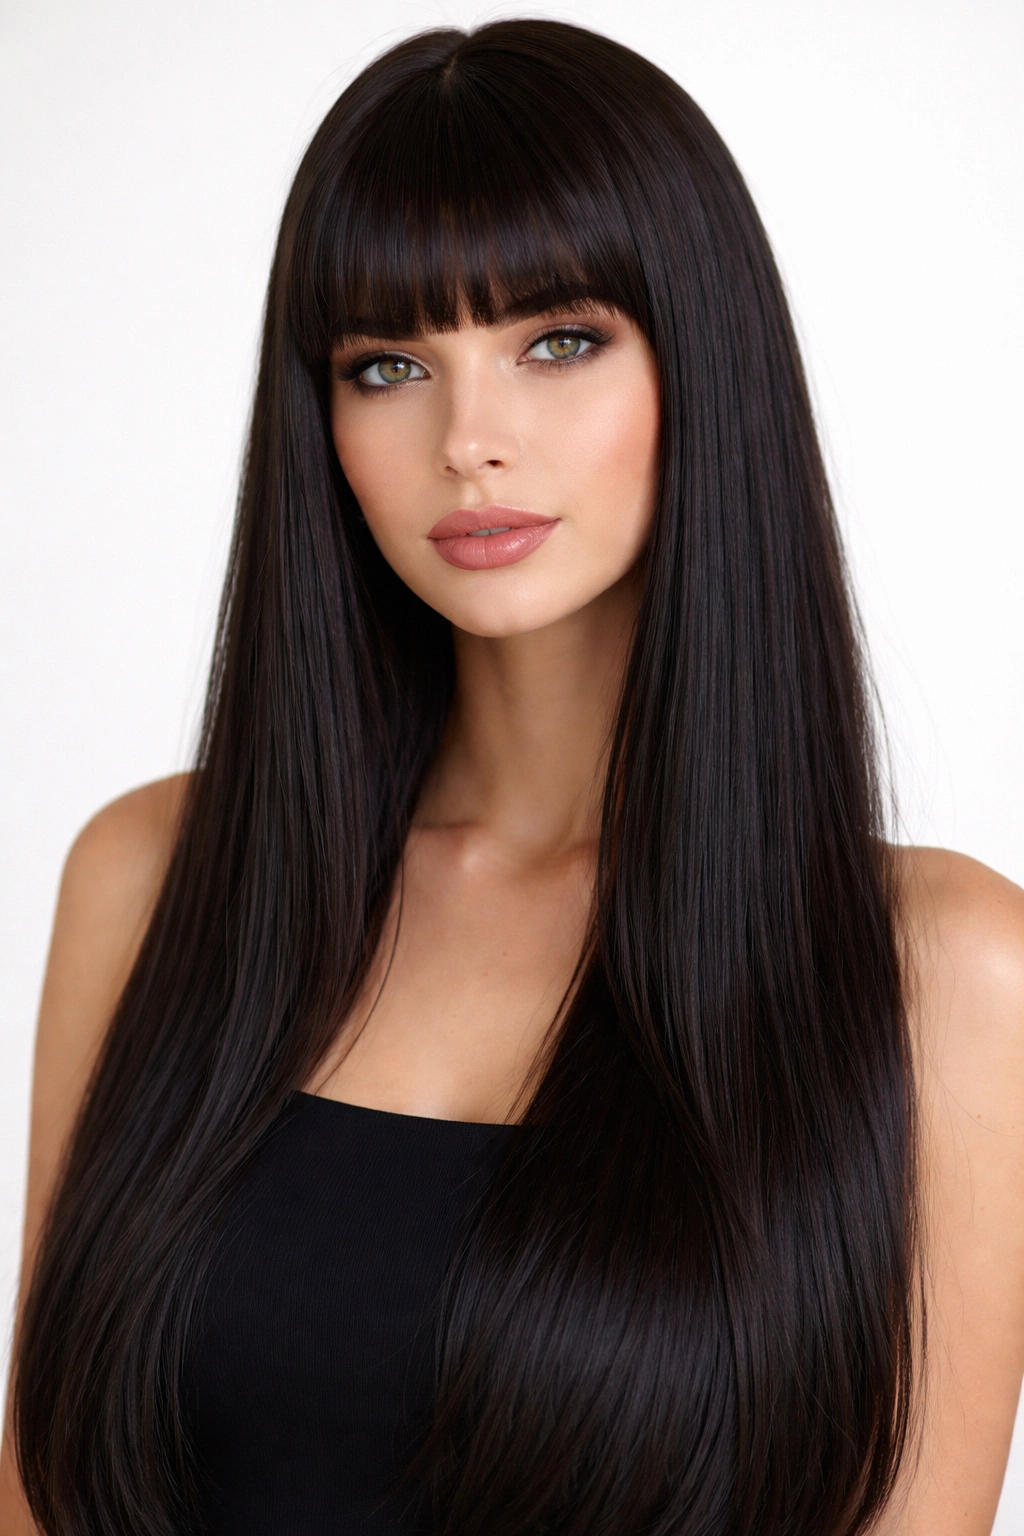
Blunt bangs introduce horizontal width at your forehead and create a striking frame for your face when paired with long, sleek hair. The contrast between the clean line of the bangs and the smoothness of the lengths below creates a chic, intentional look that feels modern and fashion-forward. This style works particularly well if you have naturally straight or very straight hair, as it emphasizes the polish and precision of the cut.
Why This Works for Oval Faces
Blunt bangs specifically target the forehead area, which adds visual width at the widest part of your face and prevents the eye from traveling down the length of your face continuously. The horizontal line of the bangs interrupts the vertical emphasis created by long hair, which is precisely what an oval face needs. Long straight lengths below the bangs provide height and proportion without introducing excessive texture.
Key Styling Details
- Blunt bangs should sit just above your eyebrows for the most flattering effect
- Keep the rest of your hair smooth and silky using a smoothing cream or serum
- Style bangs with a round brush, directing them slightly forward and then blending with a flat iron for a polished finish
- Trim bangs every 3-4 weeks to maintain the blunt line and prevent them from obscuring your eyes
- Use a dry shampoo or texturizing spray on roots if your straight hair starts to look flat
Worth knowing: Blunt bangs require commitment to regular trims and daily styling. If you prefer a lower-maintenance look, consider a softer wispy bang instead (see item 10).
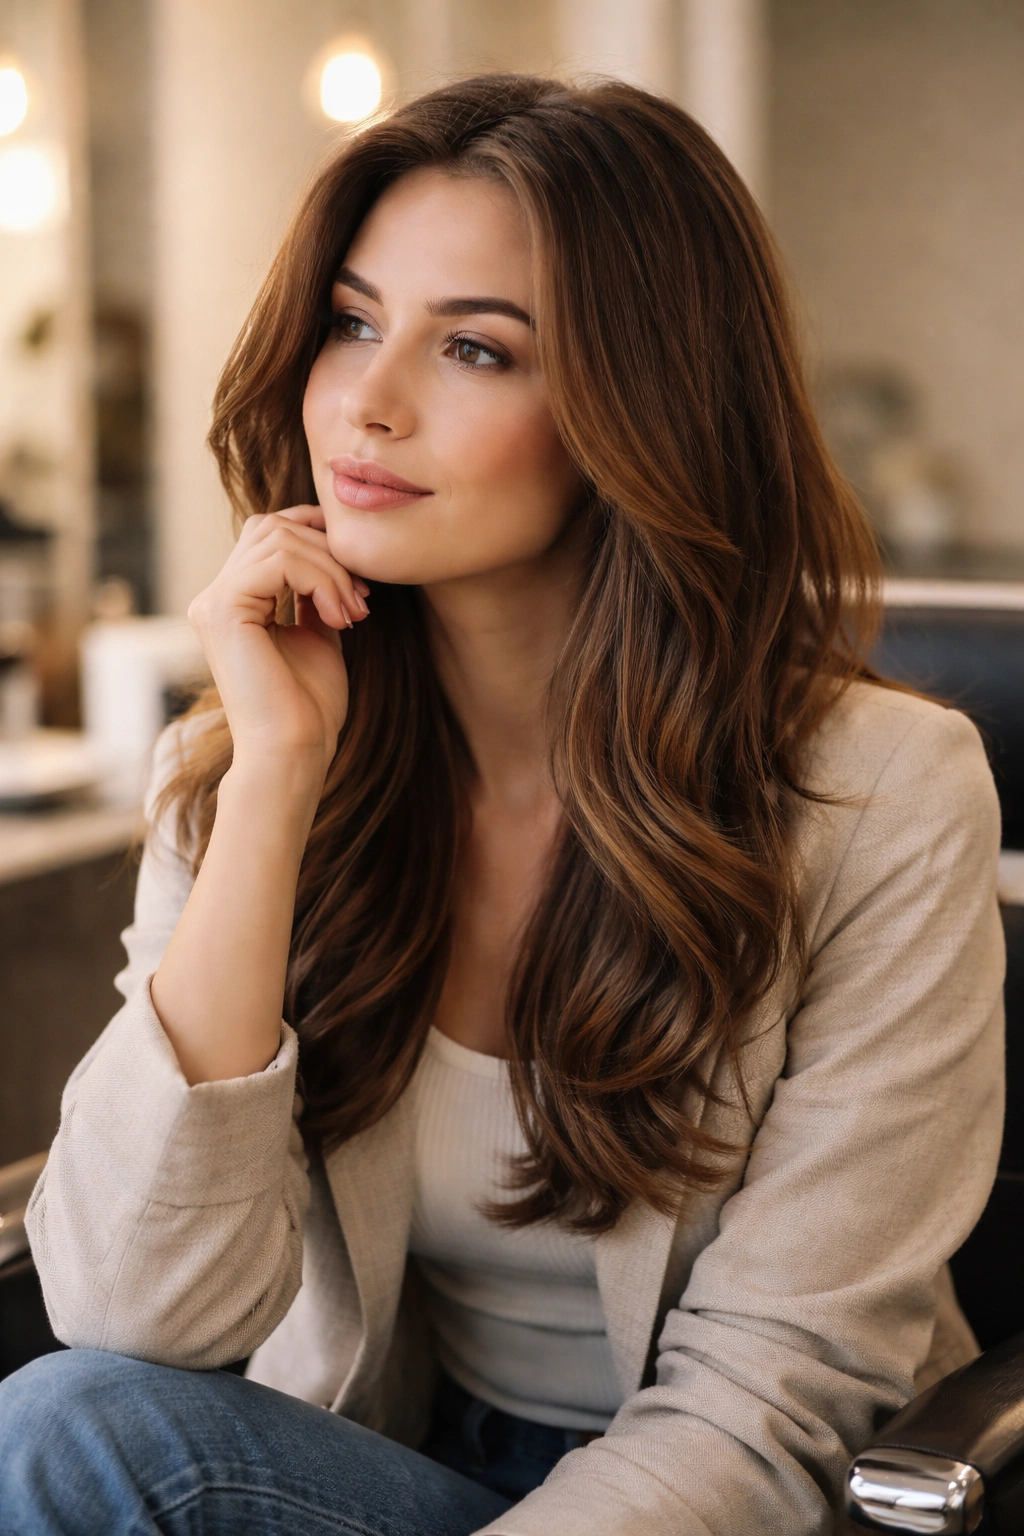
3. Side-Swept Layers
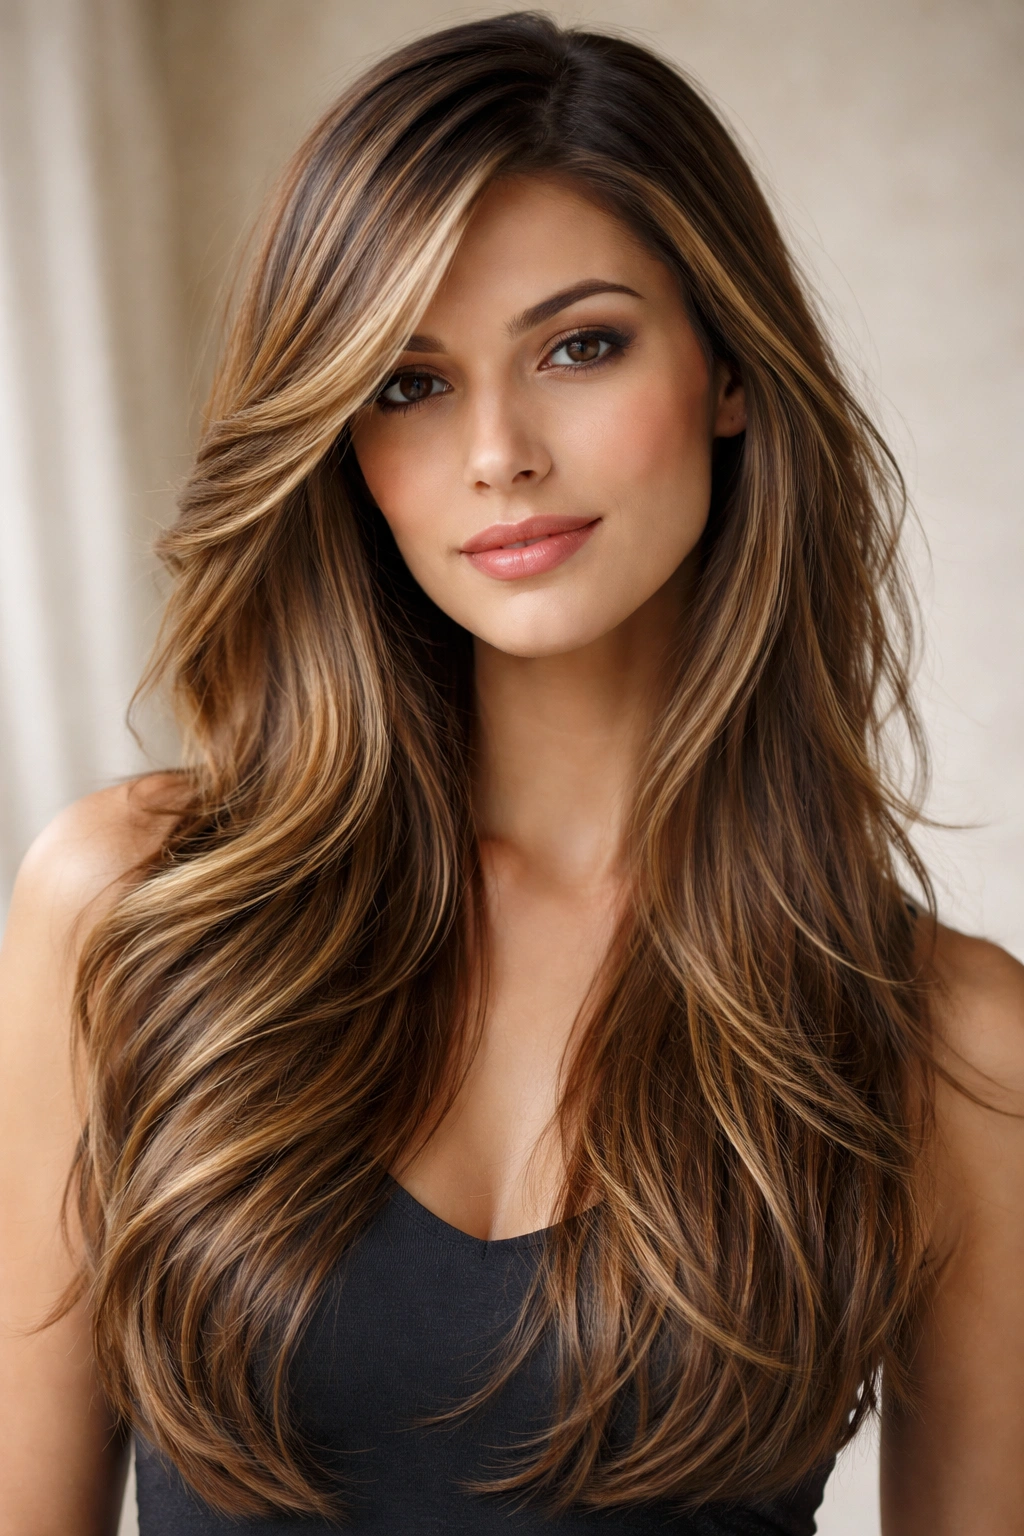
A side-swept cut with layering throughout creates movement that starts at your scalp and continues all the way down, adding dimension and volume. This style is particularly forgiving because the layers can be customized to your hair texture—whether you have fine hair that needs lighter layers or thicker hair that can handle heavier layers. The side-swept element adds an asymmetrical quality that feels modern and prevents your look from becoming too symmetrical.
Why This Works for Oval Faces
Asymmetrical styles introduce subtle width on one side of your face while the swept direction creates a slimming effect. The layers throughout add volume and movement that breaks up the vertical line of a long face. The side-sweep also naturally frames one side of your face, drawing attention to your eyes and cheekbones rather than your face’s overall length.
How to Perfect the Sweep and Layers
- Ask your stylist to create layers that are slightly shorter on one side than the other for true asymmetry
- Blow-dry with a brush to direct hair toward your chosen side, using medium heat
- Use a light styling cream or mousse to enhance the direction and hold of your layers
- Refresh the side-sweep by blow-drying damp roots in the swept direction
- Layers should start around mid-length or slightly higher for maximum movement and visual interest
Insider note: This style works beautifully with both straight and wavy textures. If you have waves, the layers already built into the cut will emphasize them naturally without extra effort.
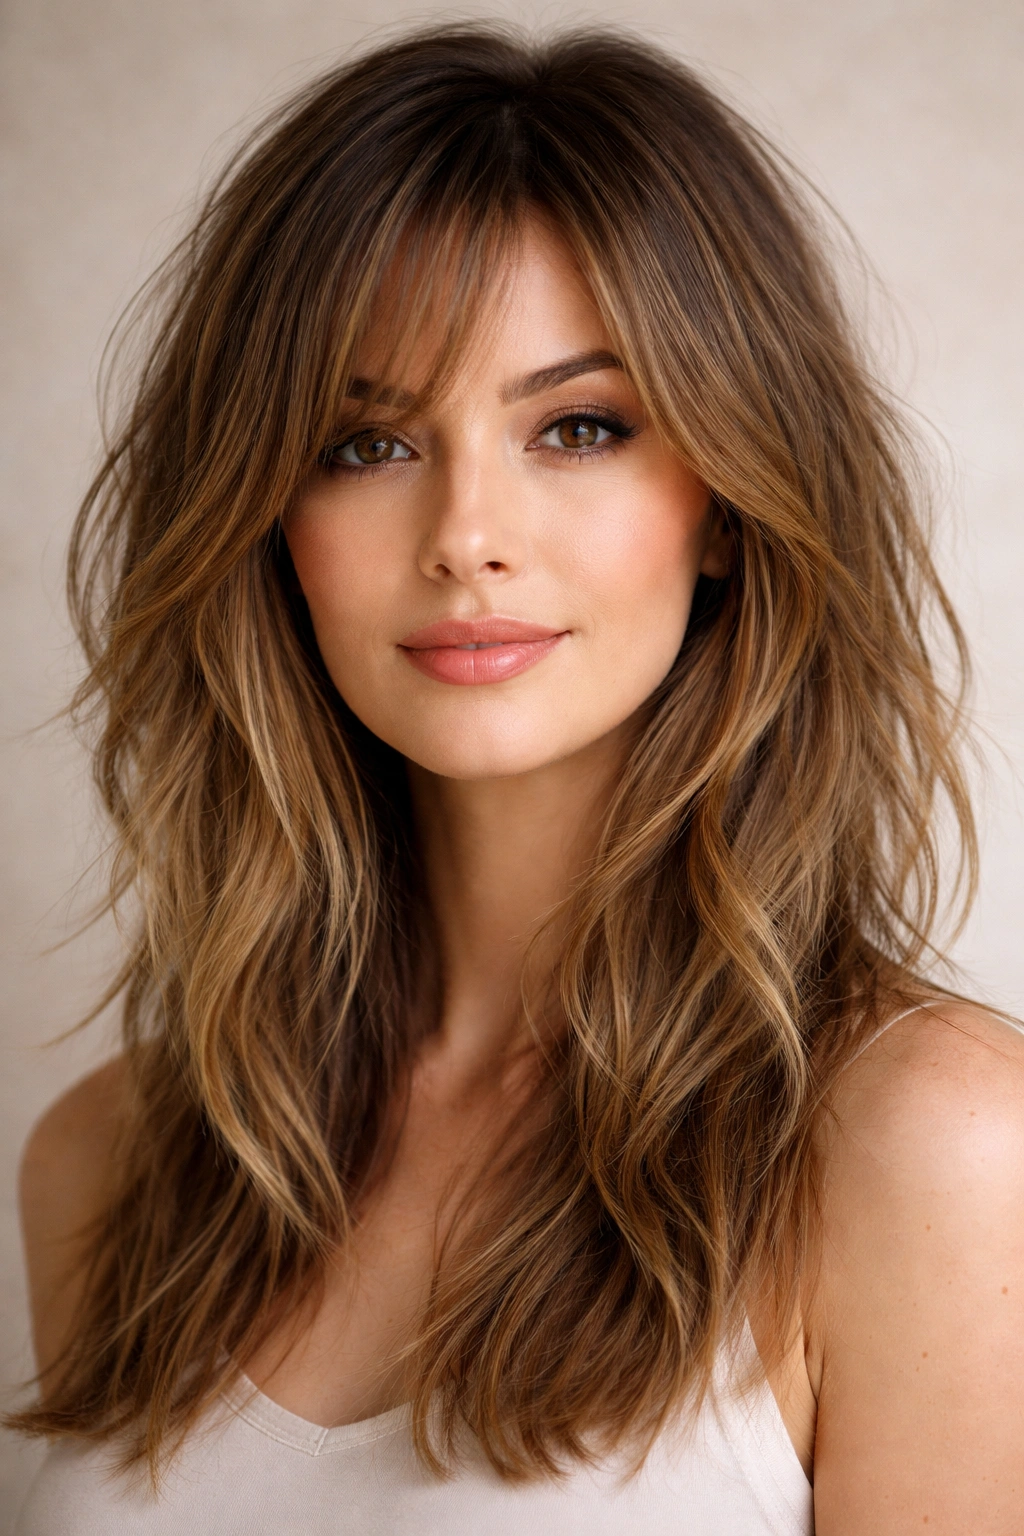
4. Shoulder-Length Shag
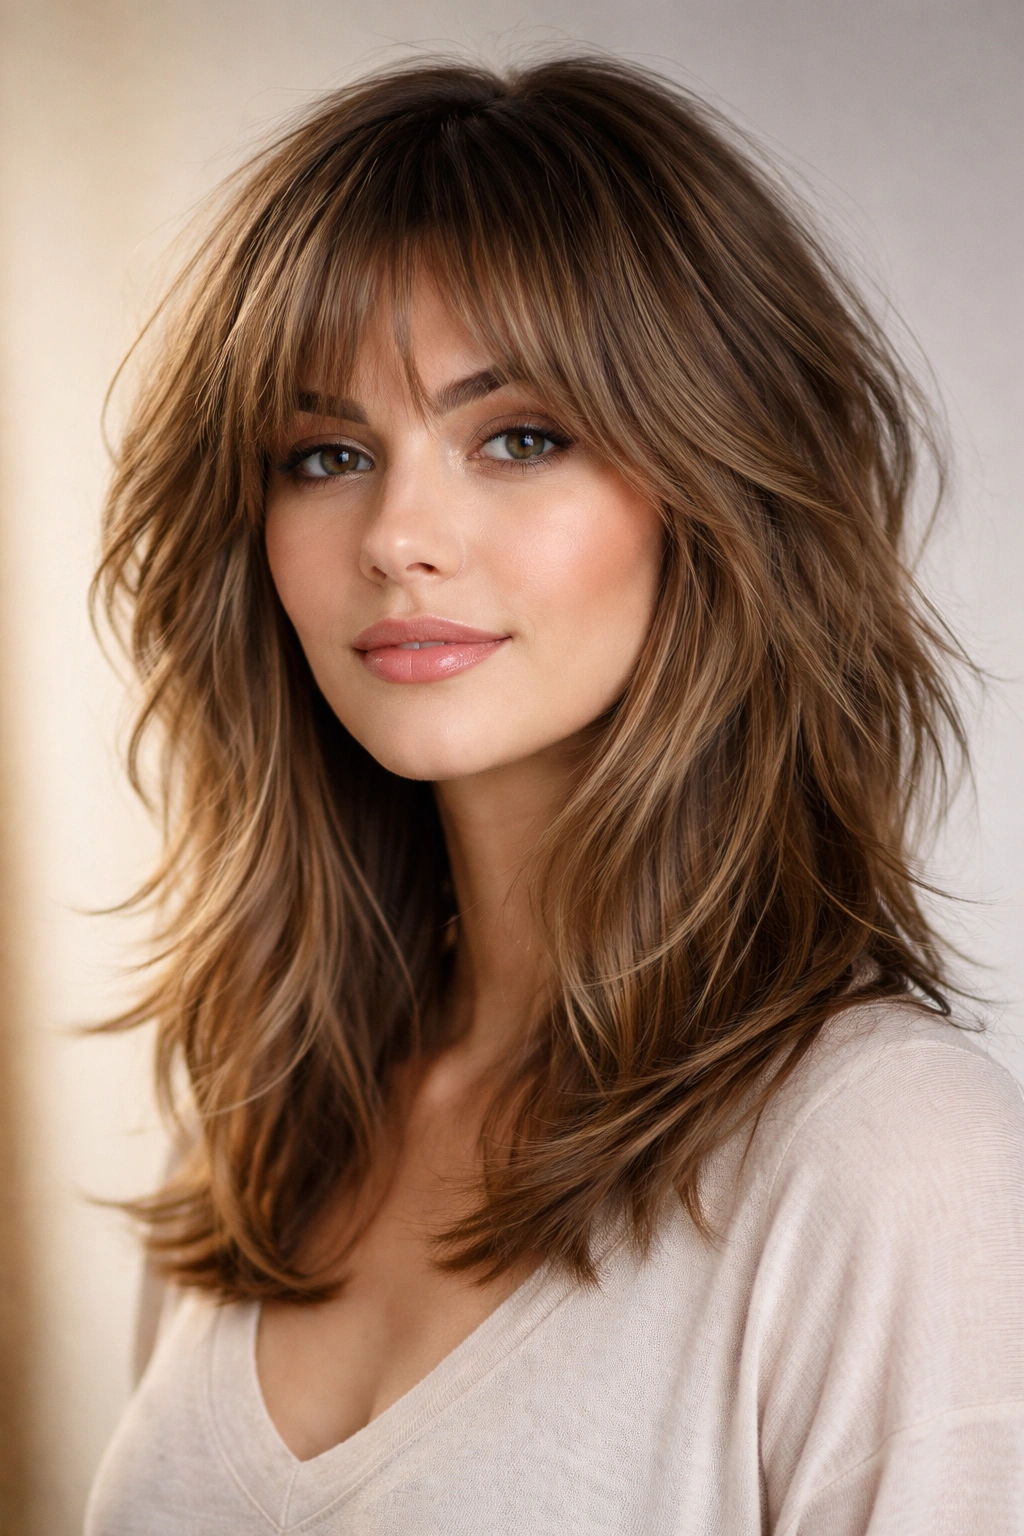
The shag is a deliberately choppy, textured cut that sits roughly at shoulder length and creates maximum volume and movement with minimal effort. Modern shags are far from the 1970s versions—today’s interpretations feature strategically placed layers that work with your natural hair texture rather than against it. This cut is perfect if you want a style that looks intentional but doesn’t demand precision styling every single day.
Why This Works for Oval Faces
A shag introduces volume throughout your hair in a way that adds width and prevents your face from appearing overly long. The choppy layers create multiple points of interest, breaking up the vertical line of your face shape. Shoulder length is the perfect landing spot because it sits right at the widest part of your shoulders, balancing the length of your face naturally.
Styling and Texture Tips
- Shags look best with movement and texture, so embrace waves or curls rather than wearing it completely straight
- Use a texturizing spray to enhance the choppy layers and add grip for styling
- Blow-dry with your head flipped upside down to boost root volume, then flip back and direct layers into place
- If you have wavy or curly hair, a shag requires minimal styling—just scrunch in product and let it air-dry
- For fine hair, ask your stylist to avoid too-heavy layers that can make thin hair look stringy
Pro tip: The shag is one of the few cuts that actually improves with a bit of bedhead texture. Aim for that deliberately undone look rather than perfect smoothness.
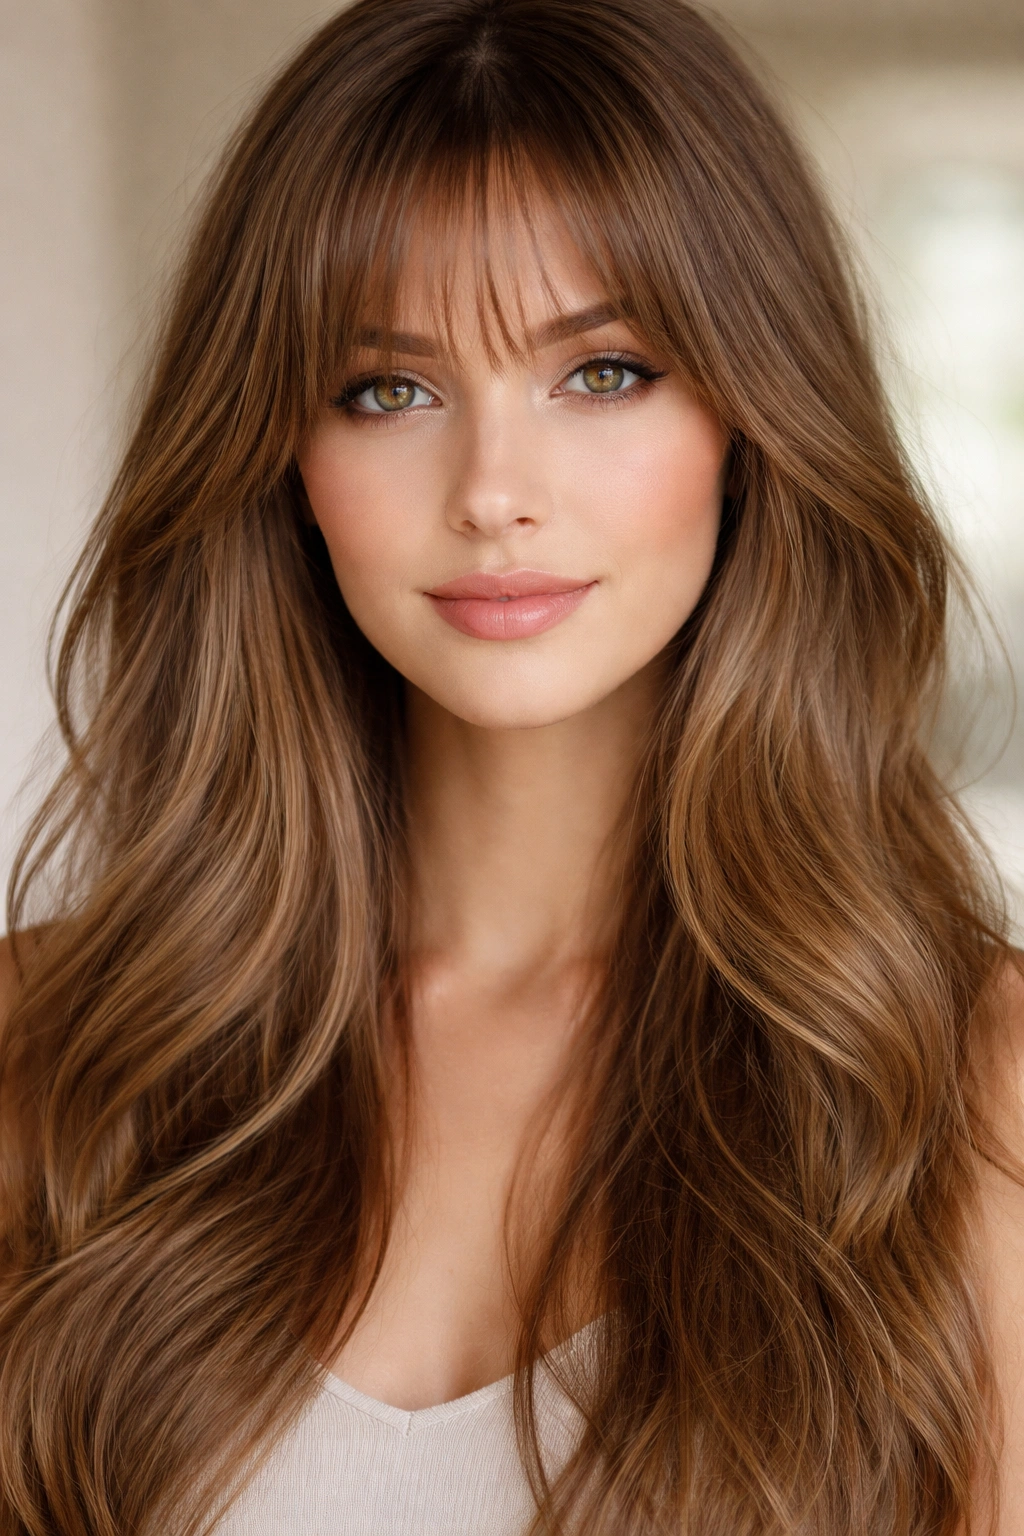
5. Curtain Bangs
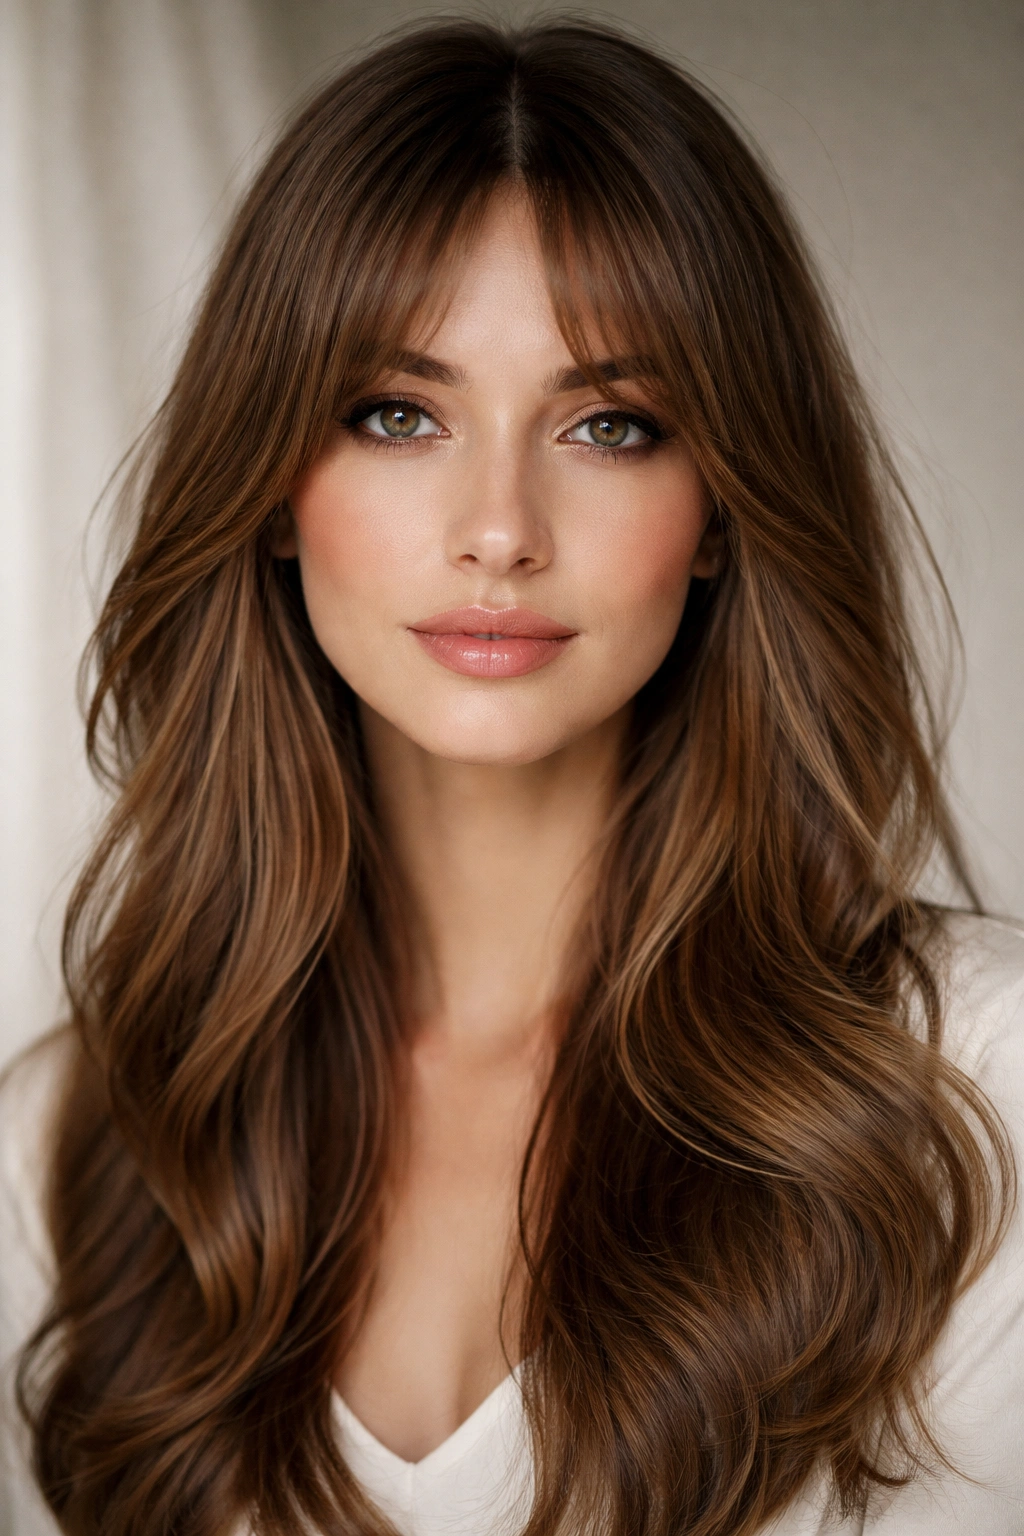
Curtain bangs fall gently on either side of your face, framing it with soft layers that part down the middle. Unlike blunt bangs, curtain bangs are longer and more flexible, parting naturally to reveal your face while still adding width and movement at the forehead. This style has become incredibly popular because it’s flattering on so many face shapes and works with virtually every hair texture.
Why This Works for Oval Faces
Curtain bangs add width and softness at the forehead and upper face without creating the severe line that blunt bangs introduce. The middle part draws the eye horizontally across your face, which visually widens it. The longer length of curtain bangs means they frame your cheekbones beautifully while still allowing your face to remain visible and open.
How to Style Curtain Bangs
- Curtain bangs should part naturally down the middle and curve slightly away from your face on each side
- Blow-dry with a round brush, directing one side back and away, then the other side
- Use a texturizing spray or light styling cream to enhance the soft curve and prevent them from looking limp
- If your curtain bangs are too straight, a light curling iron pass can add the gentle wave that makes them frame your face
- Trim every 6-8 weeks to maintain the length and shape as they grow out
Worth knowing: Curtain bangs pair beautifully with most hairstyles—straight lengths, waves, curls, or layers. They’re versatile enough to work with your preferred styling and texture.
6. Voluminous Curls
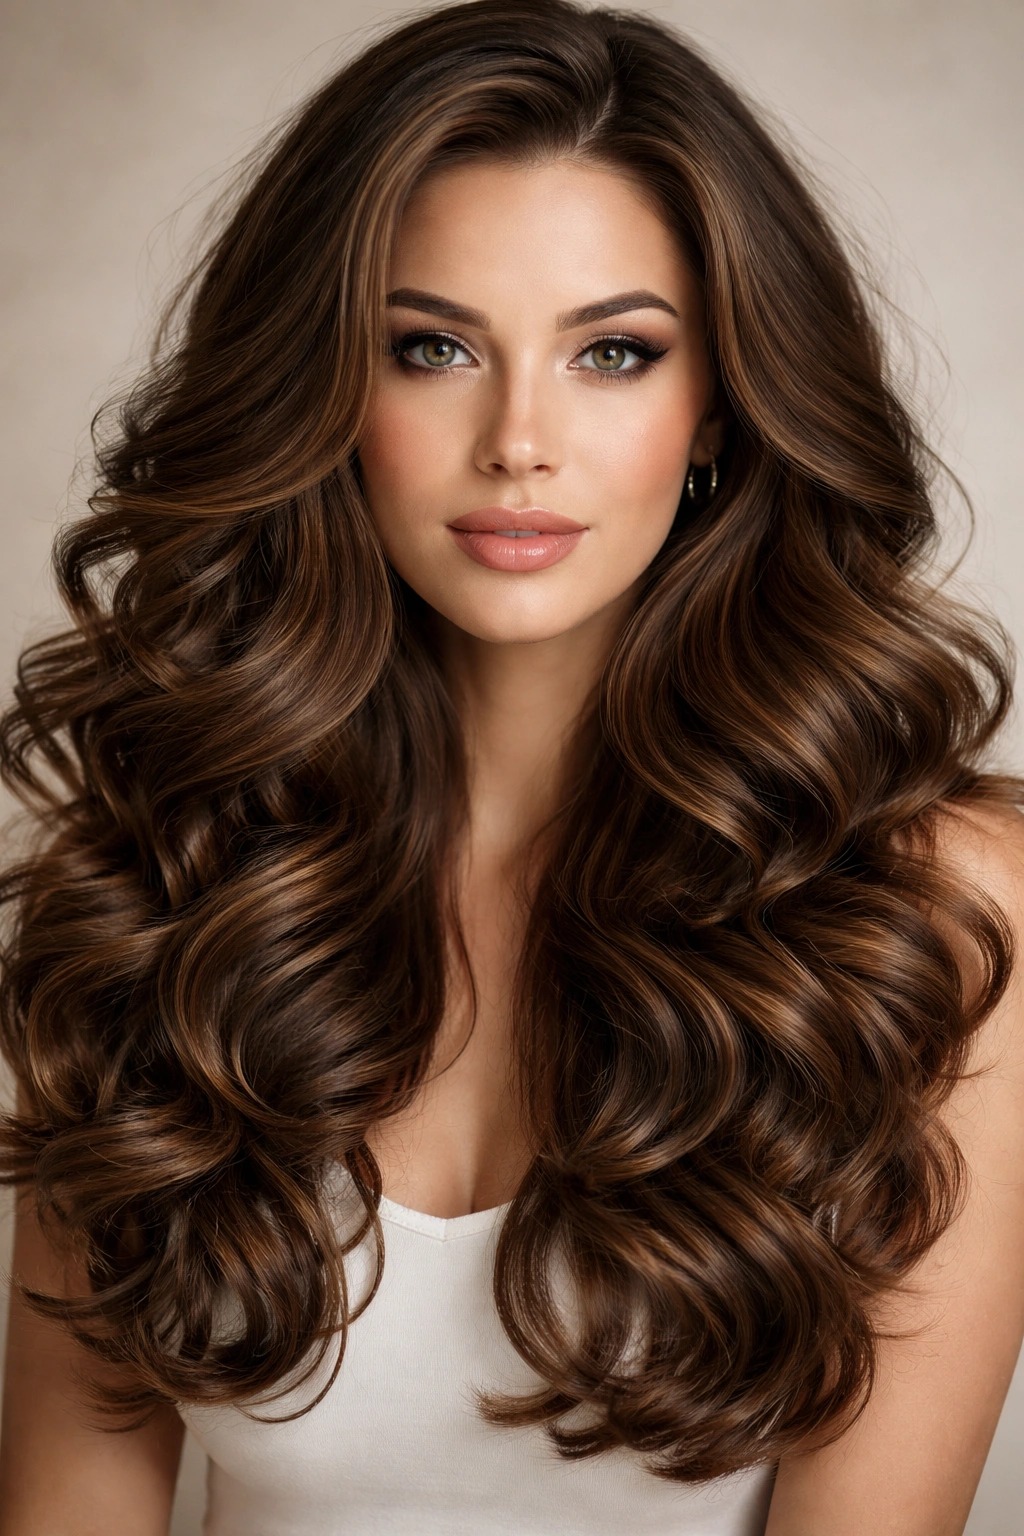
Large, bouncy curls create maximum texture and width throughout your hair, making it perfect for balancing a longer face. The volume that curls add naturally prevents your face from appearing elongated because the hair extends outward as well as downward. Voluminous curls also create multiple points of visual interest, drawing attention to individual curl patterns rather than your overall face proportions.
Why This Works for Oval Faces
Curls add width and dimension that counteracts length in a way no straight style can achieve. The three-dimensional quality of voluminous curls means your hair occupies more visual space, which naturally balances an oval face shape. Curls also create a softer, more approachable aesthetic that complements the gentle proportions of an oval face.
Creating and Maintaining Voluminous Curls
- Use a large barrel curling iron (1.5 to 2 inches) for loose, voluminous curls
- Curl sections away from your face for a flattering frame, alternating direction for natural movement
- Apply curl cream or mousse to damp hair before blow-drying for better hold and definition
- Let curls cool completely before touching them for longer-lasting waves
- Sleep in loose braids or a silk bonnet to preserve curl definition overnight
- Refresh curls between washes with a curling iron or by spritzing with a curl-refreshing spray
Pro tip: Ask your stylist for long layers throughout your hair if you want to achieve voluminous curls. Layers reduce bulk while maintaining curl definition, preventing your curls from looking too dense or heavy.
7. Half-Up Half-Down Style
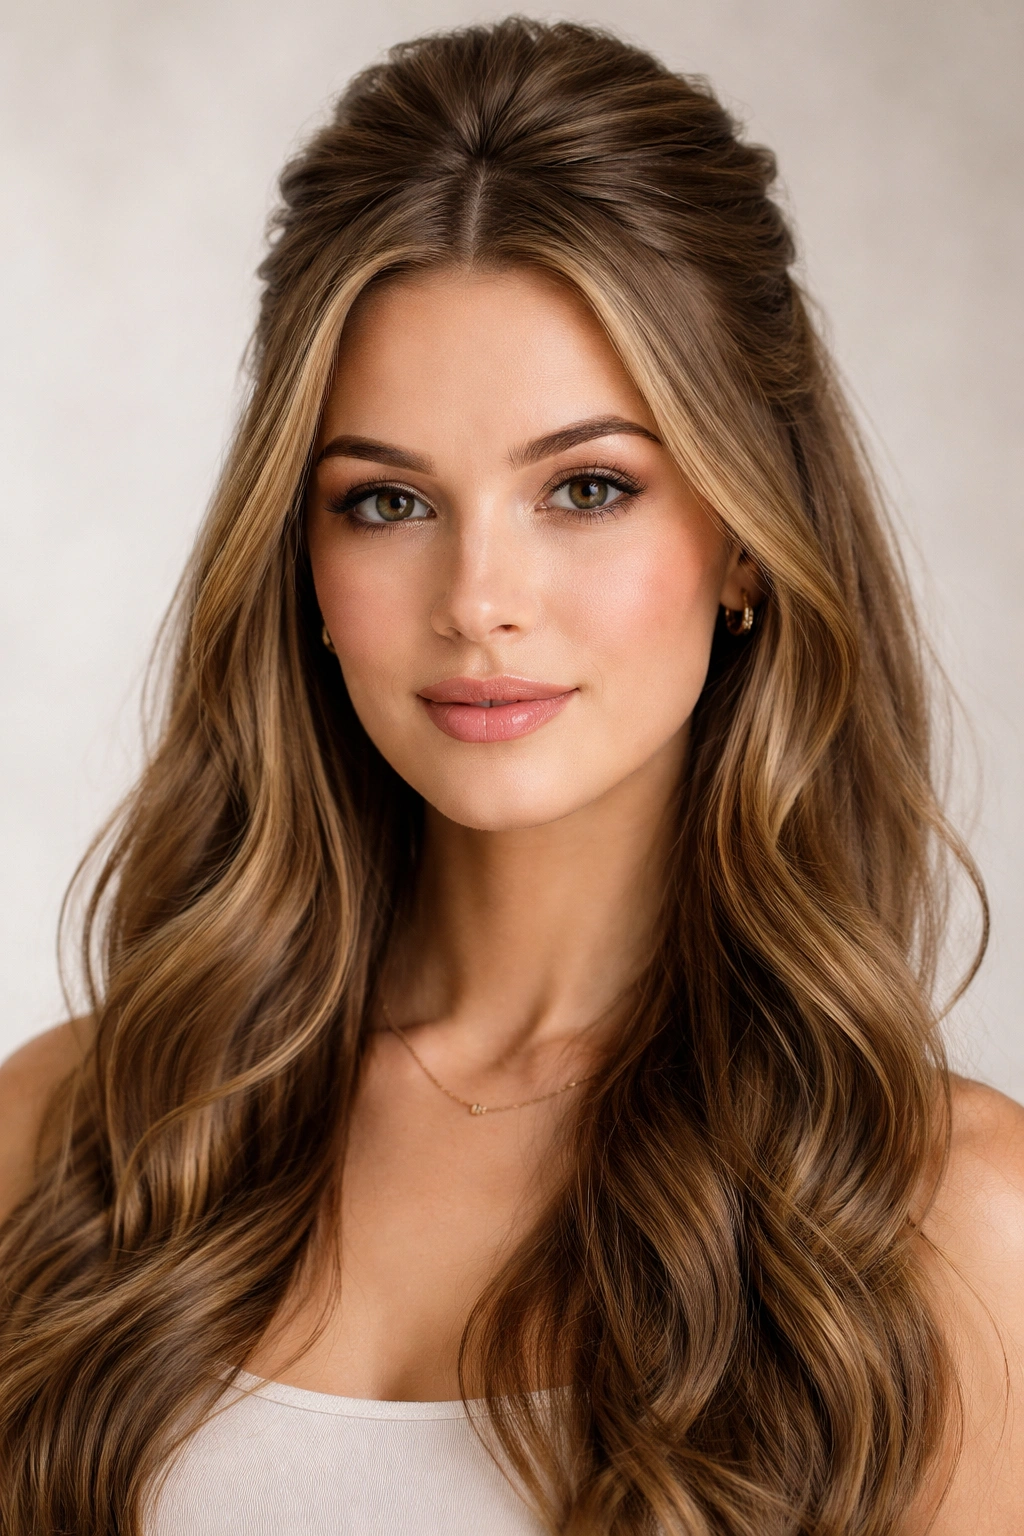
This versatile style combines the elegance of an updo with the softness of down hair, making it perfect for both casual and dressy occasions. The half-up portion pulls hair back and adds height at the crown, while the bottom half falls freely and maintains movement. This balance is particularly flattering for oval faces because it adds visual width at the crown while the down portions still frame your face softly.
Why This Works for Oval Faces
The lifted top portion of a half-up style adds volume and width at the crown, which visually shortens your face by drawing attention upward. The hair remaining down continues to frame your face but feels less severe because part of it is secured. This creates a balanced, intentional look that doesn’t elongate your features the way completely down hair sometimes can.
Styling Variations and Tips
- Secure the top section with a small elastic, bobby pin, or decorative clip for different aesthetic moods
- Pull the top section slightly back and slightly up for maximum face-shortening effect
- Tease the crown before pulling the top section up for added volume at the highest point
- Leave face-framing pieces loose in the front for softness and dimension
- Add waves or curls to the down portion for a more romantic, textured version
- The half-up section can be sleek or slightly textured depending on the occasion and your preference
Worth knowing: Half-up styles work beautifully with long layers throughout your hair. Layers in the down portion add movement that prevents the style from looking too heavy or matronly.
8. Choppy Layers
Choppy layers create a rebellious, textured style that’s full of personality and movement. Unlike smooth layers that blend seamlessly, choppy layers are deliberately disconnected and uneven, creating multiple points where light hits your hair and texture shines. This cut is ideal if you want a style that feels edgy but still flattering, and it works particularly well with wavy or curly hair textures.
Why This Works for Oval Faces
The choppy, irregular nature of this cut prevents any single vertical line from dominating your appearance. The texture and movement throughout break up length and add width across multiple points in your hair. Choppy layers also prevent your face from being framed too symmetrically, which adds visual interest and prevents the style from emphasizing face length.
How to Make Choppy Layers Work
- Choppy layers look best with natural texture or intentional waves, rather than perfectly straight styling
- Use a texturizing spray or sea salt spray to enhance the chop and separation between layers
- Blow-dry with a diffuser attachment if you have wavy or curly hair to encourage texture
- For straight hair, use a flat iron to add subtle waves, allowing the choppy layers to catch light
- Ask your stylist to space layers throughout your entire length, not just at the ends
- Choppy layers require trims every 4-6 weeks to maintain the intentional chop and prevent the style from becoming too shaggy
Pro tip: Choppy layers pair beautifully with face-framing pieces that are cut slightly shorter. These shorter pieces draw attention to your face and eyes rather than your overall length.
9. Deep Side Part with Waves
A deep side part creates immediate asymmetry and visual width on the wider side, which balances the vertical emphasis of a longer face. When combined with waves, this simple parting transforms into a sophisticated, dimensional look that works for both casual and formal settings. The depth of the part matters—it should sit significantly to one side, not at the center, to maximize the width-creating effect.
Why This Works for Oval Faces
Deep side parts are one of the easiest ways to add visual width to your face without cutting your hair or adding complexity. The deeper the part, the more one side of your face is framed, and the more width is created on the opposite side. Waves combine with the side part to create movement and prevent the style from looking too sleek or severe.
Creating and Maintaining a Deep Side Part
- Create your deep side part by parting your hair significantly to one side, not in the center
- Blow-dry your roots in the direction of the part for long-lasting hold and volume
- Add waves using a curling iron or wand, focusing on creating movement throughout
- Use a light hairspray to hold the part in place without making it feel stiff
- On day two or three, refresh waves with a curling iron and reestablish the side part
- If your natural part is center, blow-dry roots in the deep side direction while damp to train your hair
Worth knowing: The side you choose for your deep part can be intentional. Some people find one side of their face more flattering—if that’s true for you, place your deep part on the opposite side to frame that side.
10. Wispy Bangs with Length
Wispy bangs are longer, softer versions of blunt bangs that still add width at your forehead but in a much more forgiving, low-maintenance way. These bangs feature layers that create a feathery, soft texture rather than a blunt line, and they blend seamlessly into the rest of your hair rather than existing as a separate statement. Wispy bangs work beautifully with both straight and wavy hair textures.
Why This Works for Oval Faces
Like blunt bangs, wispy bangs add horizontal width at your forehead and interrupt the vertical emphasis of long hair. The softness of wispy bangs, however, makes them feel less severe and more wearable for everyday styling. The feathery layers within the bangs create texture and movement that’s particularly flattering for oval faces.
Styling Wispy Bangs
- Wispy bangs should sit between your eyebrows and eyelashes, depending on your preference
- Blow-dry bangs with a round brush for a soft curve, directing slightly back and away from your face
- For extra softness, use a curling iron on low heat to add a slight wave to the bangs
- Wispy bangs require trimming every 4-6 weeks to maintain the soft, feathered shape
- Use a texturizing spray to enhance the wispy texture and prevent bangs from looking limp
- Wispy bangs pair beautifully with long, straight lengths or with waves throughout
Pro tip: If you’re nervous about committing to bangs, wispy bangs are the most forgiving option. As they grow out, they blend into longer layers rather than becoming an awkward, separate length.
11. Face-Framing Highlights
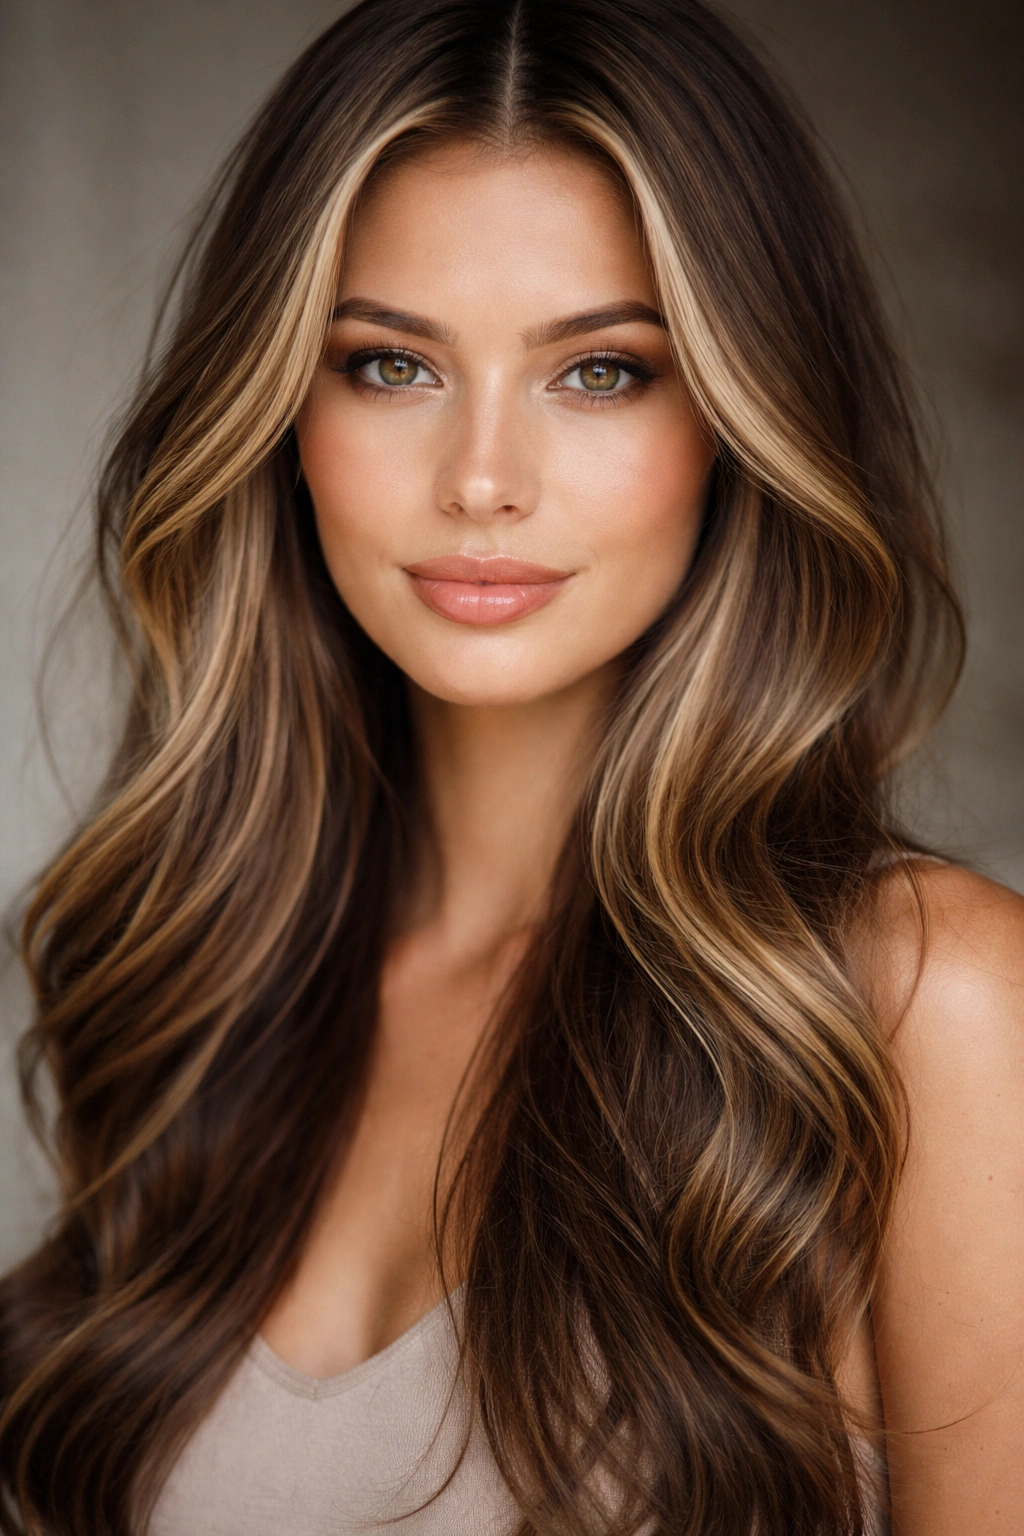
Strategic highlights placed specifically around your face create dimension and draw attention to your features rather than your face’s overall length. Lighter pieces around the face catch light and create visual interest at points where you want focus—your cheekbones, eyes, and jawline. This technique works with any base color and any length, making it incredibly versatile.
Why This Works for Oval Faces
Face-framing highlights create multiple focal points around your face, which prevents the eye from simply following the vertical line of your length. The lighter pieces catch light, making them naturally draw attention. Combined with the right haircut, highlights become a subtle but powerful tool for visual balance.
Placement and Color Strategies
- Request highlights through your face-framing pieces and around your face, not distributed evenly throughout
- Subtle placement includes pieces at your temples, around your cheekbones, and at your jawline
- Choose a highlight shade that’s 1-3 shades lighter than your base color for a natural, blended effect
- Consider warmer tones if you have warm undertones; cooler tones for cool undertones
- Face-framing highlights work with any cut but look particularly striking with layers
- Highlights also add texture and dimension that makes any style feel more interesting and intentional
Worth knowing: You don’t need dramatic blonde highlights for this to work. Subtle face-framing in a shade close to your natural color creates dimension without high maintenance.
12. Straight Bob with Angled Layers
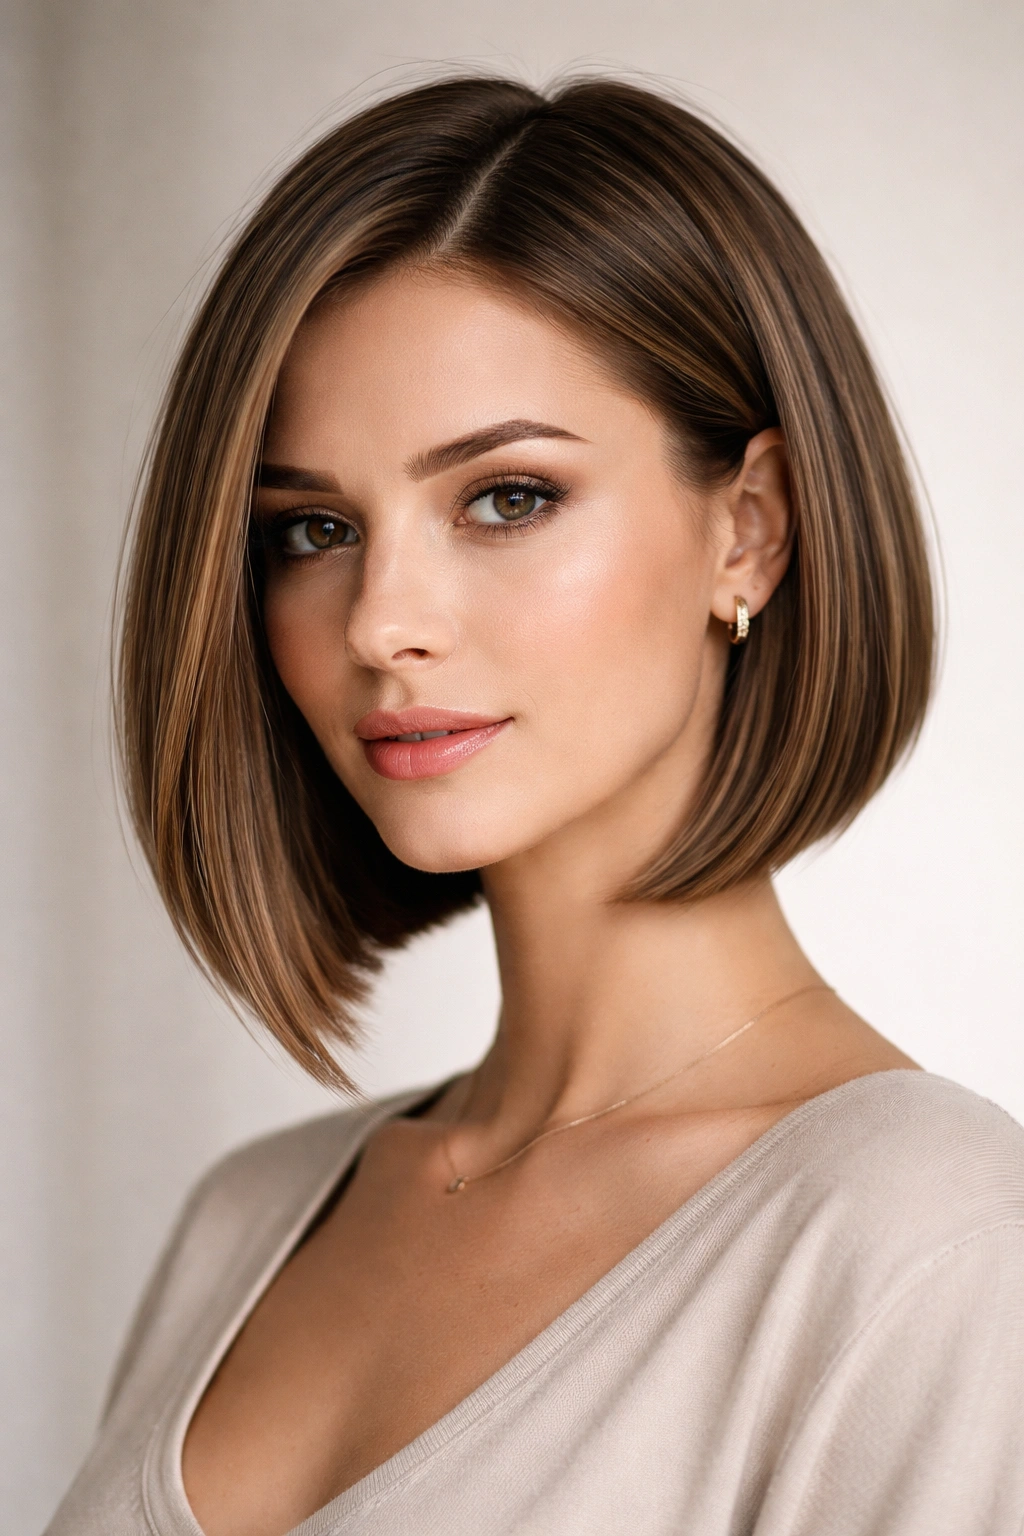
A straight bob that hits just below your chin creates a chic, defined look that feels intentional and modern. Angled layers within the bob—where the front is slightly longer than the back—add movement and softness without sacrificing the clean lines that make a bob feel polished. This cut works beautifully for women who want something shorter but still flattering for an oval face.
Why This Works for Oval Faces
A bob that sits just below the chin is the perfect length for an oval face because it sits at the widest part of your jaw and shoulders, creating natural visual balance. Angled layers add movement and softness that prevents the bob from feeling too blunt or severe. The length and angles together create a style that shortens your appearance slightly while remaining incredibly chic.
Styling an Angled Bob
- Blow-dry with a round brush to create a subtle curve at the ends, directing slightly outward
- The angled layers should curve naturally around your face, framing your cheekbones and jawline
- Use a light smoothing cream or serum for a polished finish, or embrace slight texture for a modern feel
- The longer front pieces can be styled behind your ears for a different look, or left down to frame your face
- Refresh your bob with regular trims every 4-6 weeks to maintain the angle and prevent the style from losing shape
Pro tip: Ask your stylist to make the angle subtle rather than extreme. A subtle angle adds movement and interest without making the style feel too trendy or difficult to maintain.
13. Braided Crown Detail
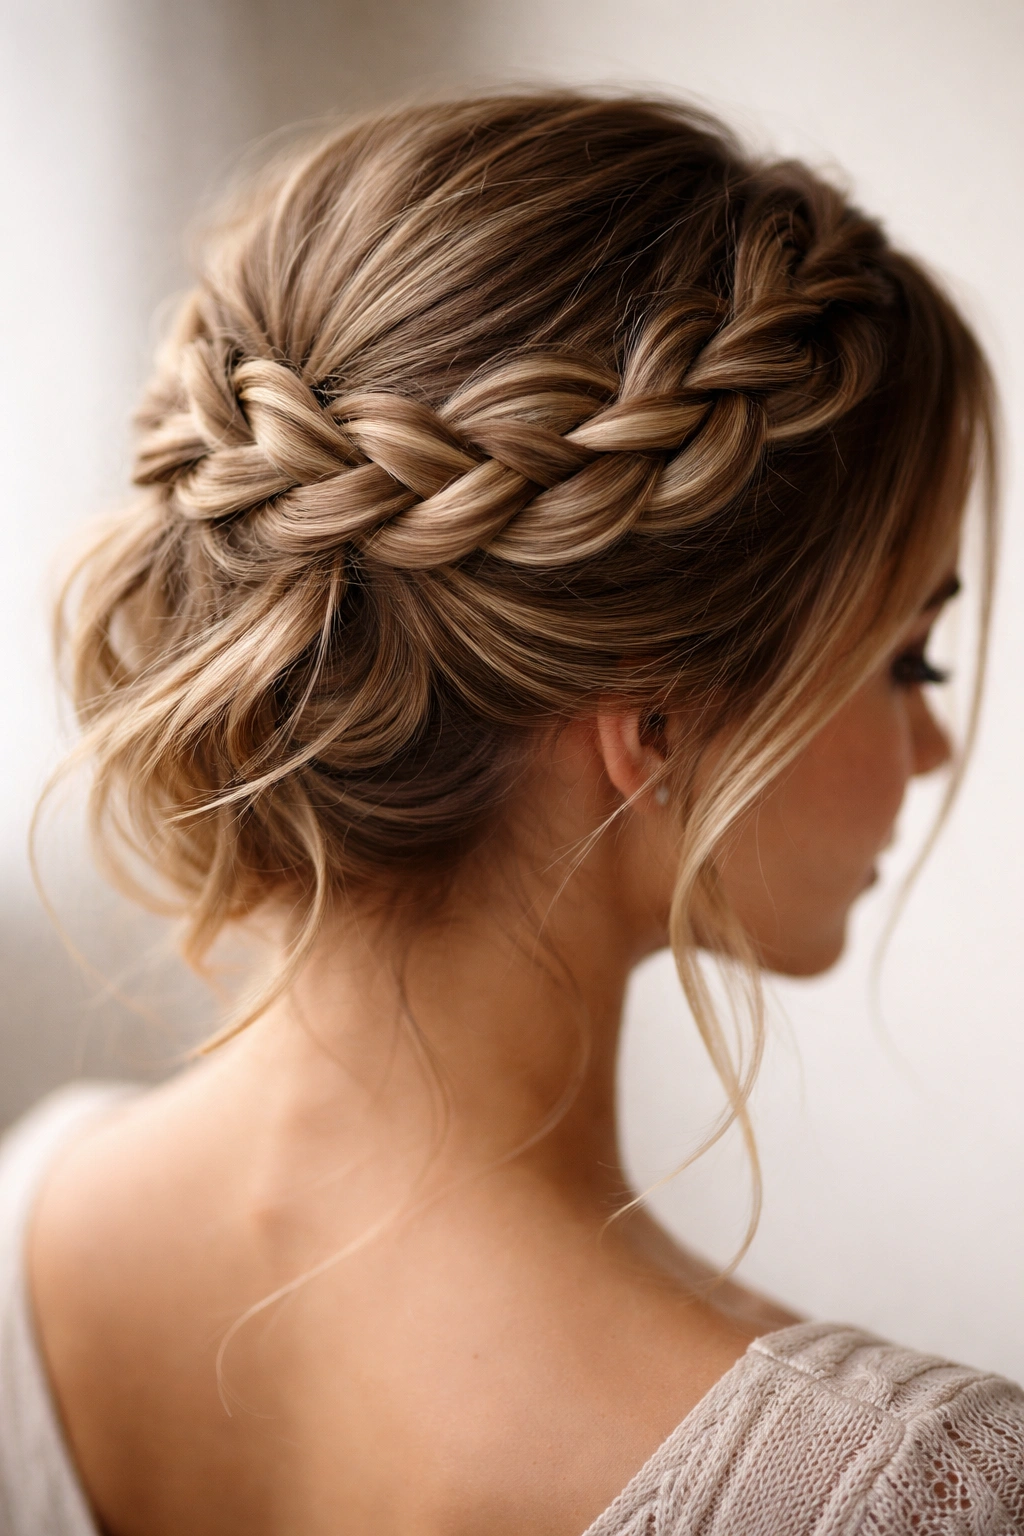
This style incorporates a braid (or braids) woven across the crown or around the head, adding texture and visual interest at the top. The braid creates height and width at your crown, which instantly makes your face appear less long. This style works beautifully as a special occasion look but can also become a casual, everyday favorite if you practice the technique.
Why This Works for Oval Faces
A crown braid or any braid positioned at the top of your head adds height and visual width at your crown. This creates a visual balance point above your face, which prevents your face from appearing as elongated as it might with completely down hair. The detail and texture of the braid also creates visual interest separate from your facial features.
How to Create a Crown Braid
- Start the braid above one ear, taking a section of hair and beginning a three-strand braid
- Add hair from the opposite side of your head as you braid, traveling across your crown
- End the braid on the opposite side of your head, securing it with a small elastic or bobby pins
- Pull the braid slightly to loosen it and create texture, making it feel romantic and intentional
- This style works beautifully with waves in the remaining down hair
- The style holds better if you start with second-day hair or texture spray
Worth knowing: You don’t need to be a braiding expert to pull off this look. Even a slightly imperfect braid looks intentional and romantic—precision isn’t the goal.
14. Textured Beach Waves
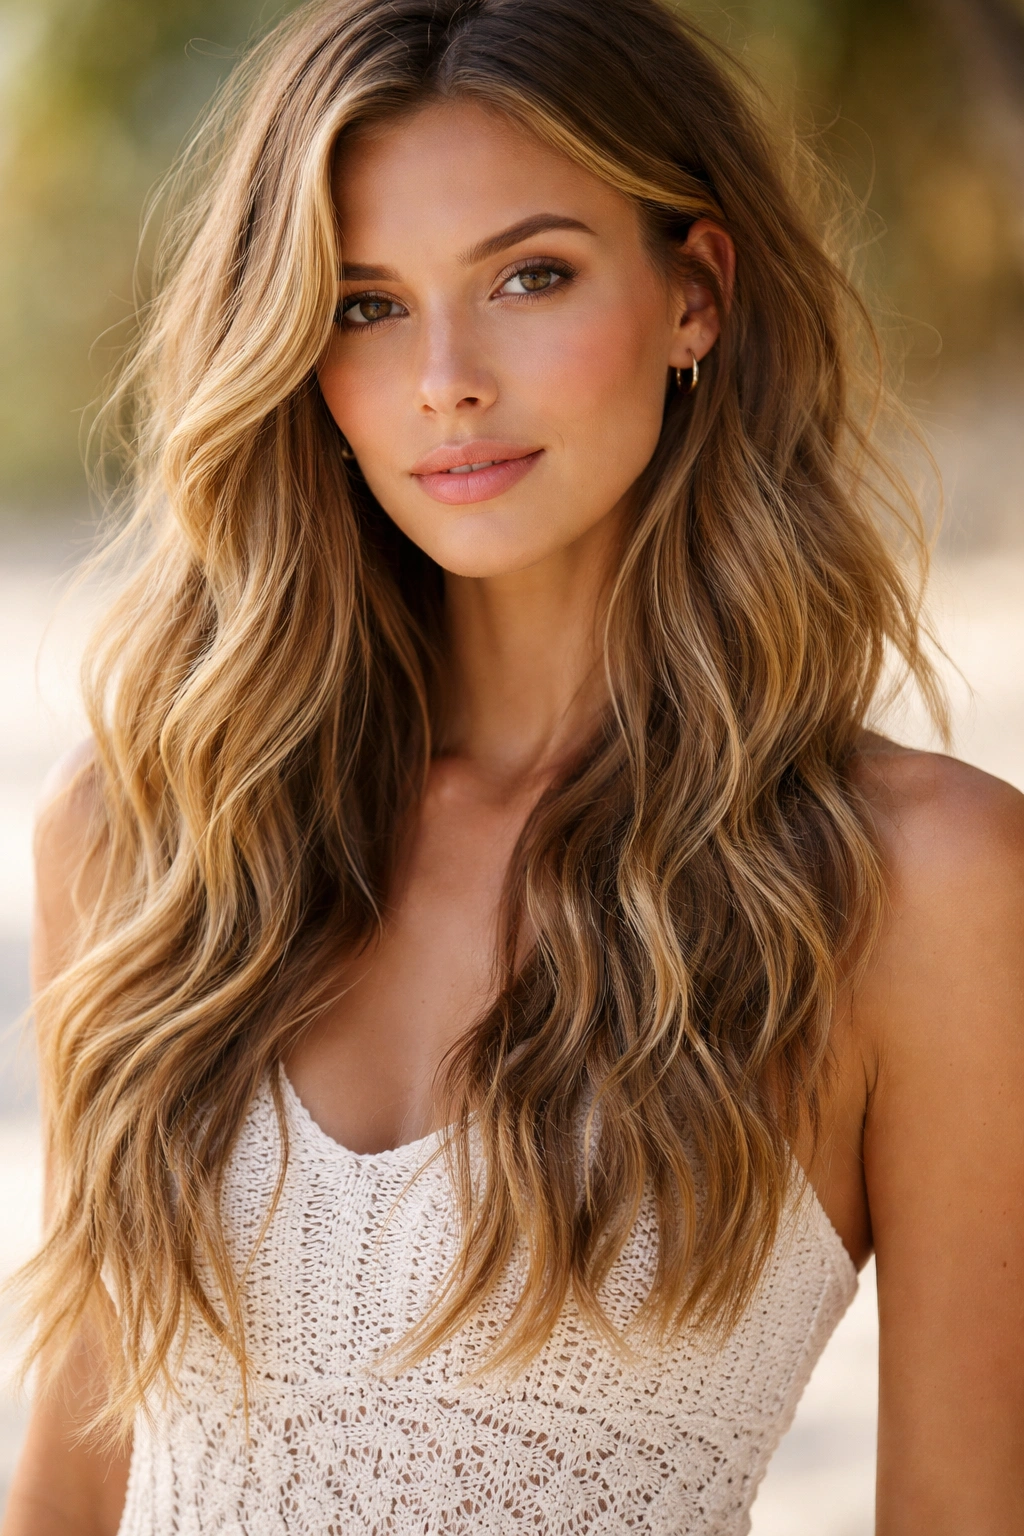
Effortless, lived-in beach waves create movement and texture throughout your hair without requiring precision styling. This style celebrates natural texture and embraces a relaxed aesthetic that feels modern and approachable. Beach waves work beautifully with layers and create dimension that’s particularly flattering for longer faces.
Why This Works for Oval Faces
Beach waves create texture throughout your hair, adding visual width at multiple points rather than emphasizing vertical length. The soft, undone nature of beach waves creates a flattering frame around your face without feeling severe or too styled. The movement prevents any single line from dominating, which is exactly what an oval face needs.
Creating Lasting Beach Waves
- Apply a texturizing or sea salt spray to damp hair before blow-drying
- Blow-dry with your head flipped upside down for root volume, then flip back and rough-dry the lengths
- Use a curling iron to create loose waves, wrapping sections around the barrel and leaving the ends out
- Let waves cool completely before running your fingers through them for a softer effect
- Sleep on braids or in a silk bonnet to preserve waves overnight
- Refresh waves with a curling iron or dry texturizing spray on day two and three
Pro tip: Beach waves look better slightly tousled and imperfect. Embrace the slightly undone aesthetic rather than trying to make them polished—that’s the whole point of the style.
15. Long Layers with Volume
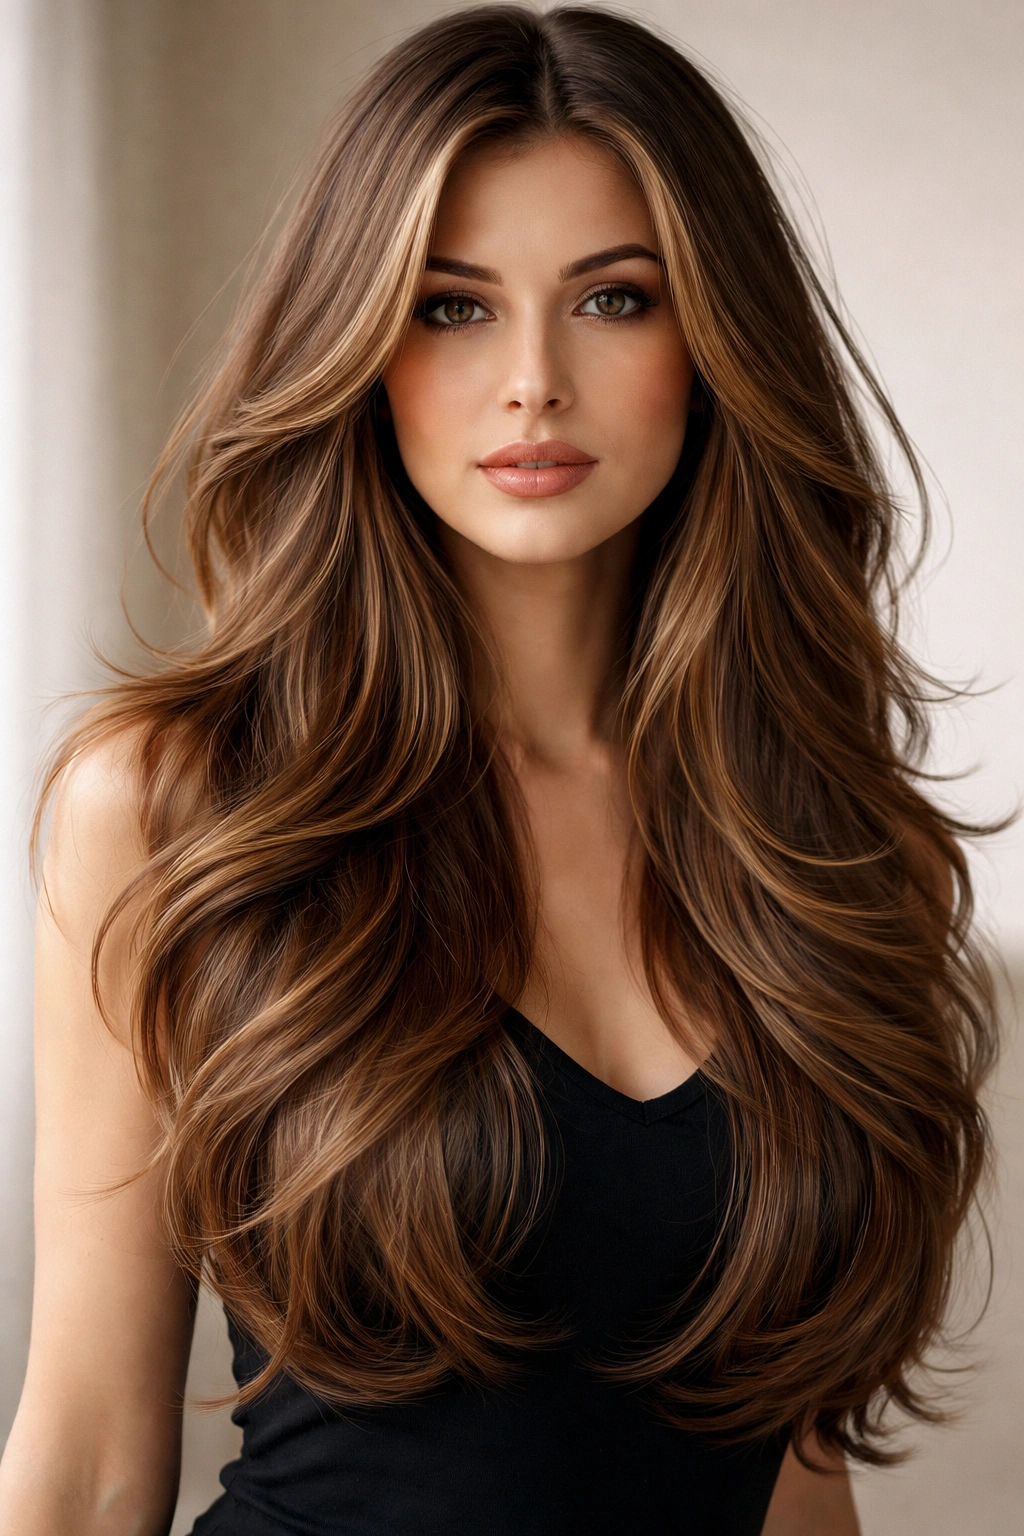
This foundational style features layers distributed throughout your entire length, creating movement and dimension while maintaining the length you want. Long layers are the most versatile style on this list because they work with virtually every hair texture and can be styled in countless ways depending on your preference. The volume created by layers is the secret ingredient that makes this style so flattering for longer faces.
Why This Works for Oval Faces
Long layers add texture and width throughout your hair in a way that prevents your face from appearing overly elongated. Each layer creates a point where light hits your hair and texture shows, preventing any single line from dominating. Layers also allow you to style your hair in multiple ways—straight, wavy, or curly—depending on your mood.
Maximizing Your Layers
- Ask your stylist to distribute layers throughout your entire length, starting around mid-length or higher
- The shortest layers (around your face) should be just long enough to frame your cheekbones and jawline
- Layers should graduate longer as they go down, creating a natural progression rather than choppy separation
- Blow-dry with a brush to create movement and direction in your layers
- Add waves or curls to emphasize the layers and maximize texture and volume
- Use a texturizing spray to enhance layer separation and add grip for styling
Worth knowing: Long layers are one of the most low-maintenance cuts if you’re willing to embrace your hair’s natural texture. You don’t have to style them—your natural waves or texture will do the work.
Final Thoughts
The right hairstyle for your long oval face isn’t about following rules—it’s about understanding how certain techniques create visual balance and choosing a style that makes you feel confident and beautiful. Whether you prefer the simplicity of a deep side part, the texture of choppy layers, the softness of curtain bangs, or the drama of voluminous curls, every style above works because it addresses the same fundamental goal: adding width and breaking up vertical length in ways that feel intentional and flattering.
The most important factor isn’t which specific style you choose, but rather finding a stylist who understands your face shape and can customize any cut to work with your unique hair texture, lifestyle, and personal style. Come to your appointment with photos of styles you love, be honest about how much styling you’re willing to do, and trust the process. Your face shape is an advantage, not a limitation—it simply means you have an almost endless array of beautiful options to choose from.