Choosing a formal hairstyle isn’t just about what looks beautiful — it’s about understanding what actually works with your hair texture, length, and the specific occasion you’re dressing for. The difference between a hairstyle that photographs beautifully and one that falls flat in real life comes down to honest knowledge about length capabilities, styling techniques that hold throughout the night, and realistic expectations about maintenance. Whether you’re working with a short cropped cut or waist-length waves, there’s a formal option that’ll make you feel genuinely confident rather than constantly worried about your hair.
The following ideas are organized by hair length because that’s actually how you should approach formal styling — not by what’s trendy or what looks good on Instagram, but by what your actual hair length can support without looking strained, overly processed, or like you’re fighting against your natural texture. Each style includes the specific techniques, products, and preparations that determine whether it holds for eight hours or falls flat after two. Let’s walk through exactly what works at every length.
1. Sleek Short Bob with Geometric Precision

A perfectly executed short bob reads as intentional sophistication at formal events. This isn’t the tousled, casual bob you might wear to brunch — it’s a precision-cut style that sits right at or just below the chin with clean lines and a slight inward curve that frames the face beautifully. The geometric sharpness of a formal bob makes it feel polished without requiring elaborate styling techniques.
Why This Works for Formal Events
The short bob’s primary advantage is that it looks controlled and intentional rather than casual. It photographs exceptionally well from multiple angles, doesn’t require an updo (which can be limiting for certain necklines), and keeps the focus on your face, makeup, and the details of your outfit.
How to Style It Perfectly
- The cut matters most: A formal bob needs a blunt or slightly curved edge, not wispy layers. Ask your stylist for a sharp perimeter line that you can maintain between appointments.
- Blow-dry with direction: Always blow-dry against your natural wave pattern with a round brush to create a subtle inward turn at the ends. This takes about five minutes but makes the whole style look deliberate.
- Use a smoothing serum before styling: Apply a lightweight smoothing serum to damp hair before blow-drying to eliminate frizz and create a polished finish that lasts all night.
- A light hairspray lock: Once your blow-out is complete, use a flexible-hold hairspray (not heavy-duty, which looks stiff) to keep everything in place without visible product buildup.
- Consider a strategic part: A deep side part often feels more formal than a center part and can add dimension to a square face shape.
2. Textured Pixie Cut with Swept Elegance
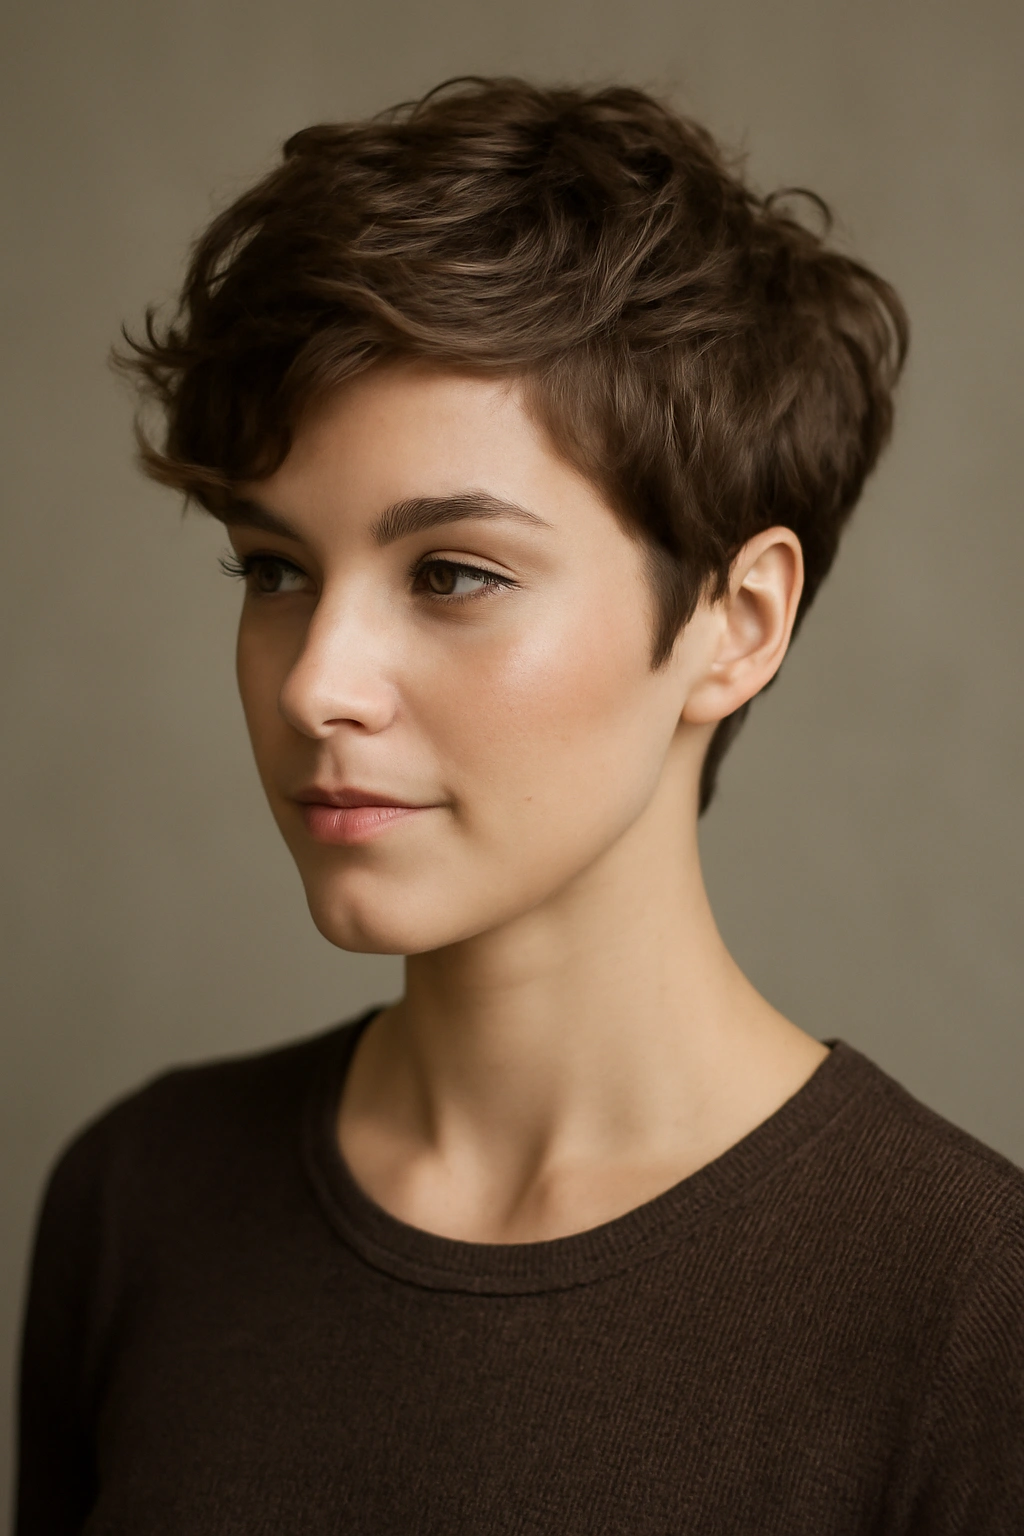
Short doesn’t have to mean blunt and minimalist — a textured pixie with intentional styling can absolutely work for black-tie events, especially if you have naturally wavy or curly hair. This style embraces texture rather than fighting it, with longer layers on top that you can sweep and sculpt into something that feels intentional and fashion-forward.
Why This Works for Formal Events
A textured pixie lets you show personality while still looking polished. It works beautifully with statement earrings, bold makeup, and sleek formal wear because nothing distracts from your face and accessories. Plus, if your hair naturally has wave or curl, you’re working with your texture rather than against it.
How to Style It Perfectly
- Keep the top longer: Longer layers on top (about two inches) give you something to work with, while the sides and back stay close and clean.
- Use a texturizing mousse while hair is damp: Apply mousse to damp roots and work it through, scrunching gently to encourage your natural texture and add volume at the crown.
- Blow-dry with fingers, not a brush: Use a diffuser attachment or just your fingers to enhance your natural wave pattern without disrupting the texture you’re building.
- Sweep one side back gently: Use a small amount of texture spray or dry-texture product to sweep longer pieces back and secure them with a tiny bobby pin hidden underneath.
- Finish with matte product, not shiny: A matte texturizing spray or dry shampoo adds grip and prevents the slicked look that doesn’t complement this cut.
3. Undercut Formal Style with Hidden Architecture
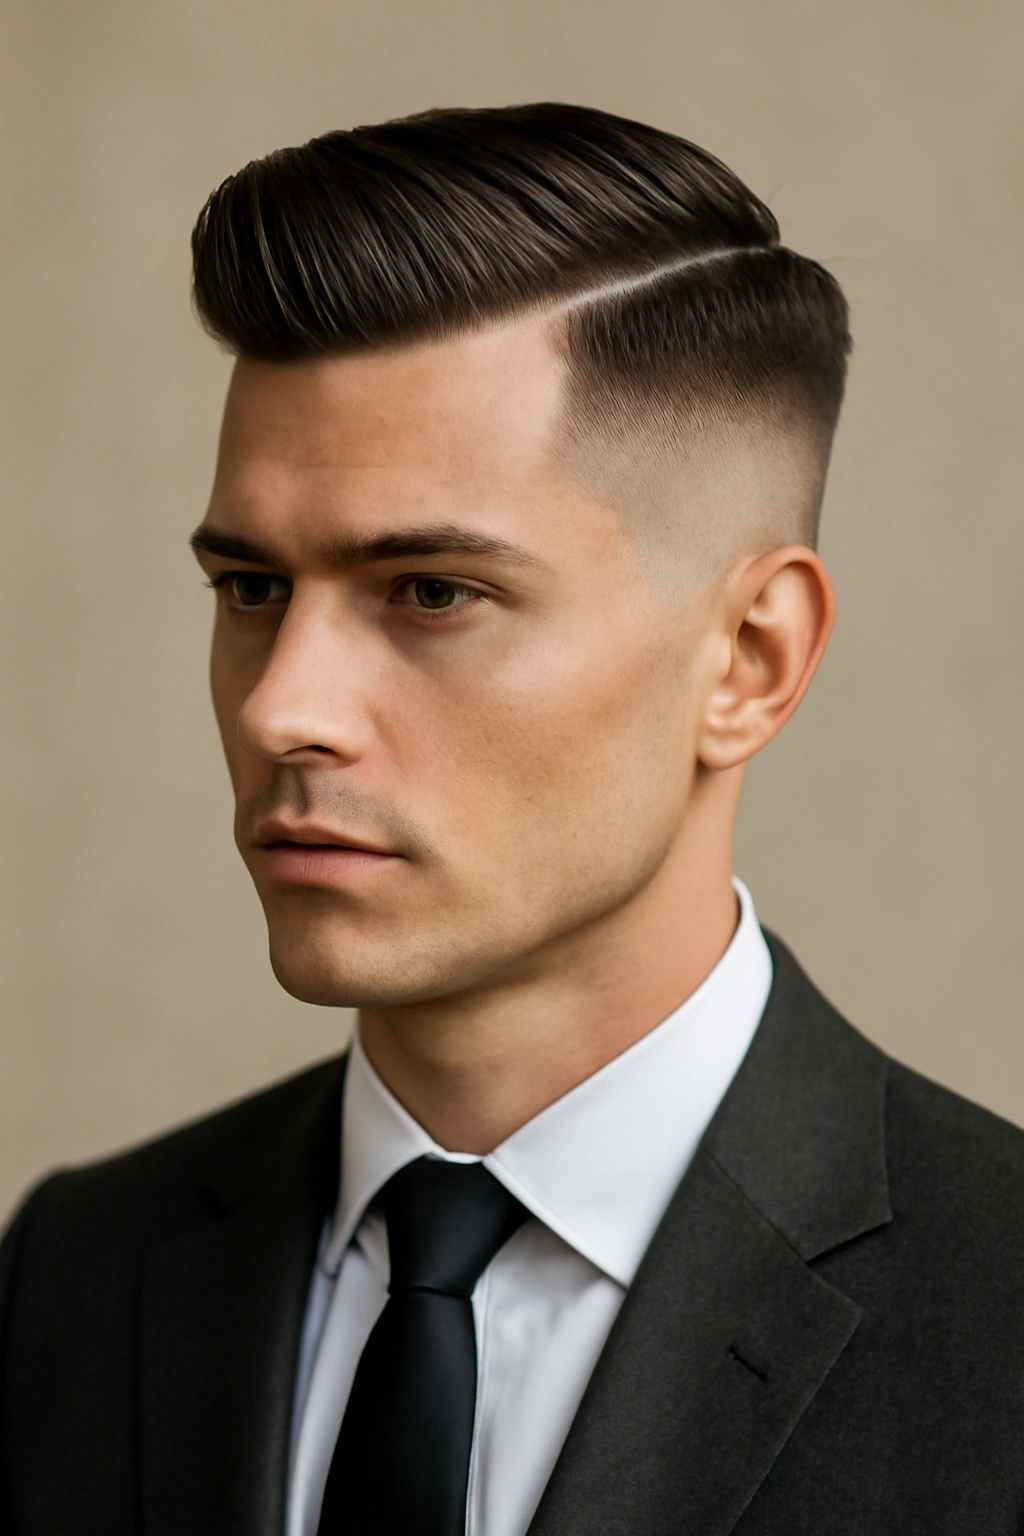
If you have an undercut or very short fade on the sides, you can absolutely style this for formal occasions — the key is understanding that the contrast between short sides and longer top becomes your design element. This works particularly well for those who like modern, architectural styling but still want to feel formal and polished.
Why This Works for Formal Events
An undercut provides clean lines and unexpected sophistication. Because the sides are sculpted, you can keep the top slightly longer and styled in a way that feels intentional rather than casual. It reads as confident and fashion-conscious without looking like you’re not taking the occasion seriously.
How to Style It Perfectly
- Keep the top sleek or subtly textured: Don’t go full mohawk — aim for a smooth, slightly sculpted top that curves gently back from the face.
- Use a strong-hold pomade or clay: Apply product to damp hair and blow-dry in the direction you want it to sit, then shape it with your fingers for a natural-looking finish.
- Make sure the fade is freshly trimmed: An undercut only reads as intentional if it’s clean and sharp. Schedule a fresh trim 3-5 days before the event so it looks sculpted, not grown-out.
- The sides must be absolutely smooth: No stray hairs breaking the line. Use a detail razor or trimmer, and you can even apply a tiny amount of edge control serum to keep the sides looking polished.
- Consider your neckline carefully: This works best with formal wear that doesn’t cover your neck, since the exposed undercut is part of the styling statement.
4. Cropped Layers with Volume at the Crown

Layered cropped cuts give you movement and texture that keep short hair from looking severe. This style works beautifully if you have naturally wavy hair or if you’re willing to use a curling iron for thirty seconds to create soft texture throughout.
Why This Works for Formal Events
Cropped layers provide visual interest and movement without length. Unlike a blunt bob, layered cropped cuts feel modern and dimensional, and they offer styling flexibility — you can make them look sleek and controlled or slightly tousled depending on the formality level of your event.
How to Style It Perfectly
- Blow-dry with layers in mind: Use a round brush and lift each layer section away from the head as you dry, creating dimension and volume that makes the style feel intentional.
- Add subtle waves if you have straight hair: Using a curling iron or wave iron on the top layers (just for thirty seconds per section) creates texture that reads as stylish rather than casual.
- Use a texturizing product for grip: A texture spray or light mousse applied to dry hair helps you shape and sculpt individual layers without looking wet or slicked.
- Keep the sides smooth: While the top has texture and movement, the sides should be smooth and close to the head to maintain the formal silhouette.
- Tuck one side gently behind your ear: A simple ear tuck on one side adds a touch of formal styling without requiring clips or visible bobby pins.
5. Blunt Bangs with Sleek Back
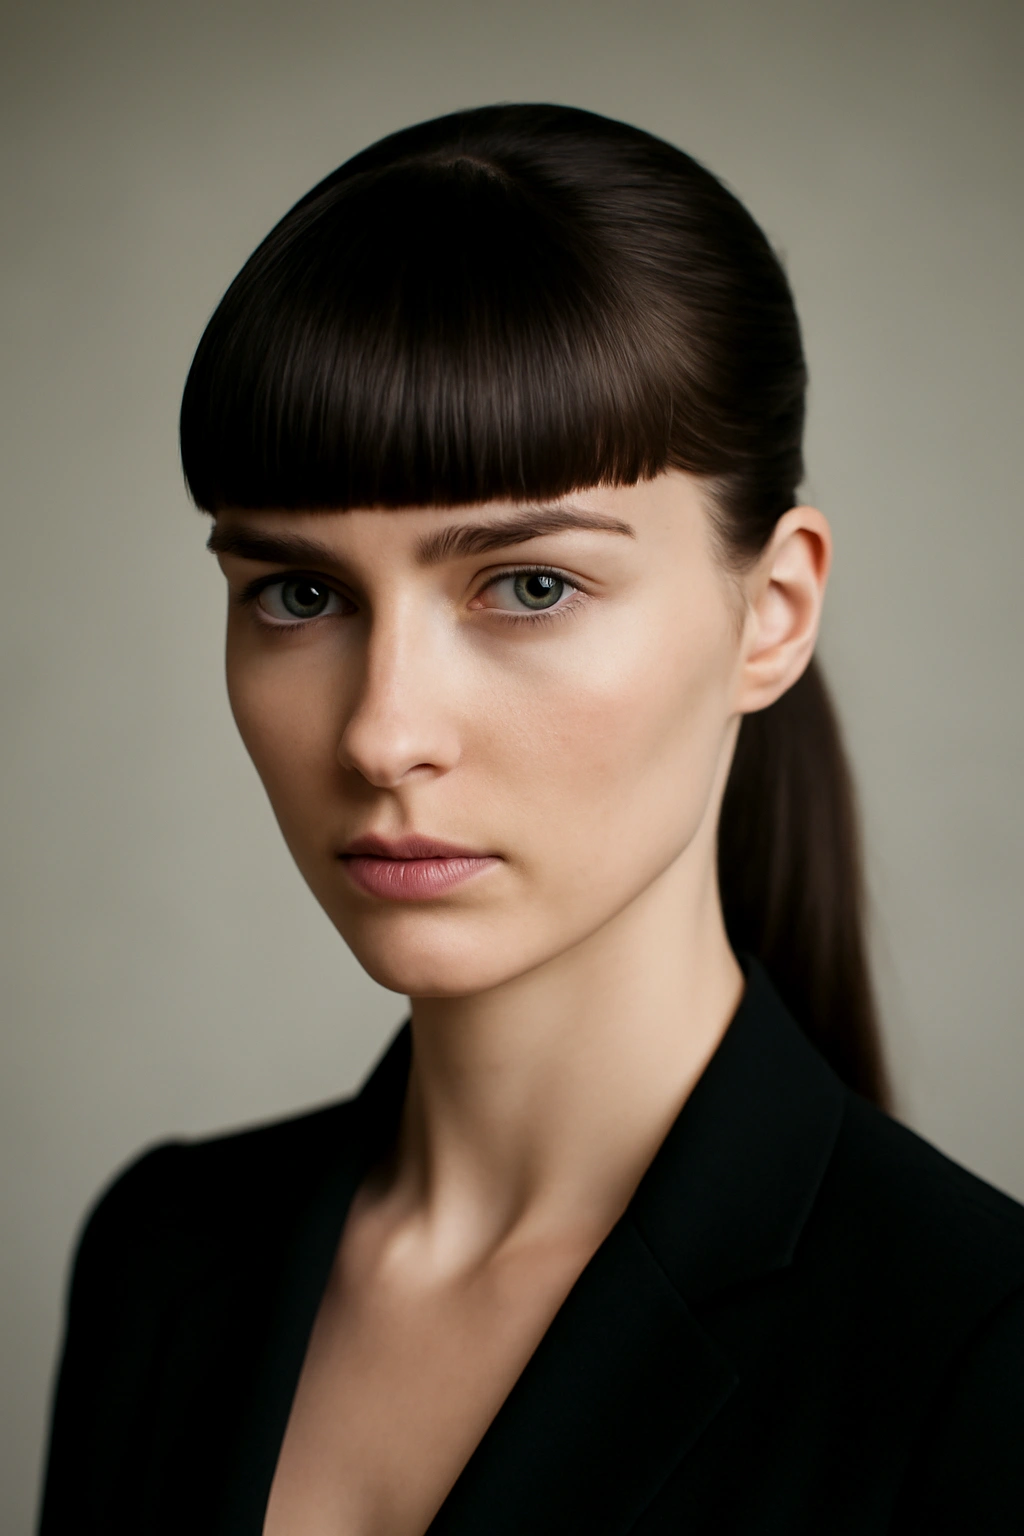
A full, blunt bang paired with hair pulled smoothly back creates a bold, high-fashion formal look. This is genuinely striking if you commit to the styling, though it requires precise blow-drying and a willingness to wear your hair off your face entirely.
Why This Works for Formal Events
Blunt bangs are a statement, and pairing them with a fully pulled-back style creates architectural interest. This works beautifully with structured formal wear, sharp makeup, and statement jewelry because your face becomes the focus.
How to Style It Perfectly
- Blow-dry the bang section separately: Dry your bangs with a round brush, directing them slightly forward and down so they fall in a perfectly straight line across your forehead.
- Use a fine-tooth comb to smooth the back: Wet your hair slightly if needed, then use a fine-tooth comb to smooth everything back into a clean ponytail or bun shape.
- Apply serum to eliminate any frizz: A smoothing serum on damp hair before blow-drying is essential for keeping everything sleek throughout the night.
- Secure everything with bobby pins that match your hair color: Even though everything will be pulled back, you’ll need invisible pins to keep the style set, so match them to your hair color.
- Use flexible-hold hairspray, not stiff: Heavy hairspray can look plastic, especially with the geometric line of blunt bangs. A light, flexible spray keeps everything in place without visible product.
6. Shoulder-Length Soft Waves with Side Sweep
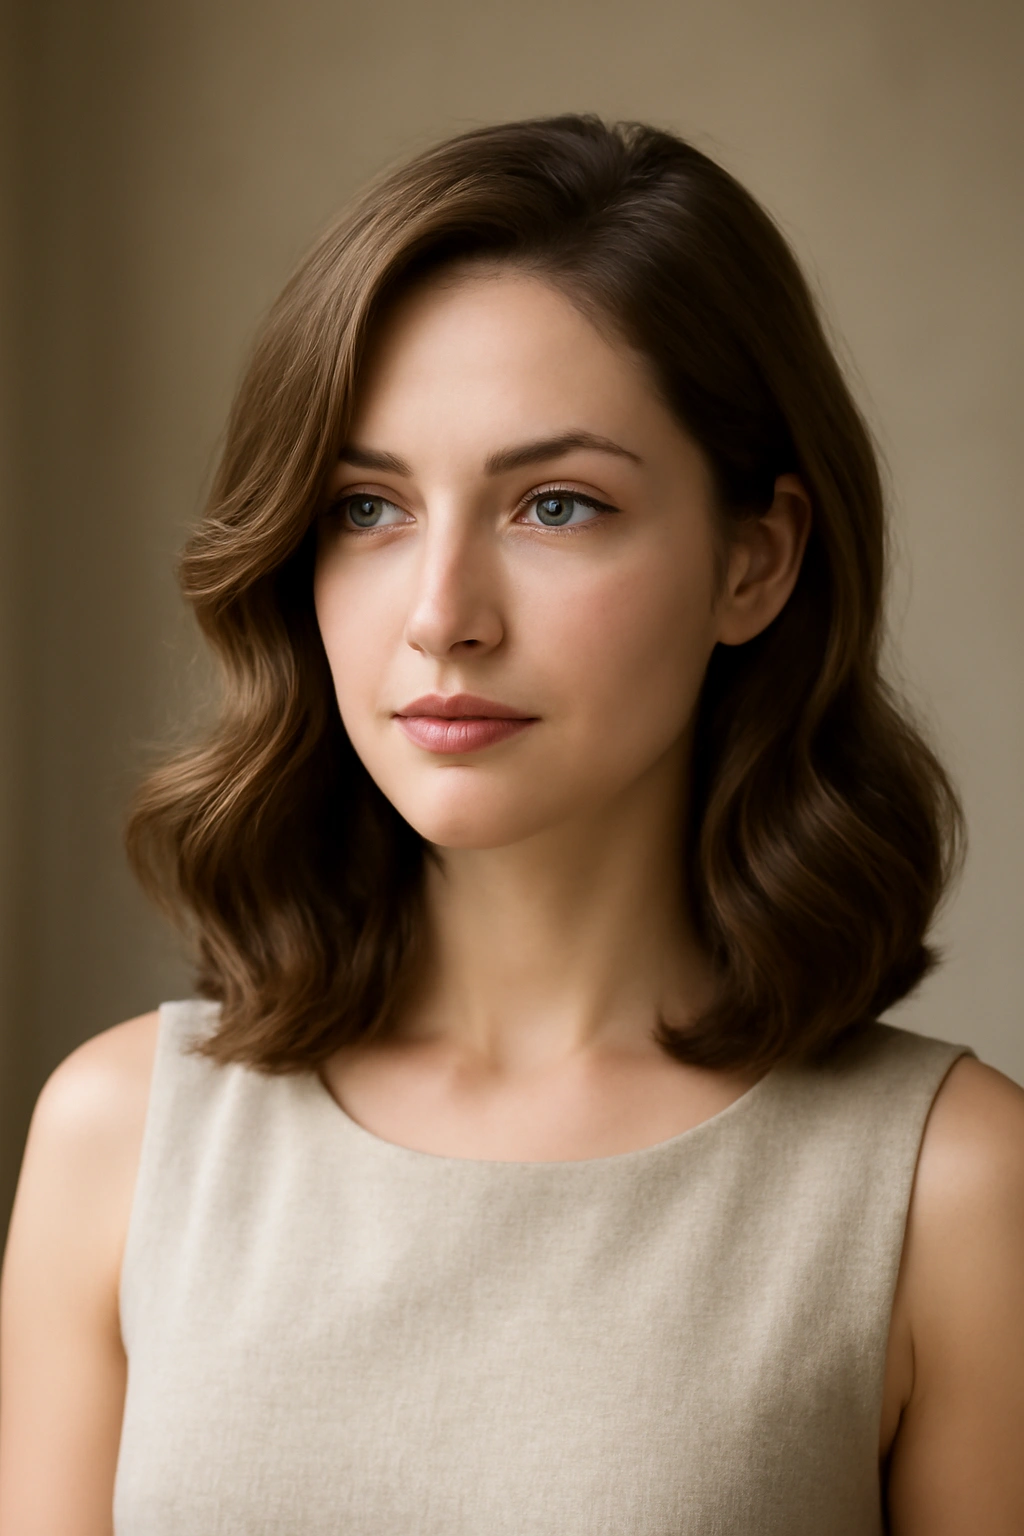
Medium-length hair is often the most versatile formal length because you have enough hair to create meaningful texture and movement, but not so much that styling becomes overwhelming. Soft waves paired with a gentle side sweep feels both romantic and controlled — perfect for most formal occasions.
Why This Works for Formal Events
Soft waves are forgiving because they accommodate various hair textures and still look intentional. A side sweep adds asymmetrical interest that keeps the style from feeling too expected or predictable. You get movement and dimension without the commitment of an updo.
How to Style It Perfectly
- Start with a side part: Place your part slightly off-center on one side. This anchors your styling direction and frames your face asymmetrically in a flattering way.
- Use a 1.5-inch curling iron on each section: Curl sections away from your face, holding each curl for about 8-10 seconds. The slower you curl, the longer your waves will last through the evening.
- Alternate curl direction for more natural waves: Curl the first section away from your face, the next toward your face, back to away — this creates a more organic wave pattern that doesn’t look uniformly crimped.
- Gently brush through your curls while they’re still warm: This breaks up the individual curls into soft waves rather than defined ringlets. Wait until curls cool completely, then brush through with a paddle brush.
- Pin one side back subtly: Take a small section from your swept side and secure it with a bobby pin behind your ear, leaving the rest loose. This prevents the style from feeling shapeless as the night goes on.
7. Twisted Crown with Center-Part Elegance

A twisted crown that moves around your head like a tiara is one of the most romantic and effortlessly elegant options for medium-length hair. Despite looking intricate, it’s actually quite straightforward to create and holds beautifully throughout a long evening.
Why This Works for Formal Events
A twisted crown reads as intentionally romantic and formal without looking like you spent two hours at a salon. It works with almost any neckline, photographs beautifully from behind and the side, and feels special without being over-the-top.
How to Style It Perfectly
- Start with a deep center part: A center part adds symmetry and makes the crown feel intentional rather than lopsided.
- Curl your hair lightly before starting: Use a 1.5-inch curling iron to create loose waves throughout, which gives you something textured to work with and makes the twist easier to control.
- Take a section from one side at the temple: Twist this section loosely (not tightly) and move it toward the back of your head, pinning as you go with bobby pins that match your hair color.
- Continue the twist from the other side: Mirror the first twist, bringing it around to meet the first one at the back center of your head. Both twists should end at approximately the crown.
- Secure with bobby pins and finish with flexible hairspray: Use at least three bobby pins to anchor both twists where they meet, then apply a light hairspray. The texture from your initial curls prevents the twists from looking slippery.
8. Half-Up, Half-Down with Subtle Braiding
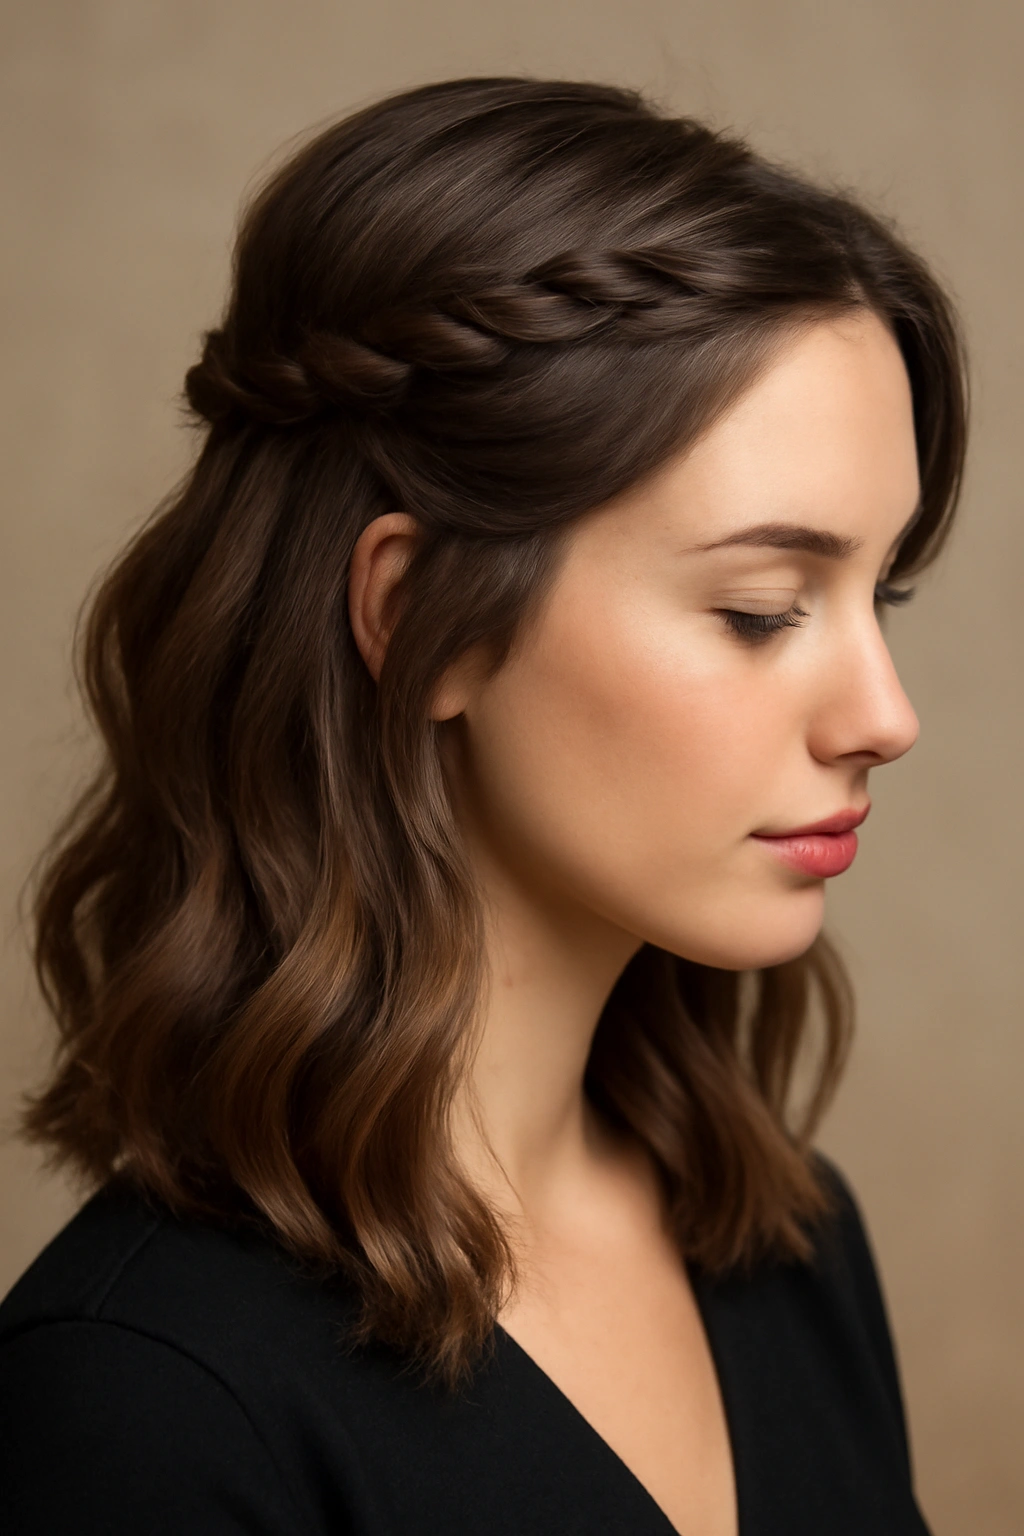
A half-up style splits the difference between an updo and wearing your hair fully down — it’s particularly flattering for medium-length hair because you get the elegance of lifted hair off your face while maintaining the softness of hair around your shoulders.
Why This Works for Formal Events
Half-up styles feel formal without being restrictive or overly complicated. They work beautifully with various necklines, photographs well from all angles, and offer the practical benefit of keeping hair off your face without committing to a full updo.
How to Style It Perfectly
- Create soft waves throughout your entire length: Use a curling iron on 1.5-inch sections, working through all your hair before you start any assembly. Waves give you texture to work with and prevent the style from looking thin or sparse.
- Take a section from each temple: Using fingers or a fine-tooth comb, gather a section from each temple that’s about 1-2 inches thick.
- Twist (don’t braid) these sections toward the back: Twisted sections feel more formal and romantic than braids, and they’re faster to create. Twist each section loosely and bring it back to meet in the center.
- Secure with bobby pins at the crown center: Cross the two twisted sections over each other and secure with 2-3 bobby pins. The crossover adds visual interest.
- Pull out a few face-framing pieces gently: Loosen a few small pieces around your face and temples by gently pulling and curling them around your finger. This prevents the style from looking too severe.
9. Textured Lob with Strategic Tucking
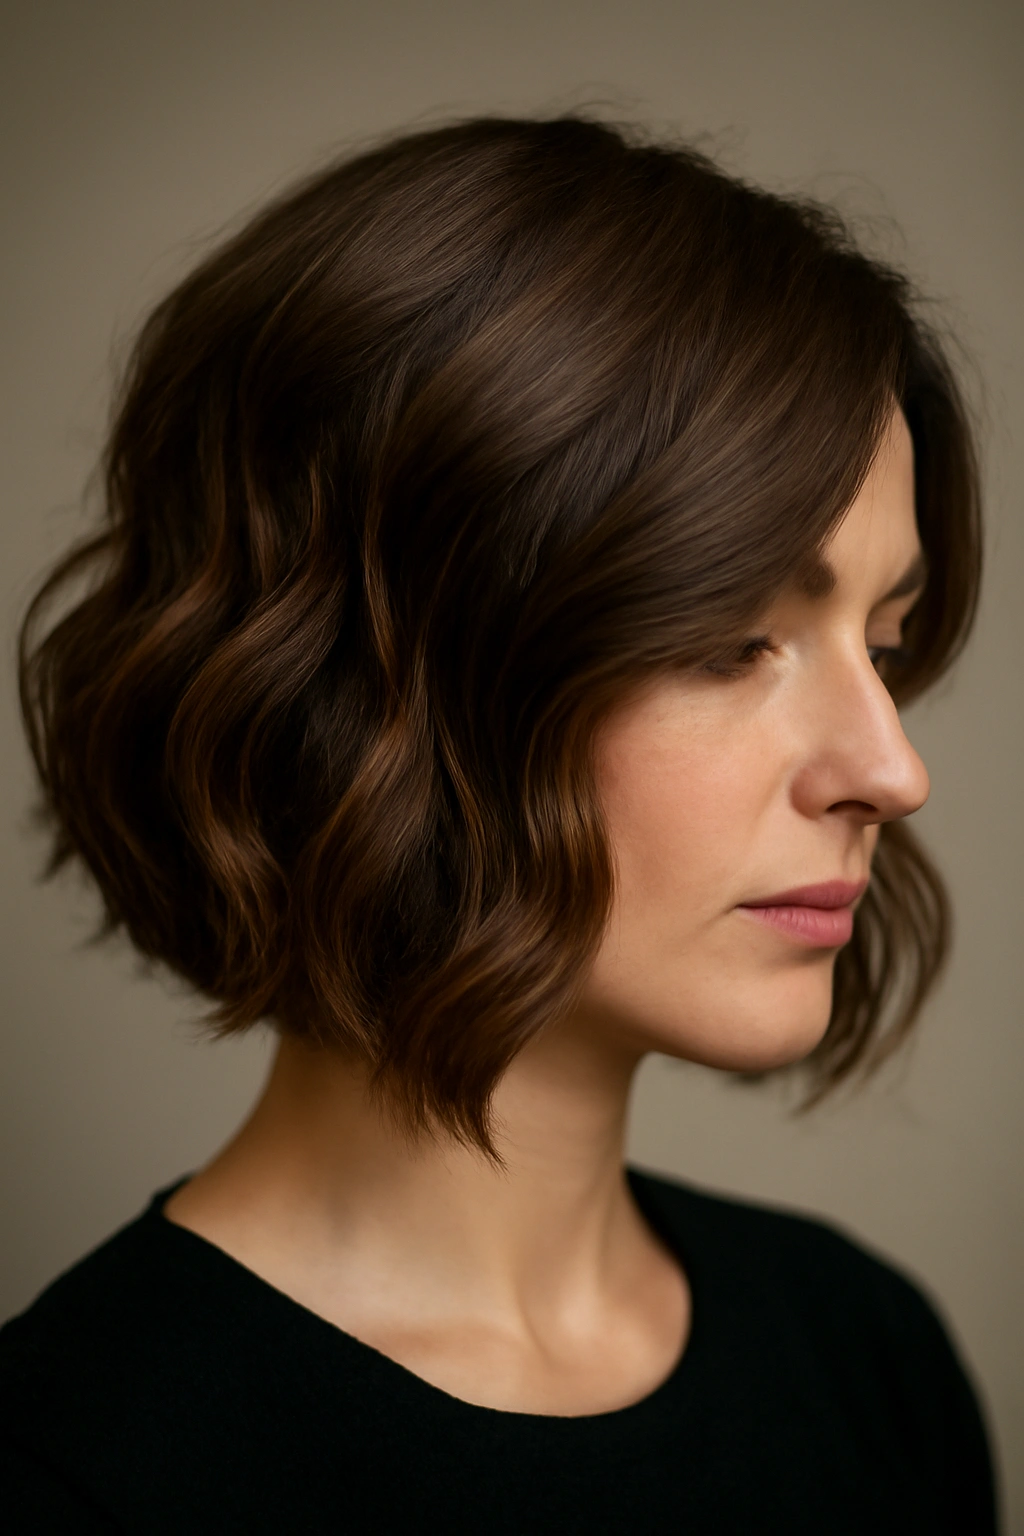
A lob (long bob) at shoulder length is having a moment because it’s flattering to almost everyone and provides endless styling options. For formal events, the key is creating intentional texture and then strategically securing pieces to show that you’ve styled it deliberately rather than just left it down.
Why This Works for Formal Events
A lob feels modern and flattering while providing enough length to create movement and texture. It’s casual enough to feel wearable but can absolutely be styled formally with the right texture and strategic pinning.
How to Style It Perfectly
- Create larger waves using a 1.75-inch barrel: Bigger barrel sizes create softer, more romantic waves that look formal rather than party-like.
- Blow-dry with volume at the crown first: Before you curl, blow-dry your roots with a round brush to create foundational volume. This prevents your waves from falling flat by midway through the evening.
- Curl each section away from your face consistently: Direct every curl away from your face as you work, which creates a flattering frame.
- Use a boar bristle brush to soften your waves: Once curls cool, brush through gently with a boar bristle brush (which creates less frizz than synthetic bristles) to convert curls into softer waves.
- Take one side and tuck it behind your ear with a pin: Secure a small section behind your ear with a bobby pin, which adds a touch of intentional styling and prevents the style from shifting as the night goes on.
10. Side-Swept Waves with Hidden Volume
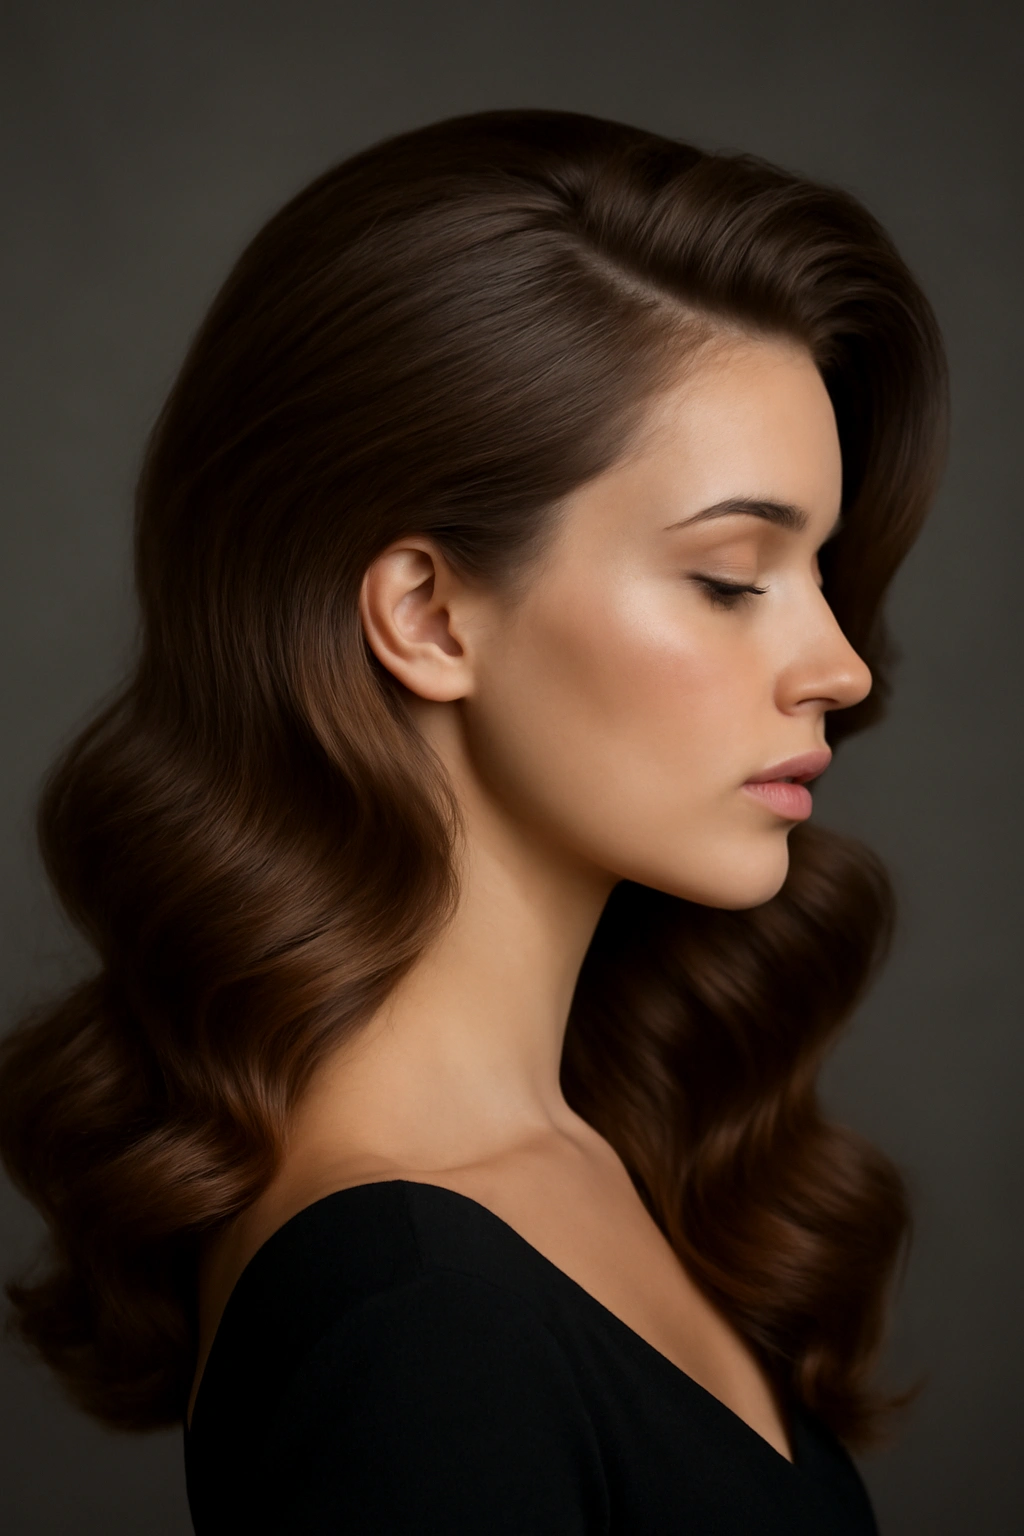
A dramatic side sweep with voluminous waves is timelessly formal and works particularly well if you have medium-length hair with some natural thickness. The key is creating actual volume at the crown (not just curls) so the style reads as intentional rather than lopsided.
Why This Works for Formal Events
A dramatic side sweep feels glamorous and old-fashioned in the best way — it’s formal without looking costume-like, and it photographs beautifully from the side. The asymmetry keeps it modern while the waves maintain an elegant, controlled feel.
How to Style It Perfectly
- Create a deep side part: Place your part dramatically to one side (much further over than a typical side part). This is the foundation of the entire look.
- Blow-dry the side with the most volume: Use a round brush and blow-dry the smaller section (the side with less hair due to the deep part) with the brush lifted at the roots to create maximum volume.
- Curl all your hair away from your face: Use a 1.5-inch curling iron on medium heat, curling each section away from your face and holding for 8-10 seconds.
- Let curls cool completely before touching: Patience here pays off — cooled curls hold longer. While they cool, take a quick drink of water or adjust your makeup.
- Gently brush curls into waves on the full side: On the side with more hair, gently brush your curls into soft waves. Keep the smaller side (the side you parted away) smoother and more controlled.
11. Romantic Braided Updo for Shoulder-Length Hair
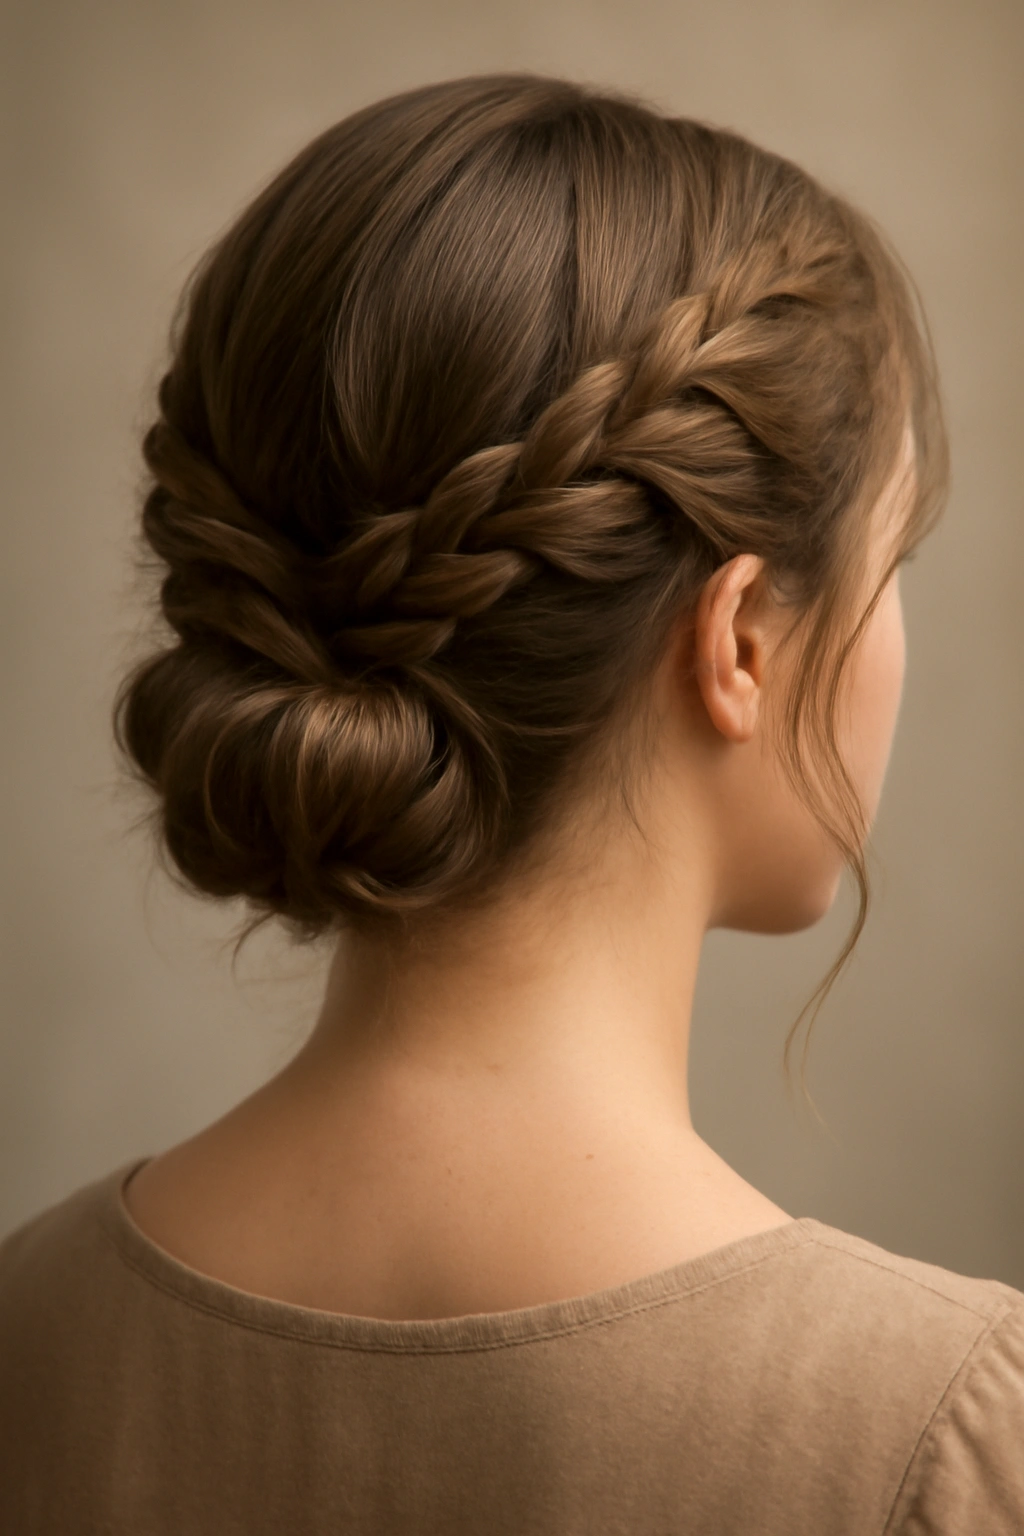
You don’t need waist-length hair to create a beautiful braided updo — with shoulder-length hair and some strategic technique, you can create a braided style that feels intricate and intentional. The key is using your entire length rather than trying to create an updo that just sits at the crown.
Why This Works for Formal Events
Braided updos are inherently formal and romantic without feeling overdone. They work beautifully with strapless or off-shoulder gowns, and they photograph exceptionally well from behind — perfect if you’re choosing a gown with an interesting back design.
How to Style It Perfectly
- Curl your hair lightly before starting: Use a 1.5-inch curling iron to add texture, which gives you grip for braiding and makes the finished style feel softer and more romantic.
- Create two French braids starting from your temples: Begin each French braid at the temple on each side and work them back toward the crown, adding hair as you go along the sides of your head.
- Meet both braids at the back center: Bring both braids to meet at the crown back and secure with bobby pins.
- Twist the remaining ponytail section loosely: The ends of your French braids will leave you with a small ponytail. Twist this loosely and wrap it around the base of your braids, securing with pins.
- Loosen your braids gently by pulling the edges outward: This makes the braids look fuller and softer, a technique called “pancaking.” Pull gently but deliberately on each edge of both braids.
12. Low, Sleek Ponytail with Twisted Detail
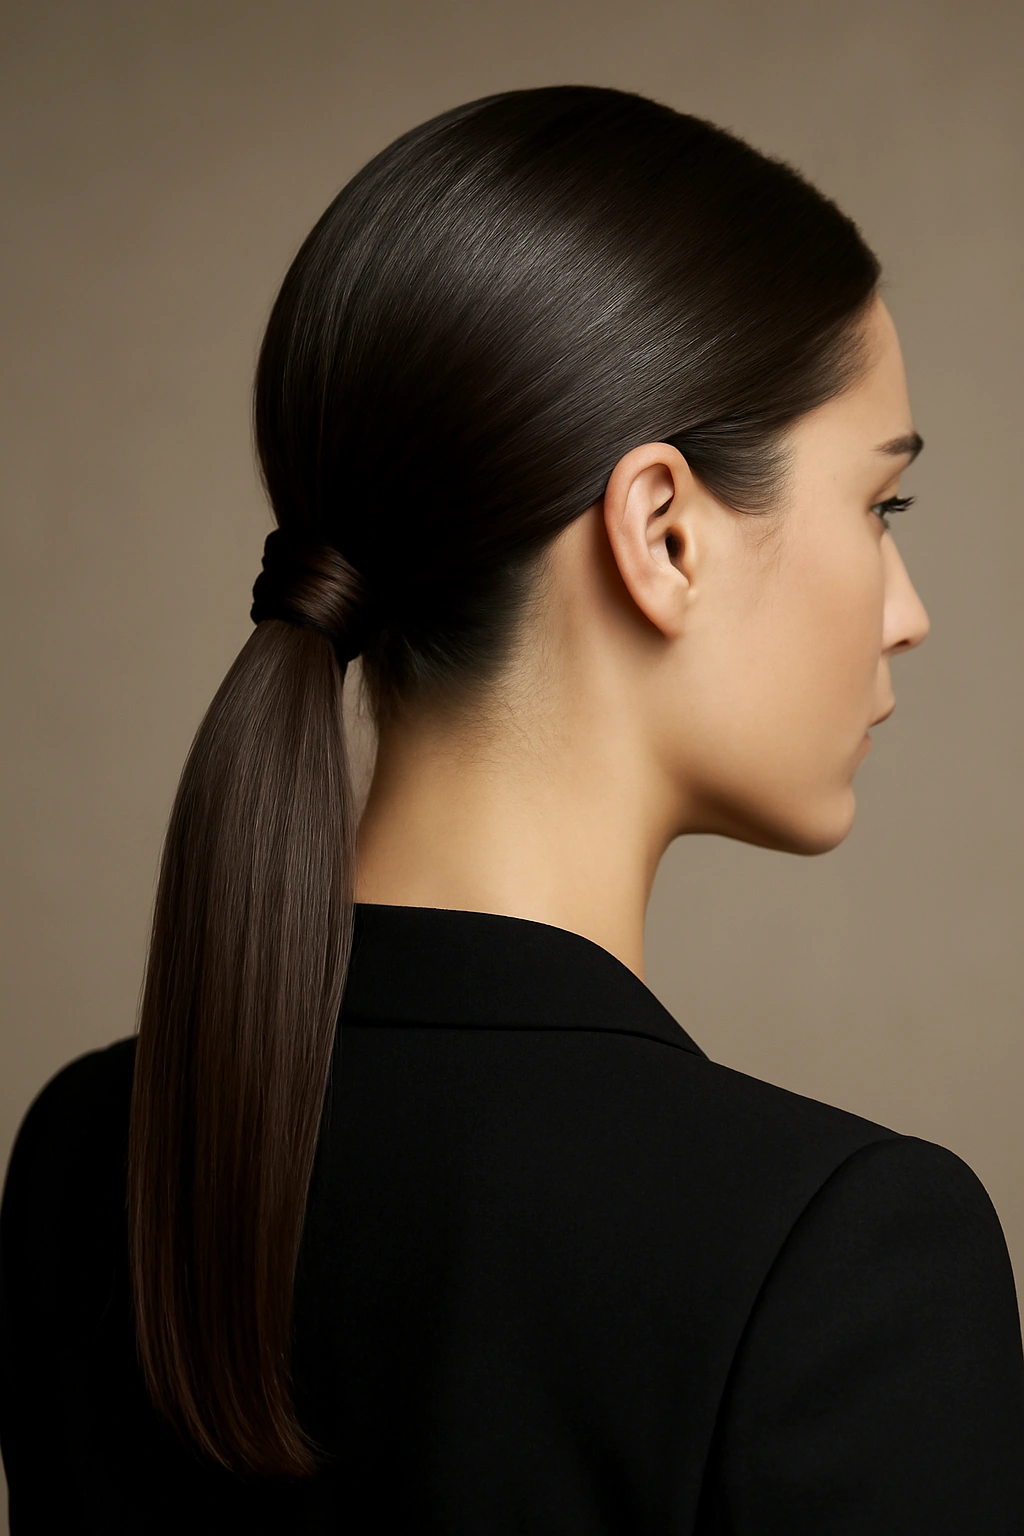
A low ponytail represents understated elegance — it’s minimal in concept but reads as intentionally formal if you execute it with sleekness and attention to detail. This works beautifully if you have naturally straight or wave-prone hair that cooperates with smoothing products.
Why This Works for Formal Events
A low, sleek ponytail is the definition of timeless formal styling. It works with virtually any neckline, doesn’t require elaborate technique, and keeps focus on your face, jewelry, and gown. It photographs beautifully and feels effortless once it’s done.
How to Style It Perfectly
- Apply a smoothing serum to damp hair: This is non-negotiable for a sleek ponytail. Work the serum through your entire length before blow-drying.
- Blow-dry your hair completely straight: Use a paddle brush to smooth your hair straight as you dry. Go section by section, and don’t skip this step.
- Gather hair into a low ponytail at the nape of your neck: The exact placement should be where your neck meets the base of your skull — not lower, which looks sloppy, and not higher, which feels less formal.
- Use a tight hair elastic (not a loose one): A snug elastic holds longer without sliding down. Use one that matches your hair color for invisibility.
- Take a small section from the ponytail and wrap it around the elastic: This hides the elastic entirely and creates a polished, intentional finish. Secure the wrapping section with a bobby pin underneath.
- Use a smoothing serum or gel on any flyaways: A tiny bit of edge control gel smooths any texture away from your face and keeps the style looking pristine.
13. Loose, Romantic Waves Throughout
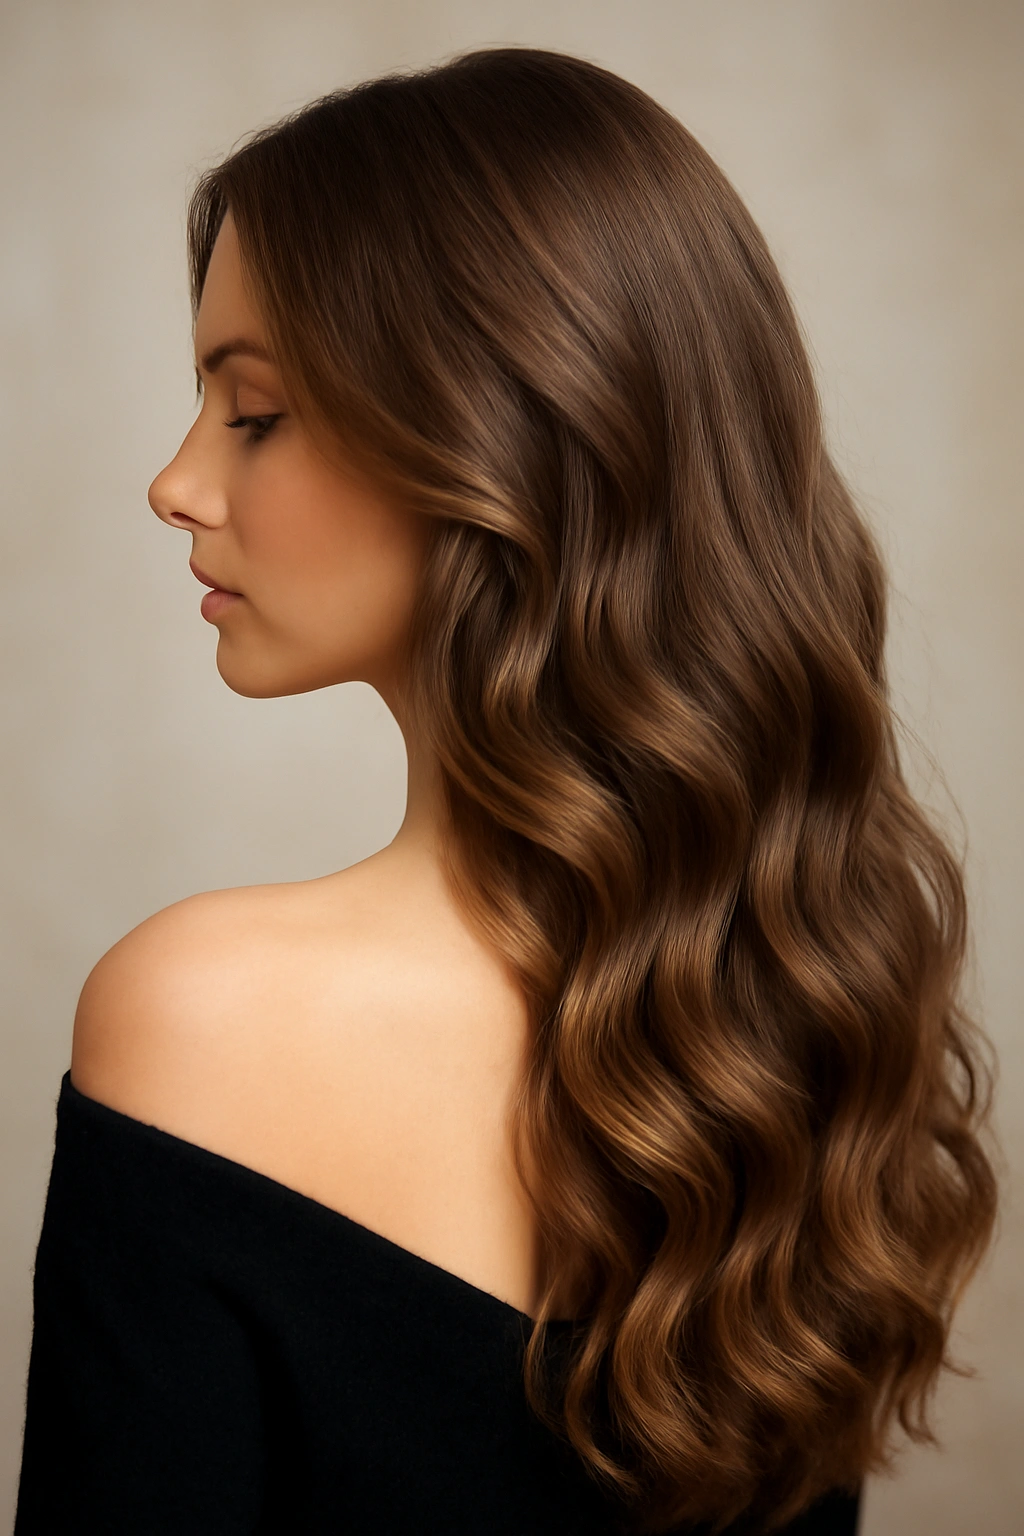
Long hair gives you the luxury of creating loose, romantic waves that flow beautifully without requiring an updo. This style reads as effortlessly elegant and works beautifully with flowing gowns, delicate jewelry, and romantic makeup.
Why This Works for Formal Events
Loose waves in long hair feel inherently romantic and formal without being complicated. This style works with any neckline, photographs beautifully from all angles, and maintains its elegance throughout the night because the weight of longer hair actually helps waves hold better.
How to Style It Perfectly
- Start with a texturizing spray on damp roots: This creates grip and prevents waves from sliding down as gravity works on longer hair.
- Use a 1.75-inch curling iron for soft waves: Bigger barrel sizes create softer, more romantic waves. A 1.5-inch barrel would create tighter curls that look less formal in longer hair.
- Curl large sections, working through your entire length: Divide your hair into 4-6 large sections and curl each one slowly, directing curls away from your face.
- Wait for curls to cool completely: Long hair takes longer to cool, but this is crucial. While you wait, do your makeup or have a sip of water.
- Brush through gently with a boar bristle brush: Once completely cool, brush through with a boar bristle brush to convert curls into soft waves. This prevents a tight, styled appearance.
- Use a flexible-hold hairspray, not heavy-duty: Light hairspray keeps waves set without the plastic feeling that heavy products create.
14. Sleek Low Bun with Strategically Placed Face-Framing Pieces
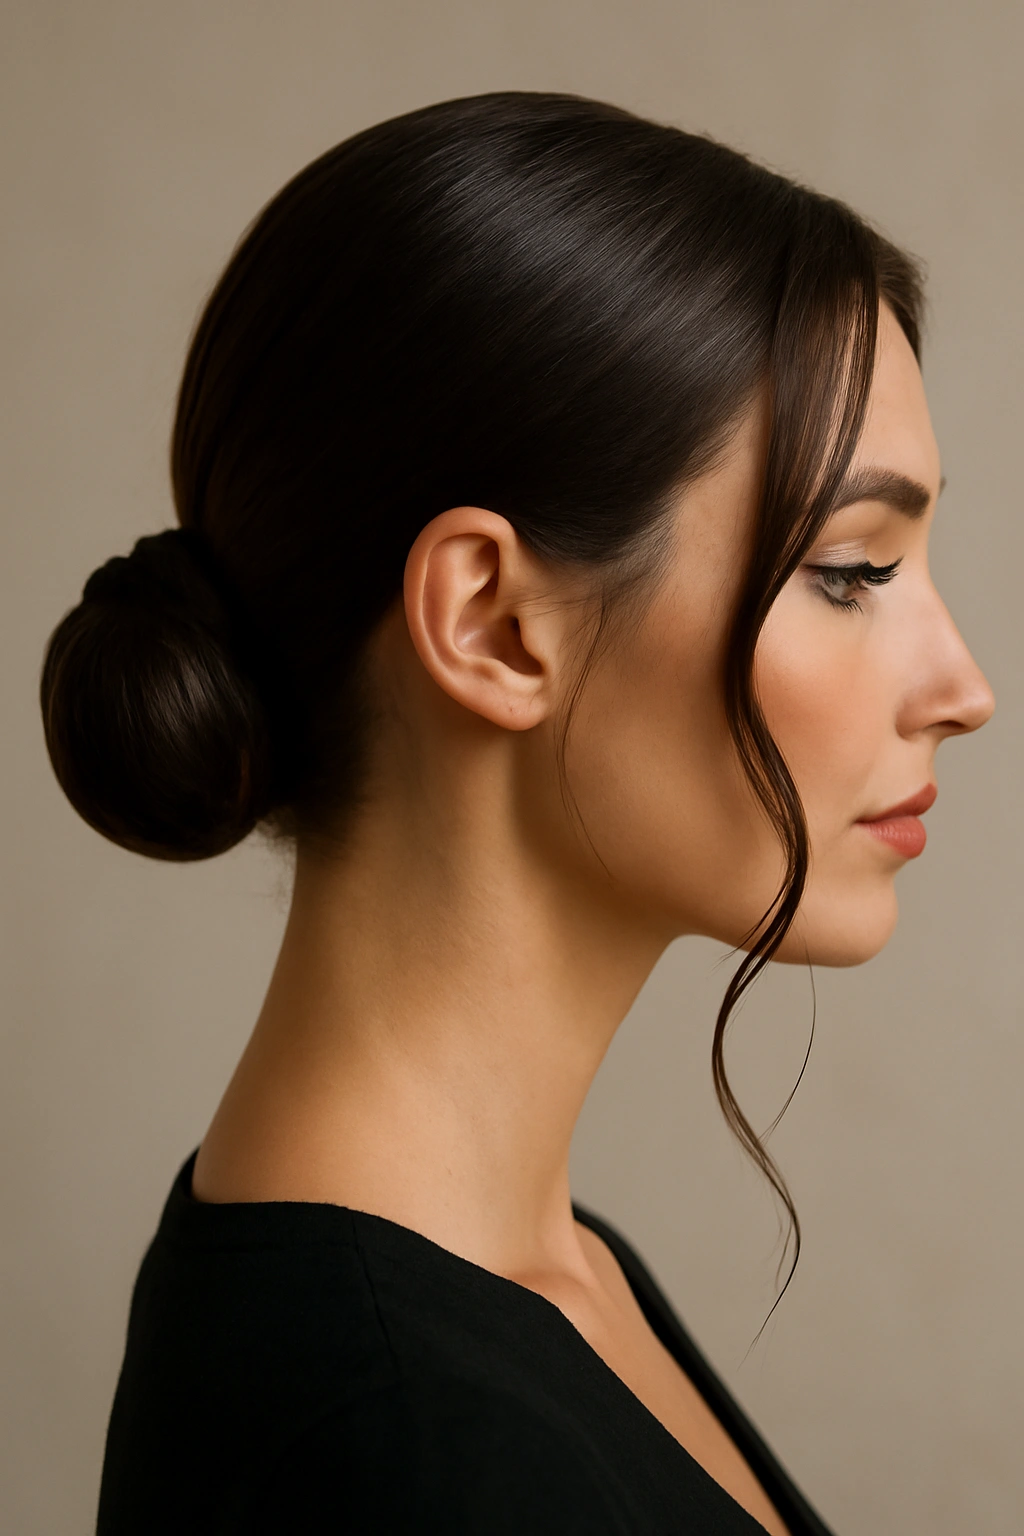
A low bun is the definition of formal elegance, particularly when paired with strategically placed face-framing pieces that soften the style. This works beautifully with long hair and is especially flattering if you have a longer face shape.
Why This Works for Formal Events
A low bun is universally formal and elegant. Face-framing pieces keep it from feeling severe, and the style works with any neckline. It’s particularly flattering with strapless gowns or open-back designs because your neck and shoulders become the focus.
How to Style It Perfectly
- Create a deep side part before you start: This adds asymmetry and prevents the style from looking too centered and severe.
- Take two small sections from your temples before creating the bun: Set these sections aside — you’ll use them to frame your face later.
- Gather the remaining hair into a low ponytail at the nape: Use smoothing serum to keep everything sleek and a tight elastic to secure.
- Twist your ponytail loosely and wrap it into a bun: Twist the ponytail, then coil it around the elastic base, securing with bobby pins as you go.
- Wrap your temple sections around your face loosely: Twist the sections you set aside earlier and wrap them around your face, securing with pins. These pieces should frame your cheekbones, not your forehead.
- Smooth any flyaways with edge control: Use just a tiny amount on a fine-tooth comb to smooth any stray hairs.
15. Crown Braid with Cascading Waves
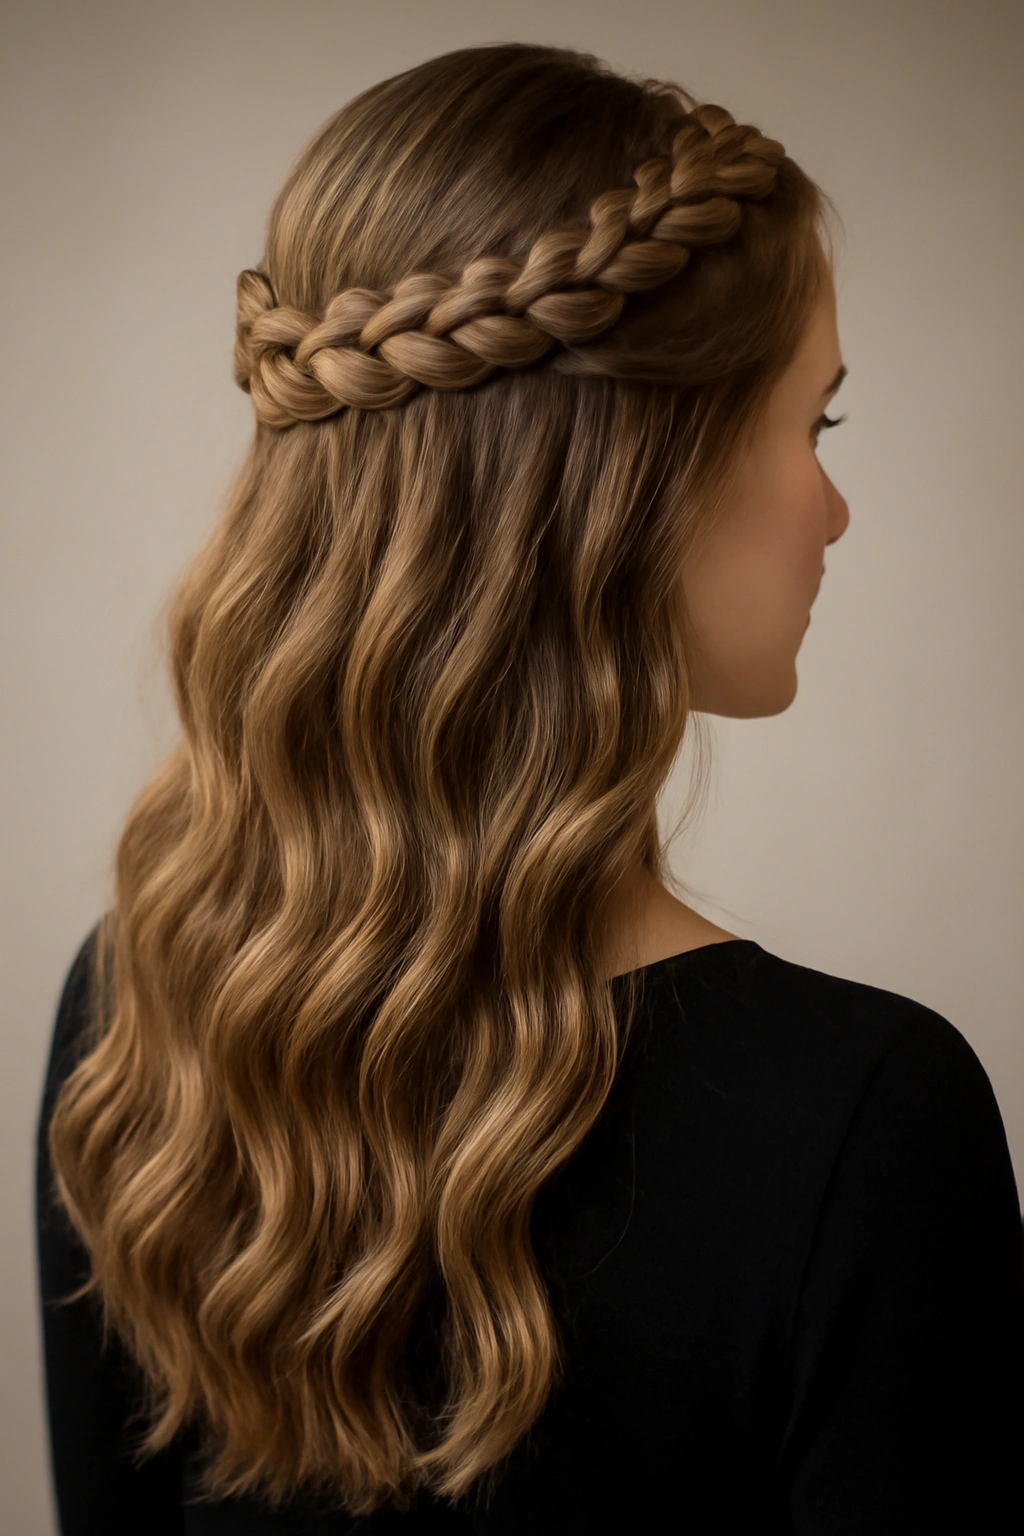
A crown braid with loose waves cascading down is the most romantic of all long-hair formal options. This style requires patience but creates something genuinely showstopping and works beautifully with romantic gowns and delicate jewelry.
Why This Works for Formal Events
A crown braid feels both intentional and effortlessly romantic. It works beautifully from every angle, photographs exceptionally well, and makes any formal occasion feel special. The combination of structure (the braid) and softness (the cascading waves) is inherently elegant.
How to Style It Perfectly
- Curl all your hair loosely before starting: Use a 1.5-inch curling iron on your entire length, creating soft waves throughout. This takes time but is essential — you need that texture for the waves to show beautifully.
- Create a deep side part: Begin your braid at the temple on the larger side of your part.
- French braid from temple to temple: Start at one temple and create a French braid (adding hair as you go) that moves from one temple, across the back of your head, to the other temple. This creates your crown.
- Secure the end of the braid with bobby pins: The braid ends near the other temple, so secure it at that point with 2-3 pins.
- Leave all your hair below the braid down: The remaining hair falls in waves around your shoulders and down your back.
- Loosen your braid by gently pulling the edges: Pancake your crown braid by pulling outward on each section, making it fuller and more romantic-looking.
- Finish with flexible hairspray and a light hand: Use light hairspray so the waves remain soft and the style feels romantic rather than stiff.
Final Thoughts
The right formal hairstyle isn’t about following what everyone else is doing — it’s about understanding what actually works with your hair length, texture, and the specific look you’re aiming for. A sleek short bob is just as formal as an elaborate crown braid if it’s executed with intention and precision. The difference between a hairstyle that feels polished and one that feels mediocre comes down to blow-drying properly, using the right products for your hair type, and committing to styling techniques that actually work.
Start your preparation the day before your event, not the morning of. If you’re using heat styling, a good blow-dry is your foundation — everything else builds on that. Use products that match your hair type, not just what’s popular, and invest in quality bobby pins and elastics that match your hair color. Most importantly, try your style at least once before the actual event so you know exactly how long the styling takes and whether adjustments are needed.
Whatever length you’re working with, there’s a formal option that’ll make you feel genuinely confident and beautiful. Choose the style that resonates with your personal taste, commit to the preparation, and walk into your event knowing that your hair looks intentional and polished.