The ponytail has been a go-to hairstyle for centuries, but it’s far from a one-note look. Whether you’re heading to the office or getting ready for an evening out, the right ponytail can completely shift how polished, approachable, or glamorous you appear. The beauty of this versatile style lies in its endless variations — from sleek and professional to textured and romantic, there’s a ponytail that works for every occasion, hair type, and personal aesthetic.
What makes ponytails so powerful is their ability to frame your face while keeping hair off your neck and shoulders, which means they work equally well at a Monday morning meeting or a Friday night dinner. They’re also incredibly forgiving — you can create them in minutes with minimal products, or spend extra time perfecting intricate braids and twists for something more intentional. The key is understanding which style suits the occasion, your hair texture, and the impression you want to make.
In this guide, you’ll discover 15 distinct ponytail styles that bridge the gap between professional and playful. Some lean into sleek sophistication, others embrace texture and movement, and a few blur the line between casual and dressed-up. Each style includes exactly what you need to know: how to create it, what products will help, who it works best for, and when to wear it. Let’s dive in and find your next go-to ponytail.
1. Classic High Ponytail
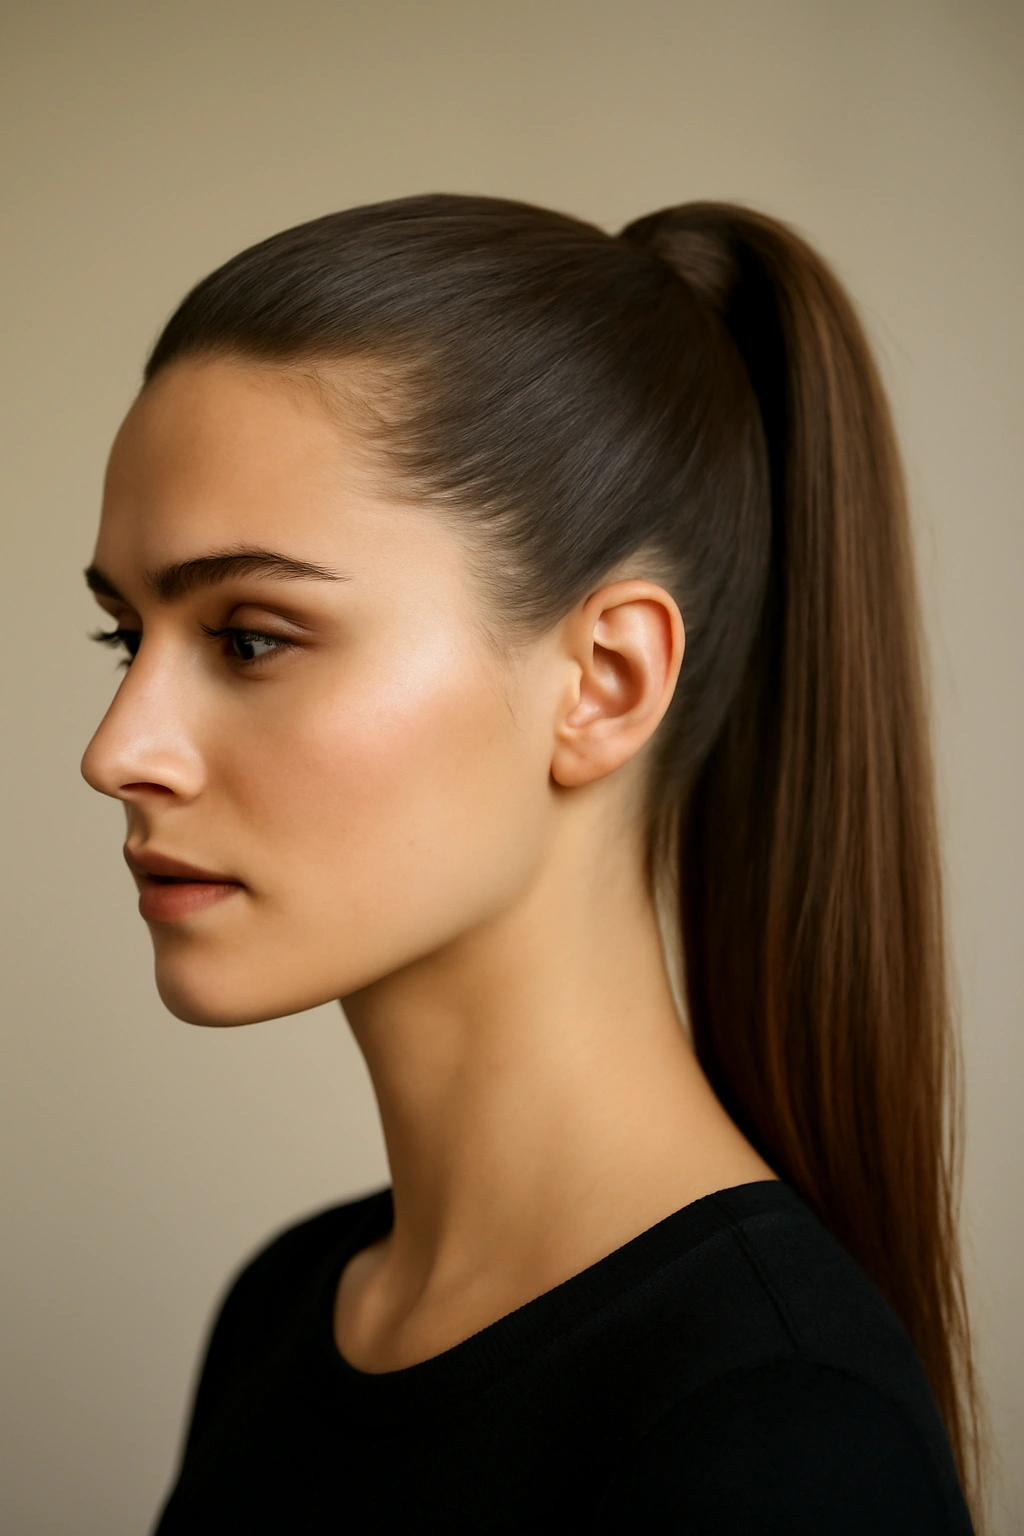
The classic high ponytail is the foundation upon which all other ponytail styles are built. It sits at the crown of your head, typically about an inch or two above where your natural hairline ends at the back. This style screams confidence and works just as well in a corporate boardroom as it does at a casual happy hour when you’ve slicked it smooth.
Why It Works for Both Settings
A high ponytail instantly lifts your face and opens up your features, which is why it’s a favorite among professionals who want to look alert and put-together. At night, the same high placement draws attention to your shoulders and neck, creating an elegant line. The versatility comes down to execution — the same style can look boardroom-appropriate with zero flyaways, or purposefully undone for an evening event.
How to Get It Right Every Time
- Start with either freshly washed or second-day hair, as it holds a ponytail better than squeaky-clean strands
- Use a fine-tooth comb or brush to smooth hair back from your face, gathering at the crown
- Secure with a quality elastic band — one that won’t snag or pull hair
- For a polished look, apply a small dab of smoothing serum or gel to any flyaways
- For evening, deliberately leave a few face-framing pieces loose and curl them with a 1.25-inch barrel curling iron
Pro tip: Pancake your ponytail by gently pulling and fluffing the sections between your elastic and the base of your head. This adds instant dimension and makes even thin hair look fuller.
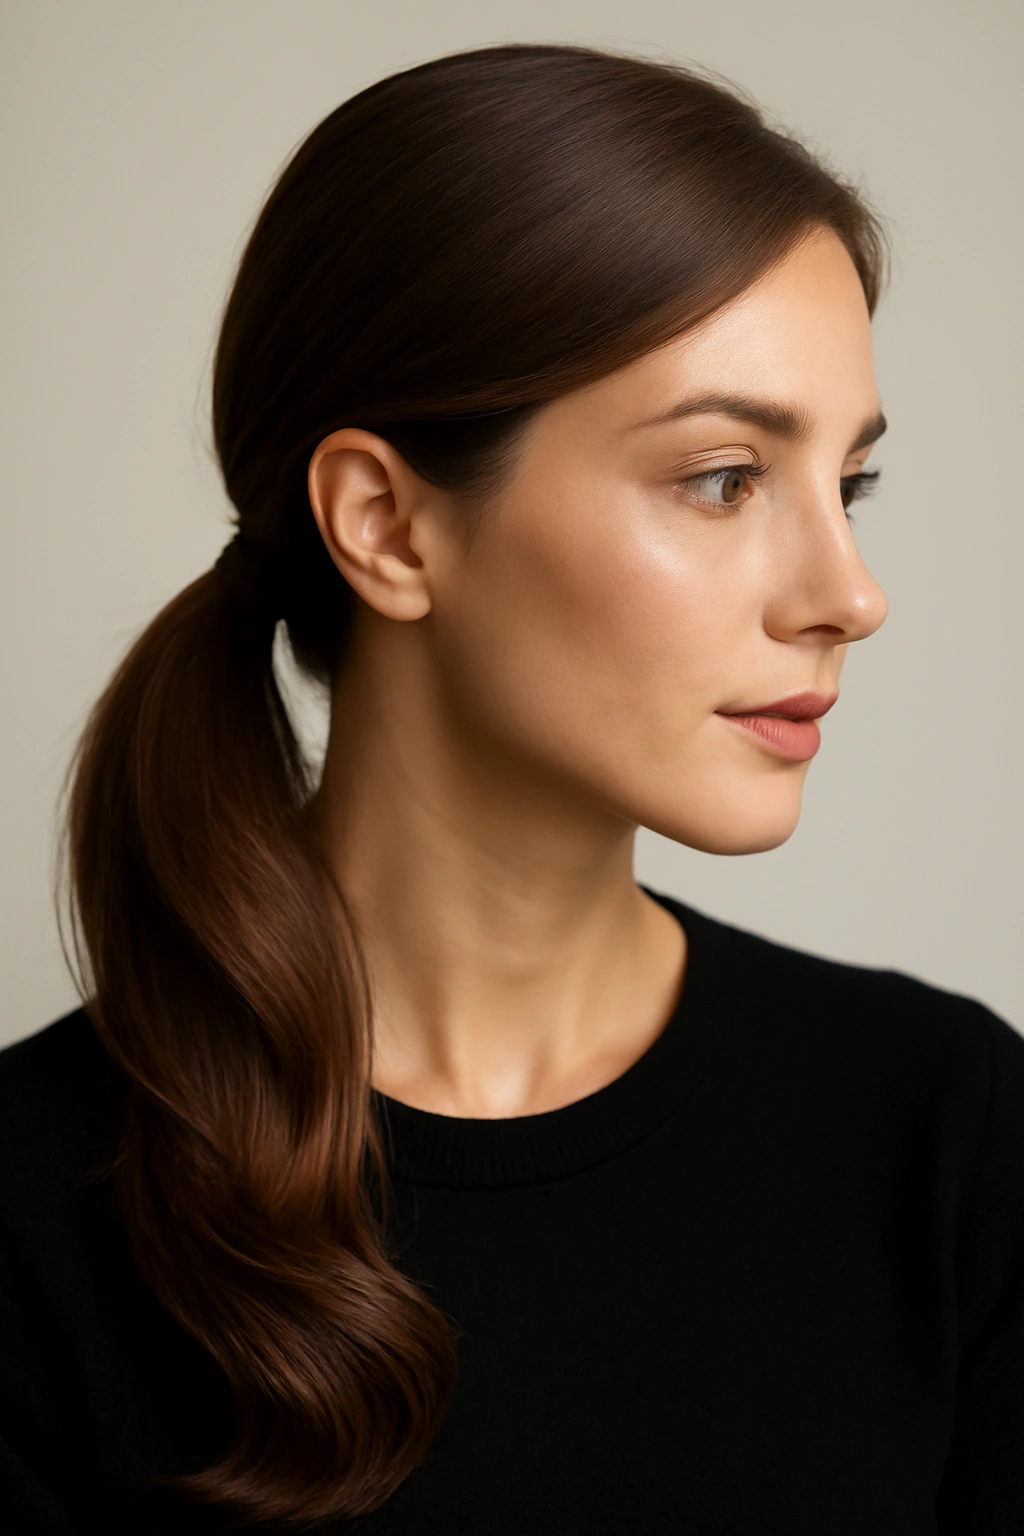
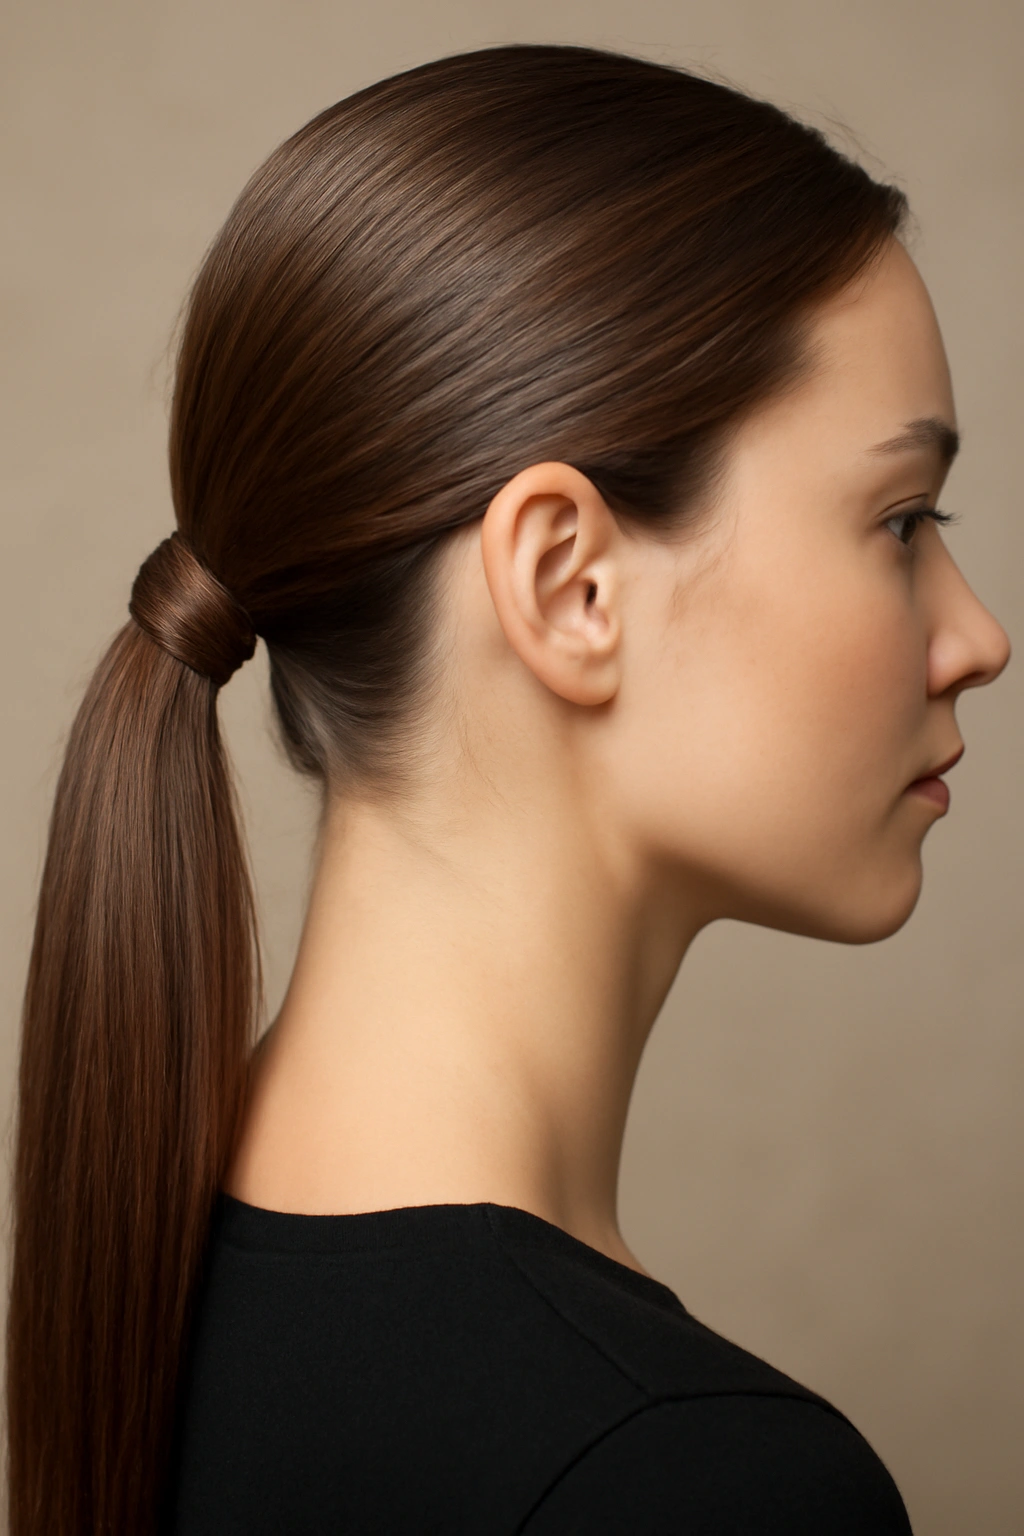
2. Low Sleek Ponytail
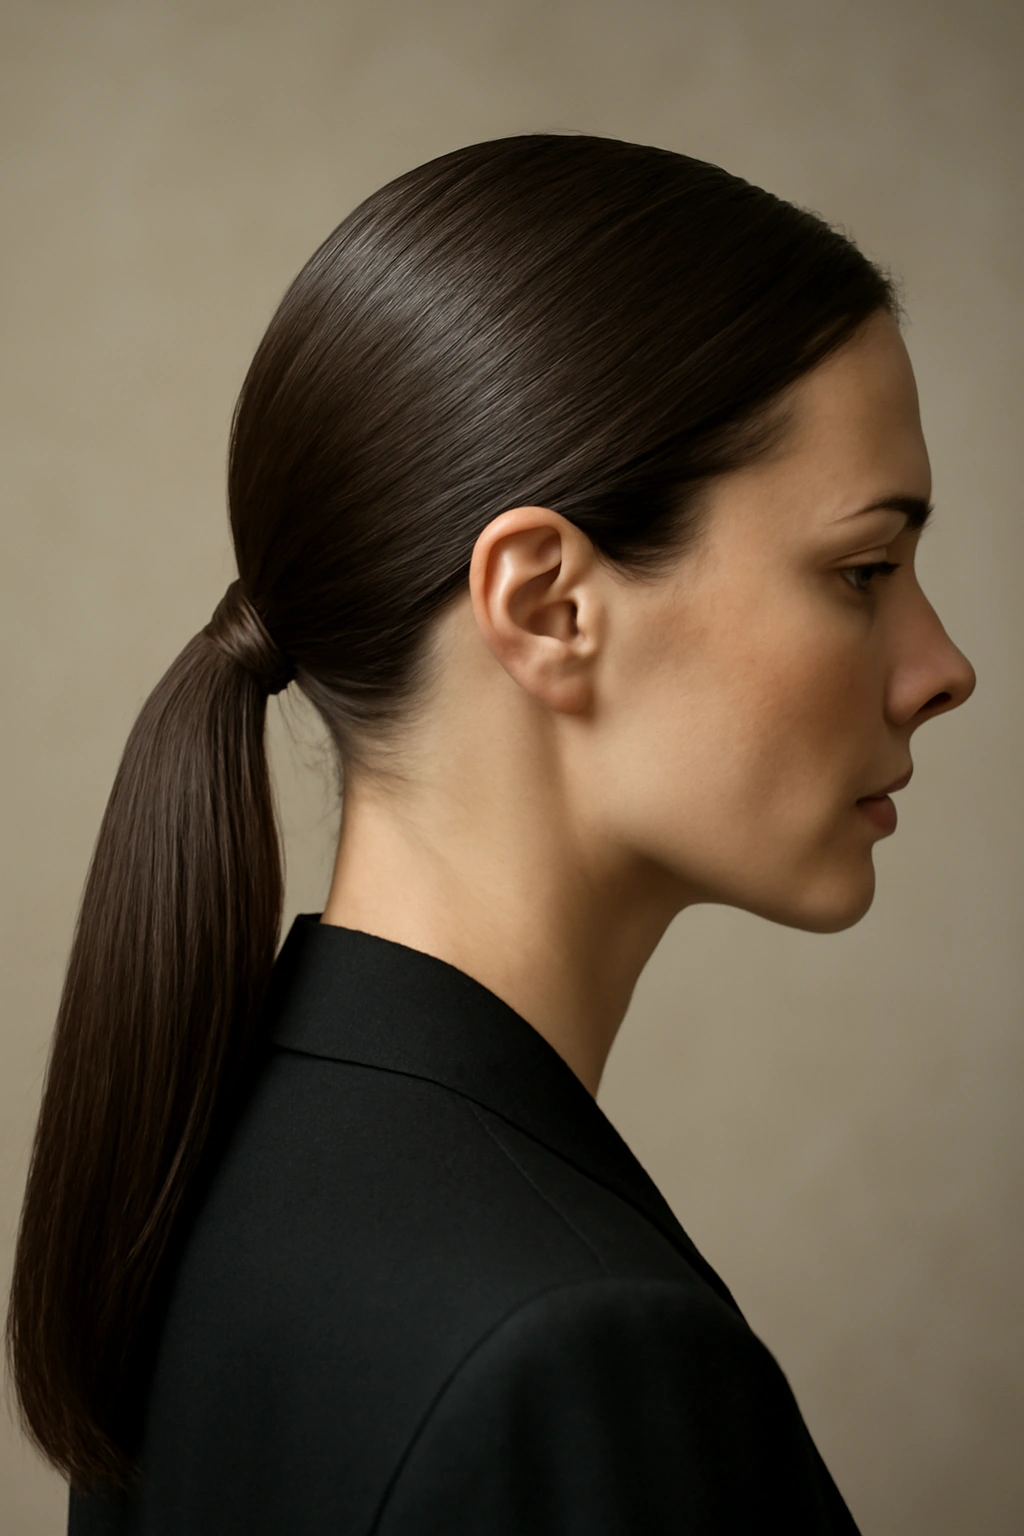
The low ponytail sits at the nape of your neck, typically 2-3 inches above your shoulders. This placement is inherently more understated and sophisticated than a high ponytail, making it the go-to choice for environments where you want to seem approachable but still professional. Sleekness is non-negotiable here — this style relies entirely on polish.
Why Low Plays Better in Formal Settings
A low ponytail keeps the focus on your face rather than making a statement about hair placement. It reads as mature and intentional, which is why you see it frequently on news anchors, corporate executives, and anyone attending a formal dinner or gala. The lower position also feels more grounded and stable, which translates psychologically to trustworthiness and control.
Creating Maximum Smoothness
- Use a blow dryer on cool to flatten your hair and close the cuticle, which reflects light and creates shine
- Apply an anti-frizz serum or smoothing cream before gathering your hair
- Use a fine-tooth comb to smooth every section as you pull hair back toward the nape
- Spray with a light hairspray once secured to lock everything in place
- Wrap a small section of hair around the elastic to conceal it completely
Worth knowing: The lower your ponytail sits, the more forgiving it is of imperfect smoothness. Micro-flyaways that would be obvious in a high ponytail barely register in a low one, making this style realistic for everyday wear.
3. Textured Voluminous Ponytail
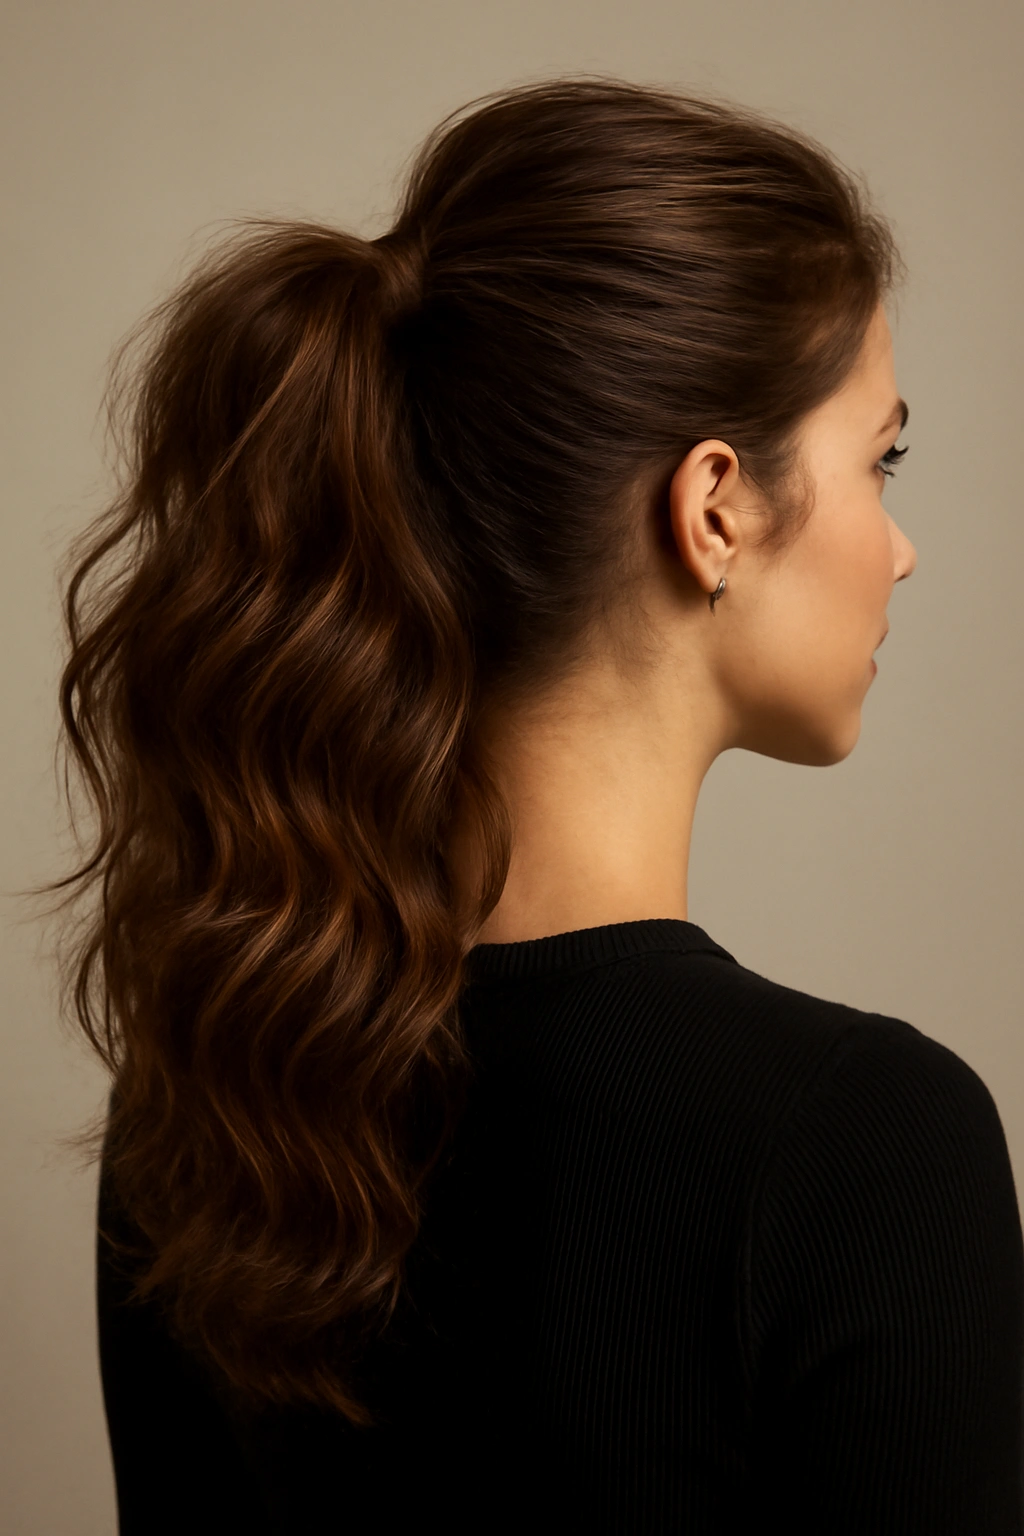
This style embraces wave, curl, and movement rather than fighting against it. The ponytail sits anywhere from mid-height to high, but the real magic happens in the texture — you’re creating dimension, dimension, and more dimension. This is the ponytail that reads as effortlessly put-together, which paradoxically requires more intentional styling.
Building Texture From the Ground Up
A textured ponytail is perfect for those who want to look polished without looking stiff. It works beautifully for both work environments that skew creative and casual evenings where you want to look like you didn’t try too hard (even though you definitely did). The texture also adds visual thickness, which is especially flattering if you have fine or medium-thickness hair.
Technique for Maximum Movement
- Start with either curled or naturally textured hair — use a curling iron, wand, or heat-free method the night before
- Gather your hair into a ponytail, but don’t pull too tightly — you want the ponytail base to feel gently anchored
- Use a texturizing spray or dry shampoo at the roots to increase grip and grip without requiring product buildup
- Gently tease small sections within the ponytail itself to add internal volume and dimension
- Pancake the sections between the elastic and your head to create a fuller effect
Insider note: If your ponytail looks too perfect or polished for the vibe you’re going for, deliberately pull out a few small pieces from around your face and lightly curl them. This softens the entire look immediately.
4. Half-Up Half-Down Ponytail
This style cleverly bridges the gap between fully wearing your hair down and pulling it all back. You’re securing roughly half your hair (sometimes a bit more or less depending on preference) in a ponytail at the crown, while letting the bottom half flow freely. It’s sophisticated enough for work but romantic enough for evening, making it one of the most versatile options available.
Why This Style Is Secretly Genius
The half-up half-down hits the sweet spot between “I care about my appearance” and “I’m approachable and not trying too hard.” It keeps hair off your face without making you look severe, and it works with almost every face shape, hair texture, and length. For work, it signals someone who’s put-together but friendly. For evening, it’s romantic without being fussy.
Nailing the Balance
- Determine how much hair you want to pull back — typically starting from your temples and going back about halfway
- Twist or braid this top section for more interest, or leave it smooth for a cleaner look
- Secure at the crown with a small elastic band
- Leave the bottom half to fall naturally, or add waves and curls for more dimension
- For evening, consider adding a small decorative clip or barrette where the two sections meet
- Make sure the ponytail portion doesn’t sit so high that it looks like you couldn’t commit to a full ponytail
Quick facts:
- This style works on hair as short as chin-length and looks equally stunning on waist-length hair
- It’s one of the easiest styles to create even if you’re not a styling expert
- You can dress it up or down depending on products, accessories, and overall grooming
- It’s ideal if you’re trying to grow out bangs or manage face-framing layers
5. Sleek Low Bun
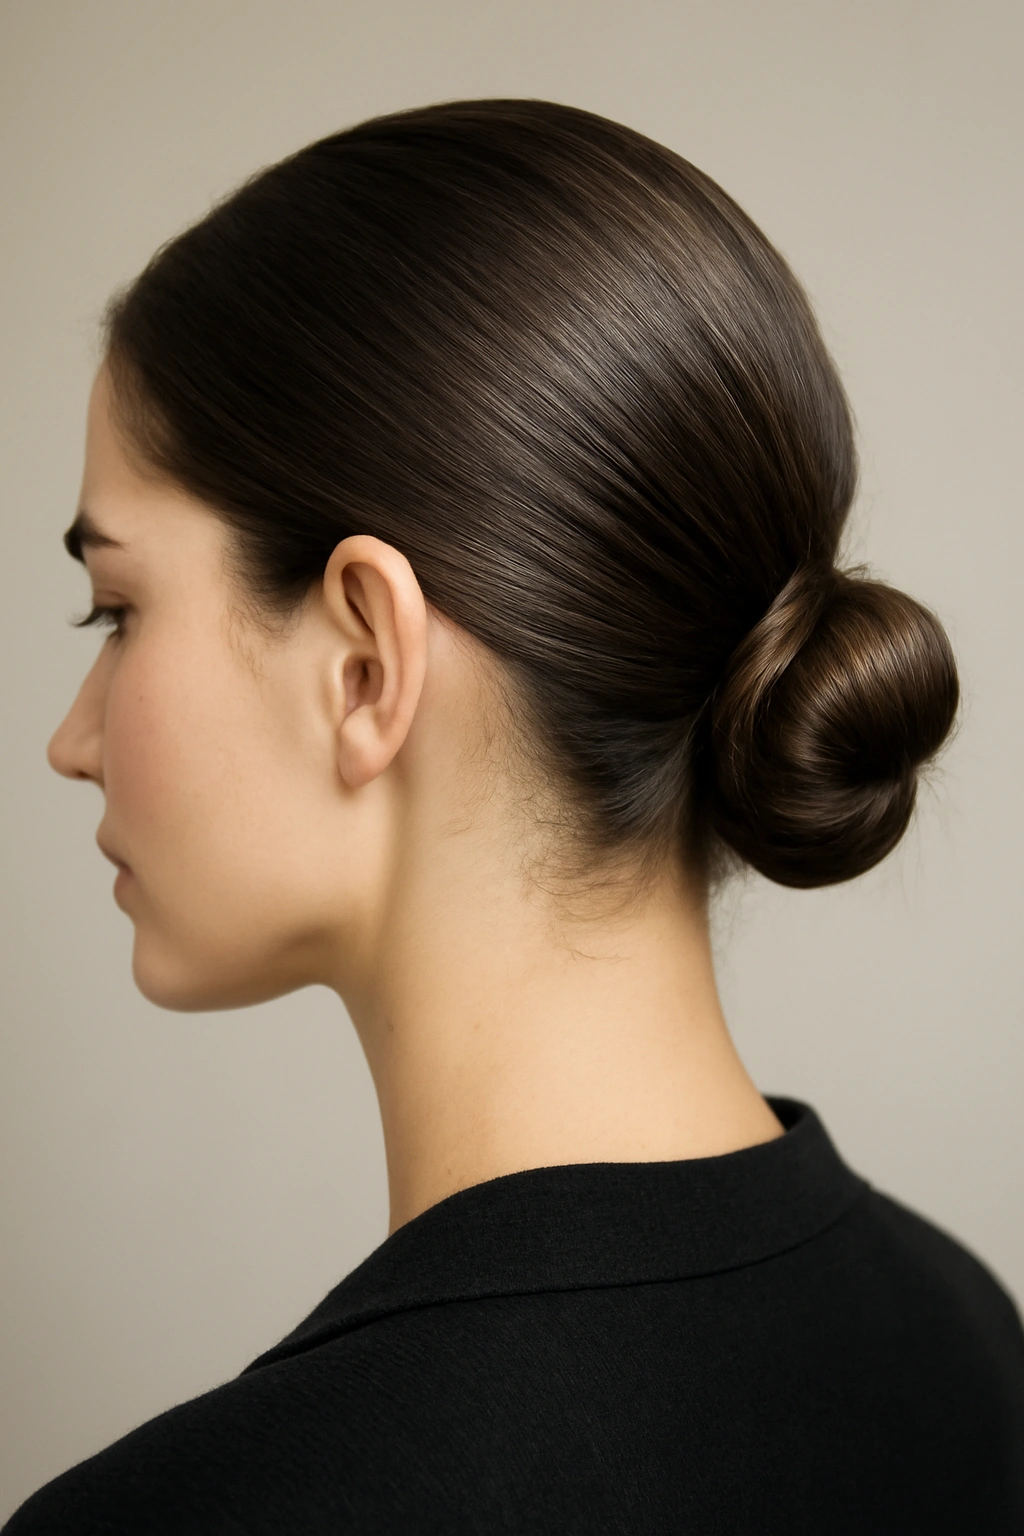
This is technically a bun rather than a traditional ponytail, but it deserves inclusion because it achieves the same goal of being polished and professional. The hair is gathered into a ponytail at the nape of the neck, then twisted and wrapped around the base to form a compact, controlled shape. It’s the ultimate power move for anyone who wants to look completely put-together.
When to Choose a Bun Over a Hanging Ponytail
A bun is ideal when you want maximum polish with zero movement or distraction. It’s the go-to for environments where strict professionalism is expected, for formal events where you want to focus attention on your face or accessories, or simply for days when you want your hair completely off your neck and shoulders. It’s also excellent for warm weather or workouts, which is why it bridges work and active life so effectively.
The Secret to a Perfect Bun
- Create a low ponytail first at the nape of your neck
- Take a small section of hair from the ponytail and wrap it around the base of the elastic, pinning the wrapped section underneath
- Smooth the main body of the ponytail and twist it loosely around the base, creating a compact coil
- Secure with bobby pins tucked underneath and against your scalp so they’re invisible
- Use a fine-tooth comb to smooth any flyaways, then lock everything with a finishing spray
What sets it apart: Unlike casual bun styles, a sleek low bun maintains absolute control throughout the day. There’s no frizz, no movement, and no surprise loose strands — just intentional, polished styling that commands respect.
6. Braided Ponytail
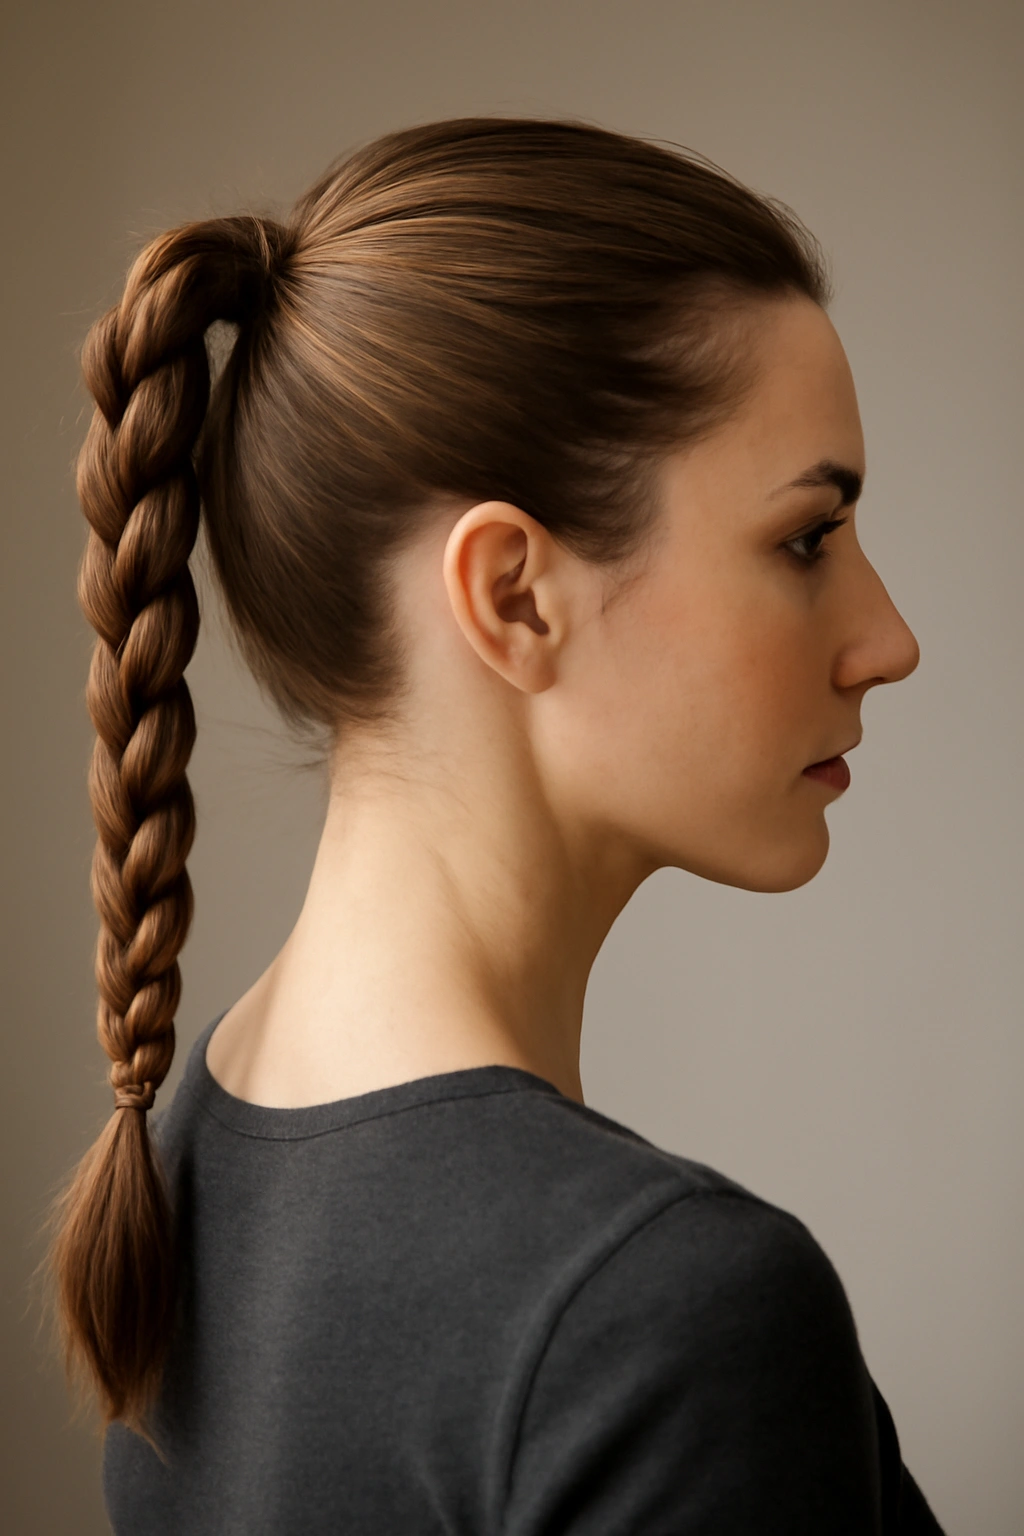
This style takes a standard ponytail and elevates it with a braid woven throughout the ponytail length. You can do a simple three-strand braid, a more intricate French braid that starts at the crown, or even a Dutch braid for extra dimension. The braid adds texture, visual interest, and a touch of intentionality that makes people notice your hair.
Why Braid Details Matter
A braided ponytail signals that you’ve invested time and care into your appearance without looking overdone. At work, it shows attention to detail. For evenings out, it looks romantic and polished. The braid also creates structure that helps your ponytail maintain its shape throughout the day, resisting that limp, flat look that develops in a standard ponytail after a few hours.
Creating a Secure Braided Ponytail
- Gather your hair into a ponytail at your chosen height and secure with an elastic band
- Divide the ponytail into three sections and braid down the length — keep the braid tight enough to hold shape but not so tight you’re pulling painfully
- Secure the braid with a small elastic at the end of your hair
- For a fuller look, gently pull the edges of the braid to loosen and separate the strands
- If you have shorter hair, you can also do a Dutch braid starting at the crown, ending at your ponytail point
- Consider incorporating a small ribbon or string that coordinates with your outfit through the braid for extra visual interest
Pro tip: If your braid feels flat, pancake the sections slightly by pulling gently on the sides. This doubles the visual width and creates a more impressive look.
7. Twisted Wrap Ponytail
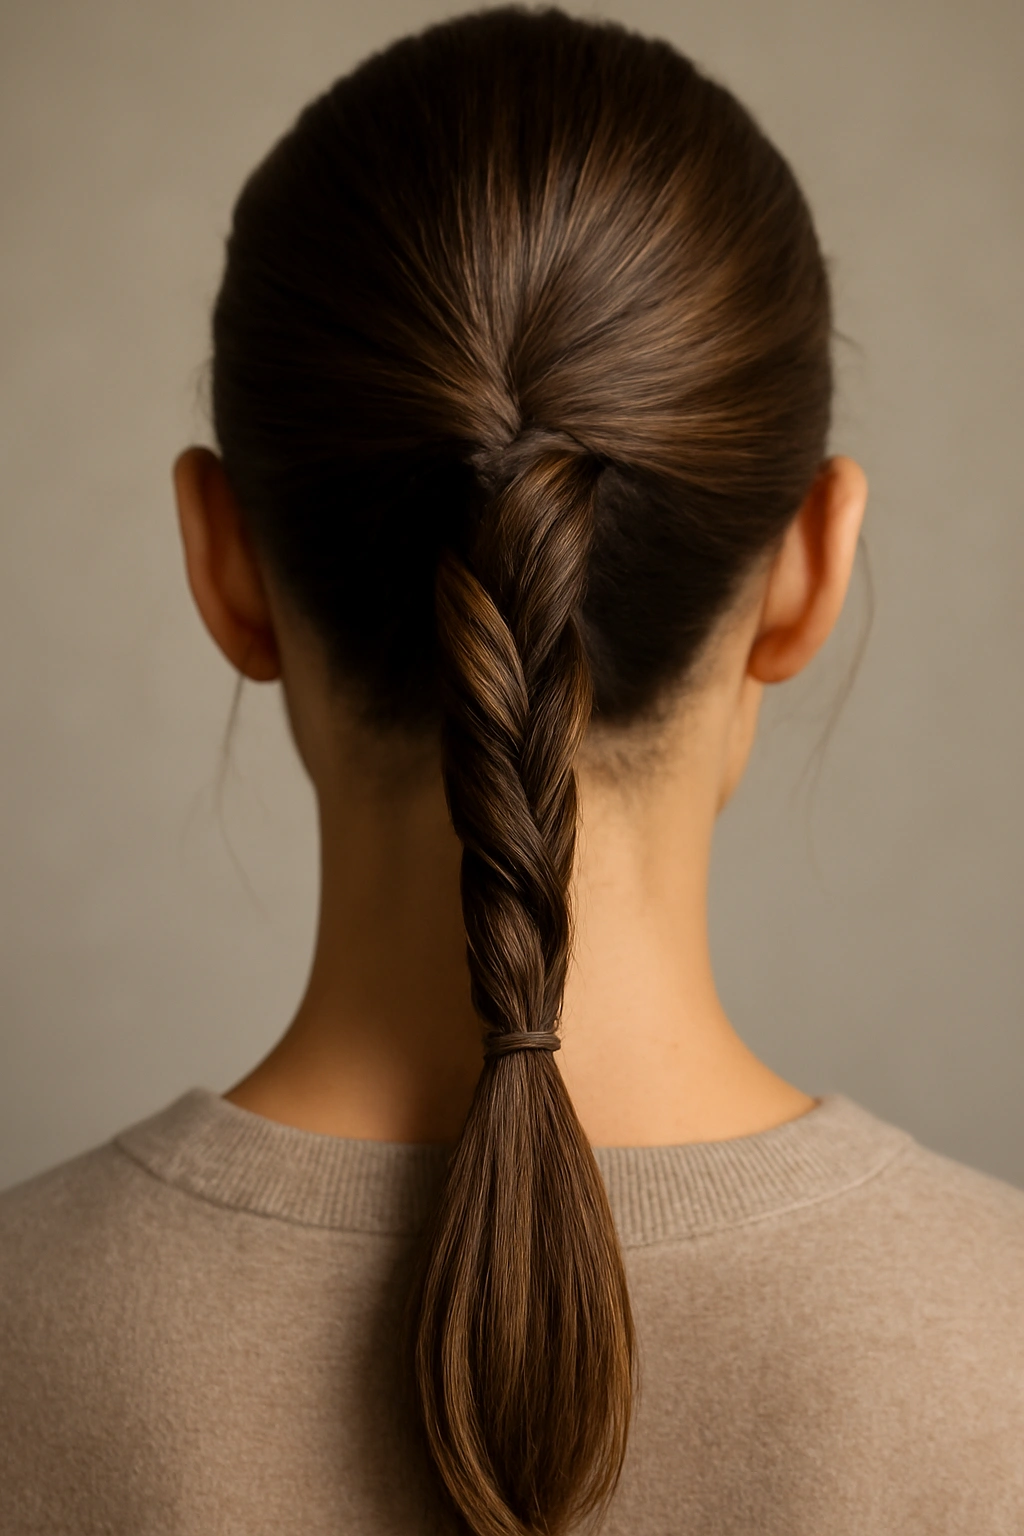
Rather than braiding your hair, you simply twist sections of the ponytail around each other before securing the end. This creates a similar visual effect to braiding but is faster to execute and often holds better. The twisting creates rope-like texture and movement that’s more visible than a braid, especially in person or on video calls.
Why Twists Work Better Than Braids for Some Hair Types
If your hair is on the thinner side, gets tangled easily, or simply refuses to hold a tight braid, twists are your answer. They’re also easier to master for anyone who hasn’t spent years braiding. The twist technique creates a sleeker line than a braid while still adding dimension and visual interest. It’s technically advanced enough to look intentional but simple enough that you can recreate it quickly.
The Twist Technique Broken Down
- Gather your hair into a ponytail at your chosen height
- Divide the ponytail into two sections
- Twist one section clockwise (to the right) while twisting the other section counterclockwise (to the left), letting them spiral around each other
- Continue twisting until you reach the ends of your hair
- Secure with a small elastic band
- For more visual interest, wrap a small section of the ponytail base around the elastic to conceal it
- Gently tease and pancake the twisted sections for added fullness
Worth knowing: Twisted ponytails actually stay intact longer than braids throughout the day. The spiral grip holds better, and you don’t have to worry about strands slipping out of a three-strand pattern.
8. High Messy Bun Ponytail
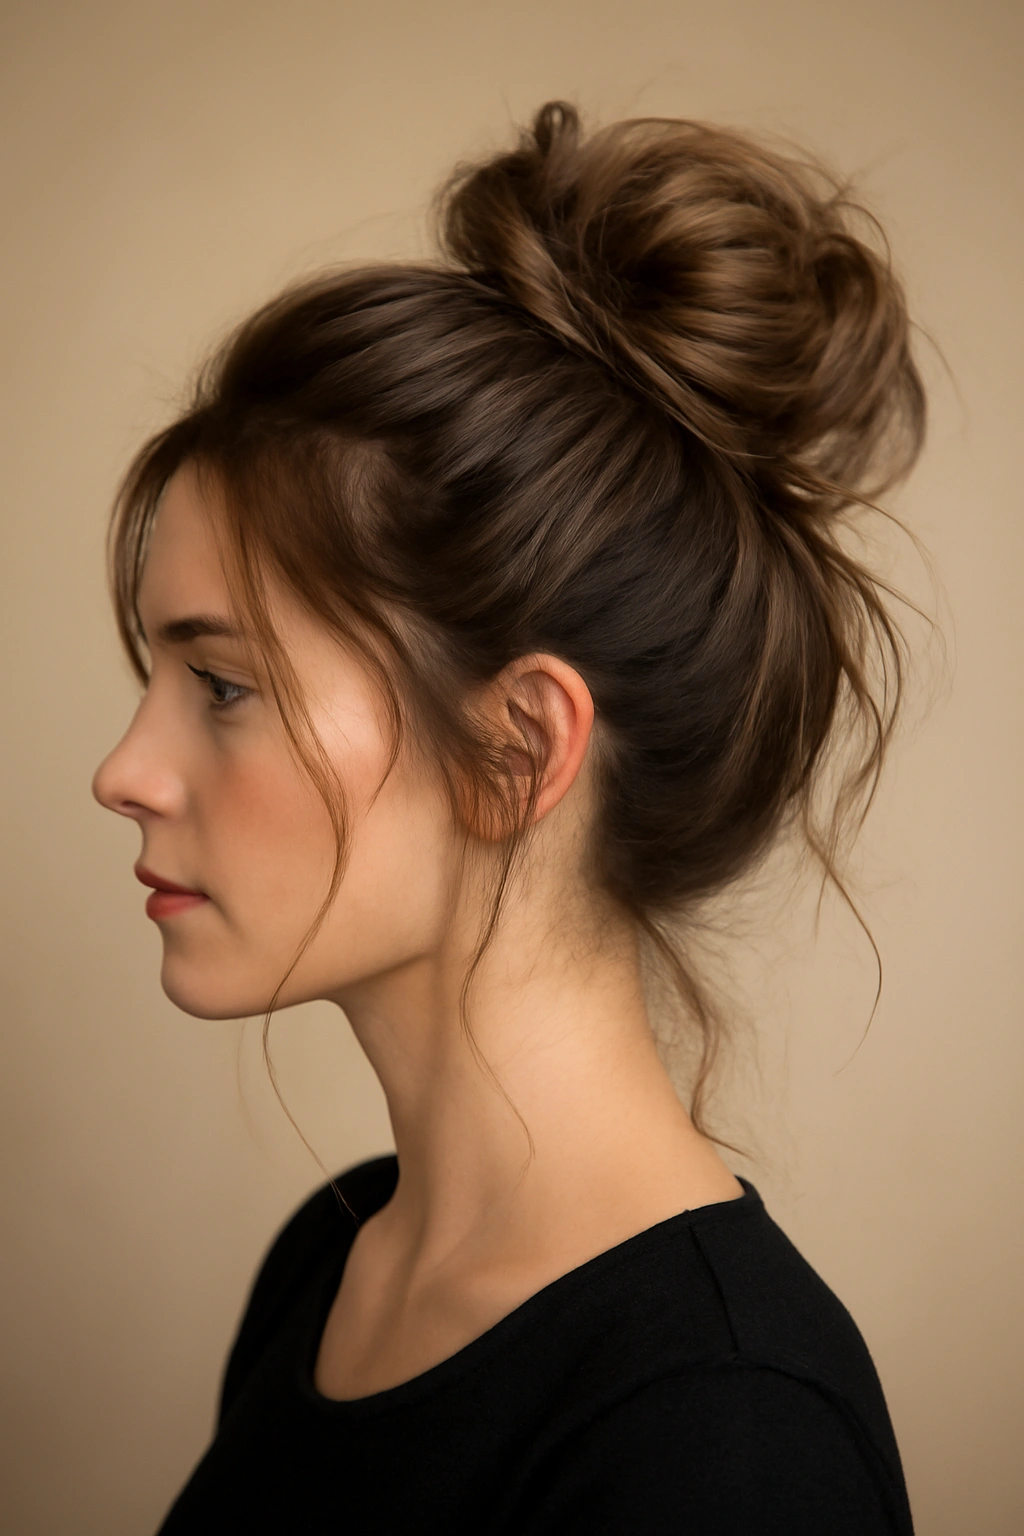
This is the “I’m busy and chic” of all hairstyles. It looks deliberately undone, with intentional texture and some pieces artfully falling around your face. Despite its casual appearance, creating an effective messy bun requires strategy — it can’t be too messy or you’ll look disorganized, and it can’t be too perfect or you’ve missed the point entirely.
When Messy Reads as Polished
A messy bun works in creative work environments, casual offices, and definitely for evening events where you want to seem sophisticated but relaxed. The key is the word “styled” — this is a messy bun that’s been intentionally created, not the result of literally just throwing your hair up at 6 a.m. The difference is visible and matters.
Creating Intentional Messiness
- Tease your hair throughout your entire head using a brush or teasing brush to create texture and volume
- Gather your hair into a high ponytail, but don’t pull tightly — you want looseness to be your design element
- Twist or loosely braid the ponytail, then wrap it around the base to form a bun shape
- Secure with bobby pins, allowing pieces to escape deliberately around your face and at the nape
- Pull out a few small tendrils and curl them around a curling iron for softness
- Lightly spray with a flexible hold hairspray that won’t make things feel stiff
- Tease the outside edges of the bun very slightly to add texture to the surface
Insider note: The most successfully messy buns have the most intentional detail. Curl those escaped pieces, make sure they frame your face, and ensure the overall shape is balanced rather than lopsided.
9. Side Ponytail
A side ponytail is exactly what it sounds like — your hair is gathered into a ponytail but positioned to one side of your head rather than directly in the center. This creates an asymmetrical, romantic look that’s undeniably flattering. It works beautifully for both professional settings and evening events, though the vibe changes depending on how you style it.
The Psychology of Asymmetry
A side ponytail feels less corporate and more approachable than a centered ponytail. It’s slightly flirtier without being inappropriate for work, and it draws attention to one side of your face and neck, which is useful if you want to accentuate features like cheekbones or jewelry. The asymmetry also creates movement and visual interest that centered styles can’t achieve.
Perfecting Asymmetrical Placement
- Determine whether you want the ponytail sitting at the side of your neck or lower toward your shoulder
- Use a fine-tooth comb to smooth hair from the opposite side of your head toward the ponytail placement point
- Gather the hair and secure with an elastic — the lower you position it, the more dramatic the side ponytail effect
- Smooth or tease depending on your desired vibe
- For professional settings, keep the side ponytail sleek and positioned higher
- For evening, consider lower placement and add waves or curls throughout the ponytail length
- Leave a few face-framing pieces loose and curl them to soften the asymmetry
Quick facts:
- Side ponytails are exceptionally flattering on round or square face shapes because the asymmetry lengthens the face
- They photograph beautifully from certain angles, making them ideal for professional headshots or special events
- A side ponytail at the shoulder with texture and waves reads as romantic and styled
- The same style positioned higher and sleeker reads as professional and interesting
10. Double Banded Ponytail
This style uses two elastic bands placed an inch or two apart along the length of a standard ponytail, creating distinct sections that pop visually. It’s a playful, modern look that’s become increasingly popular because it adds dimension and visual interest without requiring advanced styling skills. It works surprisingly well in professional settings because the multiple bands create a structured, intentional appearance.
Why Double Banding Creates Impact
The space between the two elastic bands naturally causes the hair to puff out slightly, creating volume that might not be there in a standard ponytail. The multiple bands also break up the visual line of your hair, making a fine or thin ponytail appear fuller and more substantial. It’s a styling hack that uses geometry and tension rather than product or technique.
Creating Clean Double Bands
- Create a standard high or mid-height ponytail and secure with your first elastic band
- Measure approximately 1.5 to 2 inches down from that first band
- Use a second elastic band to secure the ponytail at that point
- Gently pull the sections between the two bands to create a puffy effect
- For more impact, continue adding additional bands further down the ponytail if you want a triple or quad band effect
- You can use matching bands for a clean, uniform look or metallic bands for a bolder statement
- This style works especially well with textured or wavy hair, which naturally separates between the bands
What to avoid: Don’t pull the bands so tightly that you’re creating tension on your hair, as this can lead to breakage. The bands should be snug enough to stay in place but not uncomfortably tight.
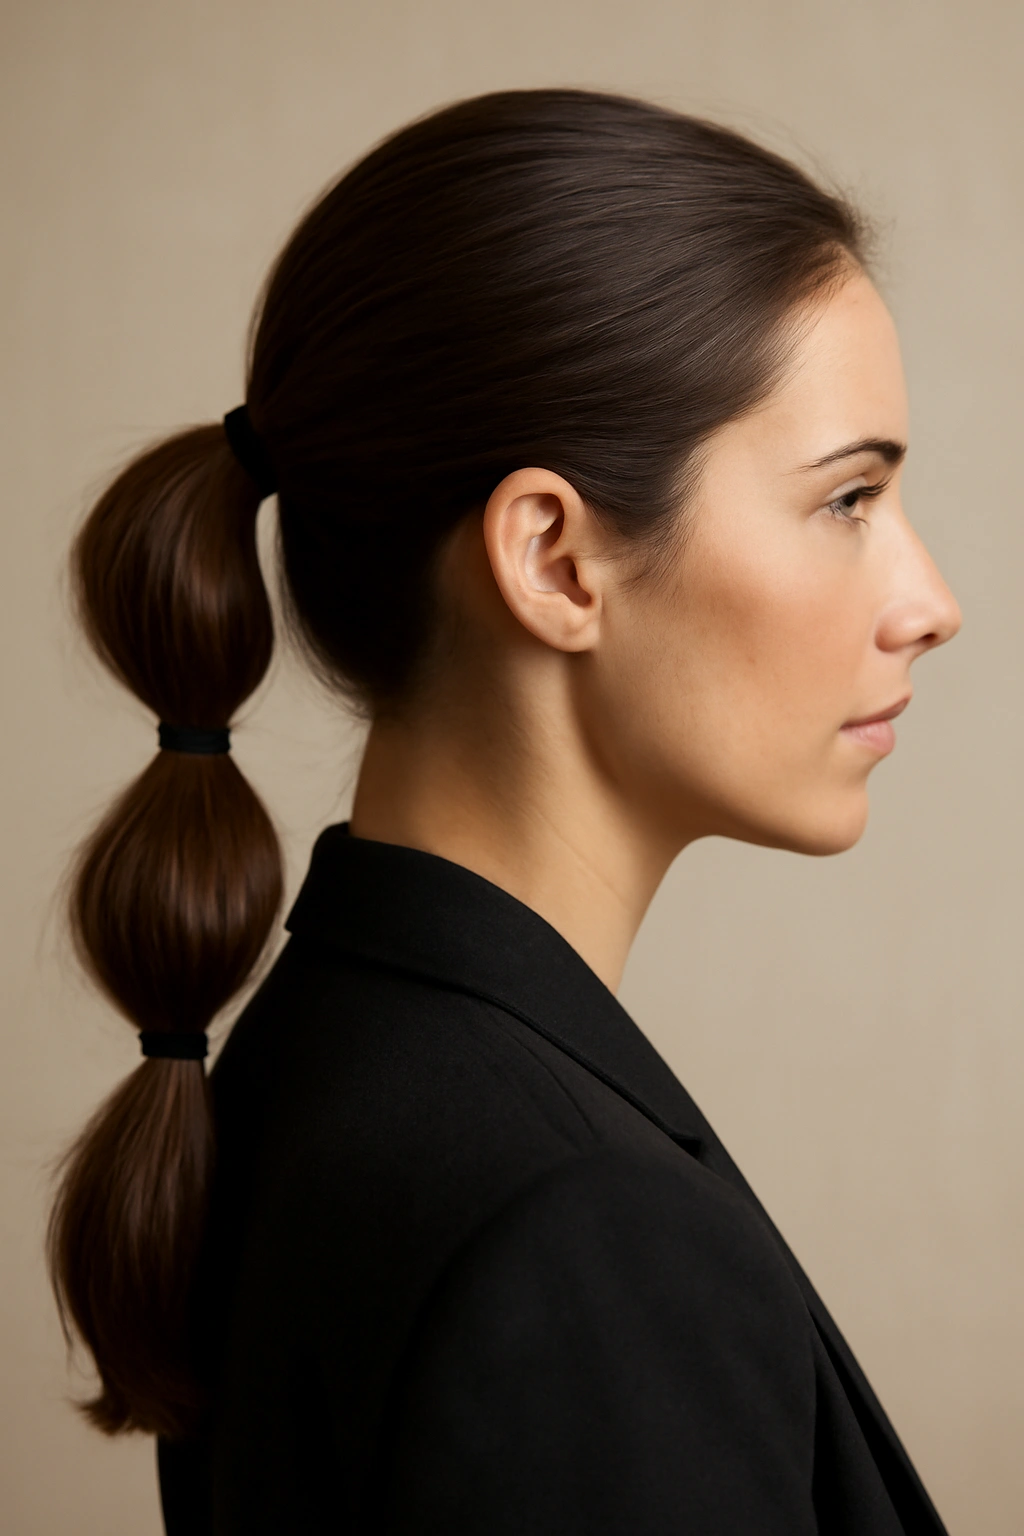
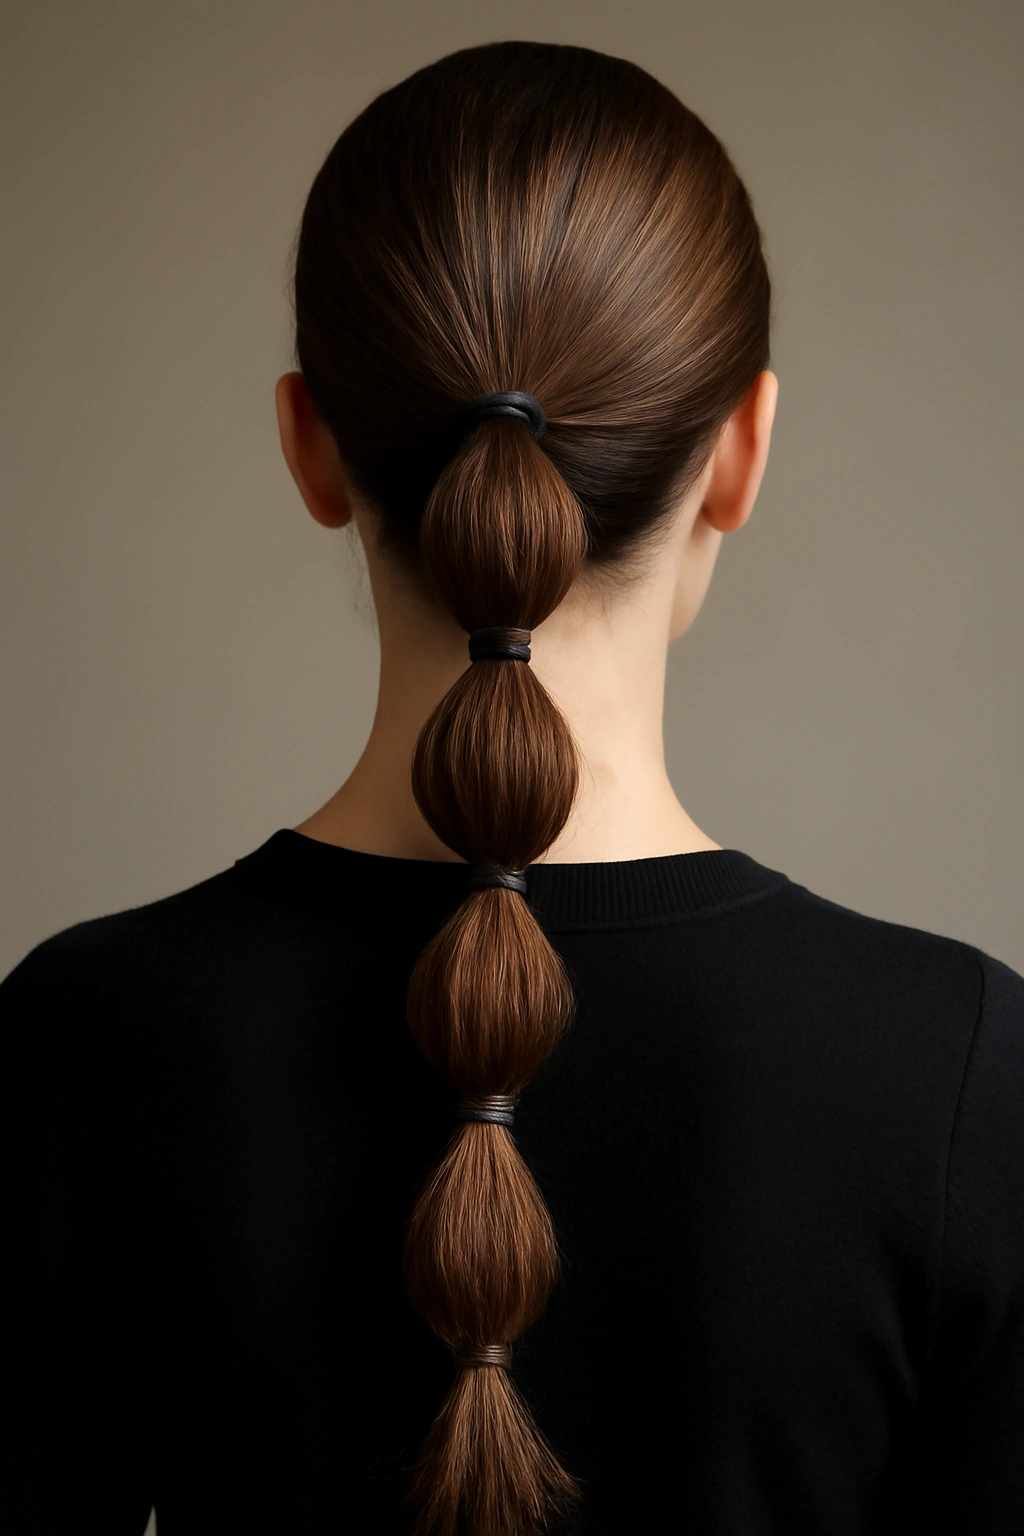
11. Bubble Ponytail
The bubble ponytail takes double banding to the next level by creating multiple pronounced sections that stick out from the hair, resembling bubbles. It’s a fun, youthful style that’s gained significant popularity on social media. While it skews more casual than some other ponytail styles, it can absolutely work in creative work environments or casual Friday settings.
When Bubble Ponytails Belong at Work
This style is best reserved for workplaces where creative expression is encouraged and professional rigid dress codes don’t apply. However, it can absolutely transition to an evening out if you use metallics or jeweled elastic bands. The playfulness of the style works best when the environment matches that energy. For a more professional approach, use bands that match your hair color and keep the “bubbles” less pronounced.
Building the Bubble Effect
- Create a high ponytail and secure with your first elastic band
- Working from the base downward, place elastic bands about one inch apart along the ponytail length
- You can create 3 to 5 bubbles depending on your hair length
- After securing each band, gently pull and fluff the section between that band and the one above it
- The hair should puff outward in a distinct bubble shape
- For a fuller effect, gently tease the center of each bubble with a fine-tooth brush
- You can curl the ends of each bubble section with a curling iron for a more polished appearance
Pro tip: The bubble ponytail looks best with shoulder-length or longer hair that has some thickness. Very fine or short hair won’t create pronounced bubbles, and that’s okay — work with what you have.
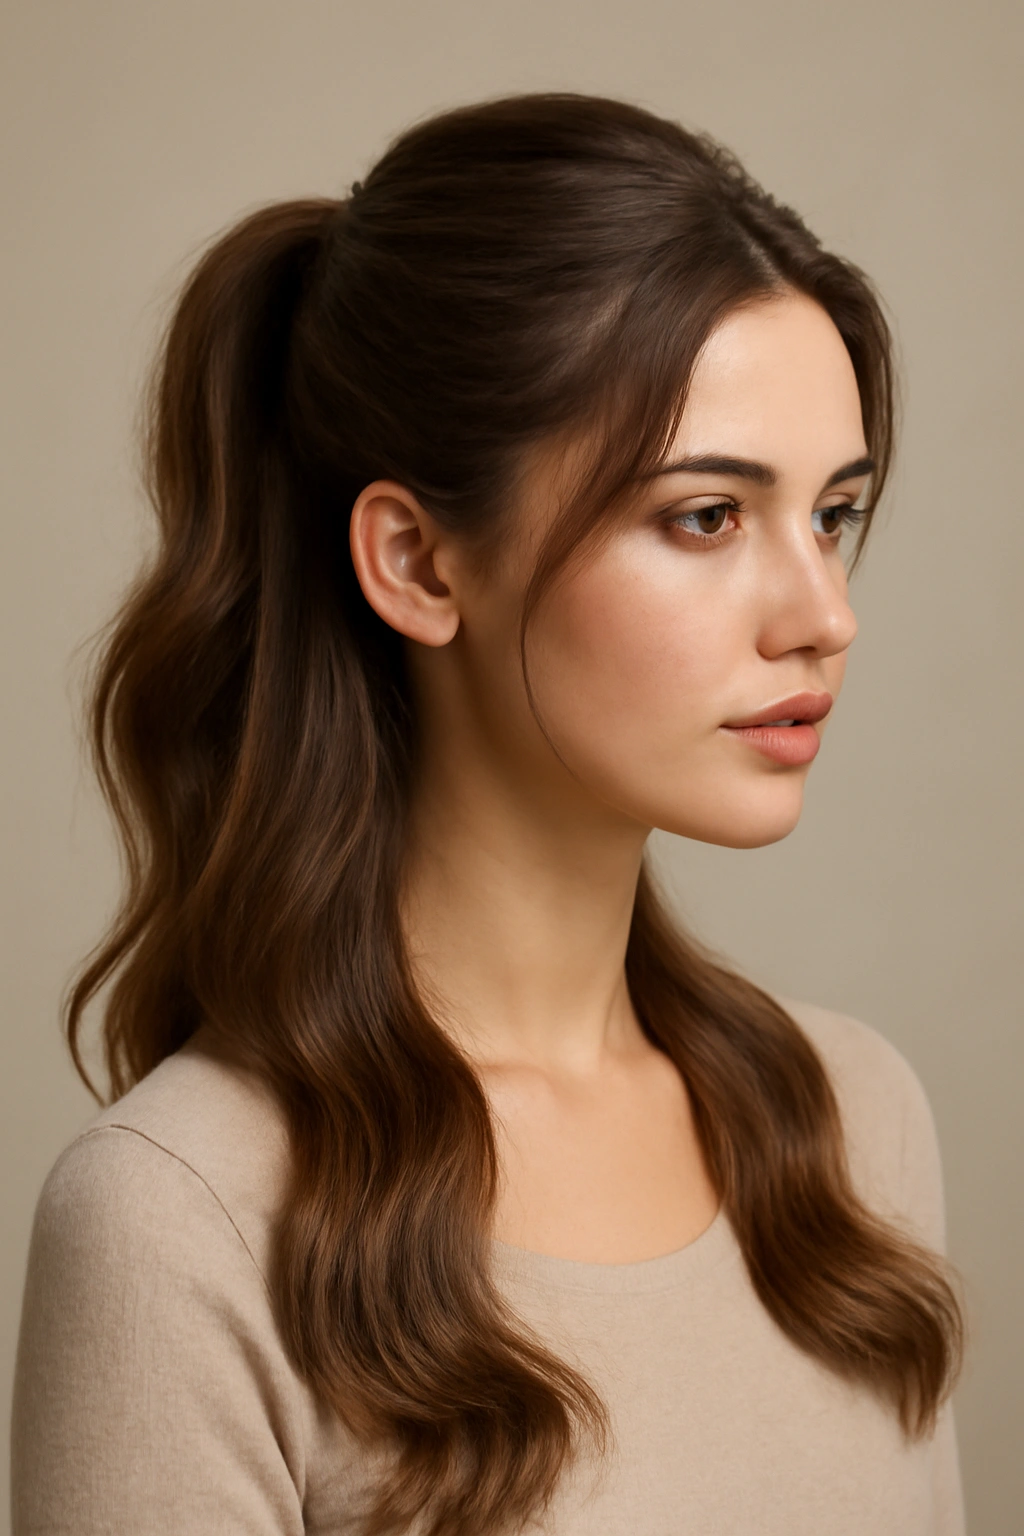
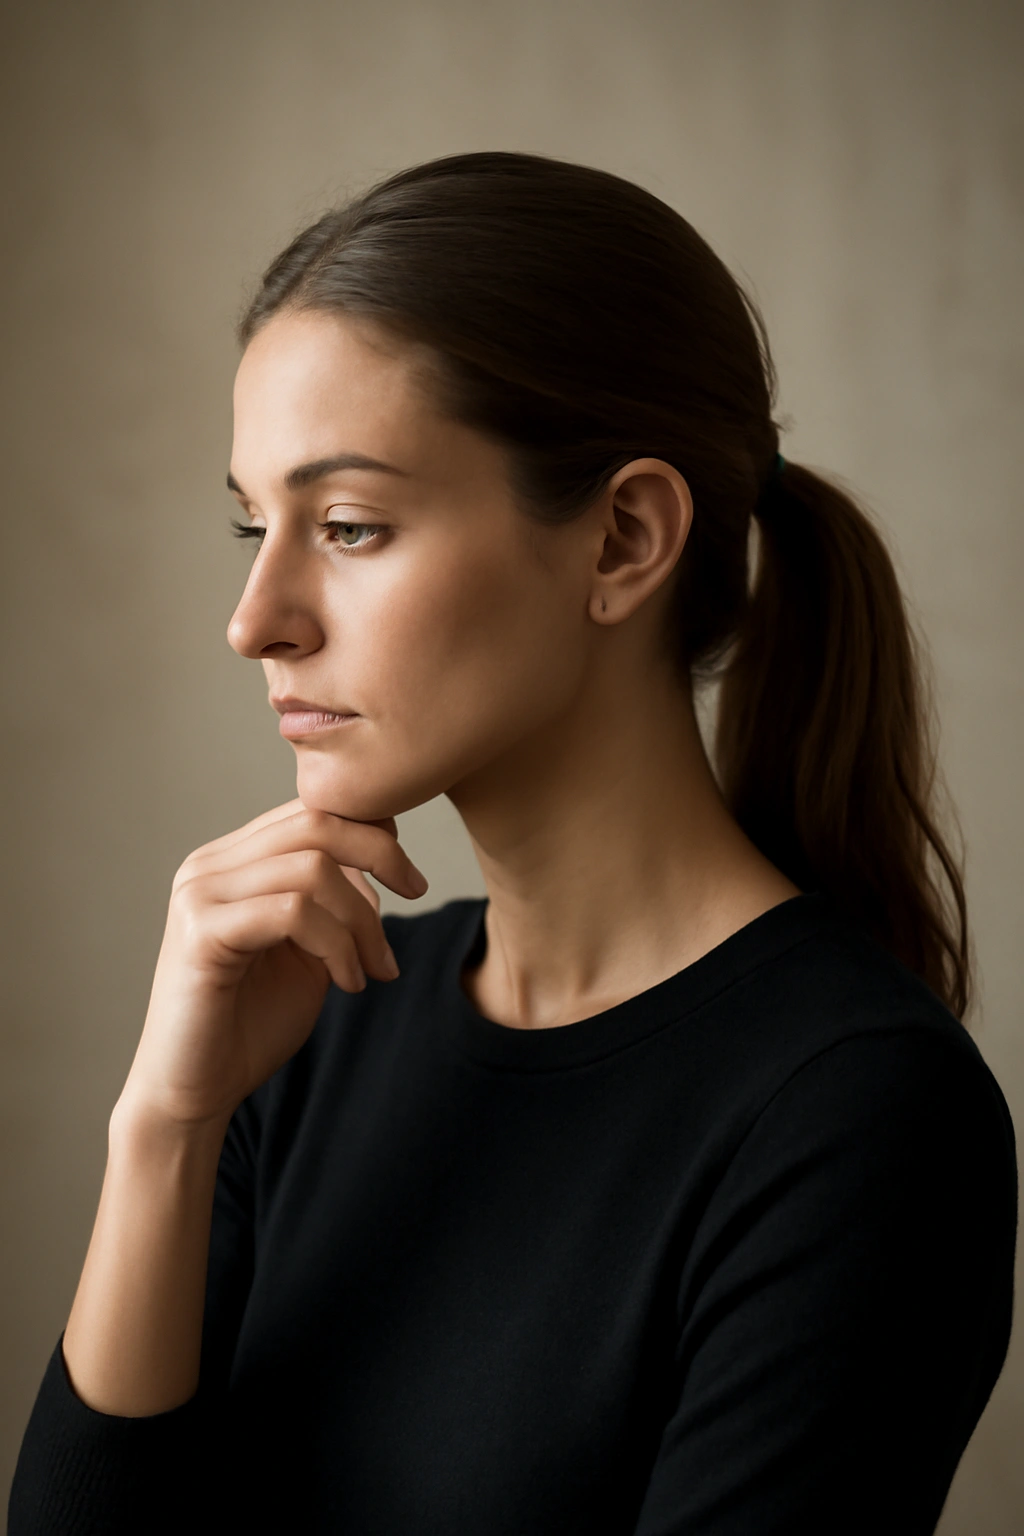
12. Low Romantic Ponytail With Face-Framing
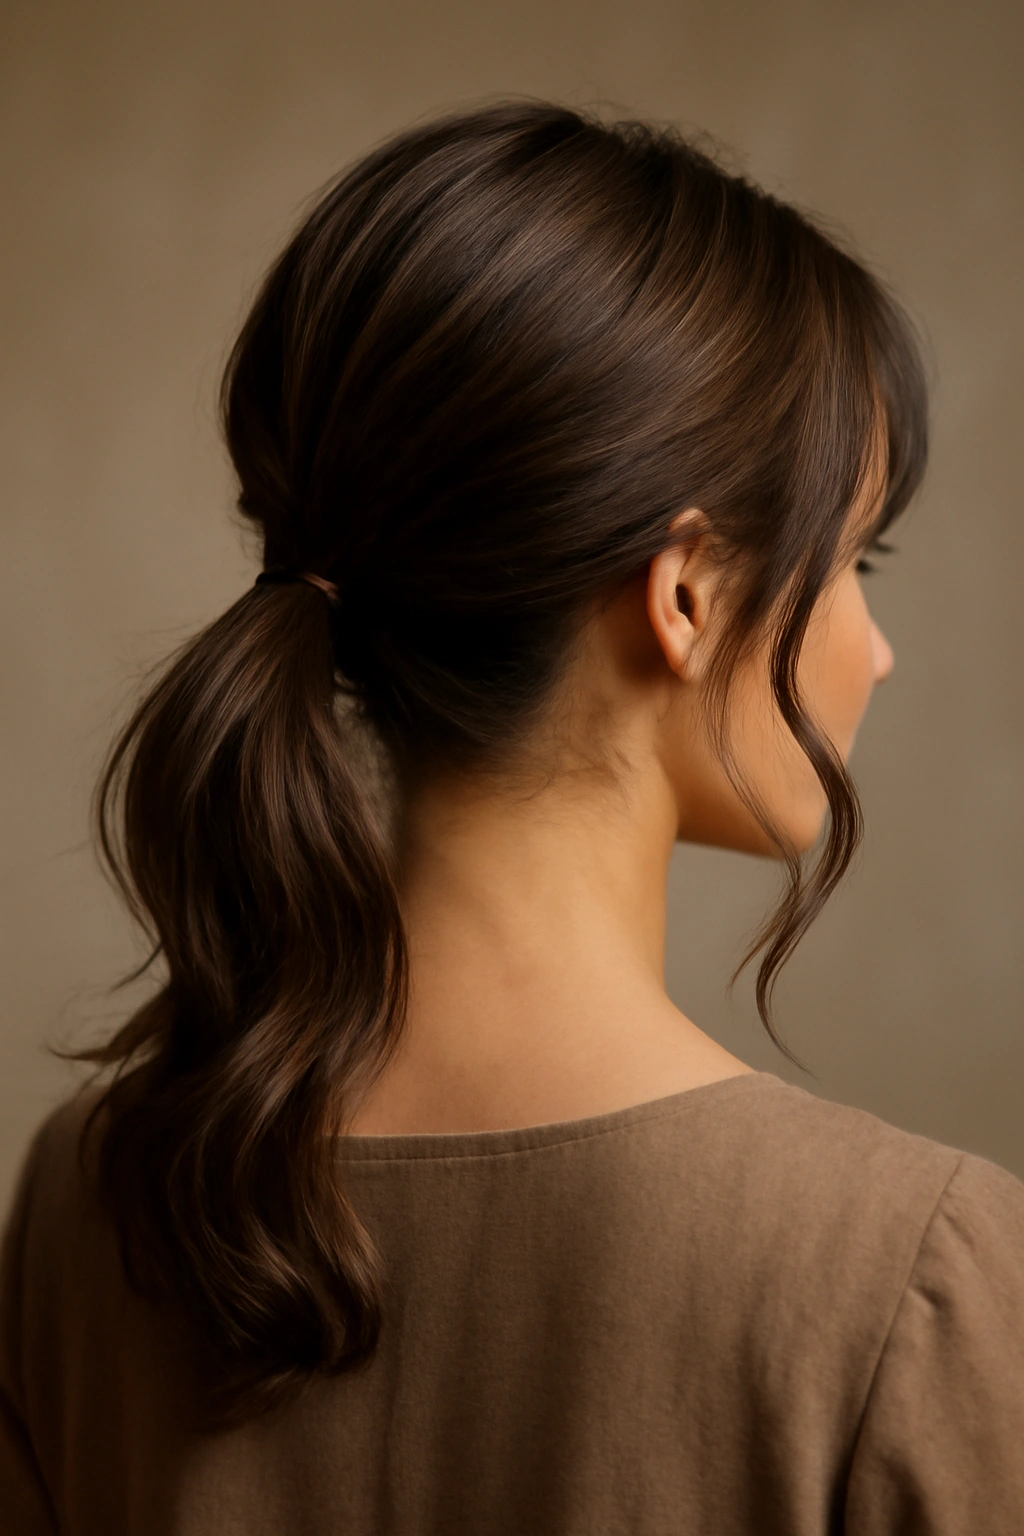
This style combines the sophistication of a low ponytail with strategically placed face-framing pieces that create softness and romance. It’s the ideal choice for evening events, professional settings where you want to seem approachable, or any time you want to look intentionally polished without appearing severe. The face-framing pieces make all the difference.
Why Face-Framing Changes Everything
A standard low ponytail can read as austere or overly formal if your face is completely exposed. Adding face-framing pieces softens the overall effect and creates a more balanced, flattering look. The pieces also draw attention to your face rather than emphasizing the ponytail, which is ideal for professional settings. The added texture and movement also feel more romantic and intentional.
Creating Flattering Face Frames
- Gather your hair into a low ponytail at the nape of your neck
- Before securing, pull out a small piece from each side near your temples
- Smooth the main ponytail and secure it tightly
- Take each face-framing piece and curl it around a 1.25 or 1.5-inch barrel curling iron, directing the curl away from your face
- Lightly tease the underneath side of these pieces to increase grip and hold
- Let the curled pieces fall naturally around your face — they should feel loose enough to move
- Smooth any flyaways with a smoothing serum, being careful not to weigh down the curls
Worth knowing: The width of your face-framing pieces should correspond to your face shape. Wider pieces work better for narrow faces, while narrower pieces suit rounder face shapes. Aim for pieces about one inch wide at the temple.
13. Sleek High Ponytail With Accessory
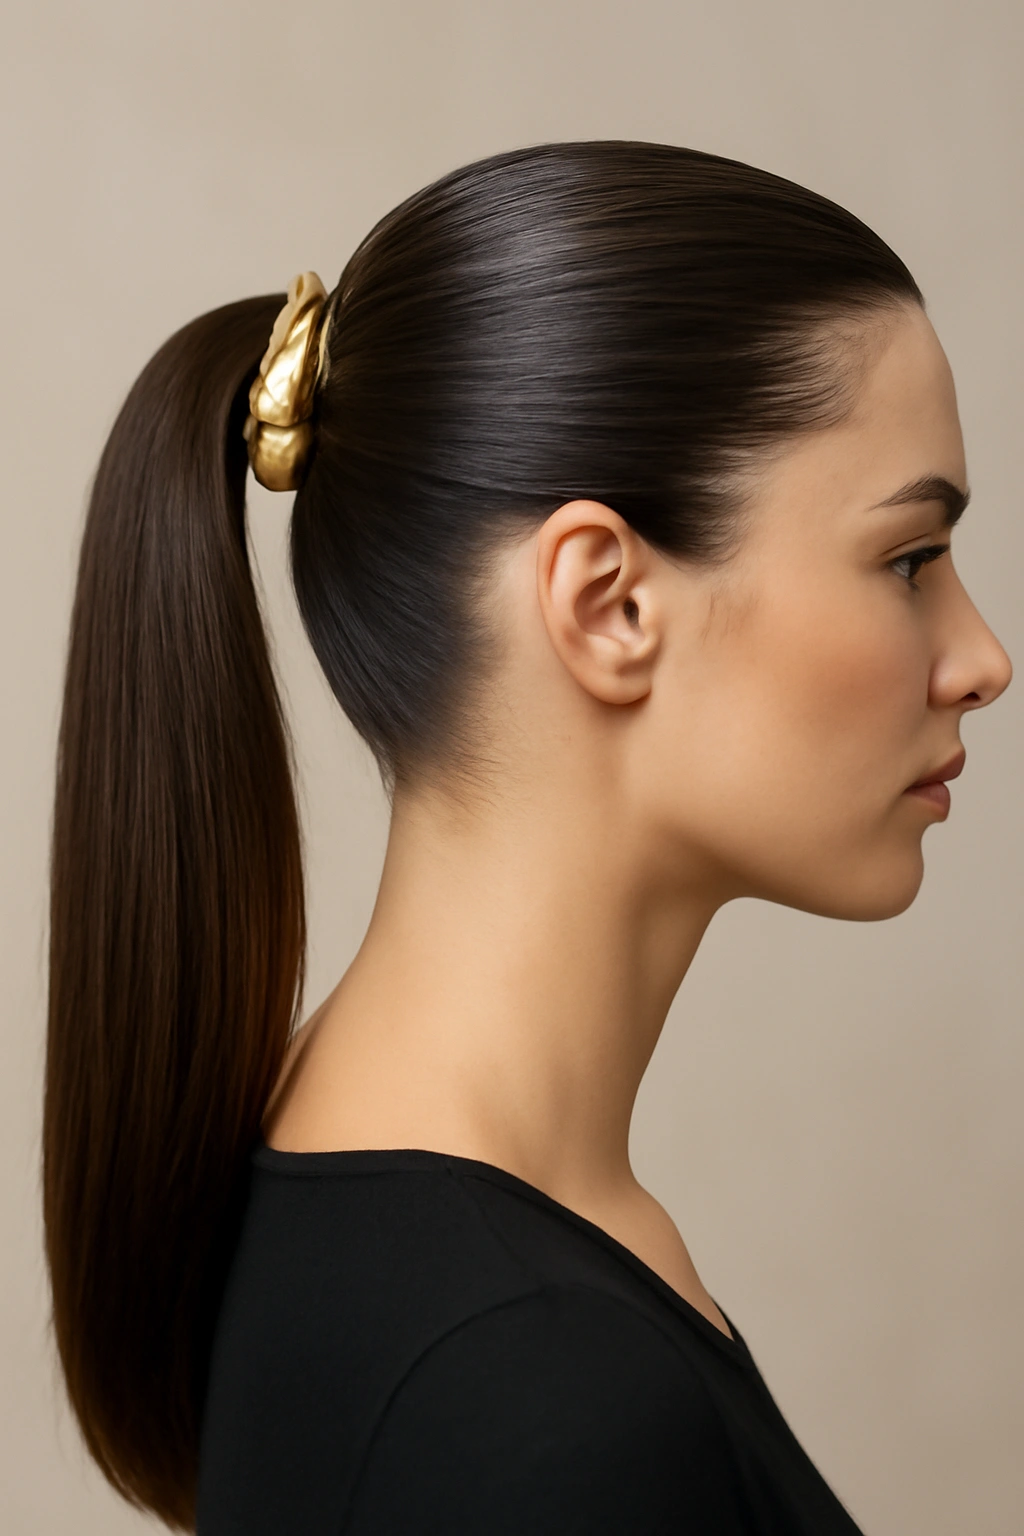
This is your classic high ponytail elevated with a statement-making accessory positioned at the base. The accessory transforms a basic ponytail into something special, whether that’s a claw clip, a decorative hair clip, a silk scrunchie, or even a small piece of jewelry. The addition makes the entire style feel more intentional and outfit-coordinated.
How Accessories Elevate the Ponytail
An accessory serves multiple purposes: it adds visual interest, coordinates your overall look, and signals that you’ve put thought into your appearance. At work, a minimalist metal cuff or structured claw clip reads as polished. For evening, a larger statement clip or even a small chain can transform the same basic style into something special. The right accessory can also disguise imperfections in your hair or cover an elastic band completely.
Styling With Statement Accessories
- Create a sleek high ponytail using a fine-tooth comb to smooth every section
- Secure with a sturdy elastic band
- Take a small section of hair from the ponytail and wrap it around the base of the elastic band, pinning it underneath
- This wrapped section will conceal your elastic completely
- Position your chosen accessory where the wrapped section meets the main ponytail — typically just below the base of your head
- For claw clips, clip horizontally across the wrapped section
- For decorative clips or barrettes, position them slightly to one side for a more interesting look
- For hair cuffs or bands, wrap them around the base as you would a traditional elastic band
Quick facts:
- A simple gold or silver cuff can make even a basic ponytail look more expensive and intentional
- Statement clips in tortoiseshell, colorful resin, or bold metallics work beautifully for evening
- A silk scrunchie prevents creasing and snagging compared to traditional elastic bands
- Accessories also serve a practical purpose by distributing tension across a wider area, which is gentler on your hair
14. Textured Side Braid Ponytail
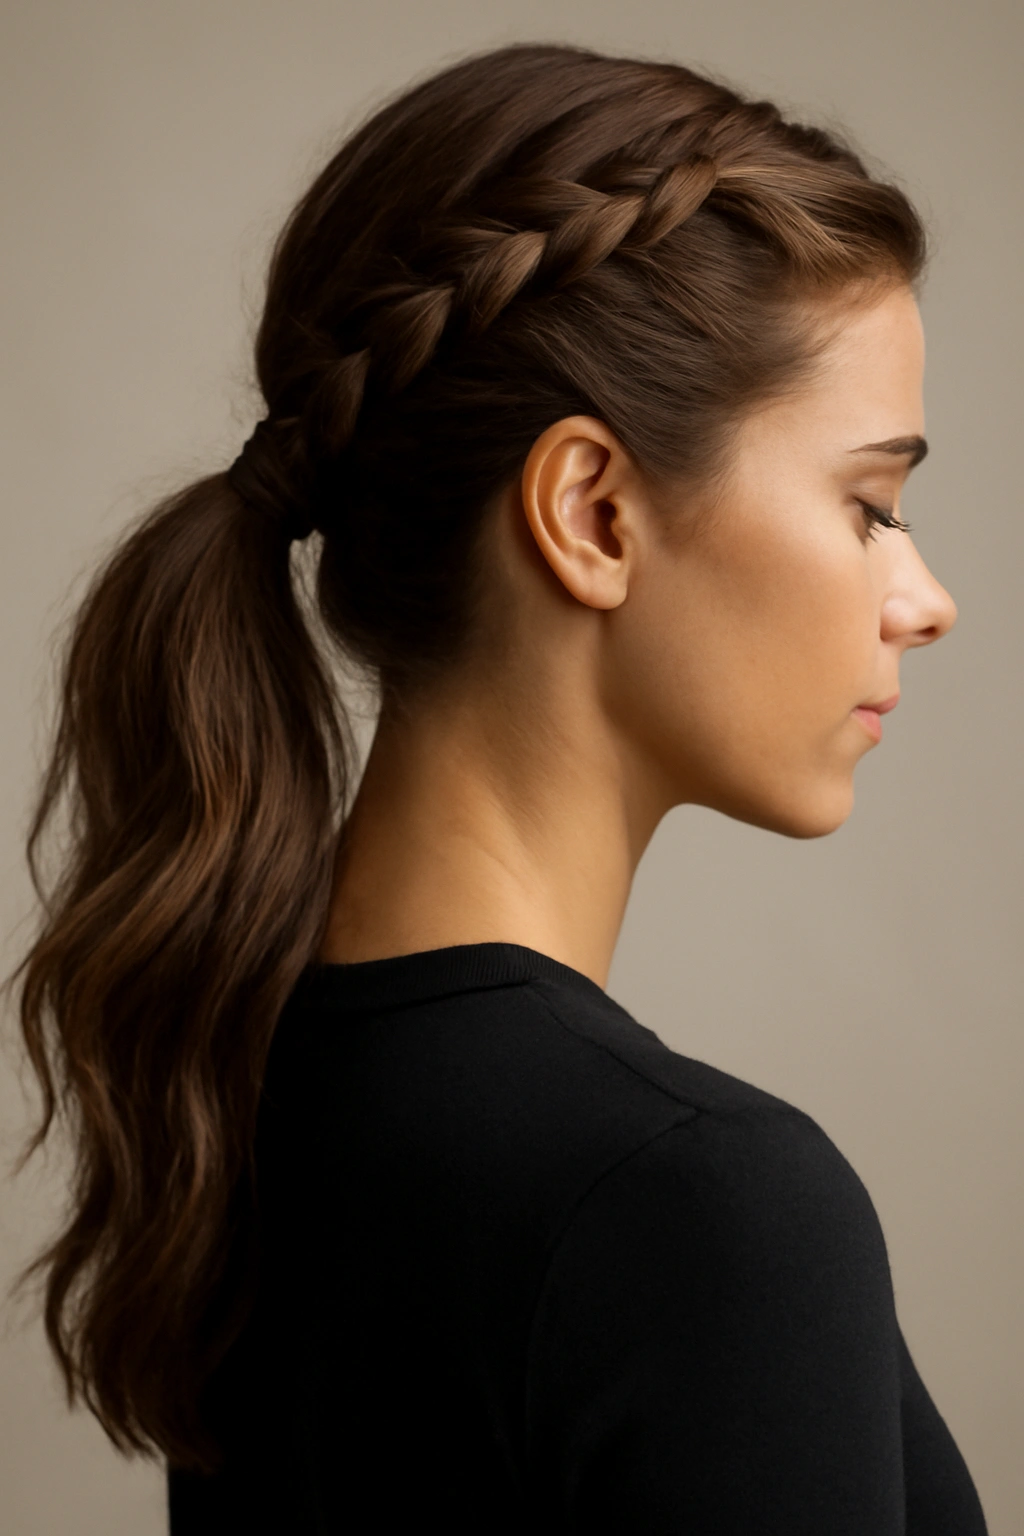
This style combines multiple techniques: a textured braid that starts at one side of your head, flowing down and eventually forming a ponytail. It’s a hybrid style that feels more intentional and intricate than a standard ponytail but is actually easier to execute than a full-head French braid. It works beautifully for both professional and evening settings.
Why This Hybrid Approach Works
The textured side braid ponytail creates visual movement and interest while maintaining enough polish for professional settings. The braid draws the eye down one side of your head, creating an asymmetrical look that’s flattering and modern. It also naturally incorporates texture and dimension that read as more expensive and styled than a straight ponytail. For evening, it looks romantic without being overdone.
Building a Side Braid Ponytail
- Begin at one temple with a small three-strand braid or Dutch braid
- Braid down the side of your head, picking up additional hair as you go if you want a thicker braid, or keeping it thin and delicate
- As you reach behind your ear, begin incorporating all of your hair into the braid
- Continue braiding until you’ve incorporated all your hair into one large braid
- This main braid becomes the base of your ponytail
- Secure the end of the braid with a small elastic band at your desired ponytail height
- Gently pancake the braid sections for added width and texture
- Leave a few face-framing pieces loose, curled lightly for softness
Insider note: You don’t need to be an expert braider for this style to look impressive. Even a loose, slightly imperfect braid reads as intentional and textured, especially once you’ve pancaked it.
15. Wrapped Base Ponytail
This final style focuses on making your ponytail base look expensive and intentional by wrapping a small section of hair around the elastic band. The wrapped section conceals the elastic completely and creates a finished, polished look that elevates any basic ponytail. It’s a detail that signals attention to grooming and styling, which works beautifully in any professional setting.
Why the Wrapped Base Matters
The wrapped base transforms a standard ponytail from looking quick and casual into looking intentionally styled. It’s a small detail, but small details compound into a polished overall appearance. The wrapped section also distributes tension across a wider area of your hair, which is gentler than a tight elastic band sitting directly against your strands. For evening events, a wrapped base with a complementary accessory looks genuinely expensive and custom.
The Wrapping Technique
- Create your ponytail at your chosen height and secure with an elastic band
- Take a small one-inch section from the underside of the ponytail
- Wrap this section around the elastic band, pulling it taut as you go
- Secure the wrapped section by tucking it underneath the ponytail and pinning it with a bobby pin pushed flat against your scalp
- The bobby pin should be positioned so the wrapped section completely covers your elastic band from front and side angles
- If needed, use a second bobby pin to fully secure the wrapped section
- Apply a light hairspray to keep everything in place
What it accomplishes:
- Completely conceals the elastic band for a polished finish
- Distributes tension more gently across your hair
- Allows you to add an accessory to the wrapped section without worrying about covering an elastic band
- Makes any ponytail style look more finished and intentional
- Works beautifully with both sleek and textured ponytails
Final Thoughts
The ponytail’s power lies in its versatility. Whether you choose a sleek low ponytail for a Monday morning presentation or a textured side braid ponytail for Friday evening drinks, you’re communicating something about yourself through your styling. The 15 styles here cover the full spectrum from boardroom-appropriate to romantically polished, with options for every hair type, texture, and face shape.
The most important thing to remember is that any of these styles can work for either work or evening — the difference comes down to execution details. A high ponytail that’s smoothly slicked and tightly anchored reads as professional, while the same ponytail made textured, loosely gathered, and paired with face-framing curls reads as evening-ready. You’re not limited to one ponytail style for one setting. Experiment with variations, find what makes you feel most confident, and don’t be afraid to repeat your favorites.
Your hair is a powerful tool for self-expression. The time you invest in learning these techniques pays dividends across every area of your life — you’ll feel more polished at work, more confident at social events, and more intentional about the image you’re presenting. Start with one or two styles that resonate with you, practice until they become automatic, then gradually build your repertoire. Soon enough, you’ll have a reliable ponytail option for any occasion that comes your way.