There’s something undeniably powerful about walking into a black-tie event with your hair perfectly styled and swept away from your face. An updo does more than keep your hair in place—it creates an instant sense of polish, intentionality, and timeless elegance. Whether you’re attending a gala, formal wedding, corporate dinner, or red-carpet-worthy occasion, the right updo can elevate your entire look and give you the confidence that comes from knowing every detail is polished to perfection.
The challenge, though, is figuring out which updo actually works for your hair type, face shape, and the specific vibe you’re going for. Not every sleek style suits every person, and what photographs beautifully might feel uncomfortable after six hours of wear. That’s why this guide walks you through eight proven sleek updos specifically designed for formal occasions—each one explained in detail so you understand exactly how to achieve it, who it looks best on, and how to make sure it lasts all night without falling apart.
The updos ahead range from architectural and dramatic to softly romantic, from classic styles that have worked for decades to modern takes on traditional techniques. You’ll learn the specific hair textures and face shapes each style flatters most, the exact products and tools that make the difference between a updo that lasts and one that droops by dessert, and real troubleshooting tips for common problems like flyaways, slipping bobby pins, and volume loss. Whether you’re planning to do this yourself or bringing these ideas to your stylist, you’ll have everything you need to choose and execute the perfect formal updo.
1. The Classic Chignon

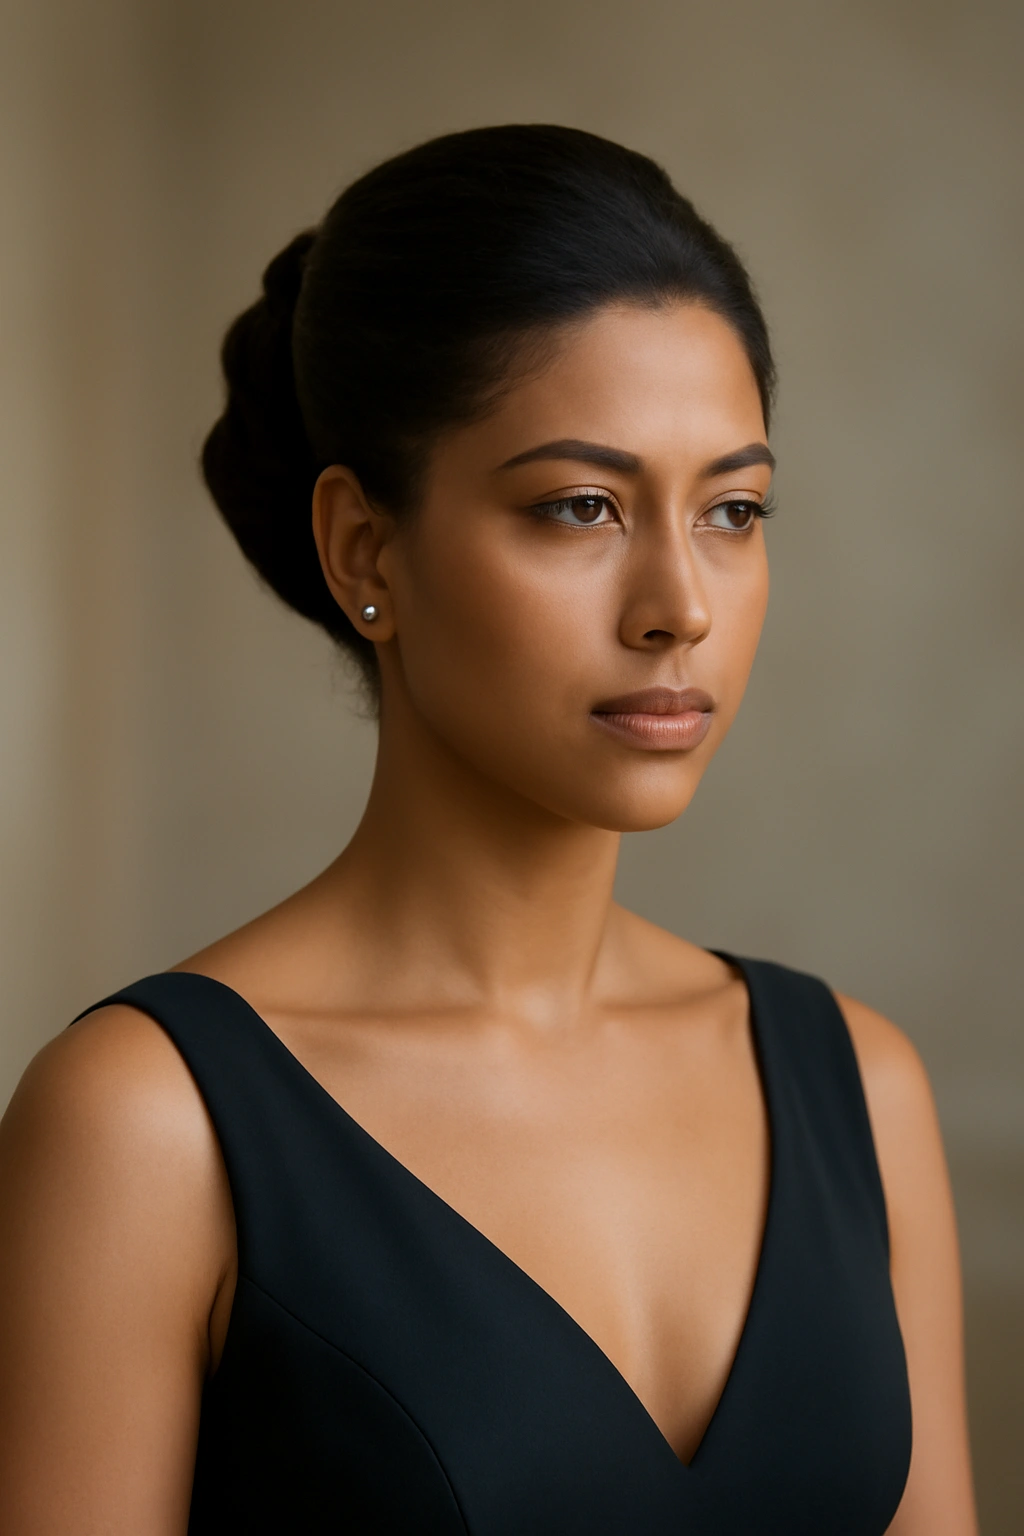
The chignon is perhaps the most recognizable formal updo in existence—refined, timeless, and elegant enough for any occasion from a wedding to a state dinner. It’s a low knot of hair positioned at the nape of the neck, either gathered into a smooth, tightly wrapped bun or gently looped and pinned for a slightly softer look. The beauty of a chignon lies in its simplicity and its absolute formality; there’s nothing trendy or experimental about it, which is precisely why it works so reliably for black-tie events.
Why the Chignon Works for Formal Events
The chignon keeps hair completely off the face and neck, creating clean lines that flatter virtually every face shape. It’s particularly stunning on oval and heart-shaped faces, where it elongates and showcases the jawline, but it also works beautifully on square faces because the low placement softens the corners. The style photographs incredibly well—your face is fully visible, your neck appears elegant and elongated, and there are no stray wisps to distract from your features or your outfit. From a practical standpoint, a properly secured chignon can withstand an entire evening of movement, dancing, and talking without significant slippage.
How to Create a Perfect Chignon
Begin with clean, dry or slightly textured hair (blow dry and add light texture spray if your hair is naturally very straight). Brush hair back into a low ponytail positioned at the nape—not quite at the very base of your skull, but lower, roughly where your neck begins to curve. Secure the ponytail tightly with a clear elastic. Divide the ponytail into two equal sections. Wrap one section around the base of the ponytail in a spiral, pinning as you go with bobby pins that match your hair color. Wrap the second section in the opposite direction, creating a smooth, rounded knot. Secure thoroughly with 4-6 bobby pins. Smooth any flyaways with a fine-tooth comb and a light hairspray—not so much that it looks stiff, but enough to keep everything in place through the evening.
Pro tip: For a more voluminous chignon that photographs better, gently backcomb the ponytail before wrapping it. This creates texture and makes the final knot look fuller and more substantial rather than thin and pulled-tight.
2. The Hollywood Waves Updo
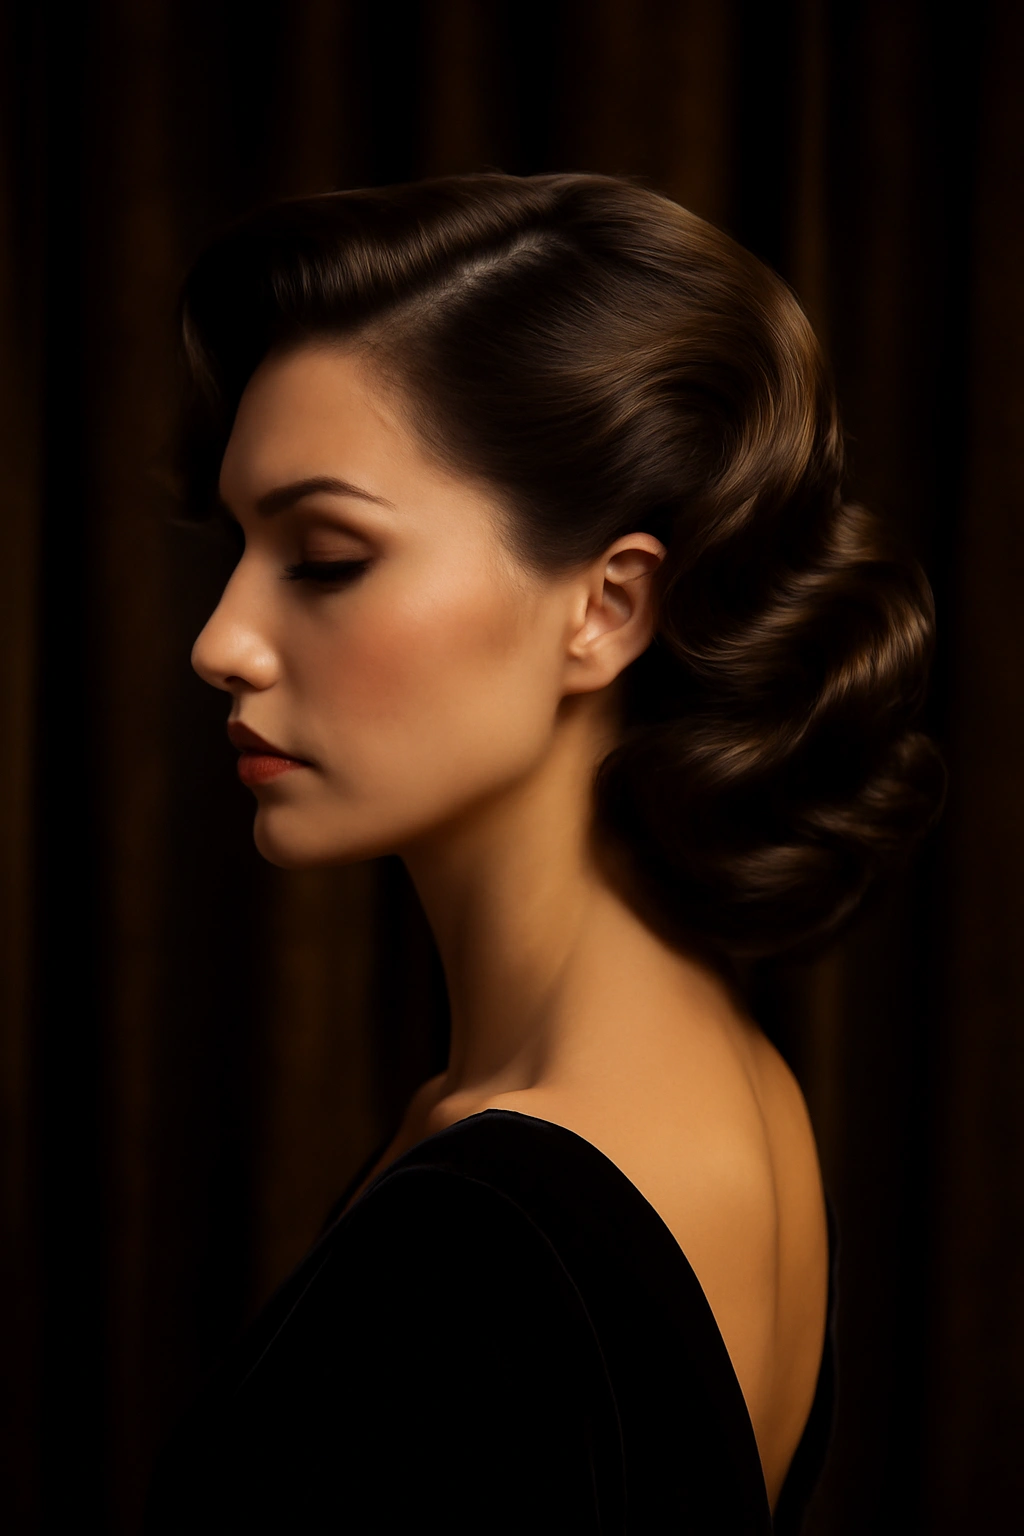
If the chignon represents timeless restraint, the Hollywood waves updo represents old-school glamour with a modern twist. This style combines the formality of a fully pinned-up updo with the romantic, undulating waves of 1940s Hollywood starlets. Hair is swept up and back, curled into loose waves before being pinned, creating an updo that has movement, dimension, and a touch of showstopper drama—perfect for someone who wants to make a visual statement while still maintaining the polish that formal occasions demand.
The Glamour Factor and Who It Suits Best
Hollywood waves updos look absolutely stunning on people with naturally wavy or thick hair, and they work particularly well on those with oval, oblong, or round face shapes. The waves create the illusion of adding height to the crown, which balances a round face beautifully. The style is especially flattering for those with strong cheekbones or a defined jawline, as the swept-back hair completely showcases these features. If you have fine or thin hair, this style can still work, but it requires more strategic pinning and potentially hair extensions or volumizing powder at the roots to create the illusion of fuller waves. The Hollywood waves updo photographs like a dream—it’s a style that looks even more impressive in pictures than it does in person, with depth, dimension, and unmistakable elegance.
Creating Hollywood Waves for Formal Occasions
Start with hair that’s been curled into loose waves using either a large-barrel curling iron or a waver tool. Let the curls cool completely before touching them—this is critical for longevity. Once cool, gently brush through the curls to soften them into waves rather than defined ringlets; you want flowing undulation, not separated curls. Spray lightly with a flexible hairspray. Section your hair into two halves down the center back. Twist each section loosely and pin to the side of your head with 3-4 bobby pins, allowing the waves to show and move slightly rather than creating a completely smooth, tight twist. For added drama, pull a few face-framing pieces loose and curl them slightly to dangle near your face. Secure everything with a strong-hold hairspray, but apply it in light misting bursts to avoid a crunchy, stiff appearance.
Worth knowing: The key to Hollywood waves lasting all evening is properly cooled curls and strategic use of hairspray between styling steps. If you rush and pin waves before they’ve fully set, they’ll drop within an hour.
3. The Sleek High Ponytail
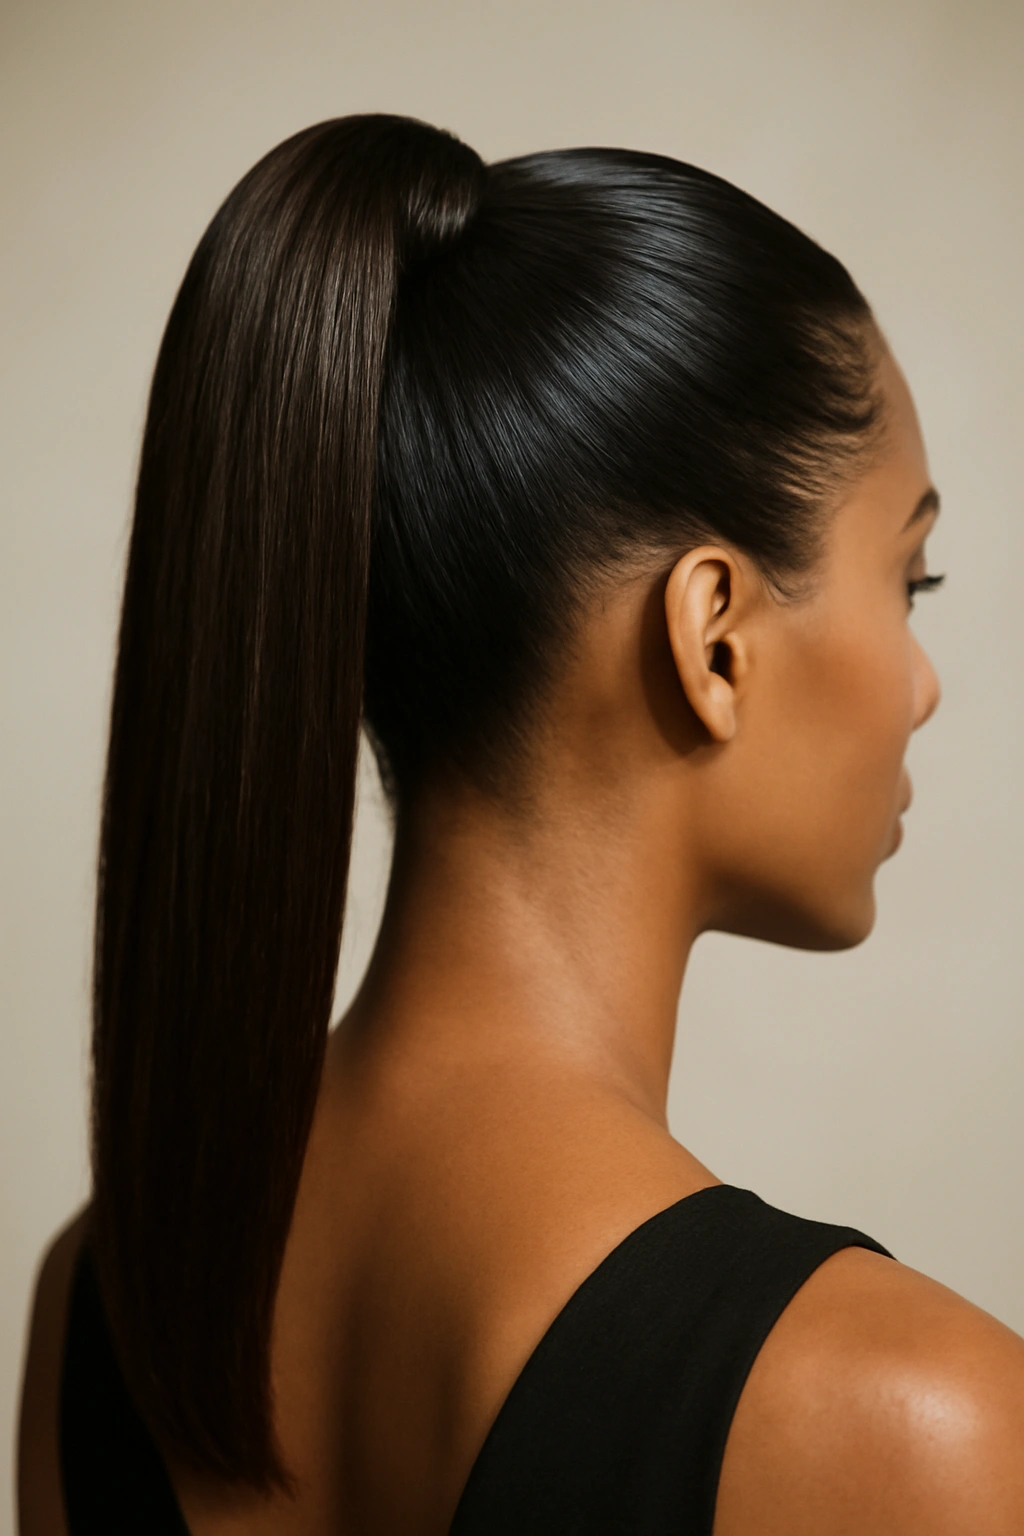
Don’t let the simplicity of a high ponytail fool you—when executed with precision, it’s one of the most striking and modern formal updos available. A sleek high ponytail sits at the crown of the head, with every hair smooth and perfectly controlled, gathered into a polished tail that falls between the shoulder blades. The style is contemporary, slightly architectural, and undeniably elegant. It works especially well for those who want an updo that feels less traditional than a chignon but equally formal and put-together.
Modern Elegance and Face-Flattering Qualities
The high ponytail draws attention upward and creates instant lift at the crown, which is exceptionally flattering for those with longer faces or oblong face shapes. It also works beautifully for oval and heart-shaped faces, where the upward pull and exposed forehead can be truly striking. The style is less flattering on round faces (where it can emphasize roundness) unless you add side-swept bangs or allow some face-framing pieces to soften the silhouette. What makes the high ponytail so modern for formal events is its architectural quality—it’s not soft or romantic, but rather sharp, intentional, and effortlessly chic. It photographs with clean lines and absolute clarity, making it a favorite of photographers for formal events and portraits.
Achieving the Perfectly Sleek High Ponytail
The difference between a casual high ponytail and a formal, elegant one comes down to meticulous smoothness and finish. Begin with blow-dried hair and apply a smoothing serum or light oil to tame flyaways. Using a fine-tooth comb, brush hair straight back into a high ponytail positioned at the crown—not so high that it pulls uncomfortably, but high enough to be visibly at the top of your head. Secure with a clear elastic, then immediately wrap a thin section of hair (taken from the ponytail itself) around the base of the elastic to conceal it. Pin this wrapped section with a bobby pin tucked underneath. Use a smoothing gel or wax on any flyaways, working it through with your fingers and then combing gently. The tail itself should be absolutely smooth—brush through it one more time and apply a light hairspray. For added polish, consider wrapping the base with a thin piece of silk fabric or a decorative hair cuff to elevate the look further.
Insider note: The secret to a sleek ponytail that doesn’t look severe or painful is ensuring it’s positioned slightly forward of the absolute crown—roughly one to two inches forward—rather than directly on top of the head. This creates an elegant lift without the pulled, uncomfortable appearance.
4. The Twisted Crown Updo
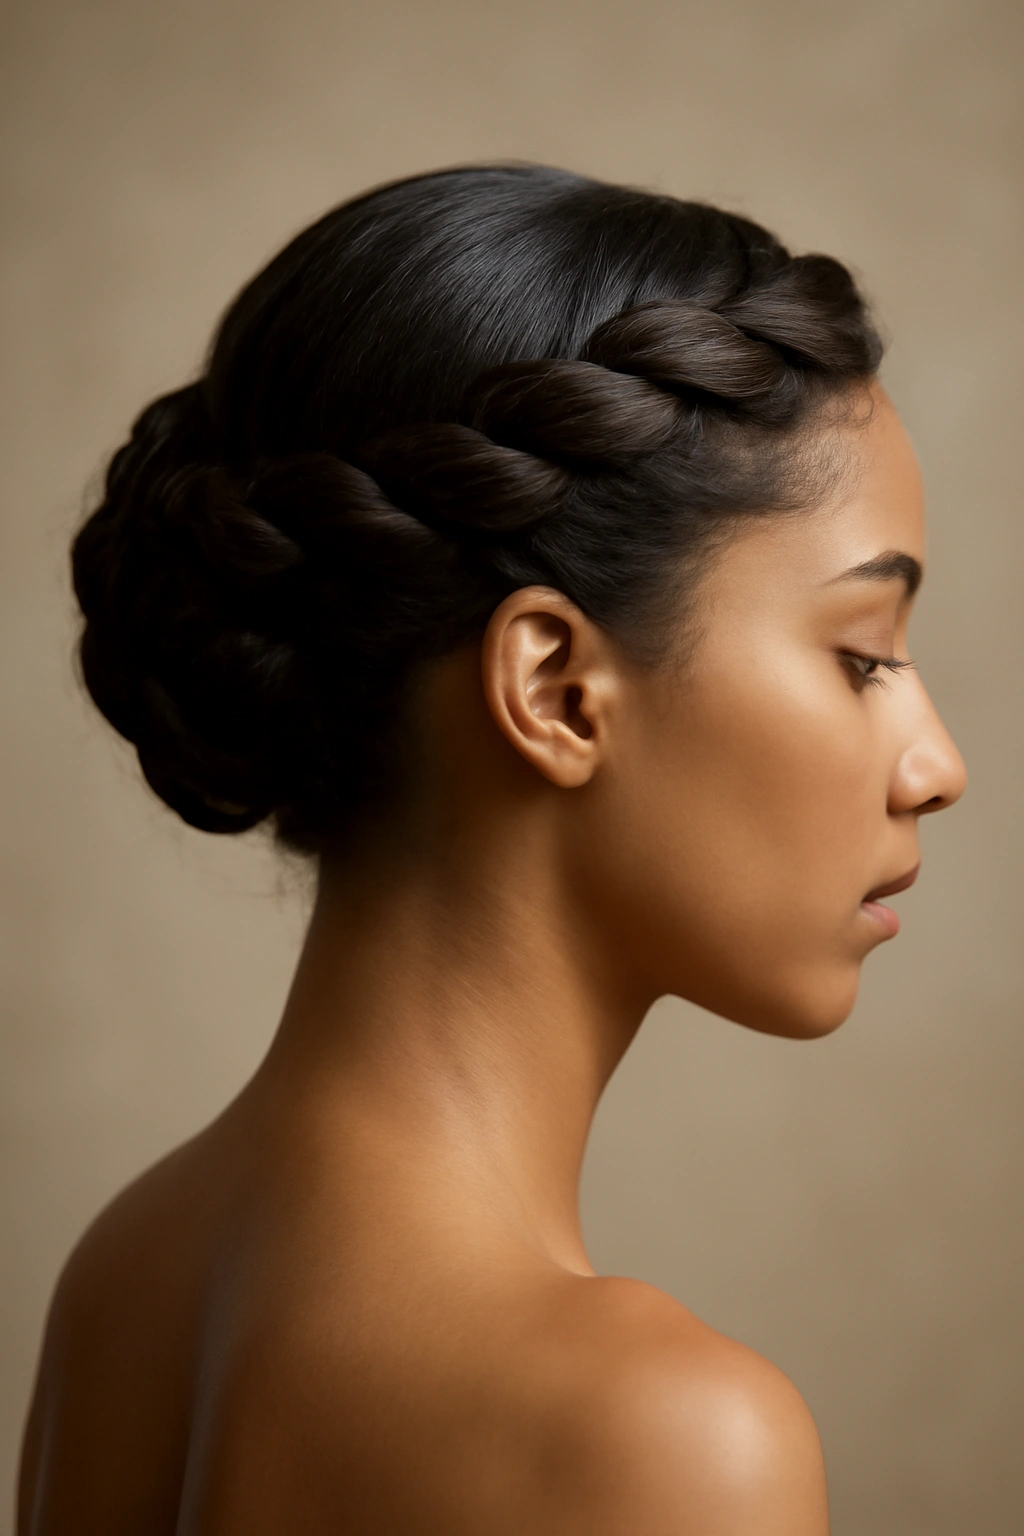
For those who want something more interesting than a basic ponytail but simpler to execute than an elaborate braided style, the twisted crown updo delivers sophisticated elegance through graceful simplicity. This style involves twisting two sections of hair around the crown of the head and pinning them together at the back, creating a halo-like effect that’s both romantic and refined. It’s formal enough for black-tie occasions but has enough texture and movement to feel modern and dynamic rather than overly traditional.
Visual Impact and Best Face Shapes
The twisted crown updo creates beautiful lines that are especially flattering on round and square faces, as the horizontal twist across the crown can visually lengthen a round face and soften the angles of a square one. The style also works wonderfully on heart-shaped faces, where it frames the upper face attractively without calling attention to the forehead or cheekbones too dramatically. The halo effect created by the twists draws the eye upward and outward, which is universally flattering. This updo has real visual interest—it’s not minimalist, but it’s also not overly complicated, making it a perfect choice for someone attending a formal event who wants to look polished and intentional without appearing fussy.
Step-by-Step Twisted Crown Technique
Start with hair that has some natural texture or light wave; if your hair is very straight, add texture with a waver or light hairspray applied to damp hair before blow-drying. Part your hair down the center or to one side, depending on your preference. Take a one-inch-wide section of hair from one side of your part near the temple and twist it loosely toward the back of your head, keeping it at crown level. As you twist, gently pull wisps of hair from underneath and incorporate them into the twist to create a fuller, more voluminous effect. Secure the twisted section at the back of your head with 2-3 bobby pins. Repeat on the other side, twisting the hair from temple to back. The two twists should meet at the back of your head; pin them together firmly. You can leave the ends of the twists slightly loose and pinned subtly, or you can wrap them around each other slightly to create a more finished look. Smooth flyaways with a fine comb and apply a flexible-hold hairspray.
Pro tip: If you want extra volume in your twisted crown updo, backcomb each section very gently before beginning to twist. This adds dimension and prevents the style from looking thin or delicate.
5. The Low, Romantic Bun

For someone who wants to attend a formal event while maintaining an element of softness and romance, the low, romantic bun offers formality without stiffness, elegance without severity. Unlike the tightly sculpted chignon, this bun has texture, movement, and a touched-by-wind quality that feels luxurious and intentional. Hair is swept into a low ponytail, then gently twisted or braided and loosely coiled into a soft, undulating bun at the nape. The style suggests effort without showing all the work, and it photographs beautifully from every angle.
Romantic Appeal and Universal Flattery
The low, romantic bun is perhaps the most universally flattering updo across all face shapes and hair types. It softens the appearance of an angular face while providing subtle lift that complements rounder faces. The style works on fine, medium, and thick hair, and it looks elegant whether your hair is straight, wavy, or curly. The romantic quality comes not from hair type but from the intentionally undone quality of the bun—it should look like you created it effortlessly, even though that takes work. This style is especially popular for black-tie events where the occasion calls for formality but the aesthetic leans toward luxury and sensuality rather than strict, architectural precision. It’s the updo you’d see at an elegant evening gala or a sophisticated dinner party.
Creating a Soft, Romantic Low Bun
Begin with textured or wavy hair; if your hair is very straight, add texture with a waver or curl-setting spray on damp hair before styling. Create a low ponytail at the nape of your neck, keeping it somewhat loose rather than pulling tightly. Gently backcomb the ponytail to add texture and volume—this is the secret to achieving that full, romantic look rather than a sparse, thin bun. Twist the backcomb section loosely, then coil it around the base of the ponytail into a loose, undulating bun shape. Secure with 4-5 bobby pins, allowing some texture to show rather than smoothing everything flat. Pull a few delicate wisps loose around the face and near the nape for that intentional, romantic effect. Apply a very light, flexible-hold hairspray that will keep the bun in place without making it look stiff or shellacked. The final look should feel soft and slightly tousled, as if you’ve been dancing all evening in the most elegant way possible.
Worth knowing: The texture you create by backcombing is absolutely essential to a romantic bun—without it, you’ll end up with a thin, tired-looking bun rather than a voluminous, romantic one. Don’t skip this step, even if your hair already has some natural texture.
6. The Braided Wrap Updo
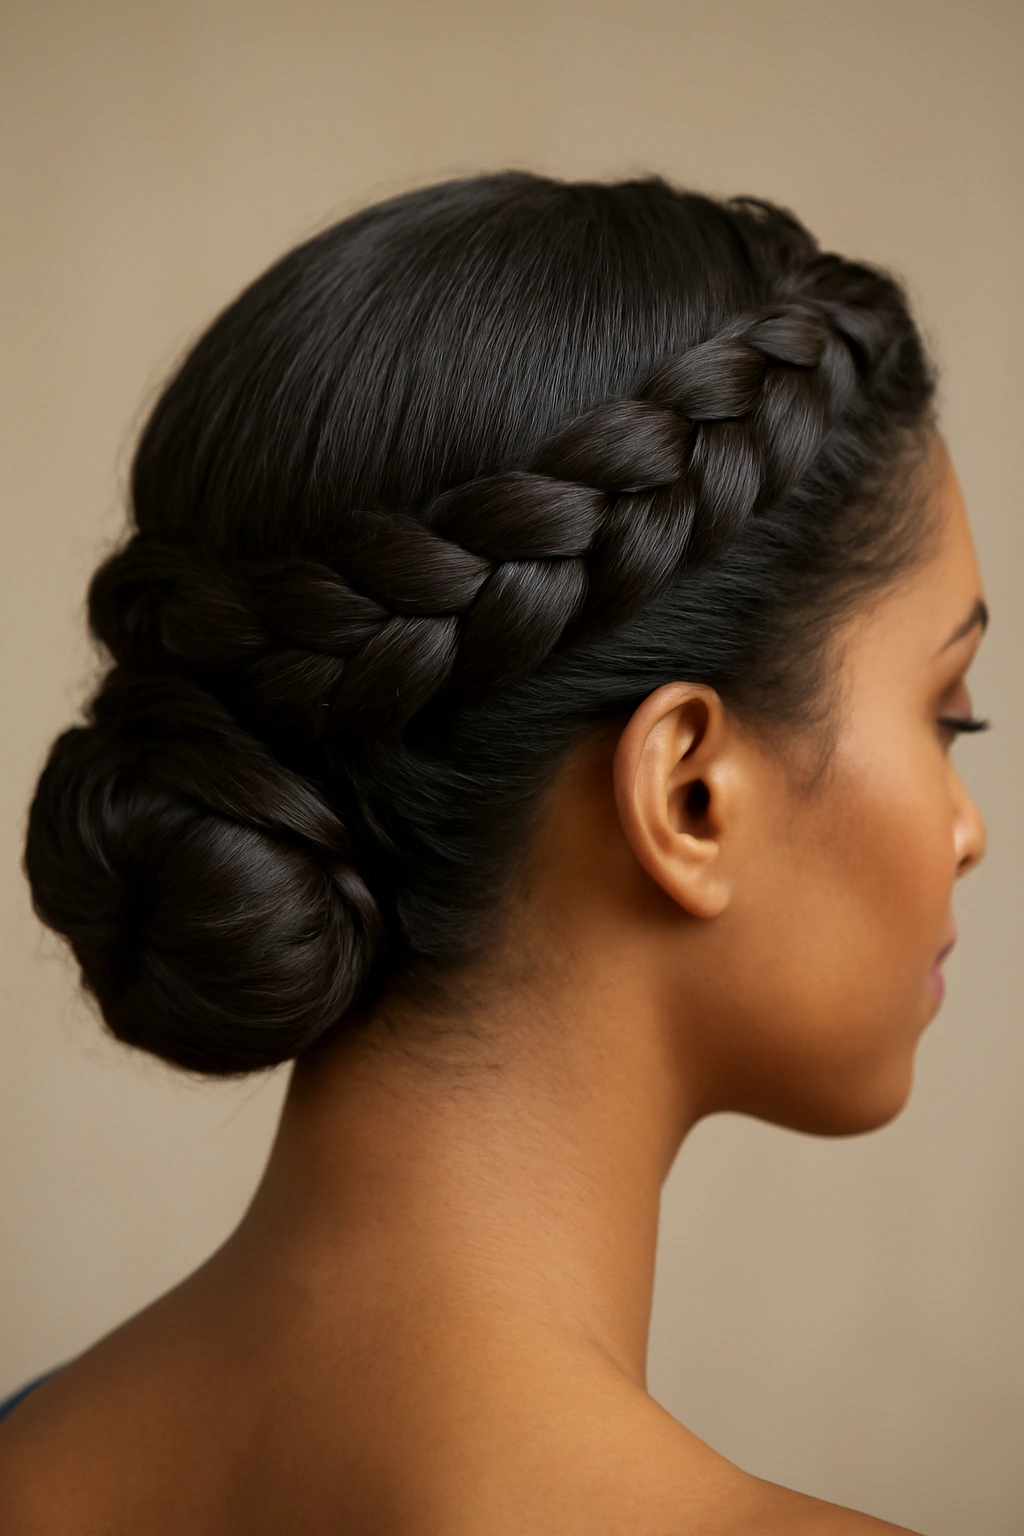
Braids instantly elevate an updo from simple to sophisticated, and the braided wrap combines the beauty of a braid with the formality of an updo to create something that feels both playful and elegant. One or two braids wrap around the crown like a crown itself, with remaining hair pinned into a bun at the nape. The style is intricate enough to look impressive and intentional, yet achievable for anyone who can execute a basic three-strand braid. It’s particularly striking for formal events where you want to demonstrate both polish and a hint of personality through the braided detail.
Sophisticated Detail That Photographs Beautifully
The braided wrap updo is especially flattering on those with oval, heart-shaped, or oblong faces, where the braided crown draws attention to the upper face and creates beautiful framing. The style works on straight, wavy, and curly hair, though it’s particularly stunning on hair with natural texture that makes the braid more visually interesting. What makes this updo work so well for formal events is that it feels special and considered—a braid signals that you’ve taken time with your appearance—while remaining completely appropriate for even the most formal black-tie occasion. It photographs with dimension and detail, and it’s the kind of style that makes people stop and ask, “How did you do that?” even though the execution is relatively straightforward.
Building Your Braided Wrap Updo
Start with hair that’s either naturally textured or has been lightly waved. Create a deep side part and, beginning from one temple, braid a Dutch braid (a braid where you thread under rather than over, creating a raised effect) across the crown toward the opposite side of the head—roughly from temple to ear on the back of your head. Secure the end of the braid with a small clear elastic. If you want extra impact, create a second, thinner braid and wrap it underneath or alongside the first. Gather remaining hair into a low ponytail or bun at the nape and secure. Tuck the ends of the braids into this low bun or wrap them around it, securing with bobby pins so they blend seamlessly. Use a fine comb to smooth any flyaways and apply a light, flexible-hold hairspray. The braids should be visible and beautiful, not hidden—they’re the star of this style.
Pro tip: If you find braiding difficult or your braids don’t hold tightly, use a light texture spray or dry shampoo on your hair before braiding. This gives your hair grip and makes braids stay in place more easily without slipping.
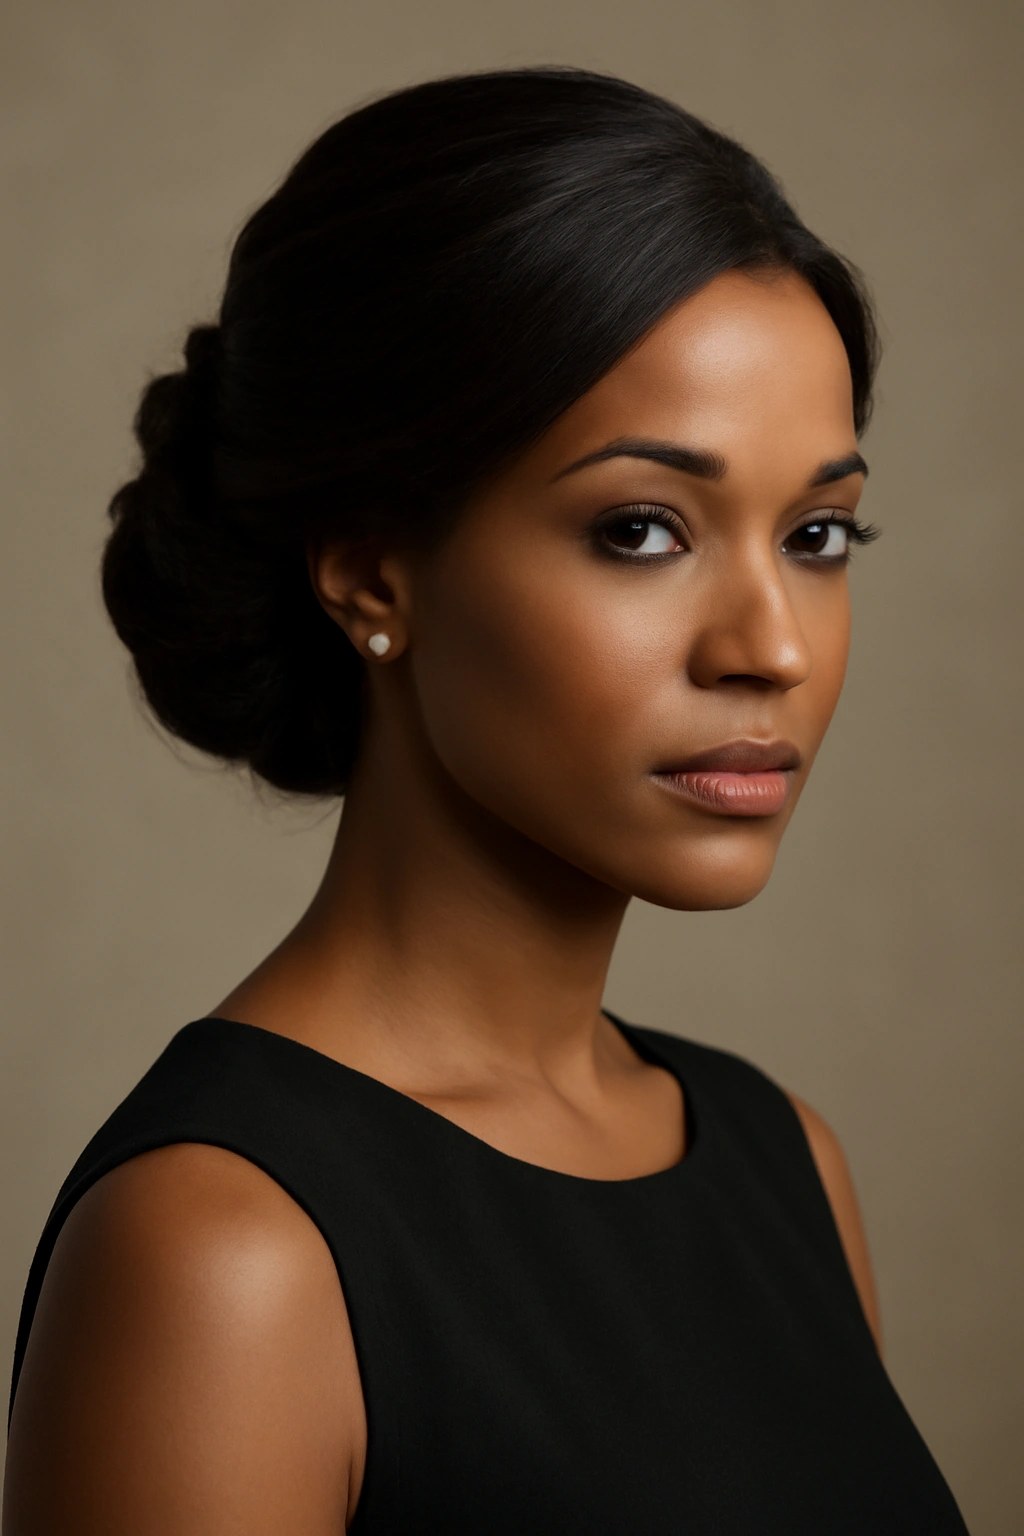
7. The Polished Low Knot

Sometimes the most striking updo is the one that looks completely effortless—a sleek, modern knot that appears to have come together in minutes but actually requires precision and technique. The polished low knot sits at the nape of the neck and is formed by wrapping hair into a tight, geometric knot shape rather than a rounded bun. It’s contemporary, sharp, and unexpectedly dramatic—a style that works beautifully for someone who wants their updo to feel edited and modern rather than ornate or romantic.
Modern Formality and Architectural Appeal
The polished low knot is ideal for those with longer faces or oblong face shapes, where the clean lines and lower placement balance facial proportions beautifully. It also works wonderfully on those with strong jawlines or defined cheekbones, as the updo completely showcases these features. The style is less suited to very round faces, where it can emphasize roundness, though adding subtle side-swept pieces can soften this effect. What makes this updo so striking for formal occasions is its modern sensibility—it’s a style you’d see on a contemporary art gallery opening attendee or a high-powered business dinner guest rather than a traditional wedding. It photographs with absolute clarity and clean lines, making it a favorite for formal portraits and event photography.
Executing the Polished Low Knot
Begin with smooth, blow-dried hair and apply a smoothing serum or light oil to create slip. Brush hair into a tight, low ponytail at the base of your neck. Secure with a clear elastic. Divide the ponytail into two equal sections. Take one section and wrap it tightly around the base of the ponytail, pinning as you wrap. When you reach the end of that section, tuck it underneath and secure with bobby pins. Wrap the second section in the opposite direction, creating a geometric, knot-like shape. Tuck the end underneath and secure thoroughly with bobby pins. The final result should look like a tight, sculptural knot rather than a soft bun—think geometry rather than romance. Smooth any flyaways with a fine comb and a tiny amount of wax or gel, and finish with a light hairspray. The knot should look polished and intentional, with clean lines and no flyaways.
Insider note: For a knot that holds all evening without slipping, use at least 6-8 bobby pins and make sure every section is pinned to your actual hair (not just to another bobby pin). The more secure your base, the more confident your knot will be.
8. The Elegant Textured Updo
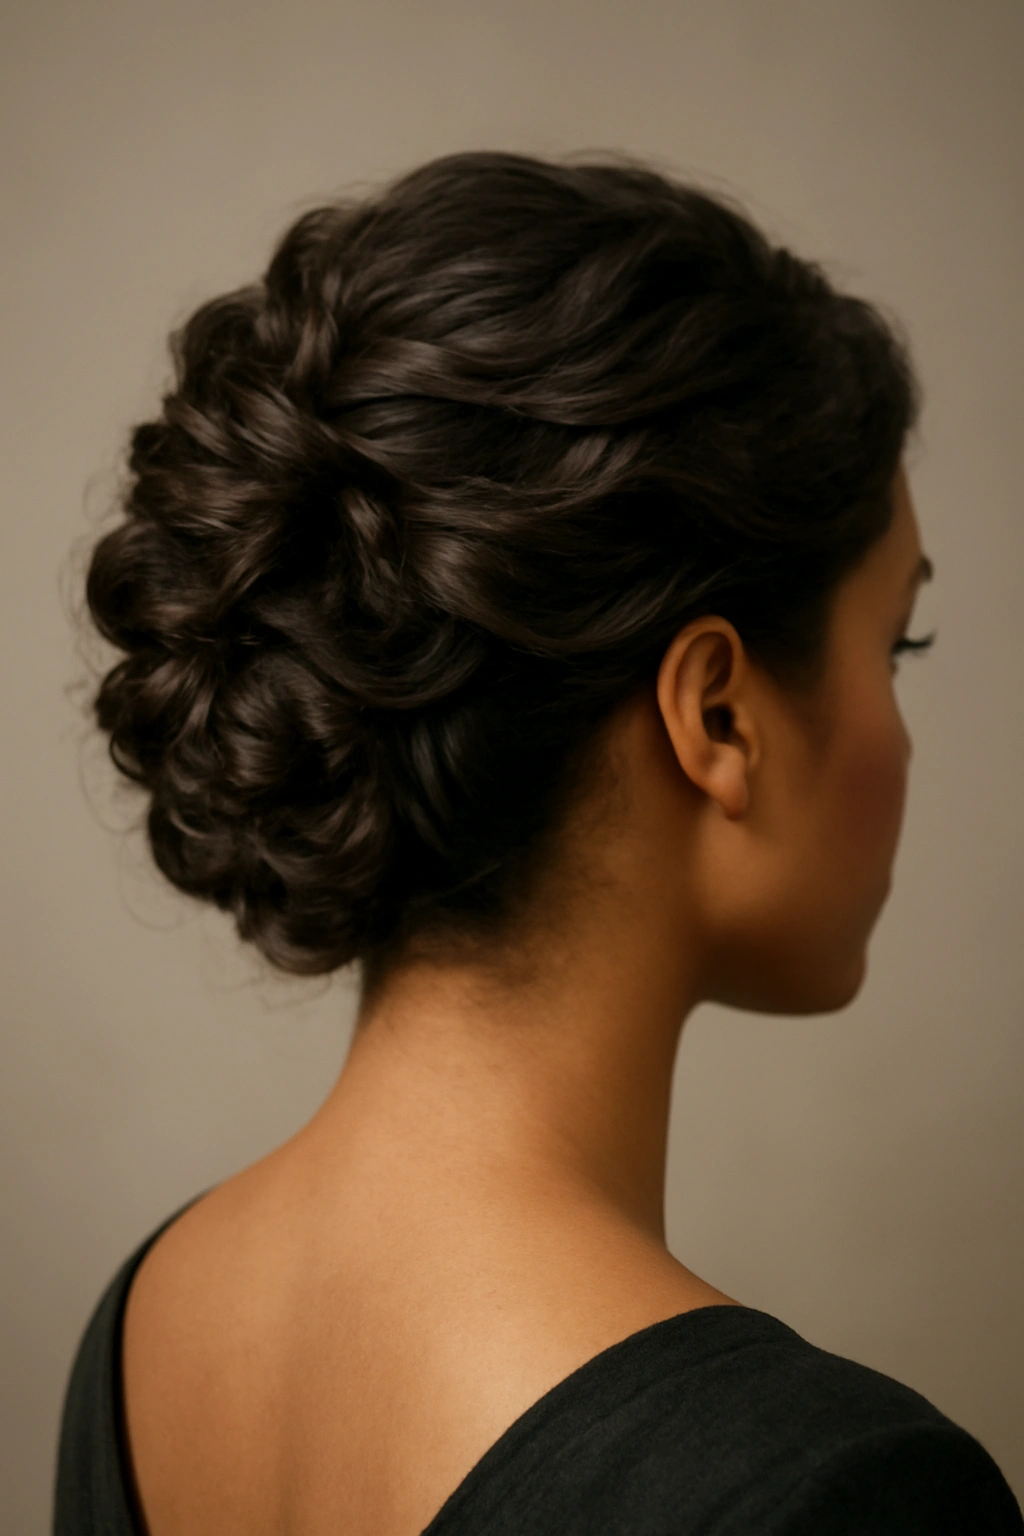
Completing this collection is the elegant textured updo—a style that celebrates volume, movement, and sophisticated dimension. Rather than smoothing every strand into sleekness, this updo deliberately preserves and enhances texture, creating an updo that looks luxurious, effortless, and undeniably glamorous. It’s perfect for those with naturally curly or wavy hair, or for anyone who wants an updo that celebrates hair texture rather than fighting against it. The style works for black-tie occasions because texture read as luxurious and intentional rather than disheveled or undone.
Texture as Elegance and Who This Style Works Best For
The elegant textured updo is naturally flattering on those with curly, wavy, or thick hair—textures that create automatic dimension and volume. However, even those with straight or fine hair can create this style by adding texture with waves or curls beforehand. The style is especially stunning on those with oval or heart-shaped faces, where the textured volume at the crown creates beautiful balance. The updo photographs with incredible dimension and visual interest; it’s the kind of style that looks even more impressive in photographs than in person. What makes this updo so effective for formal events is that it signals confidence and a sophisticated understanding of your own hair—it’s not trying to be something it’s not, but rather celebrating what it naturally is.
Building Your Textured Formal Updo
Start with naturally textured hair or create waves and curls throughout your hair using a curling iron or waver. Allow curls to cool completely, then gently finger-comb through them to create soft waves rather than defined ringlets. Flip your head upside down and gather hair into a high ponytail at the crown using a gentle hand to preserve texture. Flip back over and secure with a clear elastic. Gently backcomb the ponytail to enhance volume and texture. Twist the ponytail loosely and coil it into a bun, allowing texture to show and wisps to escape naturally. Secure with bobby pins, then use your fingers to gently pull and separate the bun slightly to enhance its textured, voluminous appearance. Spray very lightly with a flexible-hold hairspray—you want to set the style without making it look stiff. Pull a few delicate wisps loose around your face and neck for softness and movement.
Pro tip: The secret to a textured updo that lasts all evening is a strong dry shampoo applied at the roots before styling. This adds grip and texture to your hair, making everything hold better without requiring heavy product that would weigh it down.
Choosing the Right Updo for Your Occasion
While each of these eight styles works beautifully for black-tie and formal events, the right choice for you depends on several factors beyond just personal preference. Consider the specific nature of the event: a traditional black-tie gala calls for more classic styles like the chignon or romantic bun, while a modern art museum benefit or contemporary gallery opening pairs perfectly with the polished low knot or sleek high ponytail. Think about what you’ll be doing all evening—if you’re standing and talking most of the time, a secure chignon or high ponytail is ideal. If you’ll be dancing and moving, a romantic bun or textured updo that can shift slightly without falling apart is more comfortable and practical.
Your face shape matters more than you might think. If you’re uncertain, take a mirror selfie with your hair pulled back tightly and study which areas of your face you want to emphasize. Longer faces benefit from styles that add width across the crown, like the twisted crown or Hollywood waves. Rounder faces look stunning with styles that create vertical lines, like the sleek high ponytail or polished low knot. Heart-shaped faces are flattered by almost every style on this list, but particularly by those that frame the face gently, like the twisted crown or braided wrap.
Your hair type and texture also influence which style works best. Those with fine or thin hair should gravitate toward styles that incorporate backcombing or that allow for looser, more voluminous formations—the romantic bun and elegant textured updo work beautifully here. Those with thick hair can pull off any of these styles, but particularly stunning options include the Hollywood waves (which your hair naturally fills out) and the braided wrap (where your hair’s thickness makes the braid more visually impressive). If you have curly or very textured hair, the elegant textured updo and romantic bun are your stars, though any of these styles can be adapted to work with your natural texture.
Essential Products and Tools for Flawless Formal Updos
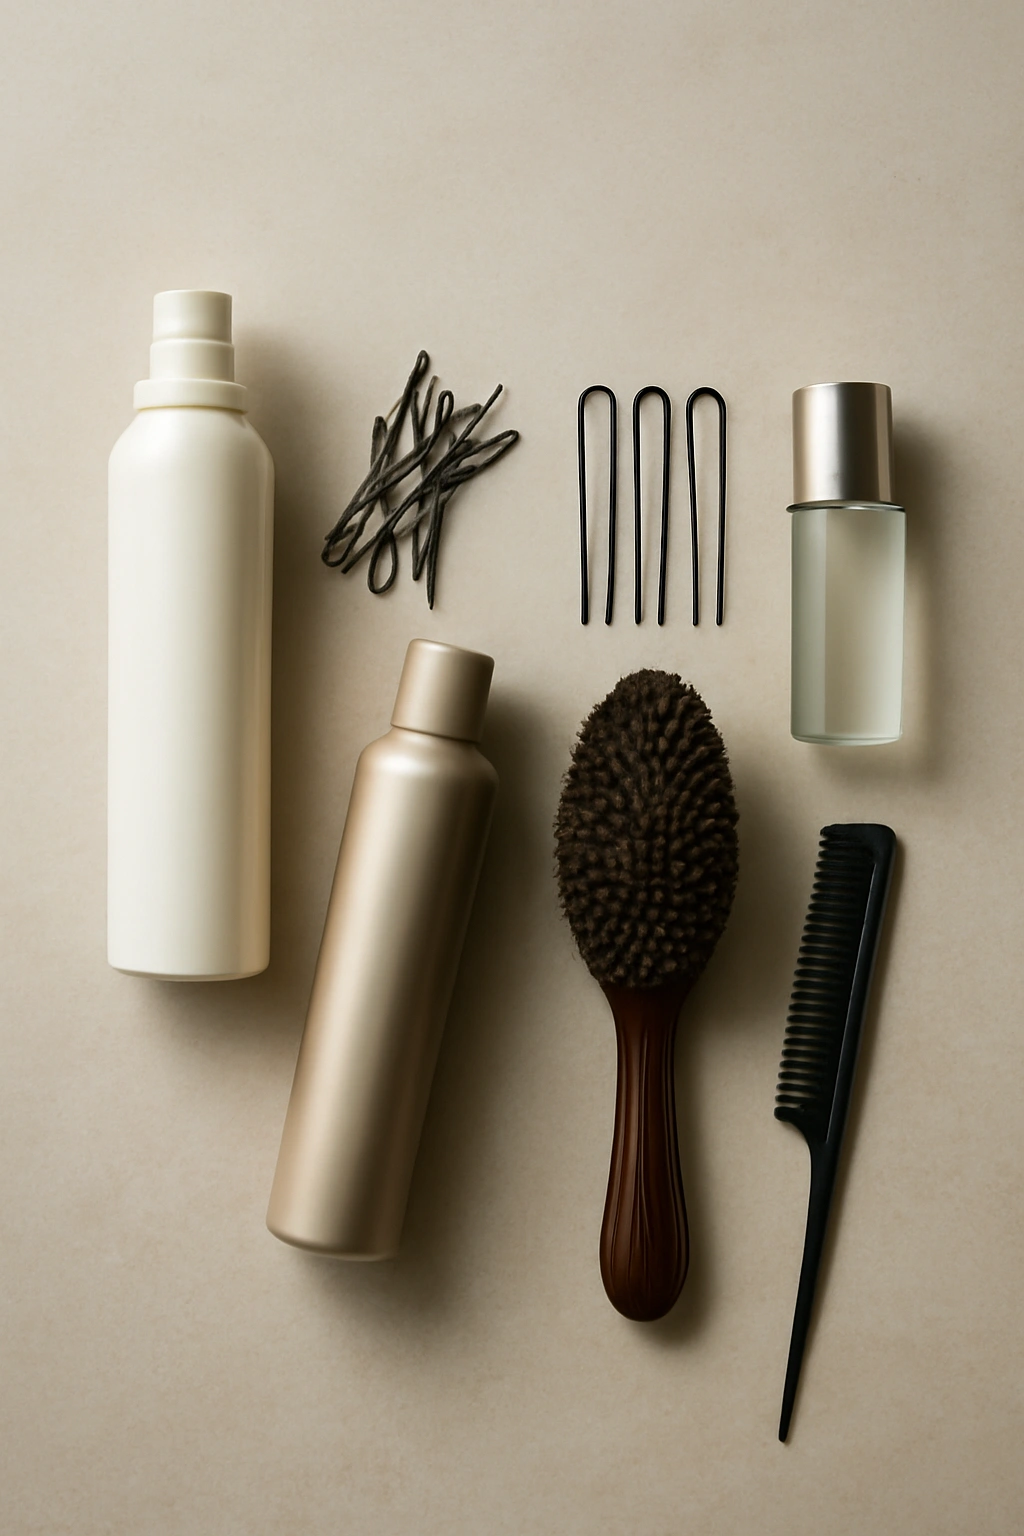
No updo is better than the products and tools used to create and secure it. Begin with a volumizing mousse applied to damp roots before blow-drying—this creates the foundation of lift and texture that makes every updo look fuller. A light texturizing spray applied to dry hair before styling gives grip and makes hair easier to work with; it’s especially valuable if your hair is slippery or fine.
For securing your updo, invest in properly sized bobby pins in a color that matches your hair. Too-short pins won’t grip; too-long pins create visible bumps. Use U-shaped bobby pins for thicker sections and smaller bobby pins for delicate finishing work. A small, fine-tooth comb is essential for smoothing sections without creating frizz, and a boar-bristle brush helps with final smoothing without damaging hair.
A light hairspray with flexible hold is crucial—you want hold without stiffness. Spray in light misting bursts rather than soaking your hair. For particularly slippery hair, a light gel or wax applied with your fingers to flyaways works beautifully without visible product buildup. A smoothing serum on damp hair before blow-drying creates slip and shine, making hair easier to work with. Finally, keep a fine-tooth comb and bobby pins in your evening bag for touch-ups during the event.
Common Updo Problems and How to Fix Them
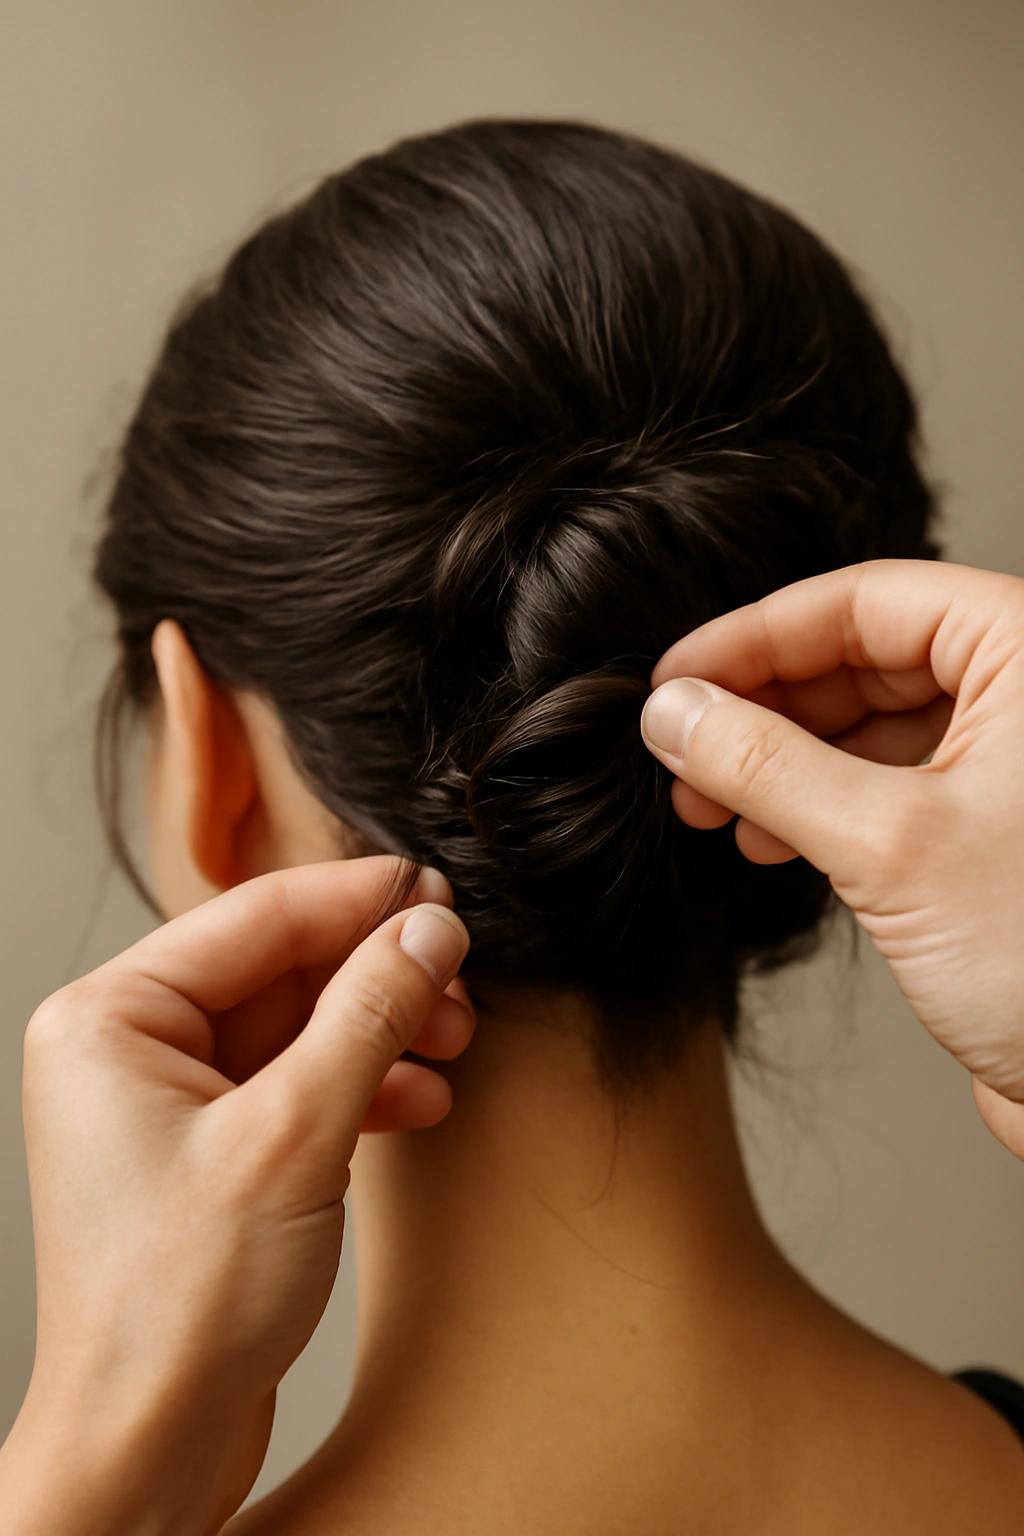
Even with perfect execution, updos can sometimes shift during a long evening. If your updo starts to feel loose or droopy, find a private moment and gently backcomb the affected area to re-grip, then re-pin if necessary. If you notice flyaways, a tiny dab of wax applied with your fingertip and smoothed down gently is infinitely more elegant than trying to spray more hairspray on top of an already-set style.
If bobby pins are showing or slipping, the problem usually isn’t the pins but the base they’re pinned into. Make sure you’re pinning directly to your scalp and hair, not just to other bobby pins or to thin wisps of hair that can’t support weight. If your bun or knot feels too loose, add one more bobby pin underneath, angled upward into the base—often just one more pin is all that’s needed.
If sections are falling down, resist the urge to add more product; instead, gently backcomb the fallen section and re-pin it with fresh pins. Product alone won’t hold hair that doesn’t have grip. If your entire updo is slipping, the problem is likely that your initial base (ponytail or sectioned hair) isn’t tight enough. For future events, pull your base sections tighter initially—you can always loosen things slightly for comfort, but starting loose means slippage throughout the evening.
Final Thoughts
Choosing and executing the right updo for a black-tie or formal event is about understanding both the occasion and yourself—your face shape, hair type, personal style, and what makes you feel confident and beautiful. Each of the eight styles covered here works beautifully for formal events, and each can be executed at home with practice or with the guidance of a skilled stylist. The most important elements are starting with well-prepared hair, using the right products and tools, securing your style thoroughly with properly placed bobby pins, and finishing with a flexible-hold hairspray that sets your work without making it look stiff.
An elegant updo does more than keep your hair in place through an evening of celebration—it signals intention, polish, and respect for the occasion. It frames your face beautifully, elongates your neck, showcases your outfit and jewelry, and gives you the confidence that comes from knowing you look absolutely put-together. Whether you choose the timeless chignon, the glamorous Hollywood waves, the modern polished knot, or any of the other styles here, you’re making a choice that says you understand both elegance and yourself. That combination is what makes a truly perfect formal updo.