Tight curls are a gift—but they come with their own styling playbook. If you’ve got coils that spring, coils that shrink, or curls that demand respect, you know the struggle of finding styles that actually work with your texture instead of fighting against it. Generic hairstyle advice glosses over what tight curls actually need: proper moisture, defined structure, and styling techniques that embrace your natural curl pattern instead of trying to stretch it into something it’s not.
The good news? Tight curls have endless styling potential. Whether you’re working with shoulder-length waves, mid-back curls, or a freshly cut pixie, there’s a style that’ll make your curls look intentional, polished, and gorgeous—without requiring you to fight your hair texture into submission. The styles that work best for tight curls fall into a few core categories: protective styles that reduce manipulation and breakage, wash-and-go styles that enhance your natural curl definition, and sleek styles that control shrinkage while looking intentional.
What makes a hairstyle actually work for tight curls isn’t magic—it’s understanding that tighter curl patterns respond to moisture, proper product layering, and styling methods that set curls in place without relying on heat or tension. The ten hairstyles below are all tested approaches that work across different hair lengths, different levels of curl tightness, and different lifestyles. Each one either maximizes your curl definition, protects your hair from breakage, or gives you a polished alternative for days when you want something structured.
1. Bantu Knots
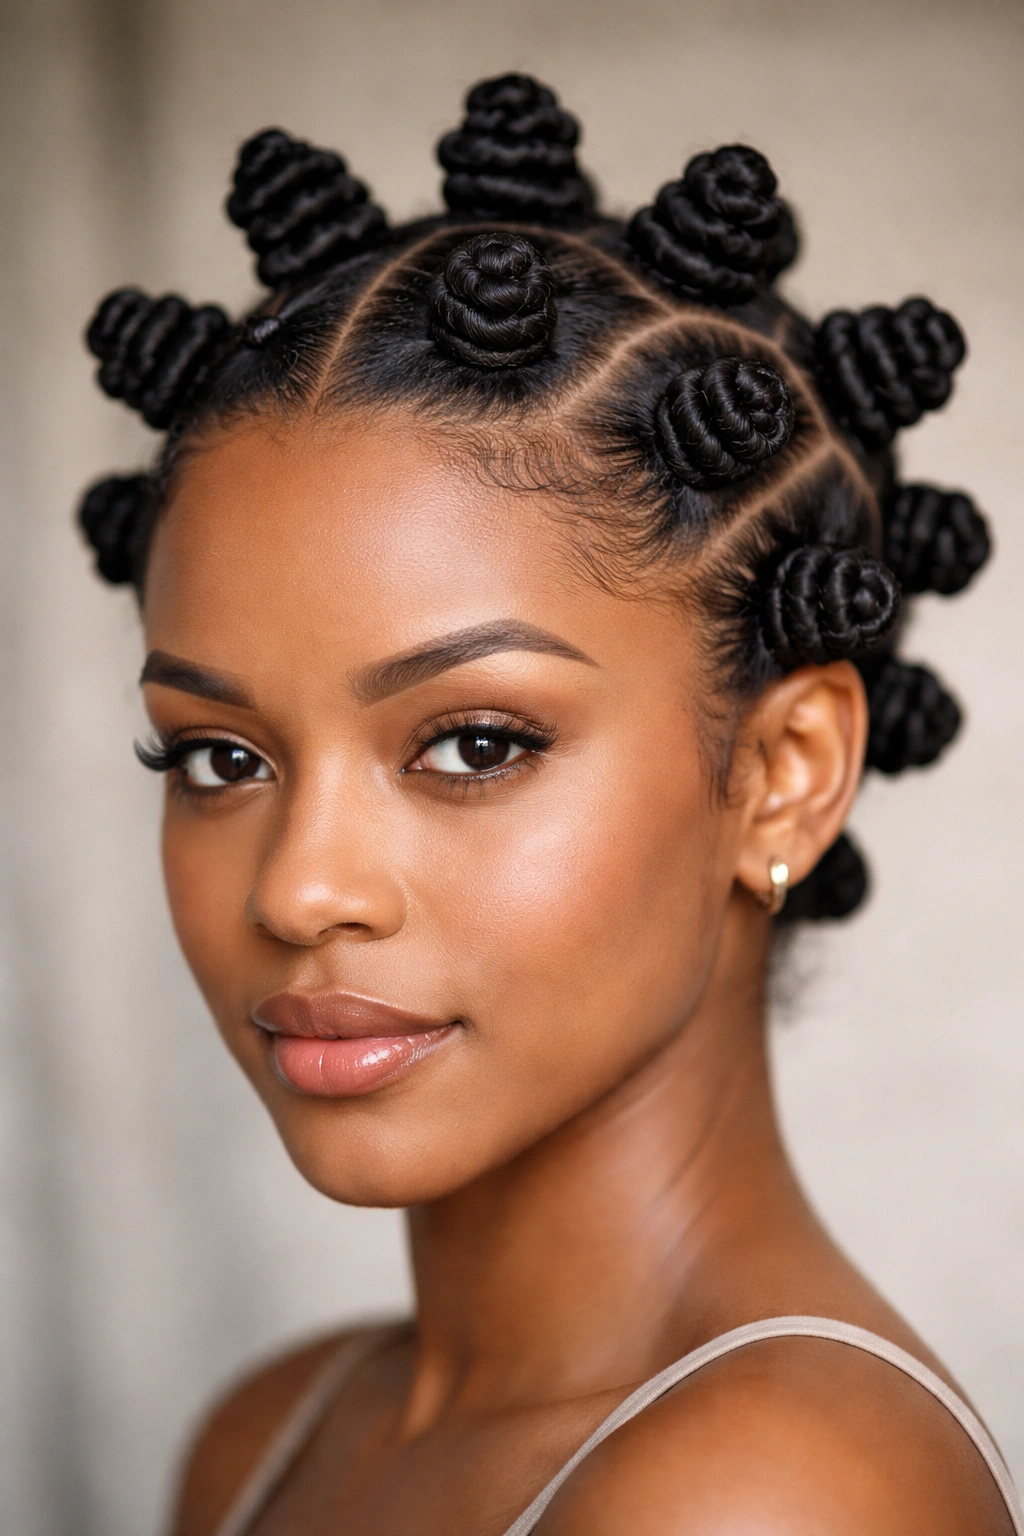
Bantu knots are one of the most versatile styles for tight curls, delivering coils on coils when you release them. This style works by sectioning your hair into small to medium squares, then twisting each section and wrapping it into a knot against your scalp. The beauty of bantu knots isn’t just the finished look—it’s the way they preserve moisture in your curls while creating defined coil patterns that can last weeks if you style them correctly.
Why Bantu Knots Amplify Tight Curl Definition
Bantu knots work specifically because they create a mold for your curls while keeping tension minimal. When you wrap each section into a knot, you’re essentially creating a curl-setting tool that doesn’t require heat, chemicals, or damaging tension. The coils that form around each knot dry in a compressed, defined shape—so when you unravel them, your natural curl pattern is actually enhanced, not flattened. This is especially valuable for tight curls that can look undefined or frizzy without the right setting method. The knots also reduce the surface area of your curls that’s exposed to friction overnight, which means less frizz and more definition when you wake up.
How to Create and Style Bantu Knots
- Wash and condition your hair, then apply leave-in conditioner and a lightweight styling cream while hair is still soaking wet
- Section your hair into 8 to 20 knots depending on how defined you want the coil pattern (more knots = tighter coils)
- Twist each section away from your face, then wrap it into a knot by coiling the twisted section around itself at the base
- Secure each knot with a bobby pin or threading it underneath adjacent knots for a secure hold
- Let them air dry completely (usually 4-8 hours or overnight) or use a hooded dryer to speed up the process
- Gently unravel each knot, starting at the bottom, and lightly fluff with your fingers to release the coil pattern
- Spritz with a curl refresher spray if needed to reactivate your curl definition
Pro tip: For extra bounce, unravel your knots before they’re completely dry—they’ll set faster and hold their shape better than fully dry knots that have stiffened.
2. High Puff
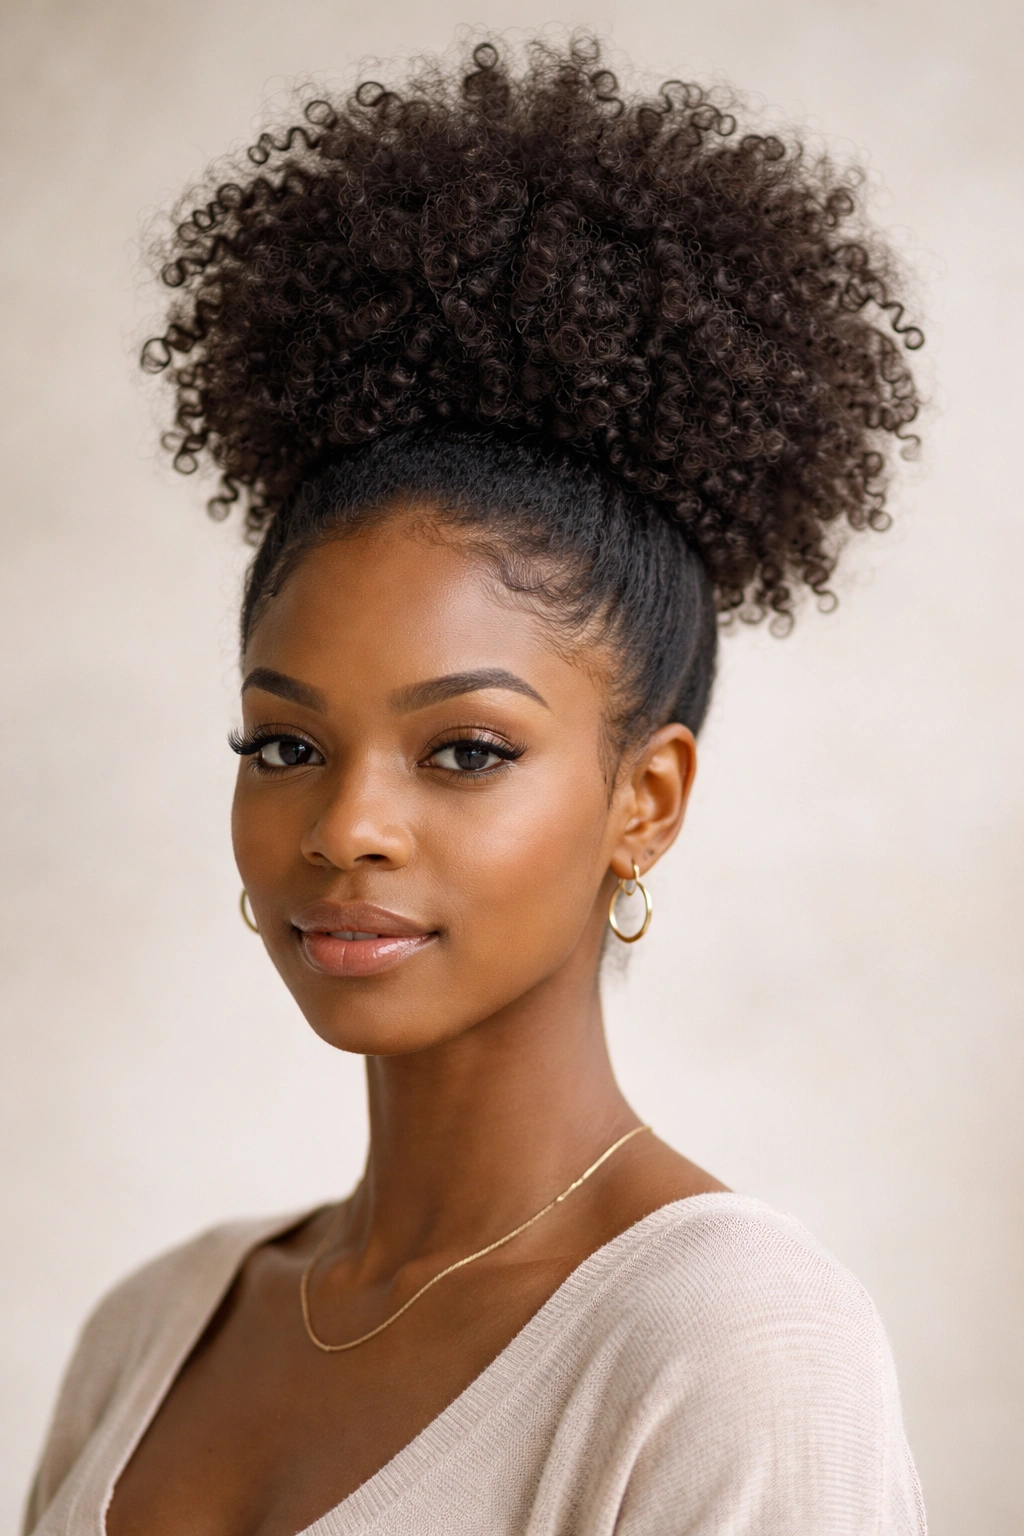
A high puff is a sleek, minimalist style that’s half protective (you’re gathering hair into one ponytail) and half wash-and-go (you’re showing off your natural curl texture). This style works beautifully for tight curls at any length—shoulder-length or longer—and it’s one of the quickest ways to go from bed-headed to polished in under five minutes.
Why High Puffs Work for Every Curl Density
High puffs are forgiving because they don’t require your hair to be super defined or frizz-free—in fact, some texture and volume actually makes them look better. The style gathers your curls into a high ponytail positioned at the crown, which means the bulk of your curl texture is concentrated at the top and cascading down. For tight curls, this creates a visually fuller, bouncier look than you’d get with straighter hair. The ponytail itself can be as neat or as textured as you want it to be, which means you have control over how styled the look feels.
Styling a High Puff for Maximum Impact
- Apply a moisturizing leave-in conditioner to damp hair and use a wide-tooth comb or your fingers to distribute it evenly
- Use a paddle brush or fingers to smooth the hair at your crown into a high ponytail, gathering it about an inch above where your hairline naturally peaks
- Secure with a silk or satin hair tie (not rubber, which causes breakage) wrapped multiple times around the base
- For extra definition, apply a small amount of curl cream or gel to the ponytail section to enhance curl clumping
- Create volume at the crown by gently teasing the ponytail with a fine-tooth comb, then smoothing the outer layer with your hands
- Pin any flyaways with bobby pins that match your hair color, or leave them natural for a lived-in aesthetic
Pro tip: A high puff lasts longer if you sleep on a silk pillowcase—it reduces friction that would otherwise disturb your curl pattern and cause frizz.
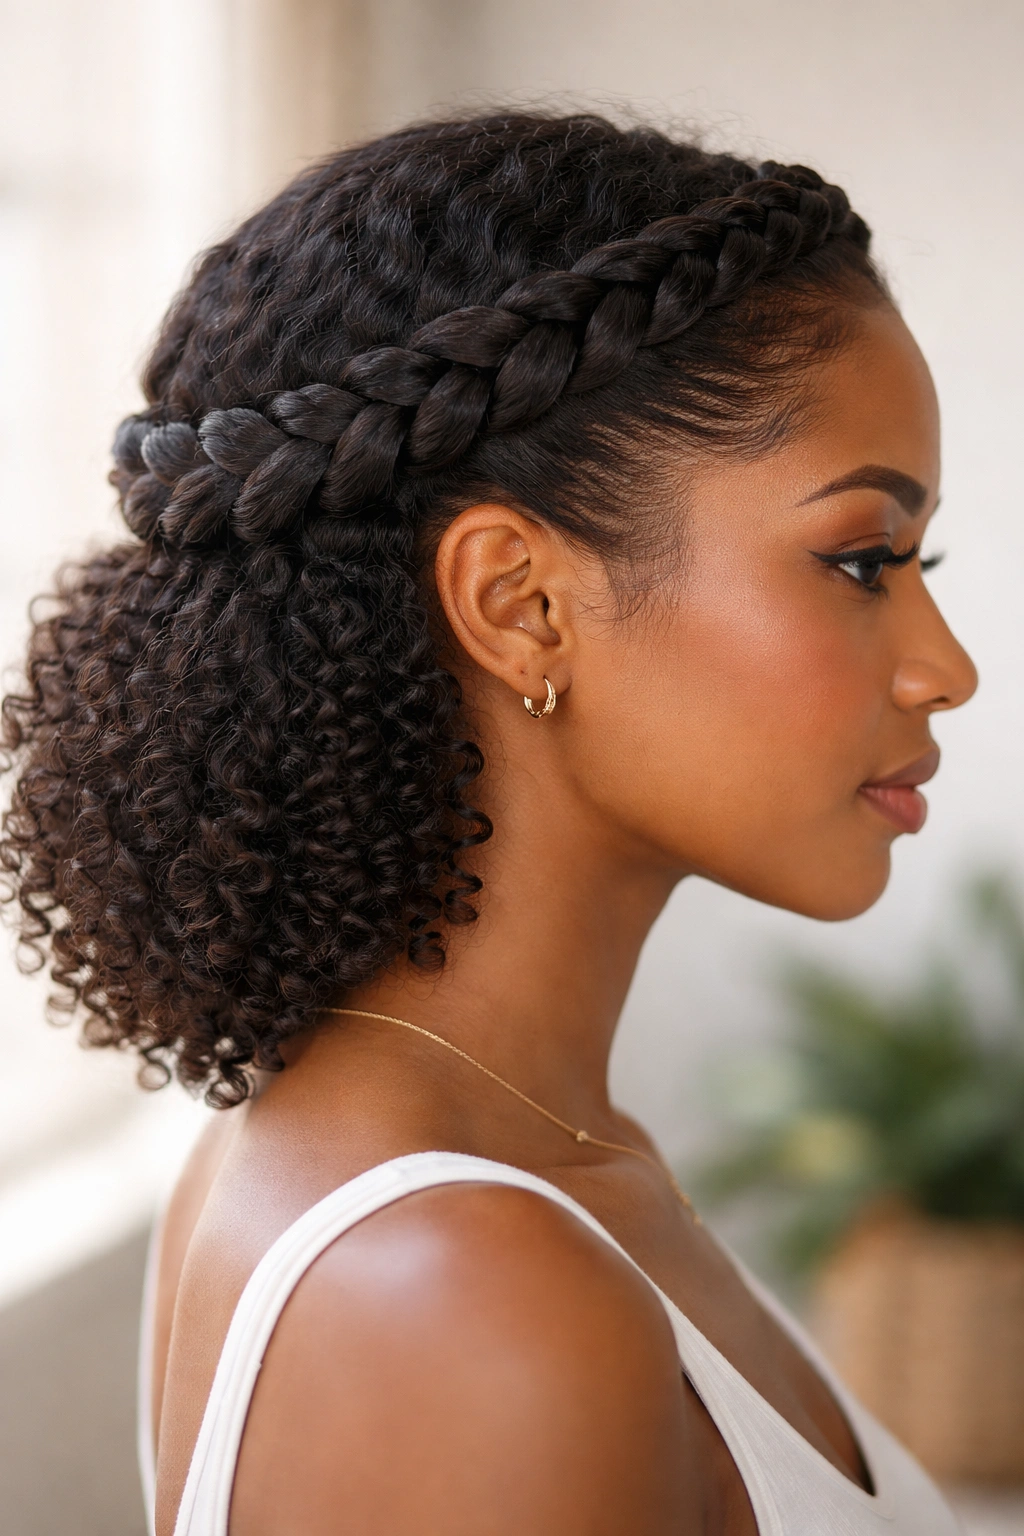
3. Twisted Crown
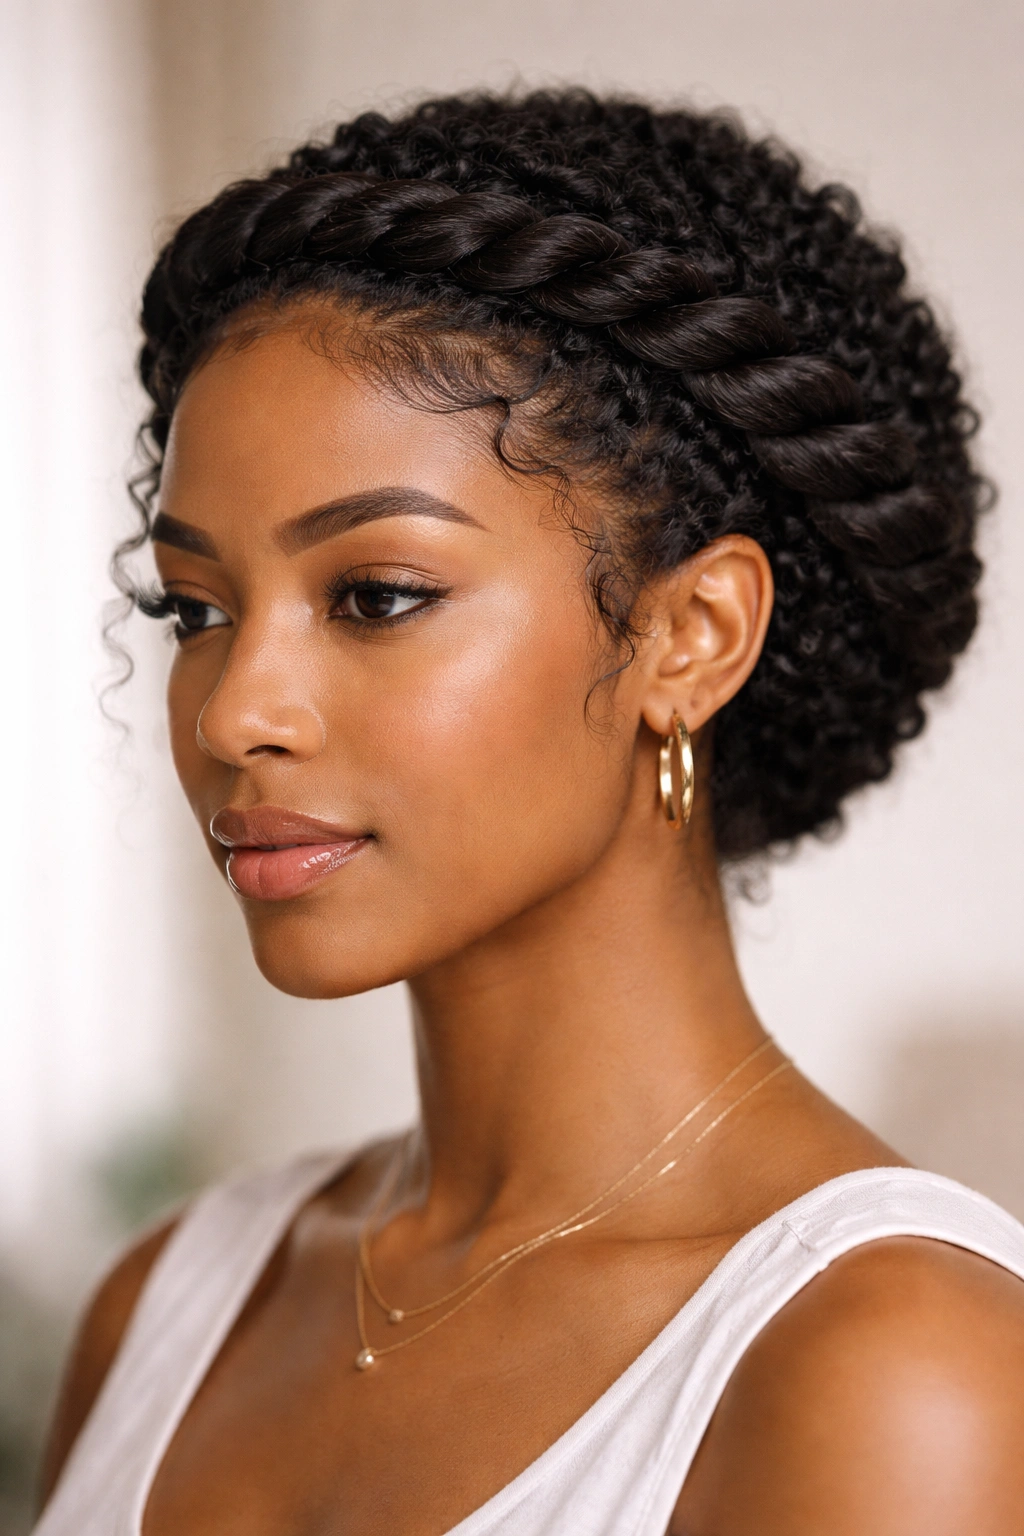
A twisted crown is an elegant protective style that wraps two flat twists around your head like a crown, converging at the back. This style is protective because the twists reduce daily manipulation, but it also looks polished enough for work or social events. It works particularly well for tight curls because the twisting action smooths the cuticle while the protective nature of the style keeps your curl ends secured and safe from breakage.
How Twisted Crowns Protect Tight Curls
The twisted crown works as a protective style by minimizing the amount of hair that’s exposed to friction and manipulation. When you twist hair into a flat twist, you’re smoothing down the cuticle layer, which makes light reflect off your curls more evenly—creating shine and definition. The fact that the twists wrap around your crown means your curl ends are tucked away from the edges of your pillowcase, which is where most friction damage happens while sleeping. For tight curls, this is protective in a subtle way: you’re not creating tension, but you’re creating structure that keeps every strand in place.
Creating a Twisted Crown Step-by-Step
- Start with damp hair and apply a curl-defining cream or lightweight styling gel
- Part your hair down the middle from your forehead to the nape of your neck
- Starting at one temple, create a flat two-strand twist by taking two sections of hair and twisting them around each other while moving toward the back of your head
- Pin the twist with bobby pins as you work backward, keeping it tight enough to hold but loose enough that you don’t create tension on the scalp
- Repeat on the other side, bringing both twists around the back of your head
- Secure both twists at the nape of your neck with bobby pins, overlapping them slightly to create a crown effect
- Leave the back section of hair loose and untwisted so your curls can show through
- Spritz with a light hairspray to hold flyaways in place
Pro tip: Twisted crowns look fuller and more polished if you gently pull at the twists to widen them slightly before pinning—this creates texture and makes the twists look intentional rather than tight.
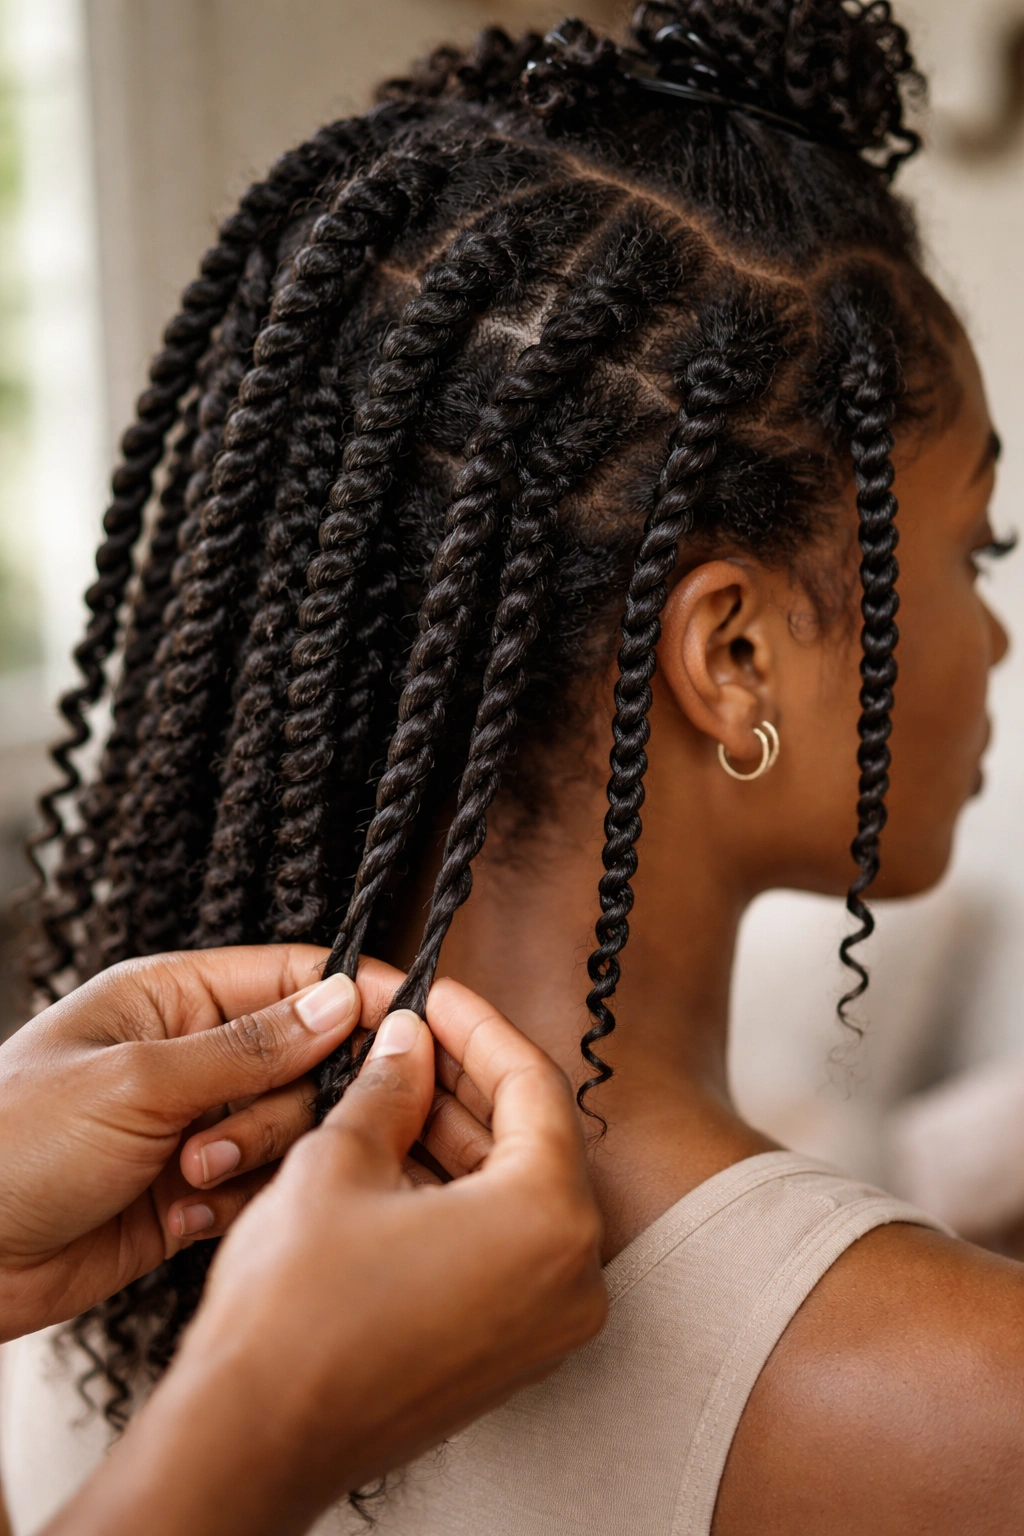
4. Coil-Out
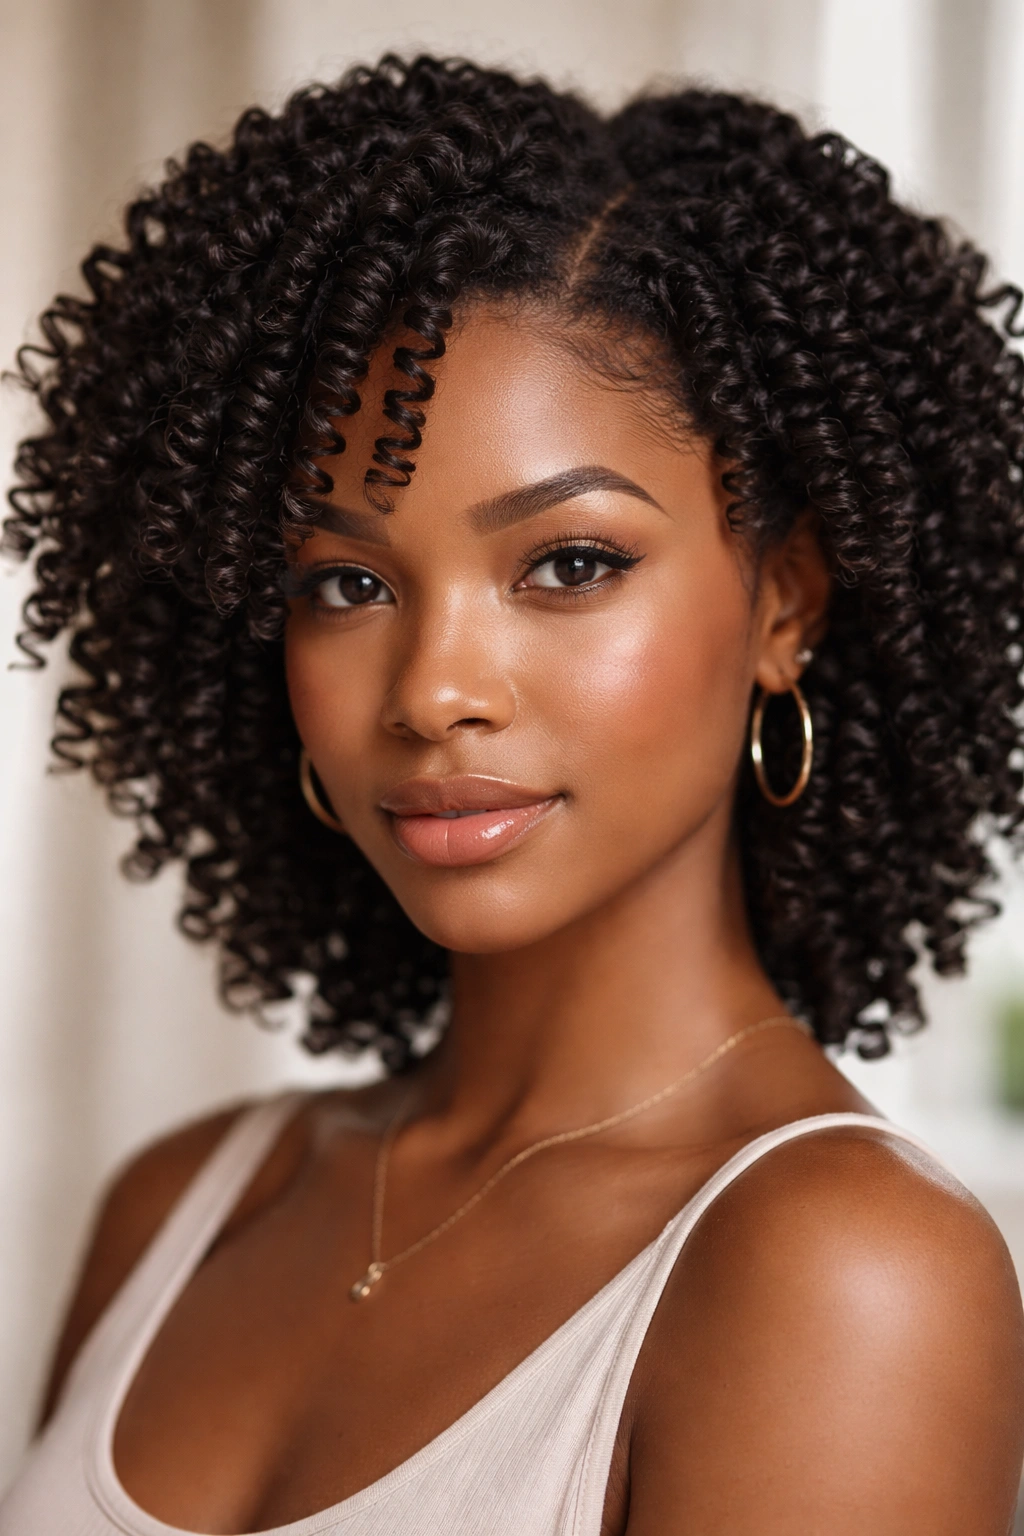
A coil-out is a textured style created by releasing your hair from protective braids or twists, giving you defined coils without using heat or chemicals. This style works specifically for tight curls because coiler curl patterns already mirror the coil shape—so when you braid or twist and release, your natural coil texture is amplified rather than altered.
Why Coil-Outs Enhance Natural Tight Curl Patterns
Coil-outs work because they use your hair’s natural curl memory to set a pattern. When you braid or twist wet hair and let it dry, the hair fibers are held in that twisted shape while moisture evaporates. Once you release the braids, the hair springs back to its natural curl pattern—but it’s been held and set in a way that makes each curl more defined and less frizzy. For tight curls, this means coils that actually show their individual spirals instead of blending together into one undefined mass. The coil-out also tends to show more length than your hair might appear on a regular wash-and-go day, because the definition makes each curl look more structured and intentional.
How to Create a Coil-Out That Lasts
- Wash your hair and apply a leave-in conditioner and curl cream while it’s soaking wet
- Section your hair into 6 to 15 sections depending on how defined you want the coil pattern
- Braid each section in a three-strand braid or two-strand twist, starting at the roots and working all the way to the ends
- Let the braids air dry completely (8 hours or overnight) or use a hooded dryer
- Gently unravel each braid, starting at the ends and working toward the roots
- Separate and fluff your coils with your fingers to enhance the definition
- Apply a curl refresher spray or light mousse to rehydrate and set the coils
Pro tip: Coil-outs hold longer if you don’t wash your hair the day before styling—day-two or day-three hair has slightly more grip, which helps the braids set more permanently.
5. Chunky Braids
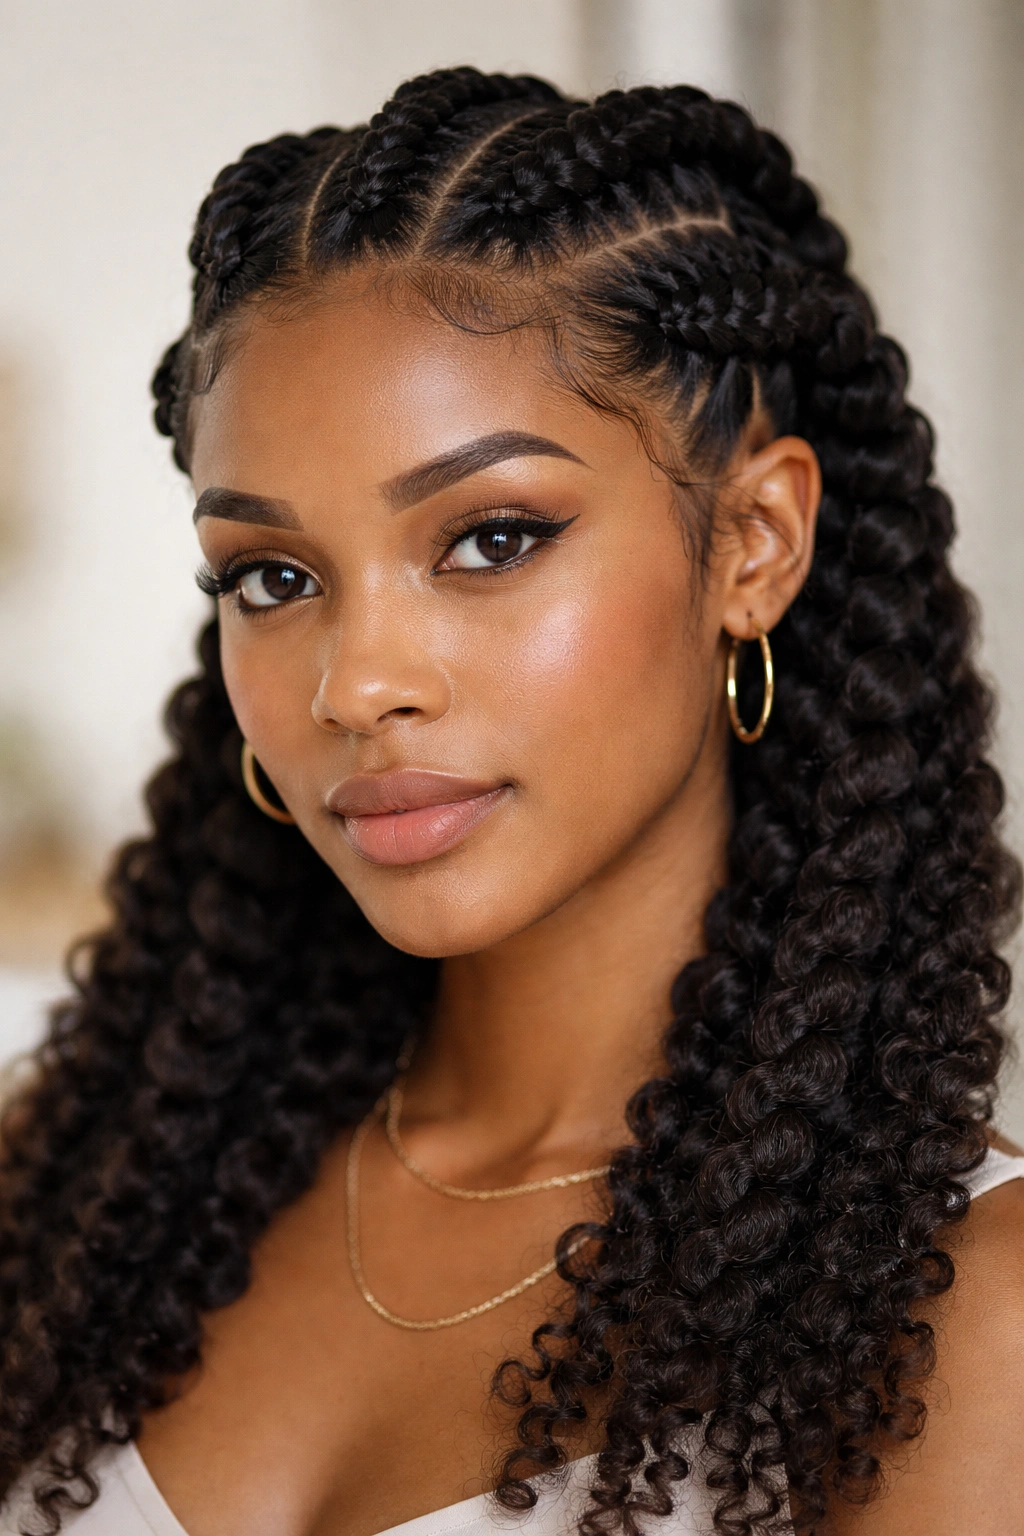
Chunky braids use fewer, thicker sections than traditional braids, creating bold, defined plaits that showcase your curl texture. This protective style works for tight curls at mid-back length or longer and sits at the intersection of casual and intentional—you can wear chunky braids to the gym or to dinner depending on how you style them.
Why Chunky Braids Are Protective for Tight Curls
Chunky braids work as a protective style because they gather a larger amount of hair into fewer braids, which means there’s less surface area of individual strands exposed to friction and manipulation. The larger braids also tend to feel less tight on the scalp, which matters because tight curls are already compact—adding tension-heavy braids can stress your roots and cause breakage. Chunky braids also showcase your curl texture in each braid strand, so you’re not hiding your natural pattern; instead, you’re organizing it into a polished style that still celebrates your curls.
Braiding Technique for Defined Chunky Plaits
- Apply a leave-in conditioner to damp hair for moisture and slip
- Section your hair into 4 to 6 chunky sections (fewer sections = chunkier braids)
- Take the first section and divide it into three strands
- Cross the right strand over the middle strand, then cross the left strand over the new middle strand
- Continue this three-strand braiding pattern all the way to the ends, keeping the tension even and the strands separated
- Secure the end of each braid with a small elastic
- Gently pull on each braid to widen it and create a fuller, more textured appearance
- If desired, wrap a contrasting thread or yarn around each braid for a decorative element
Pro tip: Chunky braids stay fresher-looking longer if you interlock your fingers and push the base of each braid upward to add volume at the roots—this prevents them from looking flat or compressed.
6. Flat Twist Updo
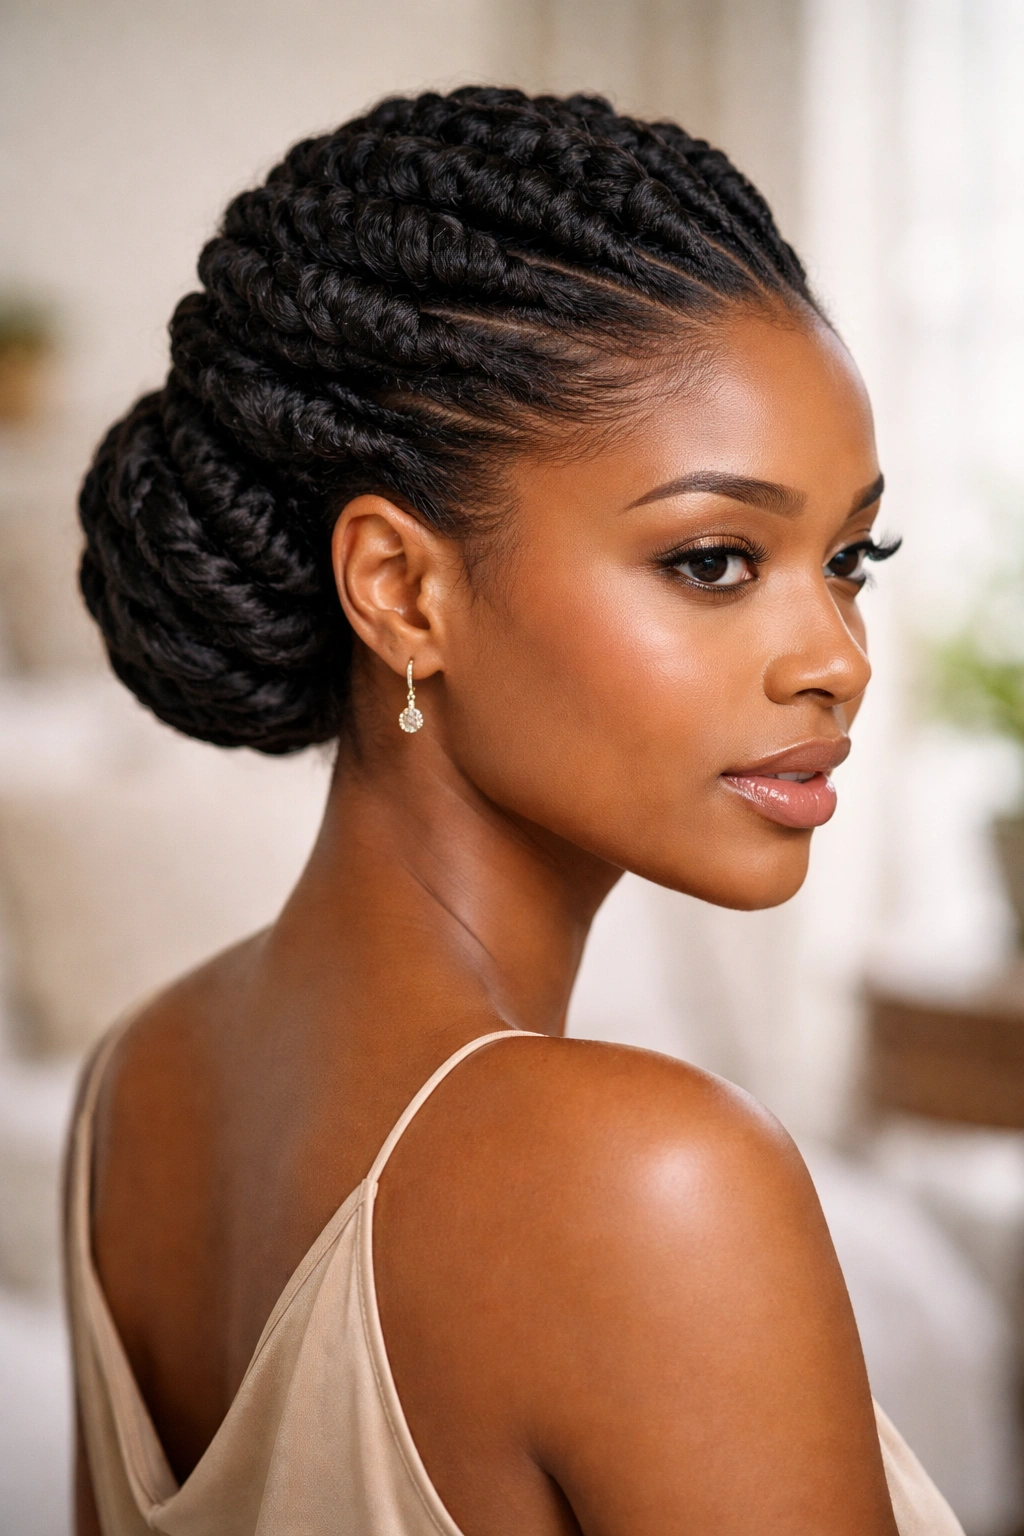
A flat twist updo combines the protective benefits of flat twists with an elegant upstyle that works for formal events or days when you want a polished look without damaging your curls through constant manipulation. This style works across different lengths and creates a sophisticated shape that flatters tight curls.
How Flat Twists Create a Protective Updo
Flat twists are protective because they’re created by twisting two sections of hair around each other while adding hair from the surrounding scalp as you move downward—similar to a flat-laid braid. The twisting action smooths your cuticle while the fact that hair is gathered upward means your curl ends are secured and protected. When you gather flat twists into an updo, you’re creating a style that’s both protective and polished—your curls aren’t hanging loose and exposed to friction, but they’re also gathered into a shape that looks intentional and elegant.
Building a Flat Twist Updo for Longevity
- Apply a styling gel or curl cream to damp hair for hold and definition
- Create flat twists by taking two sections of hair and twisting them around each other while incorporating hair from the scalp as you move
- Lay the twists going from your edges inward toward the center of your head, creating converging lines
- Gather the loose curls and the ends of your flat twists at the crown or back of your head
- Secure everything with bobby pins, creating a low or high bun from the gathered section
- Use more bobby pins to tuck any flyaways or loose ends into the base of the bun
- Set the style with a lightweight hairspray that won’t weigh down your curls
Pro tip: A flat twist updo lasts longer if you create your flat twists on day-two or day-three hair (hair that’s already been washed once and set overnight)—the slight oil buildup gives twists more grip and staying power.
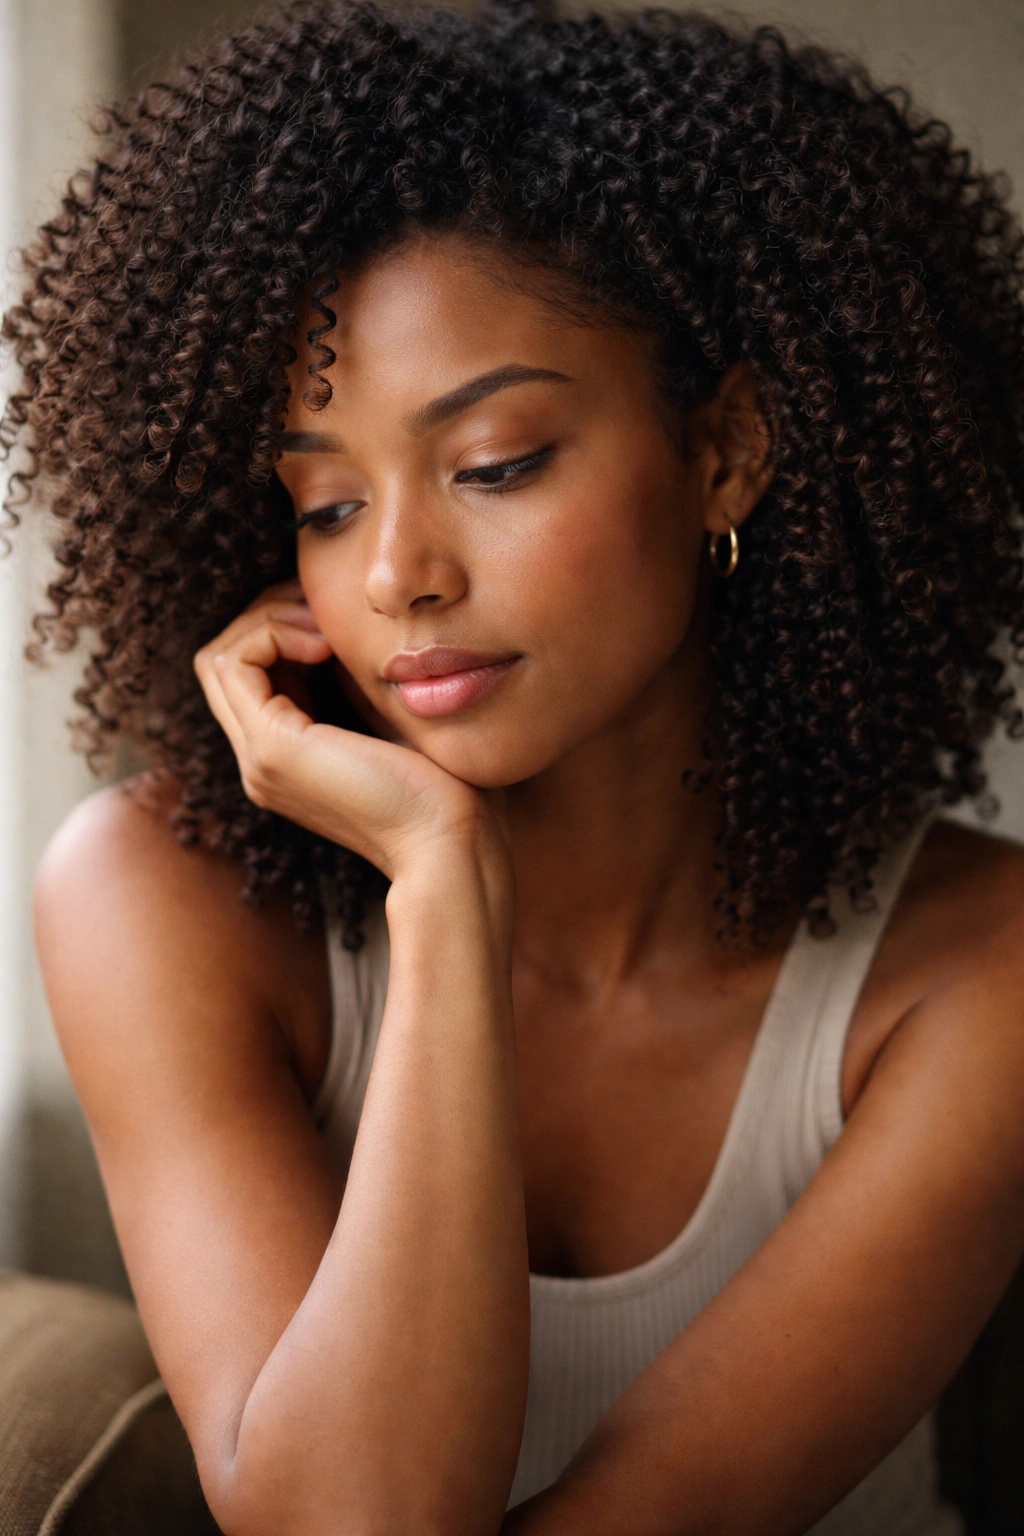
7. Wash and Go
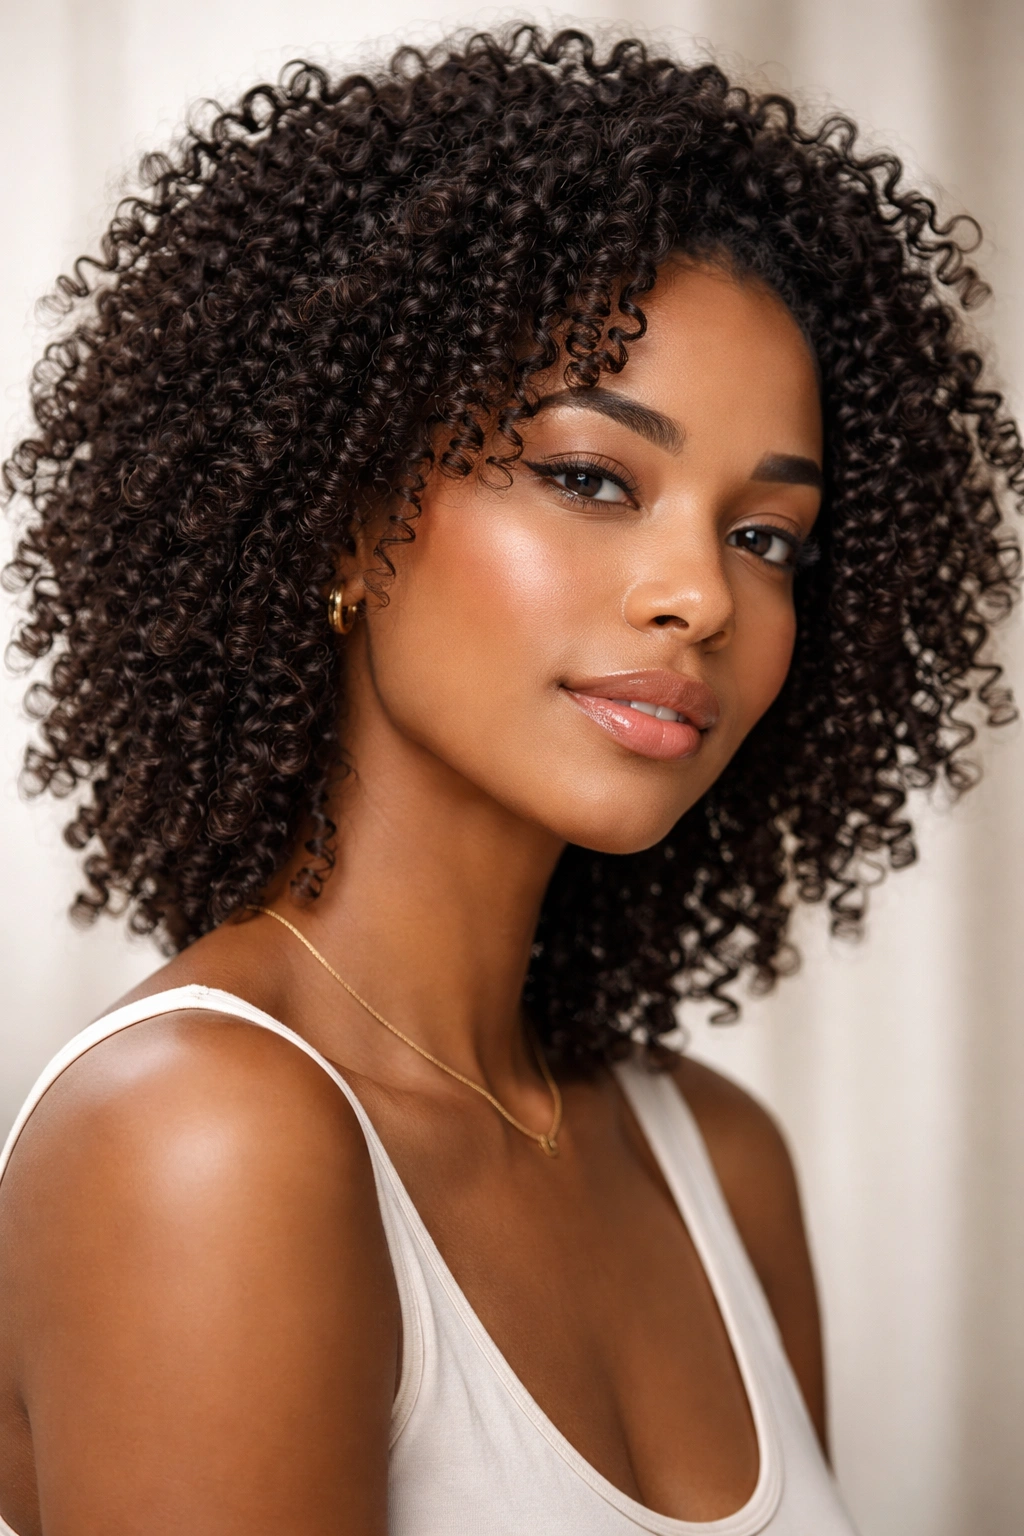
A wash and go is exactly what it sounds like: you wash your hair, apply product, and let your natural curl pattern dry in its most natural state without twists, braids, or manipulation. This is the simplest style on this list, but it requires the most intentional product selection and technique to actually work for tight curls.
Why Wash and Goes Showcase Tight Curl Definition
Wash and goes work because they rely entirely on your curl’s natural pattern and the right product combination to create definition and hold. For tight curls, a good wash and go shows off the individual coils and spirals that make your hair unique—no braids or twists are compressing the pattern. The style works because product layering (a leave-in conditioner, a curl cream, and a gel or mousse) creates structure that holds your curls in place as they dry. The key is using products that are lightweight enough not to weigh down your curls, but strong enough to maintain definition throughout the day.
Executing a Wash and Go That Actually Holds
- Wash your hair with a sulfate-free cleanser, then rinse thoroughly with lukewarm water
- Apply a leave-in conditioner to soaking wet hair while it’s still dripping—don’t squeeze out excess water
- Apply a curl-defining cream or styling butter, working it through with your fingers using a praying hands motion
- Apply a styling gel or curl mousse to add hold and frizz control, again using gentle finger-combing rather than harsh brushing
- Use a microfiber towel or t-shirt to cup your curls and remove excess water—never rub or squeeze
- Allow hair to air dry completely or use a hooded dryer to set the curls
- Once dry, gently scrunch your curls upward to break any crunchy gel cast and enhance definition
- Apply a curl refresher spray in the mornings to reactivate your curl pattern
Pro tip: Wash and goes hold longer if you use the praying hands method (applying product with your hands together on each section, rather than raking product through) because it reduces frizz and keeps curl clumps intact.
8. Defined Curls with Clips
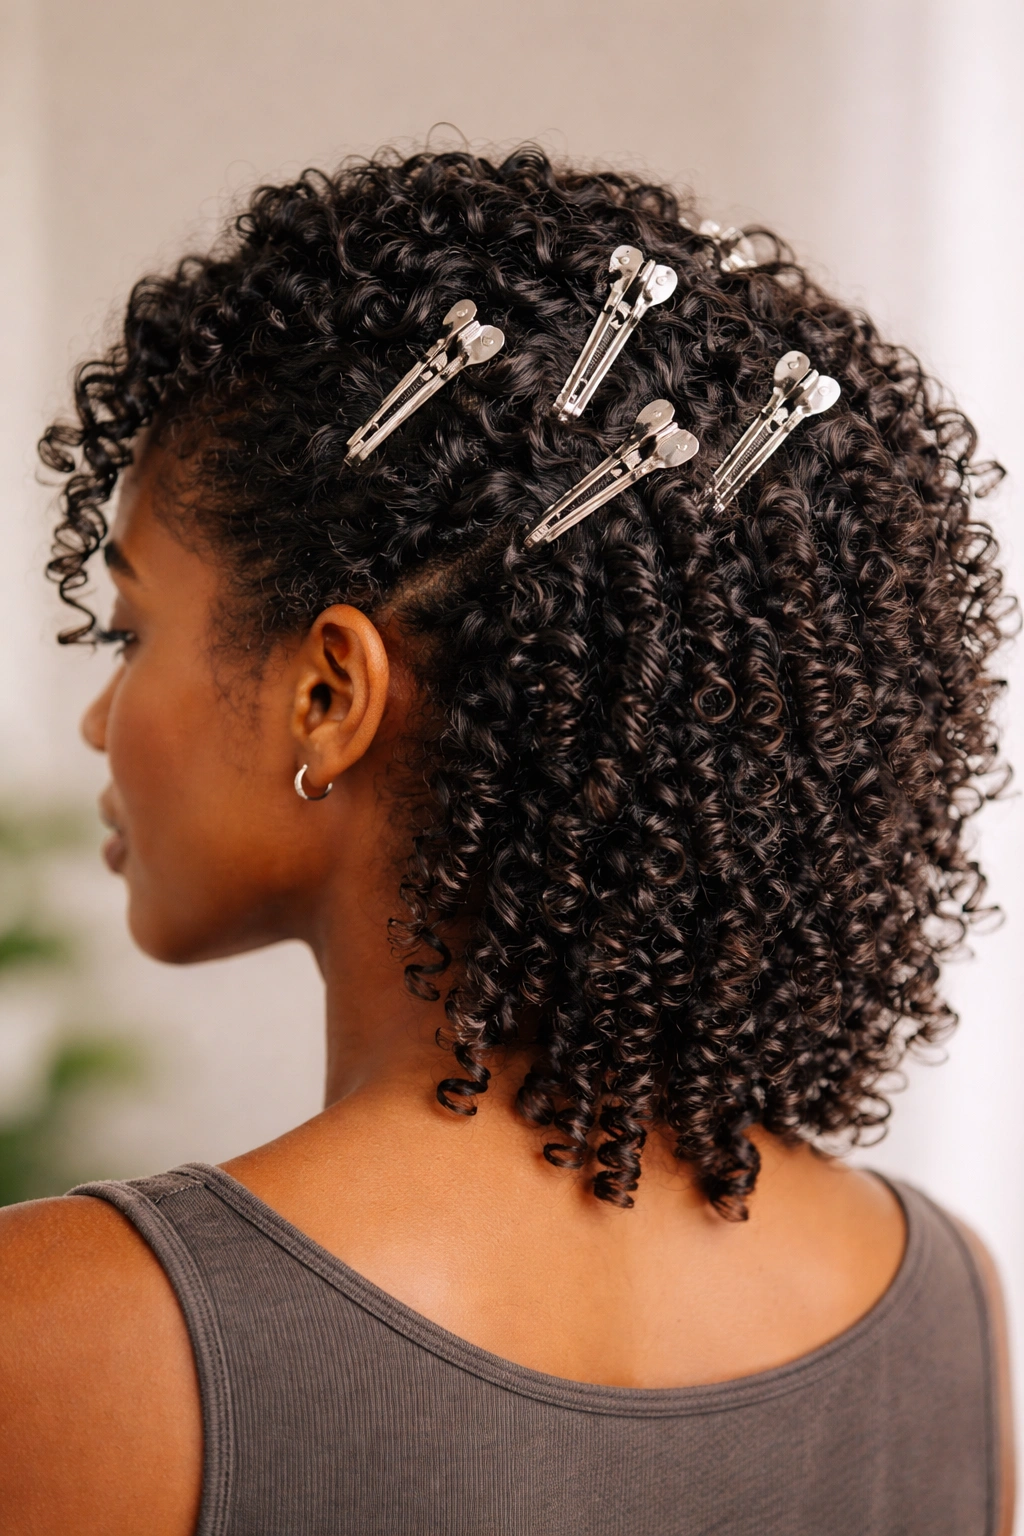
This style uses curl clips (also called hair clips or duck clips) to set your curls while they dry, creating enhanced definition and more noticeable curl patterns. Clips work by gently grouping curl clumps together, which reduces the amount of hair that can frizz while helping each curl hold its shape.
Why Clips Amplify Tight Curl Patterns
Curl clips work because they hold curl clumps in place during the drying process, which is when curl definition is actually set. For tight curls, this means each individual coil or curl spiral can dry in a tight, defined shape without being disrupted by friction or drying unevenly. The clips don’t create tension (unlike rubber bands or elastic ties)—they just gently hold curl sections in place, which means you get definition without stress on your scalp or strands.
Using Clips to Set and Define Your Curls
- Wash your hair and apply leave-in conditioner and curl cream while it’s dripping wet
- Section your wet hair into roughly 8 to 12 curl clumps by using your fingers to identify natural curl groupings
- Use a curl clip to gently gather each clump, clipping it up against your head or slightly away from your scalp
- Allow hair to air dry completely with the clips in place (this takes longer than unclipped drying, usually 6-12 hours)
- Once completely dry, gently unclip each section by releasing the clip slowly and fluffing the curl with your fingers
- Separate individual curls if desired to enhance definition
- Apply a curl refresher spray to rehydrate and lock in the definition
Pro tip: Curl clips hold better if you don’t clip hair soaking wet—allow it to dry for an hour or two first so the clips have something slightly drier to grip.
9. Two-Strand Twist Out
A twist out is created by dividing your hair into two strands, twisting them around each other, letting them dry, and then unraveling the twists to reveal a textured, defined curl pattern. Twist outs are one of the most reliable styles for tight curls because the twisting technique enhances your natural coil pattern rather than fighting against it.
How Two-Strand Twists Create Defined Coils
Two-strand twists work because they create a slightly looser curl pattern than your hair’s natural state—when you twist two sections around each other and let them dry, they set in that twisted shape. When you release the twist, your hair springs back to its natural curl pattern, but the twisting process has separated individual coils and enhanced definition. For tight curls, this means coils that look distinct and intentional rather than blended together. Twist outs also tend to show more apparent length because the definition makes each curl look longer and more structured.
Executing a Twist Out That Defines Your Coils
- Wash and condition your hair, leaving it soaking wet
- Apply a leave-in conditioner and styling cream while hair is still dripping
- Section your hair into 6 to 15 sections depending on the coil definition you want
- Take the first section and divide it into two strands
- Twist the two strands around each other, moving from your roots to the ends, keeping tension even
- Secure the end of each twist with a small clip or elastic
- Let twists air dry completely or use a hooded dryer
- Gently unravel each twist, starting at the end and working toward the root
- Separate individual coils with your fingers to enhance the definition
- Use a curl refresher spray to rehydrate the coils
Pro tip: Twist outs look fuller and bouncier if you unravel them before they’re completely dry—they’ll set more quickly and maintain their shape better than fully air-dried twists.
10. Protective Crown Braid
A protective crown braid weaves your hair into a braid that starts at one ear, travels around the back of your head, and ends near your other ear—creating an elegant, protective style that showcases your curls in the back. This style is particularly good for tight curls because braiding smooths your cuticle while the crown placement keeps your curl ends secured and safe.
Why Crown Braids Offer Protection With Elegance
Crown braids protect your hair by smoothing your cuticles and gathering the bulk of manipulation into a structured braid while leaving your curl texture visible at the back. The braiding action smooths down your hair’s cuticle layer, which creates shine and reduces frizz. The fact that the braid wraps around your head means your curl ends are tucked away from pillow friction and environmental damage. Crown braids also look polished and intentional, which makes them appropriate for work and formal events while still being protective.
How to Braid a Crown That Looks Effortlessly Elegant
- Apply a leave-in conditioner and styling cream to damp hair
- Start at one ear, taking three sections of hair to begin your three-strand braid
- Braid around the back of your head, adding hair from your scalp as you move (this creates a French braid effect)
- Bring the braid to your other ear, incorporating all the hair along the back and sides of your head
- Secure the end of the braid with a small elastic
- Gently pull on sections of the braid to widen it and create a fuller, more textured appearance
- Leave your front hairline and the bulk of your curls loose in the back so your natural curl texture is visible
- Pin any flyaways with bobby pins that match your hair color
Pro tip: Crown braids stay neater longer if you braid on day-two or day-three hair—freshly washed hair can be slippery, making braids harder to control and more likely to loosen throughout the day.
Final Thoughts
Tight curls deserve styles that celebrate rather than compromise them. The ten styles above all work with your natural curl pattern instead of against it, whether you want a protective style that minimizes manipulation, a wash-and-go that shows off your coils, or something polished for special occasions. The best style for you depends on three things: your current hair length, how much time you have to style, and what your hair needs right now—protection, definition, rest, or a polished alternative to your everyday routine.
The real secret to these styles looking their best isn’t complicated: it’s proper moisture (a good leave-in conditioner is non-negotiable), the right products for your specific curl pattern, and styling techniques that work with your texture rather than against it. Whether you’re doing bantu knots, a high puff, or a crown braid, your tight curls will respond better to intentional product selection and gentle handling than to any single “best” technique.
Try one style this week and pay attention to what happens. Does your curl definition improve? Do your curls feel less dry? Does the style last through your normal routine? That feedback will tell you exactly which styles work best for your hair and which ones deserve another shot with different products or timing. Your tight curls are versatile—these styles just give you a starting point to prove it.