Finding the right haircut for your natural hair is about way more than aesthetics—it’s about working with your curl pattern instead of against it. The truth is, what looks stunning on someone with loose waves might look completely flat or damaged on someone with tightly coiled hair. Your curl type determines how your hair will fall, how it’ll hold shape, how much shrinkage you’ll experience, and which techniques will actually make your curls pop instead of frizz out.
The challenge most people face is that generic haircut advice doesn’t account for curl density, curl circumference, shrinkage patterns, or how different techniques interact with different hair structures. A blunt cut that works beautifully on Type 3 curls might create triangle-shaped, triangle-shaped hair on Type 4 texture. Layers that add movement and lightness on wavy hair could create bulk and make coily hair appear thinner than it actually is. It’s not that one cut is universally “better”—it’s that your curl type demands specific approaches.
What makes this guide different is that it’s organized around your curl pattern, not around vague categories or just what looks trendy. Whether you’re working with springy coils, defined curls, loose waves, or tight kinks, there’s a cut in here that’s been proven to enhance your specific texture, work with your shrinkage, and make styling easier rather than harder. The cuts included here range from low-maintenance styles that define your natural texture to bolder shapes that require more daily styling commitment.
1. The Textured Bob for Loose Waves
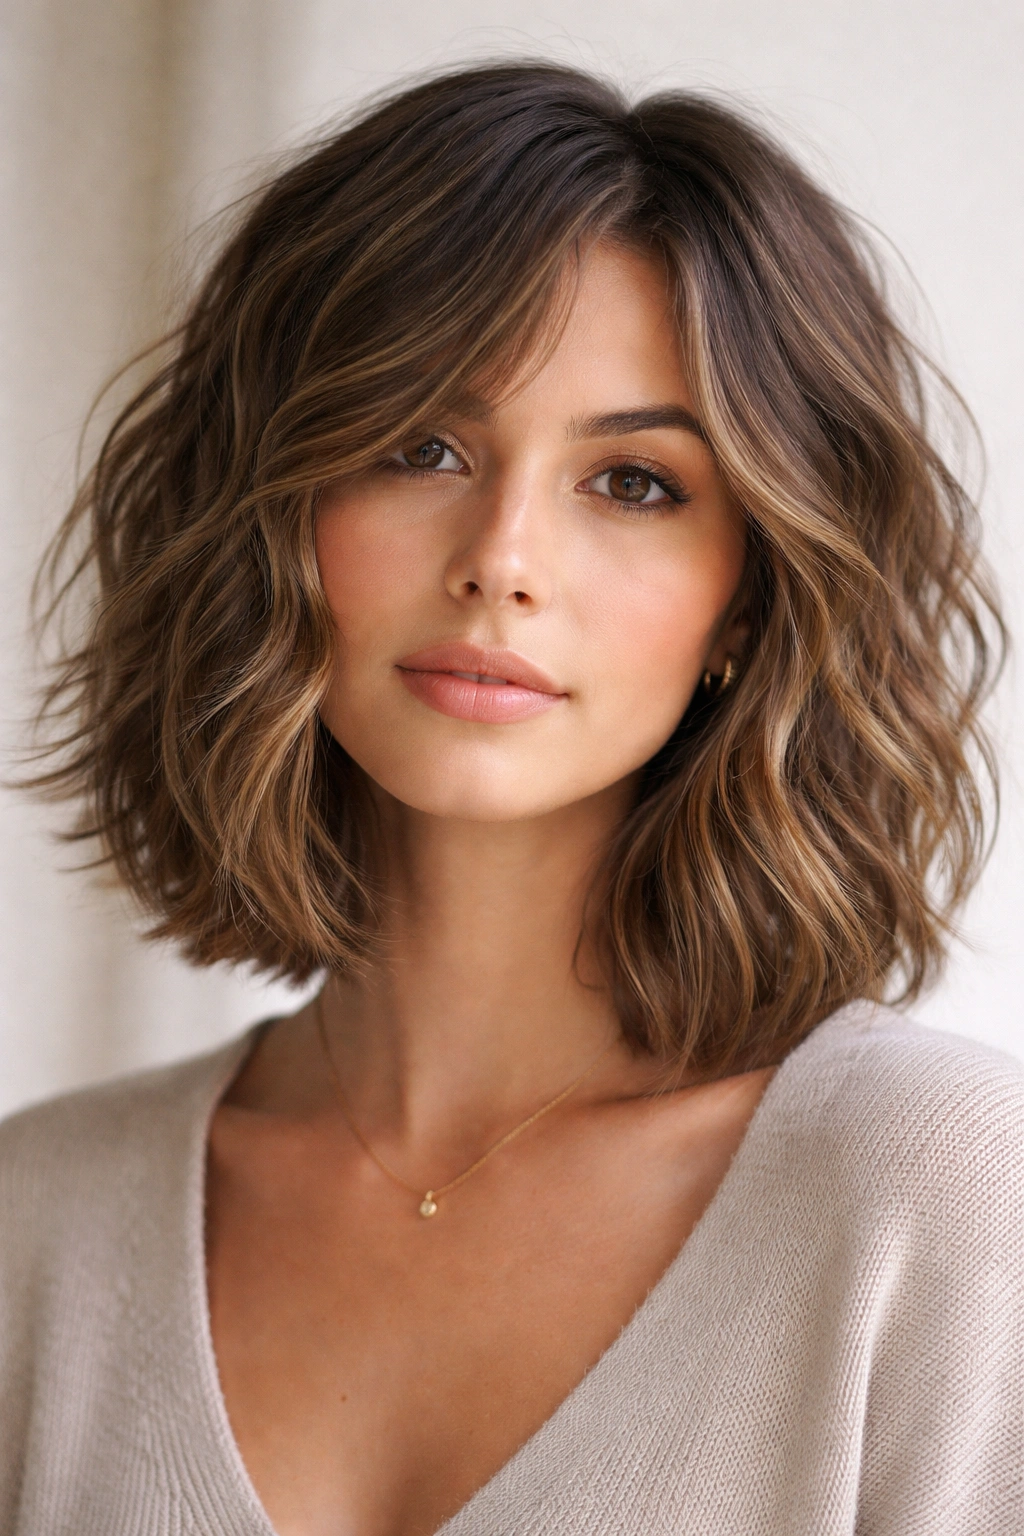
The textured bob is basically a game-changer for Type 2 wavy hair because it gives you structure without fighting your wave pattern. This cut typically lands somewhere between the chin and shoulder, with lots of choppy layers throughout that break up the hair into smaller sections and encourage movement.
Why It Works for Wavy Hair
Loose waves benefit from layers because they create natural bounce and prevent the flat, heavy appearance that a blunt bob would create. The choppy texture means your waves have room to do their thing without you having to twist sections or use tons of product. Your hair will actually look like it has more texture and definition than it probably does. Waves can appear limp when they’re all one length, but layers instantly change that dynamic by removing weight strategically.
Styling and Maintenance Tips
- Layers should be cut at least 2 inches shorter than your longest layer to create visible texture and movement
- Blow-dry with a diffuser for maximum wave definition, or try air-drying with a leave-in conditioner for a softer, more natural look
- Refresh waves on day two and three with a wave cream or mousse applied to damp hair
- This cut requires a trim every 6-8 weeks to maintain the choppy texture and prevent shapelessness
- Side-parting works best for showing off the layered movement in a textured bob
2. The Soft Shag for Wavy and Loose Curls
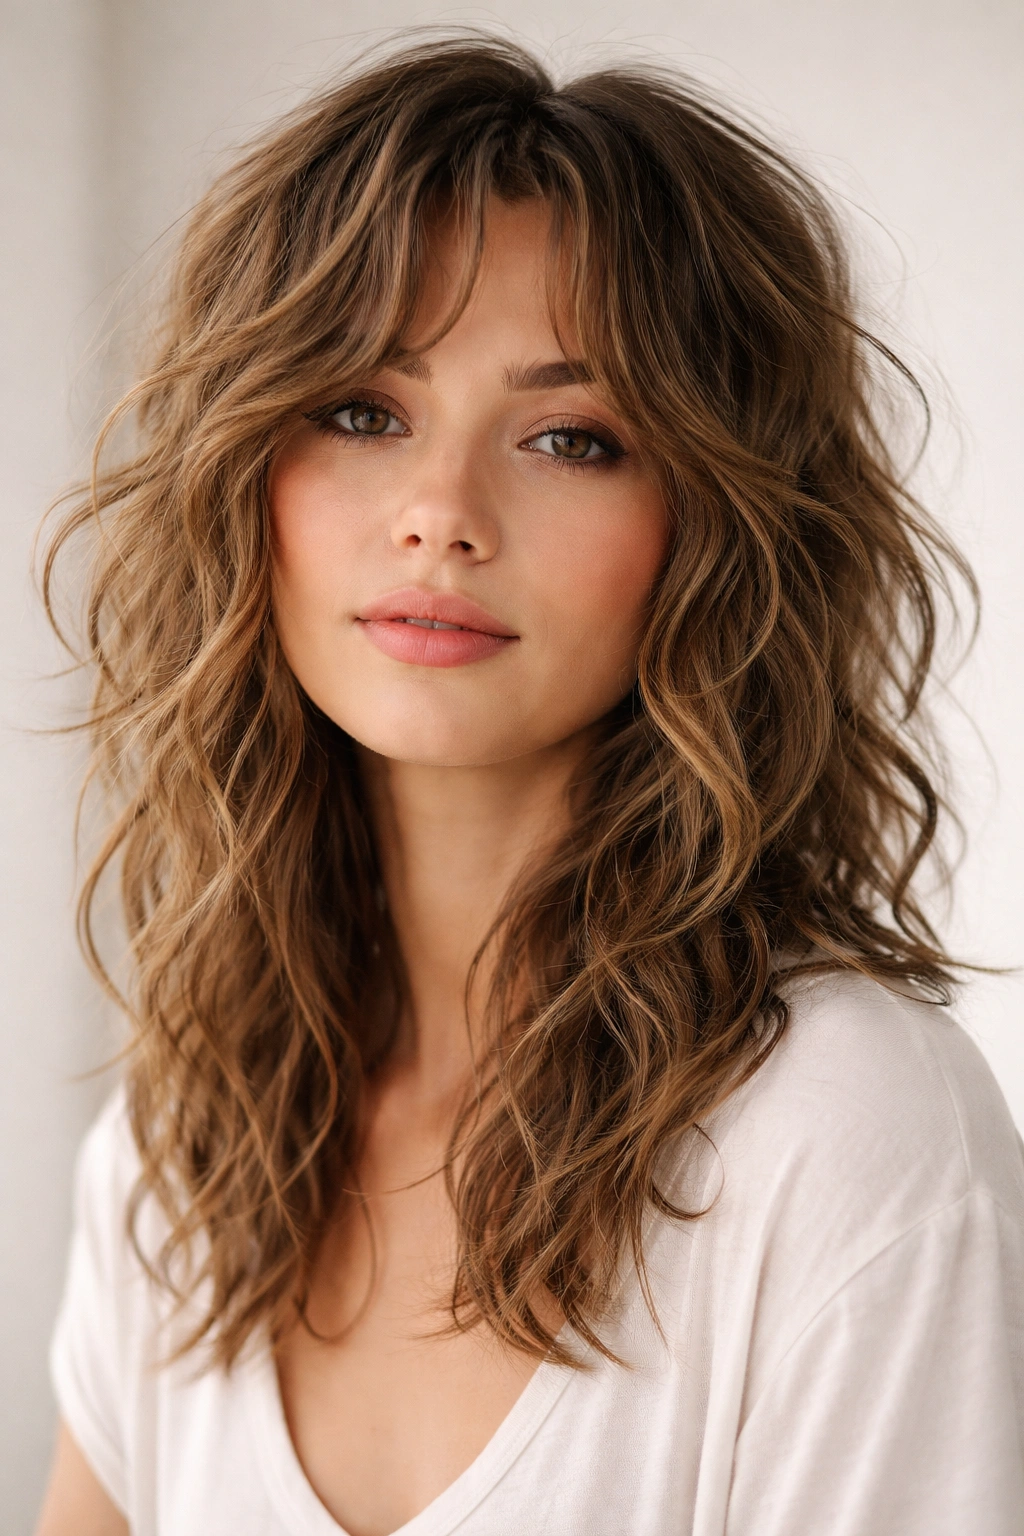
A soft shag brings serious personality to Type 2 and early Type 3 hair. It’s built on choppy layers throughout, with longer pieces in front and shorter layers on top that create a tousled, undone vibe. Think rock-and-roll energy meets effortlessly cool.
What Makes This Cut Special
Shags work magic on wavy and loosely curled hair because the layers essentially cut through any heaviness, and the longer front pieces frame the face beautifully. Unlike blunt cuts that can make waves look droopy, a shag encourages your natural texture to pop without needing to manipulate it into submission. The cut actually celebrates that you have movement in your hair—it doesn’t try to tame it or make it sleek.
How to Style and Care for It
- Shags look best with some texture product, but you don’t need much—a light mousse or sea salt spray is perfect
- Part your hair in the middle or slightly off-center to show off the layers around your face
- This cut works with both tousled, undone styling and more defined, piecy looks depending on your mood
- Get a trim every 6-8 weeks to keep the layers sharp and prevent the shag from looking grown-out and limp
- You can air-dry this cut and still look intentional, which is a huge advantage over more structured styles
3. The Modern Lob for Thick Wavy Hair
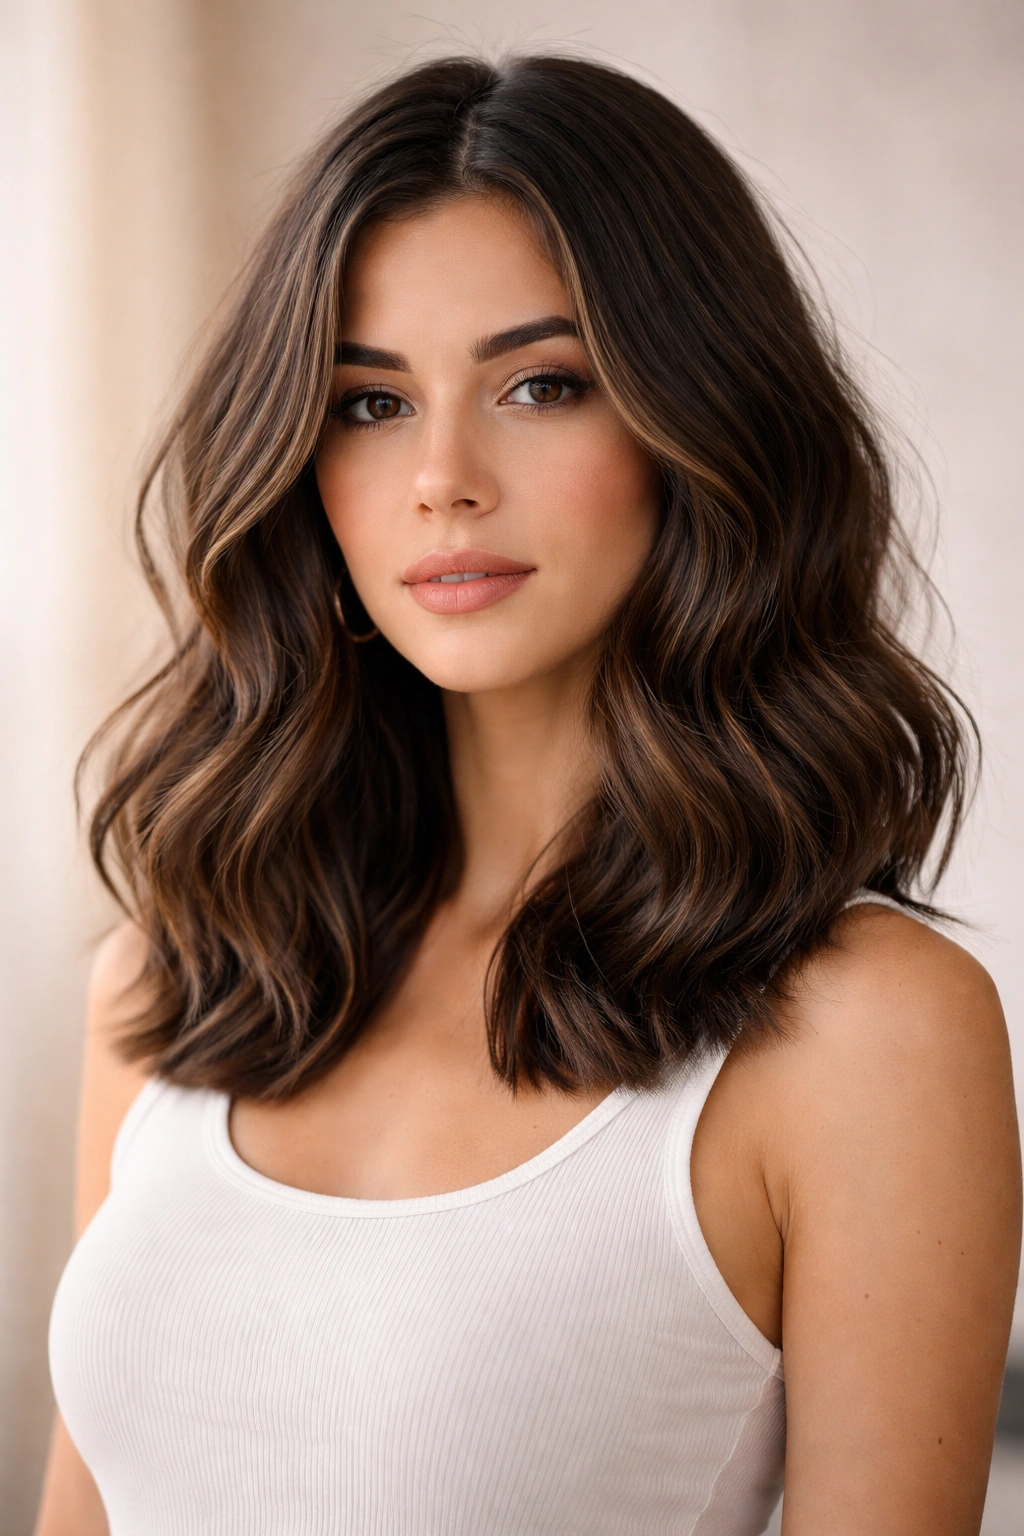
A lob—that’s a long bob—is perfect for Type 2 hair that’s on the thicker, denser side. This cut typically hits between shoulder and mid-back length, with minimal layering and a focus on a clean shape that doesn’t fight your wave pattern.
Why It Works for This Hair Type
Thicker wavy hair sometimes gets weighed down by too many layers, which can actually flatten your waves instead of enhancing them. A longer, less-layered lob respects the density you have while still allowing waves to show themselves. The clean lines create polish without requiring a ton of styling effort, and because there’s less choppy texture, you’re less likely to get frizz when you’re trying to achieve more defined waves.
Styling and Maintenance
- Keep layers minimal but strategic—maybe just one or two lighter layers around the face and through the ends
- This cut pairs beautifully with a center or deep side part, which shows off the length and shape
- Blow-dry with a paddle brush for smoother waves, or use a curling iron to deliberately define waves for a more done look
- Refresh your waves on day two with some wave cream or a curl-defining spray applied to damp sections
- Schedule trims every 8-10 weeks to maintain the clean shape and prevent split ends from making waves look scraggly
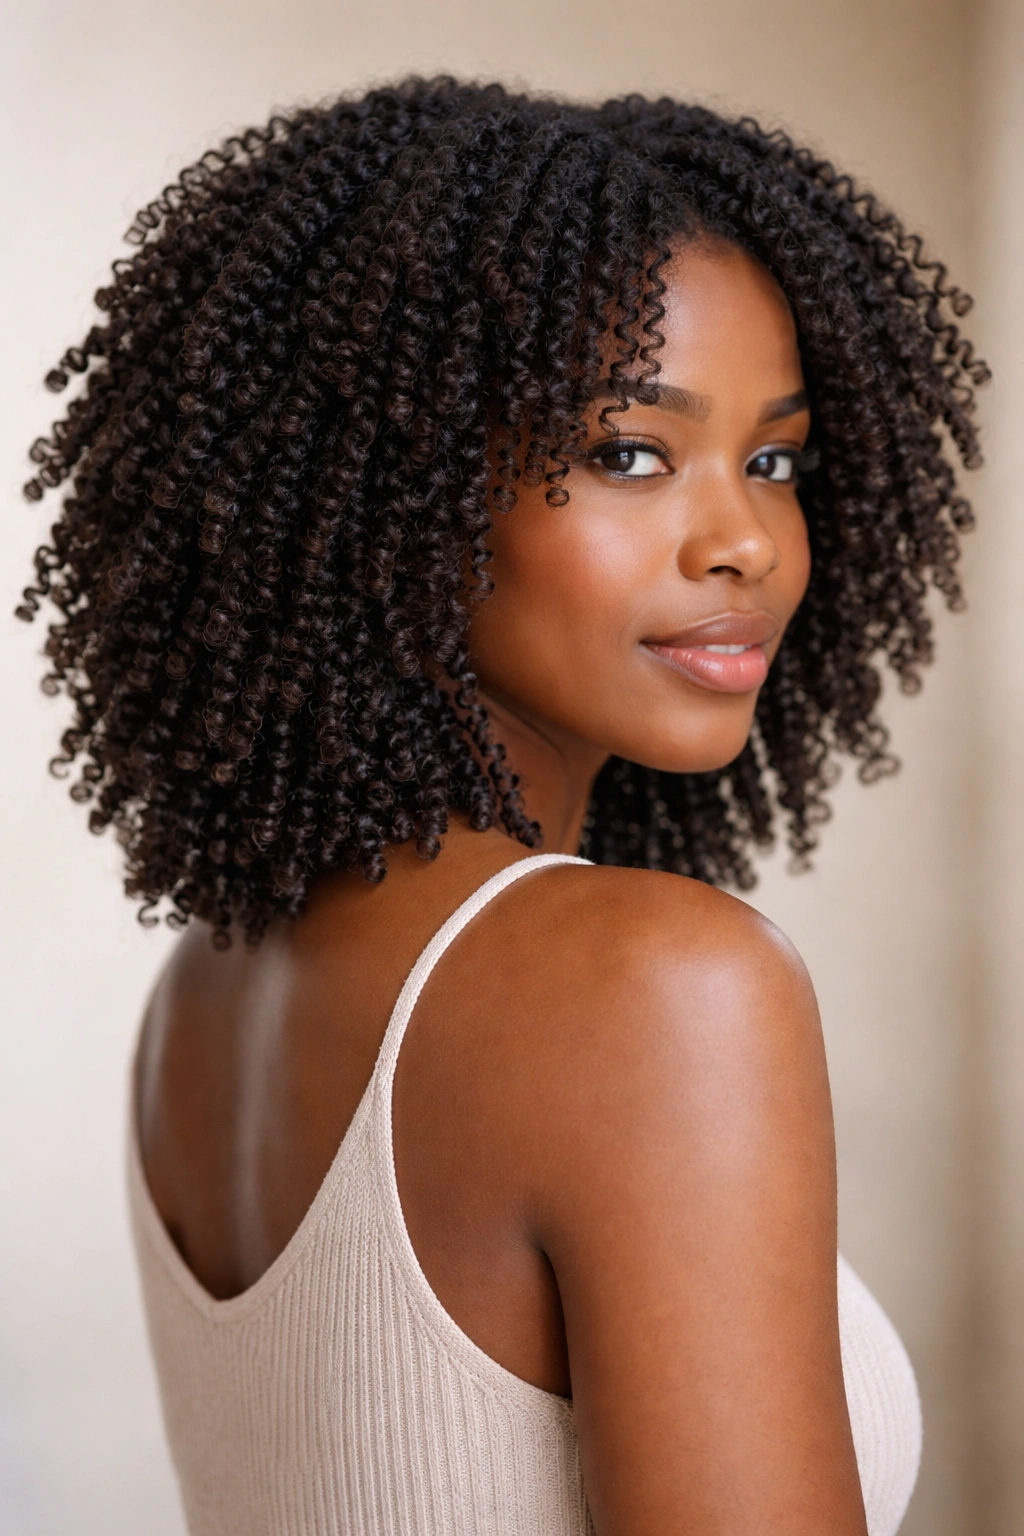
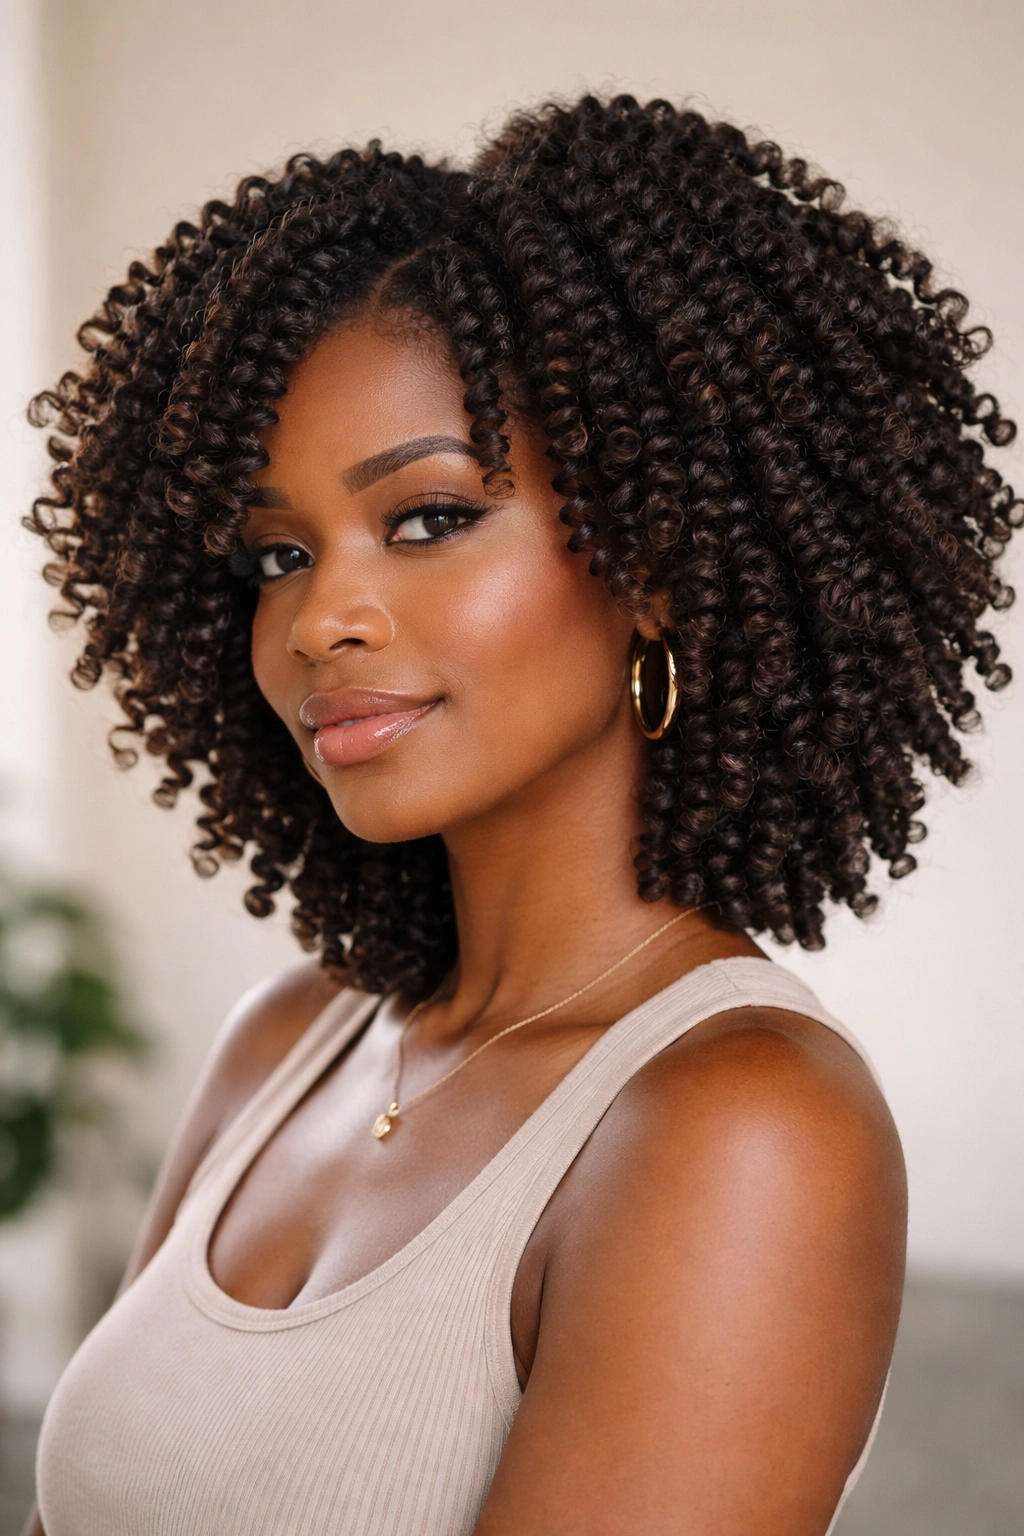
4. The Bouncy Shoulder Cut for Type 3 Curls
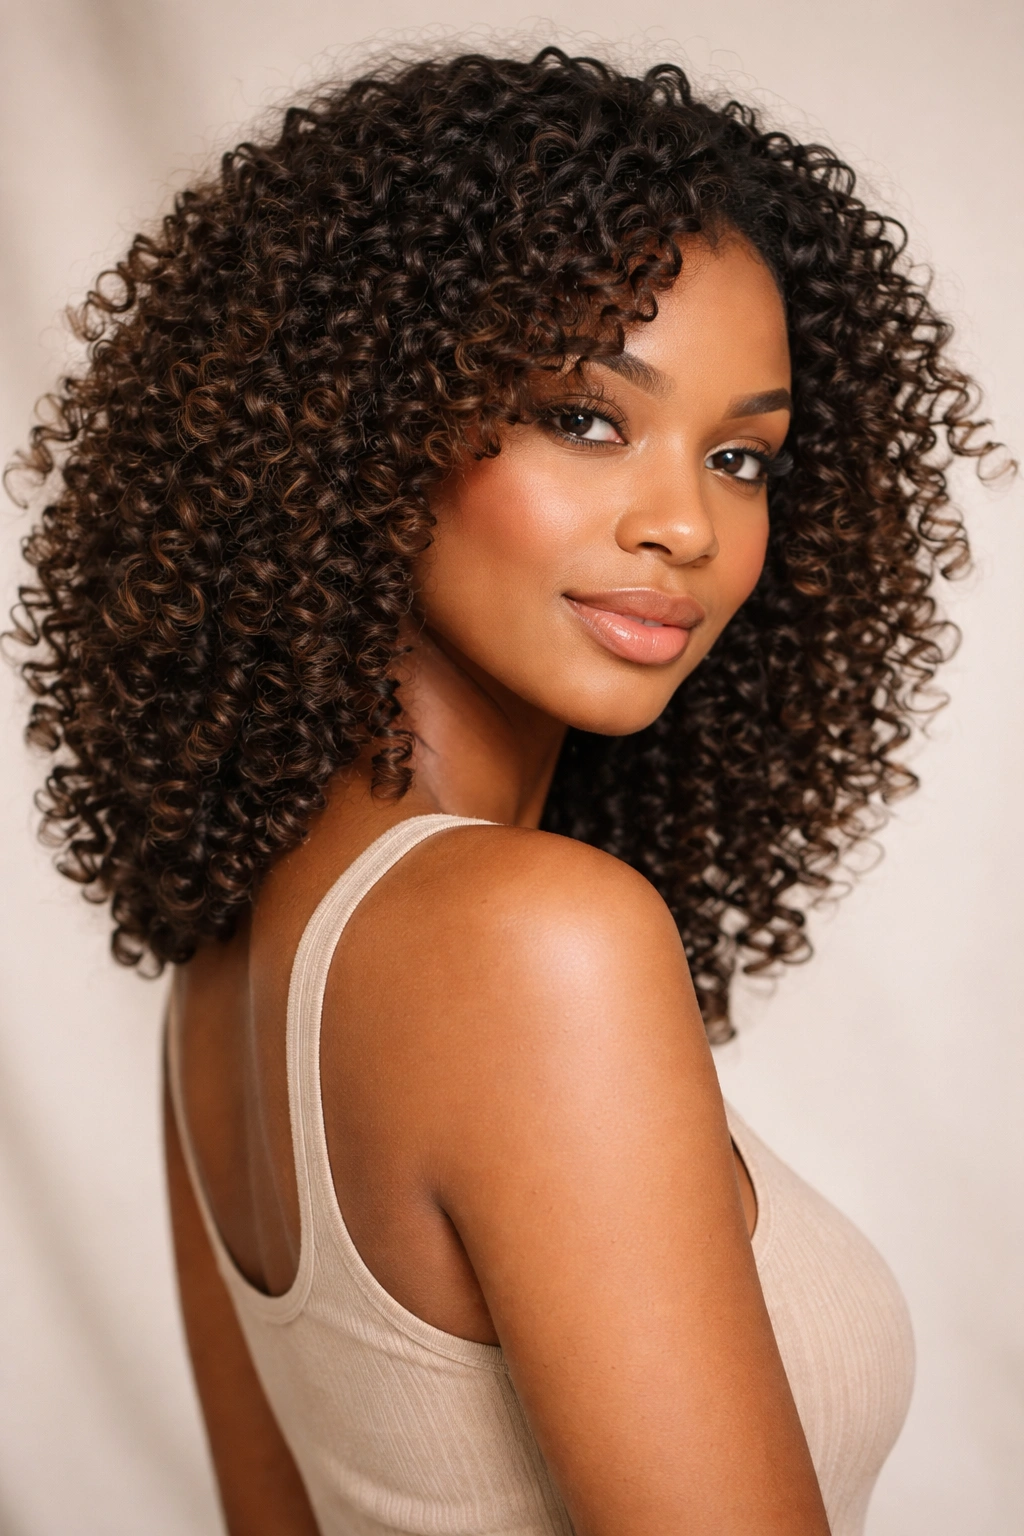
This is a shoulder-length cut with strategic layers that land around your shoulder blades—perfect for Type 3 curls that need movement but also definition. The layers are cut to encourage curls to spring up and out rather than down and flat.
The Magic of This Cut for Type 3 Hair
Type 3 curls have a natural spring and bounce, but they’re dense enough that weight can collapse them. A shoulder-length cut with layers removes exactly the right amount of bulk without making your hair look thin or sparse. The cut works with your curl pattern, encouraging your curls to hold their shape while also reducing the bulk that can make type 3 hair look shapeless. You’ll actually be able to see individual curls instead of just a cloud of hair.
Styling Tips for Maximum Definition
- Cut layers at different lengths throughout the crown to create a natural, slightly tapered look
- Use a gel, mousse, or cream-gel hybrid to define curls on wash day and you’ll see the layers work their magic immediately
- Diffuse on low heat or air-dry for the bounciest results—high heat can sometimes make Type 3 curls less defined
- The layers mean you’ll need a trim every 6-8 weeks to prevent the cut from losing shape and looking overgrown
- This cut actually photographs beautifully because the layers catch light and make your curls look even more dimensional
5. The Tapered Cut for Definition-Focused Type 3 Curls
A tapered cut is shorter on top with gradually longer layers as you move down, creating a shape that’s fuller in the middle and slightly tapered at the ends. It’s bold, intentional, and makes Type 3 curls look absolutely dimensional.
Why Tapering Works So Well
The taper actually celebrates the structure of Type 3 curls by creating a shape that works with how your curls naturally fall and cluster. Shorter layers on top give you lift and prevent your curls from getting weighed down, while longer layers underneath maintain the density that keeps your curls looking full and healthy. This cut is specifically designed to show off the individual curl pattern rather than trying to create one uniform shape.
Maintaining Your Tapered Cut
- This cut requires product—mousse, gel, or cream-gel work beautifully to define and hold the shape
- Diffuse-dry for the best results, or use your hands to encourage curls into their natural pattern while air-drying
- Plan for a trim every 6-8 weeks because the tapered shape loses impact fast if the layers aren’t maintained
- You can wear this cut textured and undone, or style it sleeker with a stronger hold gel for more polish
- The taper emphasizes face shape beautifully, so it works particularly well if you’re looking for something flattering and structured
6. The Curly Fringe for Type 3 Curls with Movement
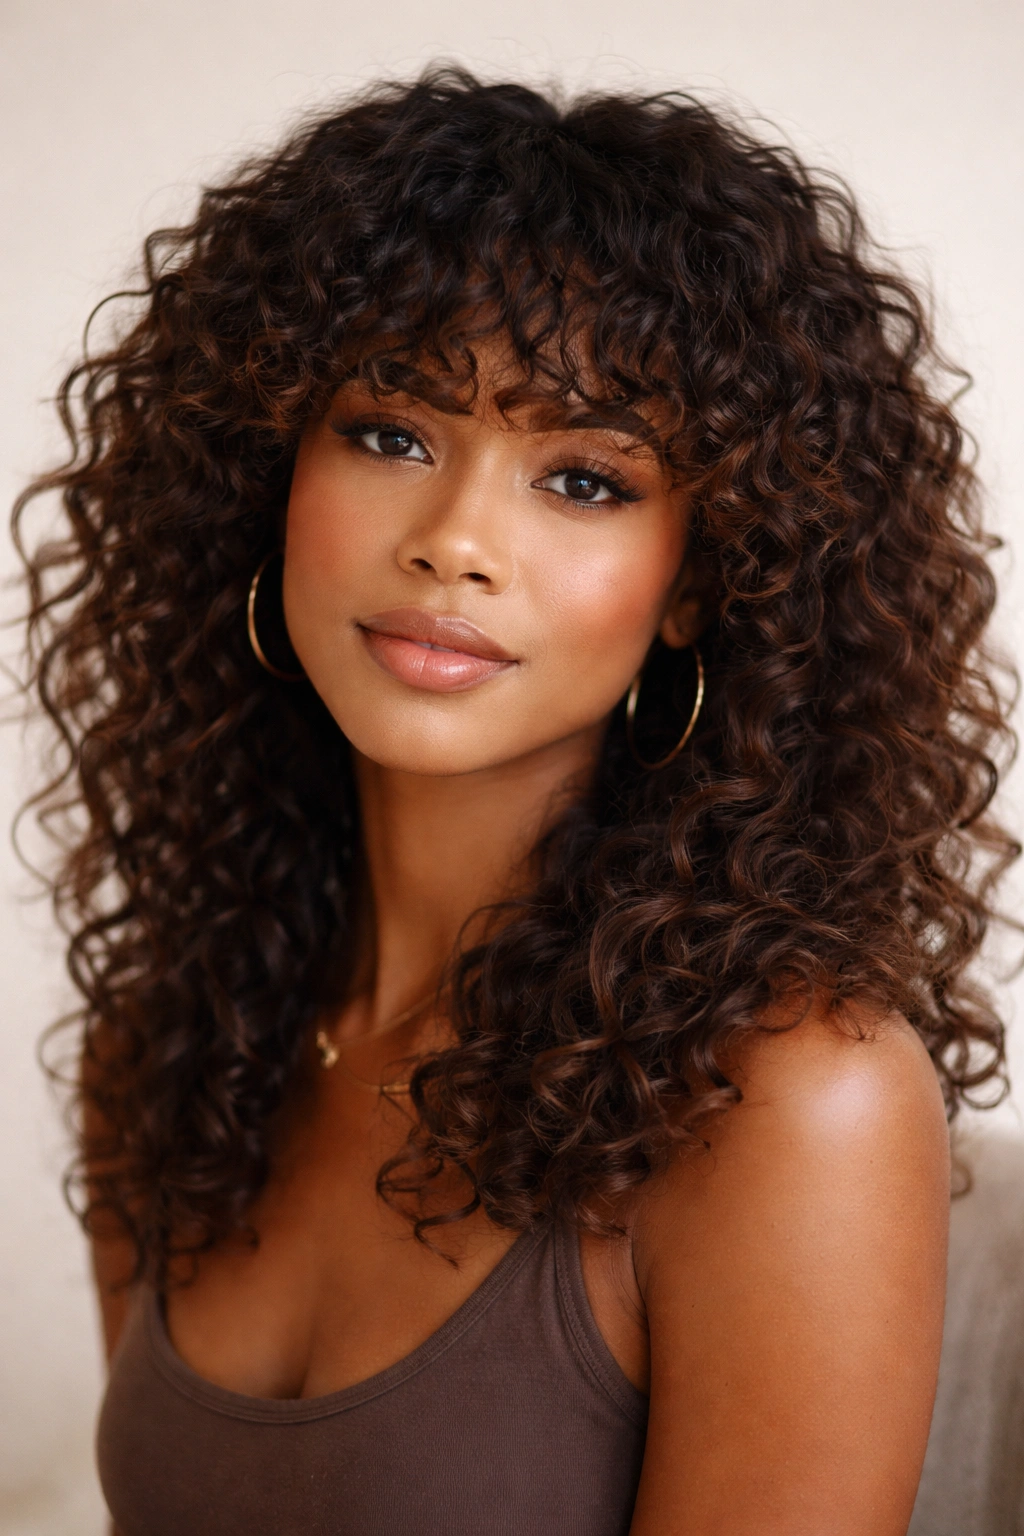
Adding a curly fringe (bangs) to a longer Type 3 cut is bold and playful. The fringe should be cut short enough to sit just above your eyebrows, with layers that allow the curls in the fringe to move independently from the rest of your hair.
Making Bangs Work on Curly Hair
Type 3 curls are the sweet spot for bangs because they have enough definition and spring to create a distinct, intentional fringe without looking scraggly or unpredictable. Bangs on Type 3 hair actually read cleaner than they do on Types 4 because of the curl structure—they maintain their shape better and require less fussing. The fringe adds personality while the layers around it prevent the cut from looking too heavy or costume-y.
Styling and Care
- Keep the rest of your hair somewhere between shoulder and mid-back length for the best balance with a fringe
- Gel or mousse applied to damp fringe and diffused will keep your bangs defined and bouncy all day
- Wash and define your fringe every wash day—this is non-negotiable if you want it to look intentional rather than messy
- You’ll need a trim every 4-6 weeks just for the fringe to keep it at the right length, so build that into your routine
- Sleep in a silk bonnet to preserve fringe definition overnight and reduce how much you need to restyle in the morning
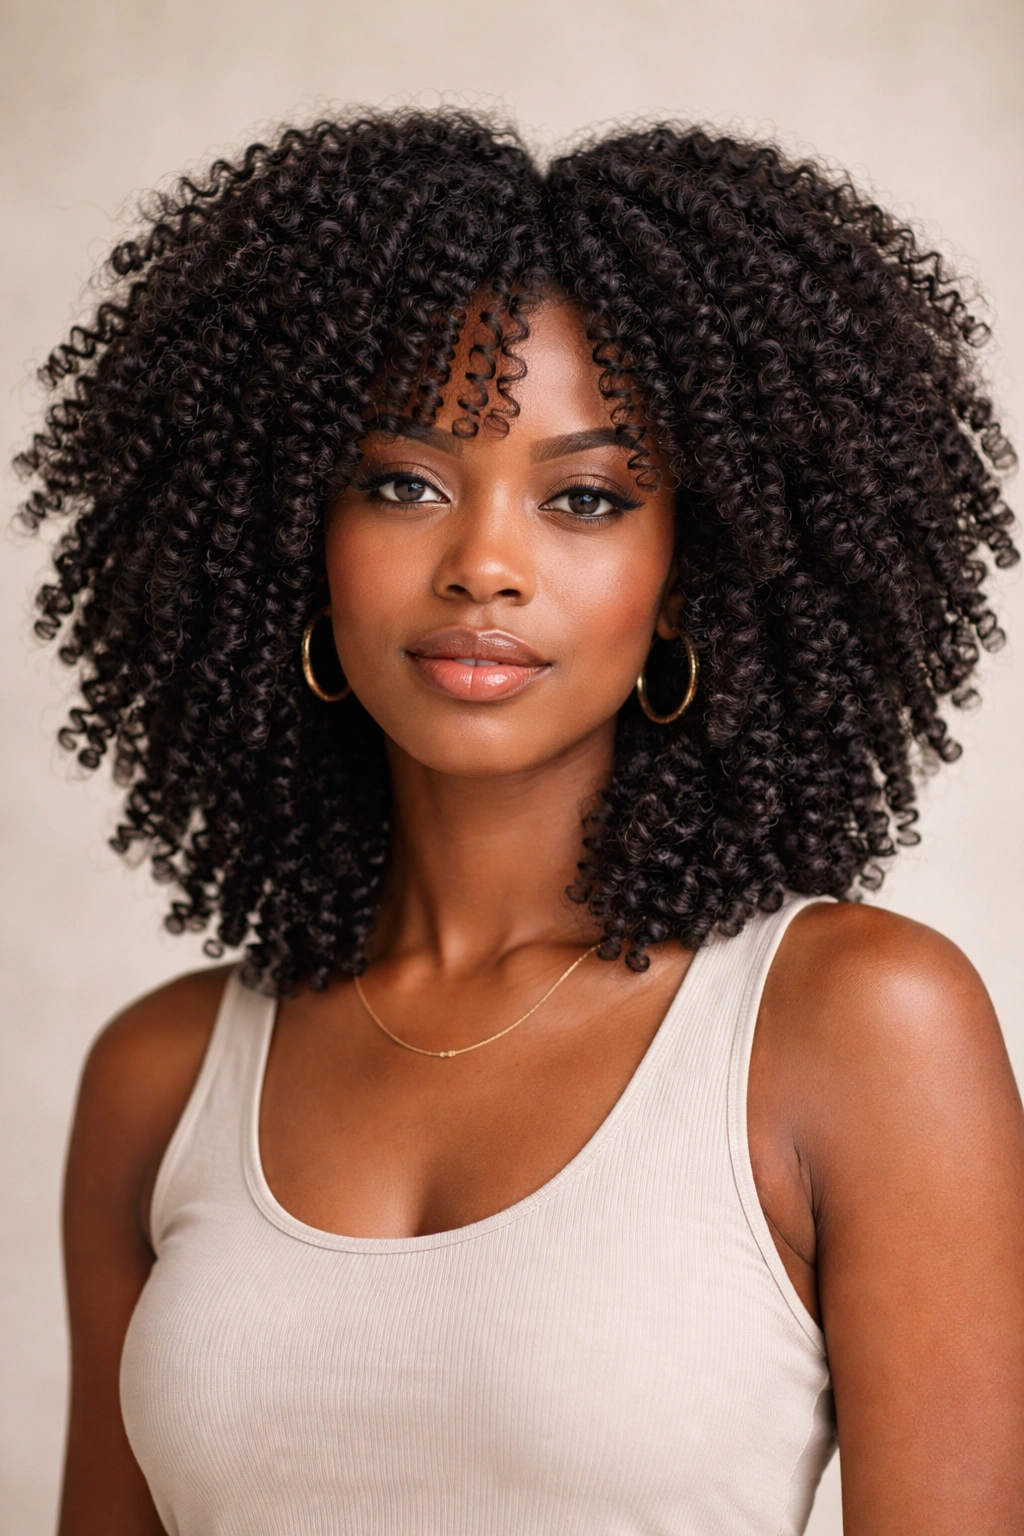
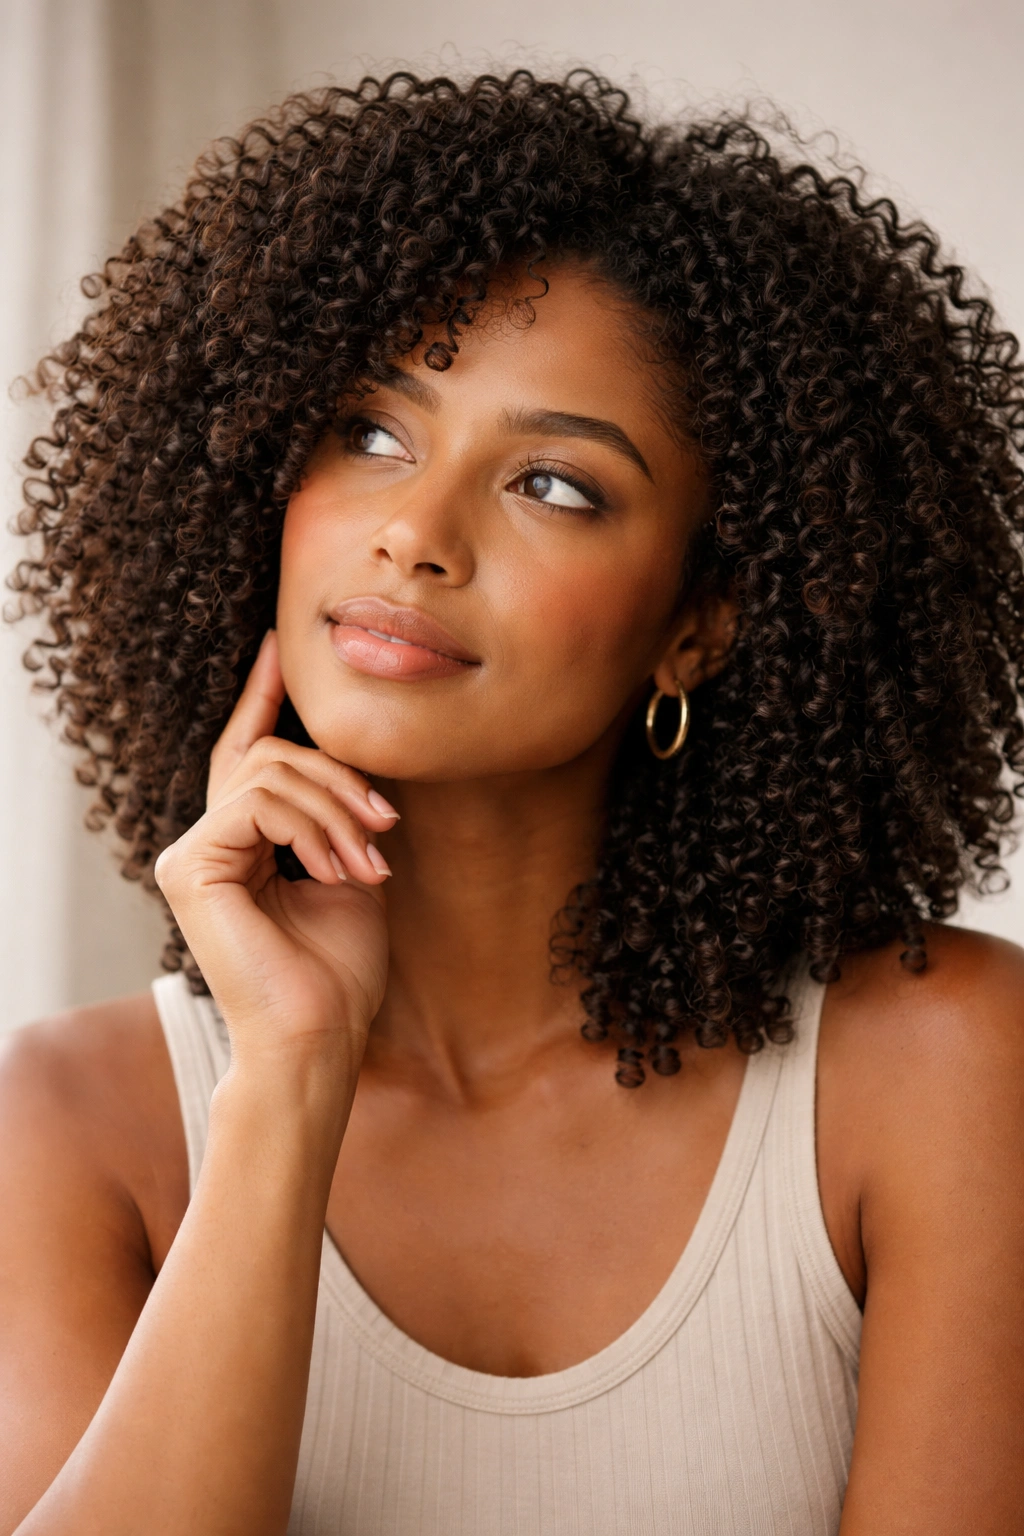
7. The Layered Mane for Voluminous Type 3 Curls
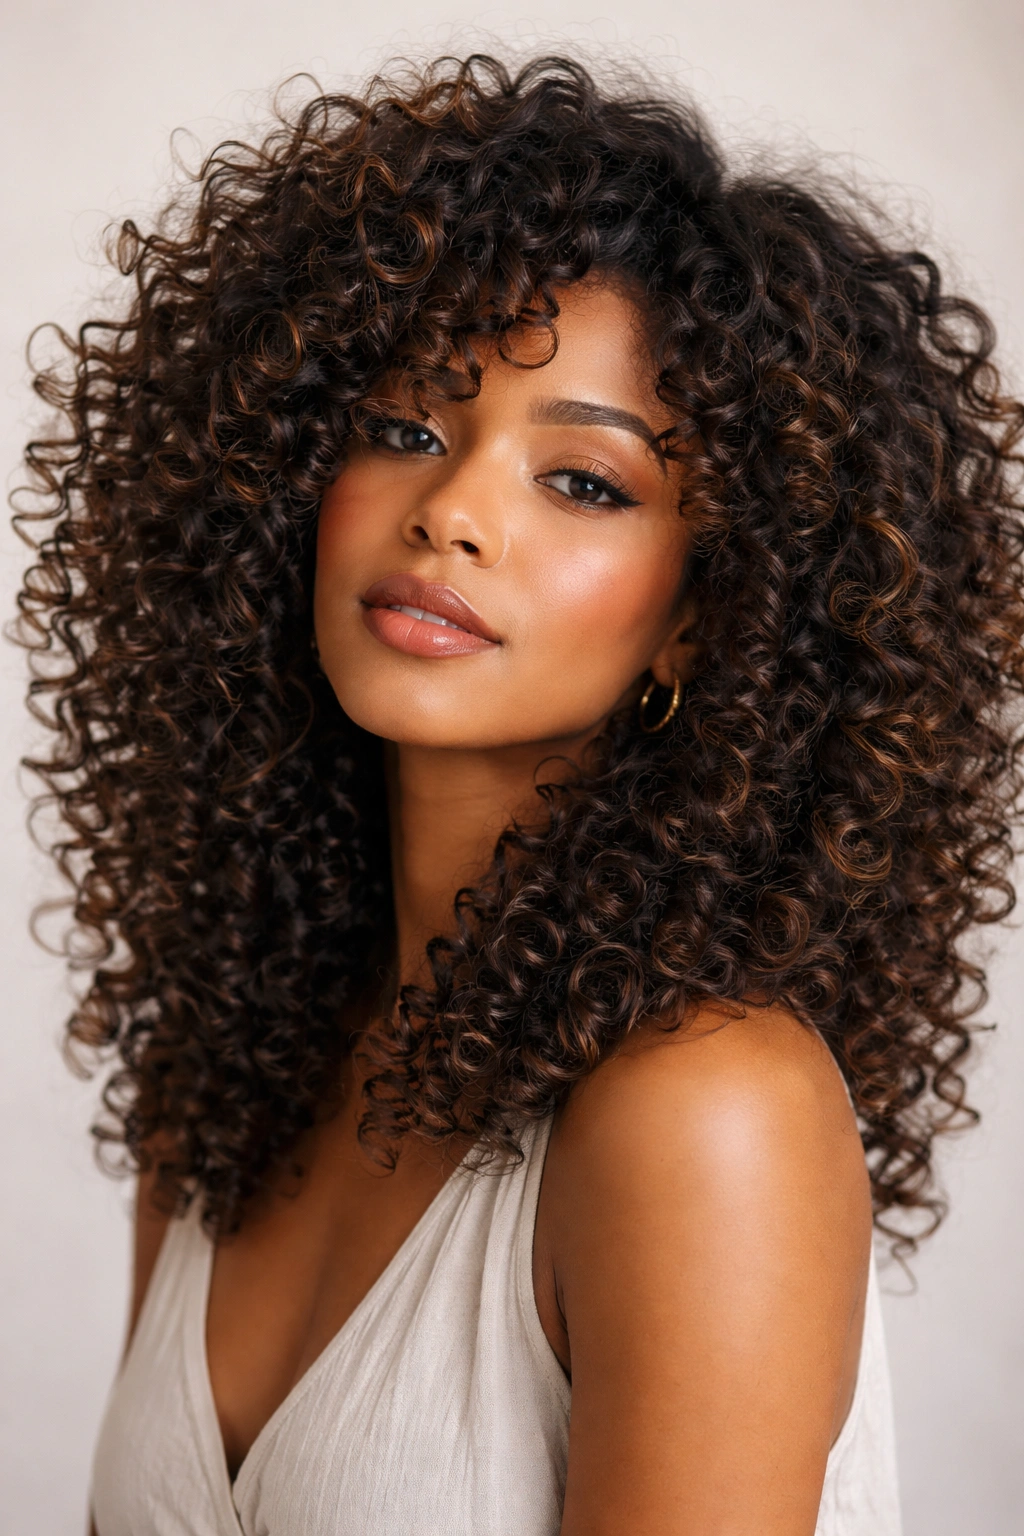
This is the “lots of layers, lots of movement, lots of volume” approach—perfect if you have Type 3 curls and you want your hair to look as big and dimensional as possible. Layers throughout, cut to varying lengths, create a cloud of curls that looks stunning.
What Makes This Cut Work
When you have Type 3 curls with good density, multiple layers aren’t going to thin your hair out—they’re going to create dimension and reduce bulk in a way that actually makes your curls look more defined and intentional. Each layer allows your curls to move independently, and when combined, they create that enviable voluminous texture. The cut celebrates that you have a lot of hair and makes it look intentional rather than overwhelming.
Styling and Maintenance
- This cut looks best when fully defined with product—gel, mousse, or curl cream will show off all those layers
- You’ll need to diffuse or use a curl-focused styling technique to get the full benefit of the layers
- Plan for a trim every 6-8 weeks to maintain the layered shape and keep it from looking stringy at the ends
- Pineapple your hair at night (tie it loosely on top of your head) to preserve the definition and volume created by the cut
- This cut genuinely requires some daily styling commitment—it’s not a wash-and-go style, but the results are worth it
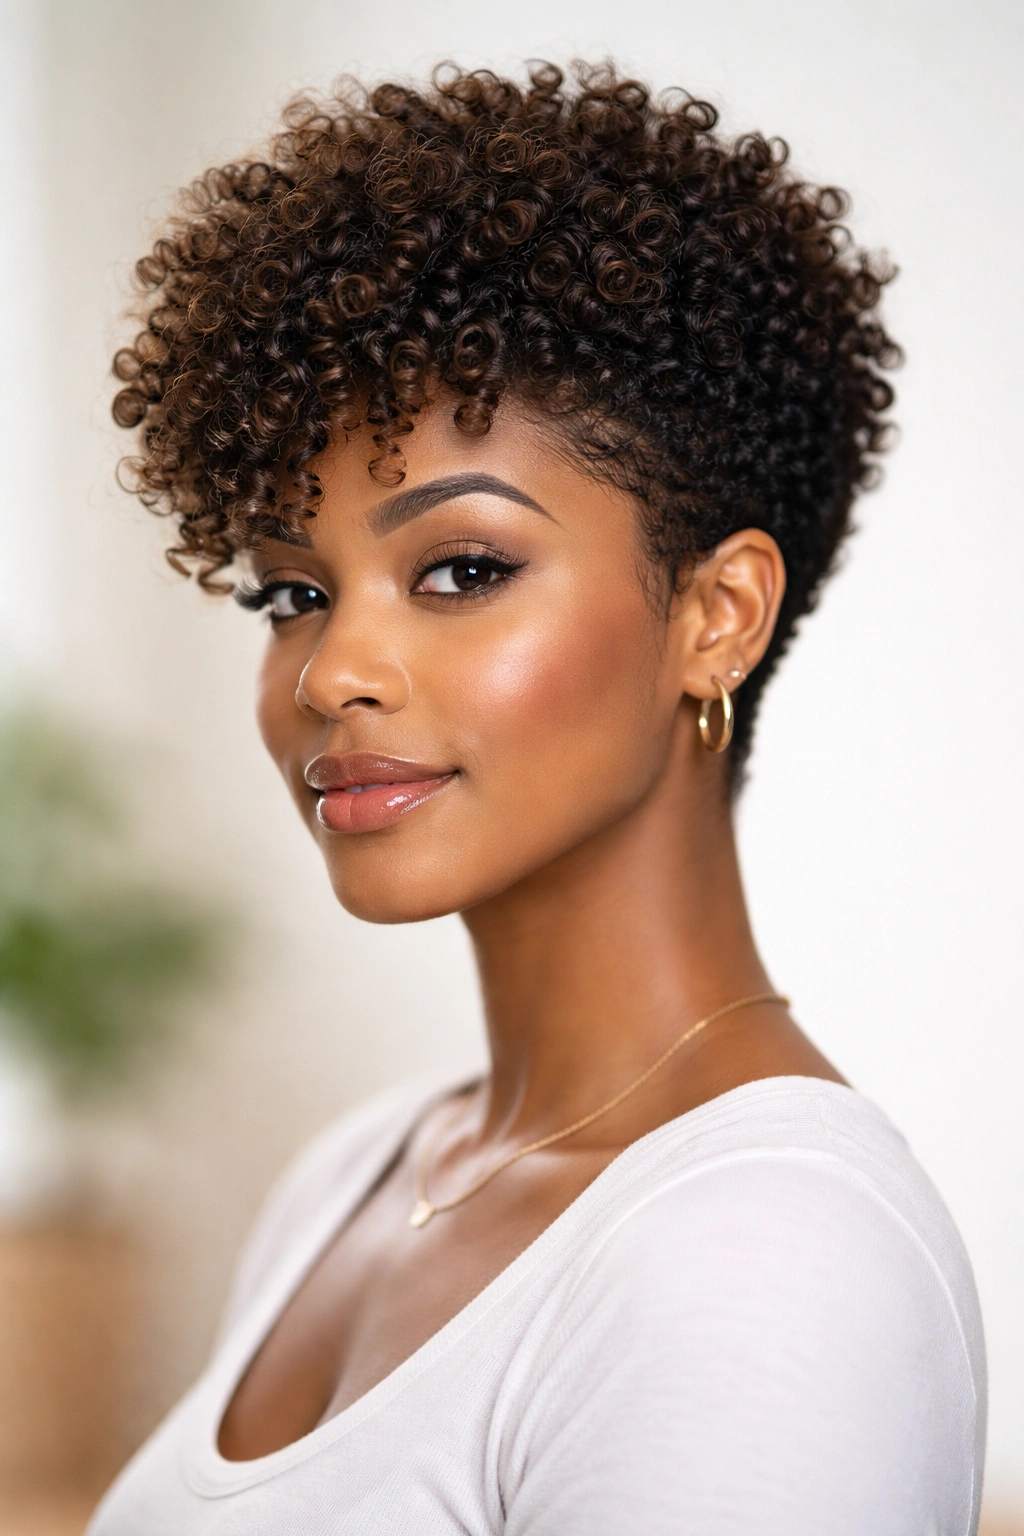
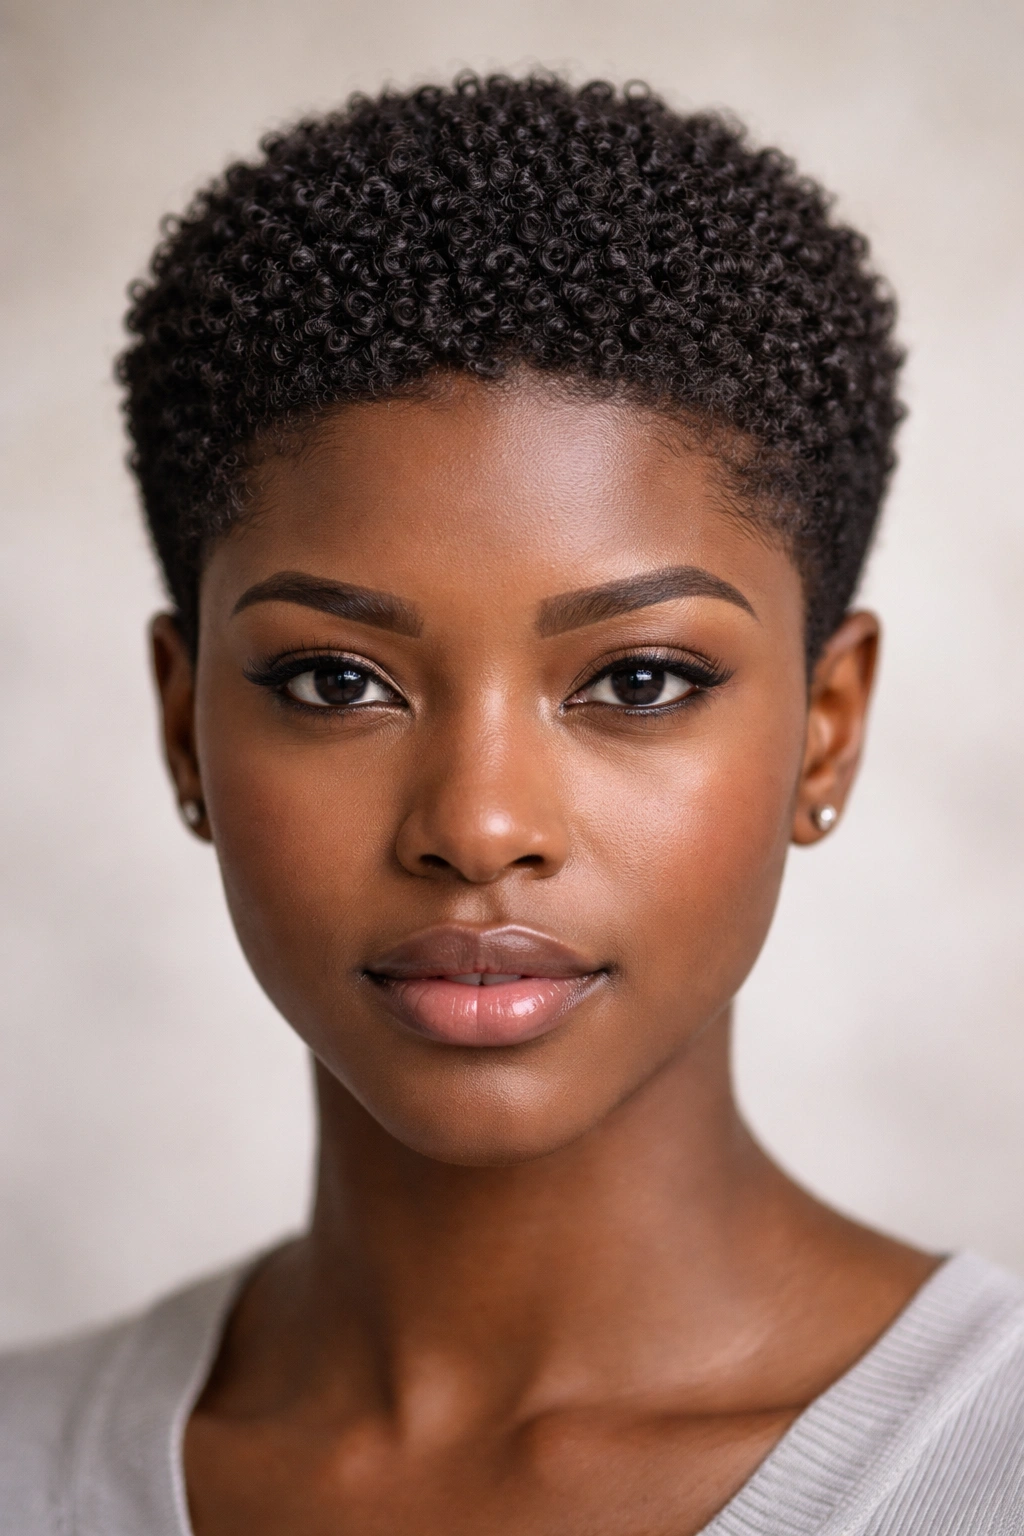
8. The Textured Pixie for Confident Type 3 Curls
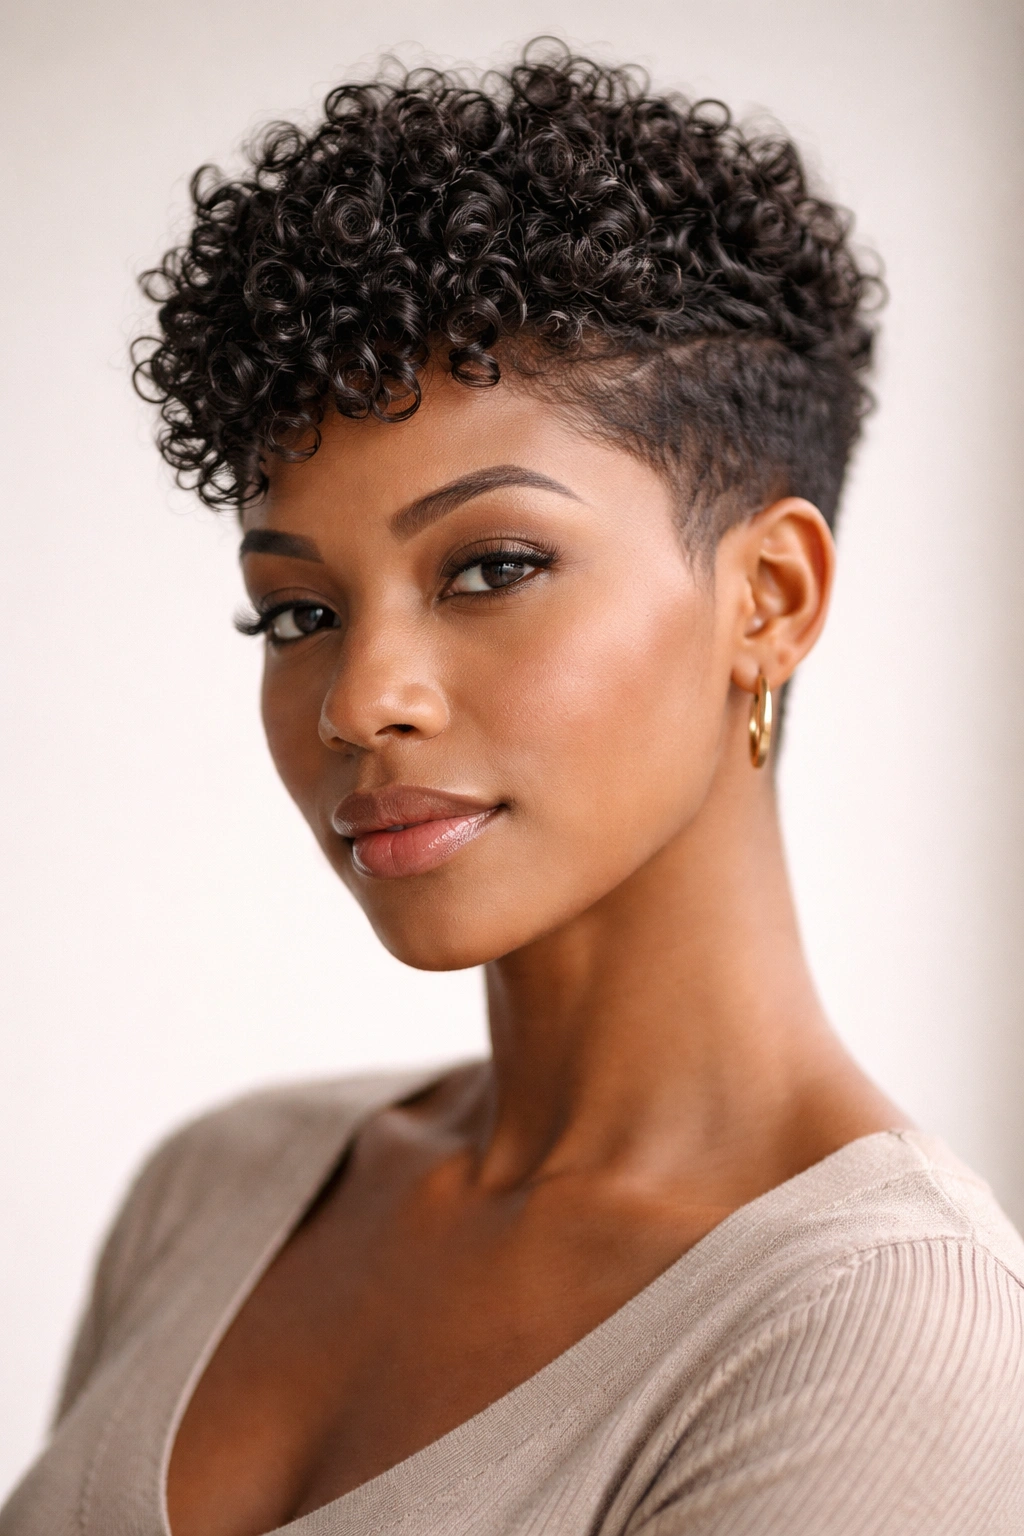
A textured pixie is a short, bold cut that celebrates Type 3 curls rather than fighting them. It’s cut close to the scalp in some areas with slightly longer, textured sections on top that showcase your curl pattern.
Embracing Short Hair with Type 3 Curls
Type 3 curls actually look absolutely stunning short because you can see the spiral structure and the individual curl definition so clearly. A textured pixie on Type 3 hair is bold and chic, and it requires way less product and styling time than longer styles. Your curls will pop without you having to do much of anything—the cut does the work for you.
Styling Tips for Pixie-Cut Curls
- This cut works best when you love your natural curl pattern enough to let it just be—minimal product, maximum texture
- You can use a small amount of mousse on wash day and let your curls air-dry for a super low-maintenance look
- Or use gel for more definition and hold if you prefer a sleeker, more structured version of short curls
- Trims every 4-6 weeks are absolutely essential because this cut loses shape faster than longer cuts
- This style works beautifully on all face shapes because the curl texture provides visual balance and softness
9. The Cut-and-Coil for Type 4A Coils
Type 4A coils are tightly coiled but still relatively uniform in pattern, and this cut is specifically designed to enhance that texture without adding unnecessary bulk. It’s typically shoulder-length with strategic layers that let your coils stack and show their natural formation.
Why Coil-Specific Cutting Matters
A regular haircut that doesn’t account for coil shrinkage and curl patterns can look completely different once your hair dries and shrinks. The cut-and-coil approach means cutting your hair while it’s wet and stretched, measuring how much shrinkage you actually have, and cutting accordingly. This prevents the common problem of cutting too much length because you misjudged the shrinkage.
Maintaining Coil Definition
- Ask your stylist to cut while your hair is stretched so they’re accounting for shrinkage accurately
- Moisturizer and a light styling cream or gel will define your coils without weighing them down
- Finger coiling (manually twisting each section around your finger) after styling product creates the most defined coil pattern
- Plan for a trim every 8-10 weeks to maintain shape and prevent matting or tangling at the ends
- Pineapple at night or use a silk bonnet to preserve coil definition between wash days
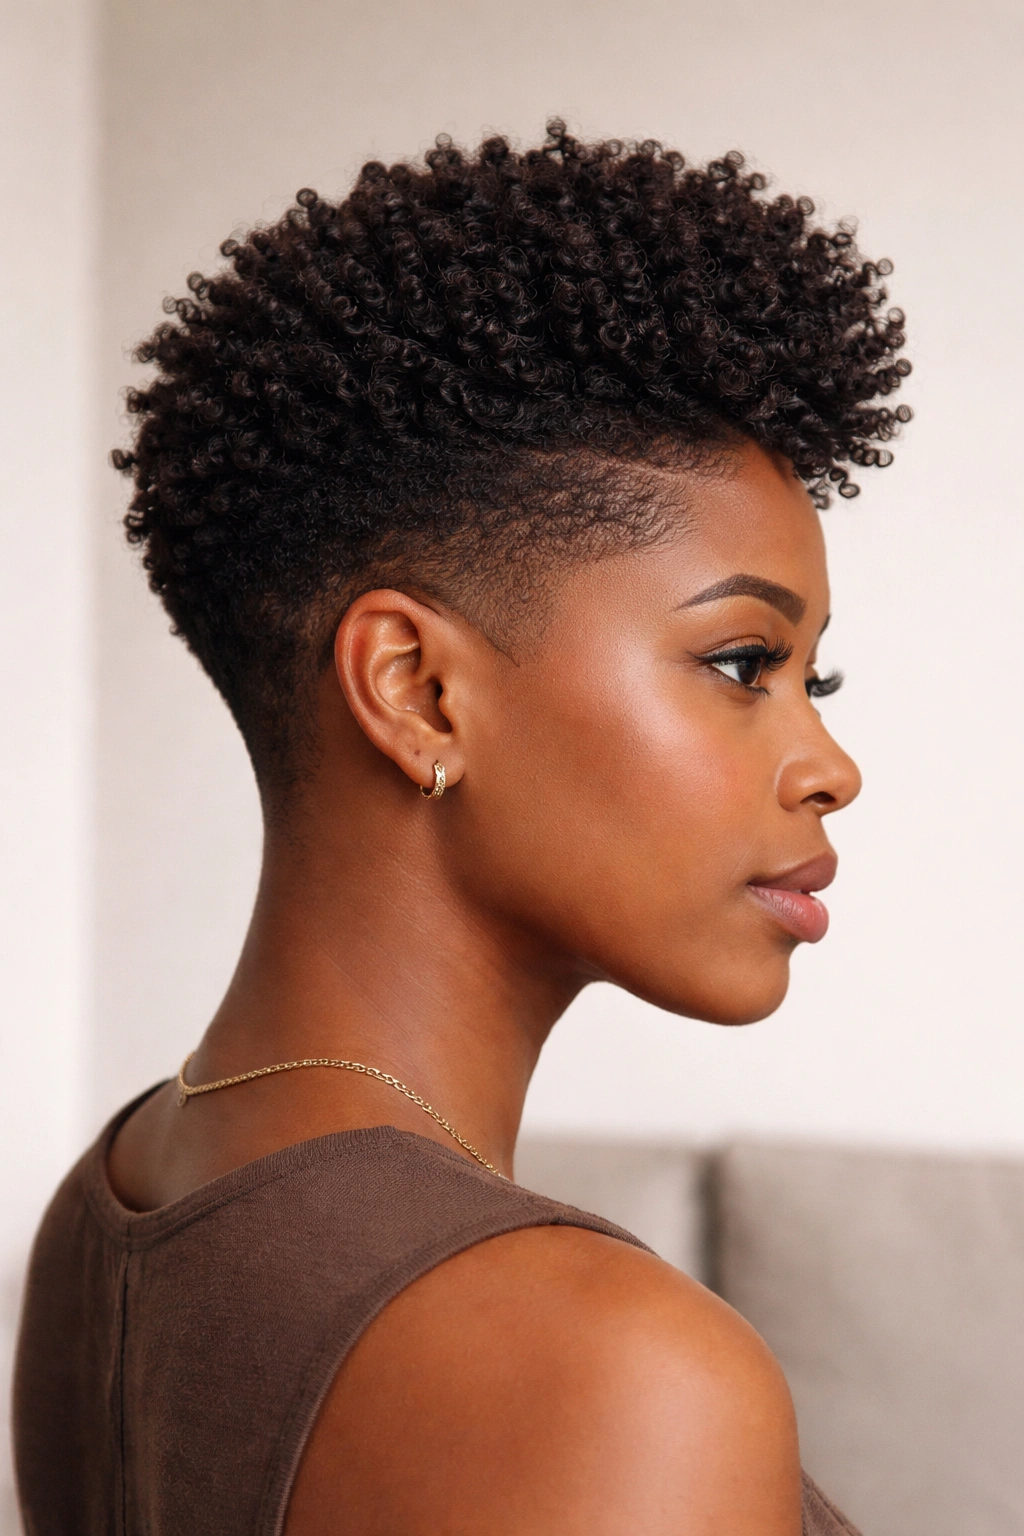
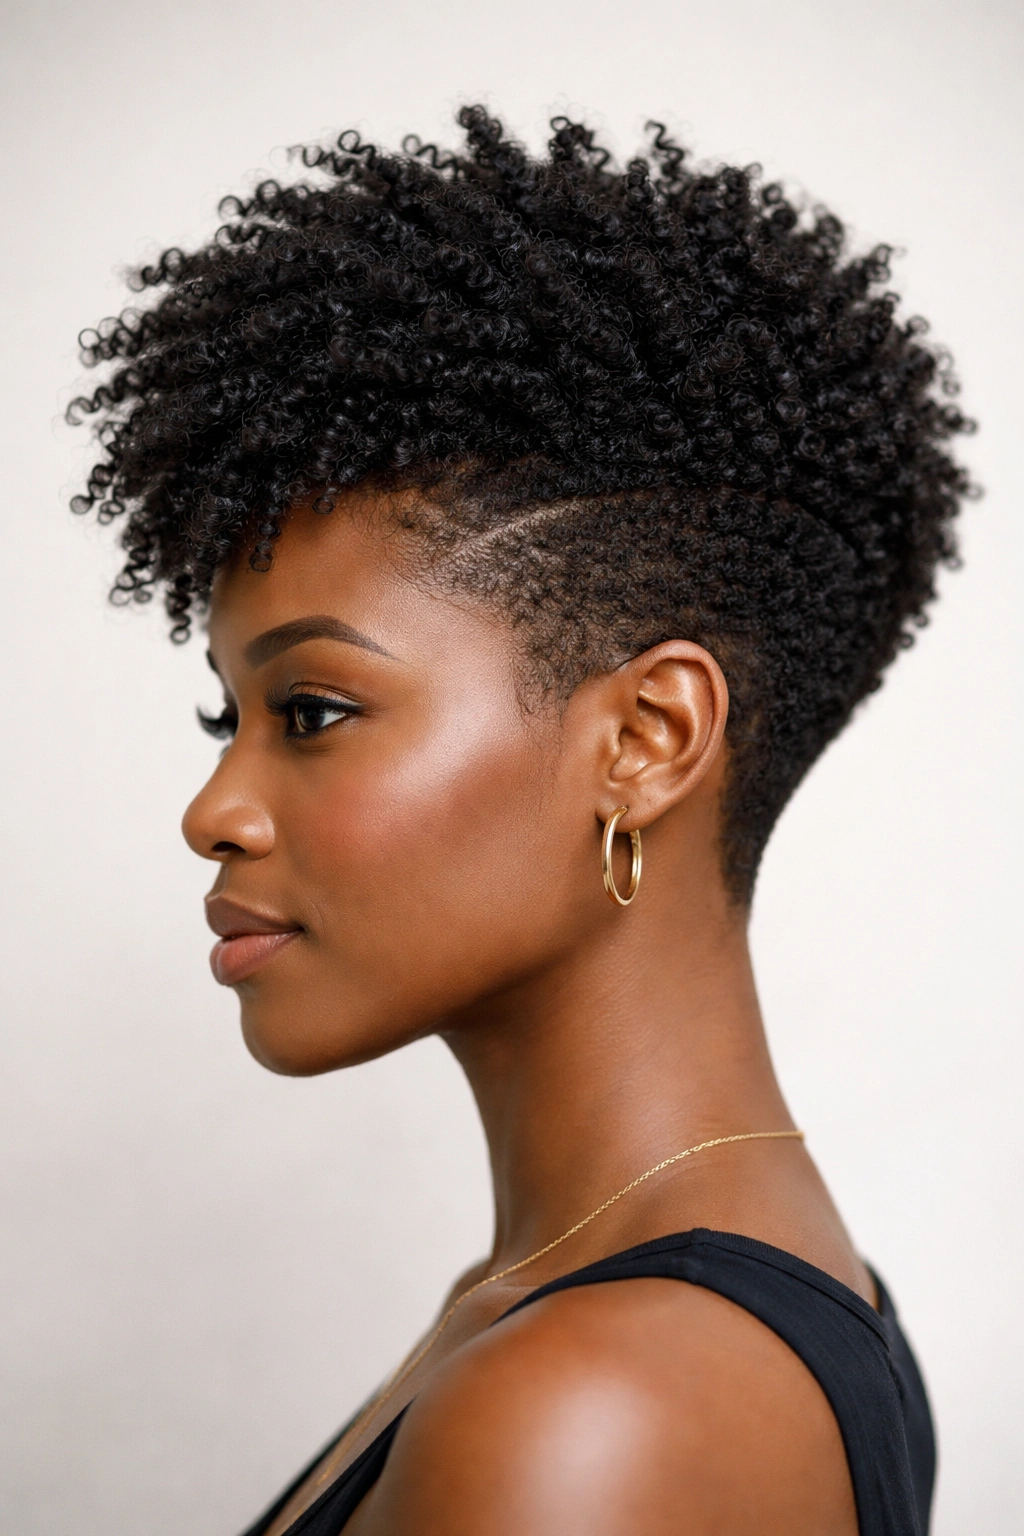
10. The Textured Taper for Type 4A Definition
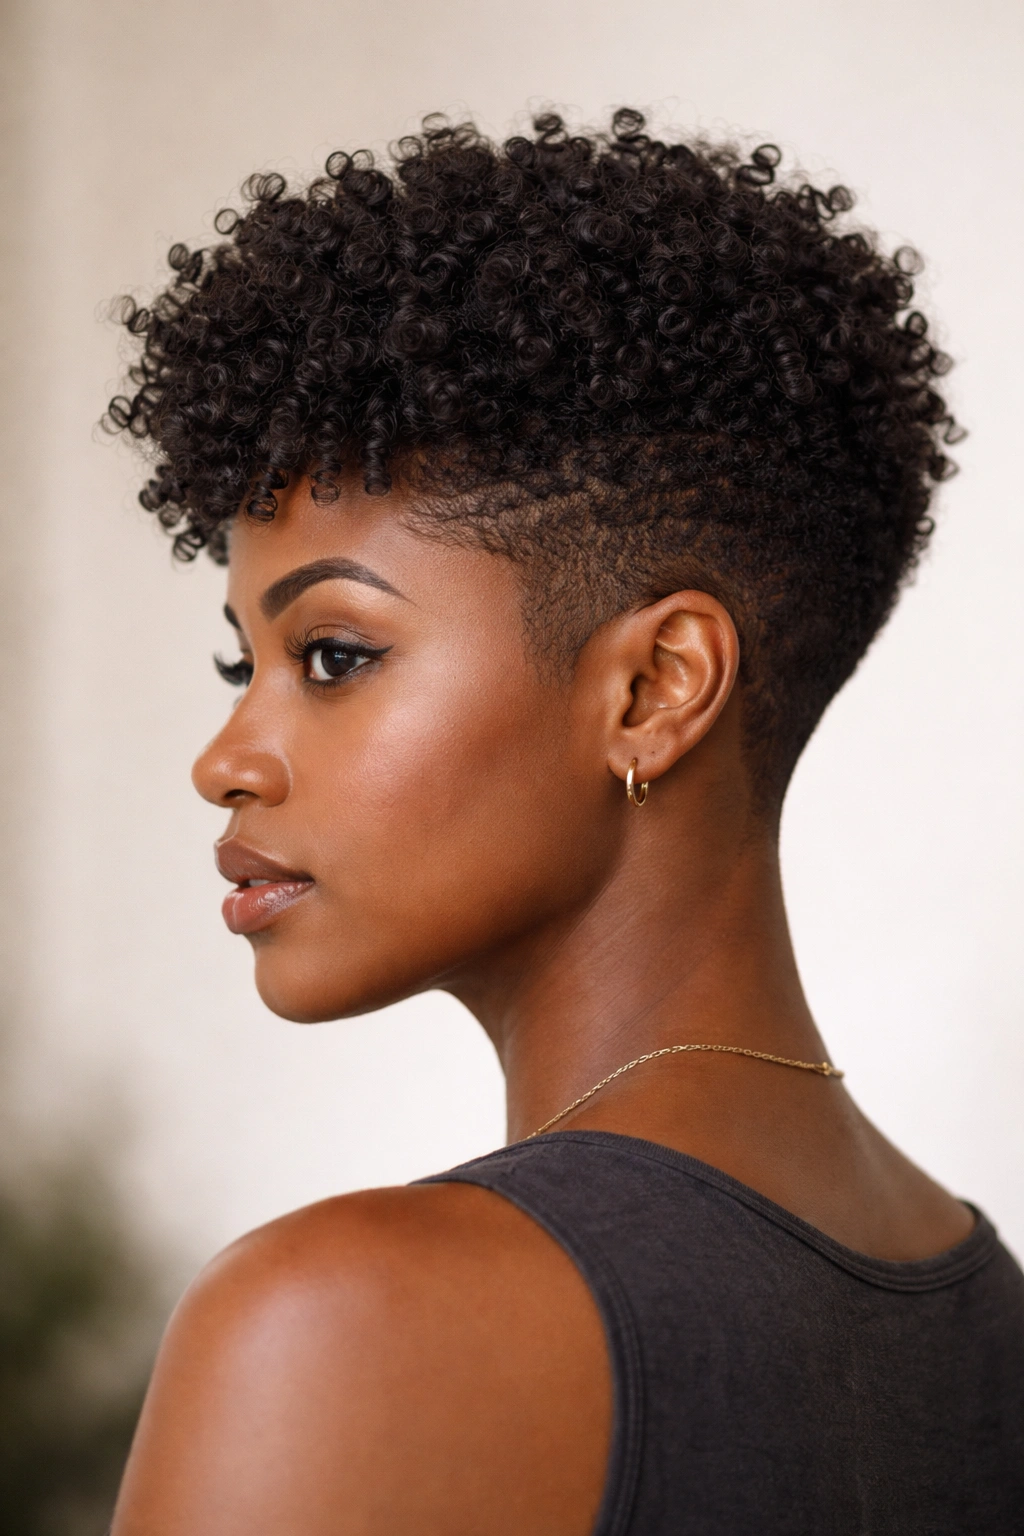
A textured taper is shorter and more dramatic than a straight bob—it’s cut close to the nape and ears with longer layers on top that taper down. It’s a statement cut that shows off tight coil patterns beautifully.
How Tapers Work on Type 4A Hair
The short sides and back create movement and lightness while the longer top gives you room to style and showcase your coils. A taper removes a lot of weight from Type 4A hair, which often gets tangled or matted by too much length and bulk. The cut makes your coils look deliberately sculptural and intentional rather than overgrown or unkempt.
Styling and Maintenance
- This cut pairs beautifully with styling gels that provide strong hold and definition
- You can wear your coils very defined and sleek, or soften the look with a curl cream for a more undone vibe
- Trims every 4-6 weeks are essential to keep the taper sharp and prevent the short sides from looking unkempt
- This cut shows off your face shape boldly, so consider your proportions when deciding how dramatic to go
- Many people with Type 4A hair find this cut way easier to maintain than longer styles because there’s less hair to detangle daily
11. The Faux Hawk for Type 4A Bold Styling
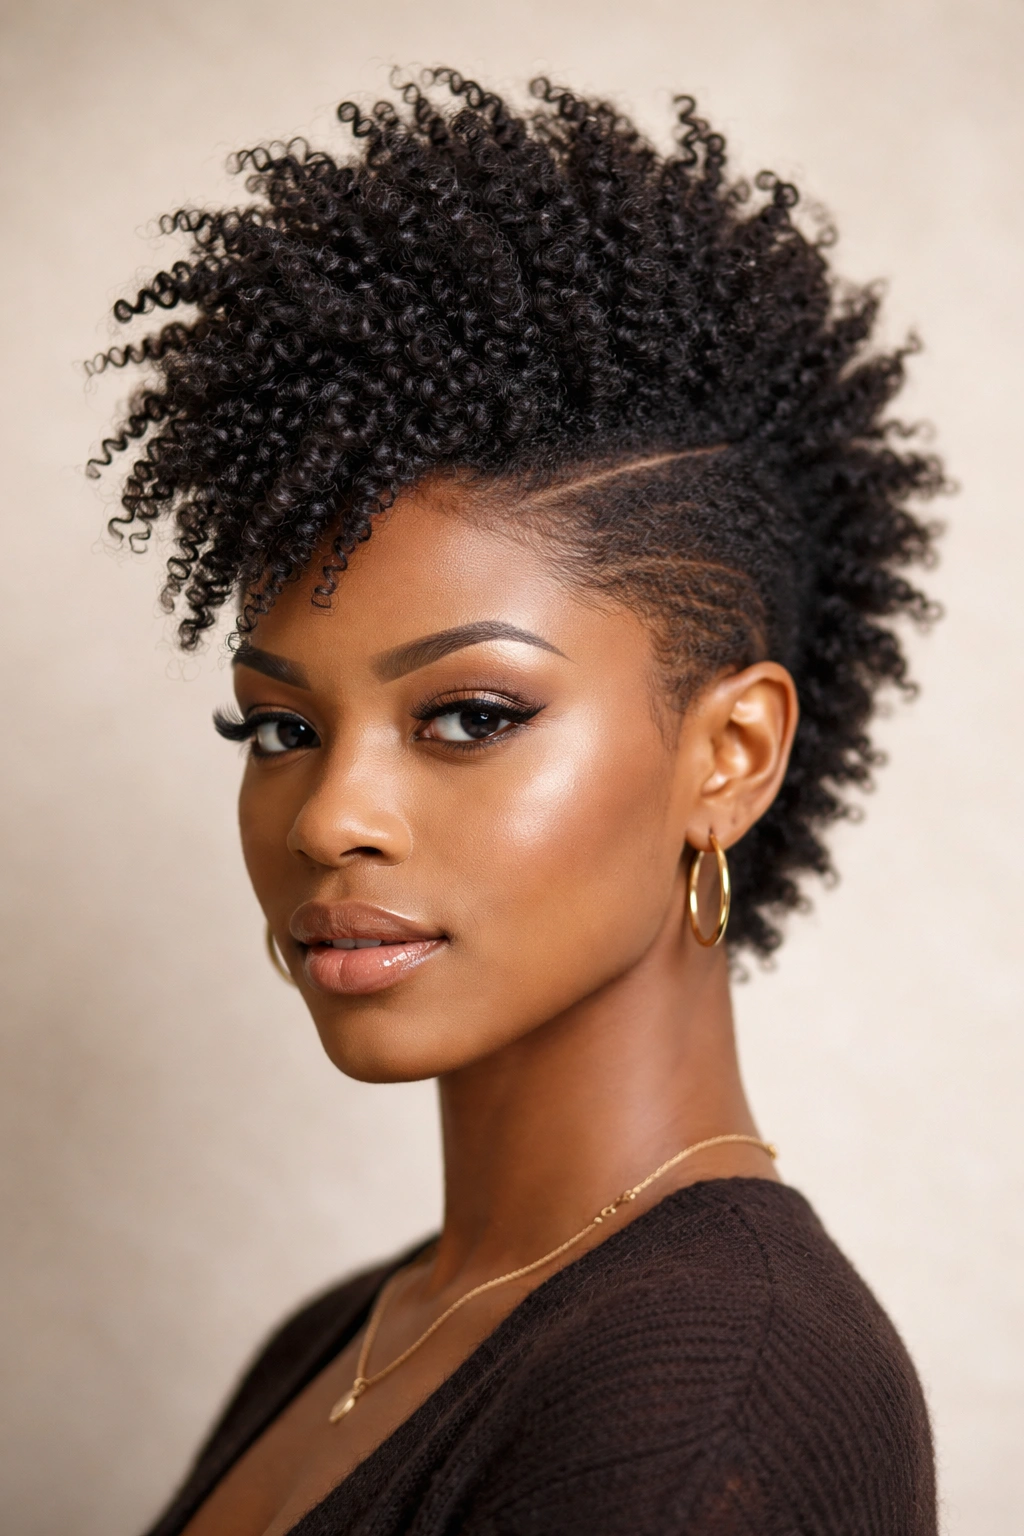
A faux hawk is similar to a textured taper but with an even more defined peaked shape in the center—longer and fuller at the crown, shorter on the sides. It’s playful and bold while still being wearable every day.
Making a Faux Hawk Work
Type 4A coils are perfect for a faux hawk because the tight coil pattern allows you to create actual shape and height without it looking costume-y. The coils themselves provide structure and hold, so you’re not relying entirely on product to create the silhouette. You can wear it sleek and defined, or soften it with a cream for a more textured, undone version.
Styling Tips
- Use a firm-hold gel or edge control on damp hair and brush it backward and up to create the peaked shape
- Air-dry or use a blow-dryer to set the style, or let it dry and then gently separate coils with your fingers for a softer look
- A faux hawk works for both casual and slightly dressier occasions depending on how polished you style it
- Trims every 4-6 weeks keep the sides sharp and the overall shape intentional
- You can switch between a faux hawk style and just wearing your hair as loose coils depending on your mood—the cut supports both
12. The Coil-Out Cut for Type 4A Volume
This style is built on the idea of creating maximum volume and definition through deliberate layering and shaping. It’s typically mid-length with lots of texture and movement built into the cut itself.
Why Layering Works for Type 4A
Type 4A hair sometimes looks like one heavy mass if it’s all one length. Layers strategically placed throughout the cut create pockets of space and allow each coil to be seen individually rather than as one tangled blob. The cut intentionally works with shrinkage so that even at fully shrunk length, you still have shape and dimension.
Creating and Maintaining Coil-Outs
- Apply a leave-in conditioner and styling cream to damp hair and use your fingers to gently separate and define coils
- A coil-out can take several hours to dry, but the definition is absolutely worth the wait
- Pineapple at night and refresh with a spritz of water and light product to extend your coil-out through the week
- This cut requires moisture and product—your coils need to be hydrated to look their best and show the layering
- A trim every 8-10 weeks keeps the layers crisp and prevents the style from losing shape
13. The Long and Layered for Type 4A Length Goals
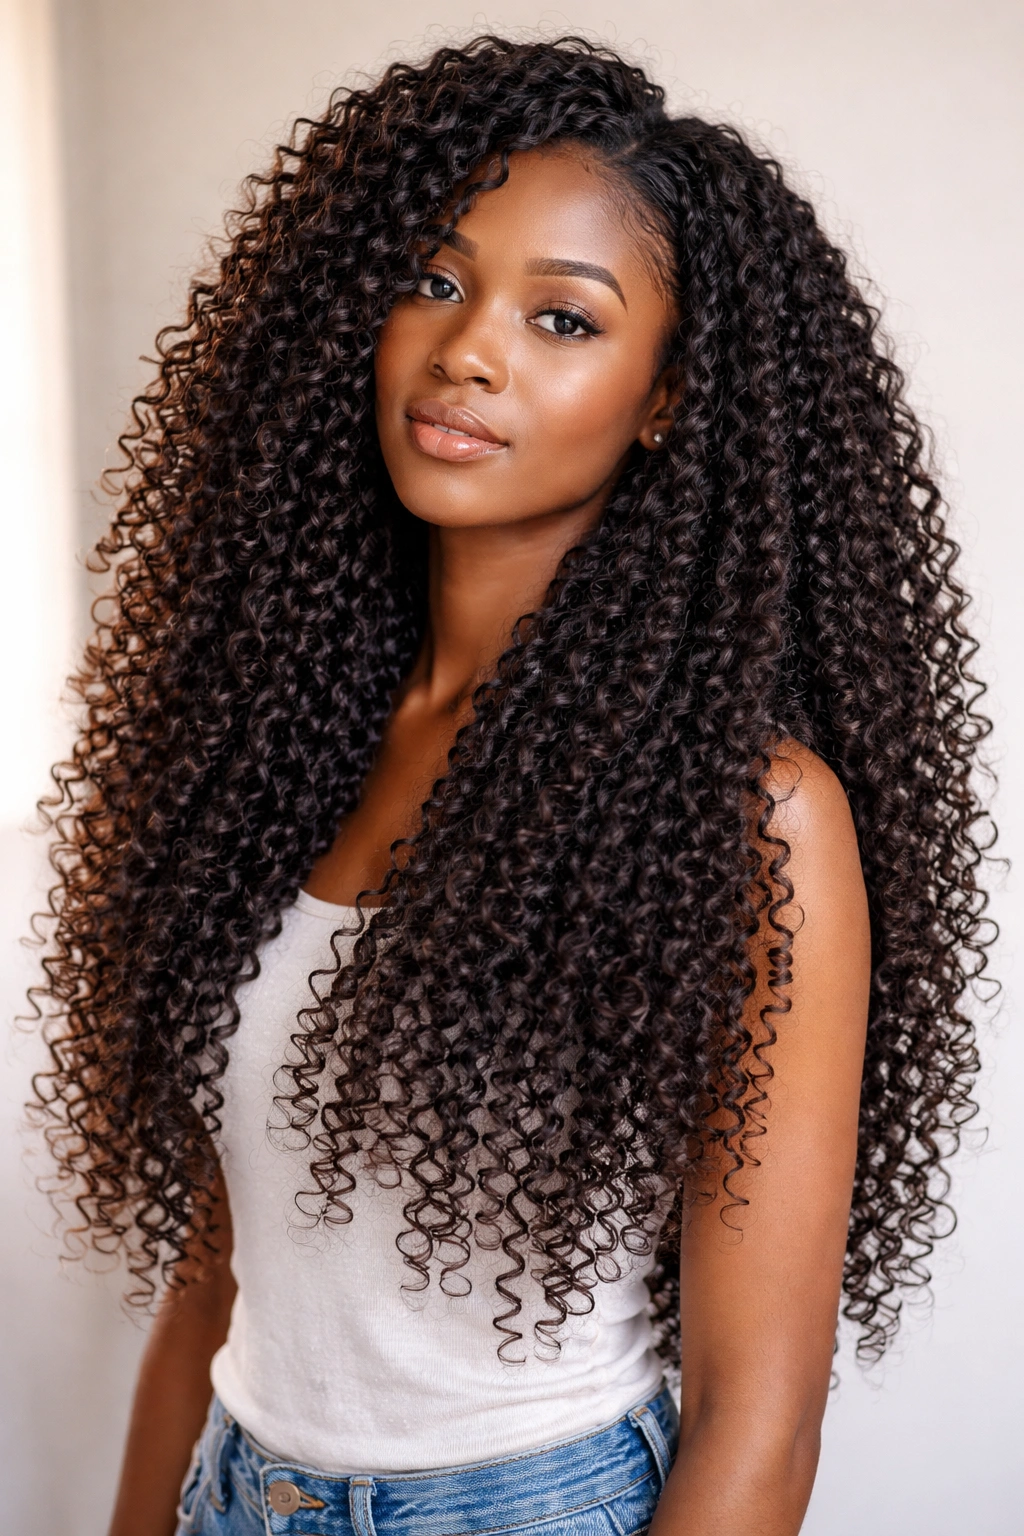
If you want to keep length on your Type 4A coils but still have a cut that’s intentional and shaped, this is it—long with layers scattered throughout that add dimension without removing too much length.
Balancing Length and Definition
It’s totally possible to have long, healthy Type 4A hair with clear shape and movement. The key is cutting strategic layers that reduce bulk without making your hair thin or wispy. The layers should be cut to work with your natural coil pattern so they enhance rather than disrupt it.
Maintaining Long Coils
- Monthly deep conditioning is non-negotiable when you’re keeping length on Type 4A hair
- Protective styling (braids, twists, buns) is your friend for keeping long coils healthy and preventing breakage
- This cut needs a trim every 10-12 weeks to prevent split ends and matting at the ends
- You can wear your coils in all kinds of patterns—coil-outs, twist-outs, braid-outs—and the layering will show through each style
- Length on Type 4A hair requires commitment to moisture and gentle handling, but if you’re willing to put in the work, it’s absolutely achievable
14. The Tapered Coil for Type 4B Texture and Shape
Type 4B hair has a tighter, less defined coil pattern than Type 4A, and this cut is built specifically for that texture. It’s shorter with a distinct taper that removes bulk while creating intentional shape.
Understanding Type 4B Structure
Type 4B hair often has a zigzag pattern rather than a defined coil, and it’s prone to tangles and matting. A tapered cut removes a lot of that potential bulk and creates a shape that’s actually easier to manage and style. The shorter length means you spend less time detangling and more time styling.
Styling and Care
- Type 4B benefits from creamy products like butters and thicker creams that provide moisture and hold
- The tight texture means you have options for sleek styling or textured, separated styles depending on your product choice
- Trims every 4-6 weeks keep this cut looking intentional and sharp rather than grown-out and unclear
- Protective styling between cuts helps prevent breakage and keeps your ends healthy
- You can style this cut with or without product, but moisture-rich products will show off the texture best
15. The Textured Fade for Type 4B Modern Edge
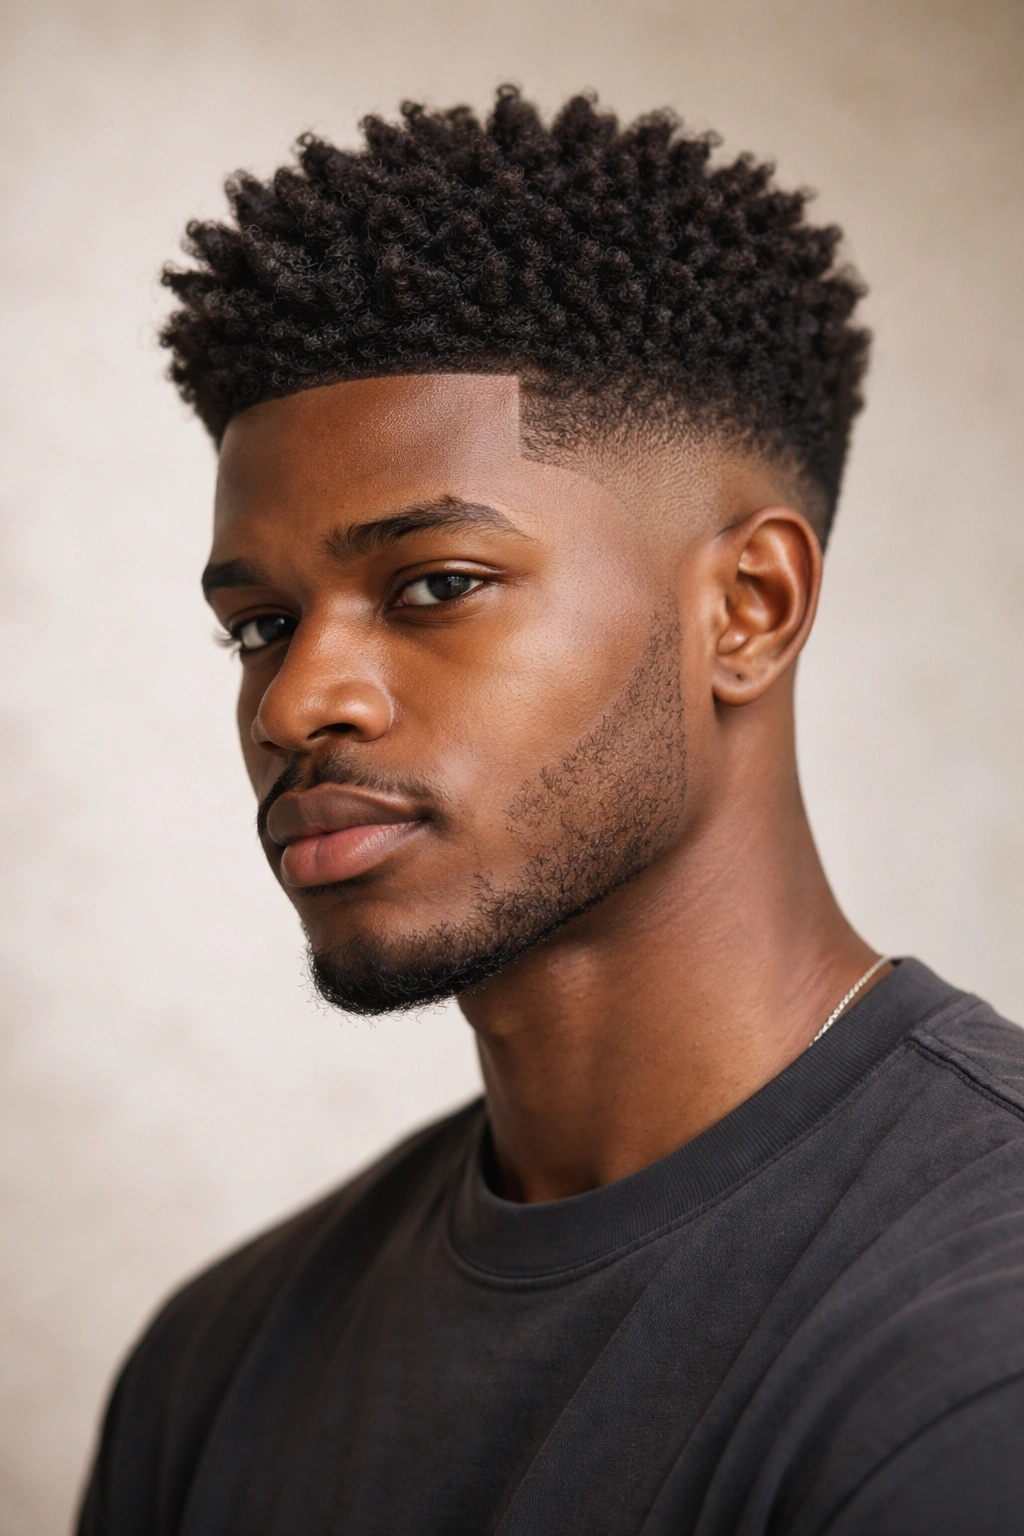
A textured fade is short and contemporary—faded at the sides and back with textured, fuller hair on top. It’s bold and shows off the unique texture of Type 4B hair beautifully.
Why Fades Work on Type 4B
A fade removes almost all of the weight and bulk from Type 4B hair on the sides, which means less tangling and easier maintenance overall. The textured top gives you a canvas for styling and showcasing your actual hair texture rather than fighting it. A fade reads as intentional and current without being trendy in a way that will look dated quickly.
Styling Your Textured Fade
- Creams, gels, and styling butters all work beautifully on a fade depending on what kind of look you want
- You can wear your texture as is, or use product to create sleeker, more polished styling
- Trims every 3-4 weeks keep a fade looking sharp—this is the most high-maintenance cut in terms of trim frequency
- A fade flatters most face shapes because it’s so geometric and intentional
- This cut honestly doesn’t require much daily styling—you cut it fresh regularly and the shape does the work for you
16. The Twist-Out Cut for Type 4B Definition
This cut is designed specifically to work with twist-out styling, where you twist sections of damp hair and then unravel them when dry for defined patterns. The cut is shaped to enhance whatever texture emerges from that styling method.
Making Twist-Outs Work
Type 4B hair creates beautiful patterns from twist-outs, and this cut is cut specifically to work with that styling technique. The layers are placed so that when you do your twist-outs, the resulting texture looks dimensional and intentional rather than shapeless.
Styling Tips for Twist-Out Success
- Dampen your hair and apply a leave-in conditioner and styling cream before twisting
- Twist-outs typically take 6-8 hours to dry, so start them in the afternoon and wear them the next day for best results
- Once you unravel your twists, you can gently separate sections to get more definition or leave them chunky and cohesive
- Pineapple and sleep on a silk pillowcase to extend your twist-out through the week
- Trims every 8-10 weeks keep the cut shaped so your twist-outs always look fresh and defined
17. The Textured Crop for Type 4C Precision
Type 4C hair is the tightest texture—it shrinks the most and has the most variation within the hair itself. A textured crop is a short, precise cut that celebrates the unique texture of Type 4C rather than fighting it.
Working With Type 4C Shrinkage
Type 4C hair can shrink to 30-50% of its stretched length, and that’s actually useful information for a cut. A skilled stylist will measure your shrinkage and cut accordingly so that at shrunken length, you still have shape and intention rather than looking accidentally short.
Styling Your Textured Crop
- Type 4C texture is stunning when defined with gel or a strong-hold cream
- You can style it sleek for a polished look, or separate it into textured sections for a more undone vibe
- Trims every 4-6 weeks keep this cut looking intentional and sharp
- Moisture is important, but Type 4C hair often prefers thicker, creamier products over lighter ones
- This cut honestly looks better the more you style it—the texture is complex enough that leaving it completely unstyled can sometimes look less intentional
18. The Tapered Texture for Type 4C Freedom
A tapered texture is slightly longer than a crop with strategic layering and a taper that creates shape and movement. It’s the sweet spot for people who want more length on Type 4C hair but still want a cut that’s intentional and shaped rather than just grown-out.
Balancing Texture and Length
Type 4C hair can absolutely grow long and healthy if you’re willing to do the work—protective styling, deep conditioning, and gentle handling are the keys. This cut lets you keep length while still having shape and definition that makes your hair look intentional rather than like it’s just been growing wild.
Maintaining Length on Type 4C
- Protective styling is essential—braids, twists, buns keep your ends safe while your hair grows
- Deep conditioning treatments weekly help keep Type 4C hair hydrated and healthy
- Trims every 10-12 weeks keep your ends fresh and prevent split ends from traveling up the hair shaft
- You’ll see more shrinkage on Type 4C than shorter styles, but that’s just how this texture works—embrace it
- This cut supports all kinds of styling—coil-outs, twist-outs, braid-outs, gels, butters—you have endless options with a cut that’s intentionally shaped
Final Thoughts
Your curl type isn’t a limitation—it’s actually the roadmap for finding the haircut that makes you feel most confident and requires the least fighting. The right cut is the one that works with your shrinkage, celebrates your natural texture pattern, and reduces daily styling effort instead of creating it.
The most important thing is finding a stylist who understands your specific hair type and knows how to cut for it. Someone who accounts for shrinkage, who can see your individual curl or coil pattern and cut to enhance it, who doesn’t try to force your hair into a shape it doesn’t naturally want. That stylist is worth the drive and the extra cost because a good cut will transform how you feel about your natural hair.
Whichever cut you choose, remember that it’s not permanent—if it doesn’t work, you can grow it out and try something different. But more importantly, take the time to understand what makes your specific curl type unique so you can communicate clearly with your stylist about what you want. Bring pictures of styles you like, describe how much styling effort you’re willing to do daily, and be honest about how much time you’re willing to spend on maintenance. That conversation is how you get a cut that actually fits your life and your hair.