Short hair doesn’t mean you have to sacrifice braiding possibilities — in fact, cropped lengths and textured bobs open up a whole world of creative braid styling that longer hair simply can’t achieve. Braids add movement, visual interest, and a polished finish to shorter styles, whether you’re rocking a pixie cut, a textured bob, or something in between. The beauty of short braids is that they work for virtually every occasion: casual everyday wear, professional settings, special events, or that moment when you just want your hair to feel a little more intentional and put-together.
What makes short braided hairstyles so appealing is their versatility and the way they can transform a simple cut into something dramatically different. You can wear a braid crown one day, a sleek Dutch braid the next, and a playful micro-braid accent the day after — all without adding length or changing your base cut. Short braids also tend to stay in place remarkably well, making them practical as well as beautiful. Whether you’re working with very fine hair, thick coils, waves, or straight strands, there’s a braiding technique and style that’ll complement your texture and suit your personal style.
The styles on this list range from understated and elegant to bold and artistic, from braids that frame the face to geometric patterns that wrap around the head. Some require professional-level skill and others you can master in a few practice attempts. Each one includes specific guidance on who it suits best, how to achieve it, and styling tips to make it last all day. Let’s dive into the best short braided hairstyles that deserve a permanent spot in your inspiration folder.
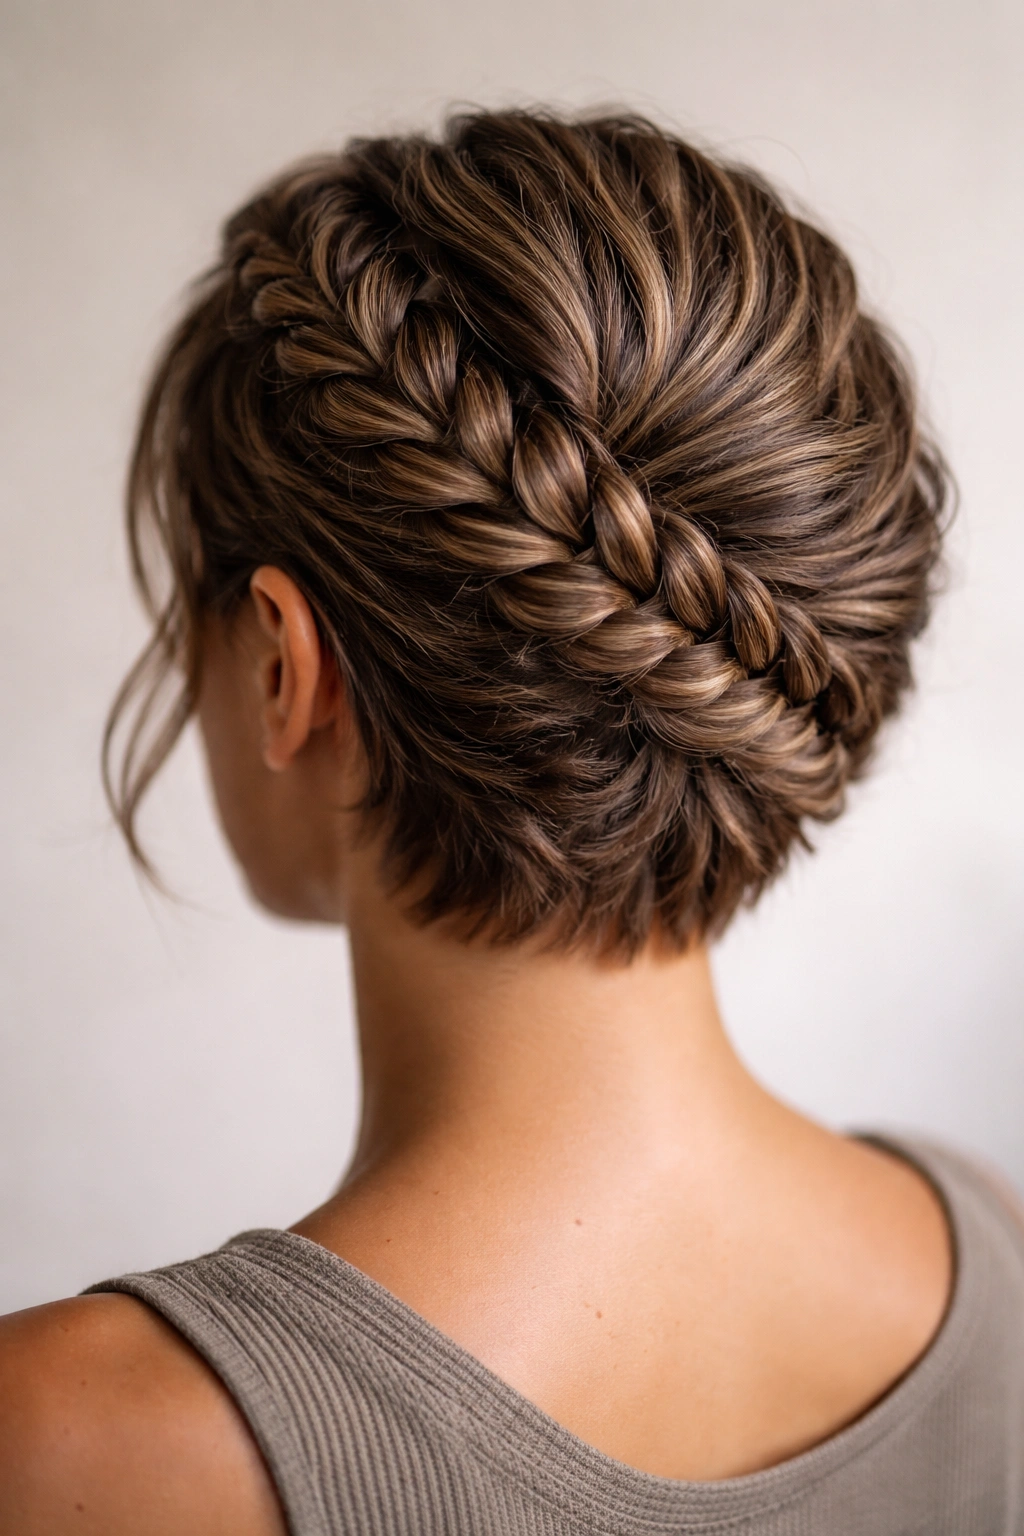
1. The Sleek Dutch Braid Crown
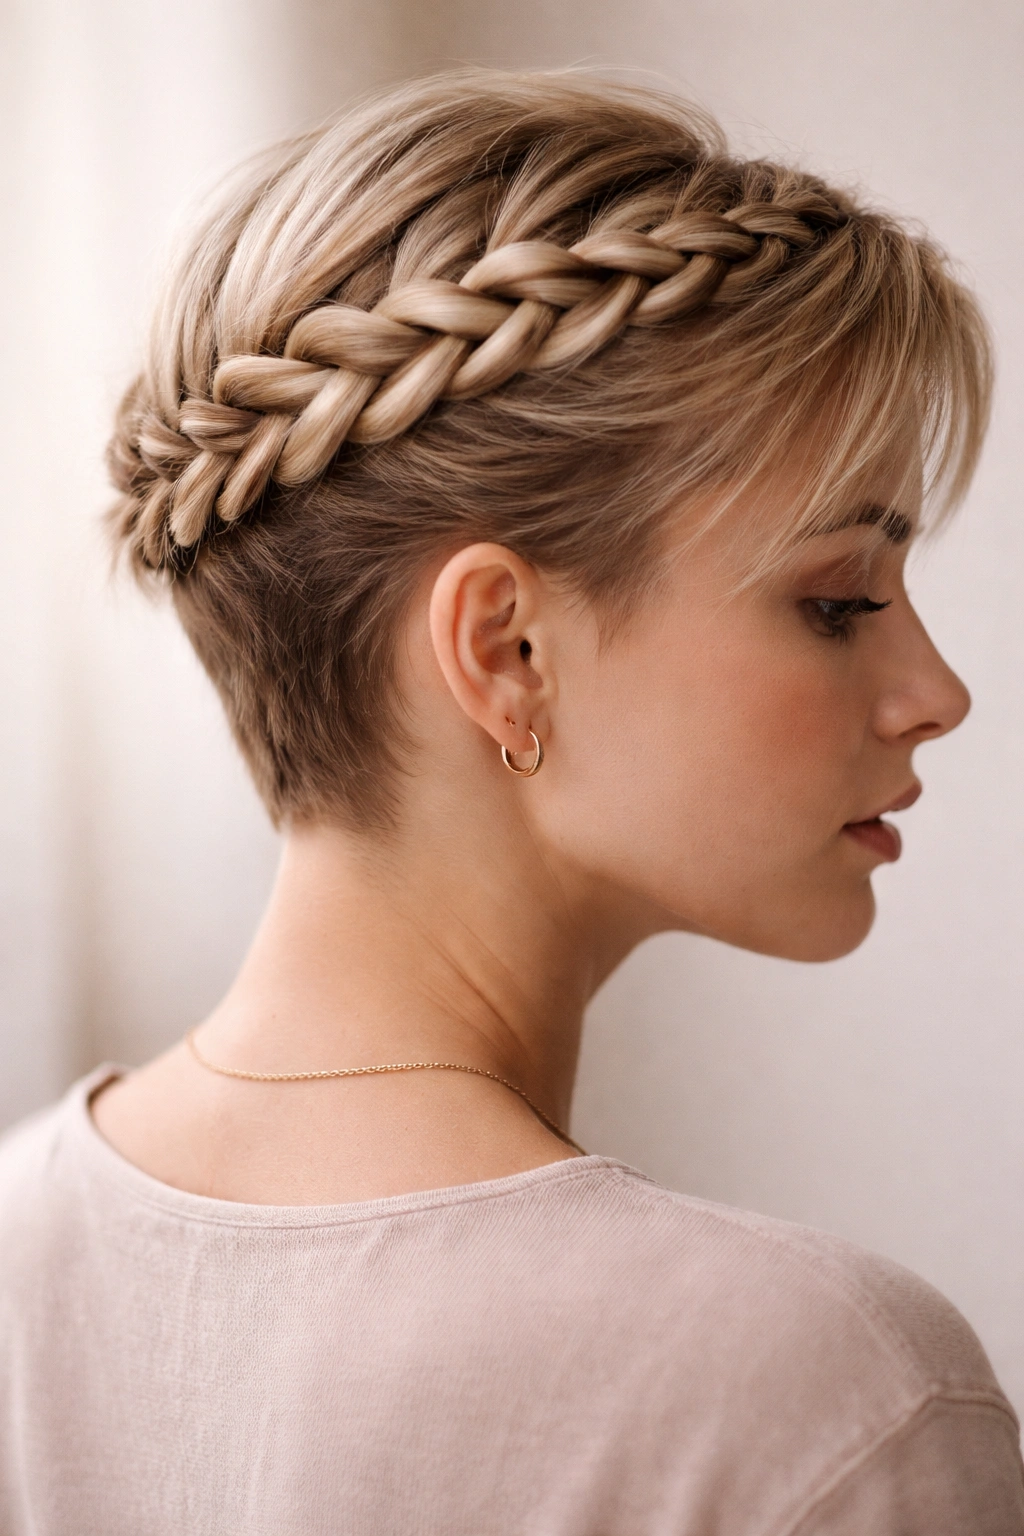
A Dutch braid crown transforms even the shortest crop into something instantly elevated and polished. This style works by braiding a single thick braid (or sometimes two thinner ones) across the back of the head from one ear to the other, creating a halo effect. The Dutch braid, which sits slightly raised on the scalp because the sections are woven under rather than over, gives the illusion of more volume and texture than you actually have.
Best For and How to Style It
This crown braid suits almost every face shape and works particularly well if you have a round or square face, since it adds height and definition. The style flatters short bobs, pixie cuts with slightly longer sides, and even very short fades where you’re leaving an inch or two of length on top. You’ll need at least two to three inches of hair on the crown to make this work smoothly.
Styling Tips for Maximum Impact
- Section off a clean parting at the crown and use a volumizing spray or light mousse beforehand to give the braid grip and texture
- Braid slightly loose if you have fine hair — a tight braid will look thinner and less impressive
- Pull gently on the finished braid to loosen the sections slightly, creating that undone-luxe vibe
- Pin the braid end underneath itself or at the base of the crown, making it completely invisible
- Pair with a sleek, tight base or a tousled, textured crown for completely different moods
2. Double Micro Braids at the Temples
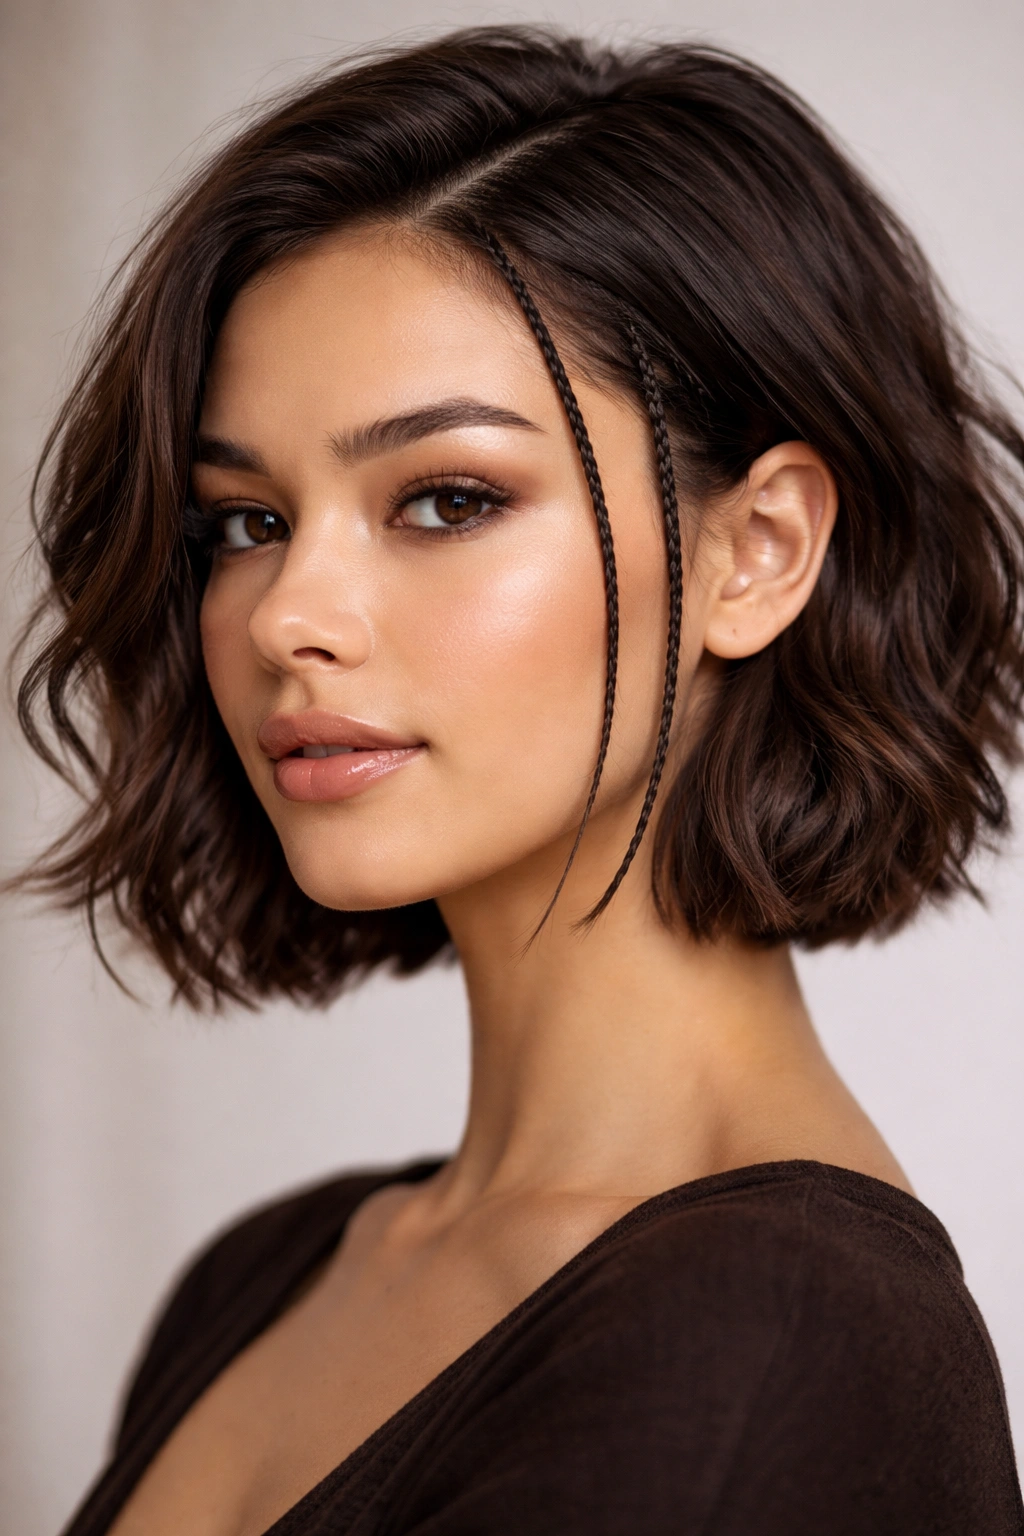
Two delicate micro braids framing the face create an intricate, almost sculptural look that draws attention to cheekbones and eyes. These paper-thin braids begin at the temple on each side and can be tucked behind the ear, secured at the back of the head, or left loose to frame the face. Micro braids require more precision than standard braids, but they’re incredibly striking once complete.
Technique and Hair Type Considerations
Micro braids work best on hair that has some texture or natural grip — they’ll slip and unravel more easily on very slippery, fine, or freshly washed hair. Slightly dirty hair (a day or two after washing) holds micro braids far better than squeaky-clean locks. This style suits shorter pixies, undercuts, and bobs where you have freedom to frame the face without worrying about length limitations.
Making Them Last and Look Polished
- Spray the entire head lightly with a flexible hold hairspray before starting — this gives the hair grip without stiffness
- Keep your sections extremely thin and consistent in size as you braid
- Use a fine-tooth comb to pick up hair cleanly and keep the braid tight
- Once complete, secure the ends with clear elastic or bobby pins that match your hair color
- You can leave them in for several days if you’re careful; they’ll actually tighten and look sharper as the days go by
3. The Asymmetrical Side Braid
An asymmetrical side braid pulled completely to one side of the head is a timeless, flattering choice for short hair that instantly adds dimension and visual interest. This could be a simple three-strand braid, a French braid starting at the crown on one side, or even a waterfall braid that cascades down the side of the head. The asymmetry itself is what makes the style feel modern and intentional rather than basic.
Who This Style Suits
The asymmetrical side braid is incredibly flattering for oval, heart-shaped, and oblong faces, since it adds width and curves. If you have an angular or square jawline, pulling everything to one side softens the effect and creates visual flow. This style works beautifully on bobs where one side is slightly longer than the other, but it also translates perfectly to pixies and shorter cuts where you have enough length to actually grab sections.
Styling Approach and Variations
- Start the braid further back on the crown for a sleek, polished look, or at the hairline for a more romantic, face-framing effect
- Use a flexible-hold spray to keep the braid intact without making it look stiff
- Twist or braid the front sections more loosely than the back for a cascading, movement-filled effect
- Leave a few loose face-framing pieces if the style feels too tight or severe
- Secure the braid end with a matching elastic, then tuck it behind your ear or curl it against the back of your head for an invisible finish
4. Boxer Braids Down the Middle
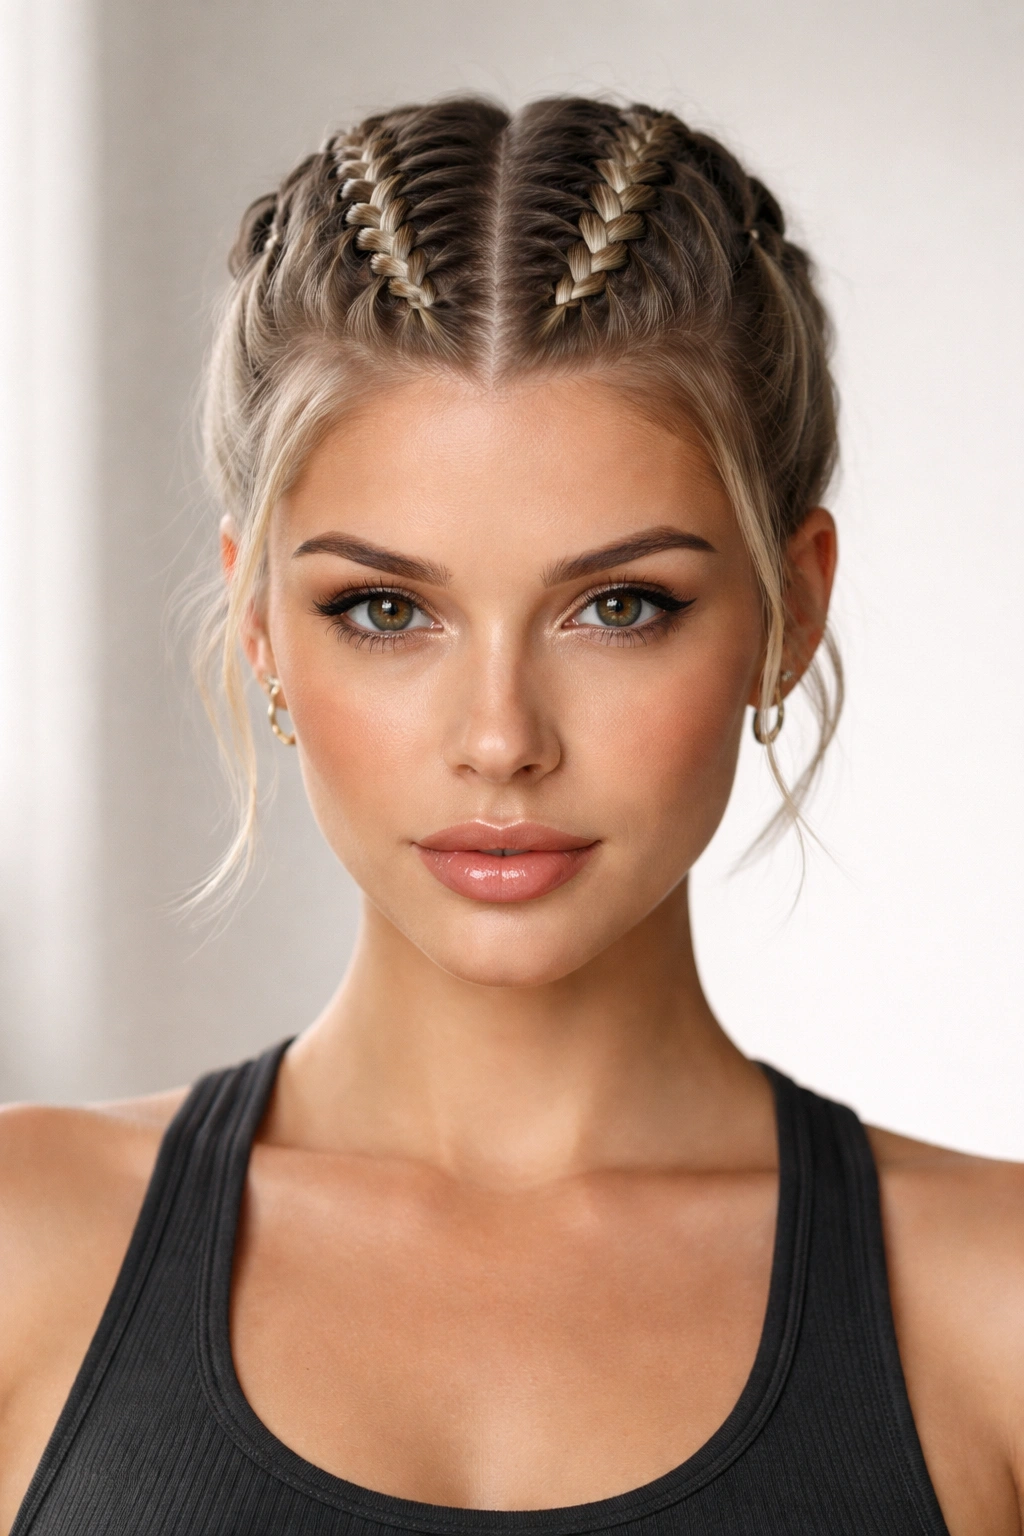
Two thick French braids running straight down the center of the head from the hairline to the nape are sporty, edgy, and utterly practical. These braids (also called Cornrows Down when they’re tighter, or Boxer Braids when they’re slightly looser) create a striking visual that works for any hair texture and suits virtually every face shape. The symmetry is deeply satisfying, and this style keeps every single hair in place for hours.
Perfect for Active Days and Casual Vibes
This style is ideal when you want your hair completely out of your face but still want it to look intentional and styled rather than simply pulled back. Boxer braids photograph beautifully, stay put through workouts or outdoor activities, and translate across professional and casual settings depending on how tight you make them and what you pair them with.
How to Perfect This Classic
- Section the hair straight down the center using a rattail comb for absolute precision
- Start both braids at the hairline, taking small, even sections as you work down
- Braid at medium tightness — too loose and they’ll fall apart; too tight and they’ll pull painfully and look harsh
- Make sure both braids are the same thickness and tightness so they look intentionally symmetrical rather than accidental
- Finish by securing both ends with matching elastics, then tuck them underneath and pin for an invisible finish
- A light spritz of flexible-hold hairspray keeps everything locked in place for all-day wear
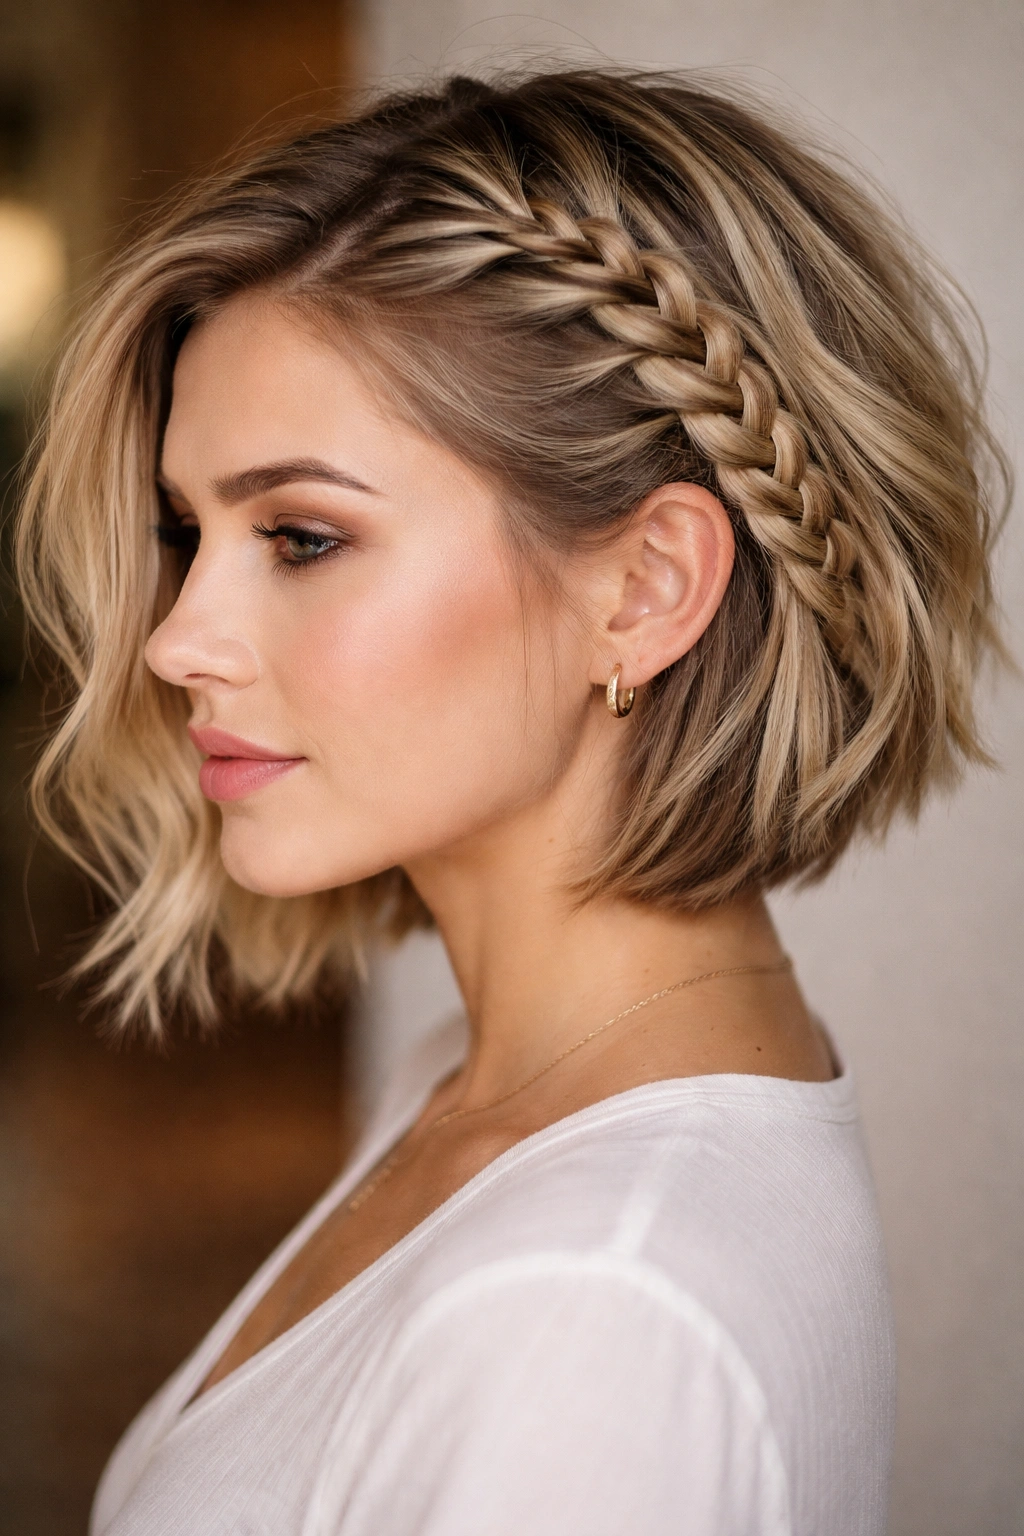
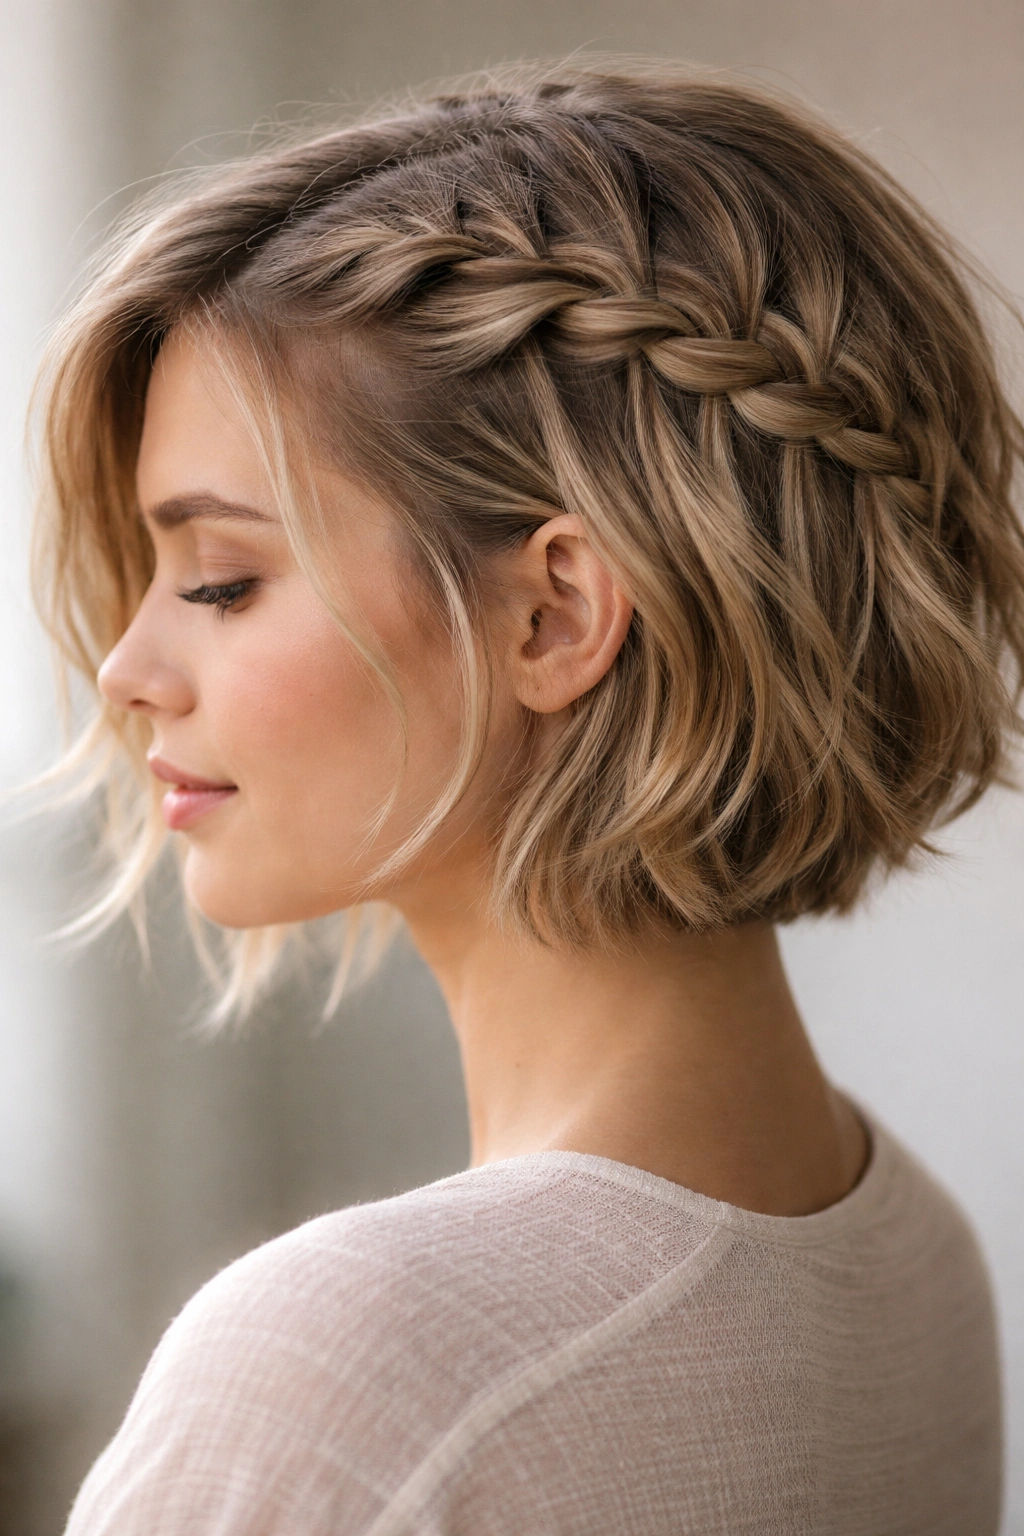
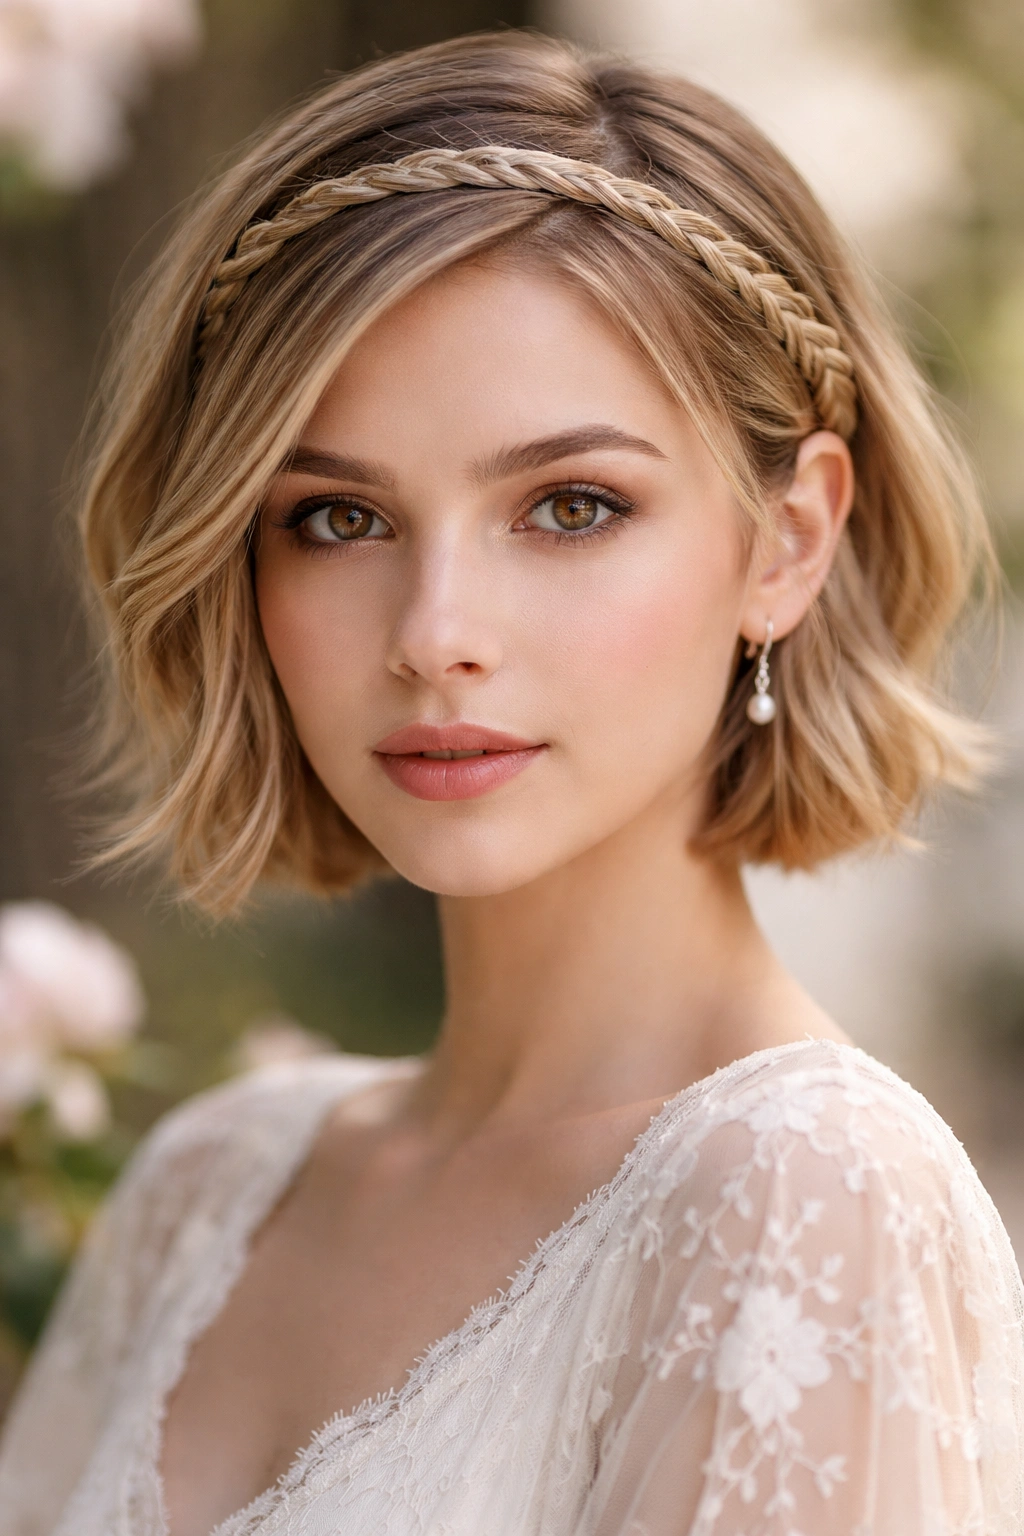
5. The Halo Braid with Loose Texture
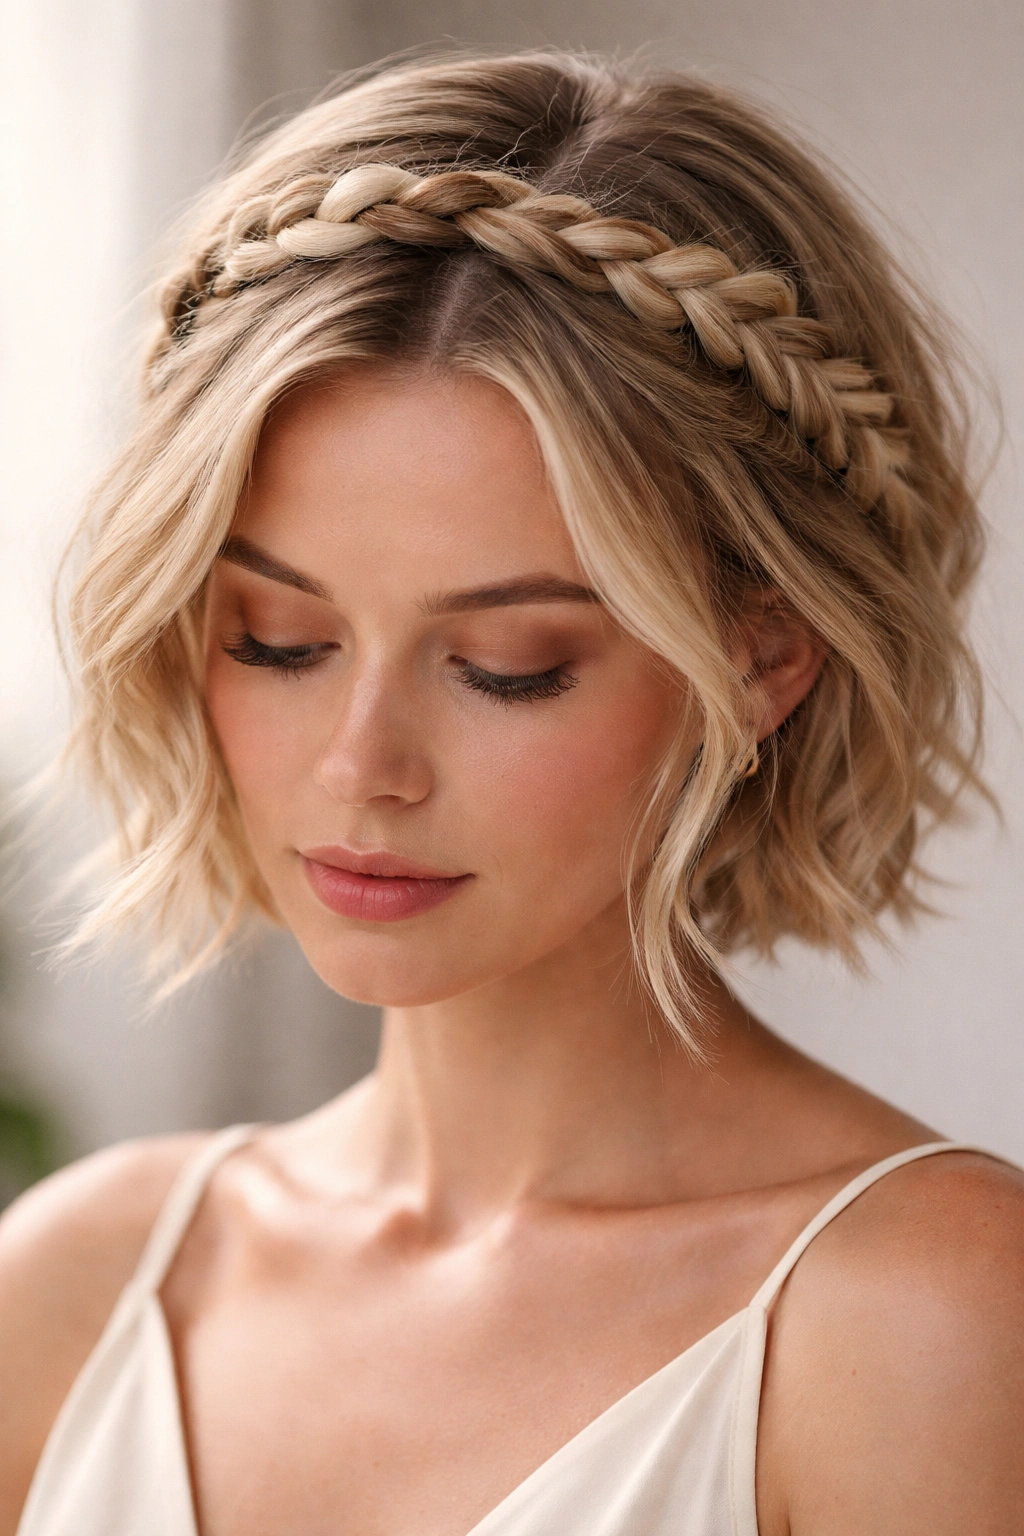
A loose, textured halo braid that circles the entire head creates an ethereal, romantic aesthetic that’s surprisingly wearable on short hair. This style works by taking a thicker braid (a French braid usually works best) and wrapping it around the head like a crown, then gently pulling on the sections to create that soft, undone texture.
Creating the Perfect Loose Braid Effect
The key to this style is starting with textured hair — waves, second-day curls, or even a dry texture spray applied beforehand helps tremendously. A completely smooth, freshly blown-out base will look too slick for this romantic aesthetic. You want the braid to feel organic and effortless rather than geometrically perfect.
Best Face Shapes and Hair Lengths for This Look
The soft, flowing halo braid flatters almost every face shape, but it’s particularly stunning on oval, round, and heart-shaped faces. You’ll need at least two to three inches of length around the crown to make this work, though you can do a modified version with shorter sides by creating a thinner, more delicate braid. This style photographs beautifully and works perfectly for date nights, casual events, or any time you want to feel polished without looking overdone.
6. The Fishtail Braid Side Sweep
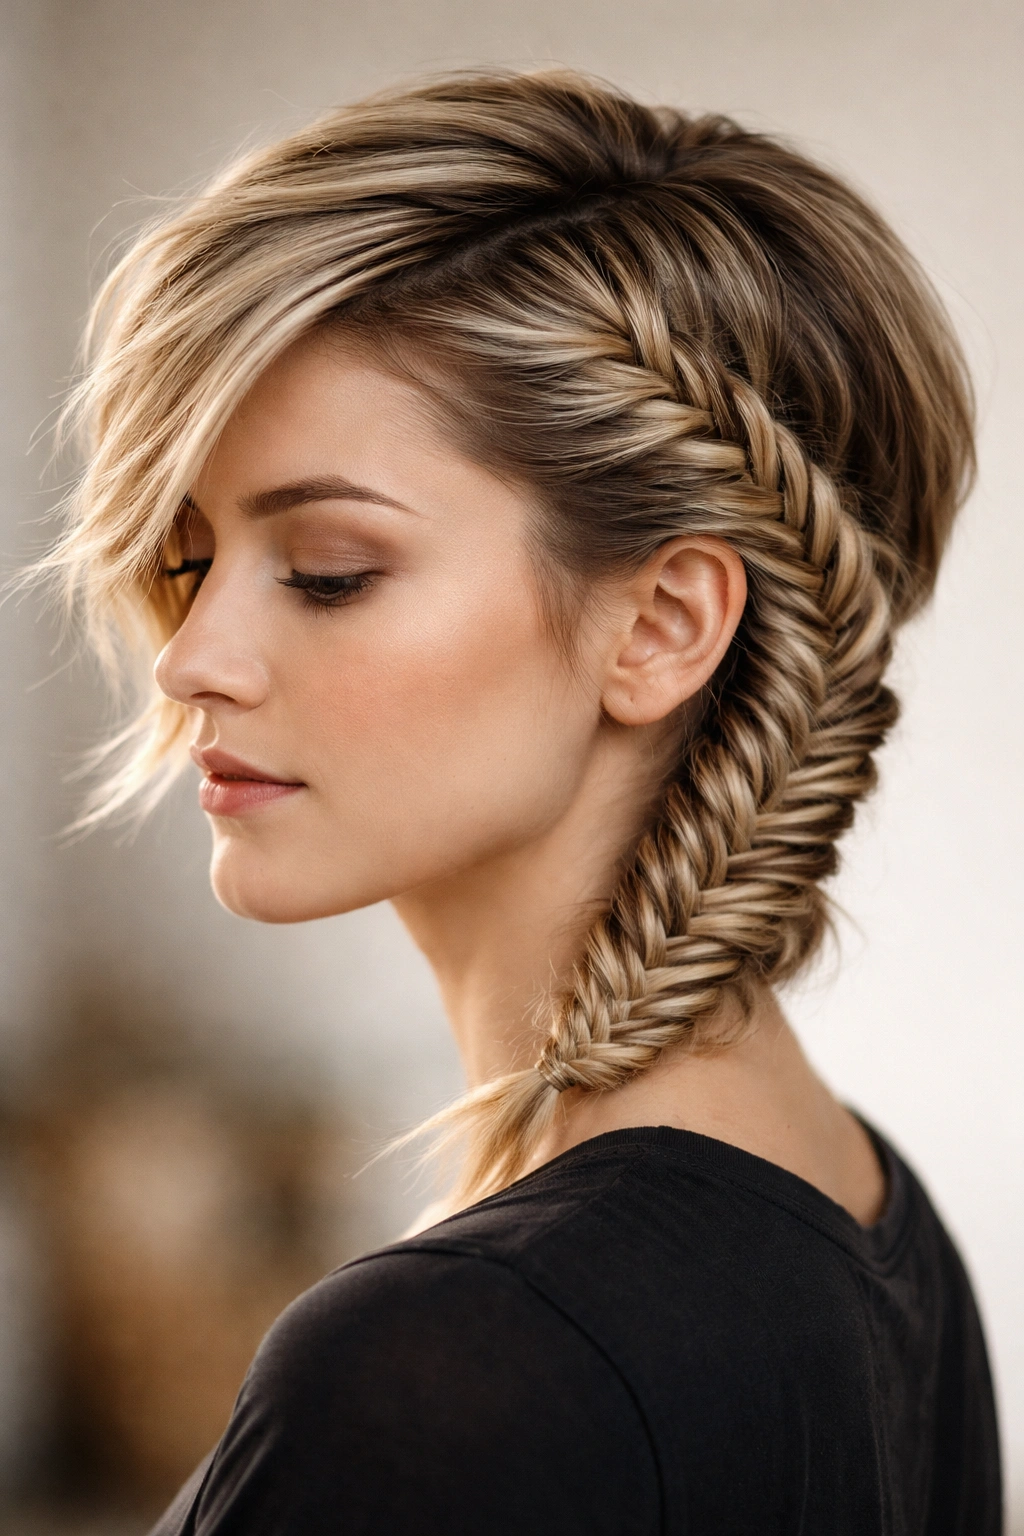
A fishtail braid — which uses alternating thin outer sections instead of traditional three-strand sections — creates an intricate, lacy appearance that looks infinitely more complex than the actual technique. Swept dramatically to one side, a fishtail braid creates movement and visual interest on shorter hair. The tight, woven appearance of a fishtail is particularly striking when you gently pull the sections to create that signature undone texture.
Mastering the Fishtail Technique
A fishtail braid takes a bit more practice than a standard three-strand braid, but once you get the rhythm, it becomes muscle memory. Instead of three sections, you’re working with two sections and alternately pulling small strands from the outside of one section and crossing them over to the other side. It feels awkward at first, but the payoff is a braid that’s dramatically more visually interesting than a regular braid.
Styling and Finishing Tips
- Work with slightly damp or textured hair for the best grip and a more interesting final texture
- Pull gently on the finished braid to loosen it and create that signature undone-luxe vibe
- Sweep the braid to the side and secure it with pins that match your hair color so they’re invisible
- This style works beautifully on bobs and longer pixies where you have enough length to create a visible braid texture
- The fishtail is particularly stunning with balayage or highlights that catch the light as the braid moves
7. Twisted Crown Detail Braids
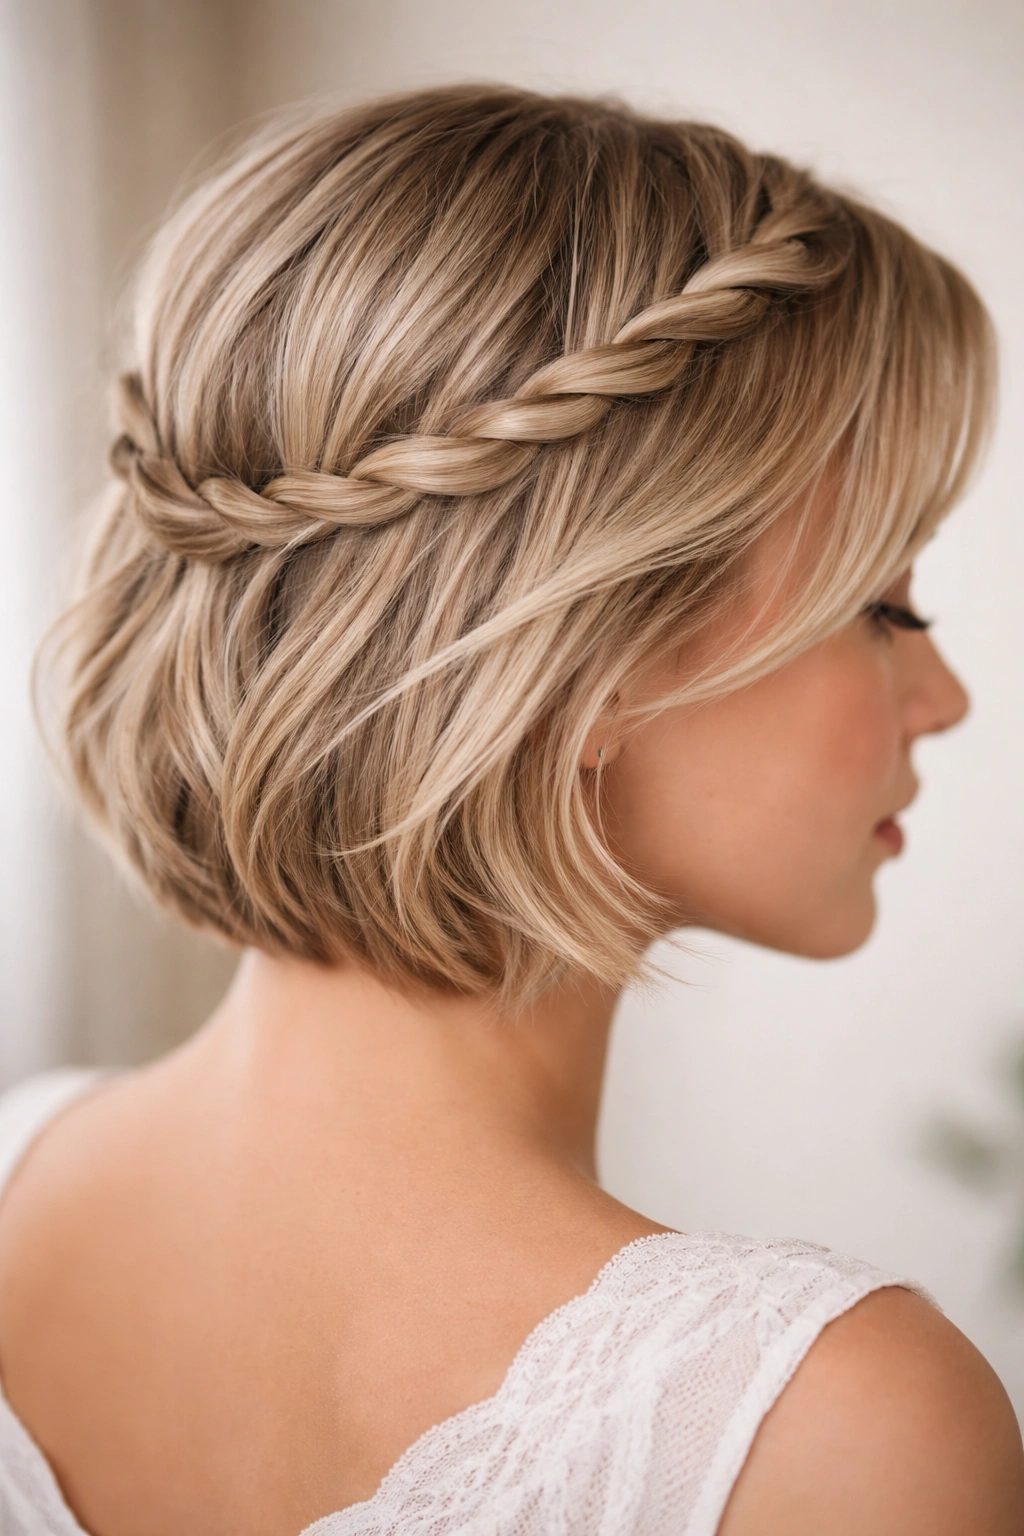
Instead of traditional braids, use twisted sections to create a crown detail that wraps partially around the head. Twists (which involve taking two sections of hair and winding them around each other) create a more delicate, refined look than braids and work beautifully on finer hair textures. Two twisted sections can frame the face on either side, or a single twisted section can arc across the back of the head.
Who This Softer Braid Alternative Suits
Twisted crowns are ideal for people with fine or delicate hair who find that traditional three-strand braids look too chunky or obvious. This style also suits more minimal, refined aesthetics — it’s polished and put-together without being maximalist. The softness of twists is particularly flattering for delicate face shapes and for creating a more romantic, less edgy aesthetic.
Creating and Setting the Twist Detail
- Start with slightly textured or damp hair so the twists have grip and won’t slip apart
- Take two sections of hair and wind them around each other, pulling taut as you go for a neat, polished appearance
- You can make the twists as thin or as thick as you like depending on the effect you want
- Secure the end with a small clear elastic, then pin the twist in place and tuck the end underneath
- A light hairspray keeps everything locked, but avoid heavy product that would make the twist look stiff or greasy
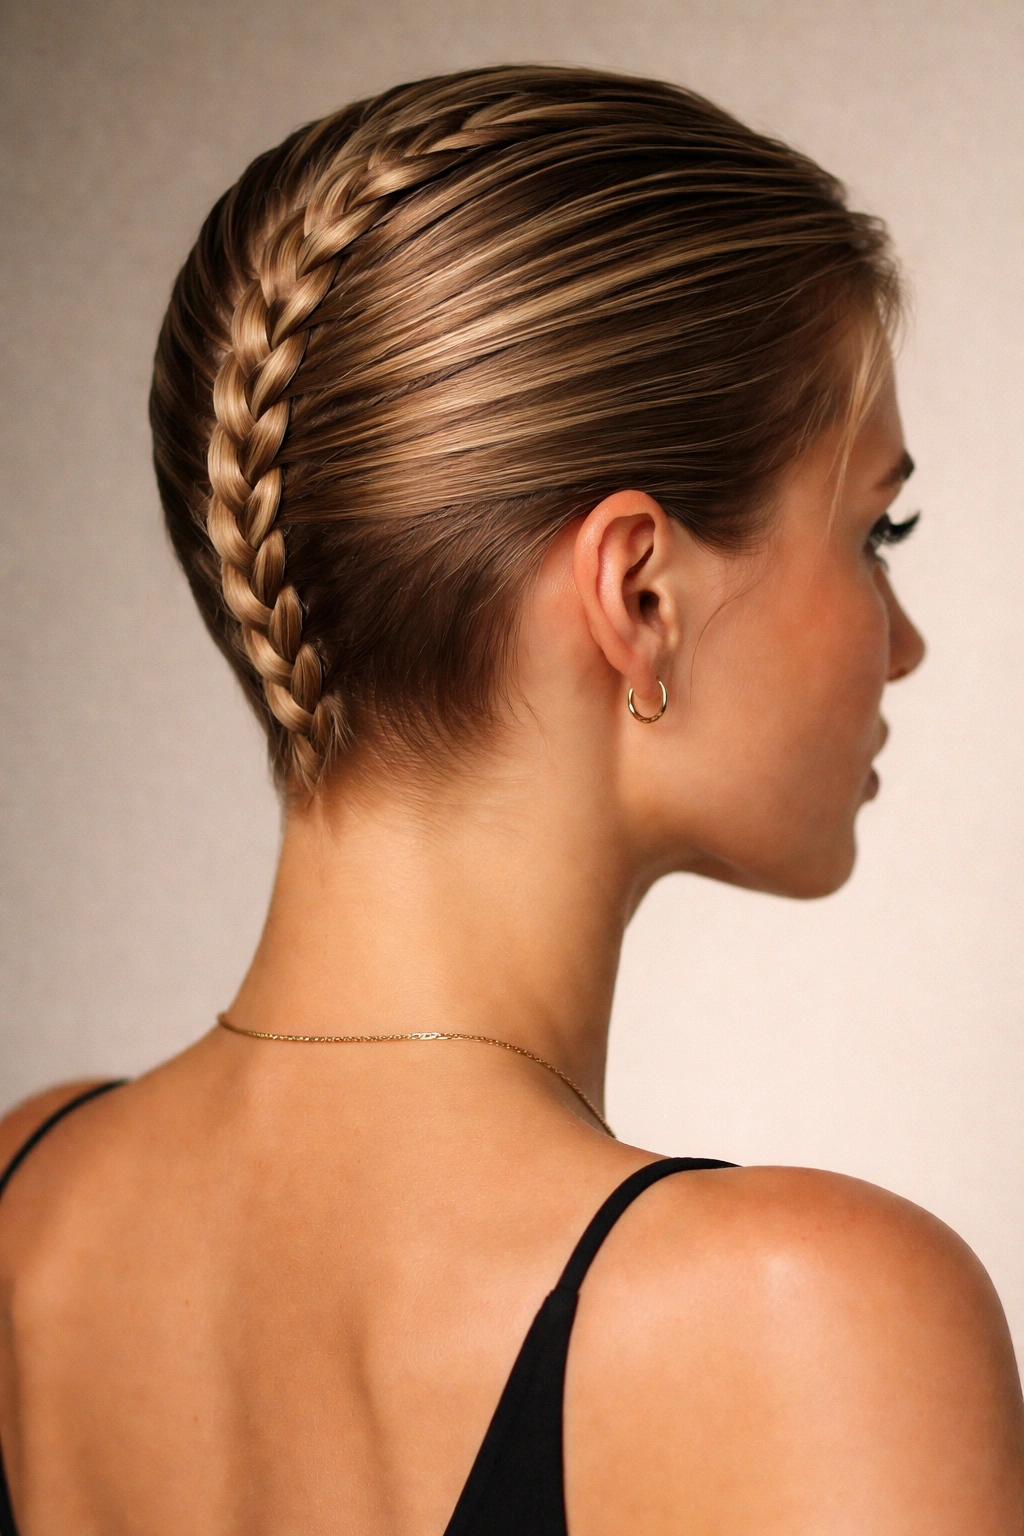
8. The Cornrow Crown
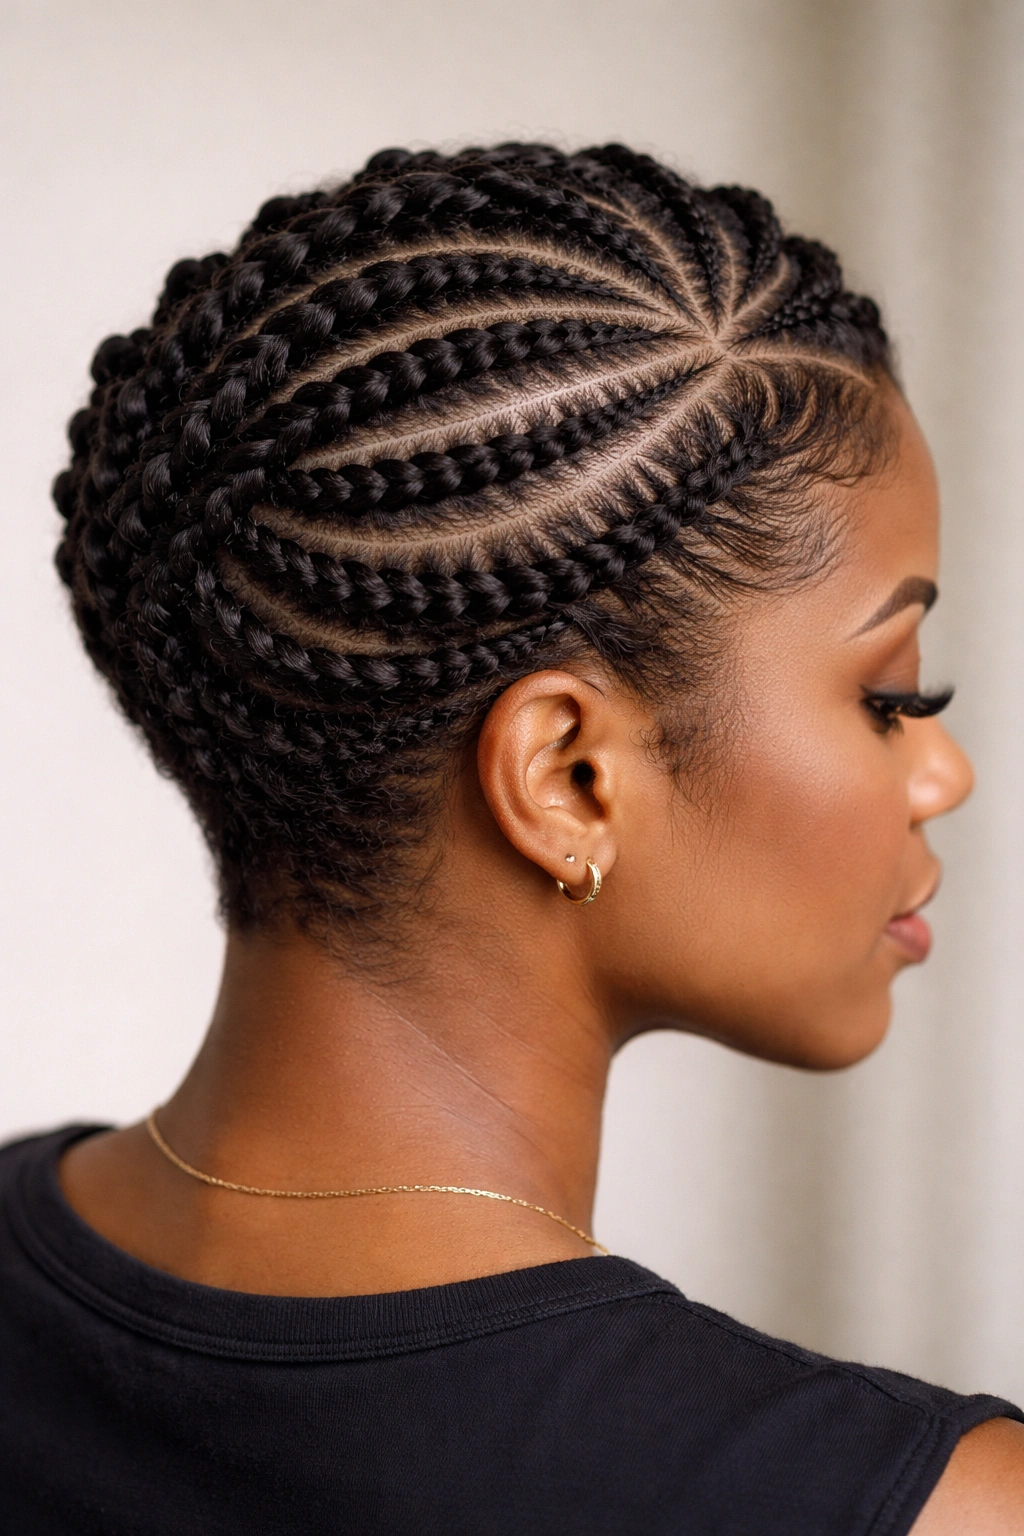
Tight, geometric cornrows that follow the natural curve of the scalp create a bold, artistic aesthetic that’s absolutely stunning on short hair. Cornrows (tight French braids that sit close to the scalp) create visual lines and patterns, especially when you do multiple rows. A crown-style arrangement with cornrows framing the face upward toward the back of the head is both elegant and undeniably striking.
Technical Skill and Planning Required
Cornrows require more precision than casual braids — you’re essentially braiding right against the scalp and need to keep tension even throughout so the rows stay perfectly straight and uniform. If you’re new to cornrows, consider having a professional do them the first time so you can see the technique and practice replicating it. Cornrows last incredibly well, often staying neat for a week or longer.
Best Suited For
Cornrows work beautifully on textured hair, coils, curls, and wavy hair. On straight hair, they still look fantastic but require a bit more styling skill to prevent flyaways and maintain that crisp, geometric appearance. The cornrow crown suits confident, fashion-forward styling and works perfectly for anyone embracing their natural texture or wanting a bold, artistic statement.
9. The Baby Braids Mixed Texture Look
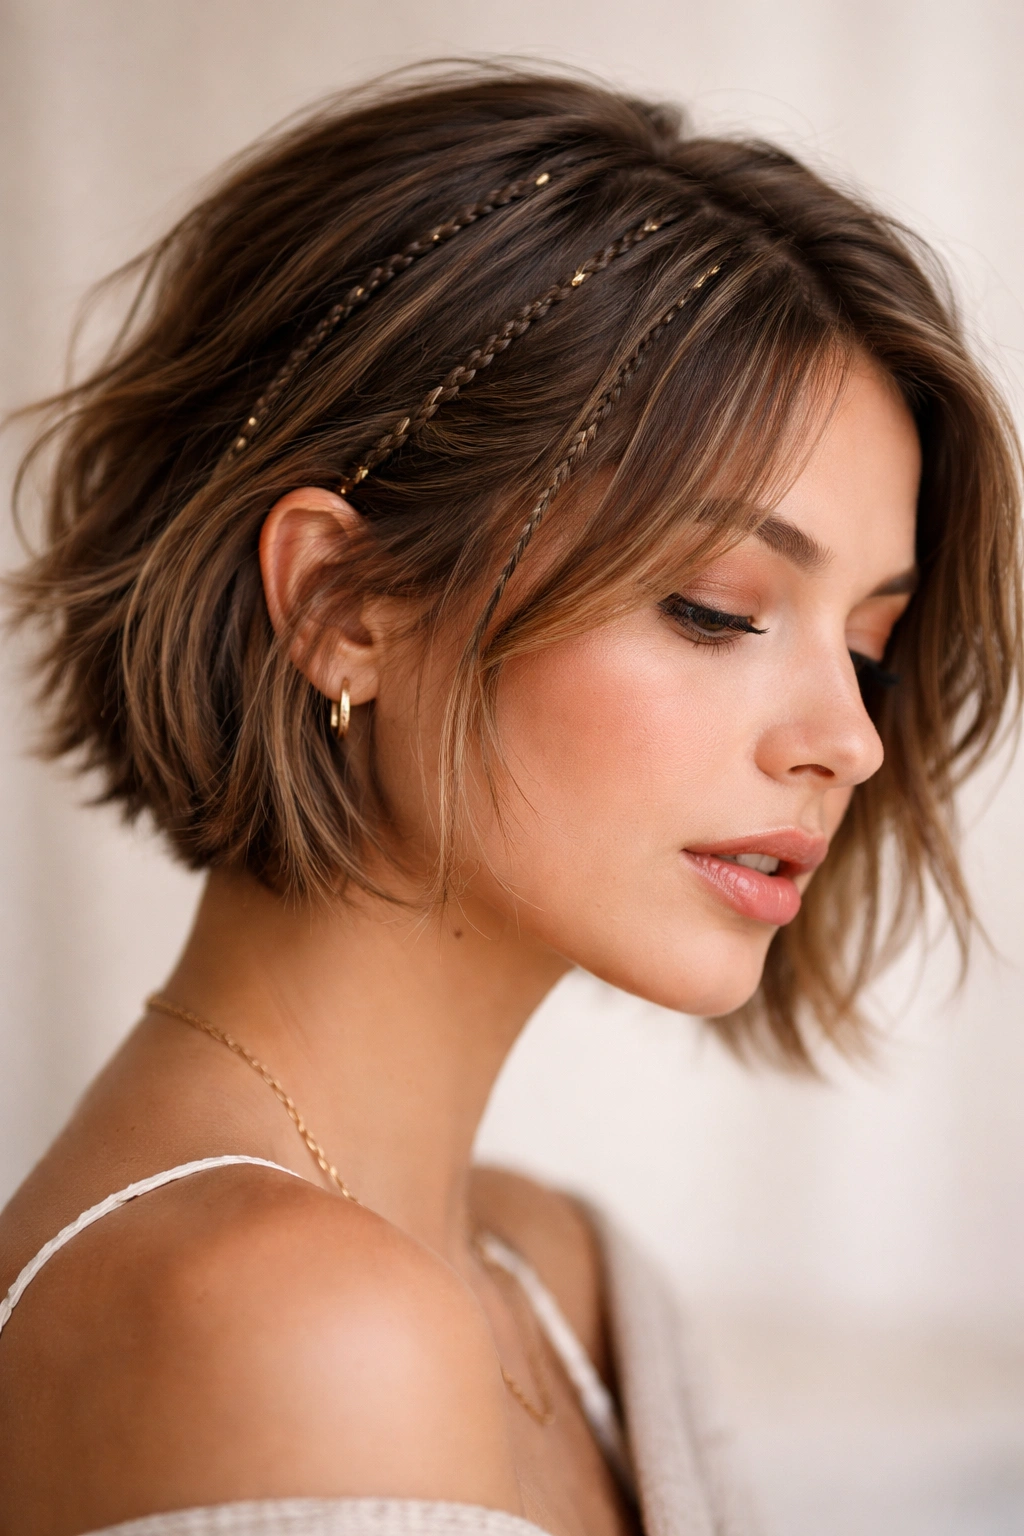
Mixing thin, delicate baby braids throughout short hair — rather than creating one or two statement braids — creates an intricate, textured look that feels artistic and intentional. You might do three or four thin braids threaded throughout a bob, or scattered across a pixie cut. The key is creating visual interest and movement without overdoing it.
Creating Balance with Multiple Thin Braids
The challenge with baby braids is ensuring they look intentionally placed rather than haphazard. Plan your braid placement before you start — you might do them symmetrically (one on each side), asymmetrically (clustered toward one side), or in a pattern that follows your hair’s natural texture and movement. Varying the thickness of the braids slightly (some thinner, some slightly thicker) creates a more organic, less matchy look.
Best Occasions and Styling Approaches
This style works beautifully for creative events, concerts, festivals, or any time you want your hair to feel artistic and expressive. It also works as a casual everyday style if you choose neutral, subtle placement. The thin braids won’t last as long as thicker statement braids, but they photograph beautifully and create incredible visual interest and movement.
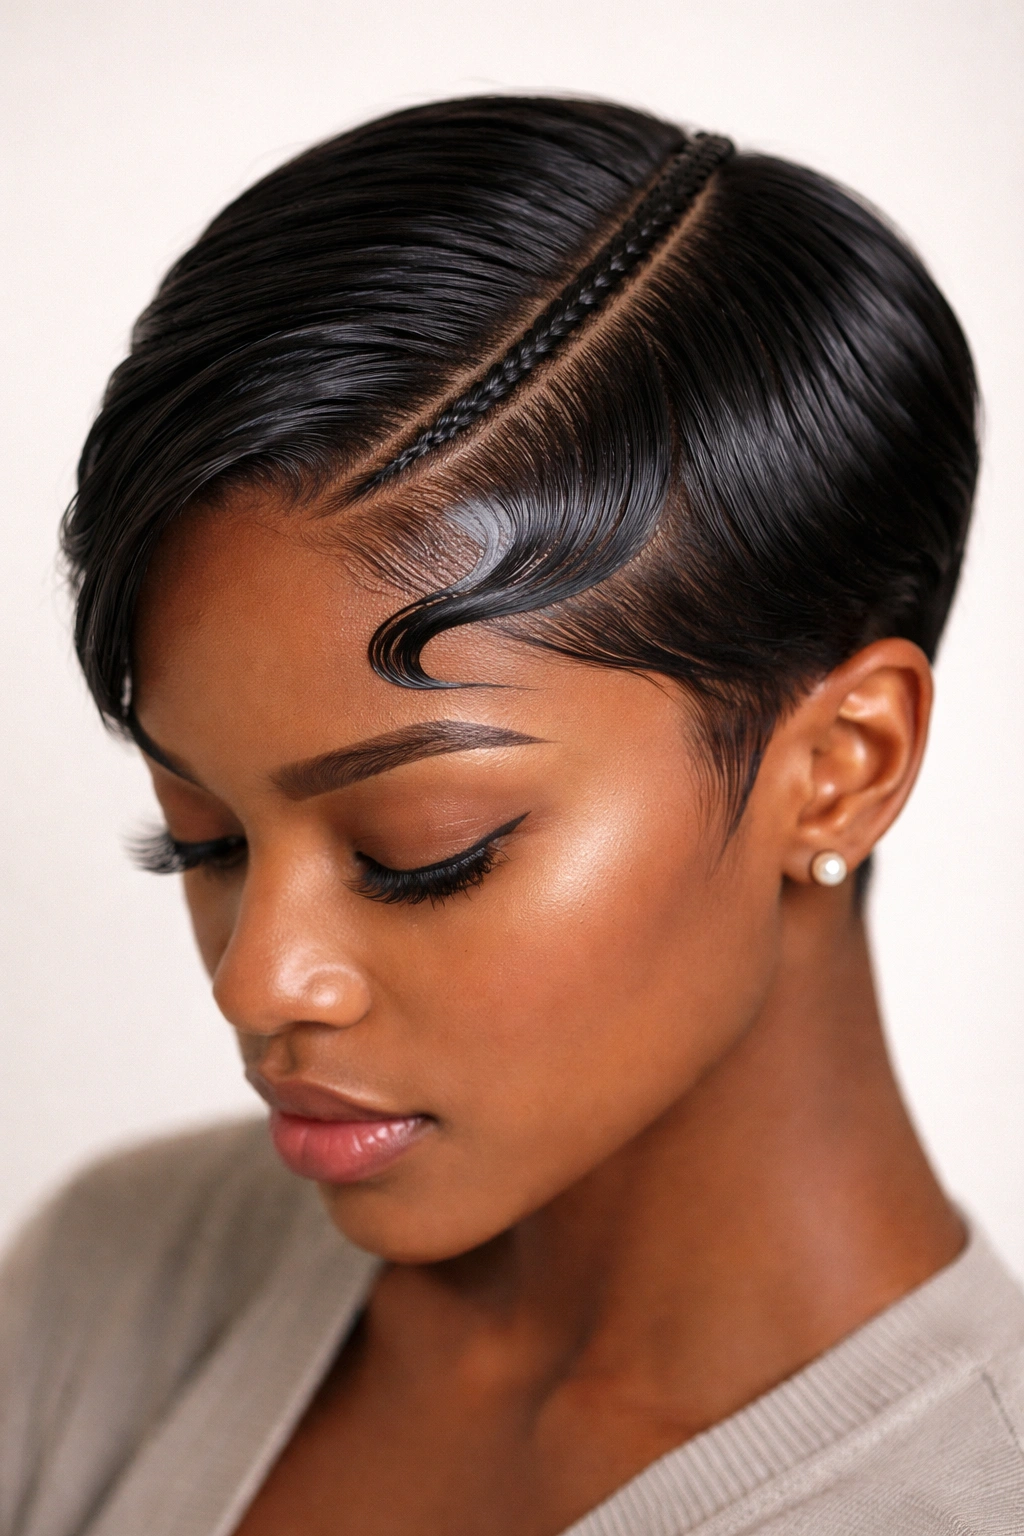
10. The Slicked-Back Braid Accent
A single statement braid secured flat against the back of the head with ultra-slicked, gel-smoothed sides creates a polished, modern aesthetic. This style takes a simple braid and elevates it by controlling and defining everything else on the head. The contrast between the sleek base and the textured braid is what makes this style feel intentional and editorial.
Achieving the Slicked-Back Base
Use a strong-hold gel, pomade, or edge control on the sides and crown to smooth everything flat and create that polished, sculpted appearance. You want everything except the braid itself to be absolutely smooth and defined. This requires a blow dryer, a smoothing product, and a fine-tooth comb or brush to get the sleek base perfect.
Braid Options and Placement
You could use a thick three-strand braid, a Dutch braid for more dimension, a fishtail for intricacy, or even a simple twisted section. Run the braid straight back down the center, off to one side, or in a diagonal pattern — the sleek base is what matters. This style photographs beautifully and works for professional settings, events, or anyone wanting a more architectural, modern look.
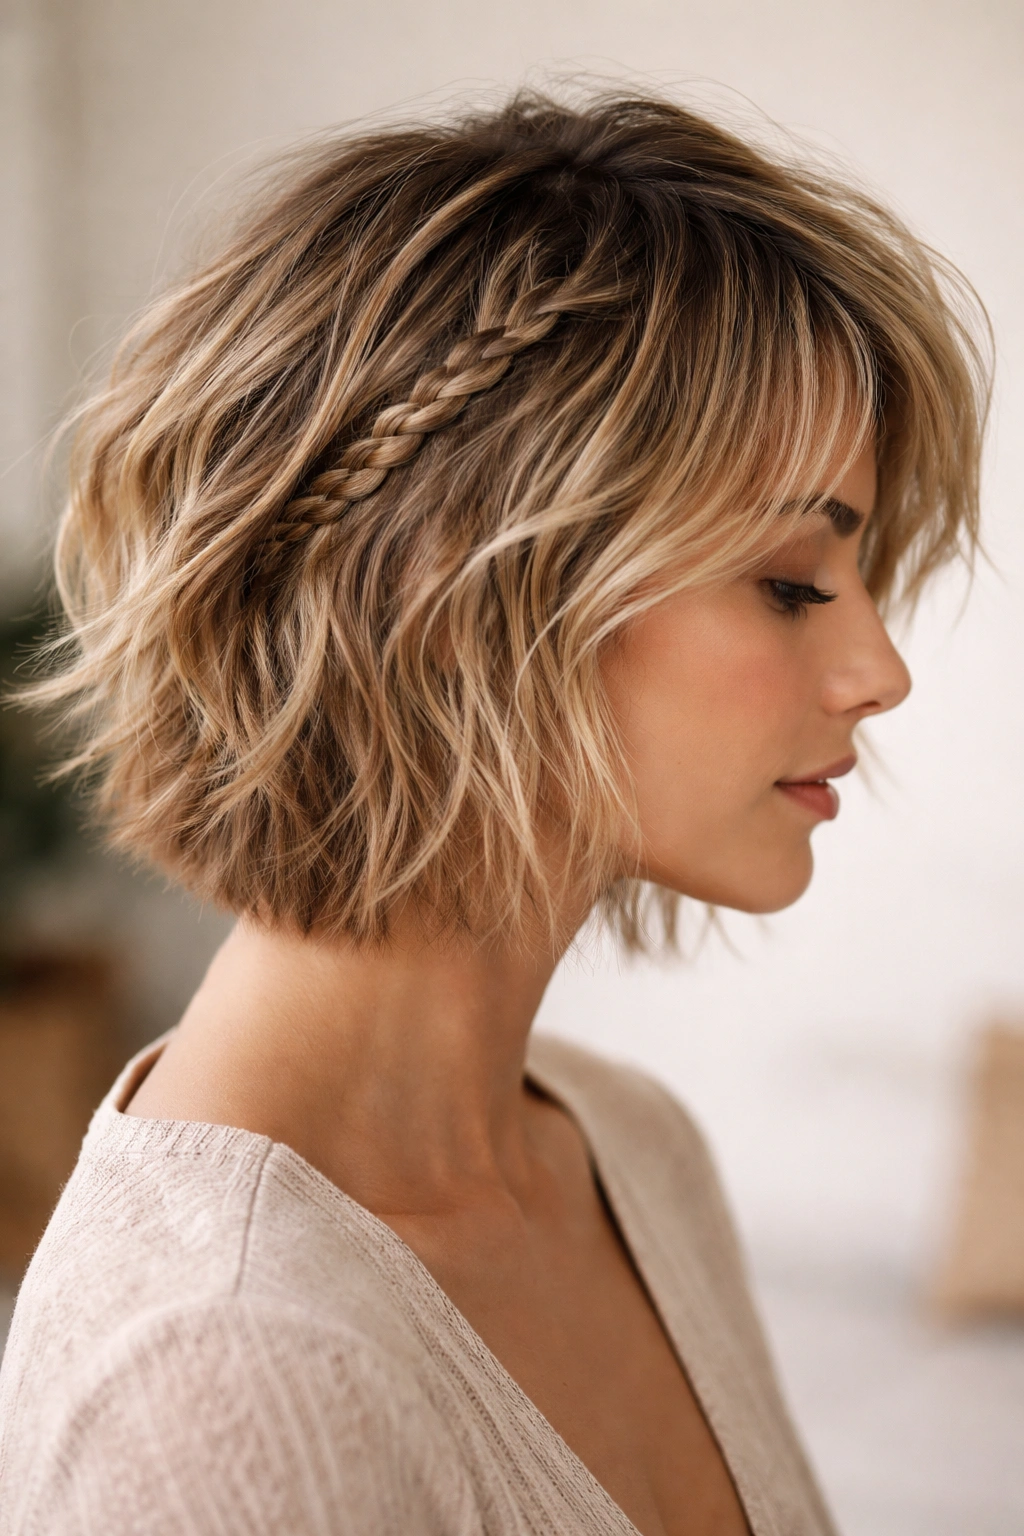
11. The Face-Framing French Braid Hybrid
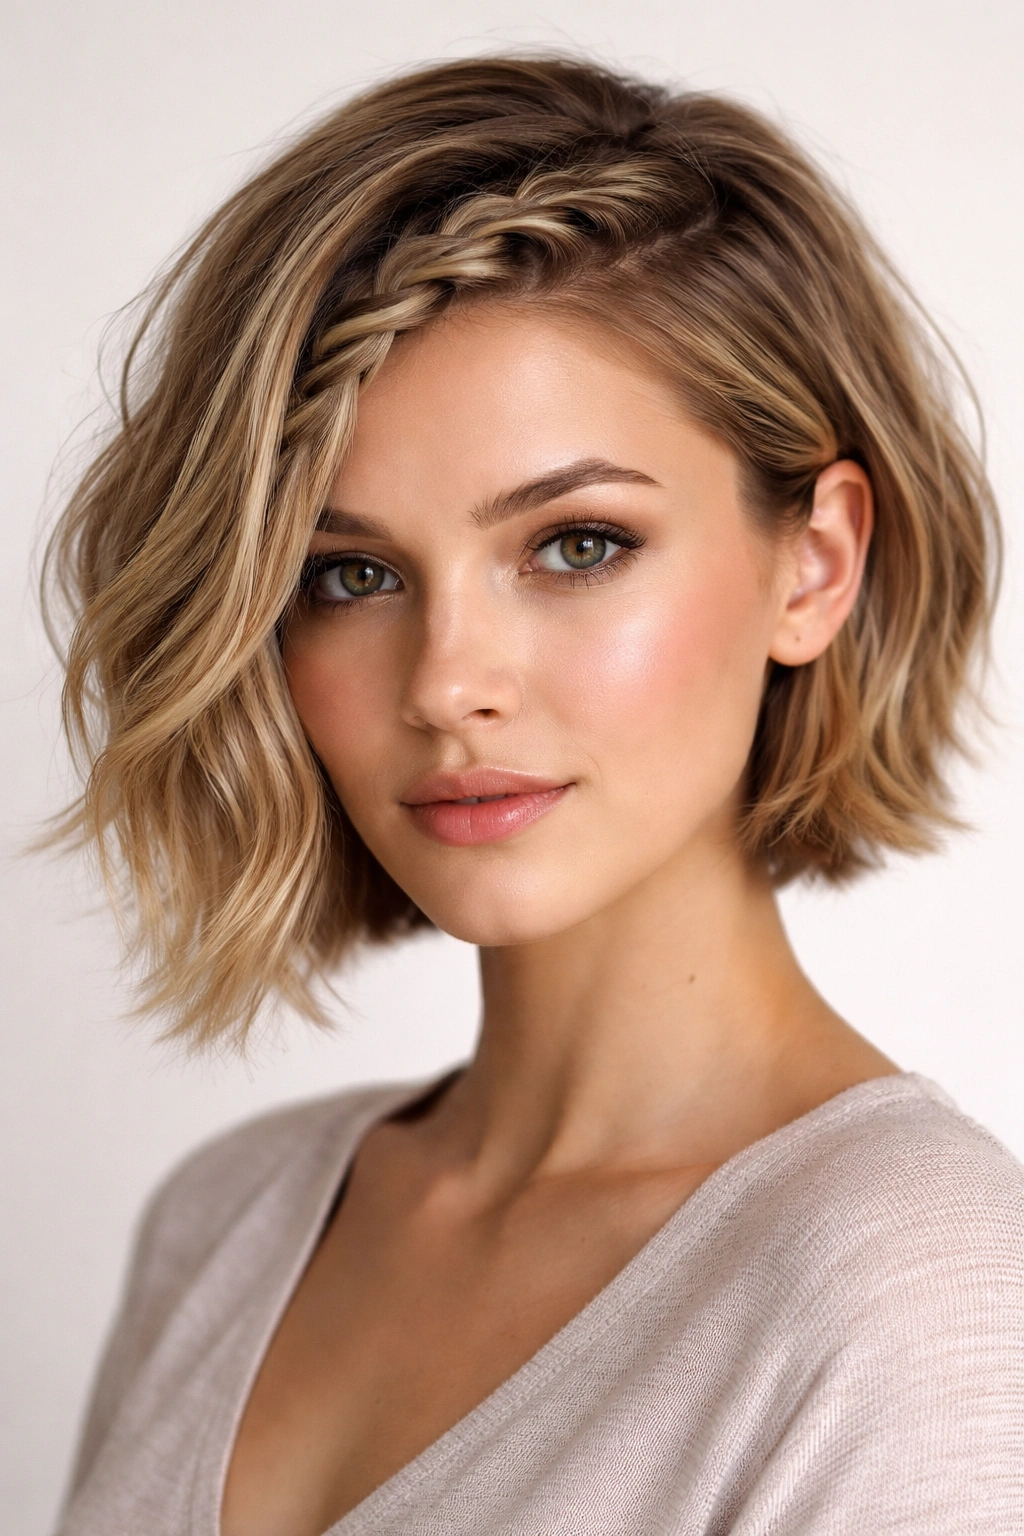
Rather than braiding the entire head, create a French braid that starts at the hairline on one side and only travels halfway across the head, leaving the other side loose and unbraided. This creates a beautiful asymmetry and adds interest without overwhelming the head with braid texture. The unbraided side can be left straight, curled, or textured for contrast.
Styling for Maximum Visual Interest
The contrast between the structured braid and the loose side is what makes this hybrid style work. You might straighten the braided side and curl the loose side, or vice versa. The braid doesn’t need to be tight or perfect — a slightly loose, textured braid actually creates more visual interest than a geometric-perfect one.
Face Shape Considerations
This style is particularly flattering for oblong, square, or rectangular face shapes because the braid adds width on one side. It’s also beautiful for anyone wanting to showcase one side of their face while adding polish and intentionality to the other side. This works particularly well on bobs where the hair length allows the asymmetry to feel intentional rather than like one side is just shorter.
12. The Waterfall Braid Cascade
A waterfall braid creates the illusion of cascading strands by incorporating sections of loose hair throughout the braid, which are then released rather than pulled all the way through. This creates a romantic, flowing effect even on very short hair. A single waterfall braid swept to the side is feminine and soft without feeling overdone.
Understanding the Waterfall Technique
A waterfall braid uses the same principle as a basic three-strand braid, but instead of continuously incorporating and securing every strand, you release some strands to hang loose. As you braid, every time you bring a new section into the braid, you release the bottom strand of the braid to hang free. This creates that signature waterfall effect where strands seem to cascade down.
Length and Texture Requirements
You’ll need at least two to three inches of hair to create a visible waterfall effect. This style works beautifully on bobs with longer lengths on top and can even work on longer pixies. The waterfall braid is particularly romantic and works well for dates, dressier occasions, or any time you want to feel feminine and polished without looking overdone.
13. The Zigzag Dutch Braid Pattern
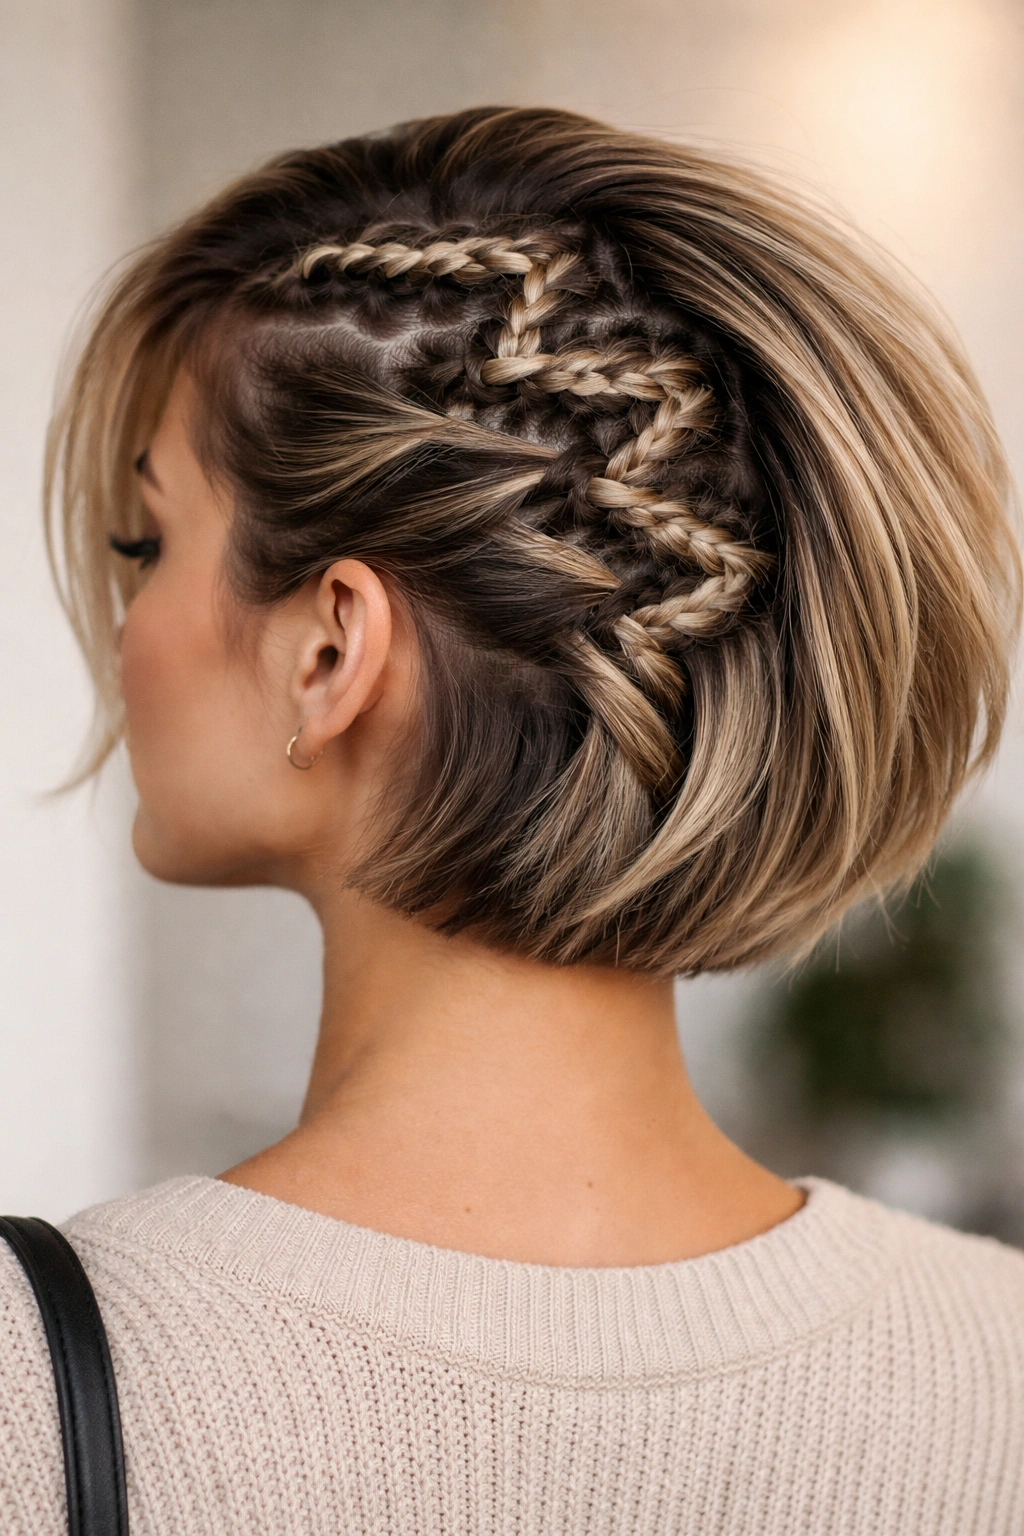
Instead of braiding straight back, create a Dutch braid that zigzags across the head in a geometric pattern. Start at the temple on one side, braid at an angle toward the center, then angle back toward the opposite side. This creates an interesting, almost optical-illusion pattern that’s bold and artistic.
Planning Your Zigzag Path
Before you start braiding, visualize where you want your zigzag pattern to go. You might start at one temple, zigzag toward the center, then finish at the opposite temple. Or you could do a full head zigzag that travels back toward the nape. The key is planning your sections so the pattern is actually visible and intentional.
Best Suited For
This style suits short hair beautifully because the geometric pattern is more visible on a smaller canvas. It works for people who want a bold, artistic statement and have the time to create a precise braid pattern. This is fantastic for festivals, creative events, or any occasion where you want hair that doubles as wearable art. Professional stylists can execute this perfectly, but it’s also absolutely achievable with practice at home.
14. The Tucked-Under Side Braid with Undercut
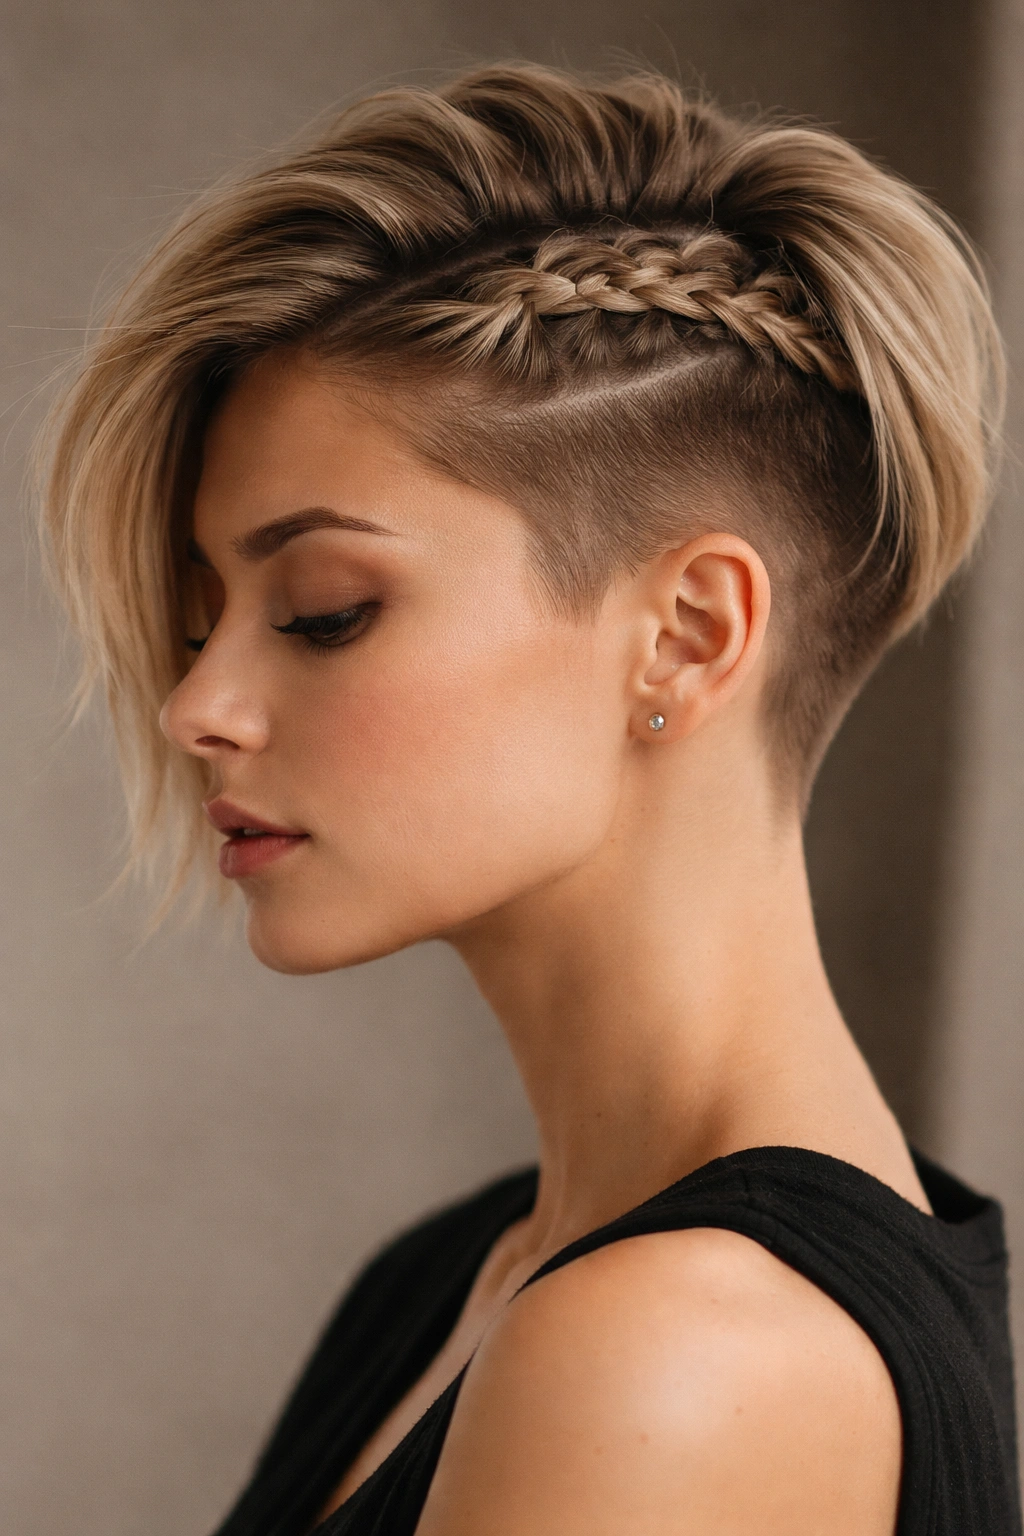
If you have a pixie cut or undercut with very short sides, a single braid on the longer top section tucked behind and secured against the longer side creates visual interest while showcasing the undercut. This style maximizes the contrast between lengths and creates a punk-rock edge that’s still wearable and polished.
Styling for the Undercut Feature
The goal is to position the braid so it follows the length gradation of your cut, essentially tucking the longer hair back and revealing the undercut. You might braid the length and pin it against the side of your head, or create a thicker braid that covers and frames the undercut in a more voluminous way.
Creating Dimension and Interest
This style works particularly well if you have colored or patterned undercut (a shaved design, undercut color, or gradient). The braid draws attention to this feature while keeping everything polished and controlled. It’s edgy but professional enough for most settings, and it photographs beautifully.
15. The Double Dutch Crown with Center Part
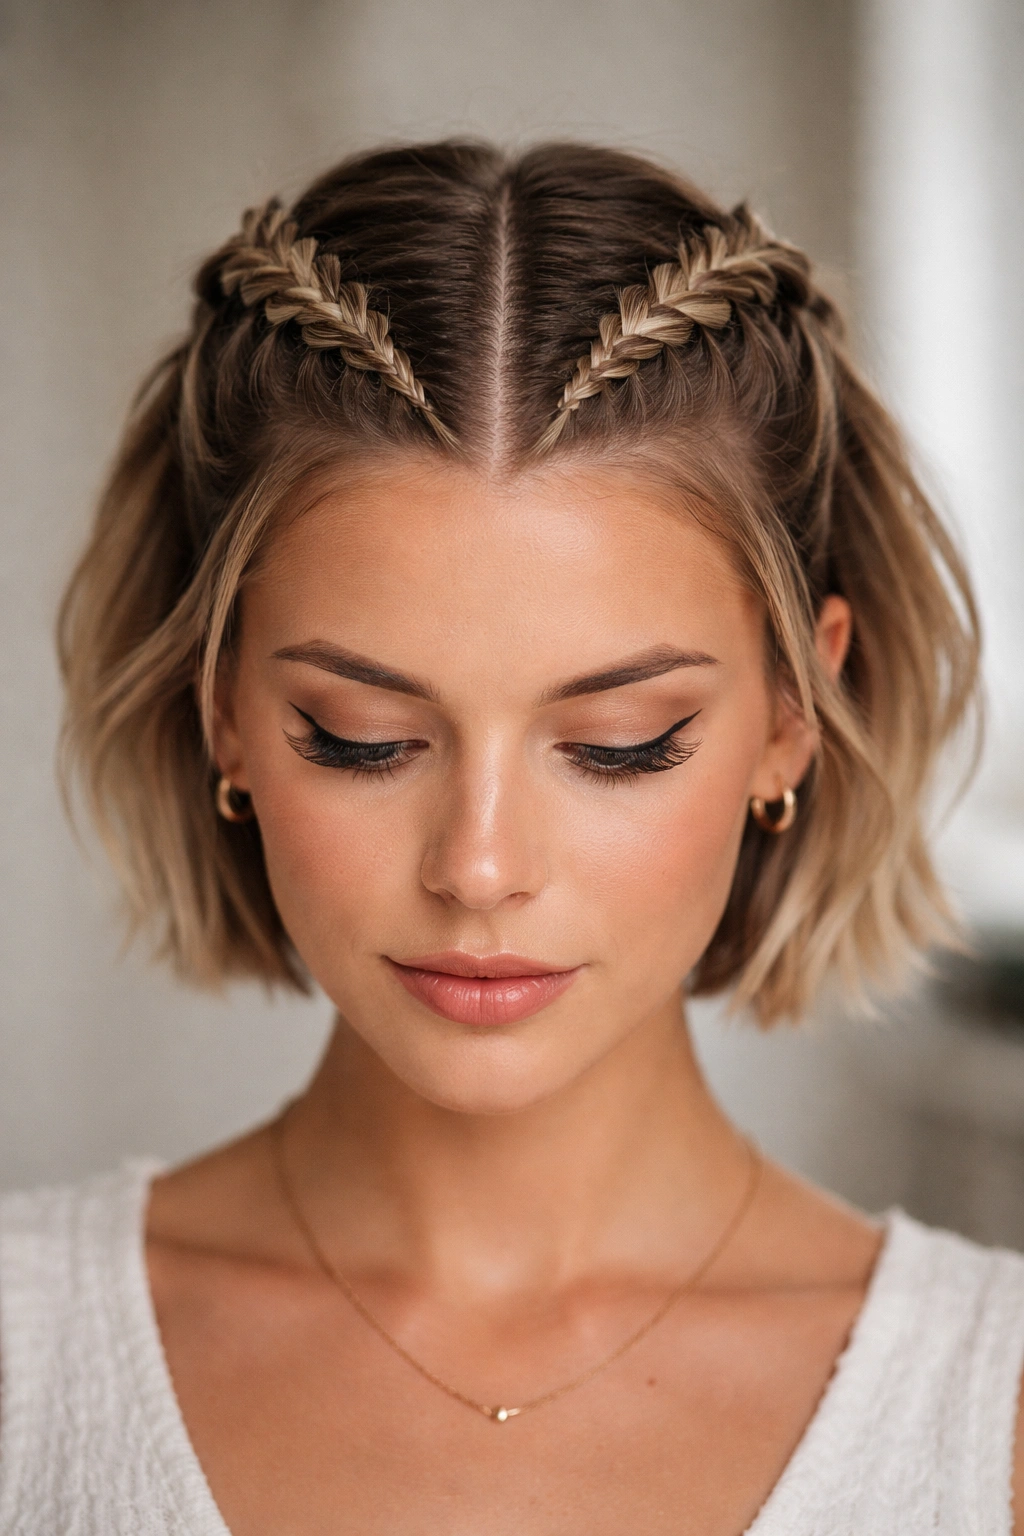
Two Dutch braids that start at a center part and travel backward on either side of the head, then meet and are secured at the back, create a bold, symmetrical crown effect. This style suits anyone who loves geometric, structured looks and wants maximum visual impact. The double Dutch crown is undeniably striking and works beautifully for bobs and pixies.
Execution and Precision
Perfect center parting is key — use a rattail comb and part spray to create a pristine center line. Braid on both sides simultaneously if possible (have a friend help, or use a handheld mirror to check your work). Both braids need to be equally tight and equally thick so the symmetry feels intentional rather than accidental.
Who This Style Suits
The double Dutch crown flatters most face shapes but is particularly striking on round, square, or heart-shaped faces because it adds height and elongates the face. This style suits confident, fashion-forward styling and works perfectly for anyone wanting a statement hairstyle. It photographs beautifully and works for special events, creative outfits, or any occasion where you want your hair to be absolutely noticed.
16. The Thin Braid Accent in a Bun
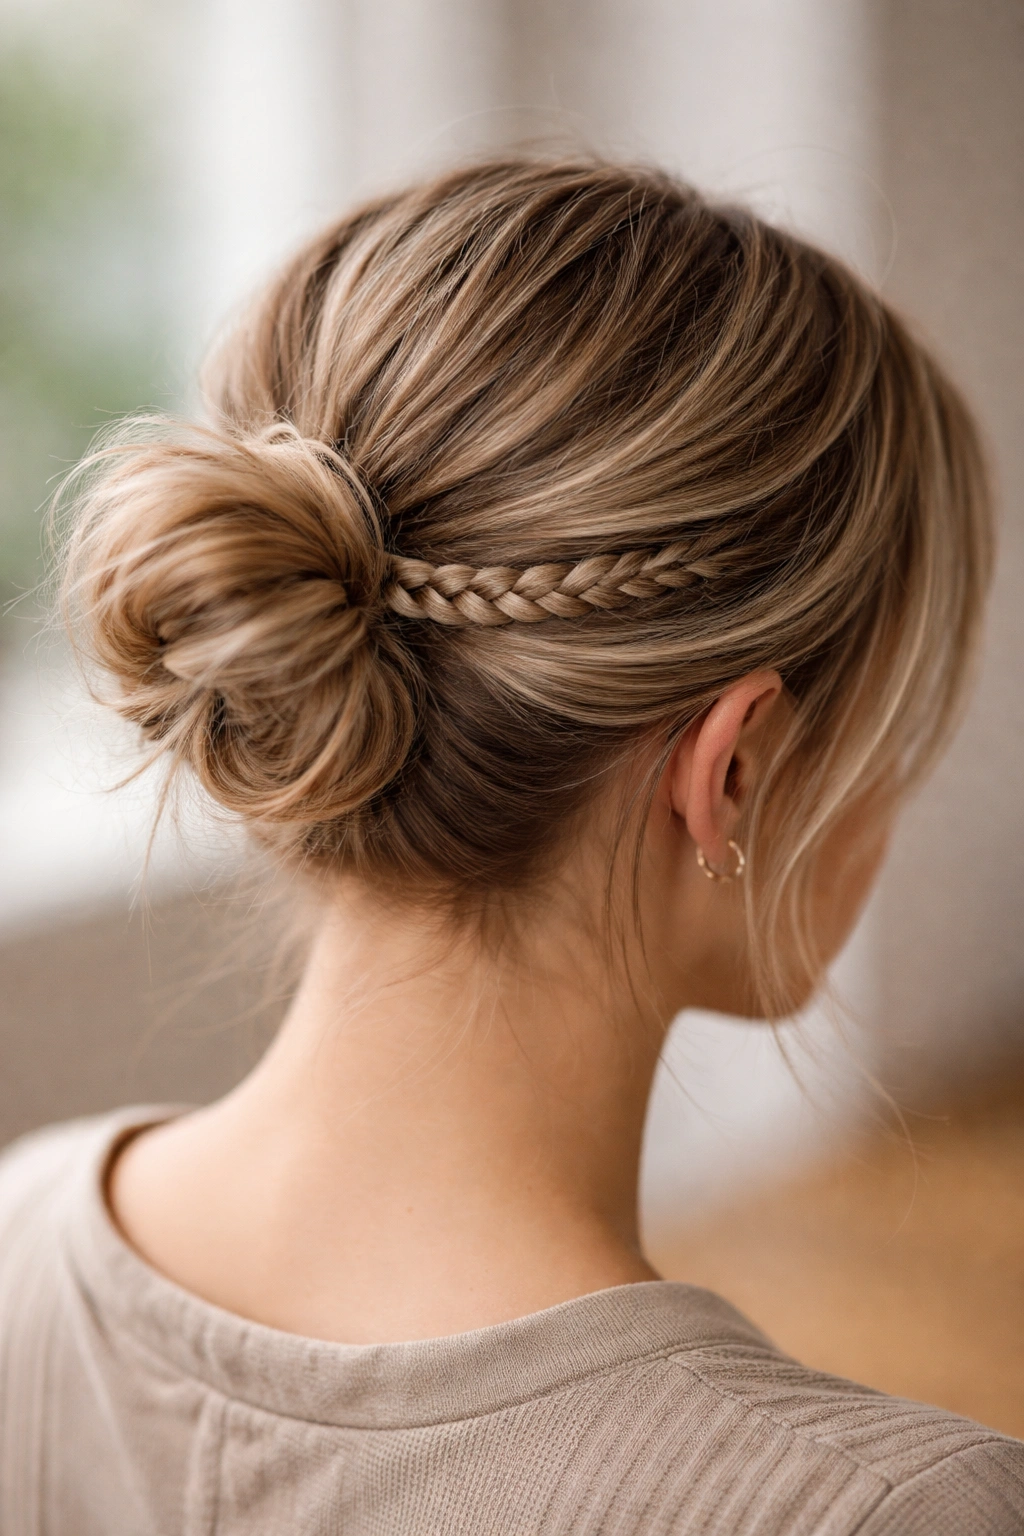
If you’re pulling your short hair into a bun (tight, textured, or soft and loose), weave a thin three-strand or fishtail braid around the base of the bun, or integrate a thin braid into the bun itself. This small detail elevates a simple bun into something much more interesting and intentional-looking.
Bun and Braid Integration Options
You could braid a thin section from one side of the bun all the way around to the other side, essentially creating a decorative band around the base. Or you could incorporate a thin braid into the twisting or wrapping as you create the bun, so the braid is actually part of the bun structure itself.
Creating Balance with Small Details
The key to making a small braid accent work is making sure it’s actually visible and intentional-looking rather than disappearing into the bun. A slightly loose, textured braid reads better as intentional than a tight, precise one. This detail is particularly effective on bobs and pixies where the base is short but you can still gather and secure a bun at the nape or crown.
17. The Wraparound Braid Hairband
A single braid created from one section of hair that wraps completely around the head like a hairband or hair accessory creates an interesting optical illusion. You can braid a thin section from one temple, wrap it around the back of the head, and secure it at the opposite temple, creating the effect of a decorative braid hairband.
Styling Approach and Technique
This works by creating a very thin braid from slightly less hair than you’d normally use, which allows it to wrap around the head without looking too heavy. The braid should be loose and textured so it reads as delicate and decorative rather than overly structured. You’ll secure both ends with bobby pins that match your hair color so they’re invisible.
Best Occasions for This Look
The wraparound braid hairband is romantic, whimsical, and works beautifully for dates, garden events, or any time you want to feel delicate and polished. It suits oval and heart-shaped faces particularly well and works across various hair lengths and textures. This style requires some skill but once you master it, it’s absolutely showstopping.
18. The Sleek Pencil Braid with Graphic Gel Swoop
Create an ultra-thin, pencil-sized braid and pair it with graphic gel work around the hairline for a modern, editorial look. The pencil braid itself is super thin and geometric, finished with absolute precision and paired with a bold geometric swoosh of gel on the sides. This is a style for people who love minimal, architectural aesthetics.
Technical Precision Required
A pencil braid requires steady hands and plenty of practice. You’re working with an extremely small amount of hair, so each section must be perfectly thin and tension must be absolutely even throughout. Pair this with a blow-dried, smoothed base and sharp edge work for maximum impact.
Who Should Try This
This style suits people with medium to thick hair (thin hair will make the pencil braid nearly invisible) and anyone who loves modern, editorial aesthetics. It works beautifully on pixie cuts and short bobs where you have enough control to create that geometric appearance. This style is bold, fashion-forward, and definitely statement-making.
19. The Textured Spiral Braid
Instead of following a straight or curved path, create a three-strand braid that travels in a spiral pattern around the head, essentially moving from the top center outward in a spiral motion until the braid reaches the nape. This creates a mesmerizing pattern that’s both bold and artistic.
Creating the Spiral Path
Before you start, visualize your spiral direction — clockwise or counterclockwise. Take sections that follow this spiral path as you braid, always moving in the same rotational direction. This requires visualization and planning, but the payoff is absolutely striking.
Best Hair Types and Lengths
This style shows up beautifully on textured, wavy, or curly hair where the spiral pattern is really visible. On straight hair, you’ll need to use styling products or create extra texture for the pattern to show up clearly. You’ll need at least two to three inches of length around the crown to make this work, making it suitable for short bobs and longer pixie cuts.
20. The Integrated Braid in a Textured Shag
If you have a textured shag cut with multiple layers and a tousled, piece-y aesthetic, integrate a thin braid into the texture for added interest. Rather than making the braid the star, this style uses braiding as a texture-building element within an already textured, layered cut. This is perfect for people who want braid detail without an obvious statement braid.
Making the Braid Work with Textured Layers
The braid should be thin, loose, and textured to match the overall shag aesthetic. You might braid one thin section from the side, weave it subtly into the layers, and secure it so it’s barely visible but adds complexity to the overall look. This requires an understanding of how your cut’s layers sit and move.
Perfect for Effortless Styling
This is the ultimate braid style for people who want interest and intentionality without heavy styling or structured looks. The braid blends with the texture rather than standing apart from it, creating a cohesive, polished appearance that still feels relaxed and effortless. This works beautifully on wavy, textured, and curly hair and suits anyone with a modern, undone aesthetic.
Final Thoughts

Short braided hairstyles prove that length is absolutely not a requirement for creative, striking, or elegant hair styling. Whether you’re drawn to structured geometric braids, soft romantic styles, bold artistic statements, or subtle texture-building details, there’s a braiding technique that fits your aesthetic and skill level. The beauty of braiding short hair is that each style feels intentional and polished — short braids don’t disappear or feel insubstantial the way they sometimes can on longer hair. They’re visible, they’re beautiful, and they’re absolutely worth incorporating into your styling repertoire.
The styles that resonate most with you probably depend on your hair texture, your face shape, the occasions you need styling for, and your personal aesthetic. Spend time experimenting with styles that appeal to you visually, don’t get discouraged if your first attempt isn’t perfect (braiding is genuinely a skill that improves with repetition), and consider having a professional stylist create a style for you the first time if you’re working with a technique that feels complicated. Once you see it executed, you’ll have a much easier time replicating it at home.
The most important part is choosing styles that make you feel confident and beautiful. Whether that’s a sleek professional crown braid, an edgy double Dutch creation, a delicate fishtail, or a barely-visible braid woven into your layers, short braided hairstyles offer endless creative possibilities. Keep inspiring photos bookmarked, practice the techniques that appeal to you, and don’t hesitate to ask your stylist questions about how to create specific effects. Your short hair is a canvas for braiding artistry — use it.