The slicked-back ponytail has transcended its gym-class origins to become one of the most versatile and polished hairstyles available to you right now. Whether you’re heading to the office, getting ready for a night out, or just want to look put-together on an ordinary Tuesday, this style delivers effortless sophistication with a touch of edge. What makes the slick back so special is its incredible range—it works with nearly every hair type, face shape, and personal aesthetic you can imagine.
The beauty of slicked ponytails lies in their adaptability. You can wear one sleek and minimalist for a boardroom-ready appearance, or dress it up with braids, twists, and texture for something more fashion-forward and creative. The style keeps hair completely off your face and neck, making it practical for everything from workouts to weddings, while simultaneously projecting confidence and intentionality. Beyond just looking good, slicked ponytails actually protect your hair by keeping it contained and reducing friction throughout the day.
The real magic happens when you understand the different variations available to you. A simple low pony can take on completely different energy depending on whether you add a sleek finish, incorporate a braid, or leave some texture intact. The height of the ponytail, the smoothness of the gel or serum you use, the placement of any additional details—these details completely transform how polished, casual, or artistic the final look becomes. You’ll find that experimenting with different versions helps you develop a signature style that feels authentically yours.
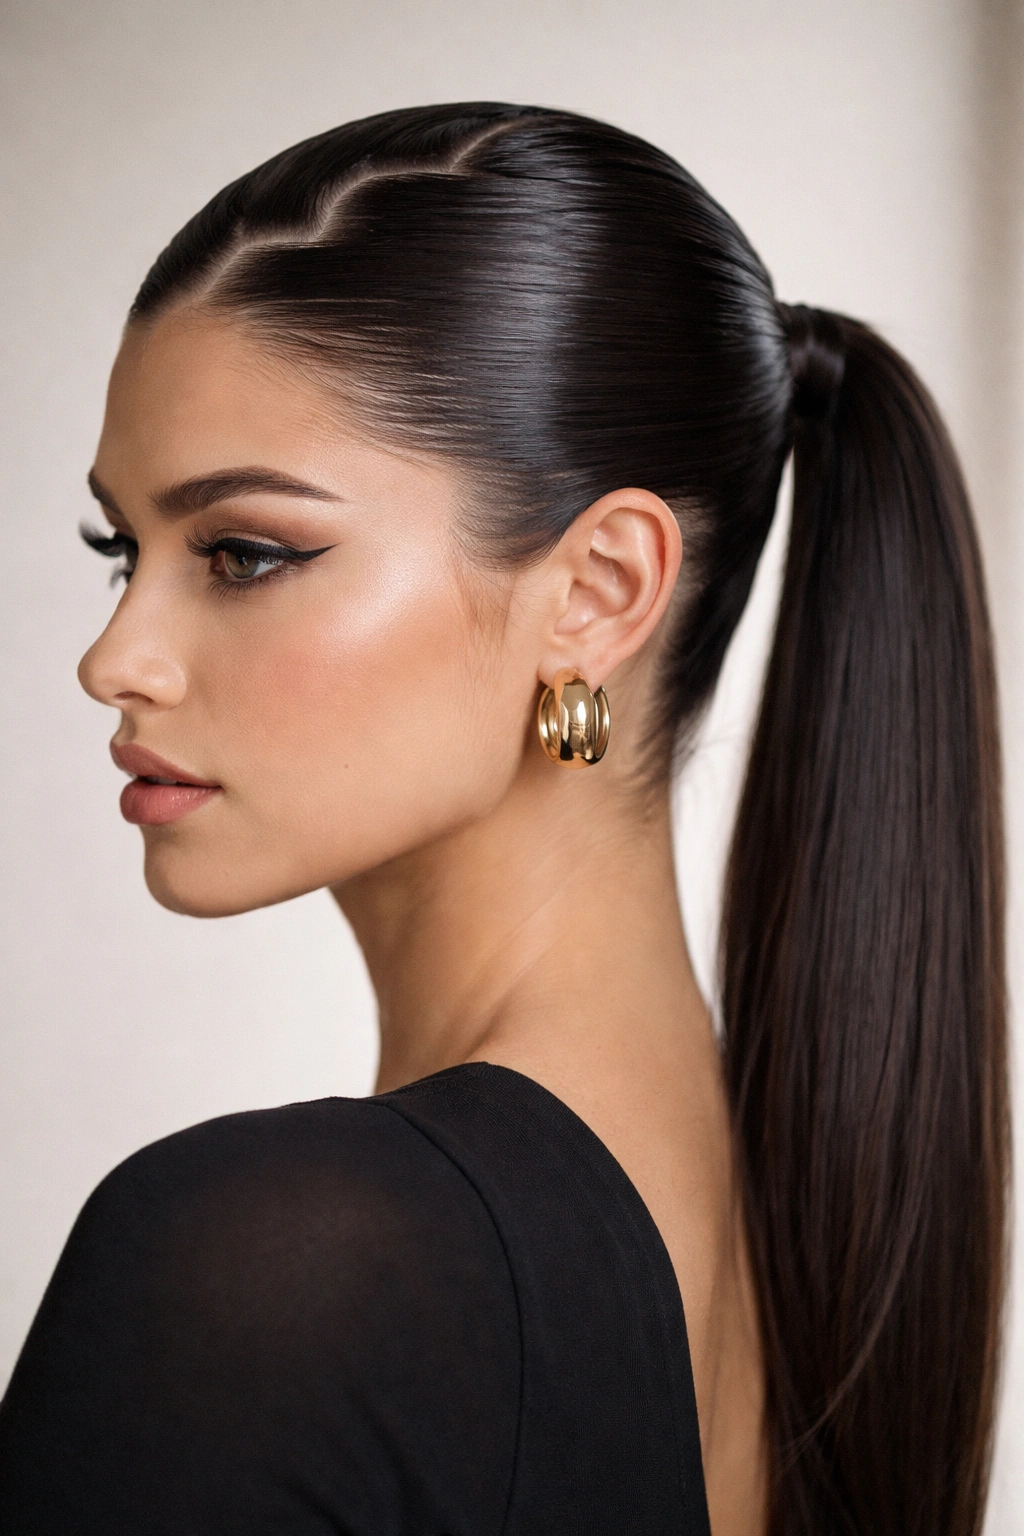
1. Classic Sleek Low Ponytail
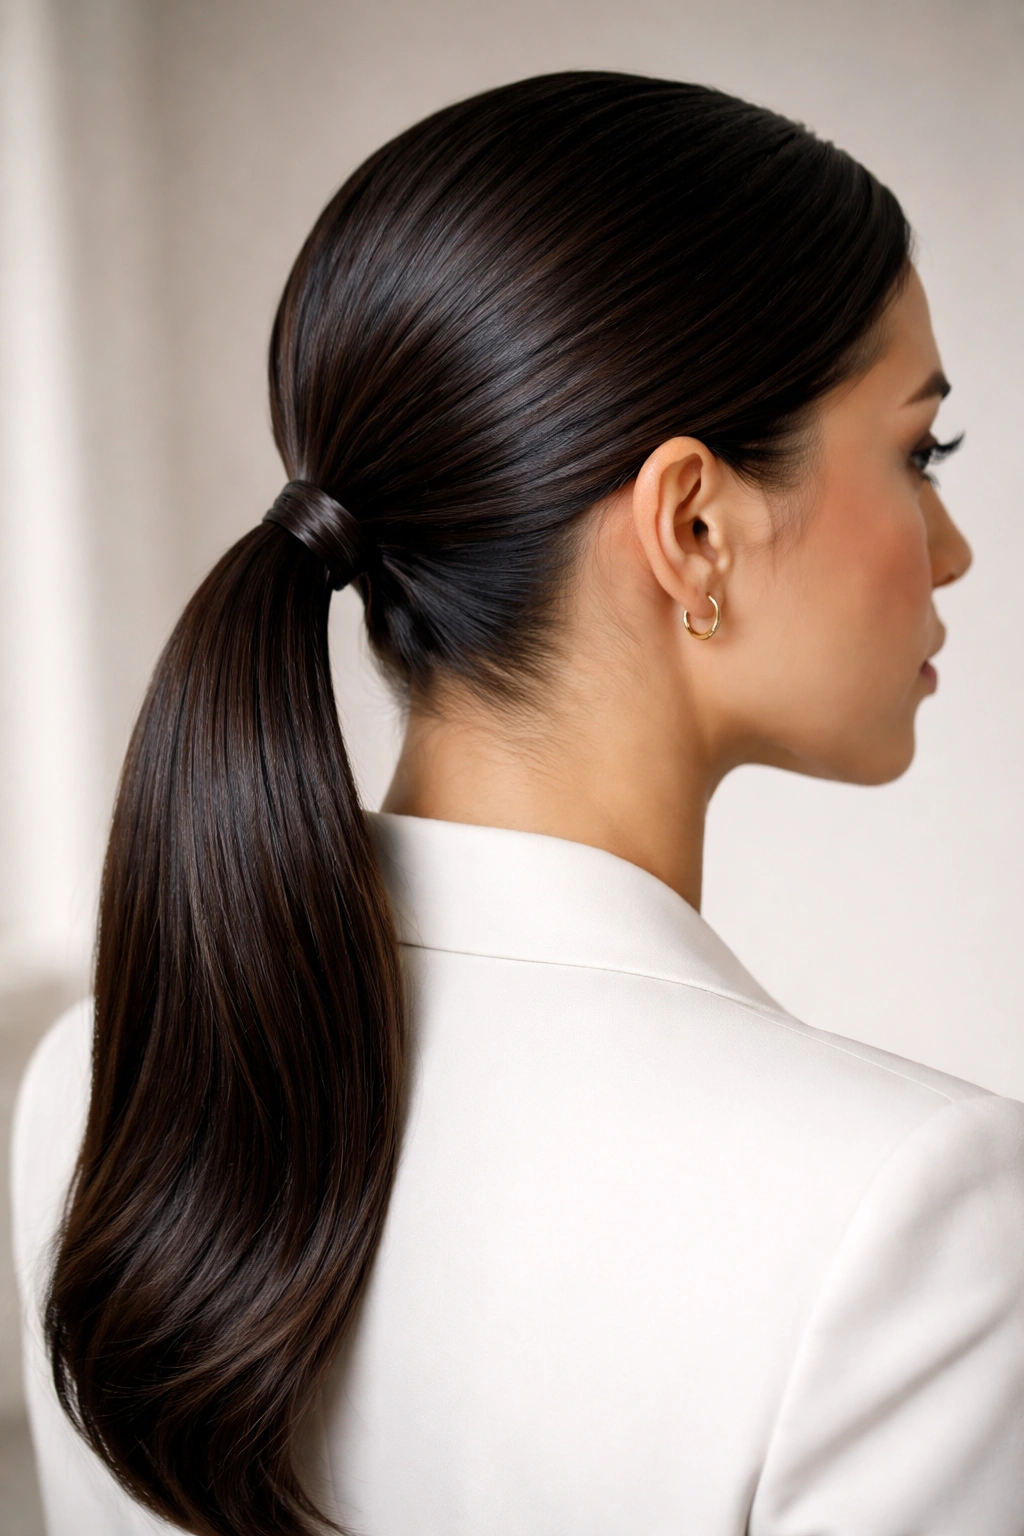
The foundation of all slicked-back styles, a classic low ponytail sits at the nape of your neck and screams understated elegance. This isn’t about complicated techniques—it’s about mastering the fundamentals with precision and using the right products to create that mirror-smooth finish. The lower placement keeps the style office-appropriate while still feeling intentional and polished.
Why This Style Never Goes Out of Style
A low slicked ponytail works across every profession, dress code, and occasion imaginable. The sleek finish conveys professionalism and control, while the positioning elongates your neck and flatters most face shapes. You can recreate this look in under five minutes once you’ve practiced it a few times, making it perfect for busy mornings when you still want to look like you’ve put genuine effort into your appearance.
How to Execute It Flawlessly
- Start with clean, damp hair or slightly dampened dry hair for easier control and smoothness
- Apply a smoothing serum or gel to your hands and work it through your hair in the direction away from your face
- Use a fine-tooth comb to brush all hair back toward the nape, smoothing any flyaways as you go
- Secure with a sleek elastic band at the very base of your neck, then wrap a small section of hair around the elastic to hide it
- Finish with hairspray to lock flyaways in place without creating crunchiness
Pro tip: If your hair tends toward frizz, a lightweight smoothing cream applied before your gel creates a barrier that extends your style’s longevity throughout the day and prevents that mid-morning halo effect.
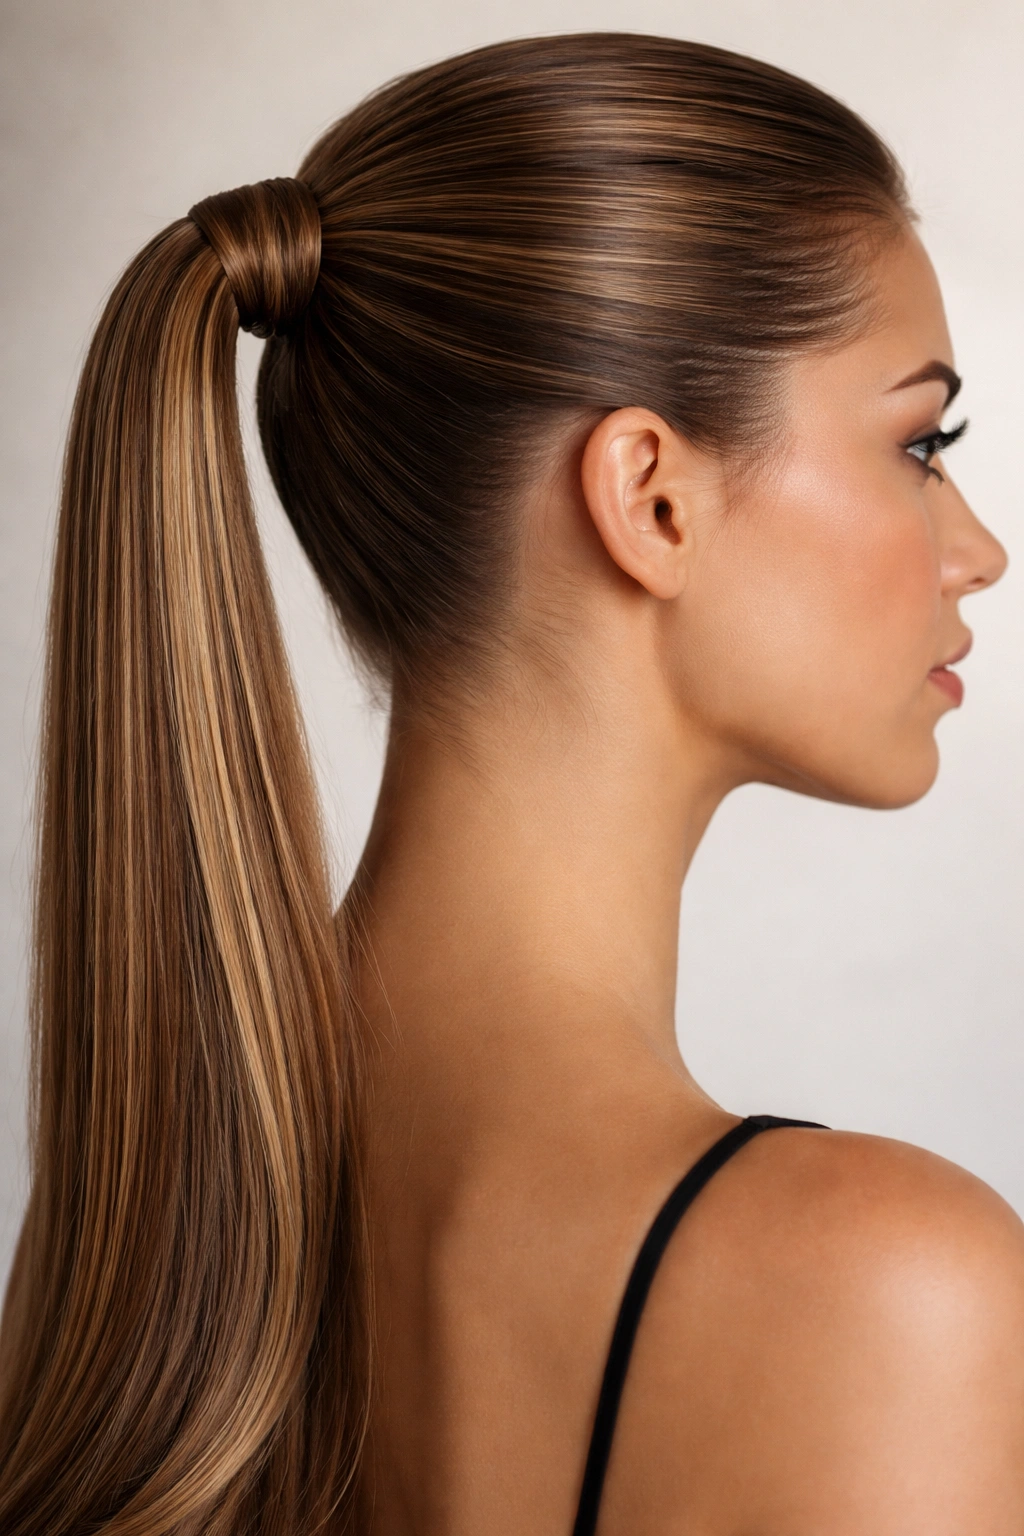
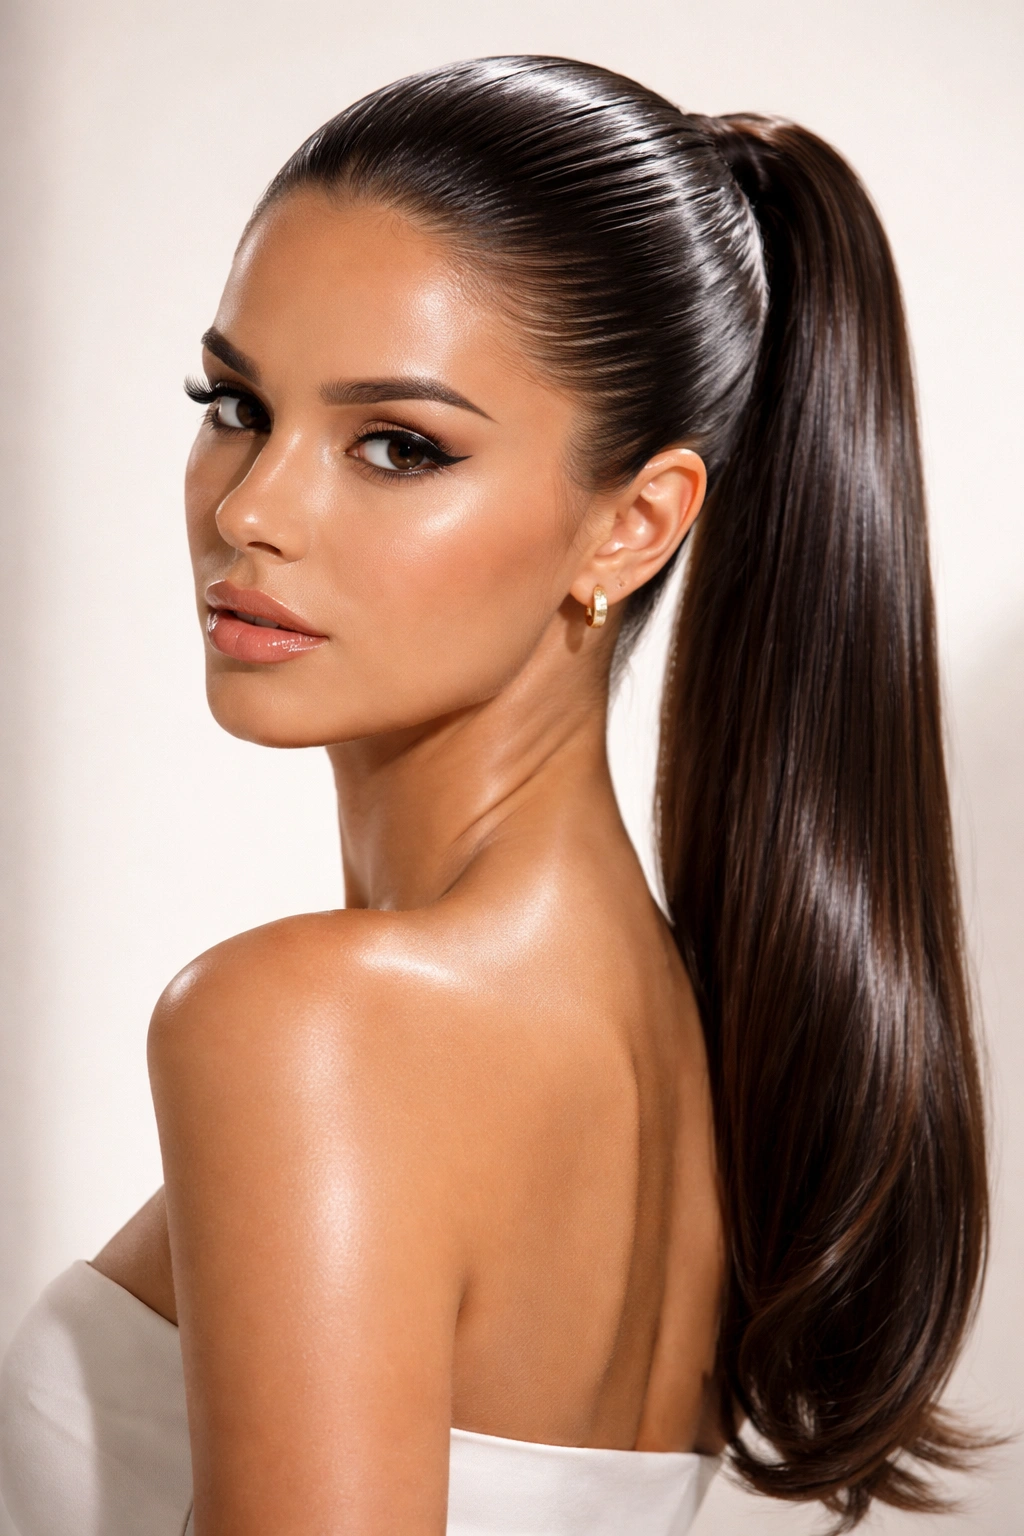
2. Slicked-Back High Pony
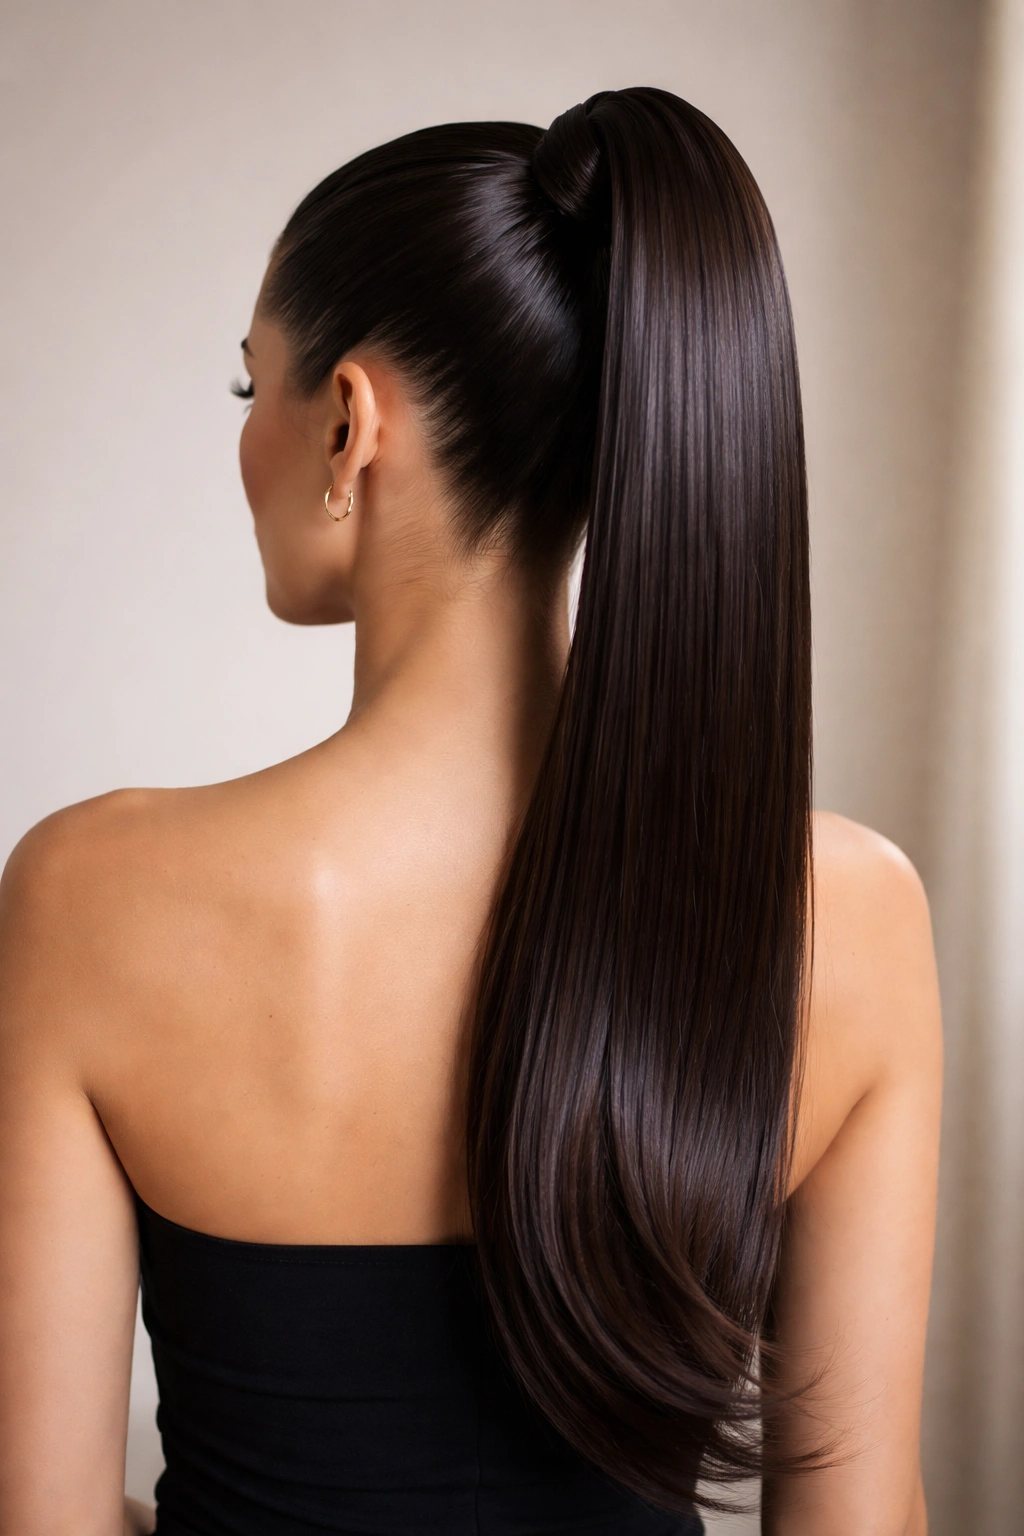
Elevate the classic by moving your ponytail to crown height for a look that’s instantly more dramatic and energetic. A high slicked pony has genuine attitude while still maintaining that polished edge—it works equally well for casual outings or getting-ready-to-go-out energy. The elevated placement creates the illusion of height and commands attention without saying a word.
The Confidence Factor Behind This Placement
Positioning your ponytail high automatically enhances your silhouette, creating more visible neck and jawline definition. The style projects confidence and youthfulness while remaining completely professional when executed with a smooth gel finish. This is the version you wear when you want people to notice you’ve made an effort, but you’re not seeking validation—you’re simply stating a fact about yourself.
Step-by-Step Application
- Flip your head upside down and spray your roots with volumizing spray for extra lift
- Return to normal position and smooth all hair back toward the crown using a paddle brush and smoothing serum
- Gather everything into a high elastic band, making sure the ponytail sits directly at the crown, not tilted
- Use a fine-tooth comb to smooth down any bumps or irregularities at the base
- Secure any loose pieces with bobby pins tucked invisibly beneath the ponytail
Worth knowing: The higher you position the ponytail, the more tension you’re creating on your hairline—so if you’re wearing this style daily, occasionally wear it lower to give your edges a break and prevent traction alopecia.
3. Sleek Bubble Ponytail
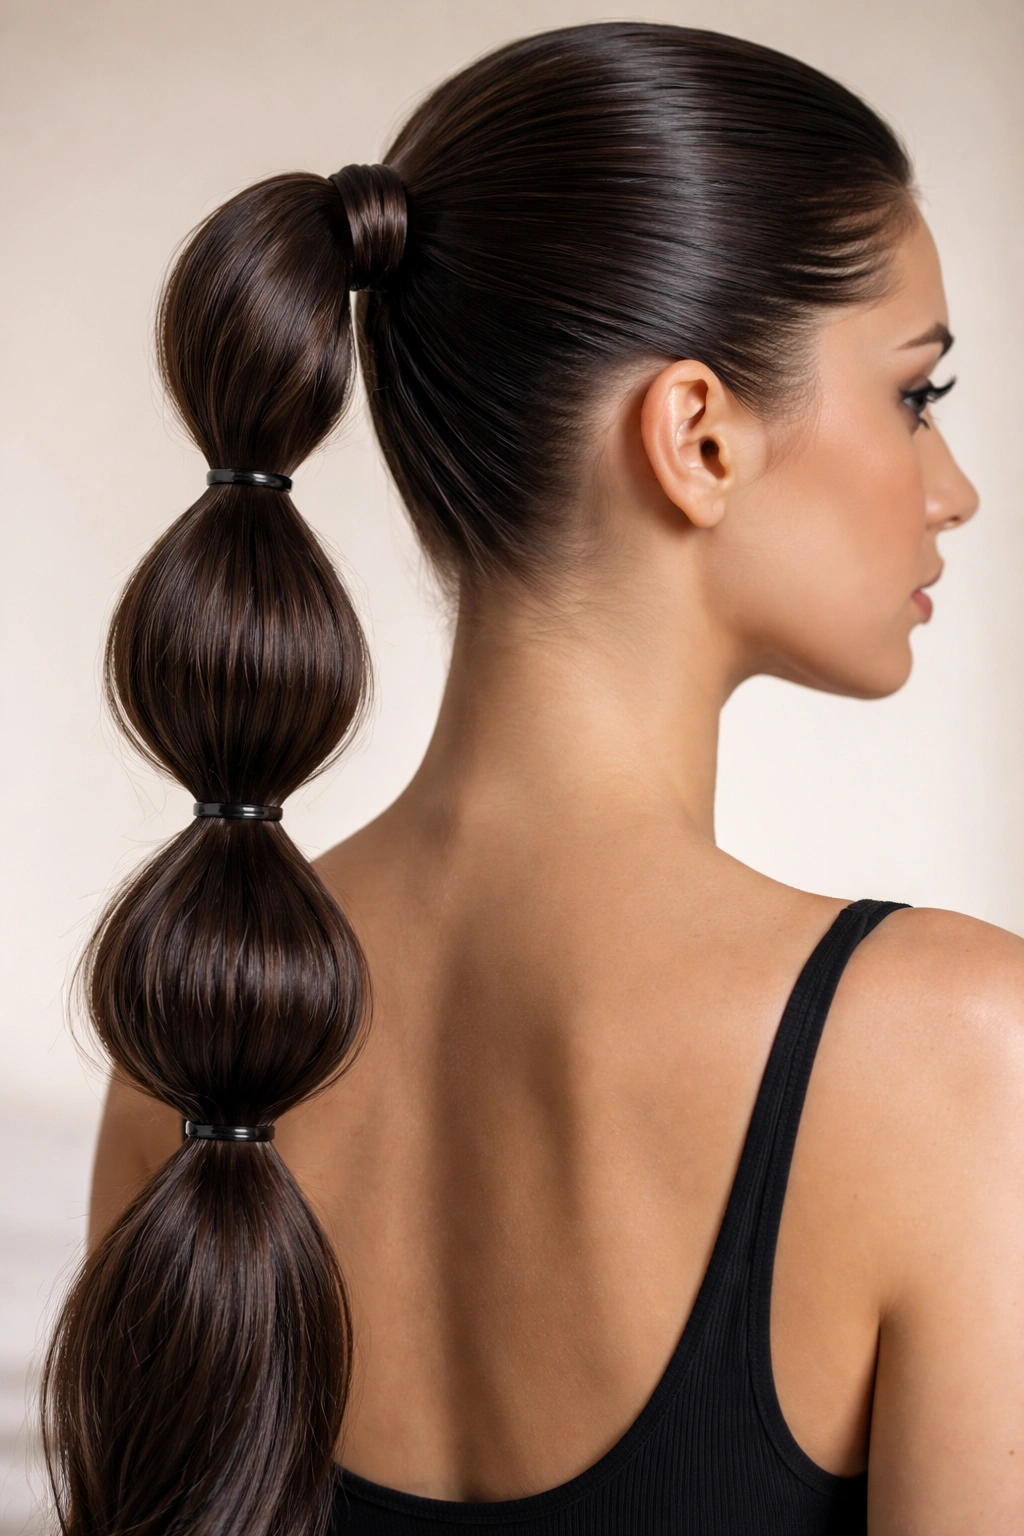
Create visual interest and dimension by dividing your slicked ponytail into distinct sections secured with multiple elastic bands. The spacing between the “bubbles” creates a playful, modern aesthetic that feels intentional and deliberately styled. This variation works beautifully for both casual days and when you want something eye-catching but still polished.
Why Bubbles Add So Much Visual Appeal
The bubble technique breaks up the monotony of a single ponytail while maintaining that slicked, controlled appearance. Each bubble can be gently teased outward to create subtle volume and movement, transforming a flat style into something with real dimension. The repetition of the elastic bands creates a rhythmic visual pattern that draws the eye and makes your hair appear fuller and more textured.
Creating Perfect Bubble Sections
- Start with a standard slicked ponytail at your preferred height, secured with an elastic band
- Starting about an inch down from the first elastic, place a second elastic band around the ponytail
- Gently tease and fluff the hair between the two elastics outward with your fingers for a rounded bubble shape
- Continue placing elastics every one to two inches down the length of your ponytail, teasing each section as you go
- Use a smoothing spray or serum to refine the lines between bubbles without flattening your work
Insider note: Matching your elastic bands to your hair color makes the bands practically disappear visually, keeping all focus on the style itself rather than the mechanics holding it together.
4. Half-Up, Half-Down Slicked Pony
Blend the polish of a slicked style with the softness of down hair by gathering only your top section into a slicked ponytail while leaving the rest loose. This hybrid approach gives you the best of both worlds—the controlled, intentional look of a slicked style paired with the romantic, flowing quality of loose hair. It’s perfect for occasions when you want to look polished without feeling overly formal or severe.
The Versatility of This Hybrid Approach
This style works beautifully whether you’re hitting the gym, heading to brunch, or attending a casual date. The slicked top section keeps hair off your face and shows off your features while the loose length down your back adds movement and softness. You’re essentially getting two looks in one, and it requires minimal styling time compared to creating volume throughout your entire head of hair.
Building Your Half-Up Ponytail
- Create a deep side part and smooth one side back with serum or gel
- Gather the smooth side section at the back of your head, roughly at mid-scalp height
- Secure with an elastic band, positioning it slightly off-center to emphasize the asymmetry
- Leave the other side of your hair completely loose, letting it fall naturally down your shoulder
- Smooth any baby hairs from the gathered section with a fine-tooth comb and hairspray
- Optionally, wrap a small piece of hair from your loose side around the elastic to conceal it
Pro tip: Curling or waving the loose portion creates stunning contrast against the sleekness of the gathered section, elevating the entire look without much additional effort.
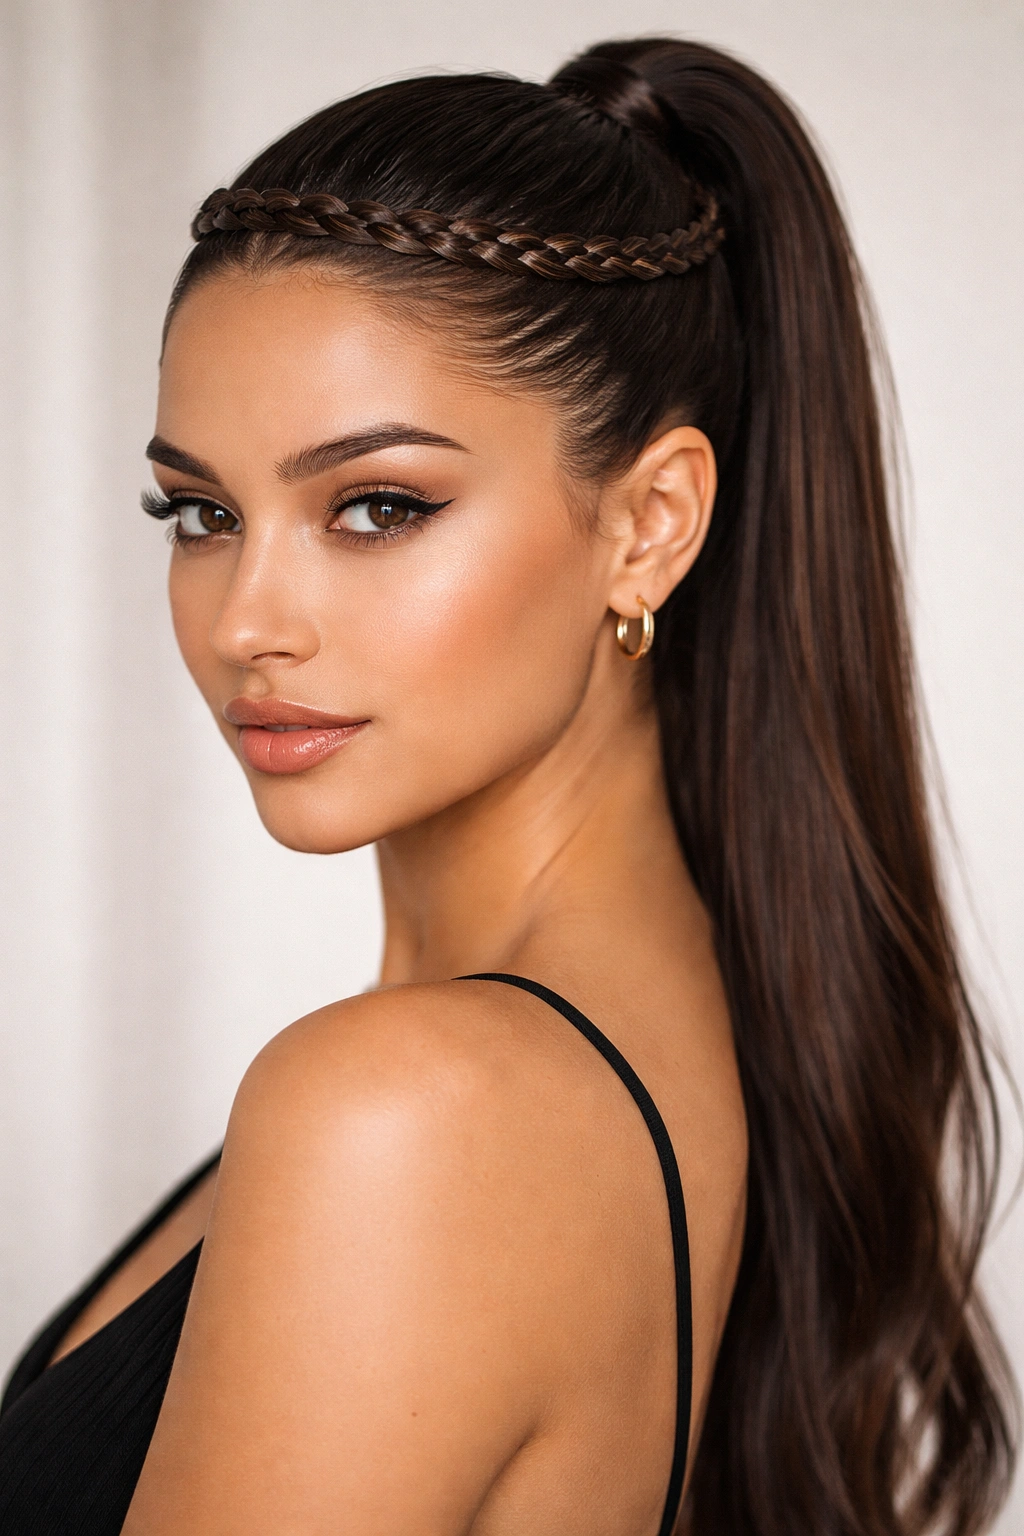
5. Slicked Ponytail with Braided Accent
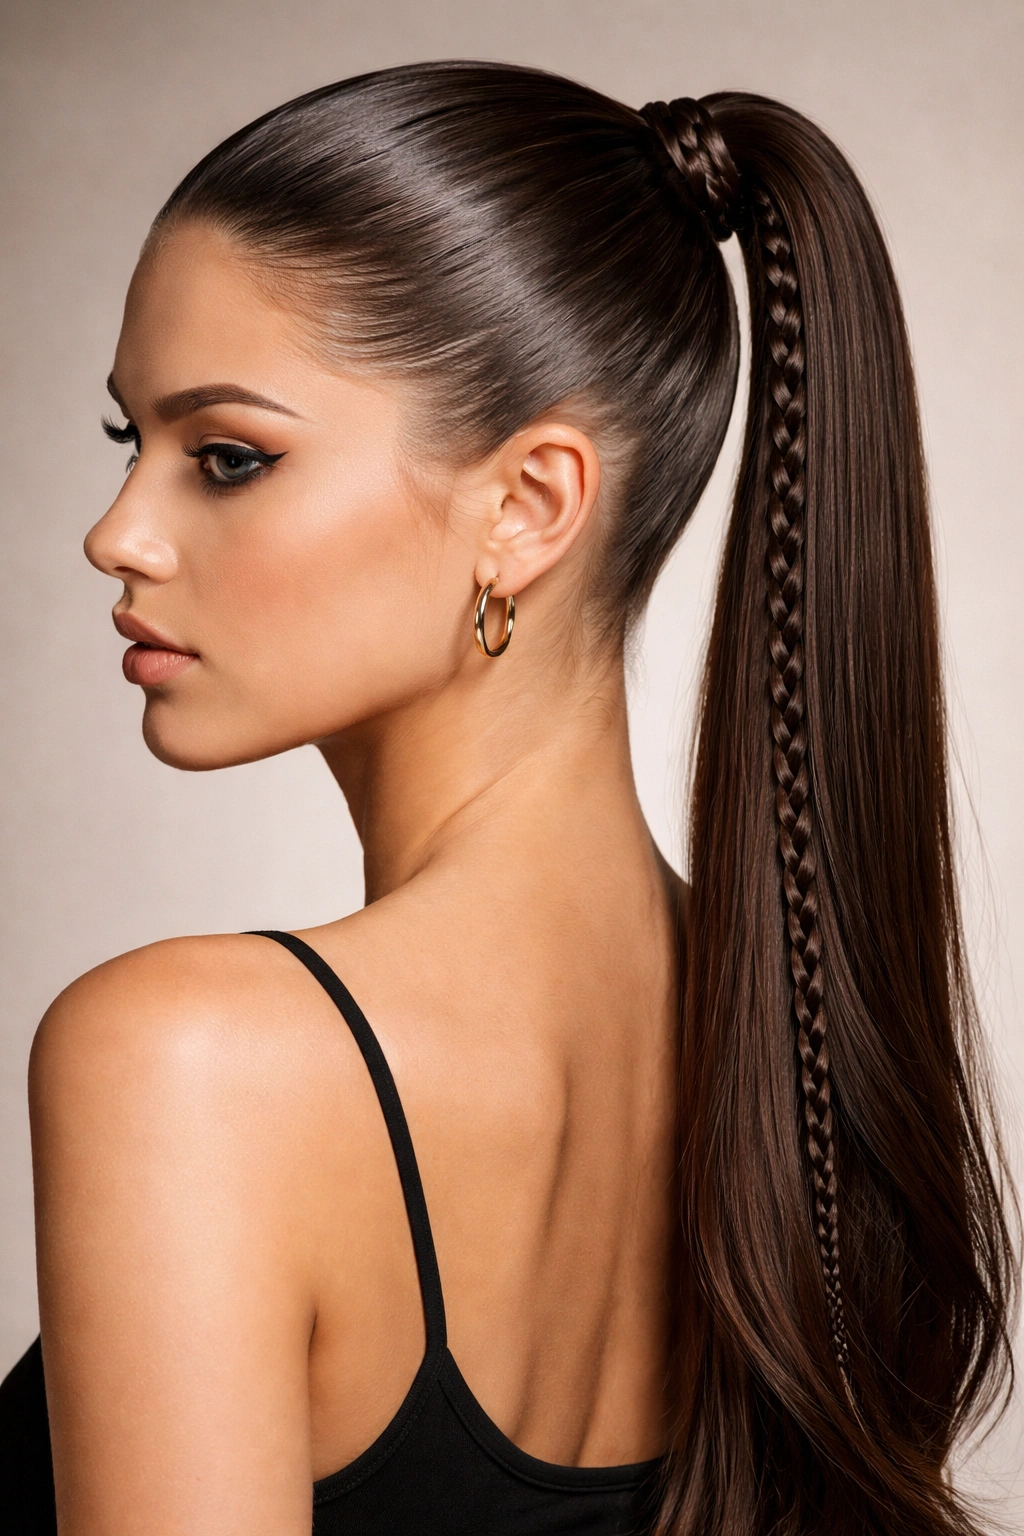
Incorporate a single braid running alongside or wrapped around your slicked ponytail to add texture and visual interest without compromising the sleek aesthetic. The braid can run down the center of your gathered hair, wrap around the elastic band, or sit to one side—each placement creates a completely different mood and level of visual complexity.
How Braids Elevate a Simple Slick
A braid immediately communicates that you’ve invested time and intention into your appearance, yet when incorporated into a slicked style, it maintains an sophisticated, not-trying-too-hard energy. The contrast between the smooth gel-sleek sections and the textured braid creates dynamic visual interest that keeps people looking. This variation works particularly well if you want your style to photograph beautifully—the braid adds dimension that reads in photos.
Three Easy Braid Placements
- Center braid: After securing your ponytail, take a thin section from the center and braid it down the length, securing the end with a tiny elastic
- Wrapped braid: Create a thin three-strand braid and wrap it around the base of your ponytail, pinning the end with a bobby pin
- Side accent: Create a thin braid on one side of your head, then incorporate it into your gathered ponytail at the elastic band
Worth knowing: Using a smoothing serum on your braid before you begin makes it appear more intentional and refined, preventing that frizzy, hastily-done appearance.
6. Slicked Ponytail with Statement Clip
Transform a basic slicked pony by replacing your standard elastic with a decorative clip, hair claw, or ornamental band. The right statement piece instantly elevates your entire look and can change your style from casual to evening-appropriate with zero additional effort. This is the hack you use when you want maximum impact with minimal styling time.
Choosing Clips That Complement Your Vibe
A tortoiseshell claw reads casual and modern, a jeweled clip says evening glamour, and a metallic or pearl option works everywhere. The key is selecting something that either matches your outfit or contrasts intentionally with it. Oversized clips appear more intentional and luxe, while dainty clips suit minimalist, understated aesthetics. Your clip choice completely transforms the attitude of your entire ponytail.
Strategic Clip Placement Options
- At the elastic: Position your clip directly at the base where your elastic sits, partially covering it for a polished finish
- Further down: Place your clip several inches down your ponytail for a more playful, fashion-forward appearance
- Wrapped around: Use a clip that wraps around your hair rather than clamping—this adds texture and movement while keeping everything secure
Pro tip: Layering multiple small clips of varying sizes and finishes creates an intentional, curated look that appears editorial and deliberately styled rather than accidental.
7. Low Slicked Pony with Face-Framing Pieces
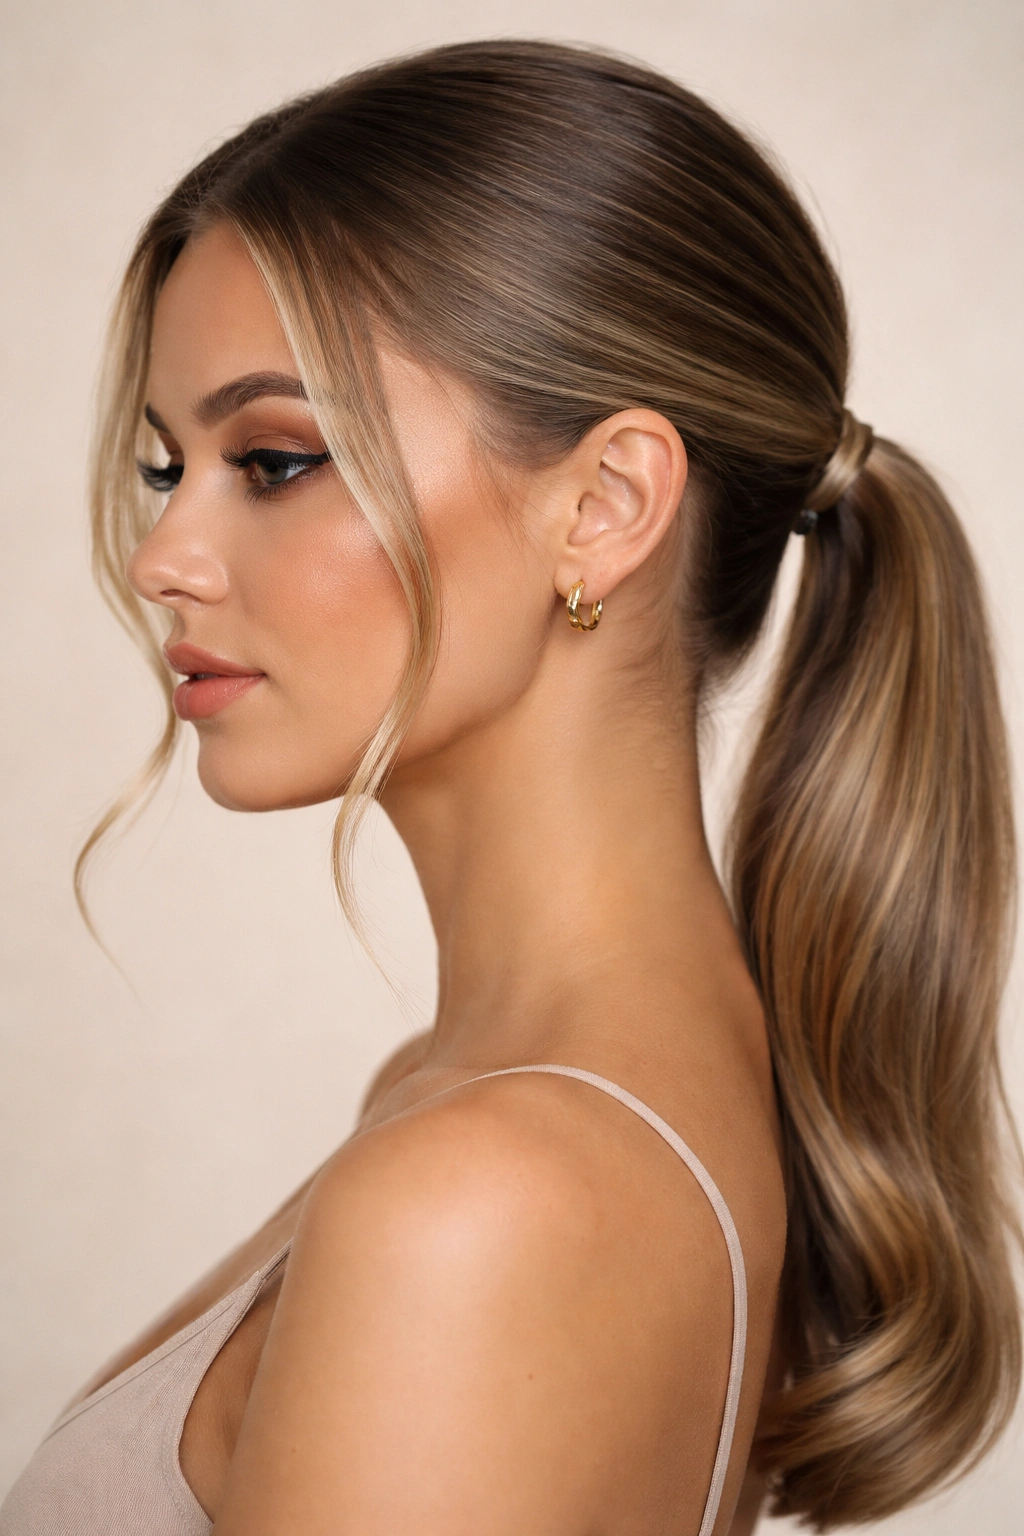
Create softness and femininity within your slicked ponytail by deliberately releasing or leaving loose a few delicate pieces around your face. These face-framing sections break up the severity of a fully slicked style while maintaining the polished effect of the ponytail itself. It’s the perfect balance between intentional styling and undone, effortless beauty.
Why Face-Framing Pieces Change Everything
Even the sleekest ponytail feels less severe when a few soft pieces frame your face and emphasize your features. This variation works beautifully if you’re concerned that full slickness might be too harsh for your face shape, or if you simply prefer a touch of softness against your skin. The pieces draw attention to your eyes and cheekbones while keeping the bulk of your hair controlled and polished.
Creating Intentional Face-Framing
- Gather your ponytail as usual, but before securing the elastic, release two small sections at your temples
- Take these sections down to your cheekbones, leaving them loose and slightly away from your face
- You can curl these pieces, leave them straight, or create soft waves for different effects
- Secure your main ponytail beneath these loose pieces so the framing sections sit on top, framing your face
- Use a light hairspray to set everything without making the pieces feel stiff or heavy
Insider note: If you have naturally wavy or curly hair, your face-framing pieces will naturally create movement that complements a sleek ponytail beautifully without requiring additional styling.
8. Slicked Back with Sleek Bun
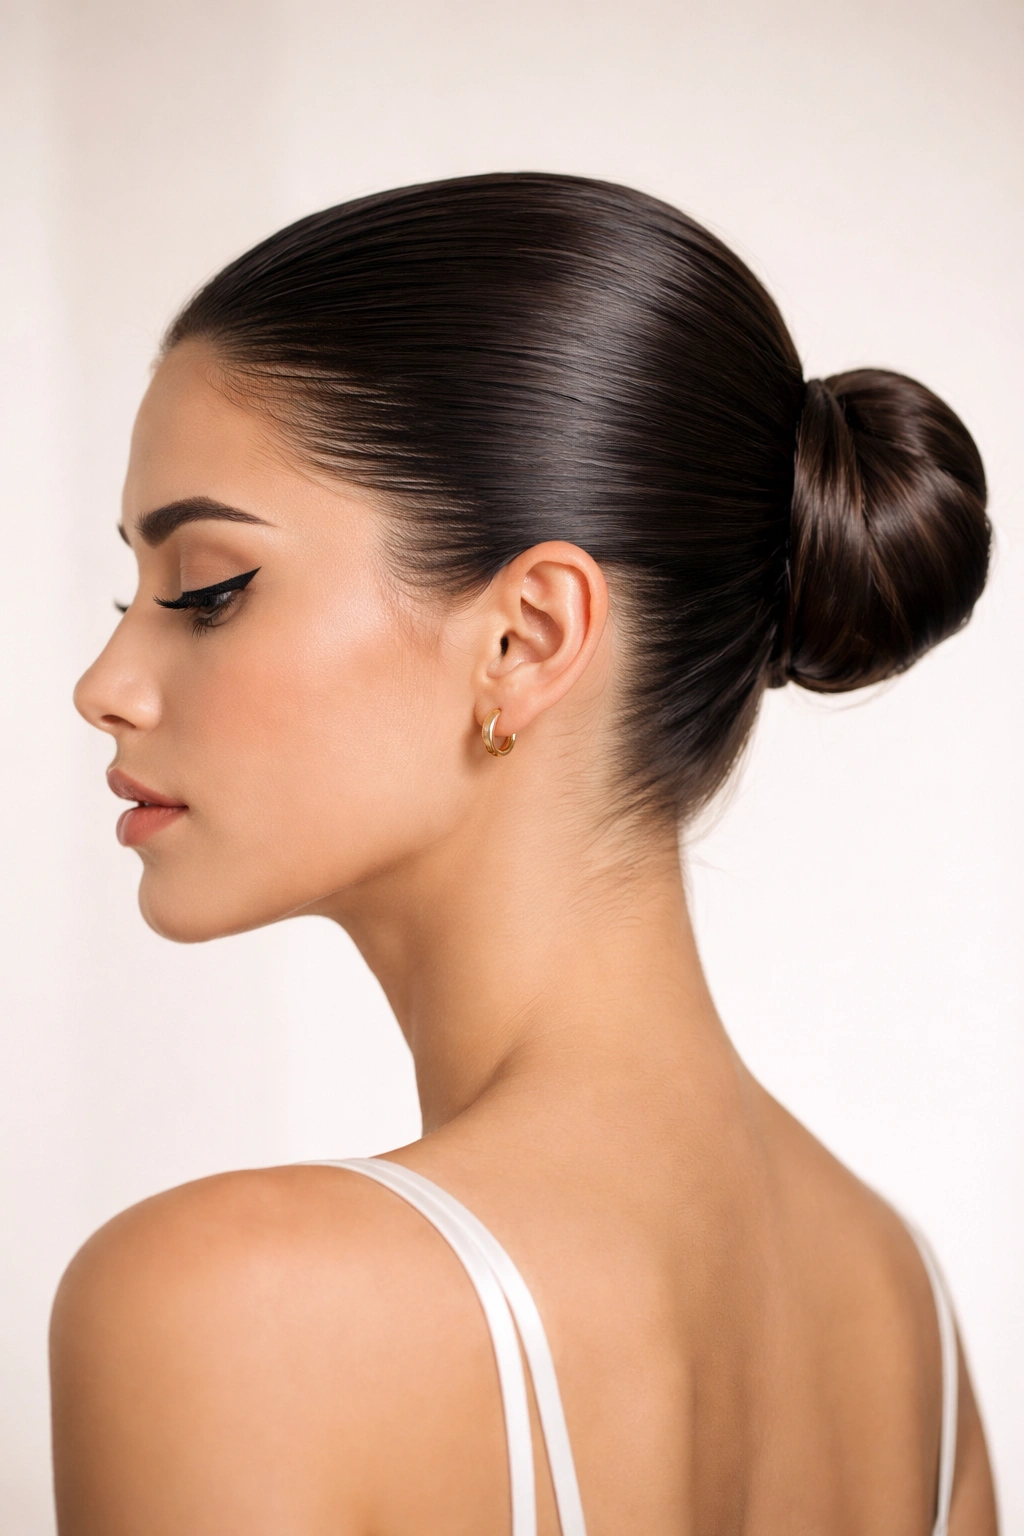
Transition your slicked ponytail into a compact bun by simply wrapping your gathered hair around the base of the elastic band. This creates a polished, streamlined silhouette that’s perfect for professional settings, formal events, or any time you want maximum control with zero flyaways. The bun variation maintains all the polish of a slicked style while eliminating the length of hair that could move or shift throughout your day.
When a Sleek Bun Becomes Your Best Choice
A slicked bun is your answer when you need complete hair control, want to showcase your face and neck, or are heading somewhere that demands absolute precision in your appearance. Unlike messier bun styles, a sleek version conveys professionalism, intentionality, and polish. This is the style you wear for job interviews, important meetings, or any occasion where you want zero distractions from your appearance.
Crafting Your Sleek Bun Base
- Start with a high or low slicked ponytail, depending on your preference and the occasion
- Tease the ponytail gently at the base to create grip and anchor your bun
- Wrap the ponytail hair around the elastic band, creating a compact circle
- Secure the wrapped ends with bobby pins tucked invisibly beneath the bun
- Smooth the entire bun with a fine-tooth comb and finish with hairspray
Worth knowing: Using a bun cage or donut under your wrapped hair creates a smoother, rounder shape that photographs beautifully and lasts longer throughout your day without collapsing.
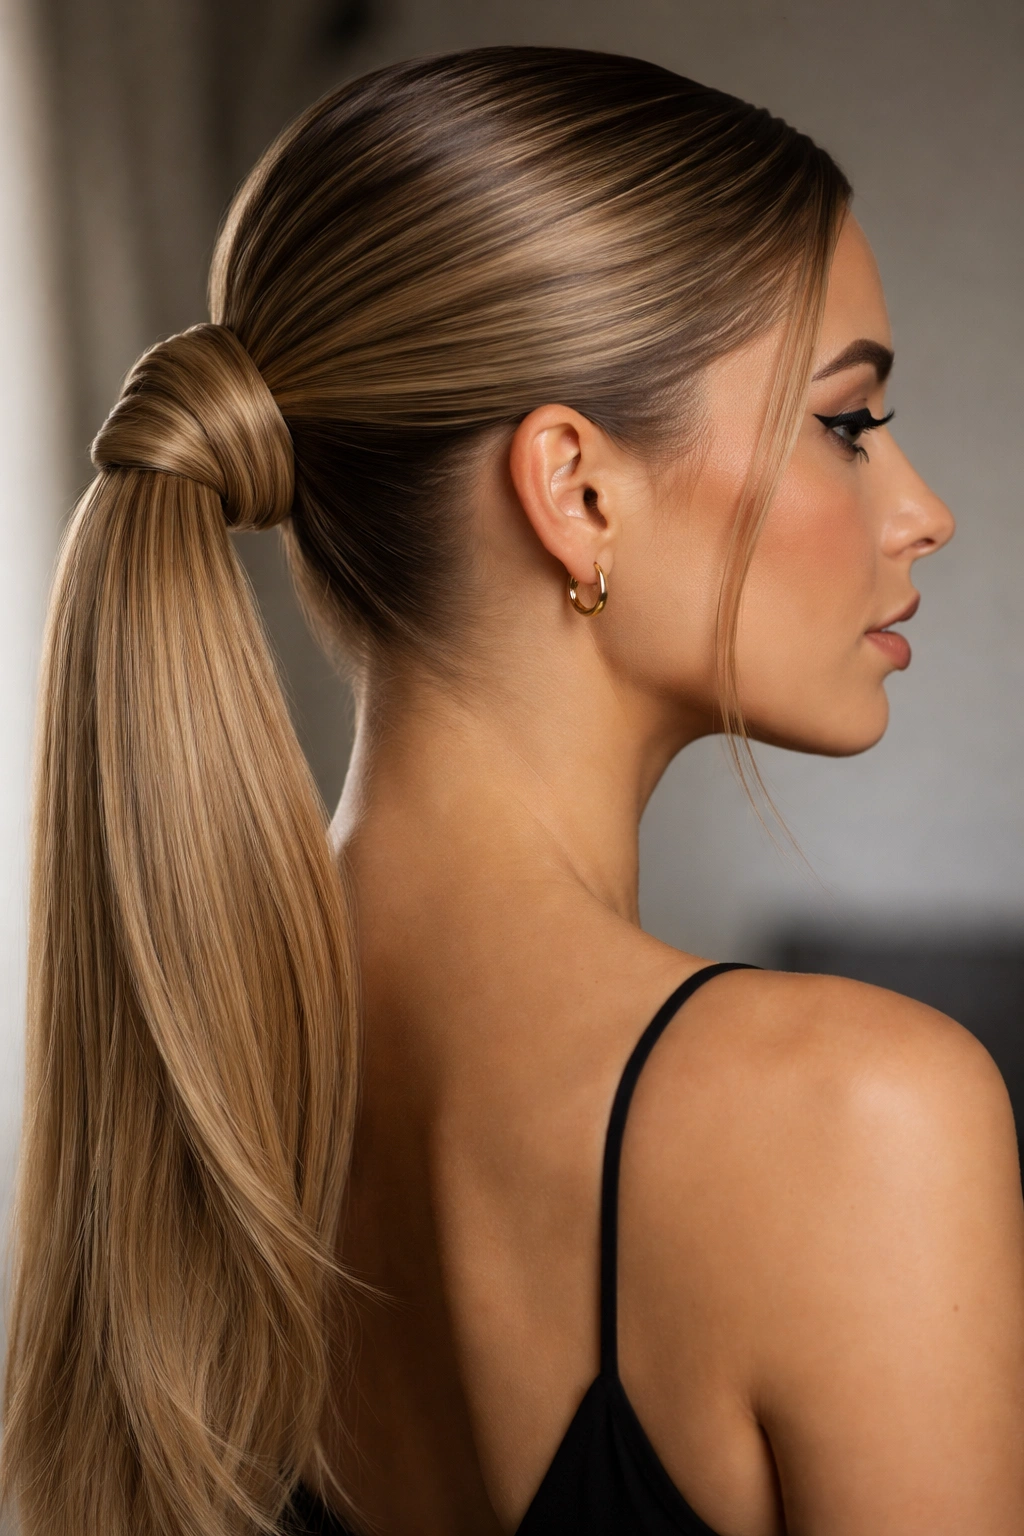
9. Slicked Pony with Twisted Wrap
Create subtle texture and visual interest by twisting a thin section of hair and wrapping it around the base of your ponytail elastic. This technique looks more intentional and styled than a simple pony while requiring only a few extra seconds of effort. The twisted wrap adds a dimensional detail that catches light and keeps your ponytail looking fresh.
Why Twists Work as Well as Braids
A twist requires zero skill to execute—it’s simply two sections of hair wrapped around each other—yet it creates an elevated appearance. The wrapped twist conceals your elastic band while adding texture and visual depth. Unlike a braid, a twist stays smooth and polished, maintaining the sleek aesthetic while adding just enough complexity to feel intentionally styled.
Executing Your Twisted Wrap
- Secure your ponytail with an elastic band at your desired height
- Take a thin section of hair from your ponytail, about the width of a pen
- Separate this section into two strands and twist them together until you reach the end
- Wrap the twisted section around the base of your elastic band, covering it completely
- Secure the twisted wrap end with a bobby pin tucked invisibly beneath your ponytail
- Smooth any loose hairs with a fine-tooth comb and hairspray
Pro tip: The tighter you twist your wrap, the more defined and intentional it appears—loose twists look more relaxed and undone, which changes the entire vibe of your style.
10. Slicked-Back Ponytail with Underlights
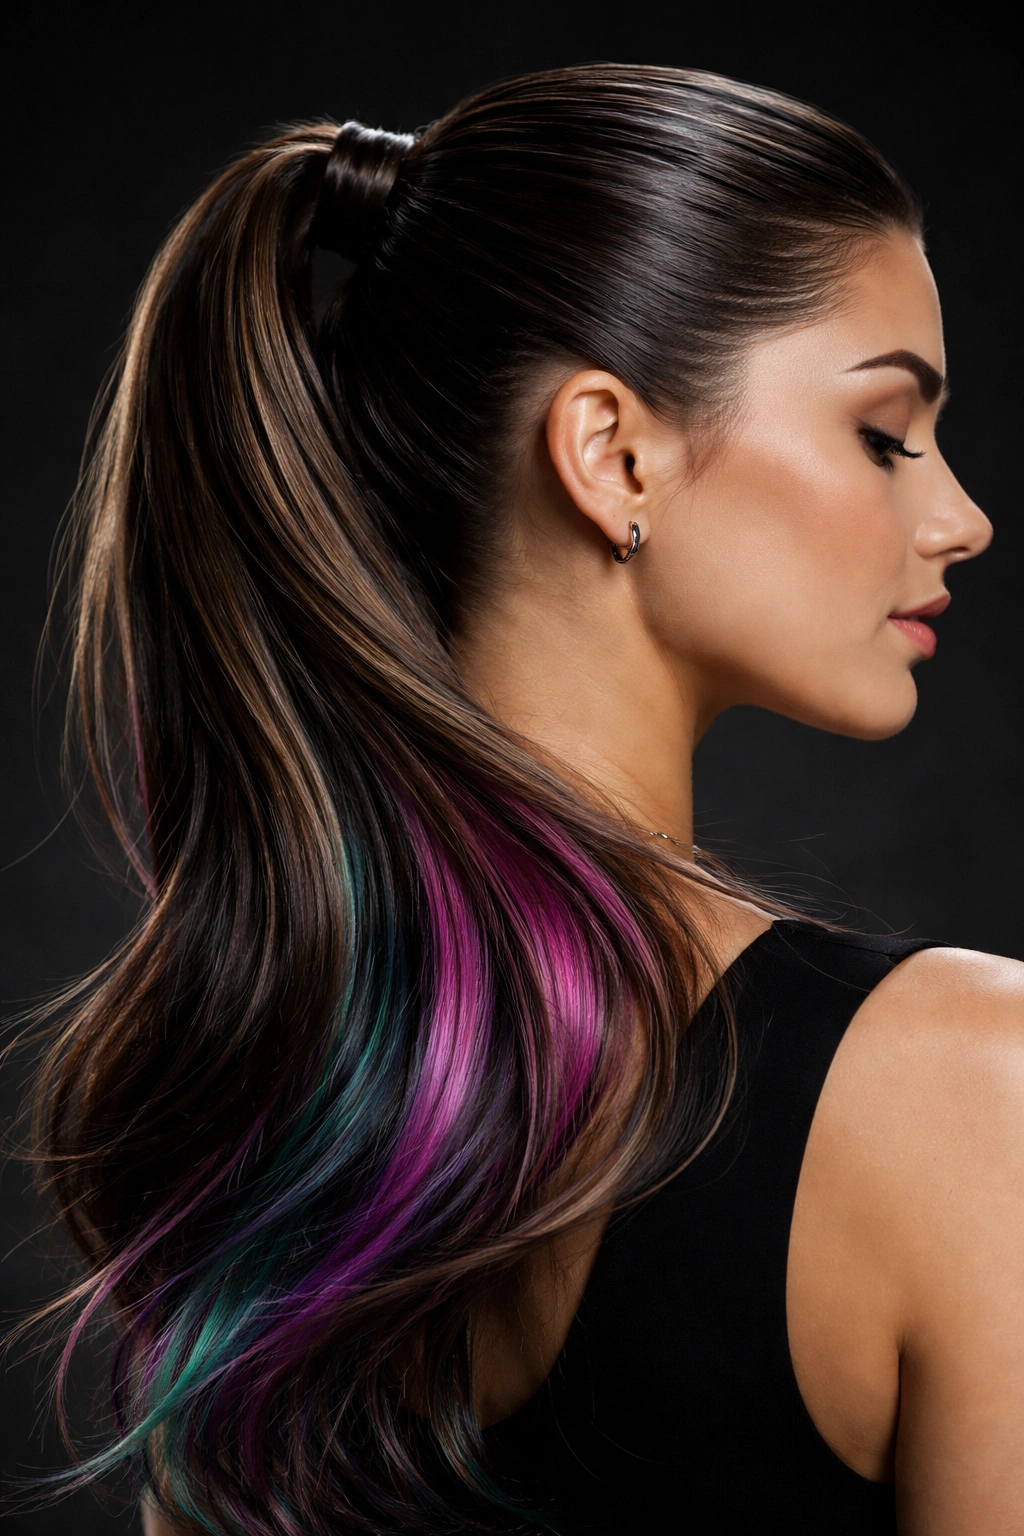
Create dimension and modern visual interest by highlighting the underside of your slicked ponytail with a contrasting color through strategic underlighting or temporary color. This technique requires more advanced styling, but the payoff is a style that looks completely different when your hair moves versus when it’s still. Underlights transform your ponytail into a statement piece.
The Impact of Hidden Color Details
When executed well, underlighting creates an element of surprise and intrigue—people only notice the color when your ponytail shifts or when you turn your head. This technique works beautifully with both permanent and temporary color options, from vivid jewel tones to subtle metallics. The contrast against your main hair color creates the illusion of additional dimension and volume.
Placement Options for Maximum Impact
- At the very bottom: Color the last three to four inches for a peek of color that appears when your ponytail swings
- Inner layers: Highlight sections throughout the ponytail’s underside so color shows in patches as you move
- Strategic sections: Choose specific areas that frame your face when loose to create color placement that surprises
Insider note: This is genuinely a project for your stylist rather than a DIY situation—professional placement and color correction matter enormously for this technique to look intentional rather than accidental.
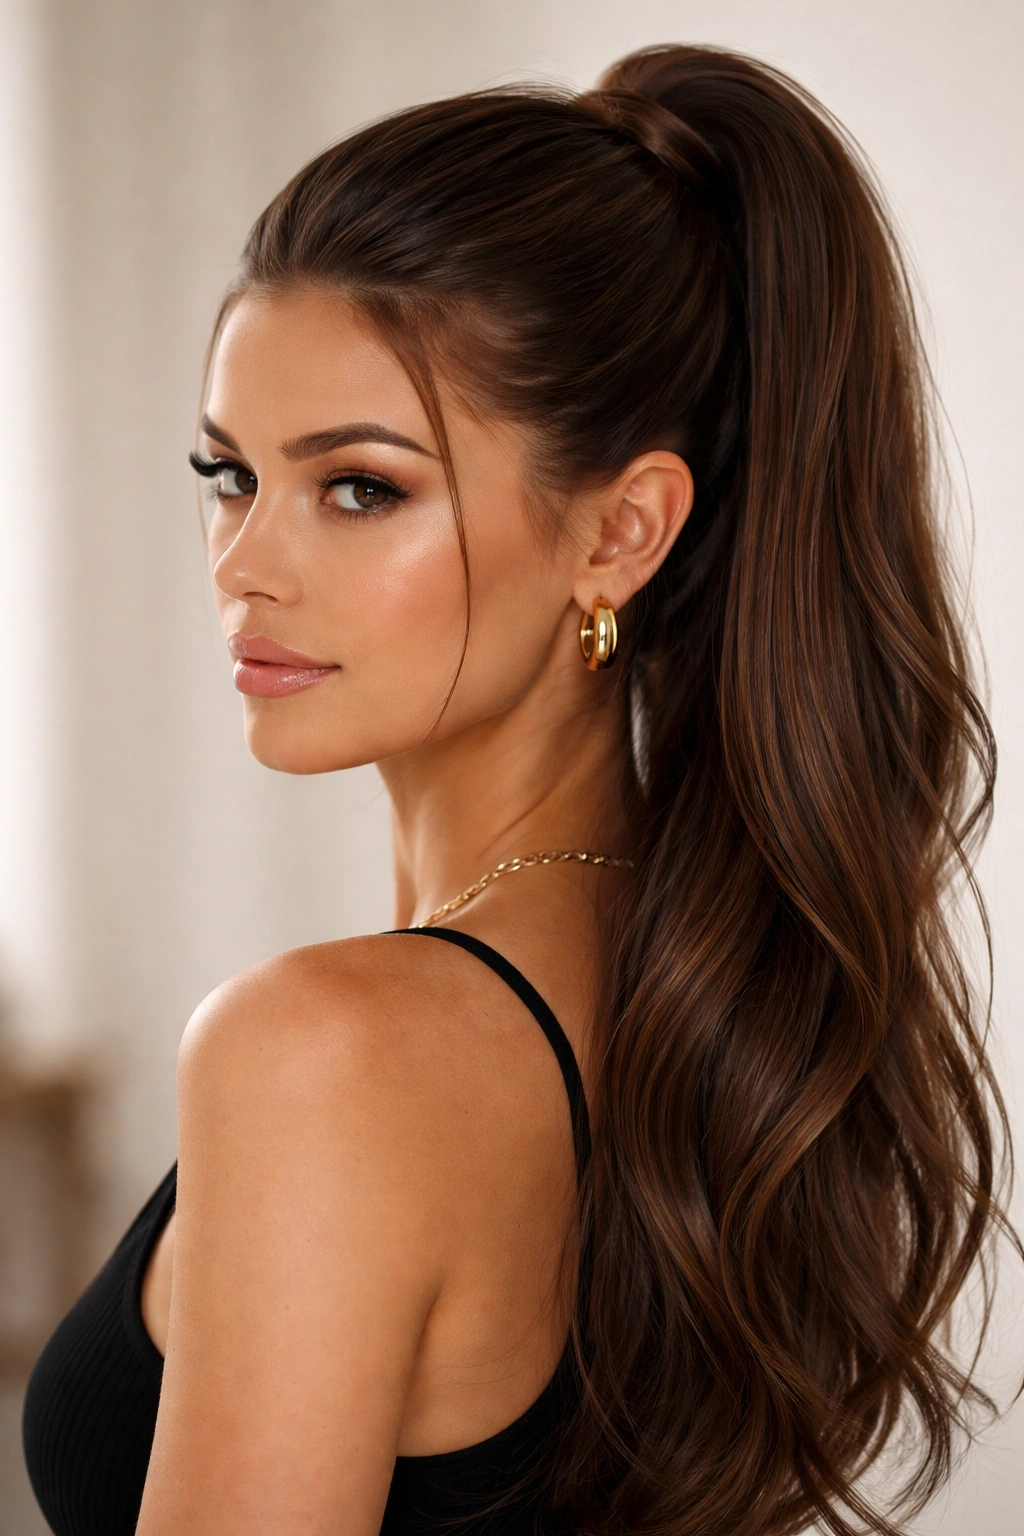
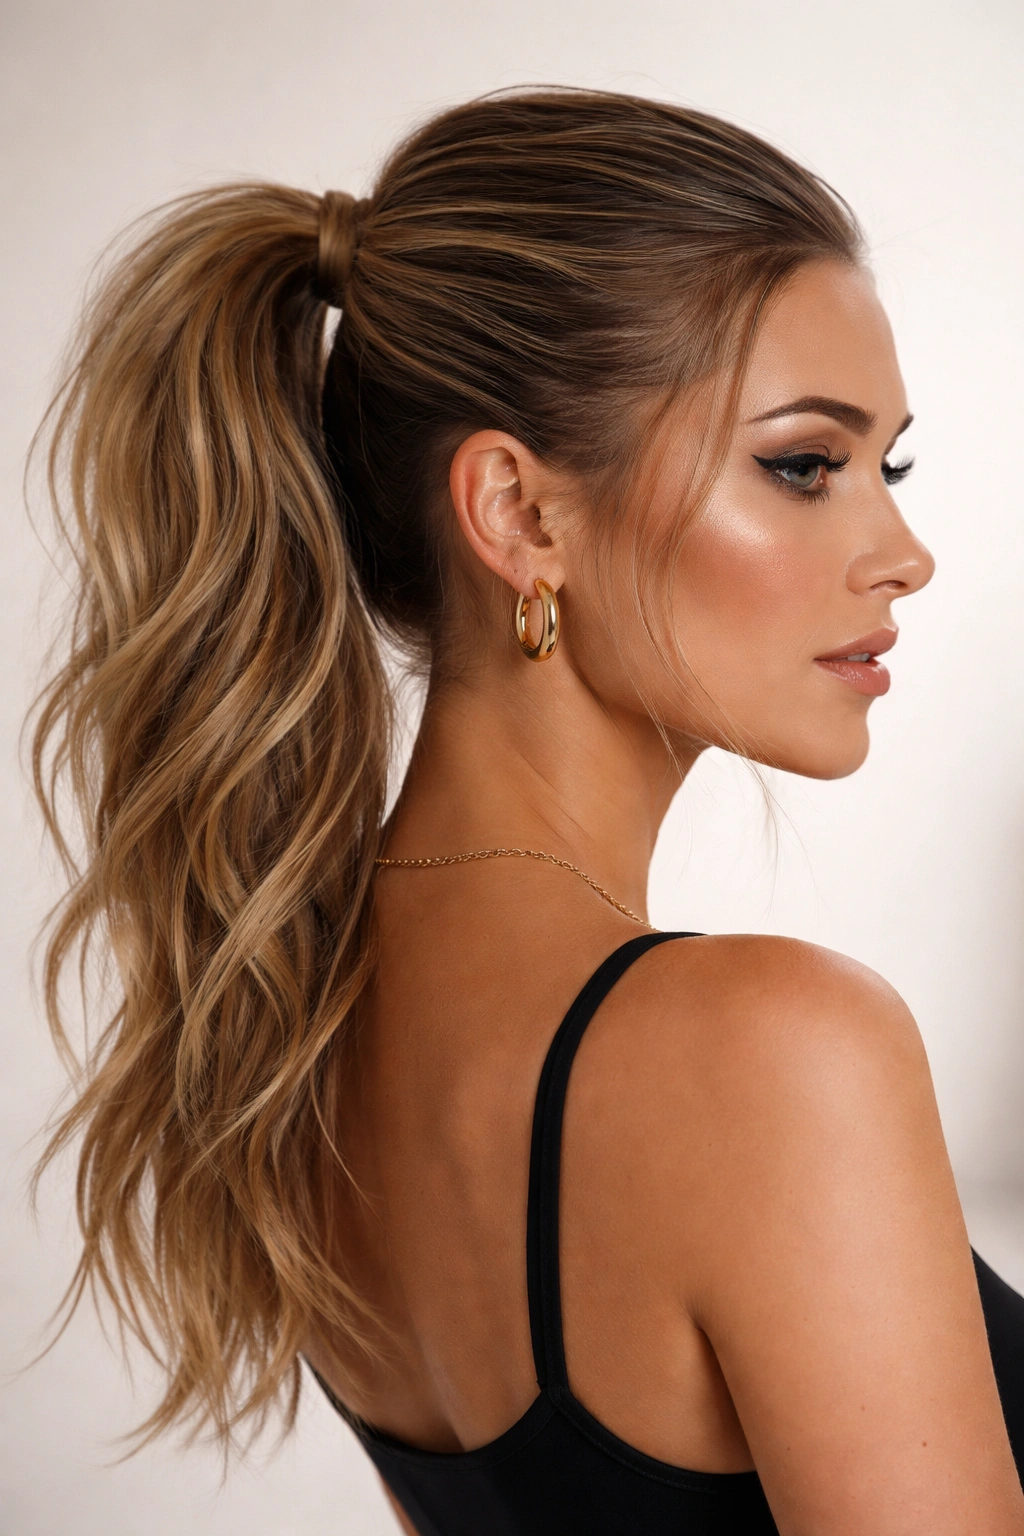
11. High Slicked Pony with Textured Ends

Combine the polish of a sleek, slicked crown with textured, wavy, or curled ponytail ends for a style that’s equal parts sophisticated and playful. This variation keeps your hairline perfectly smooth and controlled while allowing movement and personality to show through your hair length. It’s the ideal choice when you want to look put-together without feeling too severe.
Balancing Sleekness with Texture
The contrast between a smooth crown and textured ends creates visual interest and prevents your entire appearance from reading as austere. This combination works beautifully for casual outings, dates, or any situation where you want to show personality while maintaining professional polish. The textured ends also move and catch light in ways that draw attention to the length and health of your hair.
Creating Your Textured End Detail
- Gather a high slicked ponytail using your preferred smoothing products, making sure your hairline is completely smooth
- Secure with an elastic band at the crown
- Using a curling iron or wand, create waves or curls starting about three inches from the end of your ponytail
- Work in sections, alternating the direction of your waves for natural, movement-friendly texture
- Separate your waves gently with your fingers rather than brushing them out
- Lock everything in place with hairspray designed for curls rather than sleekness
Pro tip: Applying a heat protectant serum to your ponytail before curling protects your hair health and makes your waves last significantly longer throughout the day.
12. Slicked Ponytail with Ribbon or String Detail

Weave a delicate ribbon, metallic string, or decorative thread through your slicked ponytail for a whimsical, fashion-forward detail that reads as intentionally artistic. This technique works especially well with metallic ribbons or ribbons that contrast with your hair color. The detail adds visual interest without requiring complex technical skills.
Making Ribbon Details Look Intentional
A ribbon woven through your ponytail immediately signals that you’ve created a look rather than simply gathered your hair. This variation works beautifully for festivals, creative events, or any time you want to express artistic personality. The ribbon catches light and moves with your hair, creating visual dimension throughout your ponytail length.
Simple Ribbon Weaving Techniques
- Secure your ponytail with an elastic band at your preferred height
- Take your ribbon and tie it around the elastic at the base of your ponytail
- Weave the ribbon through sections of your ponytail in a spiral pattern, creating loops or twists as you work down the length
- Secure the ribbon end by wrapping it around the elastic and knotting it, or tying it at the very bottom
- Adjust the loops and twists so they sit evenly and feel intentional rather than haphazard
Worth knowing: Using a ribbon that’s slightly narrower than your pinky finger keeps the look refined rather than costume-like, and doubling up thin ribbons creates more impact than one thick ribbon.
13. Low Slicked Pony with Sleek Waves
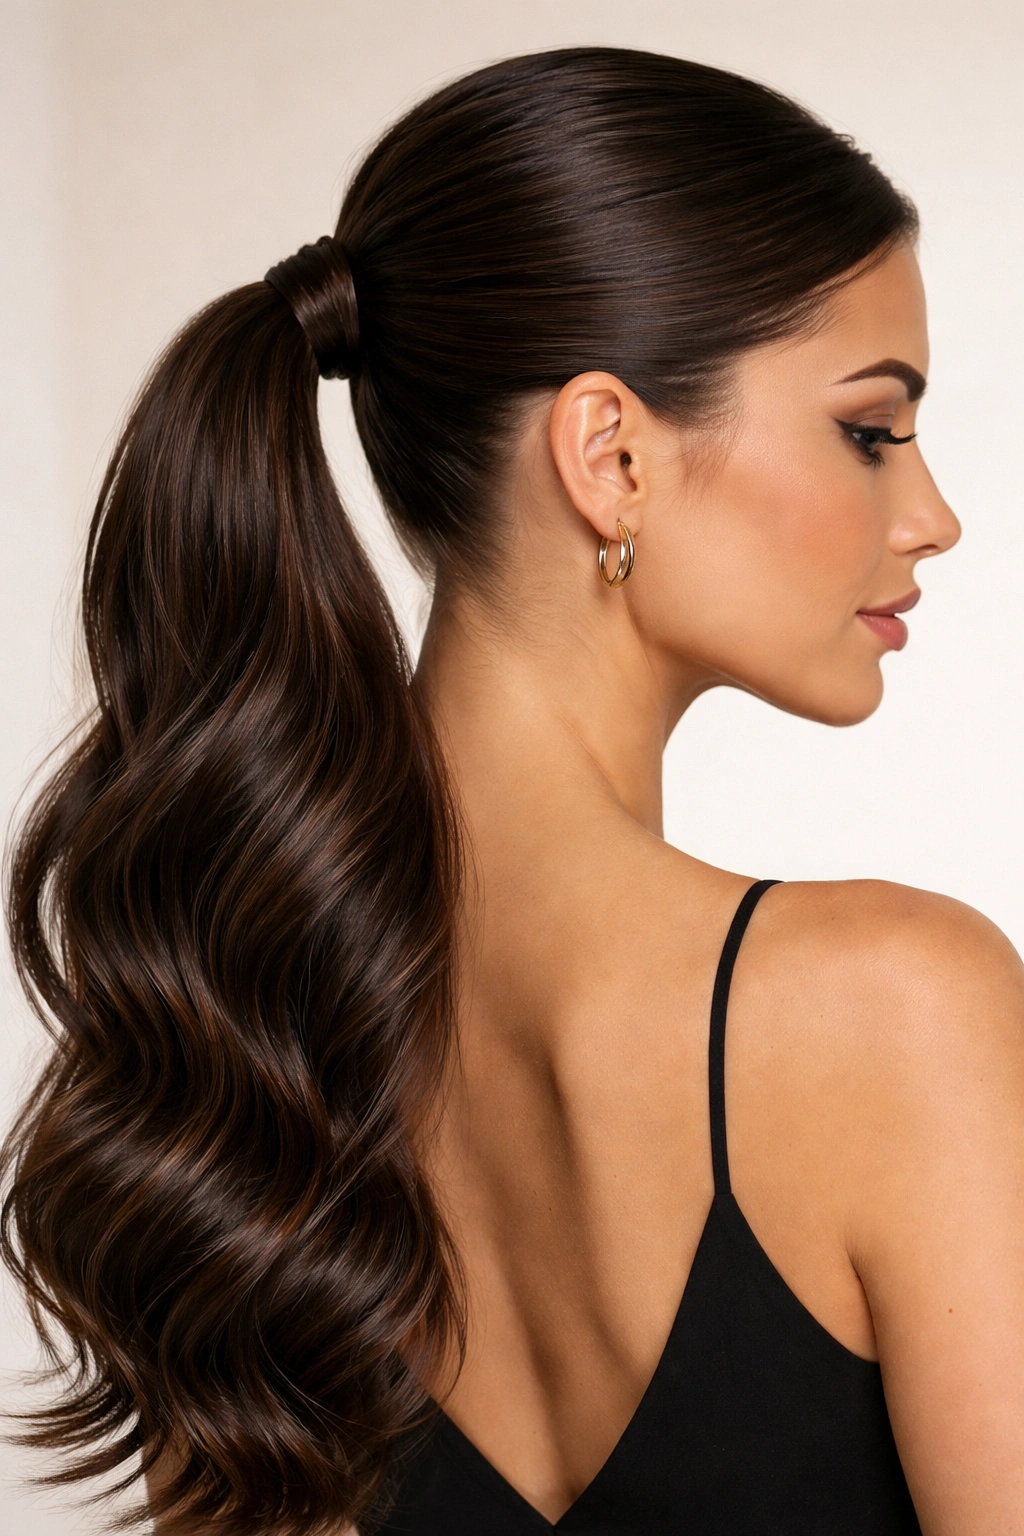
Create flowing waves throughout your slicked ponytail while maintaining the polished smoothness of your hairline and crown. This variation gives you movement and softness while keeping your face fully visible and your ponytail looking intentionally styled. It’s the perfect hybrid when you want elegance without severity.
Why Waves Transform Sleek Ponytails
Adding waves to a slicked ponytail instantly elevates the style from athletic to evening-appropriate while maintaining all the polish and professionalism of the sleek element. The waves create the illusion of fuller, thicker hair while the smooth crown keeps everything looking refined. This is the look you create when you want to transition seamlessly from office to dinner without completely redoing your hair.
Building Your Sleek Waves Foundation
- Create a perfectly smooth, slicked low ponytail using smoothing serum and gel
- Secure with an elastic band at the nape of your neck
- Allow your ponytail hair to air dry slightly or use a blow dryer to dry it completely
- Using a one-and-a-half-inch curling iron, create loose waves starting at the base of your ponytail
- Work in sections, curling away from your face in alternating directions for natural movement
- Once all waves are curled, allow them to cool completely before touching or separating them
- Gently separate the waves with your fingers and finish with a light hairspray
Pro tip: Using a lightweight texturizing spray before you curl makes your waves hold longer and prevents them from dropping throughout your day, especially if you have fine or straight hair.
14. Slicked-Back Crown Braid into Ponytail
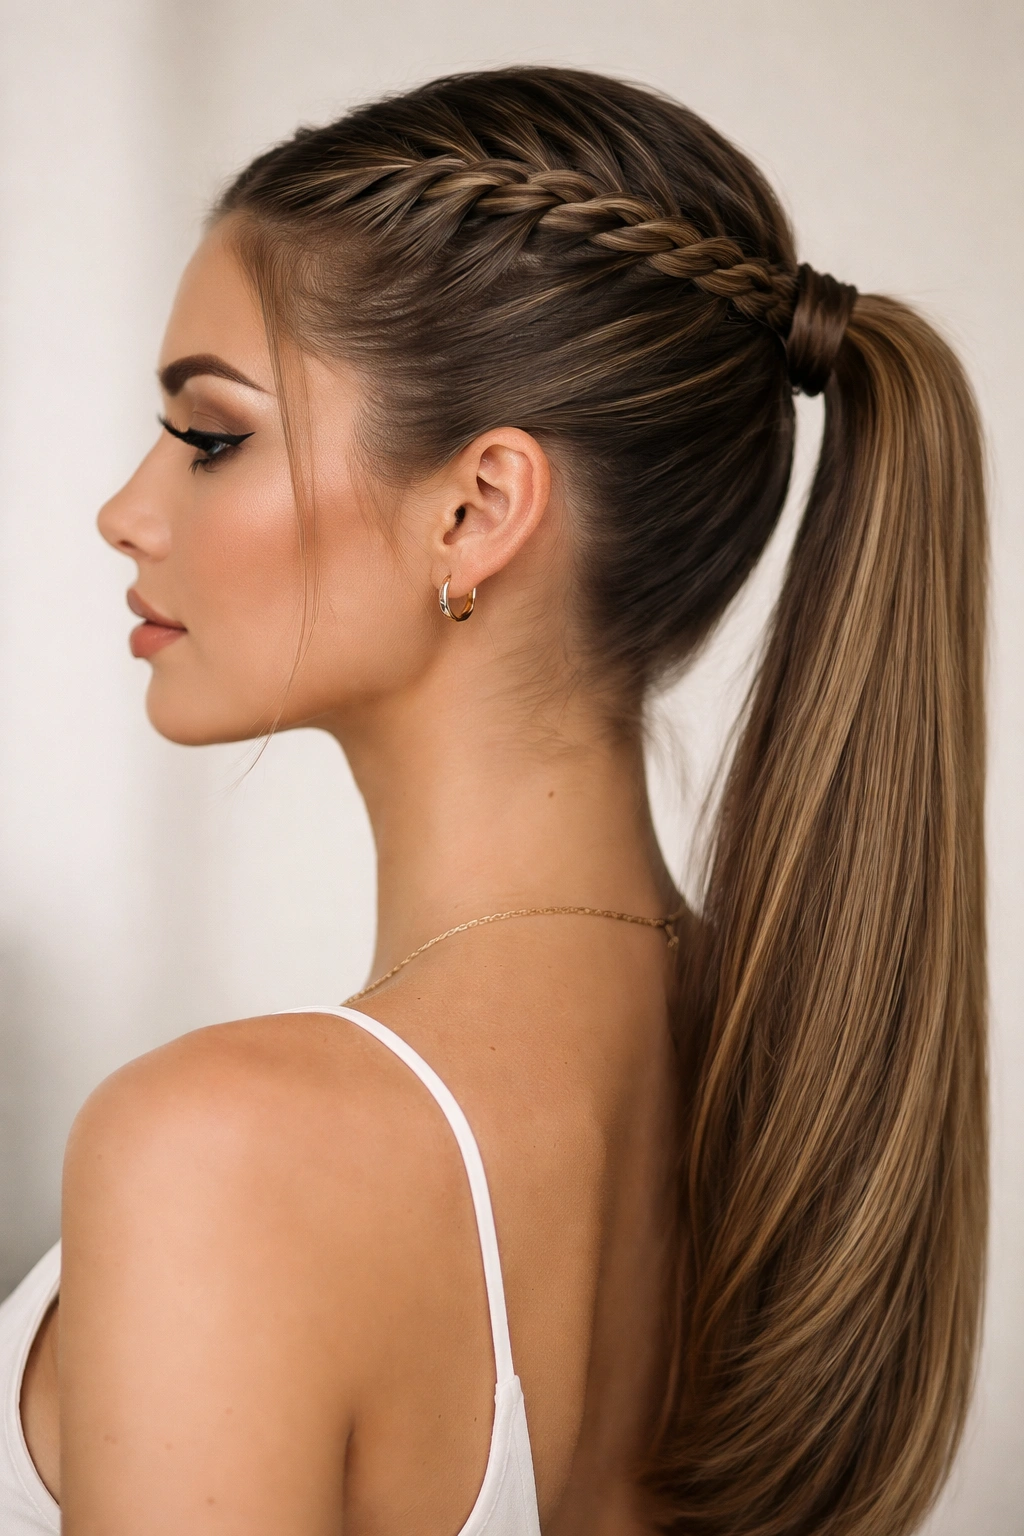
Start with a sleek braid that runs from your crown to the nape of your neck, then transition into a gathered ponytail at the base. This technique creates a polished, dimensional look that feels far more intentional than a simple pony. It works for everything from casual days to formal events, depending on your braid thickness and finish.
The Elegance of Braided Foundations
Beginning your ponytail with a braid automatically elevates the entire style into more intentional territory. The braid frames your hairline and creates visual interest at the crown while the gathered ponytail maintains sleekness and polish. This variation works beautifully if you want to show off the skill involved in your styling without creating a chaotic or overly complicated appearance.
Creating Your Crown-to-Pony Transition
- Apply smoothing serum to damp or clean hair and work it through thoroughly
- Starting at your widow’s peak, begin a three-strand braid, pulling it straight back toward the nape
- Keep the braid close to your scalp, taking thin sections as you braid for a polished, not-too-chunky appearance
- Once you reach your nape and can’t braid anymore, gather your remaining loose hair and your braid end together
- Secure everything with an elastic band, creating a low ponytail
- Wrap a thin section around the elastic to hide it
- Smooth any flyaways and finish with hairspray
Insider note: French braiding (pulling hair into the braid as you go rather than using only existing sections) creates more texture and visual interest than a standard three-strand braid.
15. Slicked Ponytail with Geometric Accessory
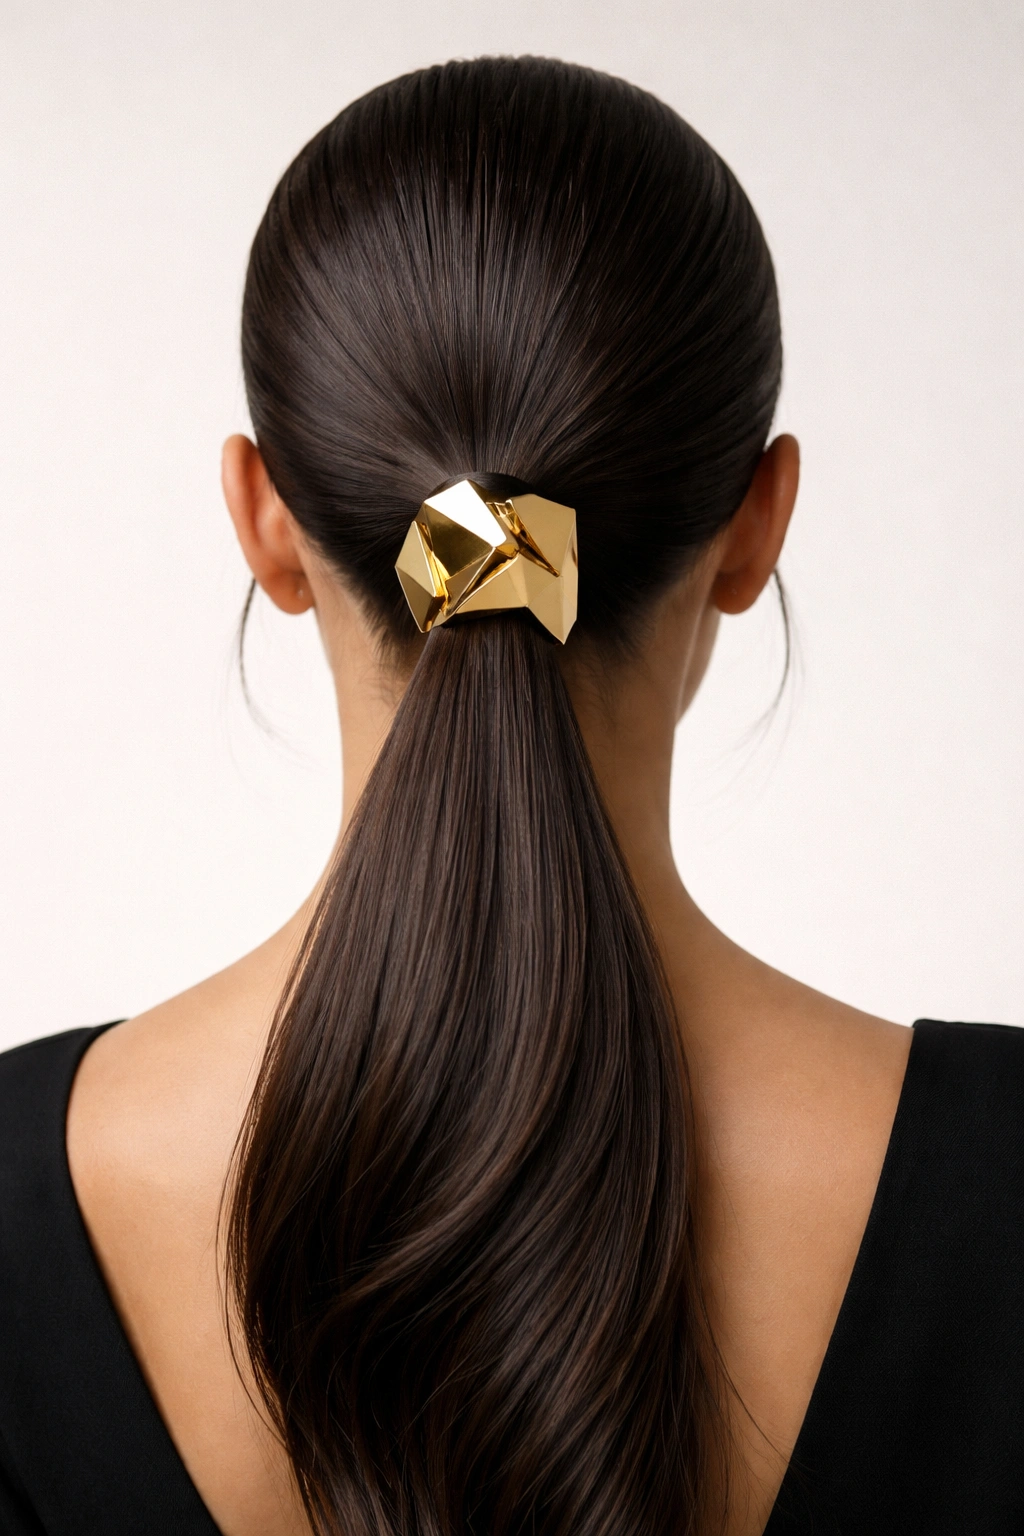
Anchor your slicked ponytail at the elastic band with a sculptural, geometric clip or cuff that makes a bold design statement. Modern geometric accessories instantly elevate a basic ponytail into something with attitude and intentionality. The right piece transforms your entire look while requiring zero additional styling time.
Using Accessories as Design Statements
A well-chosen geometric piece brings contemporary style to a timeless slicked pony, creating visual interest without adding complexity. Minimalist metallic cuffs work across casual and professional settings, while bolder sculptural pieces suit creative environments and fashion-forward occasions. The accessory becomes the focal point, drawing attention to your styling intention.
Placement for Maximum Impact
- Directly at the elastic: Position your geometric piece right where your elastic sits for seamless integration
- Slightly below the elastic: Moving it an inch down creates a more intentional, deliberately styled appearance
- Offset placement: Positioning it to one side creates an asymmetrical, fashion-forward vibe
Worth knowing: Choosing accessories that match your skin tone or hair color creates a cohesive, refined appearance, while contrasting pieces feel bolder and more statement-making.
16. Slicked Pony with Piece-y, Undone Texture
Create apparent texture and movement throughout your slicked ponytail by lightly teasing and separating sections, giving the impression of intentional imperfection. This variation balances the control of a slicked style with the approachability of undone texture—it’s sophisticated without feeling stuffy. It’s perfect for creative professionals or anyone who wants to look polished while maintaining personality.
The Appeal of Intentional Imperfection
Textured ponytails read as more modern and relatable than severely sleek versions, yet they maintain the polish and control of slicked styling. The technique makes your hair appear fuller while keeping everything off your face. This look says you’ve put thought into your appearance without taking yourself too seriously.
Building Intentional Texture
- Create a slicked ponytail using your preferred smoothing products
- Once secured, gently tease small sections of the ponytail with a fine-tooth comb or teasing brush
- Separate and fluff these teased sections with your fingers rather than brushing them smooth
- Work throughout your ponytail, creating varied levels of texture—some sections smoother, others more textured
- Use a light texturizing spray or dry texture spray to enhance and hold the separation
- Avoid brushing or smoothing everything back out—the point is intentional imperfection
Pro tip: This style works especially well on day-two or day-three hair, which has slightly more texture and grip than freshly washed hair, making your textured sections hold longer.
17. Slicked-Back Ponytail with Glossy Finish
Emphasize shine and polish by using ultra-glossy products throughout your slicked ponytail—serums, shine sprays, and reflective products that catch light beautifully. A glossy finish makes your hair appear healthier, shinier, and more luxurious while maintaining the controlled aesthetic of a slicked style. This is the version you wear when you want to emphasize the quality and health of your hair.
The Power of Strategic Shine
Glossy finishes reflect light in ways that create visual dimension and make hair appear thicker and shinier. Combining multiple light-reflecting products creates a multidimensional shine that reads as high-maintenance in the best possible way. This version works beautifully for date nights, professional presentations, or any time you want to emphasize your hair’s quality and health.
Creating Maximum Gloss
- Use a smoothing serum as your base, working it through damp hair for even distribution
- Apply your gel smoothly, choosing a formula with subtle shine rather than matte finish
- Once your ponytail is secured, use a shine spray designed for glossy finishes
- Add a few drops of lightweight hair oil to the very ends of your ponytail for extra luminosity
- Use a flat iron or smoothing paddle brush to smooth everything once more, which enhances shine
- Finish with a shine-enhancing hairspray rather than a matte hold formula
Insider note: Photographing yourself in natural light rather than artificial light shows off glossy finishes far better—glossy styles photograph beautifully in daylight.
18. High Slicked Pony with Voluminous Crown
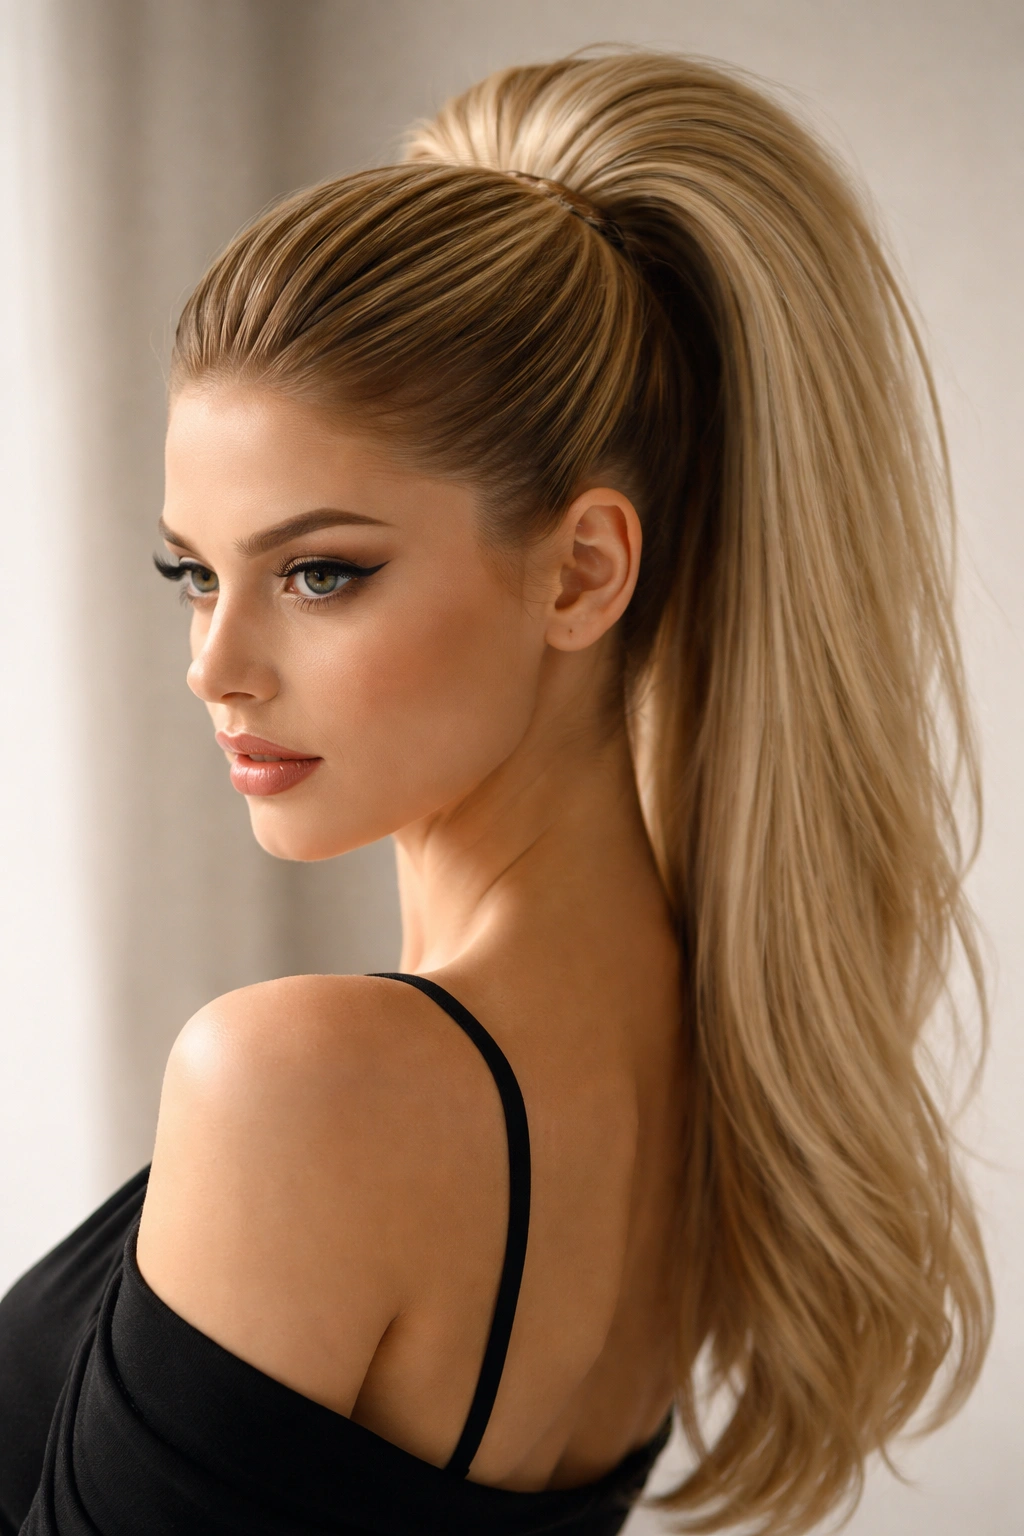
Build volume at the crown using teasing or a volumizing powder while keeping the rest of your ponytail sleek and smooth. This technique creates the illusion of thicker hair and adds height to your silhouette while maintaining the control and polish of a slicked style. It’s perfect if you want presence and drama without severity.
Creating Intentional Volume Contrast
A voluminous crown paired with a sleek ponytail creates visual interest and draws attention to the top of your head and face. This variation works beautifully for photographs and makes your hair appear significantly fuller than it may be. The volume at the crown combined with smooth sides creates a flattering silhouette that elongates your neck and face.
Building Your Volumized Crown
- Apply volumizing spray or mousse to damp roots, focusing on your crown area
- Blow-dry your hair, roughing up your crown area with your fingers as you dry to create texture and lift
- Once dry, gently tease the crown area with a fine-tooth comb or teasing brush, creating a cushion of texture
- Smooth the top layer gently so you maintain volume beneath without visible teasing
- Smooth all hair back into a high ponytail, keeping the volume intact at the crown
- The gathered hair will sit slightly away from your head due to the volume beneath
- Secure with an elastic band and finish with hairspray
Worth knowing: This style works best on second or third-day hair—freshly washed hair lacks the grip necessary to hold crown volume when pulled back.
19. Slicked Low Pony with Zigzag Part
Add an unexpected detail by creating a zigzag or diagonal part before pulling your hair back into a slicked ponytail. This geometric line adds visual interest and architectural precision to your styling while maintaining full polish. The distinctive part makes your style feel intentionally fashionable rather than simply functional.
Making Geometric Details Feel Intentional
A zigzag or diagonal part transforms the entire attitude of your ponytail from basic to statement-making. These geometric lines show in photographs beautifully and create a contemporary, fashion-forward vibe. The distinctive parting adds detail without requiring additional styling complexity—it’s one intentional choice that changes everything.
Creating Your Geometric Part
- Start with clean or slightly damp hair
- Using a rattail comb or the tip of your styling brush, create a sharp zigzag pattern from your hairline to your crown
- The zigzag should be dramatic enough to be visible—tiny zigzags won’t create the visual impact you want
- Apply smoothing serum to your hands and smooth each side of the part separately
- Gather everything into your slicked ponytail, maintaining the definition of your part as you go
- Use hairspray to set the part definition so it stays crisp throughout your day
- Smooth the rest of your hair into your gathered ponytail using your preferred smoothing products
Pro tip: Creating your zigzag part in clean, damp hair and allowing it to set as your hair dries maintains the definition much better than trying to create it in dry hair.
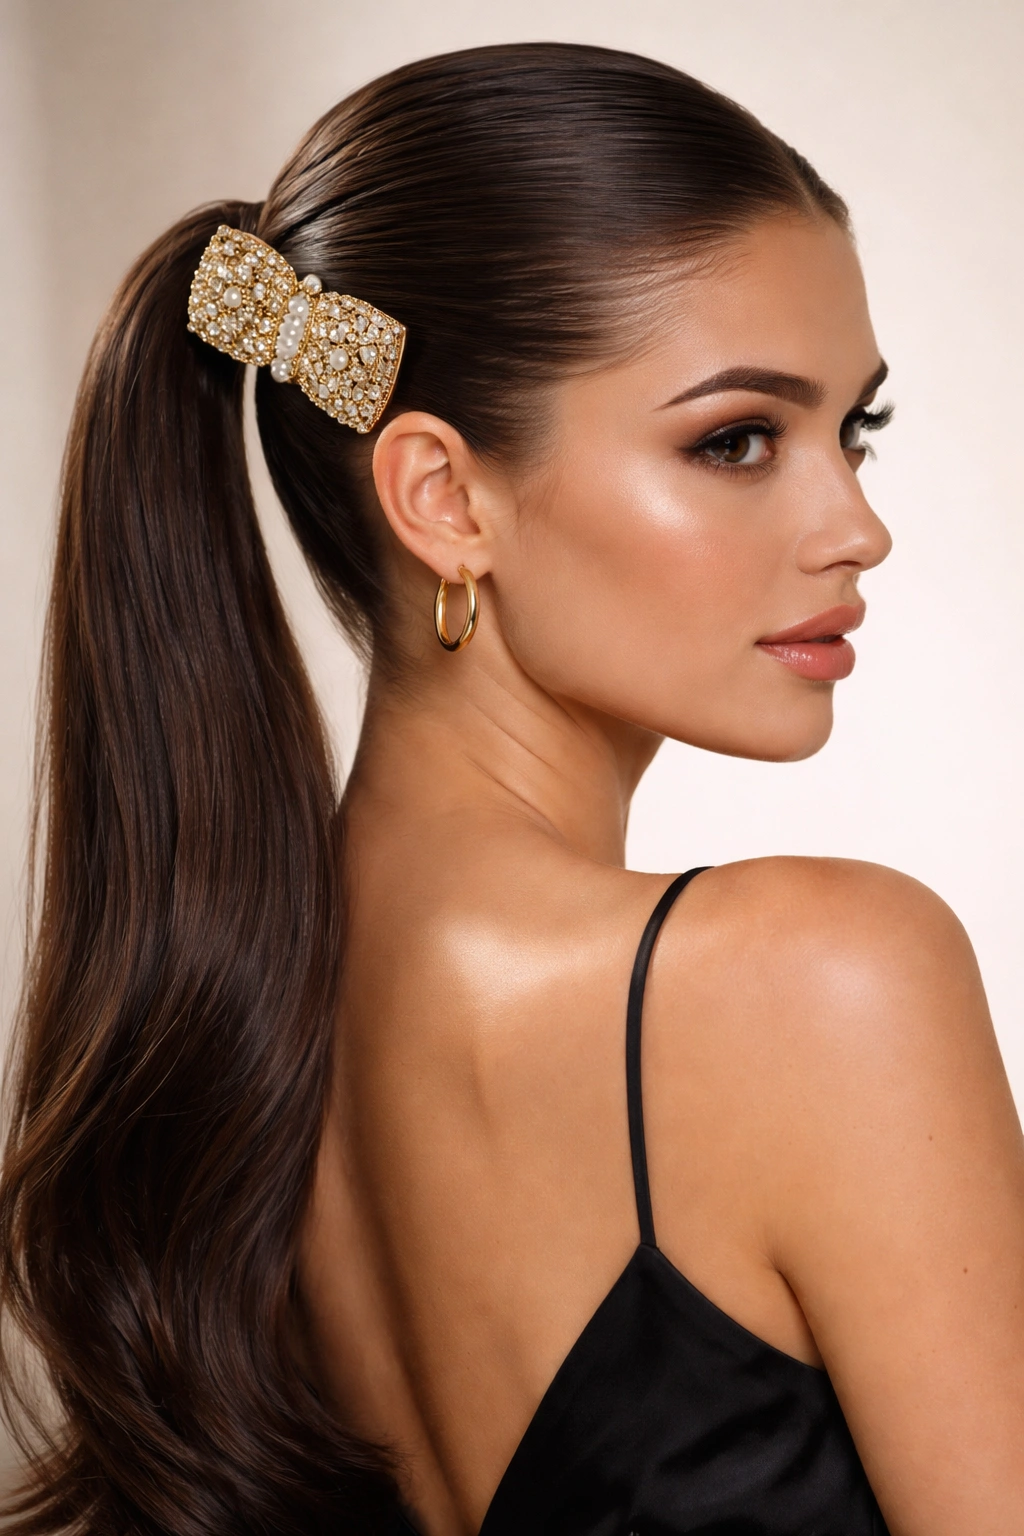
20. Slicked Ponytail with Pearl or Metallic Embellishments
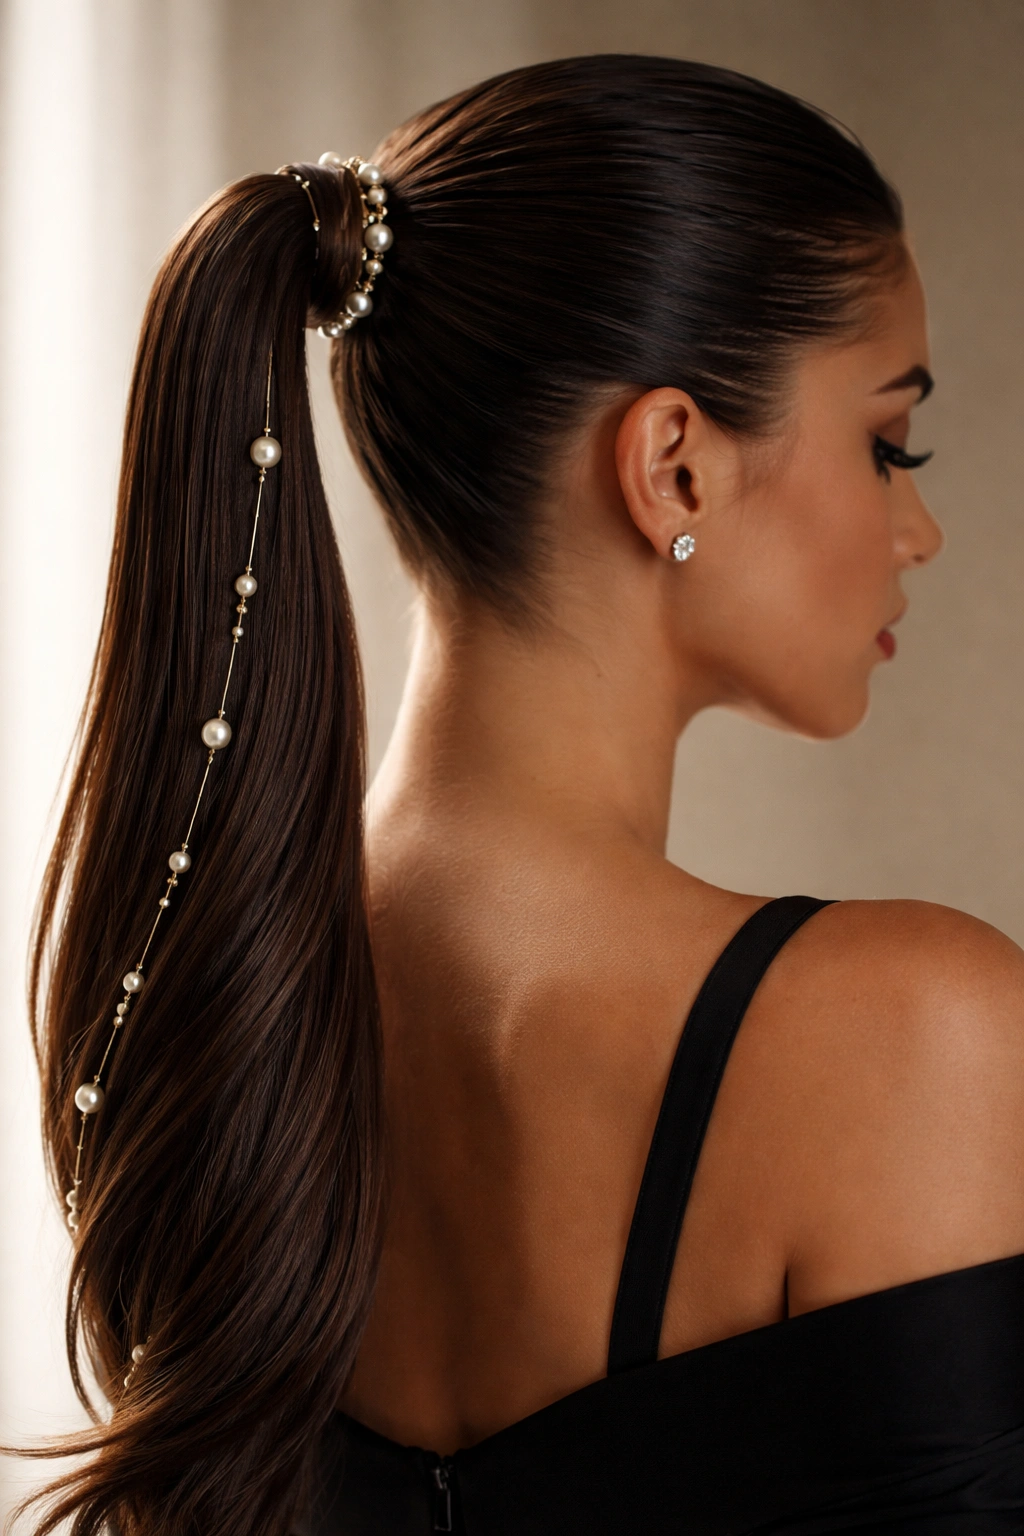
Add luxury and visual interest by incorporating pearl clips, metallic bobby pins, or beaded elastic bands throughout your slicked ponytail. These small embellishments catch light and create the impression of intentional, curated styling. They work beautifully for evening events while remaining subtle enough for daytime wear.
Elevating Simple Styles with Accessories
Small, luxe embellishments transform a basic ponytail into something that feels special and intentionally styled. Pearl details read as classic and elegant, while metallics feel contemporary and modern. The key is using pieces small enough to feel refined rather than costume-like. Strategic placement creates visual interest without overwhelming your appearance.
Placement Options for Embellished Ponytails
- Pearl bobby pins: Position several pearl bobby pins around your elasticband or scattered throughout your ponytail for subtle sparkle
- Beaded elastic bands: Replace your standard elastic with a pearl or metallic version for continuous shimmer
- Clustered clips: Group several small metallic clips at your elastic band for intentional, jeweled details
- Throughout the length: Space small sparkly bobby pins throughout your ponytail for movement-catching details
Insider note: Mixing metallic finishes (rose gold, yellow gold, silver) creates a luxurious, intentional appearance rather than appearing costume-like.
21. Slicked-Back Ponytail with Color-Blocked Sections
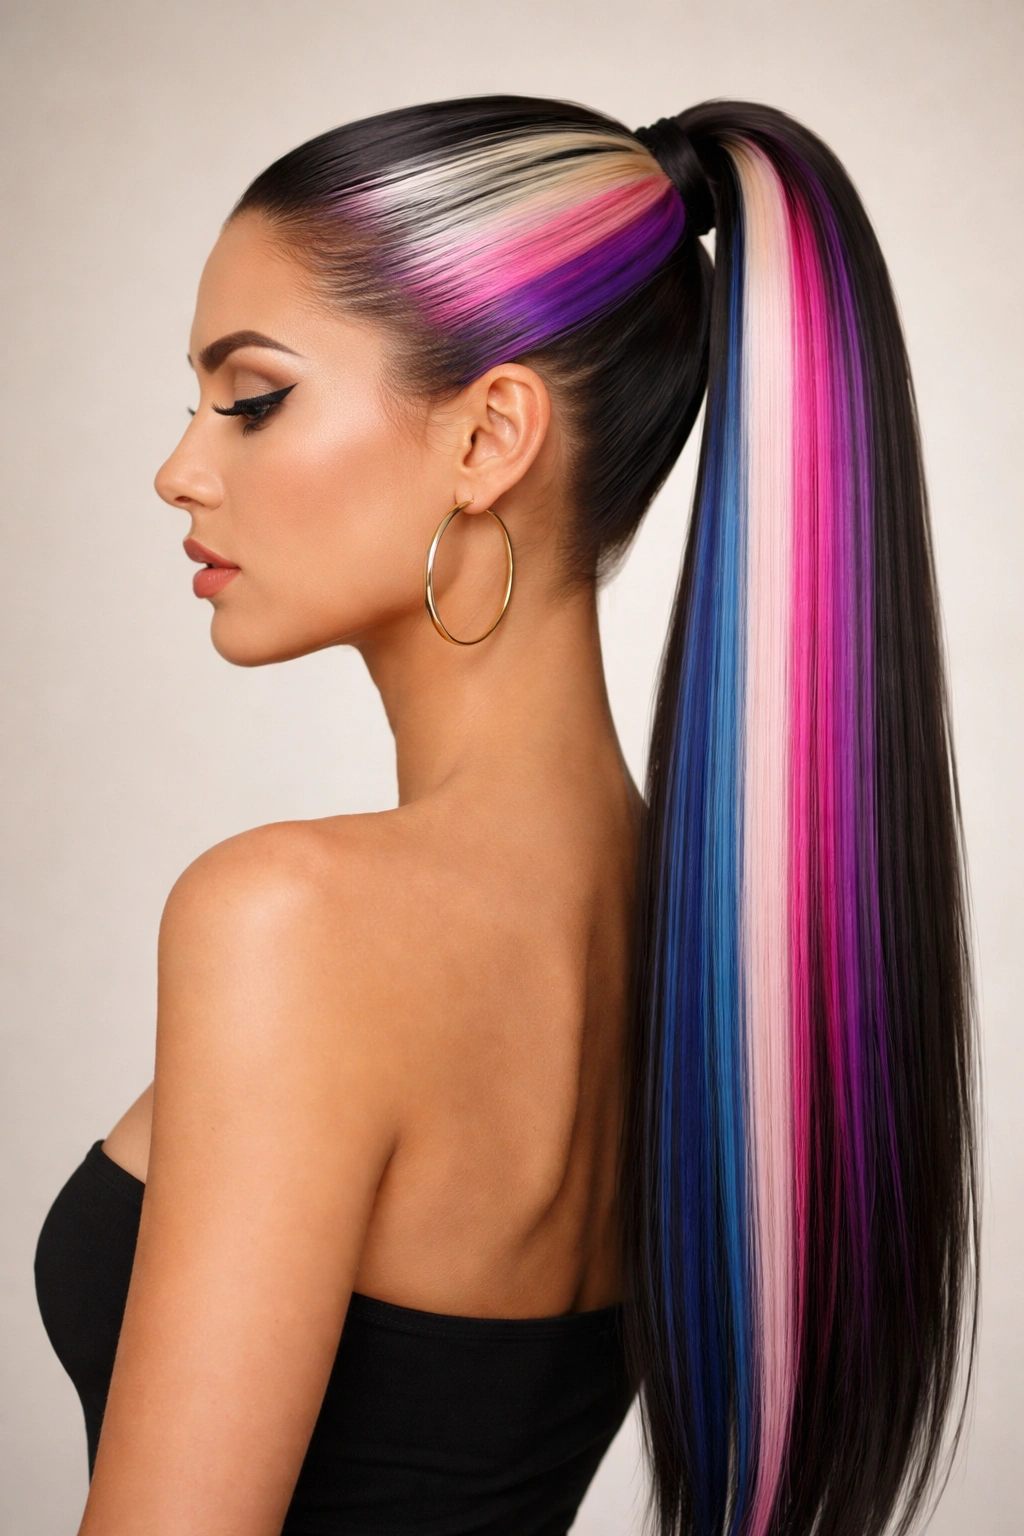
Create visual drama by incorporating sections of contrasting color through color tape-ins, extensions, or two-tone coloring that creates blocks of distinct hues throughout your ponytail. This technique works beautifully for creative professionals or anyone wanting to make a bold statement. The slicked styling keeps the bold colors looking intentional rather than chaotic.
Using Color as a Design Element
Strategic color placement transforms your ponytail into a work of art while the sleek styling maintains sophistication and control. Color blocks read as deliberate and artistic—this isn’t accidental color, it’s a statement. The slicked styling prevents the colors from feeling wild or overwhelming, maintaining polish even with bold hues.
Simple Color-Blocking Techniques
- Two-tone ends: Keep your natural color sleek and smooth while the final inches are a contrasting bold color
- Alternating sections: Create distinct color blocks throughout your ponytail, alternating between your natural color and a bold shade
- Hidden colors: Color only the underside or interior sections for color that shows when your ponytail moves
- Gradient blocks: Use color tape-ins that transition from one color to another for an ombré effect
Worth knowing: This is best executed by a professional colorist—attempting color blocking yourself risks visible demarcation lines and uneven tone application that looks unintentional rather than intentional.
22. Slicked Pony with Side Knot Detail
Create subtle sophistication by knotting a section of your ponytail at an angle, then tucking the end beneath to create a dimensional knot detail. This technique adds architectural interest while maintaining the sleek, controlled aesthetic of your ponytail. It’s perfect for anyone wanting something more interesting than a basic pony but not as visually complex as braids.
The Elegance of Knotted Details
A knot feels more intentional and intricate than other embellishment options while requiring minimal technical skill. The knotted section creates texture and catches light beautifully, drawing attention to your styling intention. This variation works across casual and formal settings, depending on whether you pair it with loose waves or keep everything sleek.
Creating Your Knotted Detail
- Gather your slicked ponytail and secure with an elastic band at your preferred height
- Separate a thin, two-inch-wide section from the side of your ponytail
- Take this section and tie it in a simple overhand knot, creating a loop
- Gently tighten the knot so it sits close to your ponytail base
- Tuck the tail end of the knot beneath your main ponytail and secure with a bobby pin
- Arrange the knot so it sits prominently and catches light—this is an intentional detail you want visible
- Smooth any flyaways around the knot with hairspray
Pro tip: Creating your knot at a slight angle rather than centered makes it read as more intentionally styled and fashion-forward than a centered knot.
23. Slicked Ponytail with Wrapped Braid Crown
Begin with a sleek slicked ponytail, then wrap a delicate braid around the crown of your head, creating a halo effect that frames your face while maintaining your ponytail’s polish. This technique combines multiple styling elements into a cohesive, elegant look that reads as genuinely intentional and artfully constructed.
Combining Techniques for Maximum Impact
Wrapping a braid around your crown creates an element of intricacy and dimension that elevates a simple ponytail into something special. The halo effect frames your face beautifully while keeping all hair completely off your face except for the artfully placed braid. This variation works beautifully for dates, special events, or any time you want to show off your styling skills.
Creating Your Wrapped Braid Crown
- Gather your ponytail as usual and secure it with an elastic band at your preferred height
- Take a thin section of hair from one side of your ponytail, approximately two inches wide
- Create a three-strand braid with this section, working it loosely
- Wrap this braid around the crown of your head, positioning it like a tiara or halo
- Secure the braid end on the opposite side with bobby pins tucked invisibly
- You can create two braids for additional coverage or keep it to one for a more minimalist effect
- Smooth any loose hairs and finish with hairspray
Insider note: The looser your crown braid, the more romantic and ethereal your overall look—overly tight braids read as more athletic or severe.
24. High Slicked Pony with Sleek Undercut
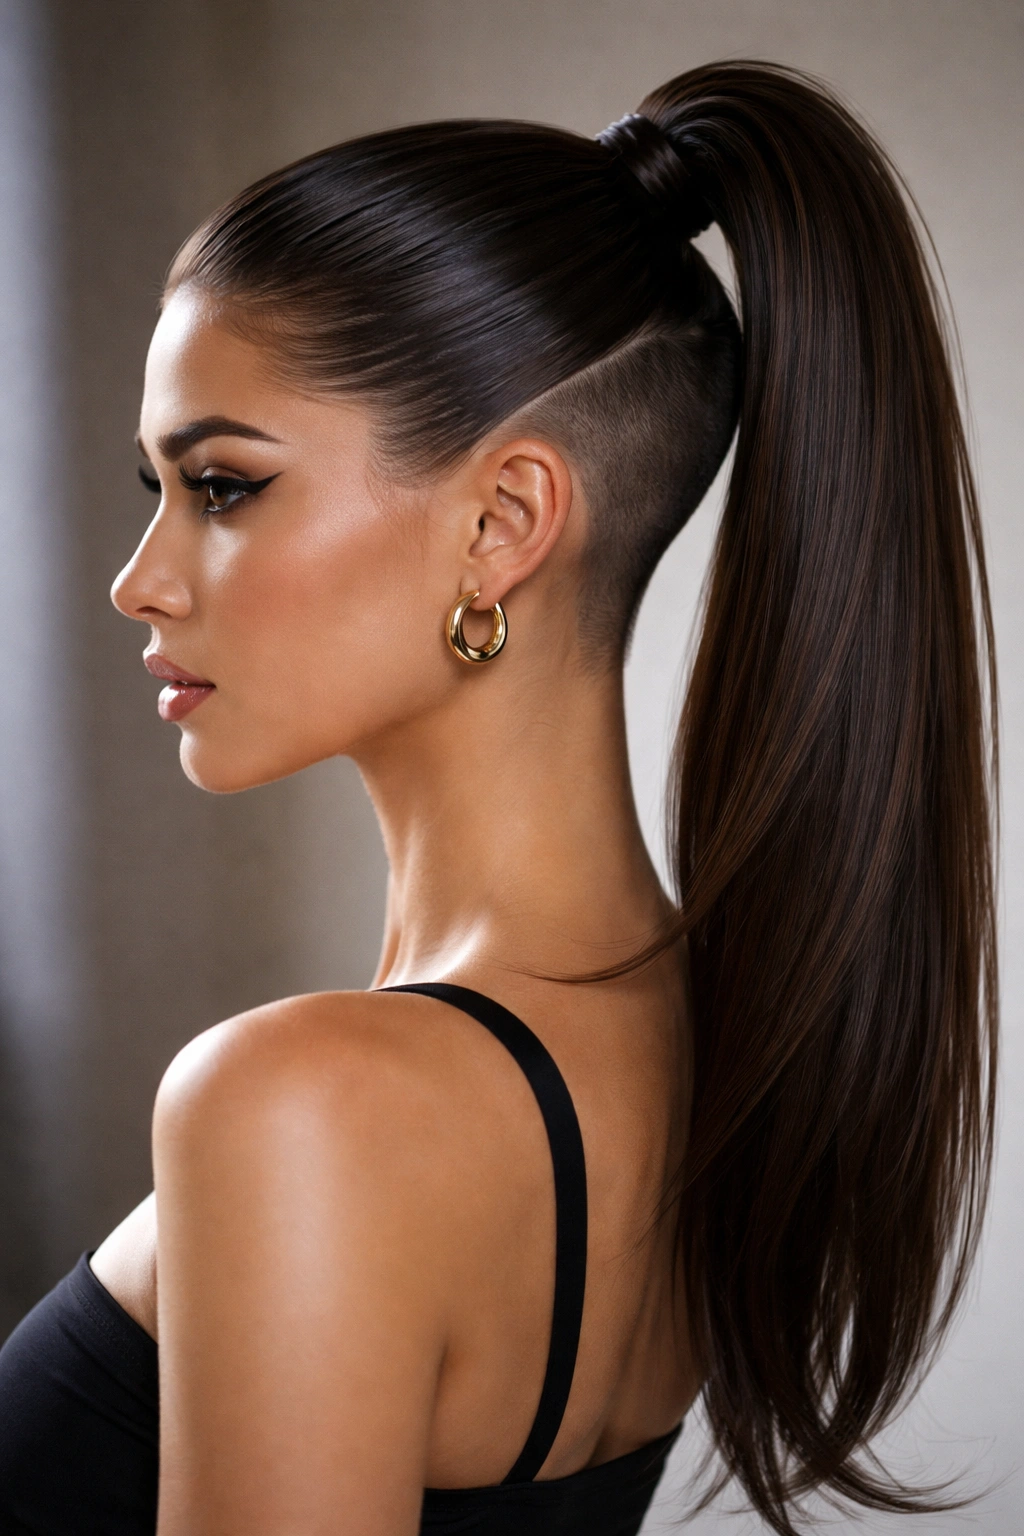
Create a bold contemporary look by styling your ponytail high and sleek while showcasing an undercut or shaved section on your underside. This dramatic variation requires existing short hair or an undercut, but the payoff is a genuinely architectural, fashion-forward style. It’s perfect for anyone wanting to make a statement about their personal style.
Making Undercuts Work with Slicked Styling
An undercut creates visual intrigue and shows beautifully when you move your ponytail or wear it to the side. The combination of sleek styling above with a shaved underside creates contemporary attitude. This look works for professionals in creative fields, musicians, or anyone unbothered by conventional beauty standards.
Styling With Your Undercut
- Slick your hair back into a high ponytail using your preferred smoothing products
- The sleek styling should be impeccable—let the cut do the talking, not styling hesitation
- You can position your ponytail directly at the crown or slightly to one side
- The undercut shows beautifully in side ponytails because it creates dimension
- Keep your undercut smooth and clean—this showcases the intention behind the style
Worth knowing: If you’re considering an undercut specifically for this look, ensure you’re working with a stylist experienced in undercuts, as poor execution reads as unintentional rather than intentional.
25. Slicked Ponytail with Silk Scrunchie Elegance
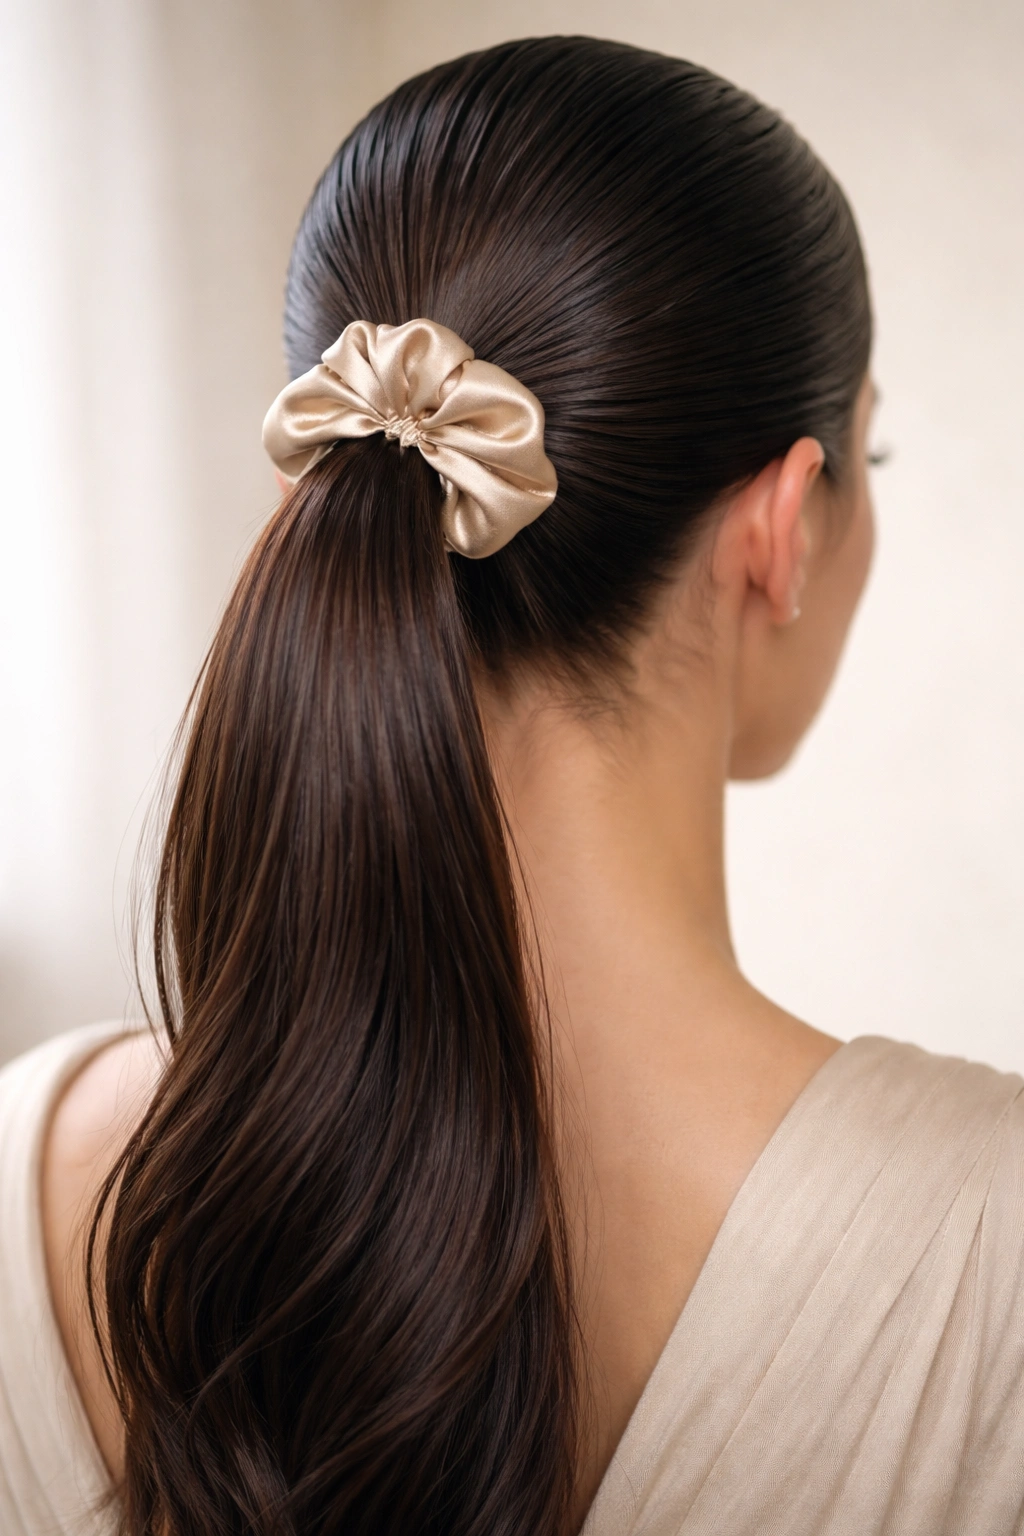
Complete your slicked ponytail with a luxe silk or satin scrunchie instead of a standard elastic band. Silk holds your hair gently without creating creasing or breakage, while the lustrous finish maintains the polished aesthetic of your entire style. This final detail protects your hair health while maintaining maximum elegance throughout your look.
Why Silk Changes Everything
Replacing your elastic band with silk or satin isn’t just a luxe detail—it’s a genuine investment in your hair’s health and longevity. Silk scrunchies create less friction than standard elastics, preventing breakage and frizz. The smooth finish of the scrunchie complements your slicked ponytail’s polish while creating the impression that you care deeply about your appearance and hair health.
Choosing and Using Your Silk Scrunchie
- Select a silk or satin scrunchie in a color that complements your hair or coordinates with your outfit
- Gather your ponytail as usual, securing it with the silk scrunchie instead of a standard elastic
- The silk sits smoothly against your hair without creating creasing or disruption
- Wrap a small section of hair around the scrunchie to hide it, just as you would with a standard elastic
- The silky finish catches light beautifully and maintains the elegant aesthetic of your entire style
- Choose scrunchies made from genuine silk or high-quality satin—cheaper alternatives defeat the purpose
Pro tip: Sleeping with your hair in a silk scrunchie reduces friction and breakage throughout the night, meaning you can wake up with your slicked pony relatively intact and refresh it quickly.
Final Thoughts
The beauty of slicked-back ponytails lies in their incredible versatility and sophistication—you’re never limited to just one way of wearing this style. Whether you choose a classic low pony or experiment with braids, accessories, and color-blocking, each variation delivers polish while allowing your personal aesthetic to shine through. The technique remains fundamentally the same: smooth hair, secure control, and intentional finishing touches.
What really matters is understanding your own preferences and experimenting with the variations that genuinely excite you. You might discover that you love the simplicity of a basic sleek pony most days, yet reach for bubble sections or braided details when you want something more visually interesting. The confidence you build from mastering these techniques translates into a personal style that feels authentically yours rather than copied from someone else.
Remember that slicked ponytails work beautifully across every season, every dress code, and every occasion because they’re fundamentally about control, intention, and polish. The investment you make in learning proper smoothing techniques and discovering which products work with your specific hair type pays dividends every single time you style your hair, creating a look that works whether you have five minutes or thirty minutes to get ready.